

 Feb 10, 2016, 09:26 AM
Last edit by: IB Advertising
See related guides and technical advice from our community experts:
Browse all: Steering & Suspension Guides
- Toyota 4Runner 1984-1995 How to Replace Locking Hubs
Step by step instructions for do-it-yourself repairs
Browse all: Steering & Suspension Guides

Aisin Locking Hubs Tear Down/Build Up
Nov 11, 2008 | 09:58 PM
#21
Contributing Member
Joined: Feb 2007
Posts: 9,055
Likes: 10
From: maple ridge, British Columbia, Canada
thank you very much for the link! i was not aware that the tension spring had to ride on the fowler pawl/clutch assebly like that... i shall tear into it again tomorrow... besides, somehow both the gold bolts were broken in the CV shafts, so im going by toyota tomorrow to pick those up...
 Nov 12, 2008 | 06:00 AM
#24
Registered User
Joined: Sep 2005
Posts: 621
Likes: 0
From: Dillsburg, PA
Overall a good write-up.
One thing you might want to note is to watch how much you torque the bolts down on the face of the hub. In my experience, I've seen people think they have to go crazy with it and end up snapping the bolt off inside the hub (myself included).
One thing you might want to note is to watch how much you torque the bolts down on the face of the hub. In my experience, I've seen people think they have to go crazy with it and end up snapping the bolt off inside the hub (myself included).
Nov 12, 2008 | 07:17 AM
#25
Thread Starter
Registered User
iTrader: (1)
Joined: Aug 2008
Posts: 5,527
Likes: 118
From: Wilton, CA
by no means is this writeup finished... i still need to add the torque specs, yes, go back and fix my fowler pawl and tension spring, and add my piece about installing...
thank you all for the comments, i appreciate it.
when i finish it, depending on the finished product, should i submit it to the tech section?
thank you all for the comments, i appreciate it.
when i finish it, depending on the finished product, should i submit it to the tech section?
Nov 12, 2008 | 05:28 PM
#29
Registered User
Joined: Jul 2008
Posts: 4,592
Likes: 0
From: Grew up in S.C.V, So Cal.....now in Hampstead, NC
Maybe put down as estimated rebuild time......How long did it take you to do the actual rebuilding, minus the day waiting for the paint to dry? Know what I mean?
Dec 8, 2008 | 05:30 PM
#30
Registered User
Joined: Jun 2008
Posts: 141
Likes: 1
From: Southern Utah
great info! thanks for taking the time to write it. my 9 yr old son and i rebuilt a pair on sunday. it took us about 2hours, with most of that time painting and letting them dry in front of a heater!!
Dec 8, 2008 | 07:57 PM
#31
Registered User
Joined: Jan 2008
Posts: 11,338
Likes: 120
From: Austin, Texas

 Dec 9, 2008 | 06:55 AM
#34
Registered User

Joined: May 2008
Posts: 3,277
Likes: 23
From: way way nor cal
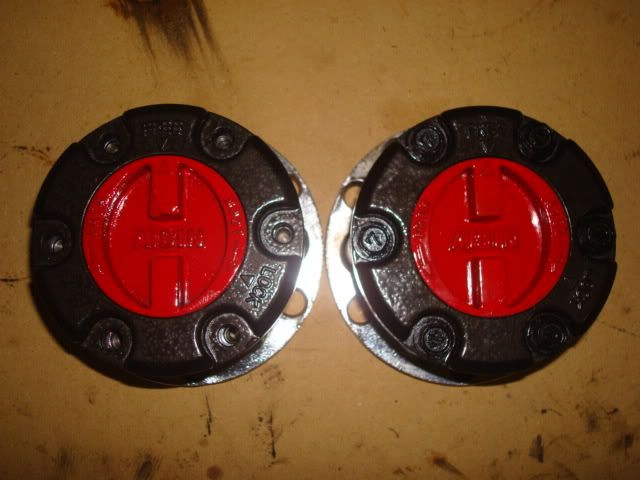
I used some paint from a Porsche I painted Jet Black. The red is a hobby paint. The clear coat is from the Porsche job.
BTW this was a great write up, very informative. I used it to rebuild mine. Thanks!!
BTW this was a great write up, very informative. I used it to rebuild mine. Thanks!!
Last edited by toyospearo; Dec 9, 2008 at 07:05 AM.
Feb 26, 2009 | 01:06 PM
#35
Registered User
Joined: Oct 2007
Posts: 3
Likes: 0
From: Vancouver
I'm reviving this old thread to say thanks for the great write-up, Space-Junk!
Here's my tip:
If you manage to lose the little ball (as I have) and have an old broken 1/4" socket extension laying around (as I did), the ball in the extension is the same size as ball you just lost.
Here's my tip:
If you manage to lose the little ball (as I have) and have an old broken 1/4" socket extension laying around (as I did), the ball in the extension is the same size as ball you just lost.
Feb 26, 2009 | 06:46 PM
#37
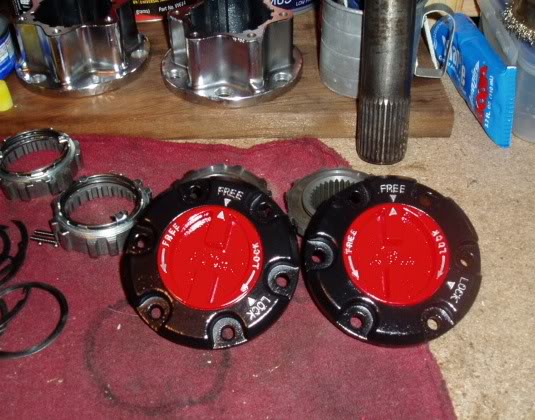
Painting the dials/faces black/red again looks good, but you guys cannot imagine how much better they look powder coated over paint. No comparison to the durability either. 
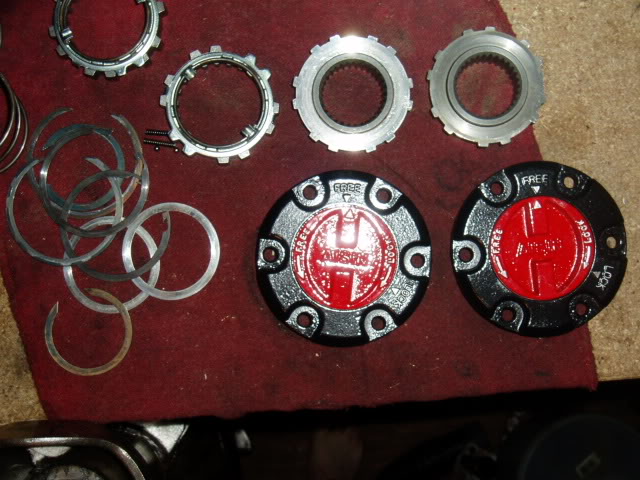
Out of every 10 Aisins I get in here I bet 8 of them are missing the spring/ball bearing. Folks just don't pay attention and lose them...luckily I have sourced replacements for them.

Out of every 10 Aisins I get in here I bet 8 of them are missing the spring/ball bearing. Folks just don't pay attention and lose them...luckily I have sourced replacements for them.
Feb 26, 2009 | 07:21 PM
#39
Contributing Member
Joined: Feb 2008
Posts: 12,248
Likes: 33
From: Lake City, Fl
Painting the dials/faces black/red again looks good, but you guys cannot imagine how much better they look powder coated over paint. No comparison to the durability either.
Out of every 10 Aisins I get in here I bet 8 of them are missing the spring/ball bearing. Folks just don't pay attention and lose them...luckily I have sourced replacements for them.
Out of every 10 Aisins I get in here I bet 8 of them are missing the spring/ball bearing. Folks just don't pay attention and lose them...luckily I have sourced replacements for them.
I'm about to aquire a second set for free ( buddie of mine was GIVEN an 89, and he's got like 3 sets of hubs, and he said I could have em ), and I got a friend of a friend who's got a small powder-coat oven, and I'm think'n about go'n that route

Last edited by rworegon; Nov 23, 2014 at 04:47 PM.
Feb 26, 2009 | 09:54 PM
#40
Thread Starter
Registered User
iTrader: (1)
Joined: Aug 2008
Posts: 5,527
Likes: 118
From: Wilton, CA
what i want to do eventually when i get enough money and time to tear them down again, i want to have the hub bodies polished, the dial ring powdercoated black and the dial face dipped in chrome and then blued with heat... i know, its totally mall crawler, but i think that they would look sick...
maybe ill do that when i get some money to buy a second set...
maybe ill do that when i get some money to buy a second set...


