3vze rebuild update (pics)
 01-24-2006, 10:53 AM
#21
Contributing Member
Join Date: Apr 2003
Location: Raleigh NC
Posts: 1,579
Likes: 0
Received 0 Likes
on
0 Posts
ive never done it before but i plan on priming my oil pump with an electric drill with the timing belt off until i reach good oil pressure, then turn it over by hand, repeat, then assemble the timing belt and crank her up.
 01-24-2006, 03:03 PM
#22
Registered User
Thread Starter
on a v6? the oil pump is driven off the crank. by the time i got the bottom end all put to gether and cranked down with new rings and what not it isnt something that an avg hand drill can turn over. Its smoth, but does take some effort.
we on the same page?
we on the same page?
01-24-2006, 05:15 PM
#23
Registered User

Join Date: Aug 2005
Location: Indiana
Posts: 30
Likes: 0
Received 0 Likes
on
0 Posts
What I did on mine was to pull the coil wire off crank it uver with the starter a couple times until you get oil pressure. Then put the coil wire back on and fire it up. If you packed the oil pump in petroleume jelly it will pick up pretty quick.
When you fill it with coolant be sure to fill the radiator and fill the engine by the top radiator hose with it loose turned up pouring it into the engine. This way it will fill on both sides of the tstat and you won't have to wait for it to open before topping it off.
When you fill it with coolant be sure to fill the radiator and fill the engine by the top radiator hose with it loose turned up pouring it into the engine. This way it will fill on both sides of the tstat and you won't have to wait for it to open before topping it off.
01-25-2006, 12:16 PM
#24
Registered User

Join Date: Aug 2005
Location: Arlington, TX
Posts: 213
Likes: 0
Received 0 Likes
on
0 Posts
Originally Posted by snap-on
FYI has anyone else noticed that you start at 33ftlbs then first 90 is ~60ftlbs and the second 90 is ONLY ~80ftlbs. i would have thought it should be more than that but ....
01-25-2006, 12:40 PM
#25
Registered User
Join Date: Oct 2005
Location: Berkeley, CA
Posts: 587
Likes: 0
Received 0 Likes
on
0 Posts
Originally Posted by motoracer47
i believe that is because the last 90 puts the bolt within its elastic region, as the bolt stretches, it will take more revolutions for the same percentage of torque increase, if that makes sense.
 01-25-2006, 05:13 PM
#27
Contributing Member
Join Date: Apr 2003
Location: Raleigh NC
Posts: 1,579
Likes: 0
Received 0 Likes
on
0 Posts
Originally Posted by snap-on
on a v6? the oil pump is driven off the crank. by the time i got the bottom end all put to gether and cranked down with new rings and what not it isnt something that an avg hand drill can turn over. Its smoth, but does take some effort.
we on the same page?
we on the same page?
my truck has a supra 7M, i've never worked with the 3.0, my oil pump is driven by the timing belt so its easy to turn independant of the crank. Ignore my post in that case then

Last edited by NCSU-4runner; 01-25-2006 at 05:14 PM.
04-13-2006, 10:52 AM
#28
Registered User
Thread Starter
tomarrow 8am it starts going back in.
i dont know weather to be thrilled that ill be able to drive my second gen again!
or terrified because after its stitting in the truck its only a few hrs of wrenching till i find out if i really ˟˟˟˟ something up in my rebuild....
i dont know weather to be thrilled that ill be able to drive my second gen again!
or terrified because after its stitting in the truck its only a few hrs of wrenching till i find out if i really ˟˟˟˟ something up in my rebuild....
04-13-2006, 02:48 PM
#30
Contributing Member
I rebuilt my 3.0 a few months back. Turning the key for the first time is scary. I had my timing off 180 degrees, so my heart sank first couple turns. When I got that figured out, she fired up first twist.
No exhaust though with new headers in a closed garage... I thought I blew it up anyway. That 3.0 sounds pretty mean that way.
Best of luck.
No exhaust though with new headers in a closed garage... I thought I blew it up anyway. That 3.0 sounds pretty mean that way.
Best of luck.
04-13-2006, 03:41 PM
#31
Registered User
Join Date: Dec 2002
Location: Idaho
Posts: 4,655
Likes: 0
Received 0 Likes
on
0 Posts
Originally Posted by MorphiasX
Wow they want that much for a 5VZFE in your neck of the woods? Ill be getting mine from a local yard for $1000. Thats the complete swap with the harness and ECU.
Thats just for a motor, A swap kit is $$ on top of that, and you need a 4cyl xcase.
Check out www.offroadsolutions.com for a swap kit.
04-17-2006, 06:45 AM
#32
Registered User
Thread Starter
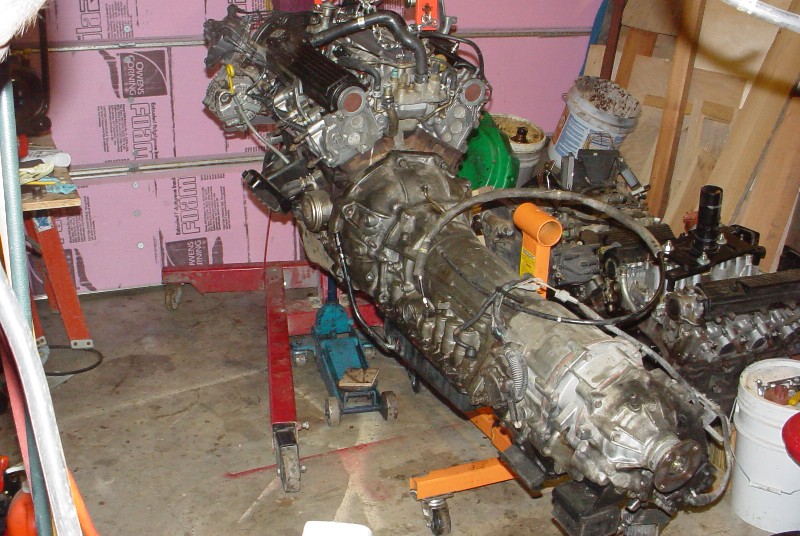
its in, pics and a few tips/tricks when i get the pics uploaded tonight.
after we got it in i basicly called it a weekend and didnt fool with it much so not much is hooked up yet, but that will change by the end of the week (plan on working on it a few hrs each night after work)
after we got it in i basicly called it a weekend and didnt fool with it much so not much is hooked up yet, but that will change by the end of the week (plan on working on it a few hrs each night after work)
05-17-2006, 06:39 PM
#33
Registered User
Thread Starter
IT MOVES! under its own power to!
got the trans cooler lines put back on and something worked up for the rear "cooler" off the xcase. "drove" it 3 houses down to my neighbors to get the front radiator support member welded up.
Tomarrow it goes to the exhaust shop!
got the trans cooler lines put back on and something worked up for the rear "cooler" off the xcase. "drove" it 3 houses down to my neighbors to get the front radiator support member welded up.
Tomarrow it goes to the exhaust shop!
05-27-2006, 05:45 PM
#34
Registered User

Join Date: May 2006
Posts: 1
Likes: 0
Received 0 Likes
on
0 Posts
Many of you have rebuild the 3VZE so some of you will know this for sure. I am cleaning the 3VZE block. Can some one tell me how do I clean the oil passage? There are ' balls " at the end of the passage. I am more used to threaded plugs for blocking off these passage ends.
05-28-2006, 02:45 PM
#35
Contributing Member
Join Date: Apr 2003
Location: Raleigh NC
Posts: 1,579
Likes: 0
Received 0 Likes
on
0 Posts
Originally Posted by snap-on
IT MOVES! under its own power to!
got the trans cooler lines put back on and something worked up for the rear "cooler" off the xcase. "drove" it 3 houses down to my neighbors to get the front radiator support member welded up.
Tomarrow it goes to the exhaust shop!
got the trans cooler lines put back on and something worked up for the rear "cooler" off the xcase. "drove" it 3 houses down to my neighbors to get the front radiator support member welded up.
Tomarrow it goes to the exhaust shop!
05-25-2009, 08:06 PM
#36
Registered User

Many of you have rebuild the 3VZE so some of you will know this for sure. I am cleaning the 3VZE block. Can some one tell me how do I clean the oil passage? There are ' balls " at the end of the passage. I am more used to threaded plugs for blocking off these passage ends.
"Toyota and some other manufacturers utilize a ball bearing to cap off oil galleys instead of a pipe plug. These should always be removed to ensure that the oil galleys are cleaned of any contaminants.To remove the ball, heat it cherry red with a TIG welder, then cool it with water; the ball will
then fall out. Drive the other end out with a rod from the opposite end. To replace, use sealer and install new balls which are available from several different suppliers that sell standard balls for ball bearings. So far, the balls used have been standard sizes."
from enginebuildermag.com http://www.enginebuildermag.com/Arti...ta_30l_v6.aspx
Since I don't own a TIG welder I'd be happy to hear of alternatives. -- Matt
Last edited by wrenchtech; 05-25-2009 at 08:09 PM.


Thread
Thread Starter
Forum
Replies
Last Post
FS[PacSouthWest]: 2- 8"3rd members:4.88 ratchet lockers,new setup kit, rear axle rebuild kit,diff armor
jerusry
Axles - Suspensions - Tires - Wheels
1
10-19-2015 05:28 PM
FS[SouthEast]: Mercury Villager Fan & DCC Fan Controller
coryc85
Misc Stuff (Vehicle Related)
6
09-09-2015 06:24 AM


