
1st Gen 4Runner Tailgate Latch Cable Repair and Upgrade
 Sep 30, 2012 | 04:02 AM
#1
Thread Starter
Registered User
iTrader: (5)
Joined: Jun 2009
Posts: 19,281
Likes: 21
From: Lake Havasu, AZ
1st Gen 4Runner Tailgate Latch Cable Repair and Upgrade
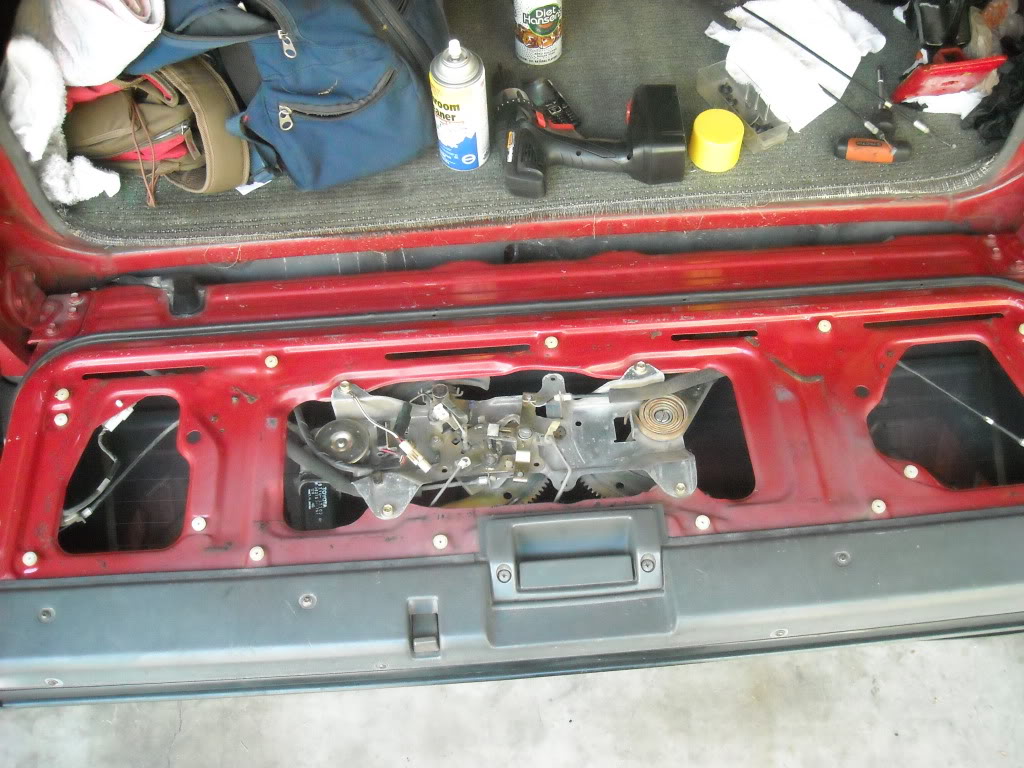
Bottom line, my tailgate wouldn't even latch on the pass. side, let alone lock. This is a very common problem, from what I've learned.... And the culprits, as I've also come to glean from great Yotatechy Brothers like Terrys_87 and others is these..........
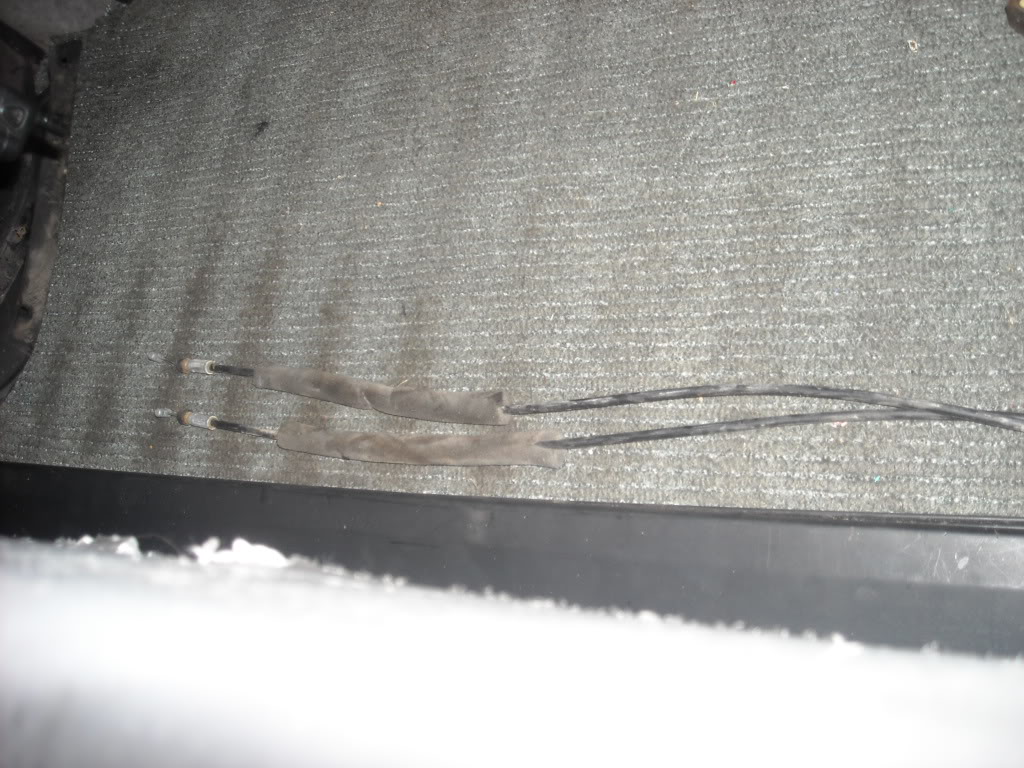
The Tailgate Latch Release/Latch Cables...........
************************************************** ********
So let's get to it..........
1st: Remove the Carpeted Panel, Metal Plate and then Plastic Film(The film can be brittle... Mine was solid.. Just a lil dried out on the corners. But pick a spot to start and peel it up and continue to peel it up all the way around until it's removed)...........
Mine was very dirty inside and on top.......
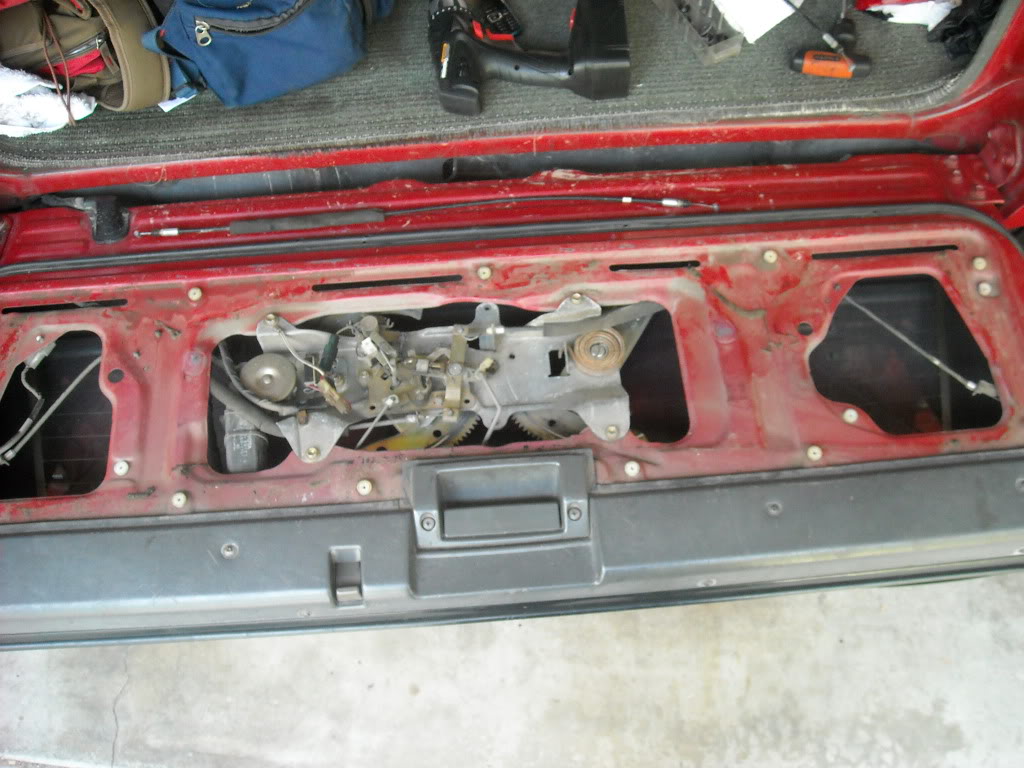
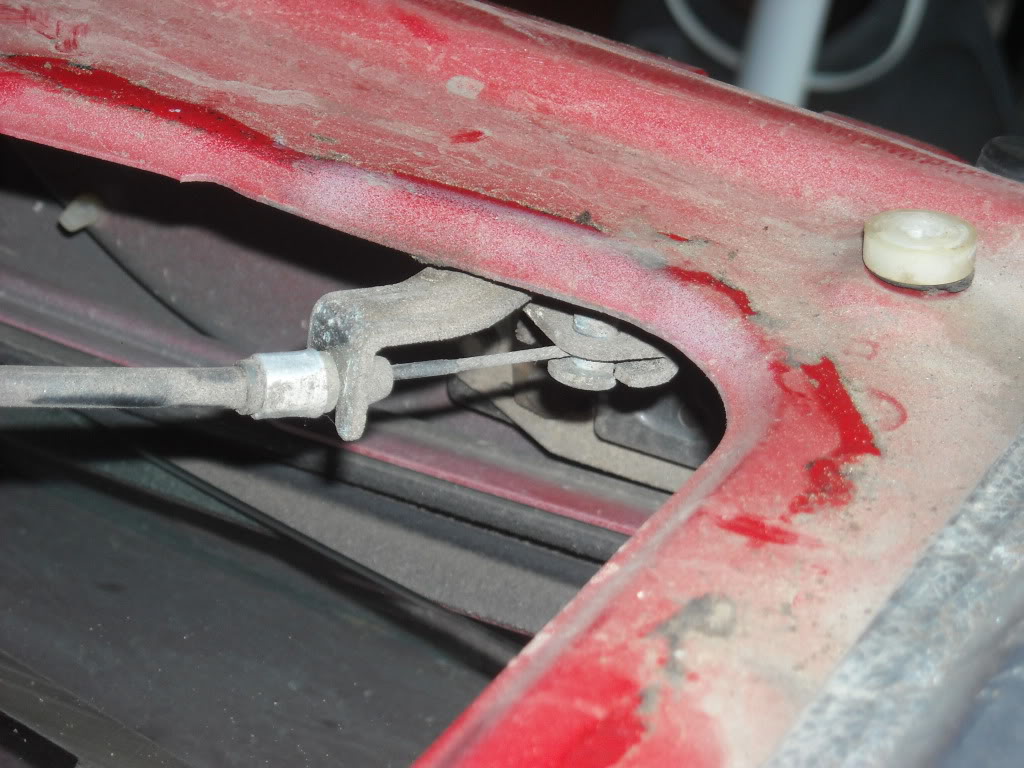
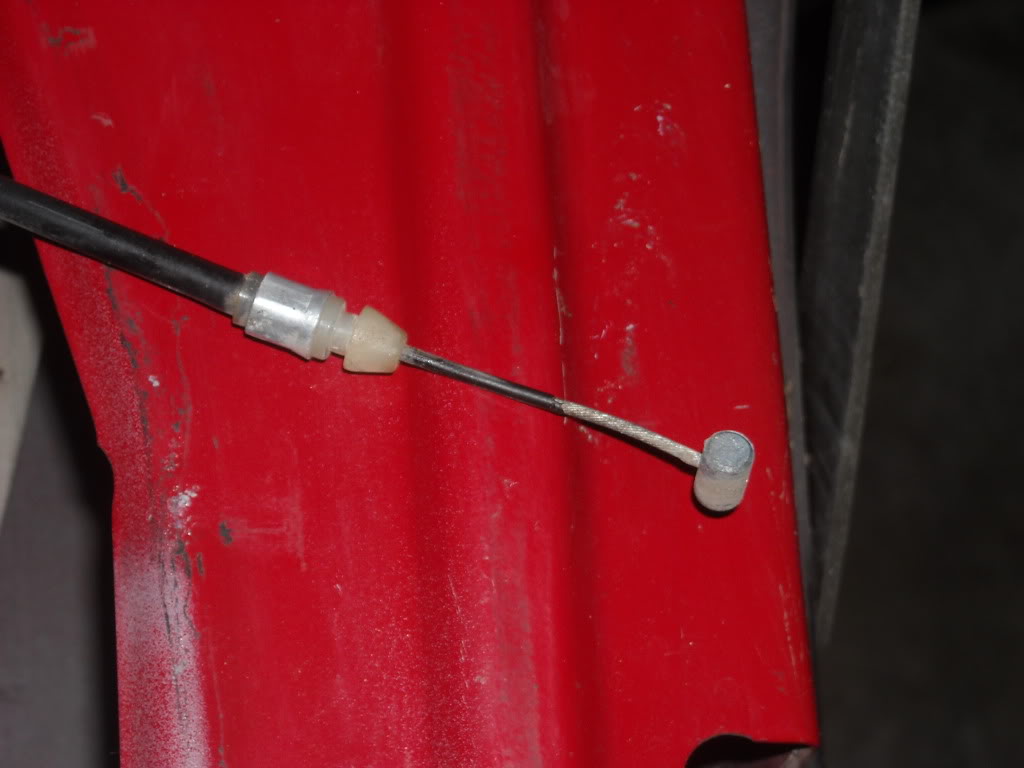
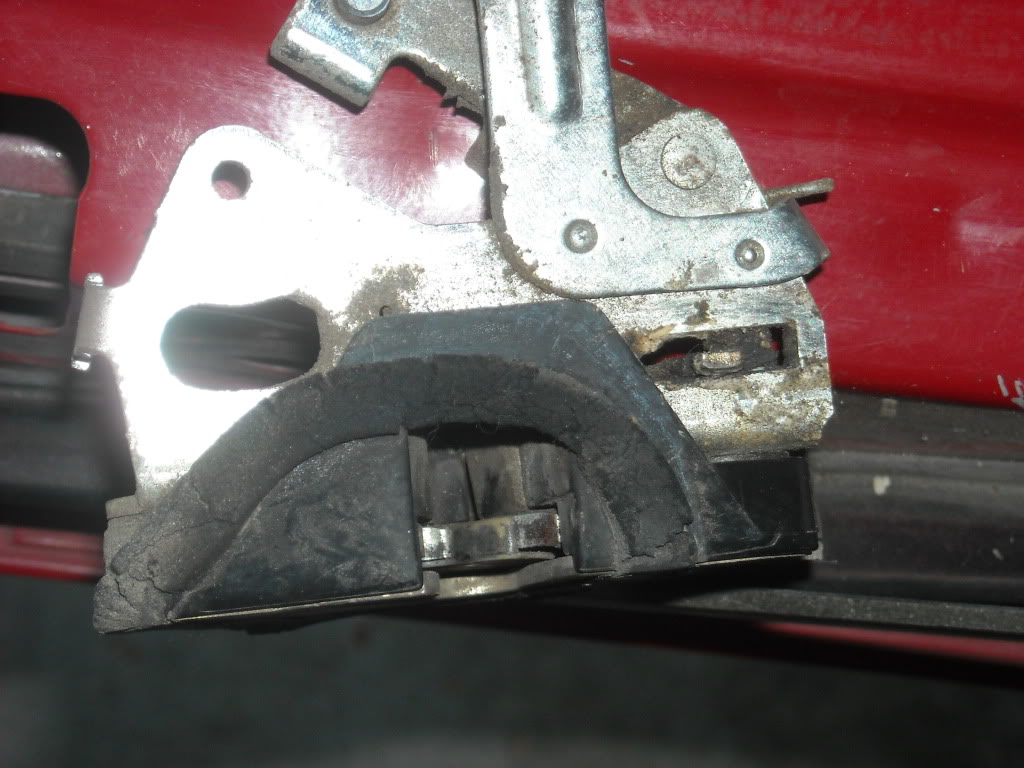
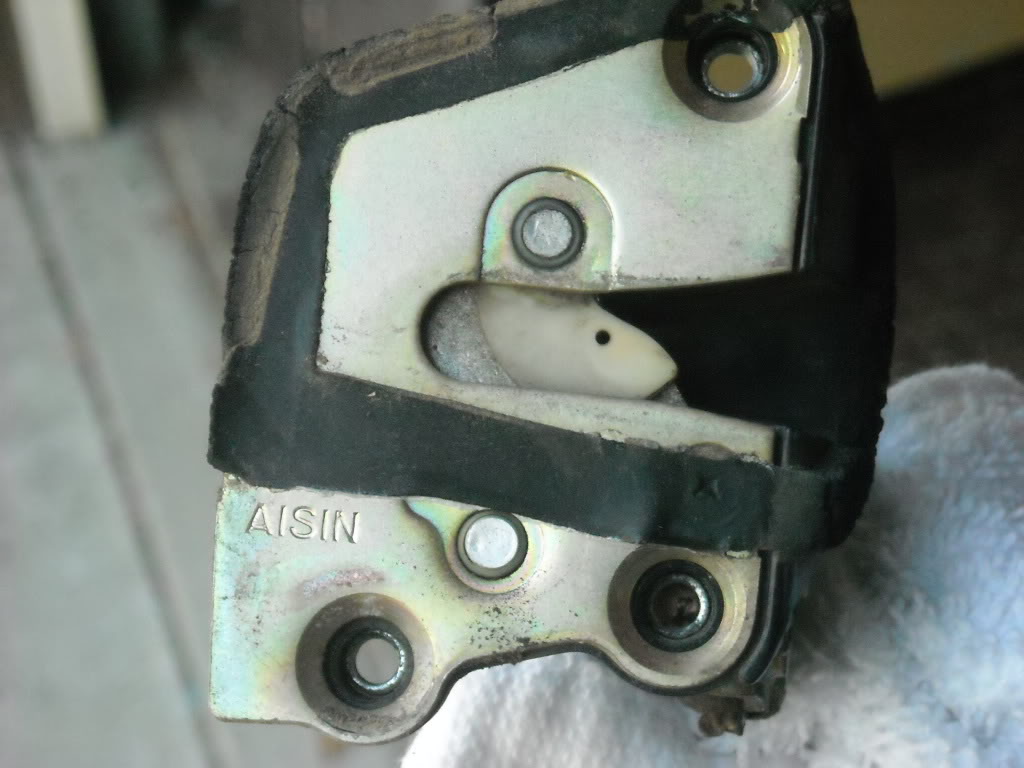
Here's a close up of the most common cable to wind up sticking/freezing up, passenger side... It can't enter the shaft to re-engage the latch mechanism...
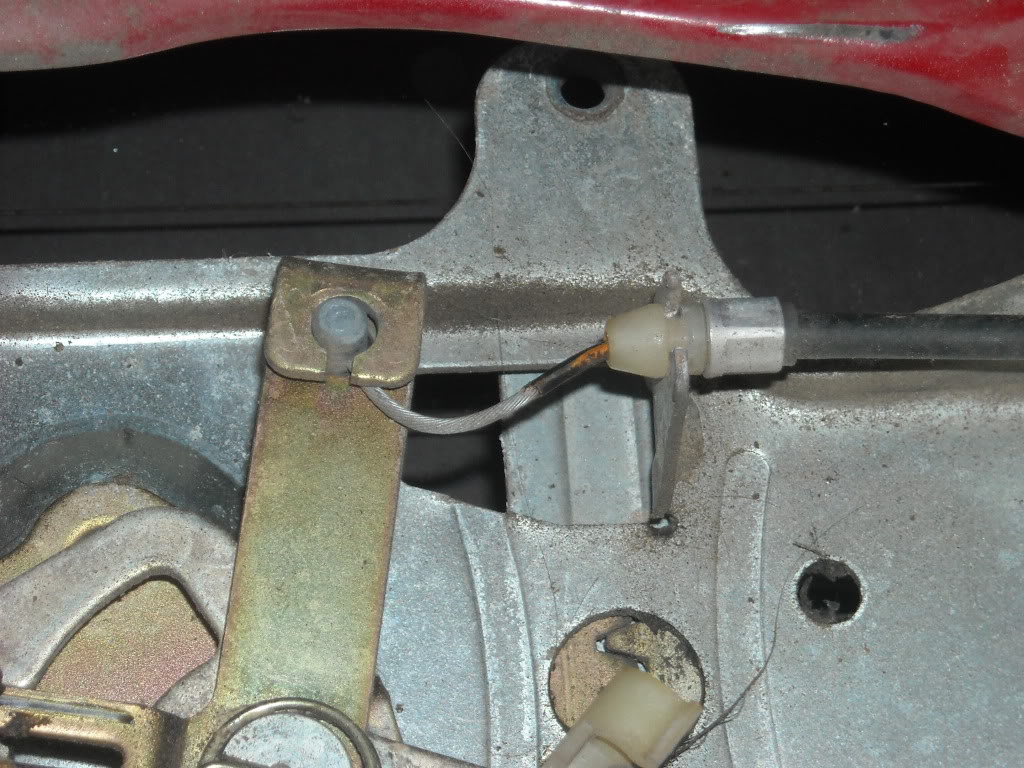
The cable going to the driver side latch seemed to move 'OK'... but I replaced them both, for reasons I'll explain in video, more so, later(but briefly; The 1st Gen cables ARE DIFFERENT, in more than one way. They DO NOT have a rubber boot on the end that the cable slides through.... Rather, the cable itself is 'rubberized'... It rusts right through the rubber and seizes up inside the shaft/guide)........Driver side Cable.......
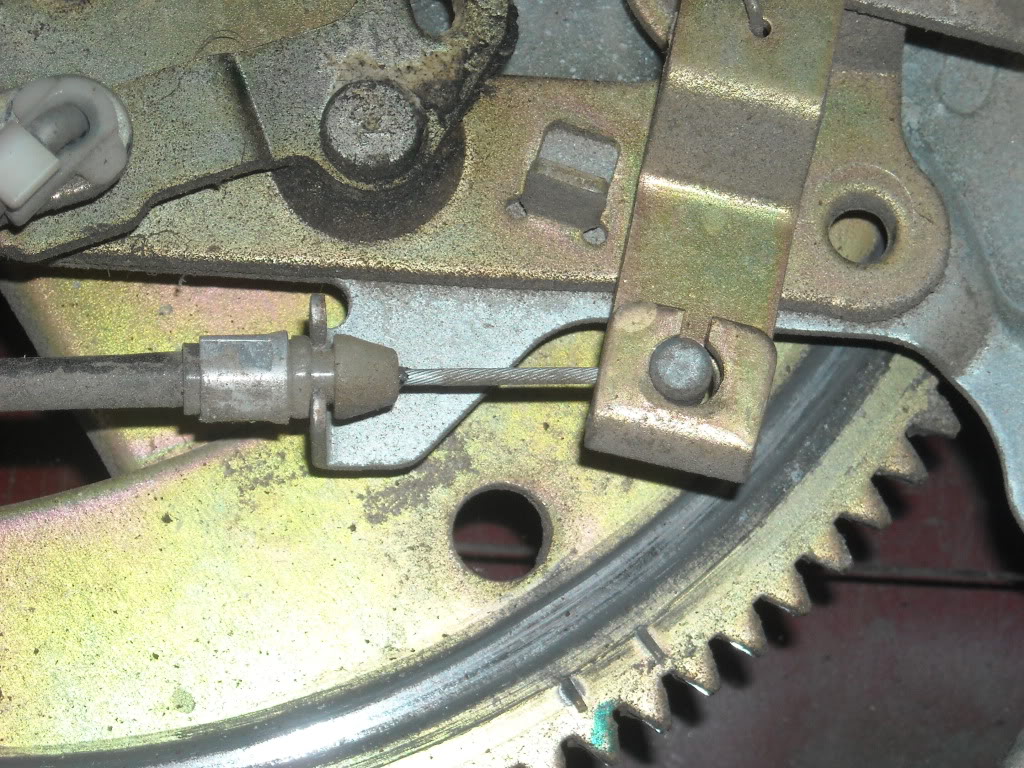
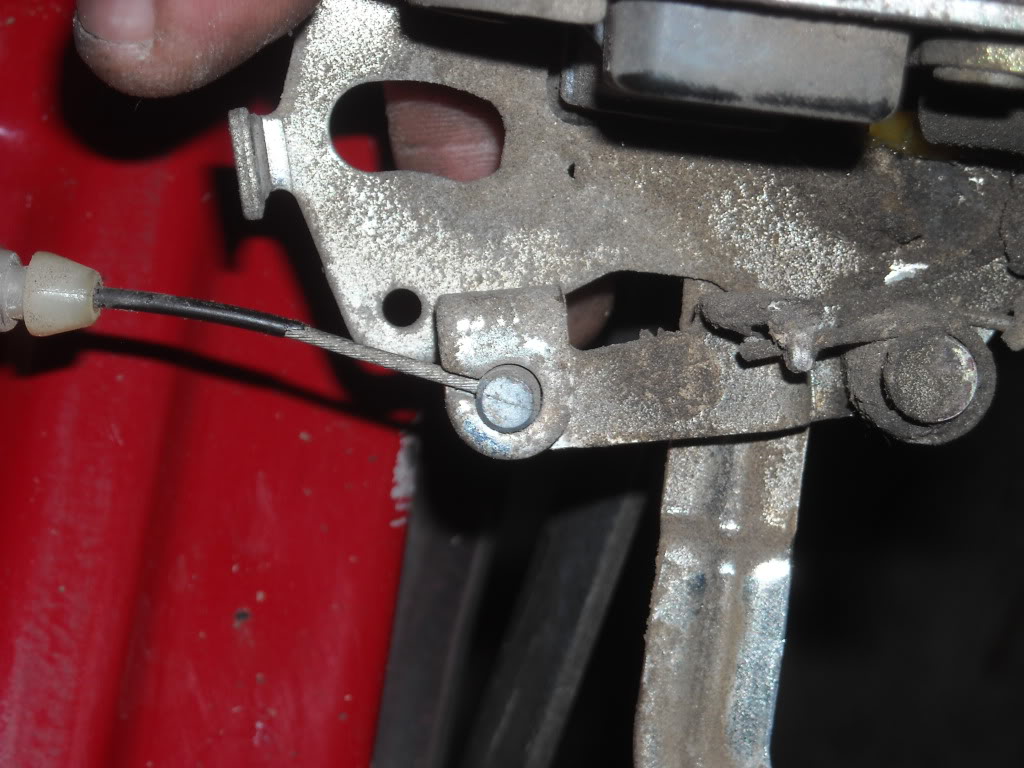
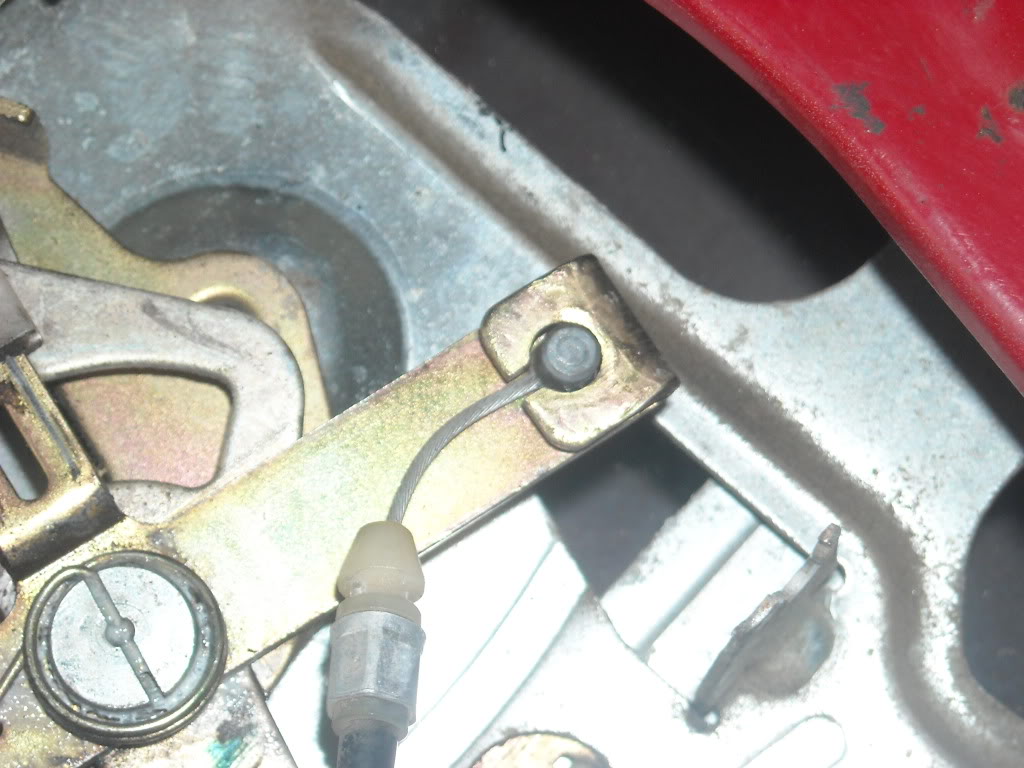
Here is the passenger side latch mechanism bracket, where the cable clips in/Second pic is the driver side one......
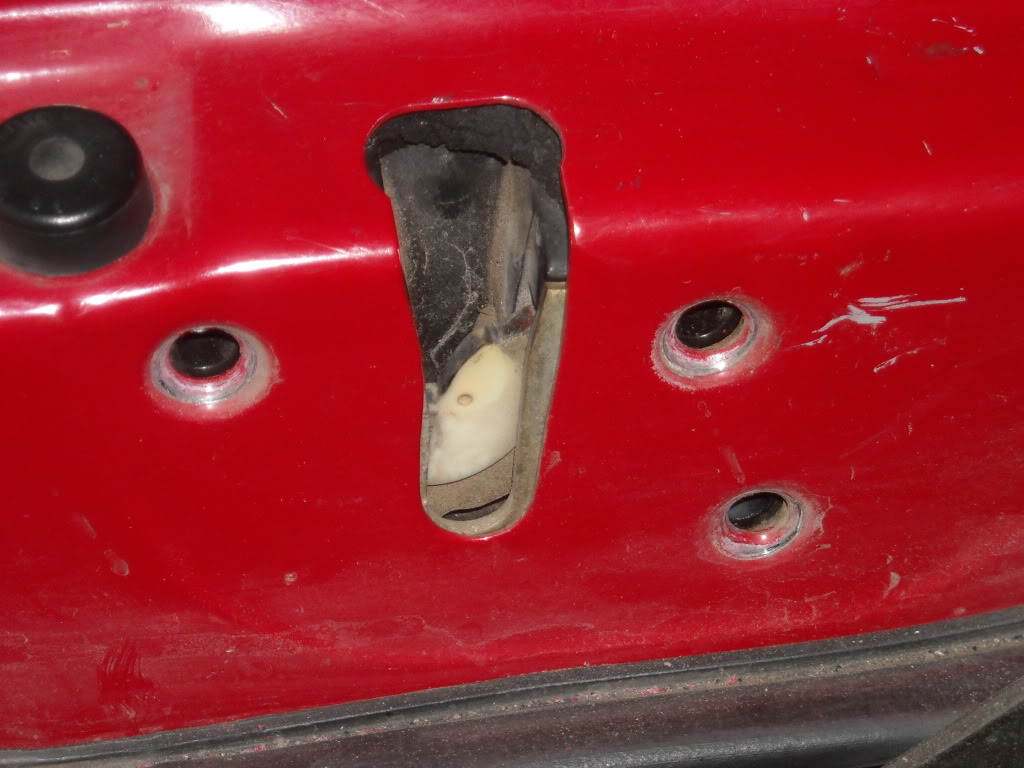
This is the Lock-Safety Switch Actuator in, first, the unlocked position, then locked.......
2nd: Clean up the Tailgate very well, inside I used a vacuum and on top I used some Bathroom Foaming Cleaner.........
Next, I prepared the NEW to me, 2nd Gen 4Runner Latch Release Cables by pulling off the boot and injecting silicone lubricant spray.....
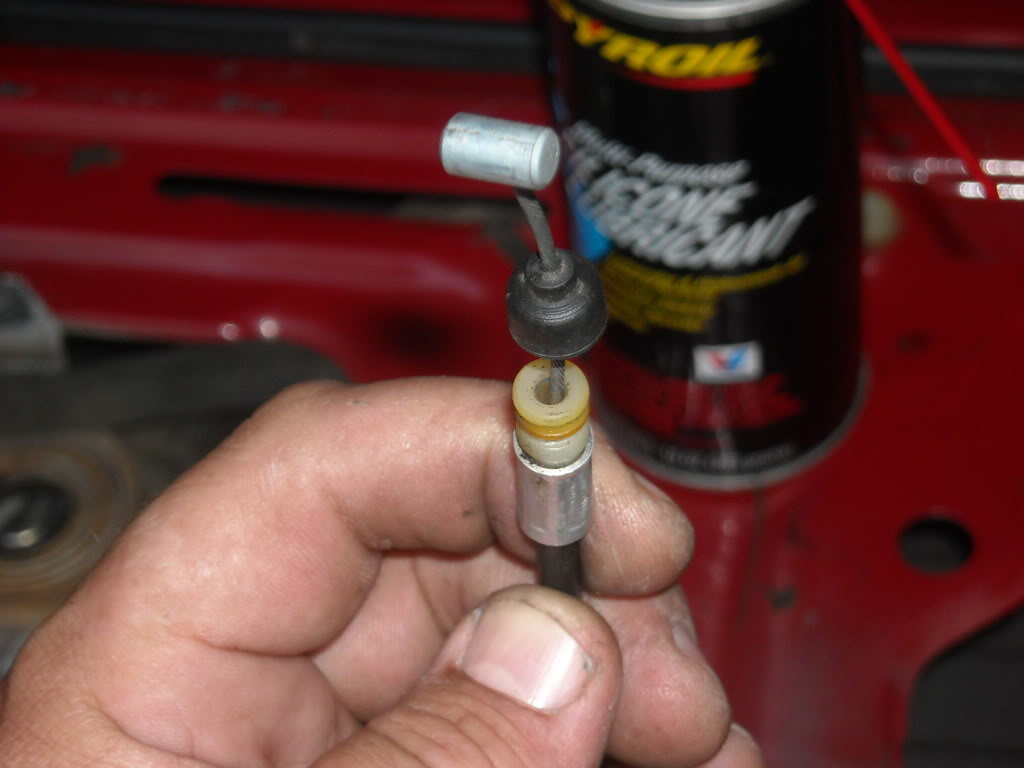
BELOW, notice the difference in the 1st Gen 4Runner Cable ends(and notice the rubberizing on the cable itself, plus the boots that they use, instead, on the 2nd Gen 4Runner cables...
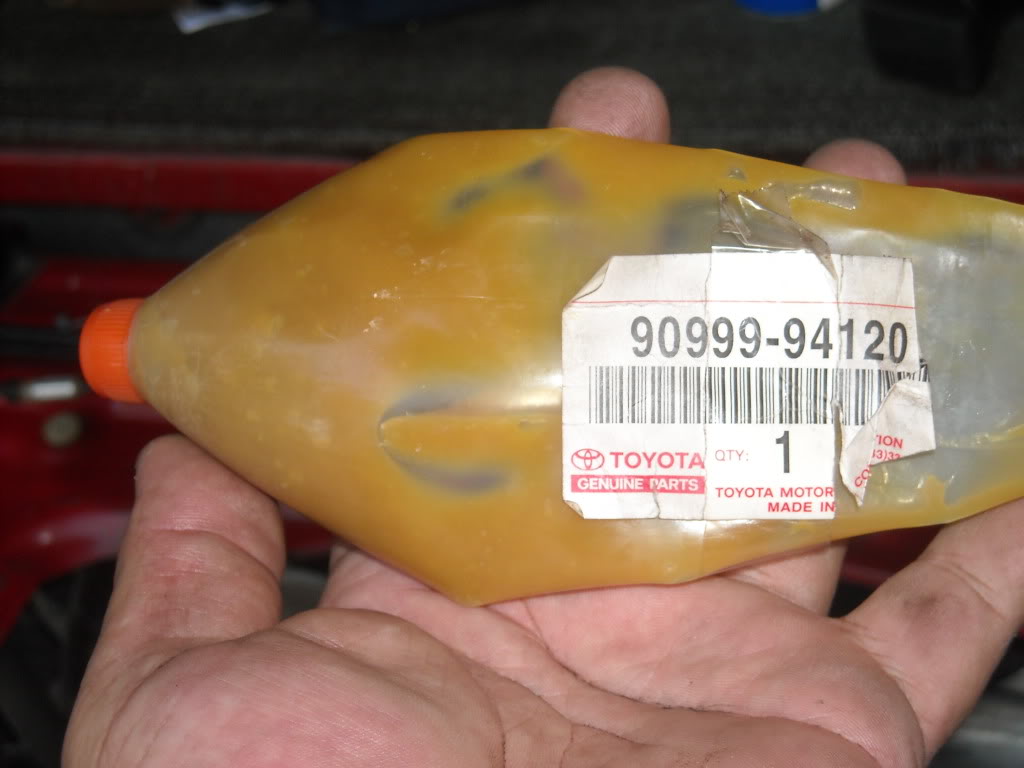
I then took some of the left over CV boot kit grease from Toyota, and used it on all the 'gliding' mechanisms and places it should be, including the latch on the driver side, which I removed and cleaned up, well.........
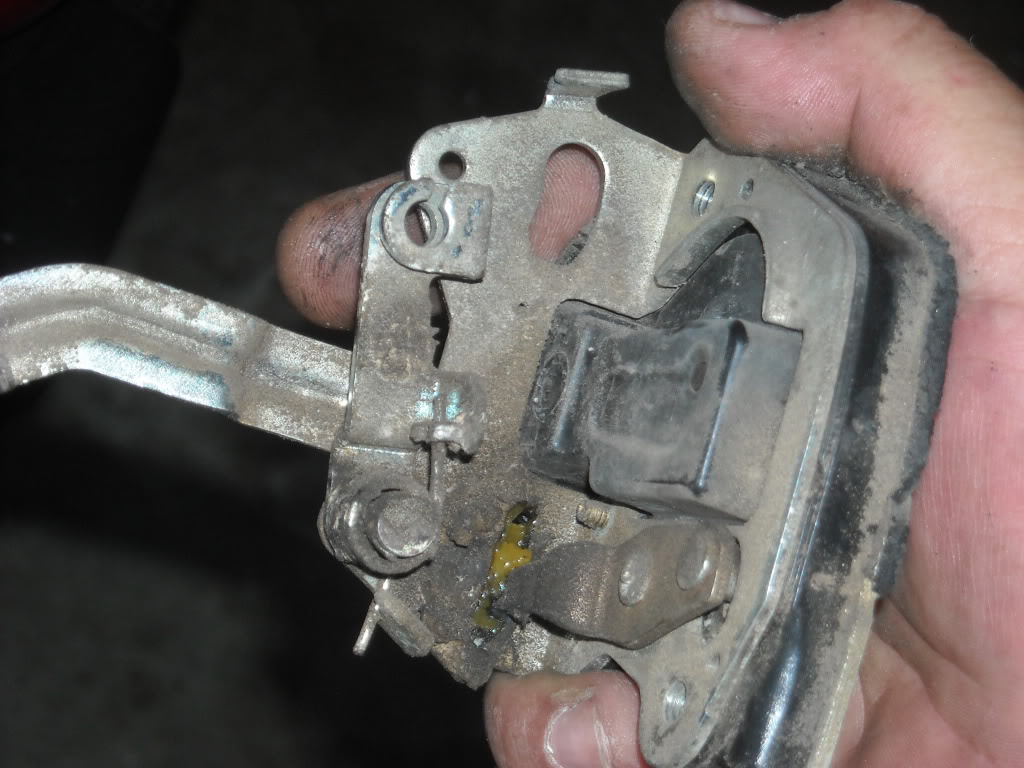
First pulled out the latch mechanism and removed the cable...
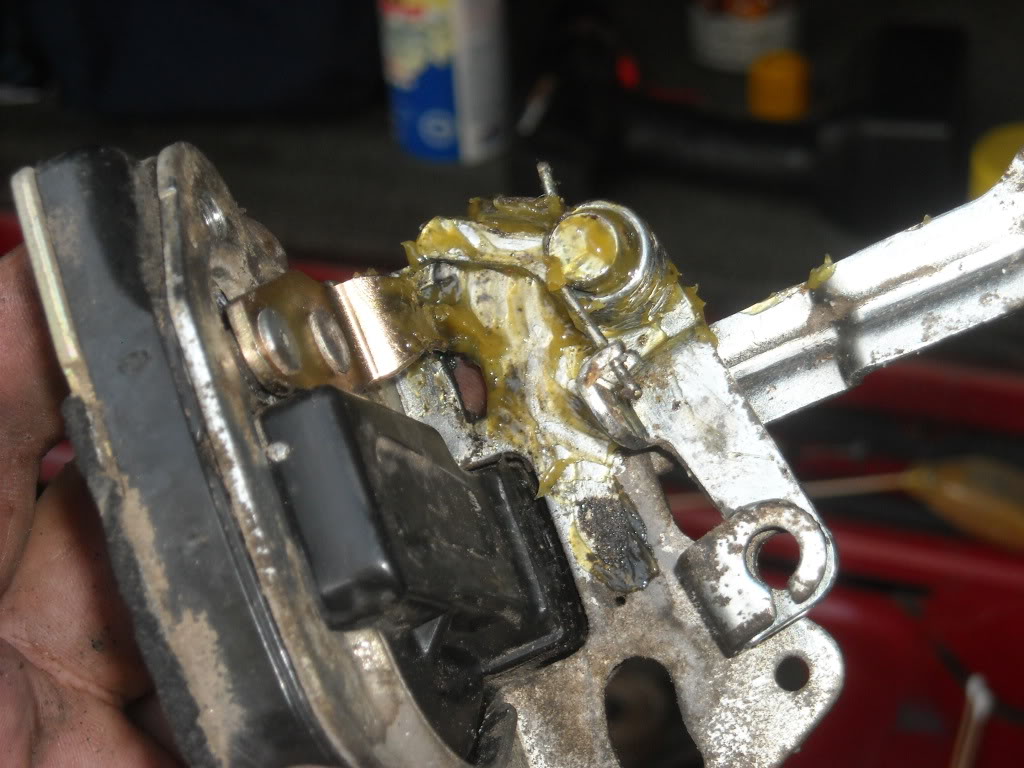
It was pretty nasty.. Then cleaned up and greased everything....
Then removed the other side on the Handle Cross Gear(Cross as in it looks like a Cross, haha).......
Put the latch back in..........
Installed the screws, then pushed up the gate, and to my GREAT BIG HEAPING SERVING OF DELIGHT.... it latches and locks!
************************************************** ********
Below is a couple of videos..... I make lots of fun of myself... And, some of it is bad lighting, etc. But all in all, it's not THAT bad, lol..... I hope they help someone............


The Tailgate Latch Release/Latch Cables...........
************************************************** ********
So let's get to it..........
1st: Remove the Carpeted Panel, Metal Plate and then Plastic Film(The film can be brittle... Mine was solid.. Just a lil dried out on the corners. But pick a spot to start and peel it up and continue to peel it up all the way around until it's removed)...........
Mine was very dirty inside and on top.......
Here's a close up of the most common cable to wind up sticking/freezing up, passenger side... It can't enter the shaft to re-engage the latch mechanism...
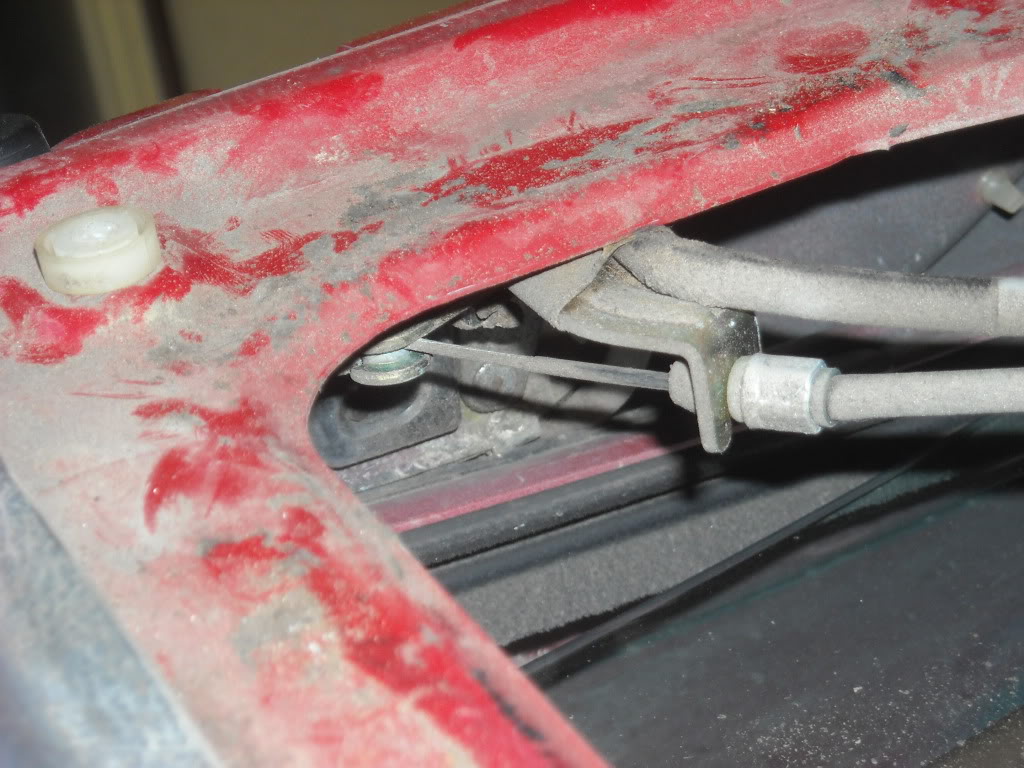
The cable going to the driver side latch seemed to move 'OK'... but I replaced them both, for reasons I'll explain in video, more so, later(but briefly; The 1st Gen cables ARE DIFFERENT, in more than one way. They DO NOT have a rubber boot on the end that the cable slides through.... Rather, the cable itself is 'rubberized'... It rusts right through the rubber and seizes up inside the shaft/guide)........Driver side Cable.......
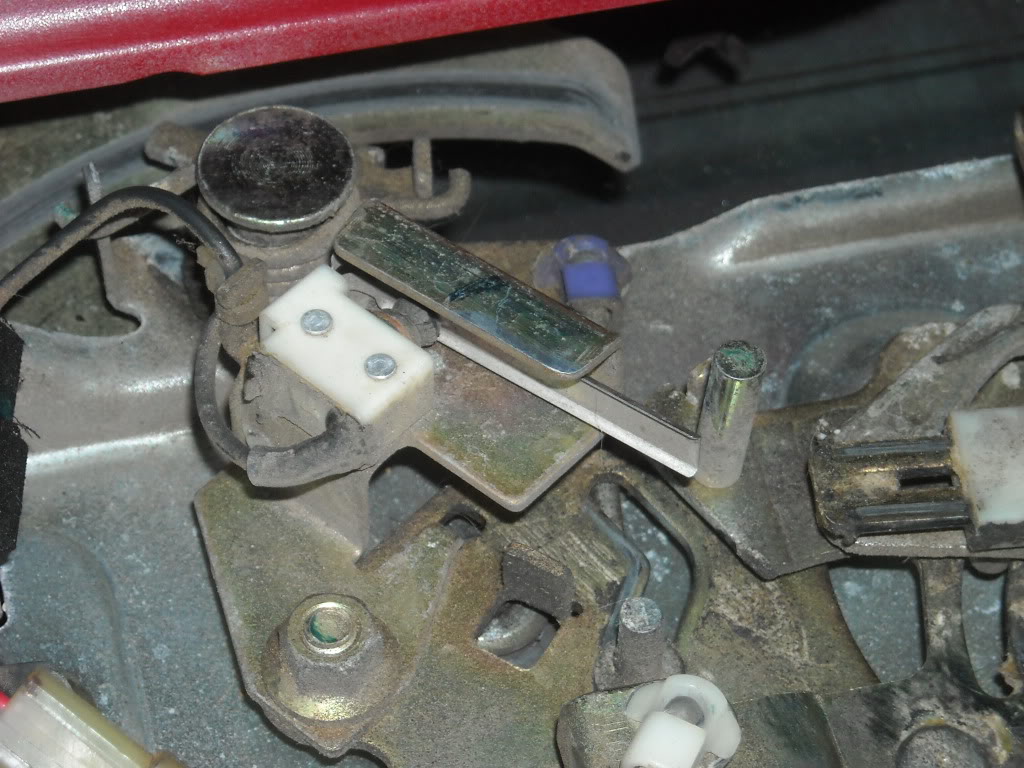
Here is the passenger side latch mechanism bracket, where the cable clips in/Second pic is the driver side one......
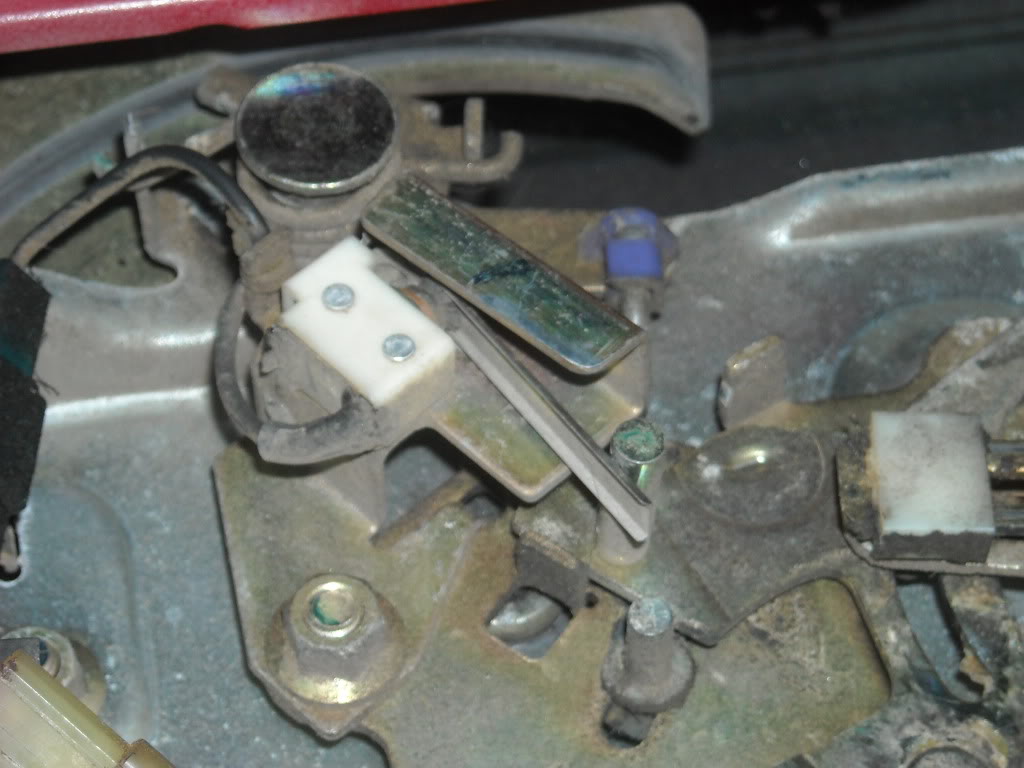
This is the Lock-Safety Switch Actuator in, first, the unlocked position, then locked.......
2nd: Clean up the Tailgate very well, inside I used a vacuum and on top I used some Bathroom Foaming Cleaner.........
Next, I prepared the NEW to me, 2nd Gen 4Runner Latch Release Cables by pulling off the boot and injecting silicone lubricant spray.....
BELOW, notice the difference in the 1st Gen 4Runner Cable ends(and notice the rubberizing on the cable itself, plus the boots that they use, instead, on the 2nd Gen 4Runner cables...
I then took some of the left over CV boot kit grease from Toyota, and used it on all the 'gliding' mechanisms and places it should be, including the latch on the driver side, which I removed and cleaned up, well.........
First pulled out the latch mechanism and removed the cable...
It was pretty nasty.. Then cleaned up and greased everything....
Then removed the other side on the Handle Cross Gear(Cross as in it looks like a Cross, haha).......
Put the latch back in..........
Installed the screws, then pushed up the gate, and to my GREAT BIG HEAPING SERVING OF DELIGHT.... it latches and locks!
************************************************** ********
Below is a couple of videos..... I make lots of fun of myself... And, some of it is bad lighting, etc. But all in all, it's not THAT bad, lol..... I hope they help someone............


 Sep 30, 2012 | 10:43 AM
#6
Great write up and video on the tailgate Chef. I added it to my 88 Runner build for a guide to repairing. Your videos turn out great.
Tail gate Problems>>>Post #186 https://www.yotatech.com/forums/f199...99/index8.html
Tail gate Problems>>>Post #186 https://www.yotatech.com/forums/f199...99/index8.html
Sep 30, 2012 | 11:21 AM
#7
Registered User


Joined: Oct 2011
Posts: 2,739
Likes: 346
From: Denver CO
I like how the tailgate was dirty under the panel and by the end it was clean but you won't see it but you know it's clean, I thought I was the only one!! When I did my door speakers the panels had never been taken off my buddy from car toys was helping me cut the panels and we were about to put them on and I told him to wait a minute so I could clean the door. He thinks I'm nuts anyway but he's sitting there tapping his feet saying dude you can't see it when the panels back on, but I know it's clean and it made me feel way better!! Anyway when I get a runner, I will just use your threads as my instructions!! Great job as usual chef!! If your ever in Colorado stop by and we can have a detail party
Trending Topics
Sep 30, 2012 | 11:24 AM
#8
Thread Starter
Registered User
iTrader: (5)
Joined: Jun 2009
Posts: 19,281
Likes: 21
From: Lake Havasu, AZ
Hahaha... WOW, I really was surprise, not only by the fact that quite a few people responded, ...but that I got no massive mocking/lashing for the pretty awful video mistakes, haha.
Thanks alot, guys.... Appreciated. I'll probably be in there again, soon, as my window gears or whatever are pretty squeaky going up and down... With a lil "squeak-squeek-squeek-squeek", repetitious style to it, going down. More of a steady 'squeak' going up....... But it works, so meh, lol. Couple things I should have done differently on the video, like more light and actually splice together a couple to show the portion of removing the latches for inspection/cleaning/regreasing, ya know? But all in all, I just hoped it would give someone, like me, the confidence to dive in there, ya know?
One thing I wanted to add(I'll add it to the original post)...
*** YOU DO NOT have to remove the latches to replace the cables. I, PERSONALLY, just found it easier to do so with them out(big hands). Plus, it felt a lil more reassuring to know that that 'latches', themselves, were all ok in the mechanism/inside portion. And honestly? THEY WERE FILTHY, covered in dried up grease and dirt. And LASTLY, I really didn't like the idea of bending the cable to that extreme just to avoid taking those latches out... Ya know? I recommend removing them for inspection.
*** The other thing? ; The Driver side latch has an "Electrical Connector"..... Just be careful with it is all I'm recommending. Mine was pristine... but they can be brittle, I imagine?
So yeah, instead of removing the latches, if you're in a hurry or maybe one of the screws strips out on ya.... Just remove the cable from the plastic retainer to give yourself a lil play, then remove the "KNOT" on the end of the cable from the Guide and Lever in the center of the tailgate..(Pull the cable toward the driver side if working on the passenger side latch end of things)... get the cable to line up with the slot, then push the "KNOT" out from the bottom(knot as I called it just the lil metal cylinder on the end of the cables)... And once you have that cable free from the 'center arm', you can EASILY create the same slack on the pass. side latch and slide the "KNOT" up and out... Then replace with the 2nd Gen ones(I SWEAR to you they're better design, guys!)
Wow, Terry, ... I feel like a Celeb being on your, ''Terry's Wall of Famous FIXES"...... hahaha... Seriously, you are the GURU of 'DIY "use what you have" repairs'.... HUGE appreciation for all you've done to help me out with research on so many things, man 
Ask any questions you want, guys, gals, hamsters .... Whomever! lol
Thanks alot, guys.... Appreciated. I'll probably be in there again, soon, as my window gears or whatever are pretty squeaky going up and down... With a lil "squeak-squeek-squeek-squeek", repetitious style to it, going down. More of a steady 'squeak' going up....... But it works, so meh, lol. Couple things I should have done differently on the video, like more light and actually splice together a couple to show the portion of removing the latches for inspection/cleaning/regreasing, ya know? But all in all, I just hoped it would give someone, like me, the confidence to dive in there, ya know?
One thing I wanted to add(I'll add it to the original post)...
*** YOU DO NOT have to remove the latches to replace the cables. I, PERSONALLY, just found it easier to do so with them out(big hands). Plus, it felt a lil more reassuring to know that that 'latches', themselves, were all ok in the mechanism/inside portion. And honestly? THEY WERE FILTHY, covered in dried up grease and dirt. And LASTLY, I really didn't like the idea of bending the cable to that extreme just to avoid taking those latches out... Ya know? I recommend removing them for inspection.
*** The other thing? ; The Driver side latch has an "Electrical Connector"..... Just be careful with it is all I'm recommending. Mine was pristine... but they can be brittle, I imagine?
So yeah, instead of removing the latches, if you're in a hurry or maybe one of the screws strips out on ya.... Just remove the cable from the plastic retainer to give yourself a lil play, then remove the "KNOT" on the end of the cable from the Guide and Lever in the center of the tailgate..(Pull the cable toward the driver side if working on the passenger side latch end of things)... get the cable to line up with the slot, then push the "KNOT" out from the bottom(knot as I called it just the lil metal cylinder on the end of the cables)... And once you have that cable free from the 'center arm', you can EASILY create the same slack on the pass. side latch and slide the "KNOT" up and out... Then replace with the 2nd Gen ones(I SWEAR to you they're better design, guys!)
Wow, Terry, ... I feel like a Celeb being on your, ''Terry's Wall of Famous FIXES"......
hahaha... Seriously, you are the GURU of 'DIY "use what you have" repairs'.... HUGE appreciation for all you've done to help me out with research on so many things, man Ask any questions you want, guys, gals, hamsters .... Whomever! lol
Last edited by ChefYota4x4; Sep 30, 2012 at 11:27 AM.
Oct 1, 2012 | 08:23 AM
#9
Registered User

Joined: Jun 2006
Posts: 2,711
Likes: 4
From: San Diego
awesome work as usual Chef... now I have some insight when I need to replace my cables.
For those stuck screws, and impact driver keeps from screwing up the heads. I used to use them all the time for Honda brake rotors..

For those stuck screws, and impact driver keeps from screwing up the heads. I used to use them all the time for Honda brake rotors..
Oct 2, 2012 | 11:37 AM
#11
Thread Starter
Registered User
iTrader: (5)
Joined: Jun 2009
Posts: 19,281
Likes: 21
From: Lake Havasu, AZ
awesome work as usual Chef... now I have some insight when I need to replace my cables.
For those stuck screws, and impact driver keeps from screwing up the heads. I used to use them all the time for Honda brake rotors..
http://www.amazon.com/Pro-Grade-1962...=impact+driver
For those stuck screws, and impact driver keeps from screwing up the heads. I used to use them all the time for Honda brake rotors..
http://www.amazon.com/Pro-Grade-1962...=impact+driver
 .....OR, ...it was taken in the divorce, 12 years ago
  ..... Guess I've had time to replace it, eh? hahaha. EXACTLY! Those screws on my Daughters Rodeo(just a Honda Passport
  ) .... they would NOT come off... I will pick one up at Harbor Freight next time i'm by there(I know, HF sucks, .... but my tools from there have done fine by me, and I have a gift card... So why not, right? I'll try it out a couple dozen times in 10 minutes at the junk yard next time, for fun
  ... Just to be sure. Then return if it's junk. Thanks, man!
  ........... And NOPE, don't look at it as 'they SEEM to be the way to go'..... THEY ARE, trust me... You'll find them to be WAY better quality and ease in gliding the cable. Plus, you can lube them from time to time to prevent it from EVER happening again... which you can NOT do on the 1st Gen Cables.
Dec 4, 2021 | 10:00 AM
........... And NOPE, don't look at it as 'they SEEM to be the way to go'..... THEY ARE, trust me... You'll find them to be WAY better quality and ease in gliding the cable. Plus, you can lube them from time to time to prevent it from EVER happening again... which you can NOT do on the 1st Gen Cables.
Dec 4, 2021 | 10:00 AM
#12
Registered User
Joined: Sep 2021
Posts: 21
Likes: 2
From: North Carolina
Bottom line, my tailgate wouldn't even latch on the pass. side, let alone lock. This is a very common problem, from what I've learned.... And the culprits, as I've also come to glean from great Yotatechy Brothers like Terrys_87 and others is these..........
Attachment 192188
The Tailgate Latch Release/Latch Cables...........
************************************************** ********
So let's get to it..........
1st: Remove the Carpeted Panel, Metal Plate and then Plastic Film(The film can be brittle... Mine was solid.. Just a lil dried out on the corners. But pick a spot to start and peel it up and continue to peel it up all the way around until it's removed)...........
Mine was very dirty inside and on top.......
Attachment 192189
Here's a close up of the most common cable to wind up sticking/freezing up, passenger side... It can't enter the shaft to re-engage the latch mechanism...
Attachment 192190
The cable going to the driver side latch seemed to move 'OK'... but I replaced them both, for reasons I'll explain in video, more so, later(but briefly; The 1st Gen cables ARE DIFFERENT, in more than one way. They DO NOT have a rubber boot on the end that the cable slides through.... Rather, the cable itself is 'rubberized'... It rusts right through the rubber and seizes up inside the shaft/guide)........Driver side Cable.......
Attachment 192191
Here is the passenger side latch mechanism bracket, where the cable clips in/Second pic is the driver side one......
Attachment 192192
Attachment 192193
This is the Lock-Safety Switch Actuator in, first, the unlocked position, then locked.......
Attachment 192194
Attachment 192195
2nd: Clean up the Tailgate very well, inside I used a vacuum and on top I used some Bathroom Foaming Cleaner.........
Attachment 192196
Next, I prepared the NEW to me, 2nd Gen 4Runner Latch Release Cables by pulling off the boot and injecting silicone lubricant spray.....
Attachment 192197
BELOW, notice the difference in the 1st Gen 4Runner Cable ends(and notice the rubberizing on the cable itself, plus the boots that they use, instead, on the 2nd Gen 4Runner cables...
Attachment 192198
I then took some of the left over CV boot kit grease from Toyota, and used it on all the 'gliding' mechanisms and places it should be, including the latch on the driver side, which I removed and cleaned up, well.........
First pulled out the latch mechanism and removed the cable...
Attachment 192199
It was pretty nasty.. Then cleaned up and greased everything....
Attachment 192200
Attachment 192201
Attachment 192202
Attachment 192203
Attachment 192204
Then removed the other side on the Handle Cross Gear(Cross as in it looks like a Cross, haha).......
Attachment 192205
Put the latch back in..........
Attachment 192206
Installed the screws, then pushed up the gate, and to my GREAT BIG HEAPING SERVING OF DELIGHT.... it latches and locks!
************************************************** ********
Below is a couple of videos..... I make lots of fun of myself... And, some of it is bad lighting, etc. But all in all, it's not THAT bad, lol..... I hope they help someone............
UPDATE:
Twist!
Last edited by SWitek; Dec 9, 2021 at 06:50 PM. Reason: Update

Thread
Thread Starter
Forum
Replies
Last Post
Gizler00
84-85 Trucks & 4Runners (Build-Up Section)
1037
Sep 29, 2016 10:20 AM
RdS
84-85 Trucks & 4Runners (Build-Up Section)
40
Feb 25, 2016 06:01 AM


