Repair Upgrade Door Panels
 07-23-2012, 08:02 PM
#1
Registered User
Thread Starter
iTrader: (4)
Join Date: May 2010
Location: People's Republic of California
Posts: 720
Likes: 0
Received 15 Likes
on
12 Posts
Repair Upgrade Door Panels
Put this on my build thread and putting a modified copy on the forum in case someone searches in the future on wanting to repair or upgrade their door panels.
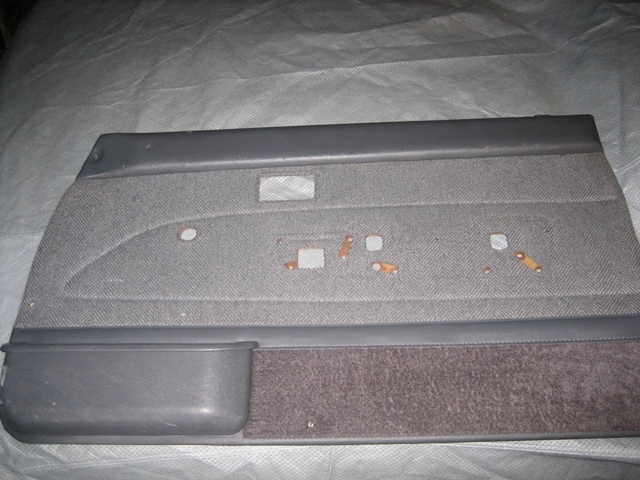
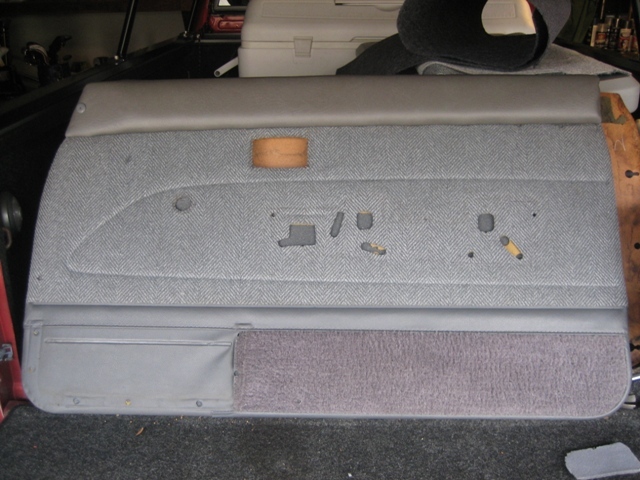
I’m more of a highway driver with my truck so I wanted SR5 cloth door panels with manual windows for some time now. Finally pieced a set together from the junk yard from two separate pickups. One cost me $17 and the other $9. So long as the fabric is up to your liking and standard you can still salvage them to work and look nice.
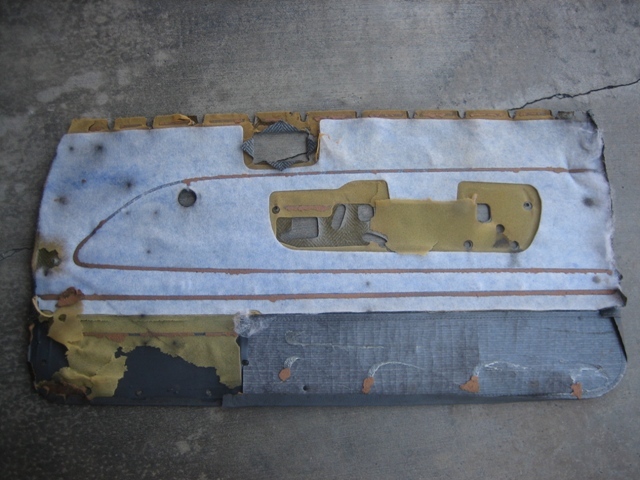
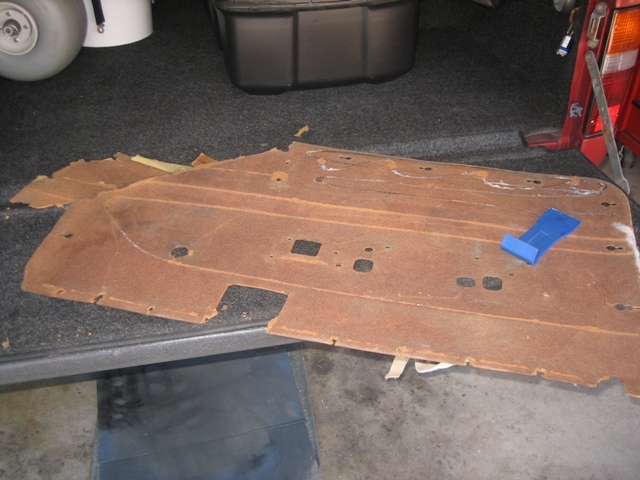
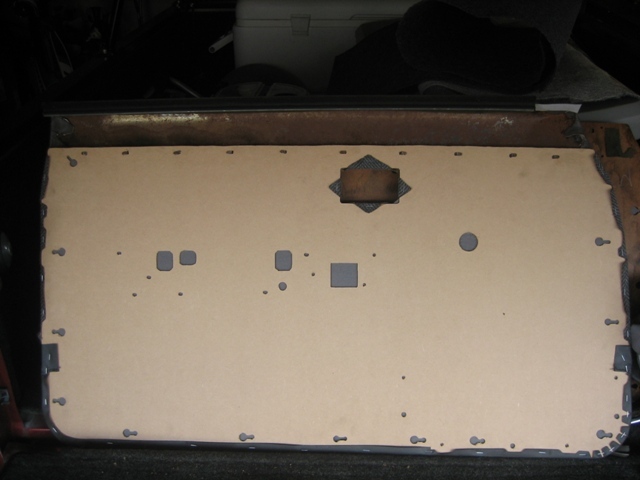
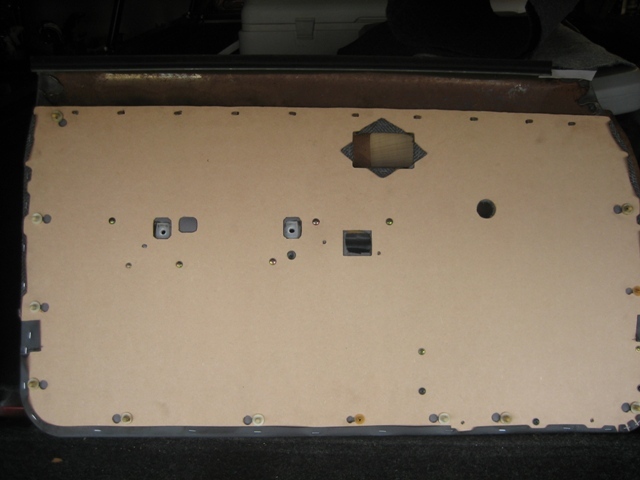
To clean the dirt, stains, and oil off, I scrubbed them down with laundry detergent and then fully air dried. In hindsight, you might want to remove the material from the board before cleaning to prevent further damage from the water to the particle board panels. The panels I had were already bent, warped, and torn so I didn’t bother removing the material first before cleaning. Passenger side:
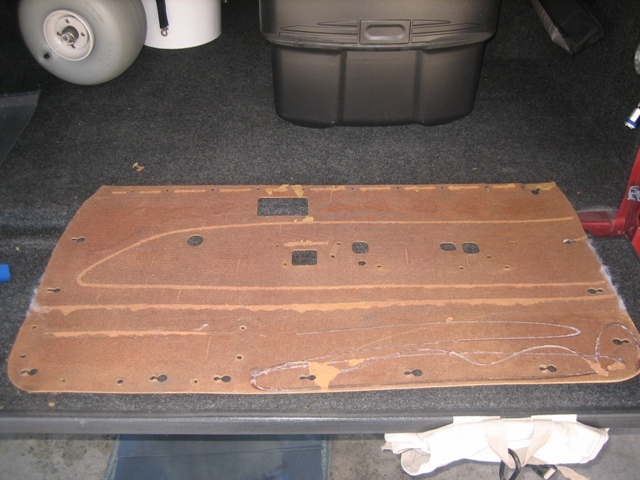
Drivers side. You'll notice the armrest pad is separated, it was already ripped from the board when I found it.

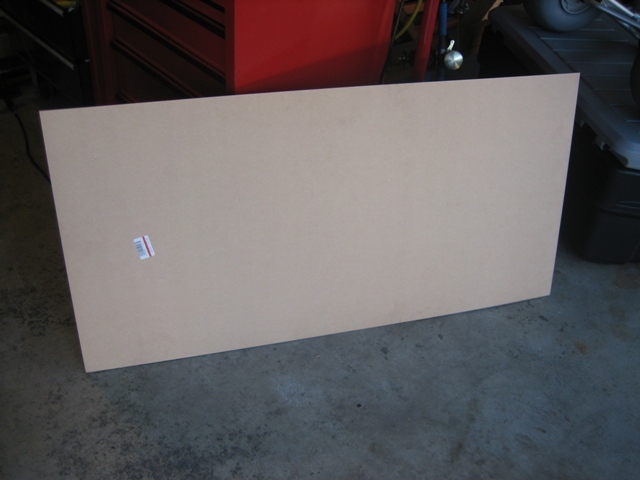
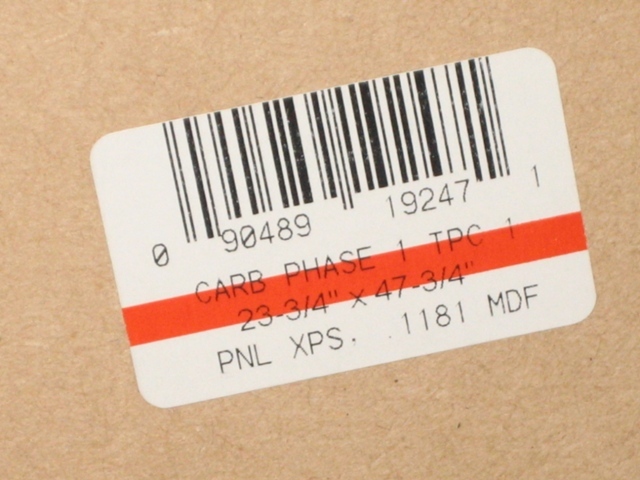
Knowing I needed to replace the particle board I went to Home Depot and purchased two approximately 2' x 4' sheets of 1/8" MDF particle board. This was nice stuff and was smooth on both sides. Cost about $4 each.
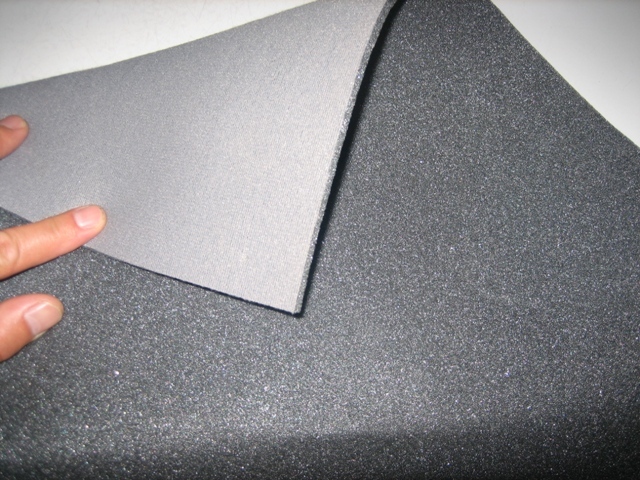
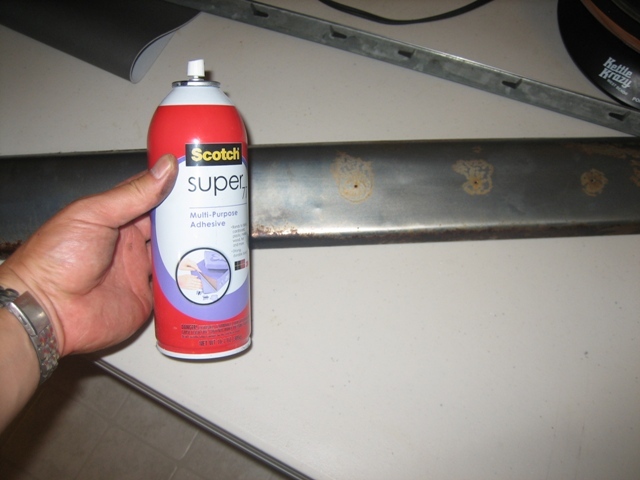
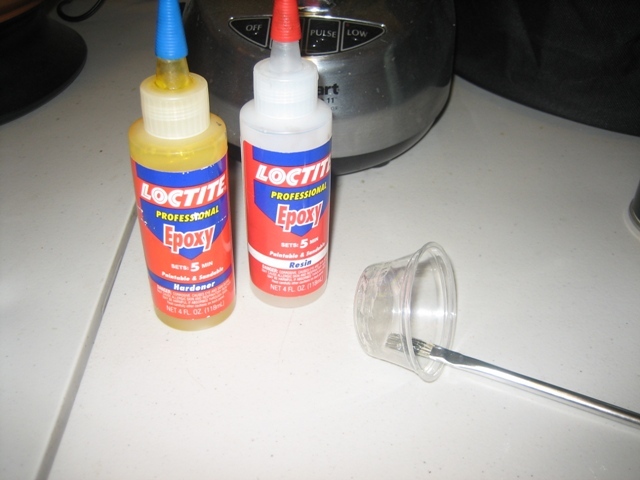
Went to a craft store called Michael's and bought headliner foam padding and grey vinyl material. The foam had felt like material covering one side of it and was about 1/8" thick. You’ll need enough foam to cover the door panel(s) and arm rests. You’ll need enough vinyl to cover the two arm rests. Cost about $20 using a 50% off coupon that the register lady gave me. Also, picked up a can of 3M spray adhesive.
Step 1 - Remove existing door panel material
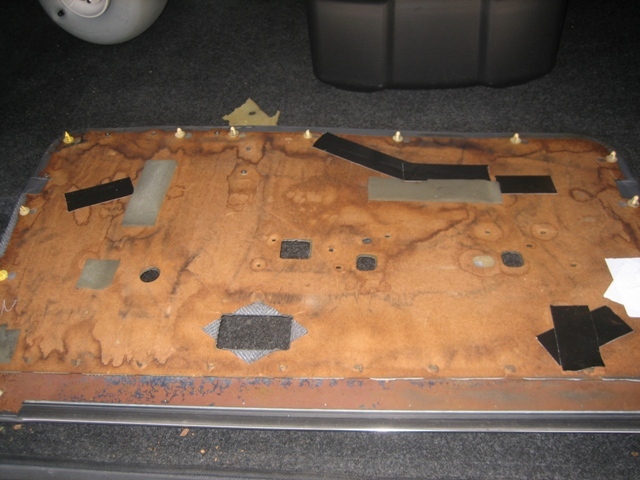
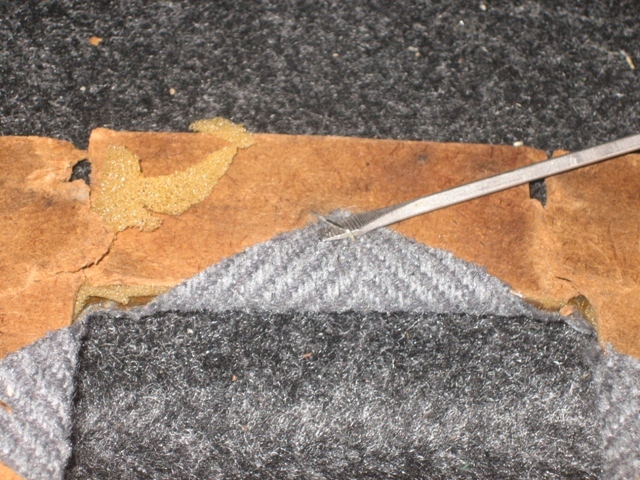
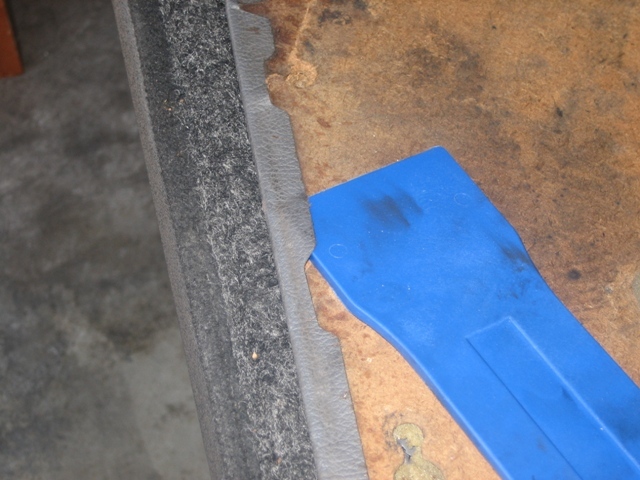
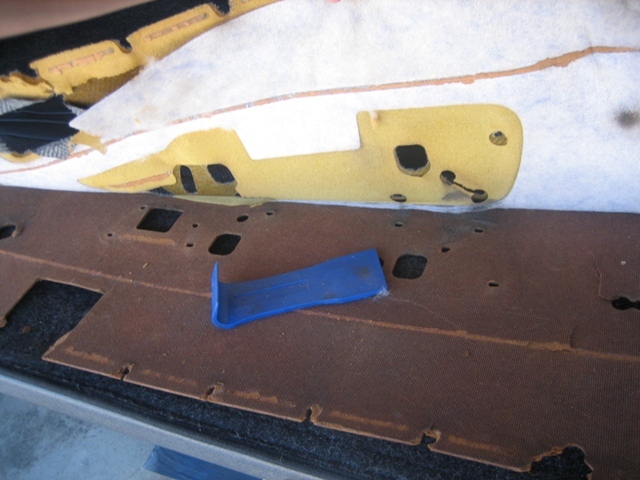
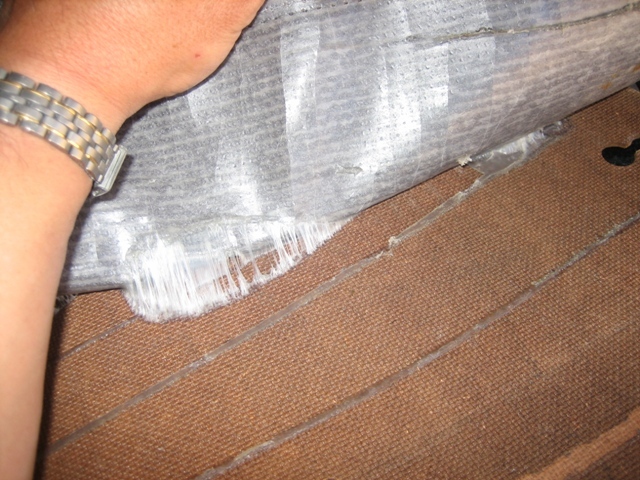
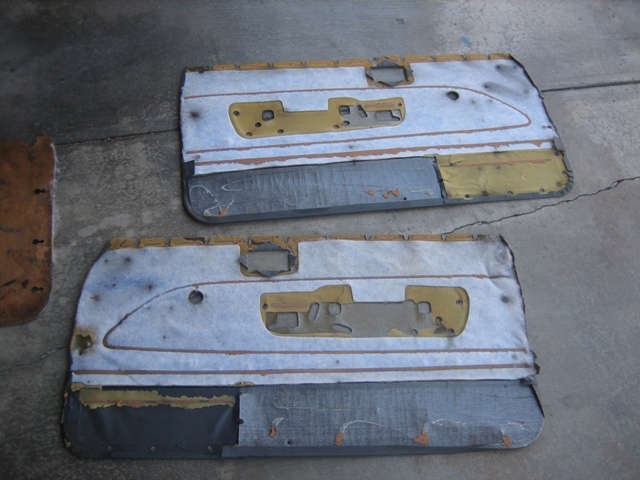
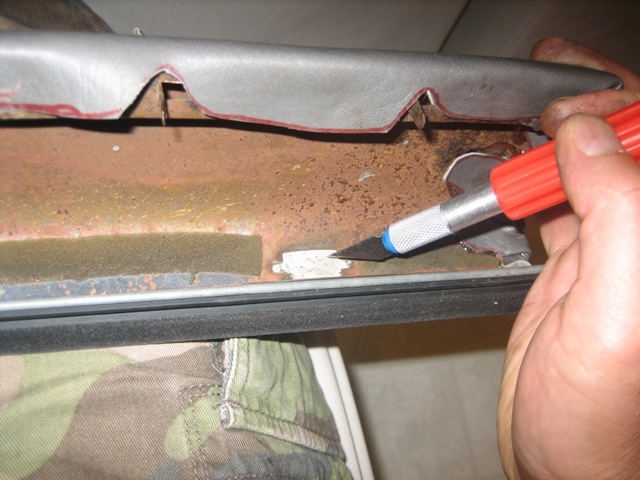
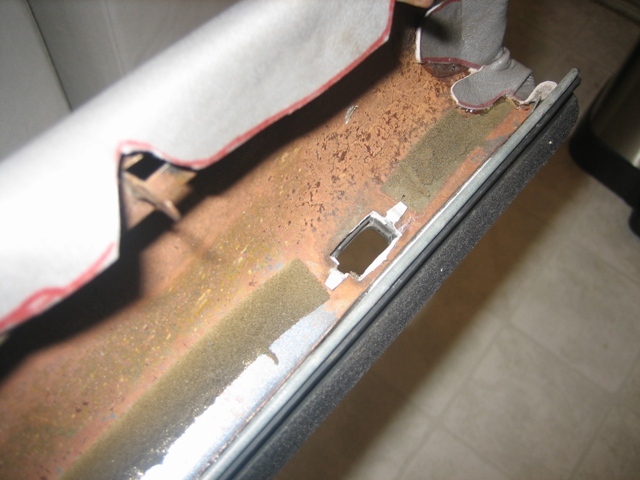
If re-using the material carefully remove all the staples (front and back sides) and peel/separate all the vinyl and cloth material from the boards. Some of the adhesive is pretty sticky.
Badly damaged panel.
You will need at least one good board in order to make a template, hopefully the other side is in better condition or you’ll probably have to tape and mend what you have to work with.
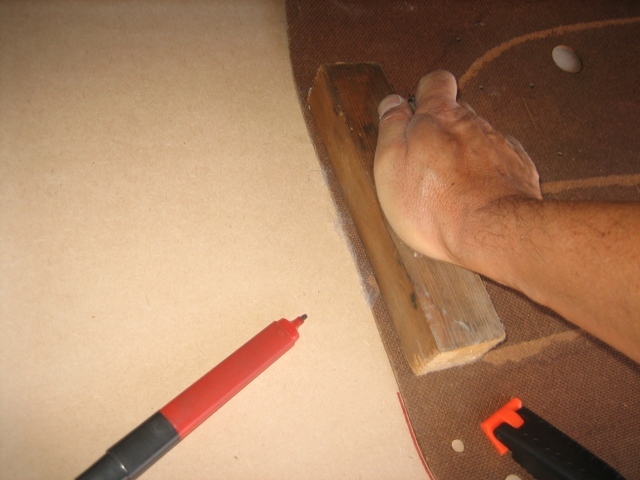
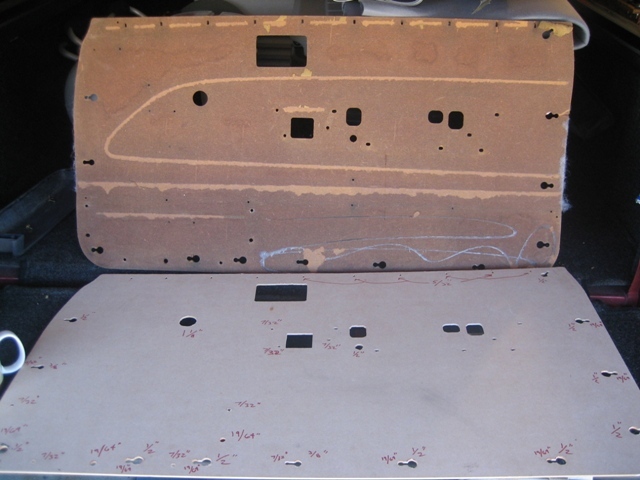
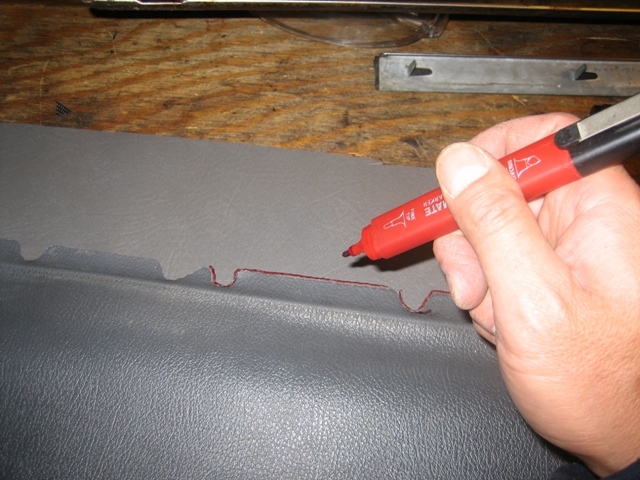
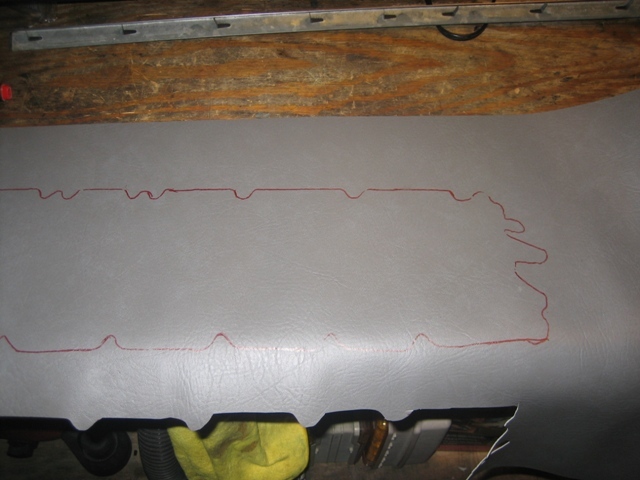
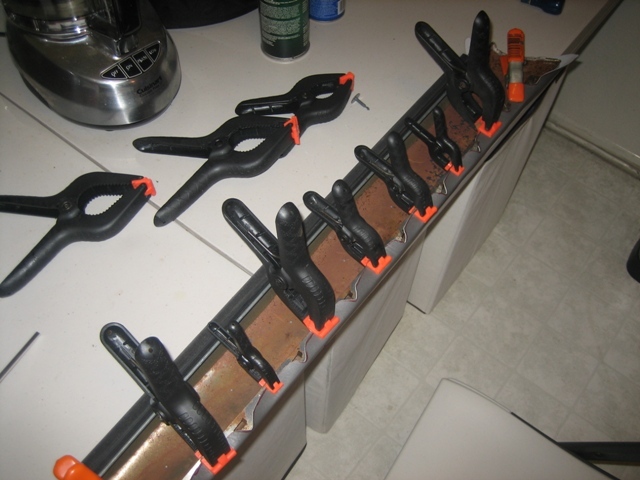
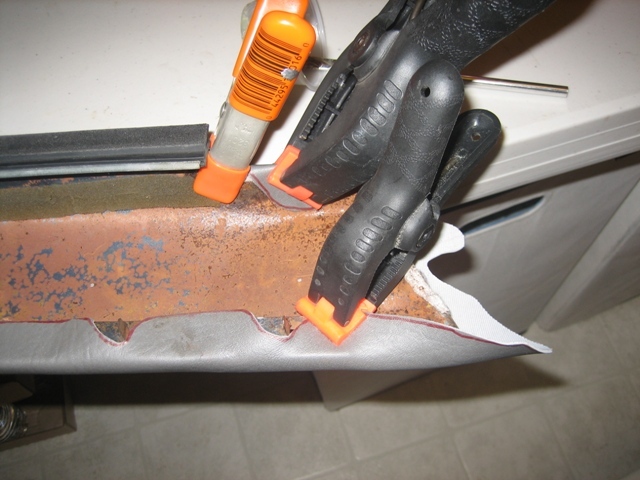
Step 2 - Make the template
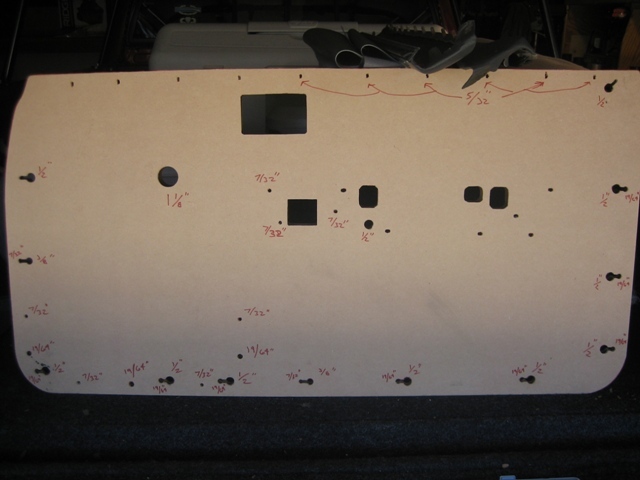
Using clamps and a marker trace the panel. You can use a block of wood to push down on the warped panel to get the cleanest and most accurate trace.
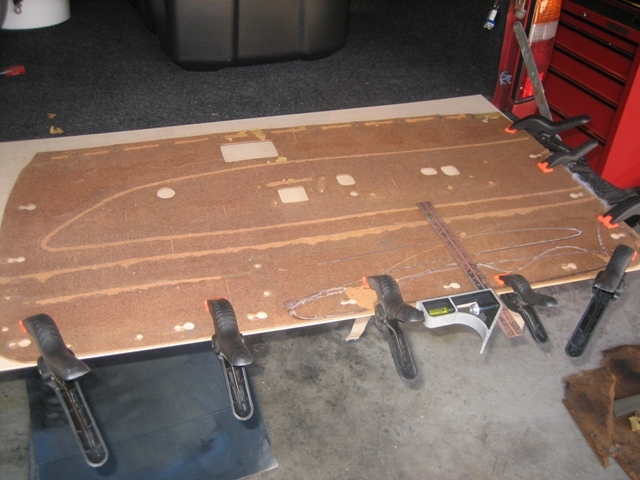
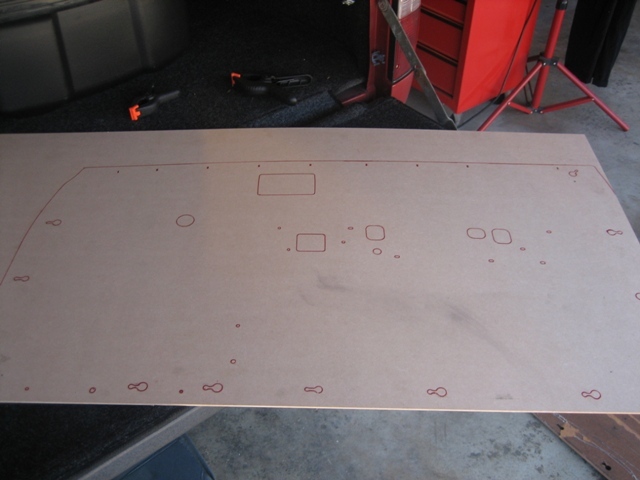
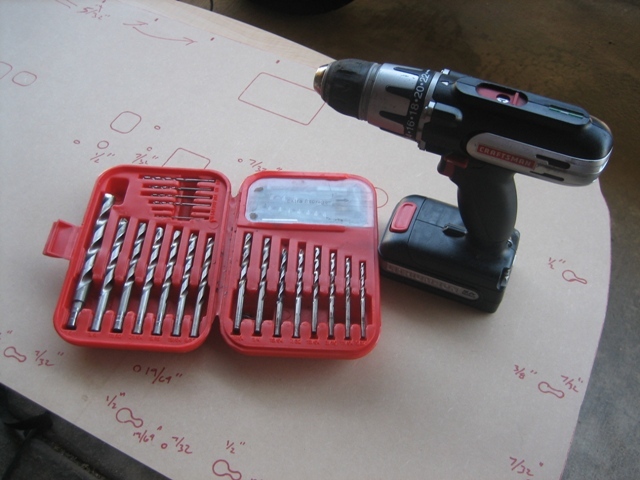
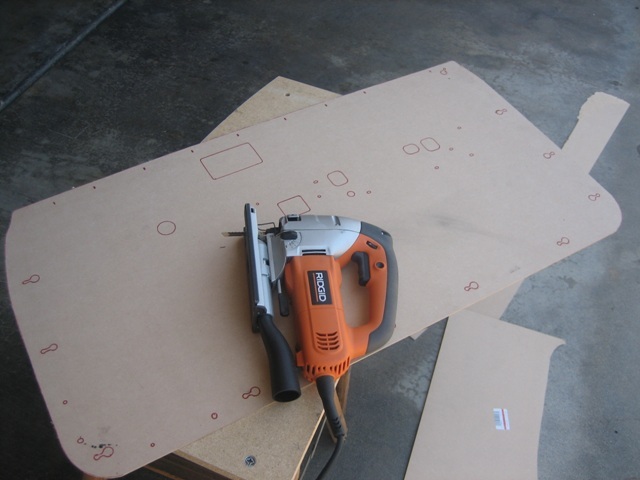
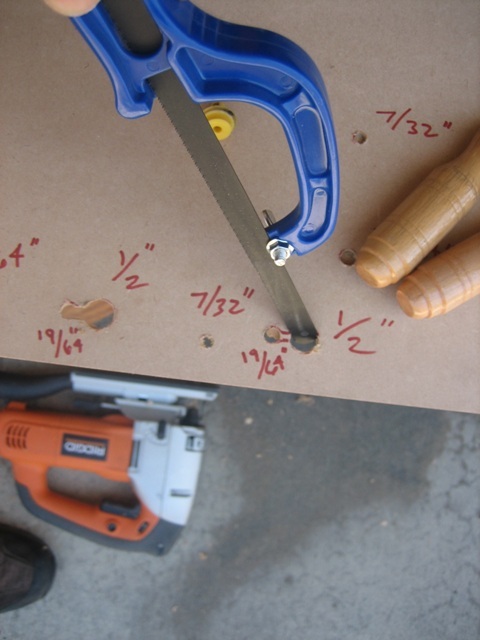
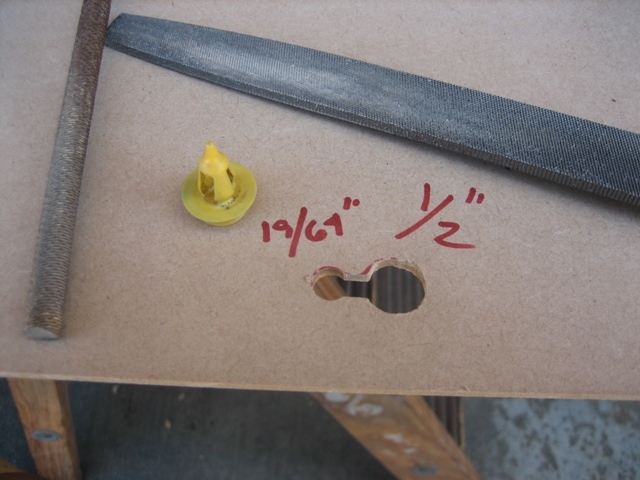
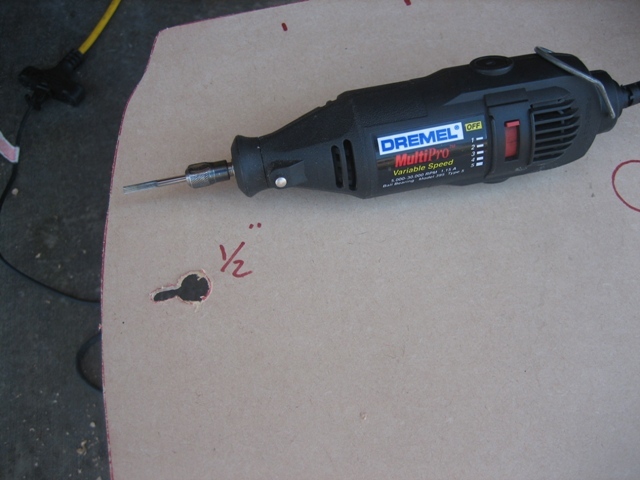
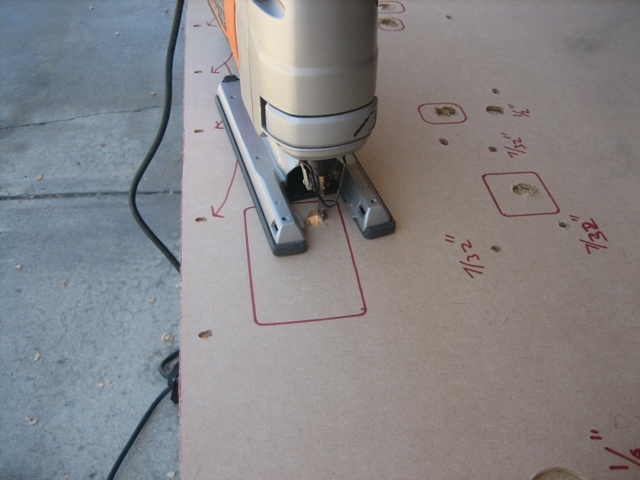
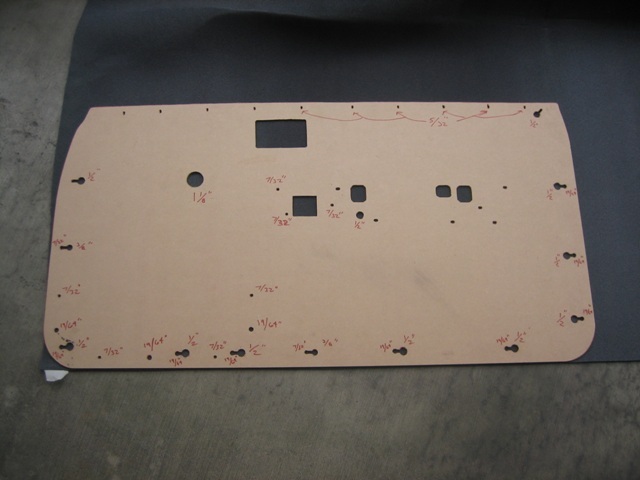
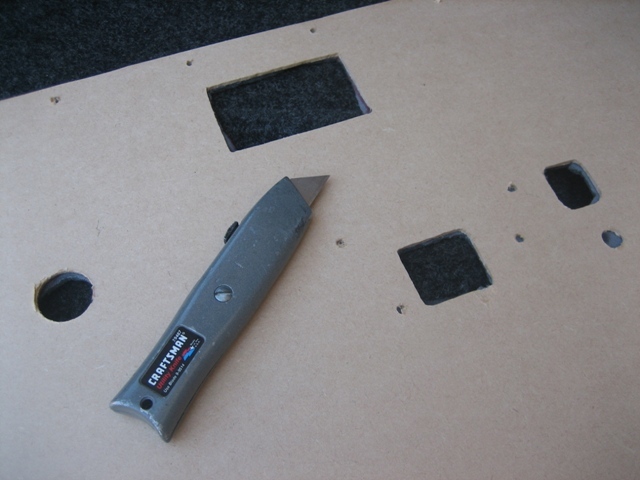
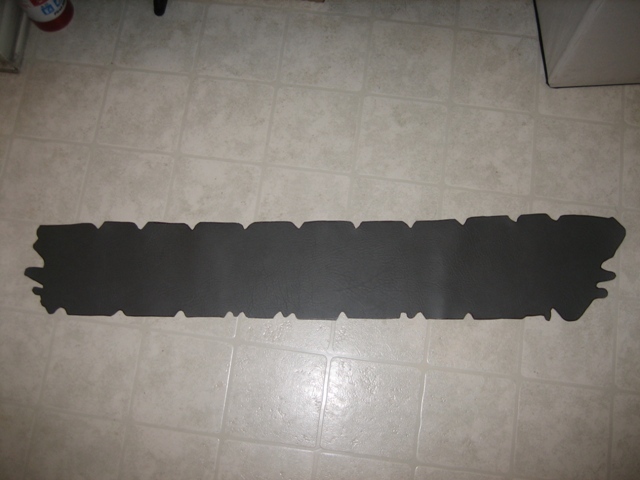
Step 3 - Making the cuts
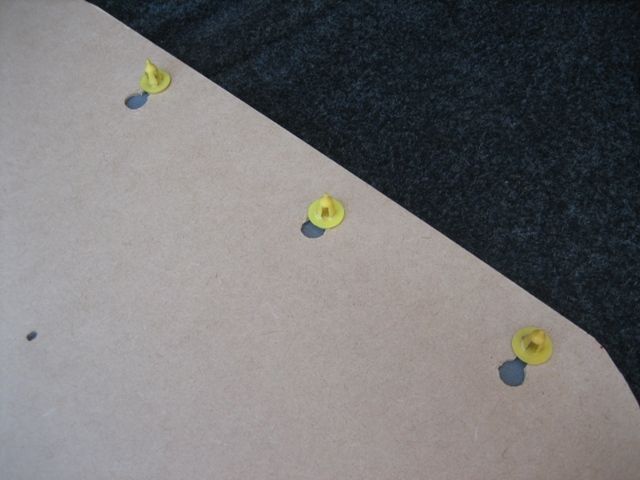
Using whatever tools you have (Jig Saw, Drill and different bits, Small Hand Saw, Dremel Tool, and Files) cut out the patterns to resemble the original door card panel. You'll notice I labeled the different size bits I used to make most of the holes to make the cutting of the 2nd panel a bit quicker. Use a cylinder and straight file to make final adjustments so that the plastic pieces that hold the card to the door fit correctly.
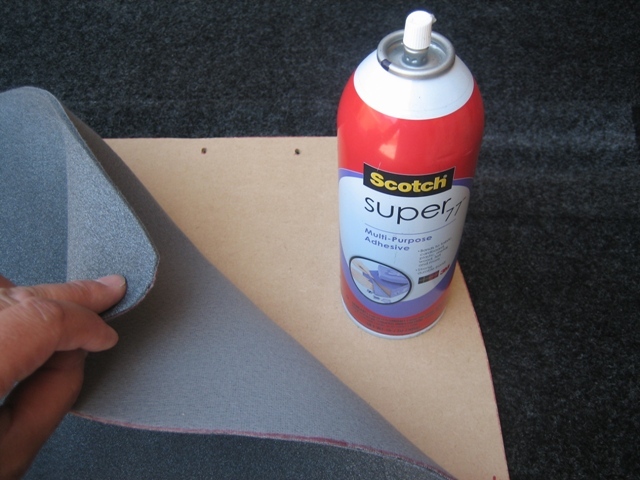
Step 4 - Foam Padding
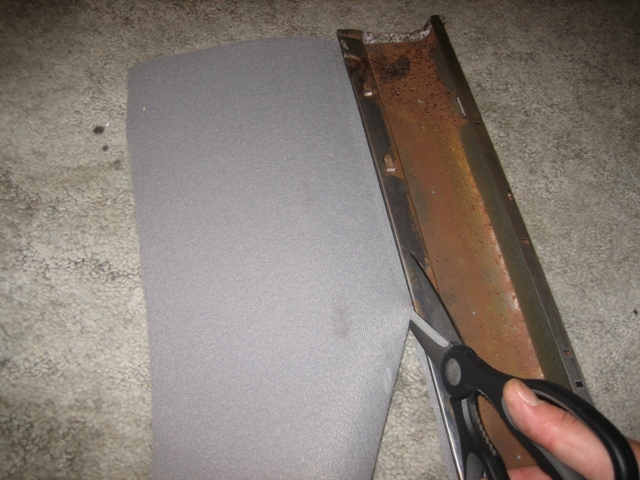
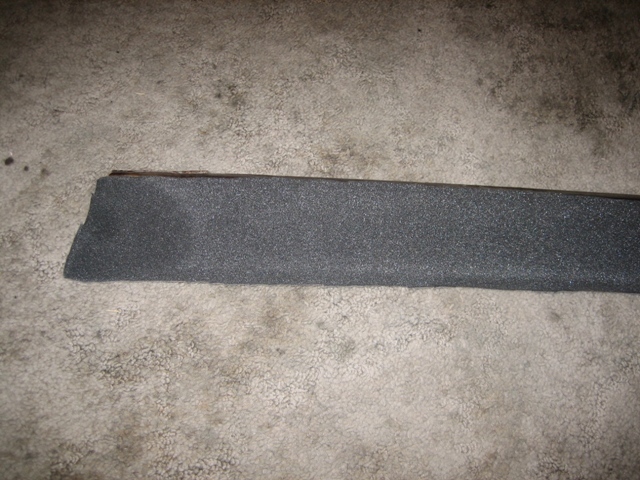
This isn’t necessary, however I wanted a plusher feeling and additional sound dampening. Lay down the foam headliner material and trace/cut to the outline of the panel. Use the spray adhesive to glue it to the new door card (felt side down), and then use a box cutter to cut out the necessary openings.
Step 5 - PITA Arm Rests
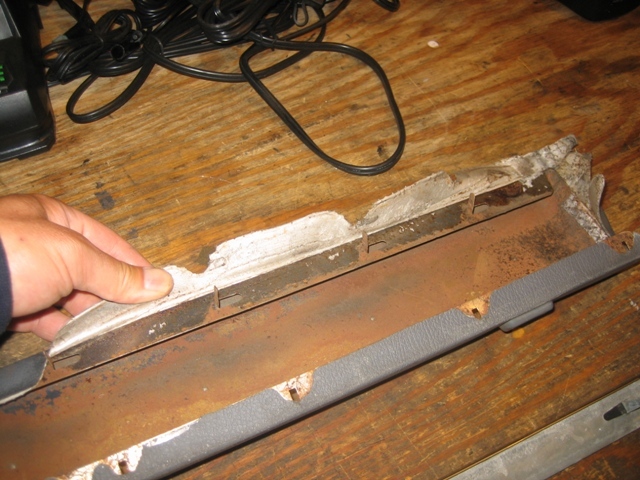
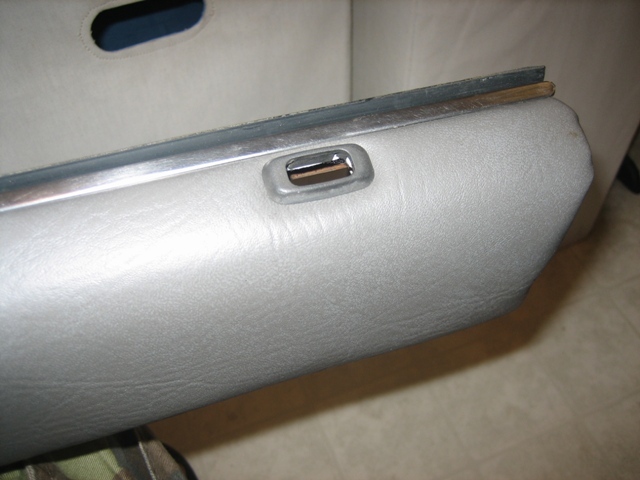
I like to ride with my window down and arm resting on the door. If you're familiar with our non-SR5 door panels you've noticed the arm pad is not very thick and has no padding, which means not very comfortable. I decided to address that with extra foam padding since I was putting new vinyl on. This part takes some patience.
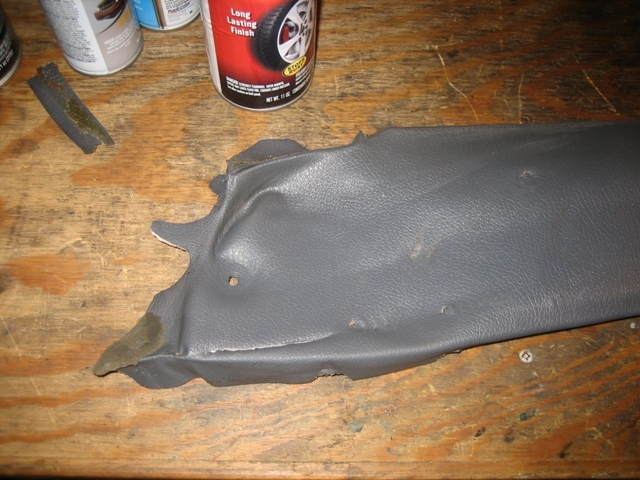
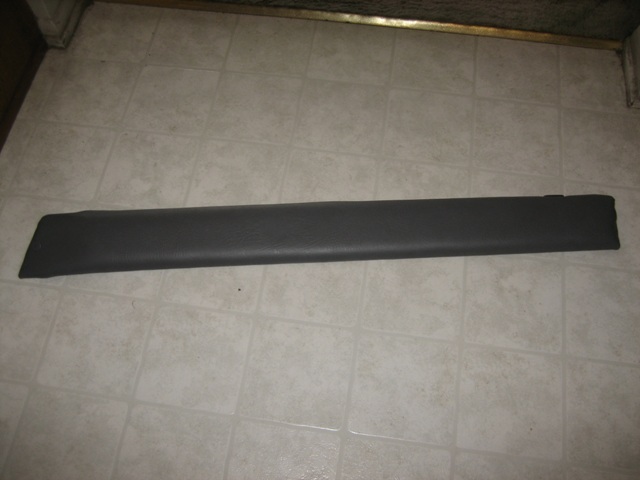
Bad vinyl

Straighten out metal clips to pull window piece off
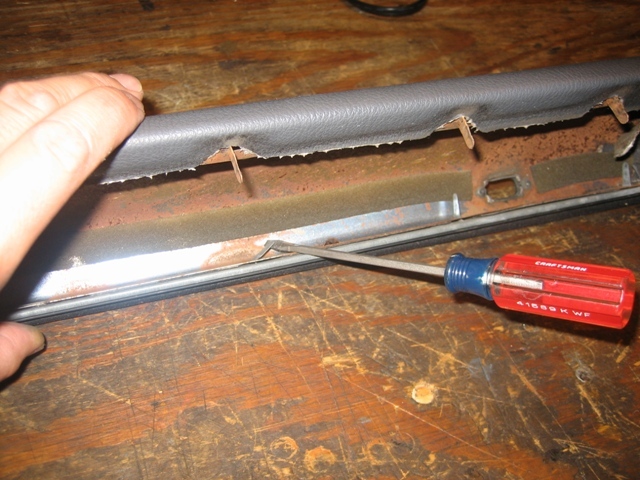
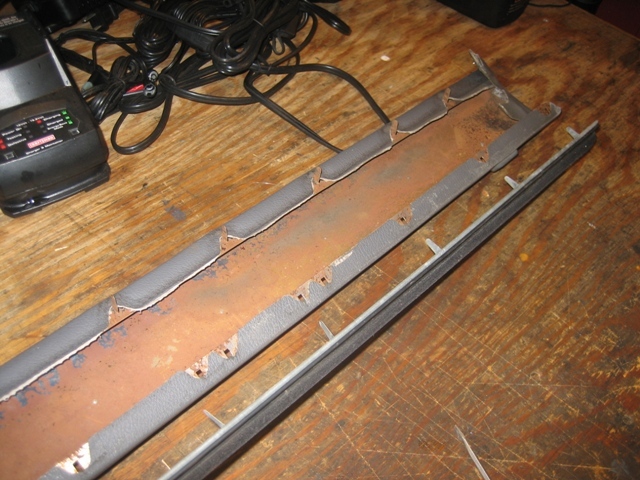
Peel off the old vinyl
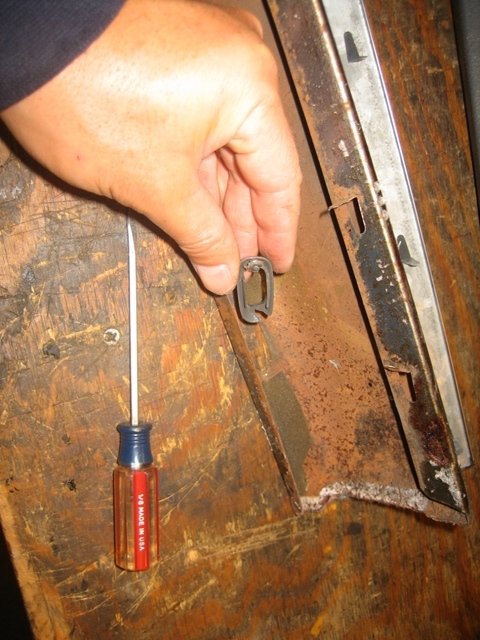
Remove the door lock plastic trim piece. The plastic pieces are melted at the ends to keep them in place so you'll either have to melt them off or just do what I did and break them off and find a substitute replacement. The 2nd Gen Camry (89-91) pieces are a good substitute. The camry's have metal tabs so you can easily remove and re-use them. I had a few extra from the junk yard for my camry so I used them on these arm pads.
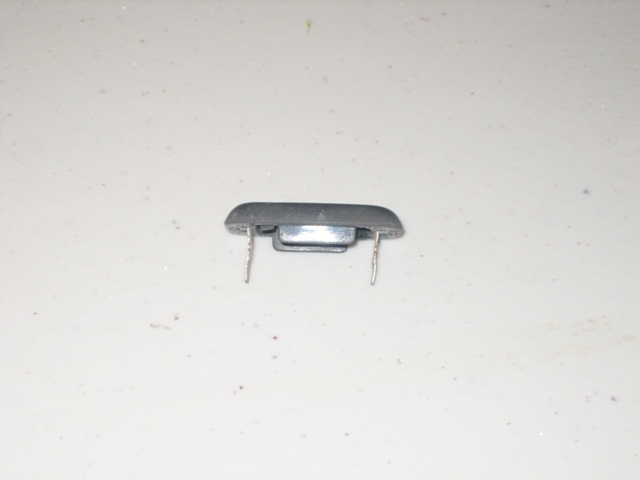
Camry replacement piece
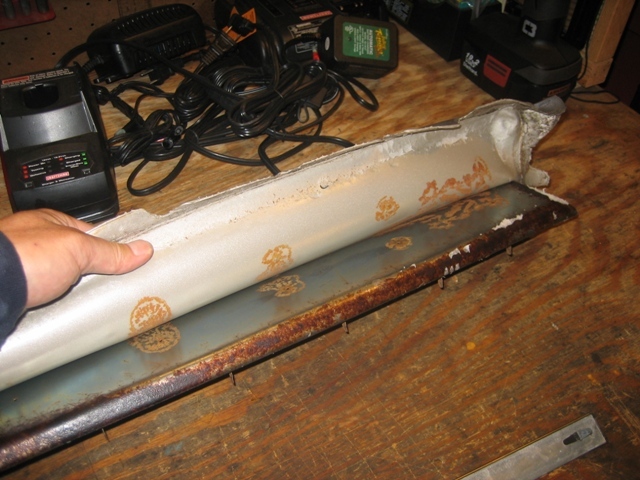
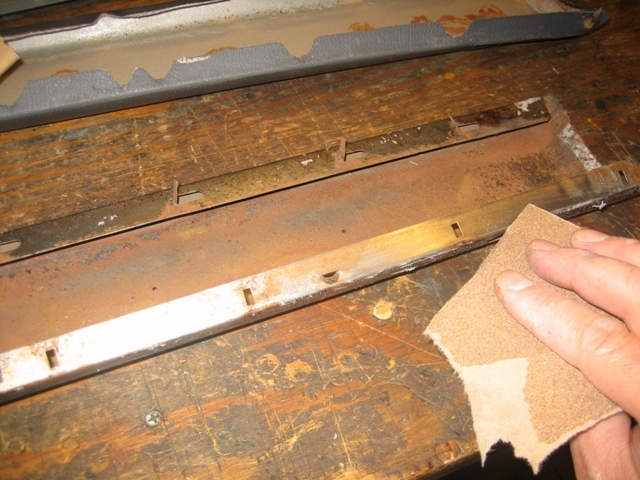
Sand off any rust and sticky residue so the new glue will adhere better
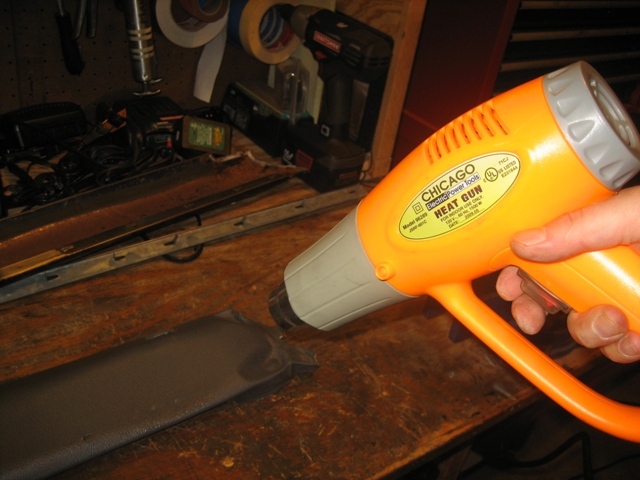
Flatten out the old vinyl so you can use it as a template. A heat gun and board makes quick work of flattening it out so you can trace it easier.
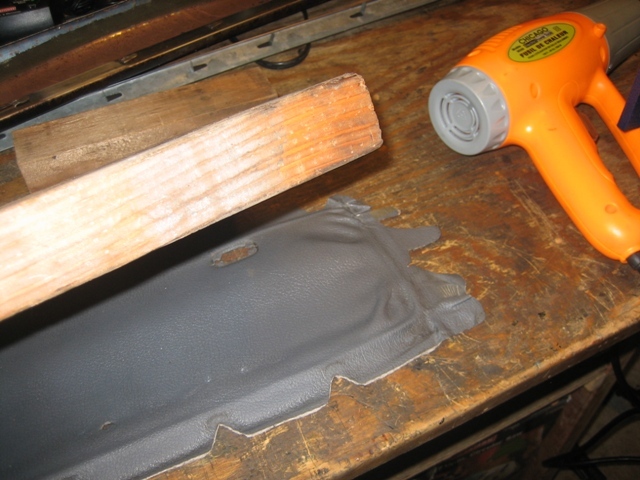
Trace and cut your vinyl skin template
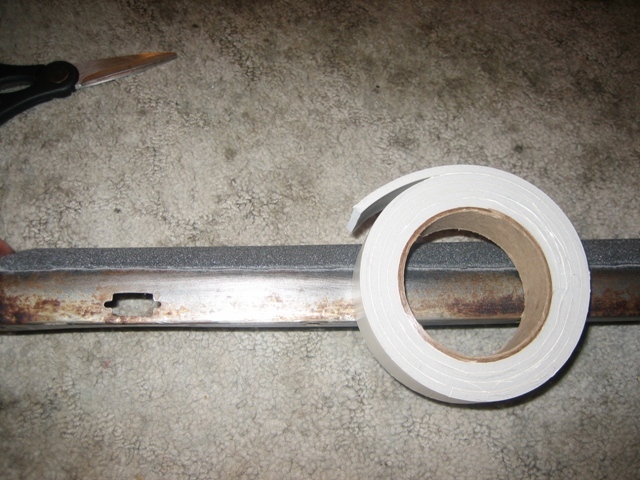
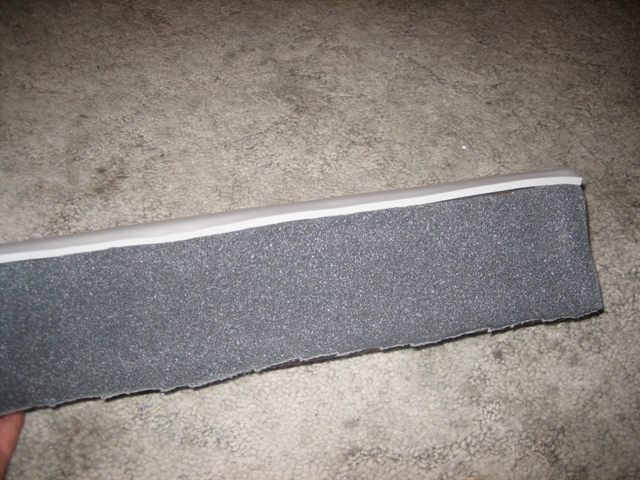
Trace, cut and glue the head liner foam for extra padding.
I opted to use a thicker and denser foam padding I had laying around on the top portion of the arm rest.
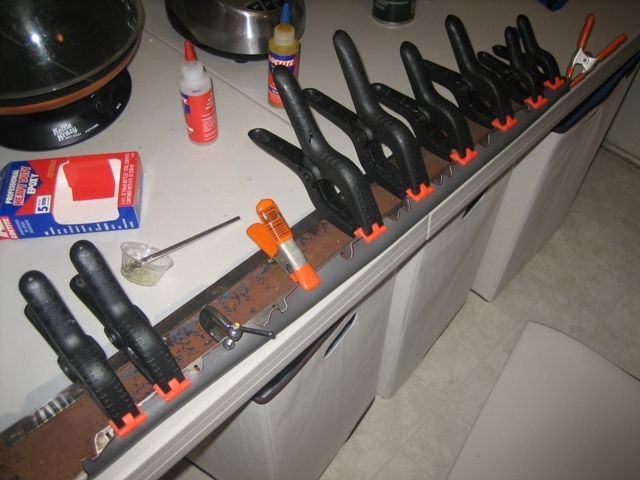
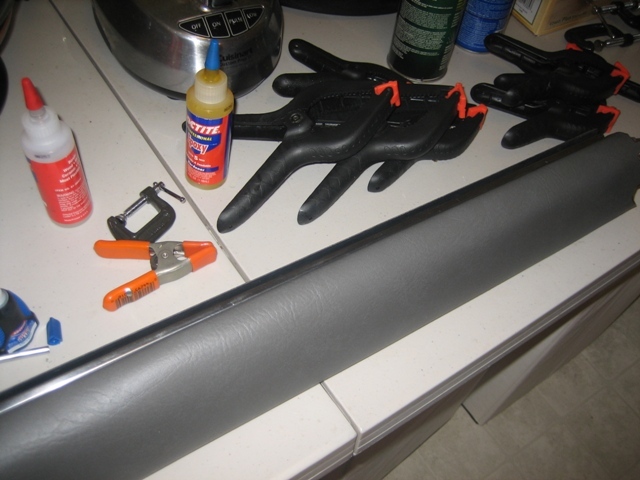
Now is the PITA part, use a good adhesive to get the vinyl stretched and stuck over the arm pad. You'll need a BUNCH of clamps! The ends are the hardest part.
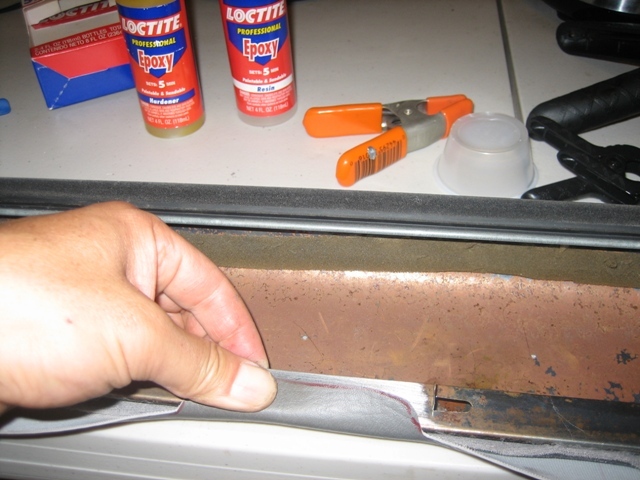
Then after it dries you can cut out the door lock hole and put the plastic camry piece in. The metal tabs just fold over to hold it in place.
Step 6 – Putting it together
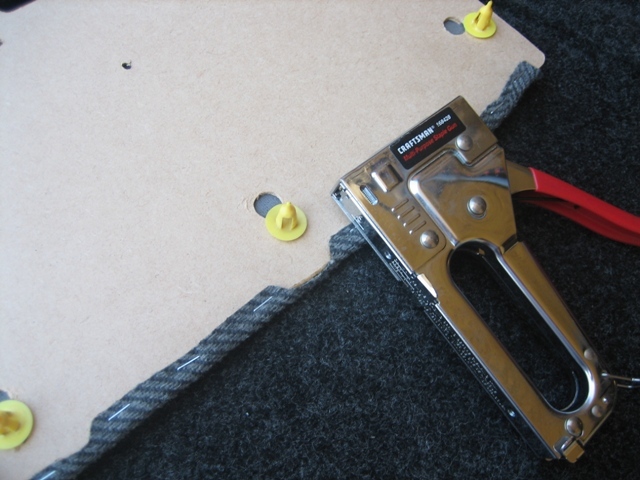
Place the cleaned material onto the new door card and either staple or glue or both in place. I used 1/4" staples.
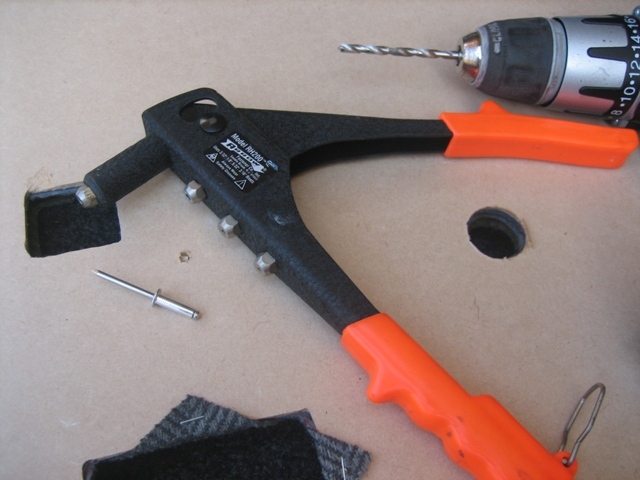
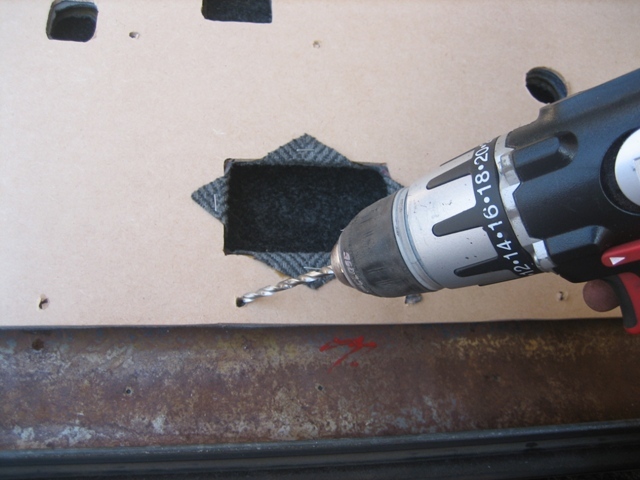
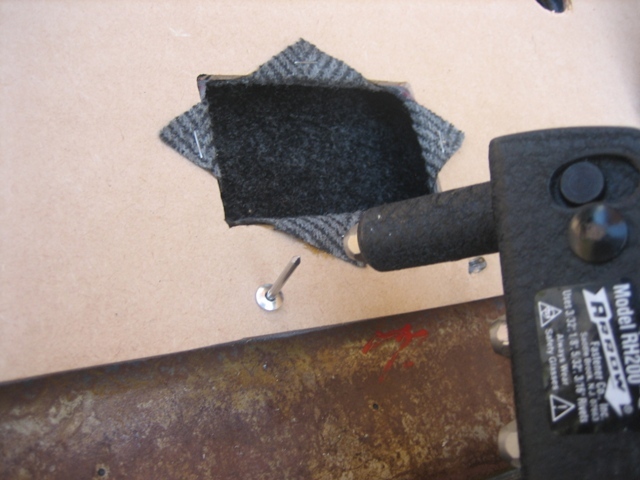
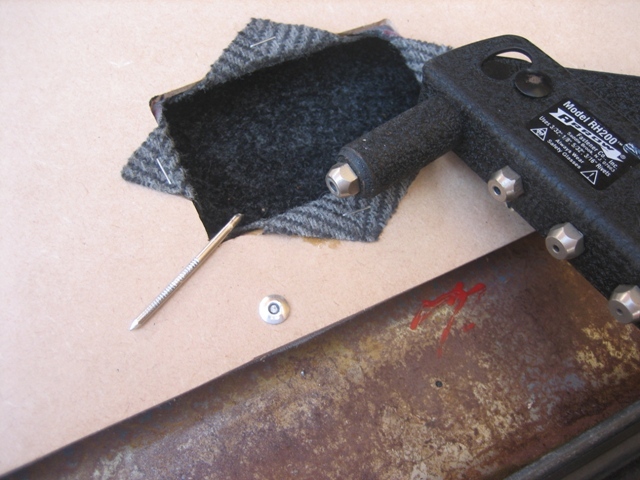
Put the arm rest on by inserting the tabs through the top holes on the board and bend them down to hold in place. If some of the tabs have broken off, you can substitute rivets to hold it in place. I drilled the appropriate hole size for the rivet and used a cheap hand powered pop rivet gun.
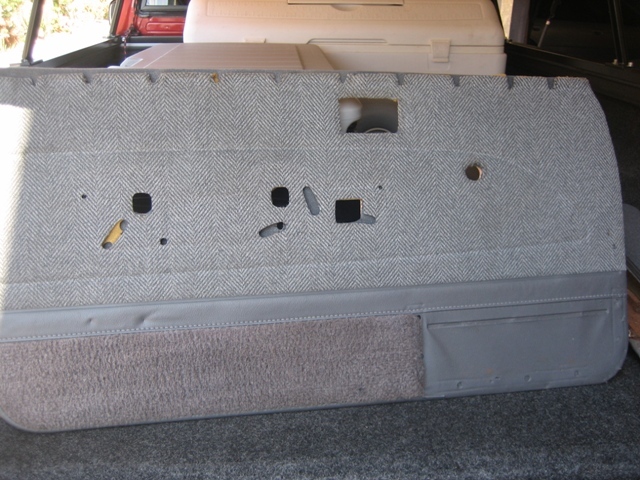
Lastly, grab grab your door handles and map pocket and screw them in. I had previously found the SR5 door handles and carpeted map pockets from a 2nd Gen 4runner.
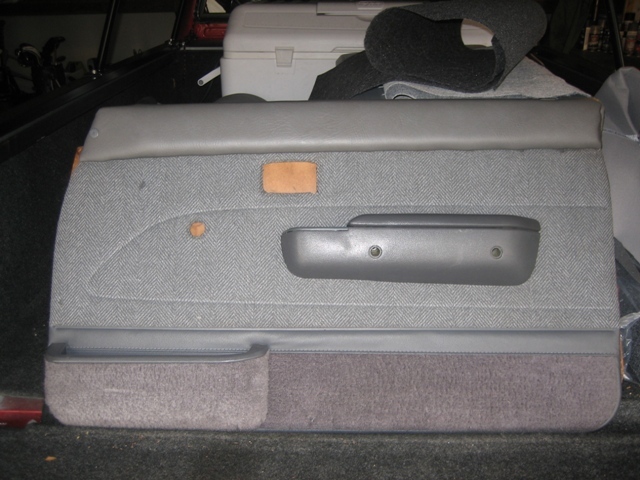
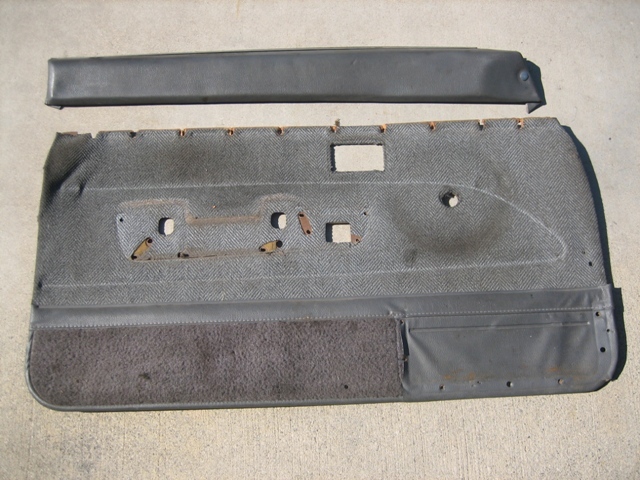
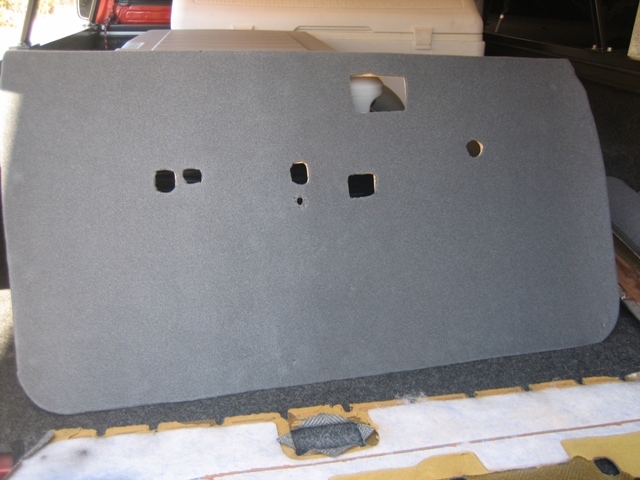
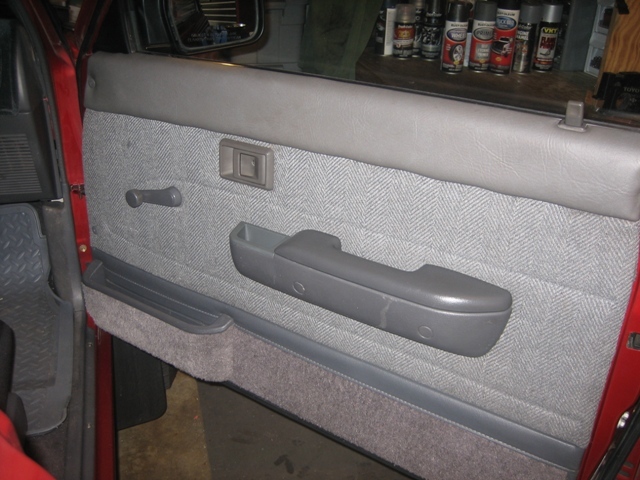
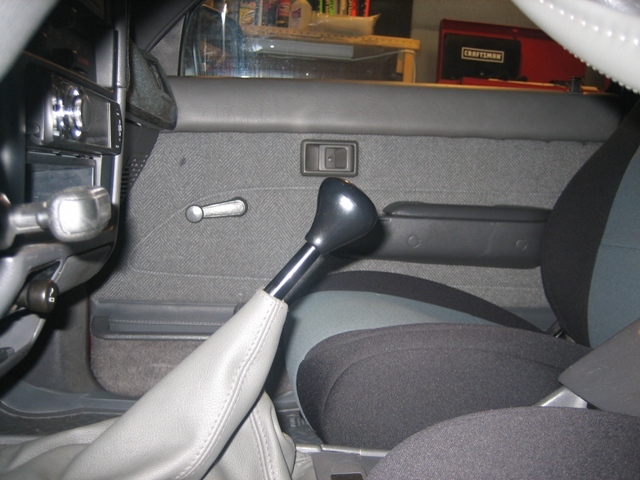
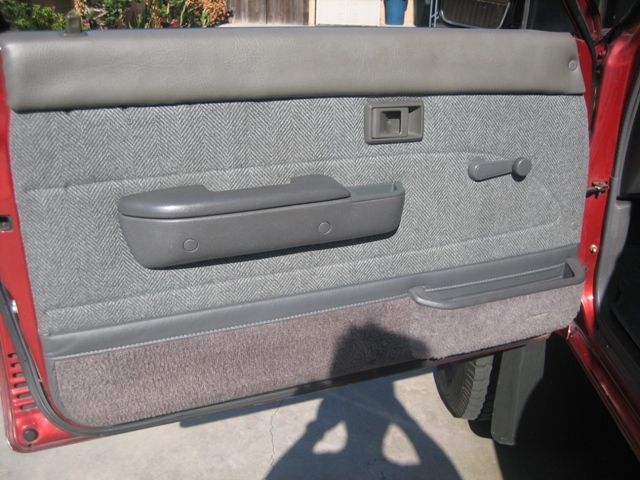
Now mount it up and see how it looks! You'll notice when placing the plastic retaining pieces in why you don't need to cut through the foam for those holes. Enjoy having some nicer looking panels, a little more comfortable arm rests, and additional sound proofing.
Passenger side.
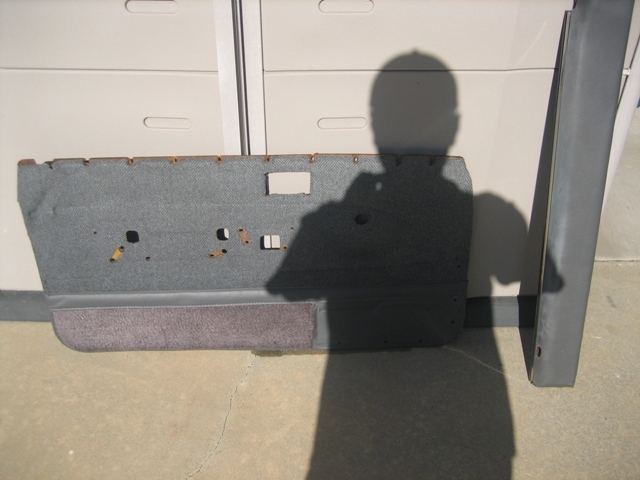
Driver side.
I’m more of a highway driver with my truck so I wanted SR5 cloth door panels with manual windows for some time now. Finally pieced a set together from the junk yard from two separate pickups. One cost me $17 and the other $9. So long as the fabric is up to your liking and standard you can still salvage them to work and look nice.
To clean the dirt, stains, and oil off, I scrubbed them down with laundry detergent and then fully air dried. In hindsight, you might want to remove the material from the board before cleaning to prevent further damage from the water to the particle board panels. The panels I had were already bent, warped, and torn so I didn’t bother removing the material first before cleaning. Passenger side:
Drivers side. You'll notice the armrest pad is separated, it was already ripped from the board when I found it.
Knowing I needed to replace the particle board I went to Home Depot and purchased two approximately 2' x 4' sheets of 1/8" MDF particle board. This was nice stuff and was smooth on both sides. Cost about $4 each.
Went to a craft store called Michael's and bought headliner foam padding and grey vinyl material. The foam had felt like material covering one side of it and was about 1/8" thick. You’ll need enough foam to cover the door panel(s) and arm rests. You’ll need enough vinyl to cover the two arm rests. Cost about $20 using a 50% off coupon that the register lady gave me. Also, picked up a can of 3M spray adhesive.
Step 1 - Remove existing door panel material
If re-using the material carefully remove all the staples (front and back sides) and peel/separate all the vinyl and cloth material from the boards. Some of the adhesive is pretty sticky.
Badly damaged panel.
You will need at least one good board in order to make a template, hopefully the other side is in better condition or you’ll probably have to tape and mend what you have to work with.
Step 2 - Make the template
Using clamps and a marker trace the panel. You can use a block of wood to push down on the warped panel to get the cleanest and most accurate trace.
Step 3 - Making the cuts
Using whatever tools you have (Jig Saw, Drill and different bits, Small Hand Saw, Dremel Tool, and Files) cut out the patterns to resemble the original door card panel. You'll notice I labeled the different size bits I used to make most of the holes to make the cutting of the 2nd panel a bit quicker. Use a cylinder and straight file to make final adjustments so that the plastic pieces that hold the card to the door fit correctly.
Step 4 - Foam Padding
This isn’t necessary, however I wanted a plusher feeling and additional sound dampening. Lay down the foam headliner material and trace/cut to the outline of the panel. Use the spray adhesive to glue it to the new door card (felt side down), and then use a box cutter to cut out the necessary openings.
Step 5 - PITA Arm Rests
I like to ride with my window down and arm resting on the door. If you're familiar with our non-SR5 door panels you've noticed the arm pad is not very thick and has no padding, which means not very comfortable. I decided to address that with extra foam padding since I was putting new vinyl on. This part takes some patience.
Bad vinyl
Straighten out metal clips to pull window piece off
Peel off the old vinyl
Remove the door lock plastic trim piece. The plastic pieces are melted at the ends to keep them in place so you'll either have to melt them off or just do what I did and break them off and find a substitute replacement. The 2nd Gen Camry (89-91) pieces are a good substitute. The camry's have metal tabs so you can easily remove and re-use them. I had a few extra from the junk yard for my camry so I used them on these arm pads.
Camry replacement piece
Sand off any rust and sticky residue so the new glue will adhere better
Flatten out the old vinyl so you can use it as a template. A heat gun and board makes quick work of flattening it out so you can trace it easier.
Trace and cut your vinyl skin template
Trace, cut and glue the head liner foam for extra padding.
I opted to use a thicker and denser foam padding I had laying around on the top portion of the arm rest.
Now is the PITA part, use a good adhesive to get the vinyl stretched and stuck over the arm pad. You'll need a BUNCH of clamps! The ends are the hardest part.
Then after it dries you can cut out the door lock hole and put the plastic camry piece in. The metal tabs just fold over to hold it in place.
Step 6 – Putting it together
Place the cleaned material onto the new door card and either staple or glue or both in place. I used 1/4" staples.
Put the arm rest on by inserting the tabs through the top holes on the board and bend them down to hold in place. If some of the tabs have broken off, you can substitute rivets to hold it in place. I drilled the appropriate hole size for the rivet and used a cheap hand powered pop rivet gun.
Lastly, grab grab your door handles and map pocket and screw them in. I had previously found the SR5 door handles and carpeted map pockets from a 2nd Gen 4runner.
Now mount it up and see how it looks! You'll notice when placing the plastic retaining pieces in why you don't need to cut through the foam for those holes. Enjoy having some nicer looking panels, a little more comfortable arm rests, and additional sound proofing.
Passenger side.
Driver side.
Last edited by Grego92; 07-25-2012 at 08:07 AM.


 07-24-2012, 05:54 AM
#5
Registered User
Thread Starter
iTrader: (4)
Join Date: May 2010
Location: People's Republic of California
Posts: 720
Likes: 0
Received 15 Likes
on
12 Posts
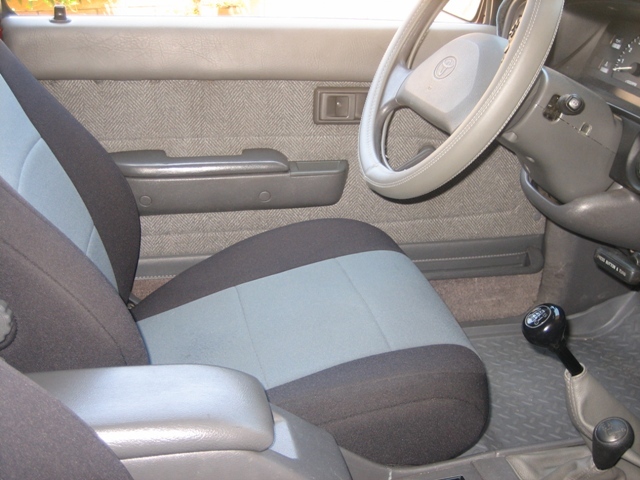
The seats are 2nd Gen 4runner SR5's, nothing special, same ones everyone else on here seems to have. The seat covers are Coverking neoprene from costco.
07-24-2012, 07:36 AM
#6
Registered User
Dangit now your putting ideas in my head, I want some cubbies on my panels!! So by the looks of it if my panels are in good shape could I find the armrests and cubbies and mount them up?? Anyway looks great, good job.
Trending Topics
07-24-2012, 11:27 AM
#8
Registered User
Great write up. Thanks! If others can't find the headliner material at Michael's I've heard you can get it at Joanne Fabrics.
07-24-2012, 12:35 PM
#9
Registered User
Thread Starter
iTrader: (4)
Join Date: May 2010
Location: People's Republic of California
Posts: 720
Likes: 0
Received 15 Likes
on
12 Posts
Cool!
Nervo19, I've also seen headliner material in rolls at Pep Boys.
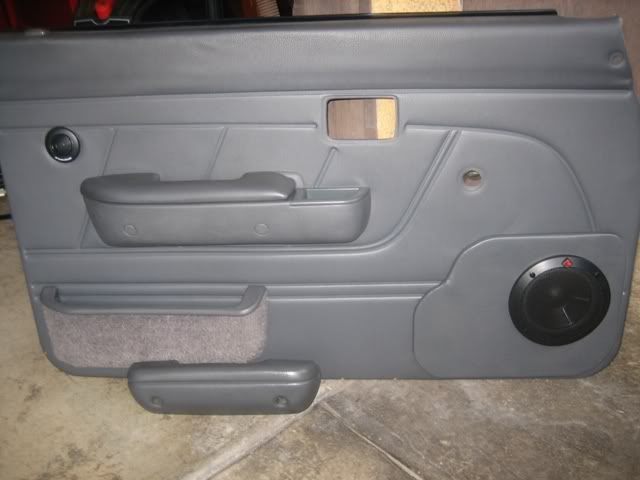
Discombobulated, you can add the map pockets and door handles to your existing door panel. Many others have already done that, below is a photo of mine and what I had before. The pockets were added on the opposite end as I already had speaker cuts in these panels before doing that.
Nervo19, I've also seen headliner material in rolls at Pep Boys.
Discombobulated, you can add the map pockets and door handles to your existing door panel. Many others have already done that, below is a photo of mine and what I had before. The pockets were added on the opposite end as I already had speaker cuts in these panels before doing that.
Last edited by Grego92; 07-24-2012 at 12:36 PM.
07-24-2012, 02:14 PM
#10
Registered User
Cool!
Nervo19, I've also seen headliner material in rolls at Pep Boys.
Discombobulated, you can add the map pockets and door handles to your existing door panel. Many others have already done that, below is a photo of mine and what I had before. The pockets were added on the opposite end as I already had speaker cuts in these panels before doing that.
Gotta say that's a very interesting tweeter location.
07-24-2012, 02:40 PM
#11
Registered User
Thread Starter
iTrader: (4)
Join Date: May 2010
Location: People's Republic of California
Posts: 720
Likes: 0
Received 15 Likes
on
12 Posts
 Don't hate! LOL I didn't know any better, couple buddies told me that was a stupid idea
  Not going to cut into the new panels...I picked up these for $4 each (two on the right with the factory dash speaker boxes) from a 2nd gen 4runner and now gotta add some base behind the seat. But it's not bad having just the two front 4" dash speakers cuz I'm not much of a sound/music perfectionist.
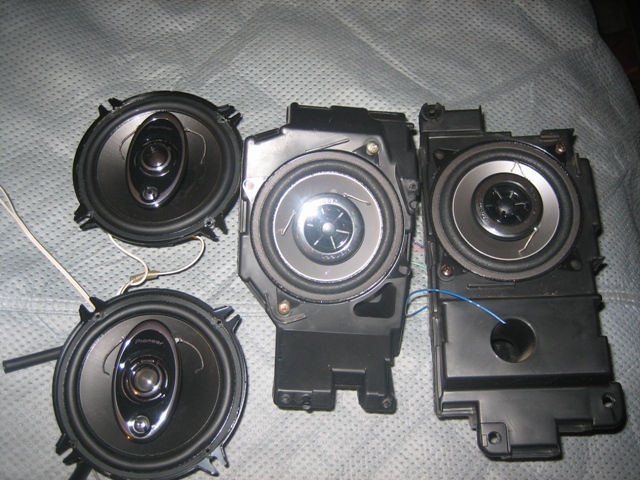
Last edited by Grego92; 07-24-2012 at 02:45 PM.

 02-07-2013, 11:44 AM
#16
Registered User
Join Date: Oct 2012
Location: Arizona
Posts: 8
Likes: 0
Received 0 Likes
on
0 Posts
What a great thread. I was able to follow it to fix mine as well. It was invaluable. I think I have hit this page 100 times this week. Thanks so much. And YoUr truck looks great.
So mine was in terrable condition to. My daughter didn't want me picking her up in parent pick up at school because it was falling apart i knew something must be done asap. I've been working on it over the last week. I'm still working on the wiring in the door. so I have not put it back . Here is mine.
So mine was in terrable condition to. My daughter didn't want me picking her up in parent pick up at school because it was falling apart i knew something must be done asap. I've been working on it over the last week. I'm still working on the wiring in the door. so I have not put it back . Here is mine.
02-10-2013, 10:35 PM
#19

You can add me to list off those inspired. Thank you sir!
Mine where base model vinyl the passenger side had split and shrunk from UV exposure and pulled loose from the backer board. And I had it wedged back together with a roofing nail between the panel and door. Totaly hillbilly!
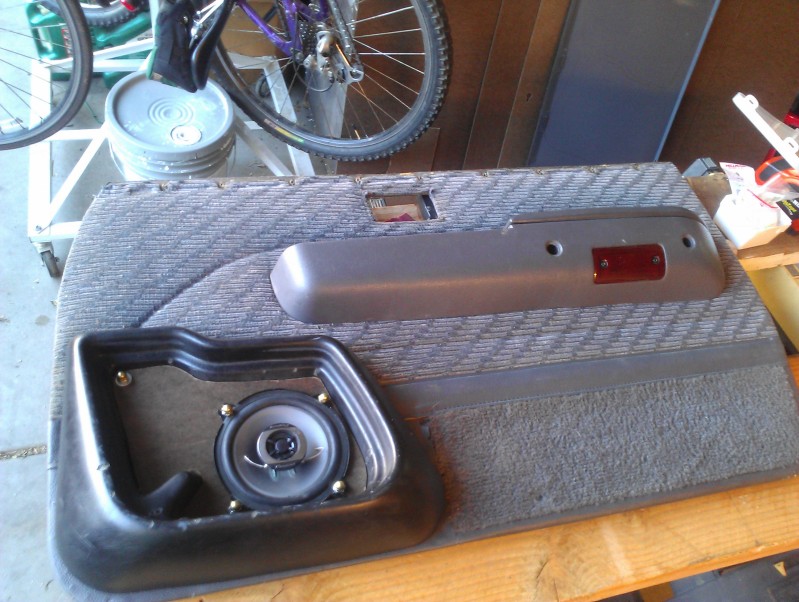
Mine aren't original factory recovers, but here are the after photos.
Overview of finished panel installed

Wasn't paying proper attention and cut out the rear mount for a full length arm rest on the drivers

Slight over cut on the drivers side window handle.

Passenger side tension a little too high causes puckering/wrinkles

I've got my eyes open for a set of those full length armrests for the manual/crank windows. So I'll get a recoverable/matchable style and an extra doo-dad pocket
Mine where base model vinyl the passenger side had split and shrunk from UV exposure and pulled loose from the backer board. And I had it wedged back together with a roofing nail between the panel and door. Totaly hillbilly!
Mine aren't original factory recovers, but here are the after photos.
Overview of finished panel installed
Wasn't paying proper attention and cut out the rear mount for a full length arm rest on the drivers
Slight over cut on the drivers side window handle.
Passenger side tension a little too high causes puckering/wrinkles
I've got my eyes open for a set of those full length armrests for the manual/crank windows. So I'll get a recoverable/matchable style and an extra doo-dad pocket

Thread
Thread Starter
Forum
Replies
Last Post
jasonty
Pre 84 Trucks (Build-Up Section)
41
12-23-2018 01:00 PM


