
'85 4Runner Build...
 Mar 17, 2006 | 06:02 PM
#22
Just weld up all the holes in the frame except for one end...then shoot it full of POR with some kinda pressurized spray gun...jack up the front and let it run back out...let it dry...weld up the end.  Rust cannot spread w/o oxygen.

Rust cannot spread w/o oxygen.


 Mar 20, 2006 | 03:53 AM
#24
Thread Starter
Registered User
Joined: Mar 2006
Posts: 115
Likes: 0
From: Duncannon, PA
Aight well I know I promised some pics but between the green beer and the shady weather up here in the north east I didn't accomplish a whole lot but heres what I did...
I can't get this one to size down so F'it... Heres the donor truck, 225$ and still starts up like its nothin.

The next four pics show all dirt and other debris laying on top of the vinyl flooring...

I didn't get a pic of it but the comp. is right behind that passenger side fender just a few inches above the floor. I think thats going to be relocated to the glove box...


Not a very close shot but there was as much dirt and debris under the vinyl as there was above it

Here is the interior completely stripped for the most part. I made sure to get the image somewhat level so yeah that roof is really pushed down that bad on the drivers side. Either this week or this weekend im gonna pull the cage (take note: needs pillars at rear of cab) and push it up and hopefully all goes well so I can put the new windshield in...

Once the weather warms up again im sprayin the floor and cage down with bed liner, covering the seats in a canvas material and pretty much redoing everything i can with either black, green, or camo... Haha its gonna be pimp.
**I worked on the half doors a little last week but didn't get up to my buddies this weekend. When I get the chance i'll take some pics on the progress of the half doors and show how I braced the top...
I can't get this one to size down so F'it... Heres the donor truck, 225$ and still starts up like its nothin.
The next four pics show all dirt and other debris laying on top of the vinyl flooring...
I didn't get a pic of it but the comp. is right behind that passenger side fender just a few inches above the floor. I think thats going to be relocated to the glove box...
Not a very close shot but there was as much dirt and debris under the vinyl as there was above it
Here is the interior completely stripped for the most part. I made sure to get the image somewhat level so yeah that roof is really pushed down that bad on the drivers side. Either this week or this weekend im gonna pull the cage (take note: needs pillars at rear of cab) and push it up and hopefully all goes well so I can put the new windshield in...
Once the weather warms up again im sprayin the floor and cage down with bed liner, covering the seats in a canvas material and pretty much redoing everything i can with either black, green, or camo... Haha its gonna be pimp.
**I worked on the half doors a little last week but didn't get up to my buddies this weekend. When I get the chance i'll take some pics on the progress of the half doors and show how I braced the top...
Last edited by Newb; Mar 20, 2006 at 04:21 AM.
Mar 20, 2006 | 04:18 AM
#25
Thread Starter
Registered User
Joined: Mar 2006
Posts: 115
Likes: 0
From: Duncannon, PA
Hijacking my own thread...
Isaracing: toyota is where its at, but that chevy pic is sick. you have good trails over there?


4.3 Vortec


A year and a half ago... The Beginning

 Mar 23, 2006 | 03:39 AM
#28
Thread Starter
Registered User
Joined: Mar 2006
Posts: 115
Likes: 0
From: Duncannon, PA
Thanks man... God this weather is a major disappointment its been about 40 or below the past week and the wind is twice as bad. As soon as it warms up the pictures will start to flow again cuz i want to trim the rear fenders and bob the rear as well before I redo the interior.
Pre - May 20th Checklist
1. 2.5" Rear Fender Trim
2. Runner Bob ~ 10"s or so (Can-Back to match)
3. Finish Half Doors
4. Relocate Comp.
5. Set-up system / Redo the interior (List above)
6. Swap brake boosters (The runners brake is stiff w/ real weak breaking, pretty sure this is the cause... Your thoughts?)
7. Replace E-Brake Cable
8. Gusset front axle & add a 5/8ths nut to the steering stops

9. Order & Install 5:29's Spool in Rear (End of April)
10. Camo Paint job
11. Grease er up and have some fun
Pre - May 20th Checklist
1. 2.5" Rear Fender Trim
2. Runner Bob ~ 10"s or so (Can-Back to match)
3. Finish Half Doors
4. Relocate Comp.
5. Set-up system / Redo the interior (List above)
6. Swap brake boosters (The runners brake is stiff w/ real weak breaking, pretty sure this is the cause... Your thoughts?)
7. Replace E-Brake Cable
8. Gusset front axle & add a 5/8ths nut to the steering stops
9. Order & Install 5:29's Spool in Rear (End of April)
10. Camo Paint job
11. Grease er up and have some fun
Last edited by Newb; Mar 23, 2006 at 09:37 AM.
Mar 23, 2006 | 05:55 PM
#30
Thread Starter
Registered User
Joined: Mar 2006
Posts: 115
Likes: 0
From: Duncannon, PA
The brake booster in the 4Runner went so I did a little researching to see the different ways they've been upgrading them and thought i'd post this small insert I found... Both of these simple little mods are pretty much a simple bolt on.
MC ~ V6 with a 1" bore '89-'95
Dual Diaphram Booster ~ Early to Mid 90's... Didn't find to many details on it
(1st gen. 4 cyl. all came with a Single Diaphram Booster)
MC's that are out there:
Truck - '89 - '94 4WD 22RE/3VZE
non ABS - 1.0" Bore
Part # TSM 112530
w/ ABS - 1 1/16" Bore
Part # TSM112711
So according to Napa, the sought after 1.0" bore m/s doesn't have to come out of just a V6 Truck or those peticular years I've seen on Pirate.
Napaonline.com will only let you pull up a '95 Tacoma - not Truck (model).
4Runner - same specs as Trucks.
T-100
'93-'98 w/ V6 (early 3.0 late 3.4) 1 ton chassis, non ABS - 1 1/16" Bore
Pt. # TSM 112710
Late model w/ 3.4L V6, 1/2ton chassis and non ABS - 1.0" Bore
Pt. # TSM112737
ALL w/ ABS (assume 1/2 ton and 1 ton chassis) - 1 1/16" Bore
Pt. TSM 112711
'93-'95 w/ 3.0 V6 and 1/2ton chassis non ABS - 1.0" Bore
Pt. # TSM 112530
Land Cruiser (FJ-80)
non ABS - 1.0" Bore
Part # TSM 112530
w/ ABS
Pt. # TSM112617
Mar 24, 2006 | 06:01 AM
#31
Thread Starter
Registered User
Joined: Mar 2006
Posts: 115
Likes: 0
From: Duncannon, PA
After working on the half doors for a few hours last night I decided I didn�t like the looks of them with just a sheet metal cap on them. I thought about it for awhile and I think I am going to make up a fiber-glass cap for them. Something along these lines:

 of the half doors?
Mar 24, 2006 | 06:14 AM
of the half doors?
Mar 24, 2006 | 06:14 AM
#33
Thread Starter
Registered User
Joined: Mar 2006
Posts: 115
Likes: 0
From: Duncannon, PA
I didn't get a chance to take any... I'll take some either tonight or this weekend, Im gonna brace the passenger door and then start on the firberglass cap for it. I'll take a pic of the driver-side door as well but i don't like the looks of it. It's not completely finished either but its got the cap tacked on it & I have no idea how they keep a straight smooth edge on the outside of the door I f'd with it for awhile then gave up  ... Hopefully the fiber glass works a little better
... Hopefully the fiber glass works a little better
Mar 24, 2006 | 02:05 PM
#34
Contributing Member
Joined: Feb 2006
Posts: 1,876
Likes: 1
From: Gulfport, Mississippi
Damn Newb!, You are a wealth of information,(post#30), and the CGs of the half-doors are awesome! I can't wait to see this rig when you are done! I would be further along in my build if I had your skills.
 Mar 27, 2006 | 04:28 AM
#36
Thread Starter
Registered User
Joined: Mar 2006
Posts: 115
Likes: 0
From: Duncannon, PA
Thanks for the compliments guys & im learning just like the rest of ya... About the wealth of information though, that comes from and ungodly amount of reading an searching on Pirate4x4. If your serious about wheeling and starting a project I deffinently recommend Pirate4x4 & don't be a douche ponie up and buy a Red star cause they are putting that information out there for you and trust me you will get well over 20$s worth out of it. My portable hard-drive is a Pirate4x4 library & is loaded with information on anything and everything. I'll post the tech info on my build as I do it for future reference for others, but what I won't do is go posting tech on things I have not yet done myself.
~~~~~~~~~~~~~~~~~~~~~~~~~~~~~~~~~~~~~~~~~~~~
Well the weather was crap again this weekend so not much was accomplished. I did pull the head unit and yanked a 'bundle' of wire out so yet another task im gonna have to redue. I f'in hate it when people put a sys. in their vehicle and use electrical tape and no known route for the wires ... I also hydro sprayed the floor out and am gonna work on prepping the floor for the bed-liner coating. As far as the doors go I made a little progress but nothing worth showing just yet. I need to brace the passenger side door and make the card-board / duct tape base for the top of it as well. I am holding off on the fiber-glass for the moment so i have something to match the other door off of & hopefully get them somewhat close.
I do need some suggestions on mounting the 'glass top to the door the only thing i can think of is to 'glass some washers in the tops (for support) and drill them out later and just run some fancy bolt down through the door braces. ???
???
**Sorry about the slowness but no garage and shady weather = lack of motivation & more ...
...
**Side-note - Can someone hook me up with the details for SE4RJ3?
~~~~~~~~~~~~~~~~~~~~~~~~~~~~~~~~~~~~~~~~~~~~
Well the weather was crap again this weekend so not much was accomplished. I did pull the head unit and yanked a 'bundle' of wire out so yet another task im gonna have to redue. I f'in hate it when people put a sys. in their vehicle and use electrical tape and no known route for the wires
... I also hydro sprayed the floor out and am gonna work on prepping the floor for the bed-liner coating. As far as the doors go I made a little progress but nothing worth showing just yet. I need to brace the passenger side door and make the card-board / duct tape base for the top of it as well. I am holding off on the fiber-glass for the moment so i have something to match the other door off of & hopefully get them somewhat close.I do need some suggestions on mounting the 'glass top to the door the only thing i can think of is to 'glass some washers in the tops (for support) and drill them out later and just run some fancy bolt down through the door braces.
???**Sorry about the slowness but no garage and shady weather = lack of motivation & more
...**Side-note - Can someone hook me up with the details for SE4RJ3?
Last edited by Newb; Mar 27, 2006 at 05:10 AM.
Mar 27, 2006 | 04:51 AM
#37
Thread Starter
Registered User
Joined: Mar 2006
Posts: 115
Likes: 0
From: Duncannon, PA
Fiberglass Tid-bit (Not a Pro just Trial & Error)
What is needed:
*Resin & Hardener (Home-Depot, Lowes, Local Hardware Store)
*Fiberglass Matting (Courser ~ Thicker) / Fiberglass Cloth (Smother finish)
*Duct Tape & Cardboard
*Rubber Putty Knives / Wedges? (Not sure of name but they are flexi & have no handle)
*Flexi plastic container of some kind
Tip-Bits:
*Works alot like Bondo also bondo will adhere to it
*Use cardboard to form the object then layer with duct tape to stiffen it. Save yourself a headache & try to get the duct tape as smooth as possible. (Less sanding later)
*Duct tape friendly (With a little bit of persuasion the duct-tape will come off leaving you with just the fiberglass)
*Mix the resine and hardener, Ratio '??'. Rather than change color like bondo you will feel the plastic container heat up a bit.
*Clean-up is so much better than bondo after the ���� hardens twist the plastic container back and forth, same with rubber wedge?, & it will just crack and fall off for the most part.
***Will show pics and give some instructions when I start it
Mar 27, 2006 | 05:07 PM
#38
Thread Starter
Registered User
Joined: Mar 2006
Posts: 115
Likes: 0
From: Duncannon, PA
Some pics...
Well it was nice out so I decided to try to get something accomplished...
I started by first trying to get the trim off the windshield and it was being a pain in my ass... Never quite finished either

I did show it who was boss though
Next up was trying to straighten out the roof... First we had to get it to the tree and like hell if i was gonna push it, so we used a little bit of ingenuity. (Deffinently need some bigger tires... 33x9.5 aren't cuttin it )

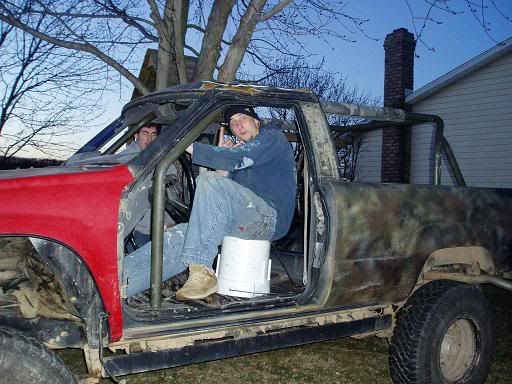
Damn little sister but whatever, Whats up homies?
Setup for the first pull...


That guy there is Kaptain, you may have seen him on 4x4wire.com or have seen his SAS thread on Pirate4x4.com

Setup for the Last pull... There was one in between there but the camera died unfortunently.


After all that the roof is actually pretty damn close and ready to install the windshield. Finally some progress being made, I've been waiting for Kaptain (the lazy bastard) to get his ass up here with the rest of the hi-lift equipment for the past week... Aight well enjoy people later onz
I started by first trying to get the trim off the windshield and it was being a pain in my ass... Never quite finished either
I did show it who was boss though
Next up was trying to straighten out the roof... First we had to get it to the tree and like hell if i was gonna push it, so we used a little bit of ingenuity. (Deffinently need some bigger tires... 33x9.5 aren't cuttin it
)Damn little sister but whatever, Whats up homies?
Setup for the first pull...
That guy there is Kaptain, you may have seen him on 4x4wire.com or have seen his SAS thread on Pirate4x4.com
Setup for the Last pull... There was one in between there but the camera died unfortunently.
After all that the roof is actually pretty damn close and ready to install the windshield. Finally some progress being made, I've been waiting for Kaptain (the lazy bastard) to get his ass up here with the rest of the hi-lift equipment for the past week... Aight well enjoy people later onz
Last edited by Newb; Mar 28, 2006 at 03:58 AM.
Mar 28, 2006 | 06:40 PM
#39
Contributing Member
Joined: Feb 2006
Posts: 1,876
Likes: 1
From: Gulfport, Mississippi
Originally Posted by Newb
**Side-note - Can someone hook me up with the details for SE4RJ3?
http://www.wabfab.org/se4rj3/se4rj3.htm
Last edited by 1985 4Runner; Mar 28, 2006 at 06:41 PM.


