
22R Front Crank Seal. 1981. 2WD.
 Oct 3, 2007 | 11:34 PM
#1

Thread Starter
Registered User
Joined: May 2007
Posts: 75
Likes: 11
22R Front Crank Seal. 1981. 2WD.
Does anyone have a part # for the Victor Reinz front crankshaft oil seal ? I'm hoping to track down an "offset" relocater version so I can avoid the whole speedy sleeve route if I can. I've priced the speedy sleeve anywhere from $ 43 to $ 64 !!! our local Napa have a Victor JV912 oil seal for $ 22.69 but the guy couldn't tell if it was an offset relocater type or not. I'd rather pay $ 30 for an offset seal than $ 100 for a speedy sleeve + the seal.
Any help would be greatly appreciated.
Thanks.
Any help would be greatly appreciated.
Thanks.
Oct 4, 2007 | 09:30 PM
#2

Registered User

Joined: Sep 2002
Posts: 1,550
Likes: 27
From: Sonora, CA
I found this site a while back with some good information on it. It has some information about crank seals that should help you out:
http://home.earthlink.net/~twopapa/toytech.htm#seal
http://home.earthlink.net/~twopapa/toytech.htm#seal
Oct 16, 2007 | 09:29 PM
#4
Thread Starter
Registered User
Joined: May 2007
Posts: 75
Likes: 11
I found this site a while back with some good information on it. It has some information about crank seals that should help you out:
http://home.earthlink.net/~twopapa/toytech.htm#seal
http://home.earthlink.net/~twopapa/toytech.htm#seal
Oct 20, 2007 | 09:52 PM
#5
Thread Starter
Registered User
Joined: May 2007
Posts: 75
Likes: 11
You'd be amazed just how much oil your 22R engine can lose with a leaking front crank seal, twice now I've checked engine oil level and found nothing on the stick ! this was after adding oil and driving maby 100 miles.
Except for a few cranky radiator hose clamps on my 81 2wd pickup, pulling the flywheel went real easy, it doesn't have AC or power steering so I was able to use a vise-grip chain clamp on the front (unused) pully on the Harmonic balancer to hold it while I used a length of pipe on a breaker bar to get the crankshaft pully bolt undone, the Harmonic balancer slipped right off without using a puller.
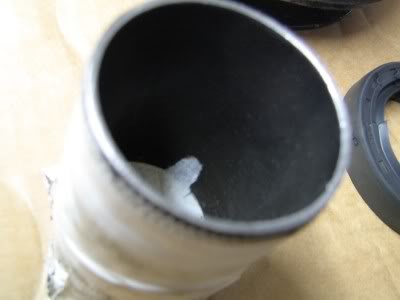
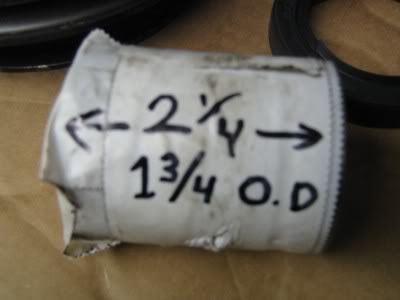
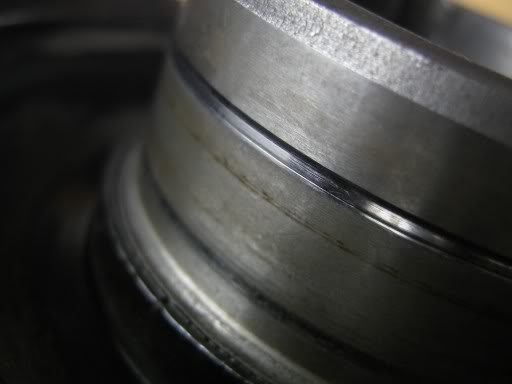
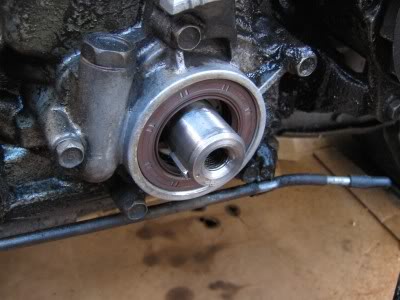
To clean the seal area, protect the crankshaft surface from damage and keep crud from entering the engine I made up a simple piece of exhaust pipe, just had to wrap it a few turns with tape and it fit snugly into the seal. using a thin wall piece of pipe means it will slip over the crankshaft without disturbing the woodruff key.
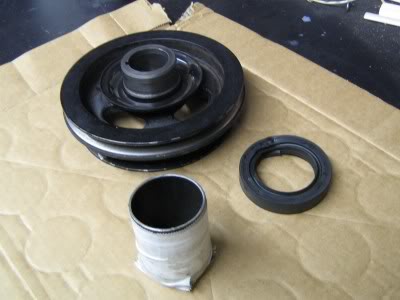
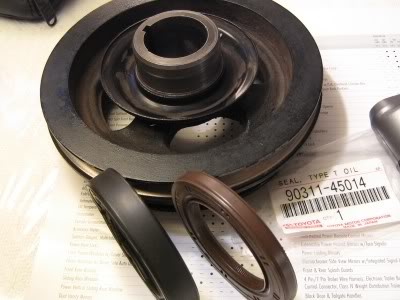
Instead of using a speedy sleeve I plan on using a seal from a 1994 22R/RE, part # 90311-45014, which measures 7mm thick as compared to my original seal at 11mm. this should reposition the sealing surface away from the groove worn into the pully hub.
Except for a few cranky radiator hose clamps on my 81 2wd pickup, pulling the flywheel went real easy, it doesn't have AC or power steering so I was able to use a vise-grip chain clamp on the front (unused) pully on the Harmonic balancer to hold it while I used a length of pipe on a breaker bar to get the crankshaft pully bolt undone, the Harmonic balancer slipped right off without using a puller.
To clean the seal area, protect the crankshaft surface from damage and keep crud from entering the engine I made up a simple piece of exhaust pipe, just had to wrap it a few turns with tape and it fit snugly into the seal. using a thin wall piece of pipe means it will slip over the crankshaft without disturbing the woodruff key.
Instead of using a speedy sleeve I plan on using a seal from a 1994 22R/RE, part # 90311-45014, which measures 7mm thick as compared to my original seal at 11mm. this should reposition the sealing surface away from the groove worn into the pully hub.
Oct 24, 2007 | 10:27 PM
#6
Thread Starter
Registered User
Joined: May 2007
Posts: 75
Likes: 11
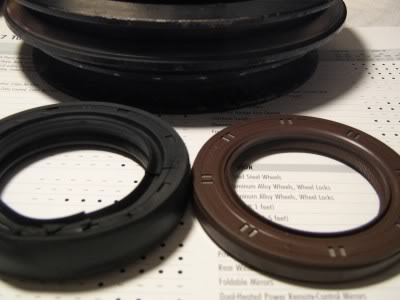
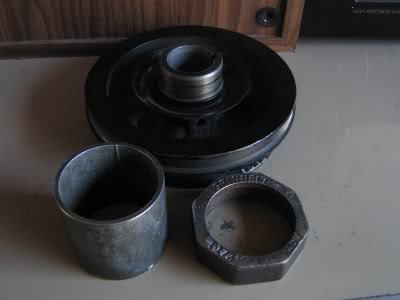
Original 12mm wide seal on the left, new 7mm wide seal on the right, part # 90311-45014 original part for 1994 22R/RE. Installation on 1981 22R.
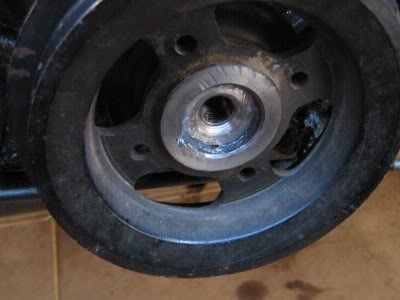
The flywheel seal bore also measures 12mm deep.
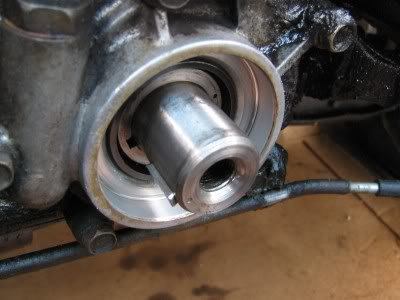
Because of the position of the lip on the new seal you'll want to position the seals face 1mm back from the front face of the timing chain cover, if you push the seal to the back of the bore it's lip will end up riding in the groove created by the old seal.
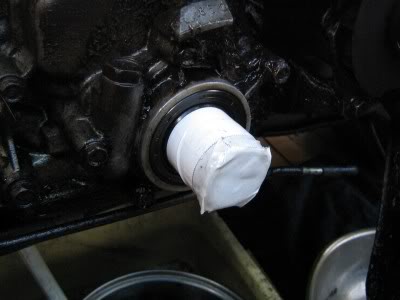
New seal installed.
This photo shows the proper depth so the seals lip will ride on an unworn area of the flywheel stub.
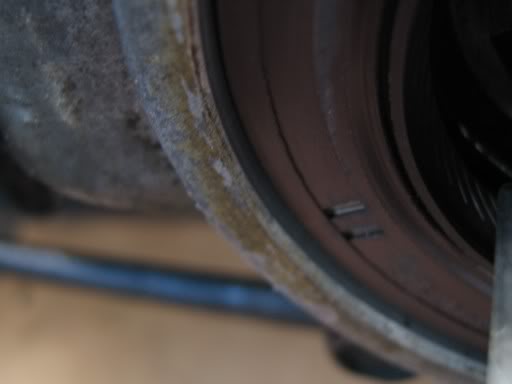
Used silicone to help seal between the crankshaft and flywheel bore.
Old water pipe connector and piece of pipe worked well to tap the seal in.
The leak has now stopped we'll see how it holds up.
The flywheel seal bore also measures 12mm deep.
Because of the position of the lip on the new seal you'll want to position the seals face 1mm back from the front face of the timing chain cover, if you push the seal to the back of the bore it's lip will end up riding in the groove created by the old seal.
New seal installed.
This photo shows the proper depth so the seals lip will ride on an unworn area of the flywheel stub.
Used silicone to help seal between the crankshaft and flywheel bore.
Old water pipe connector and piece of pipe worked well to tap the seal in.
The leak has now stopped we'll see how it holds up.
Nov 27, 2007 | 06:32 PM
#7
Registered User
Joined: Sep 2007
Posts: 6,002
Likes: 1
From: Spring Valley, CA
i think my crankshaft seal is leaking also. im leaking oil from the crankshaft, and there is oil on the underside of my hood, from oil shooting up onto it. did yours do this, and how long did it take you to do it?
Trending Topics
Nov 29, 2007 | 11:53 PM
#8
Thread Starter
Registered User
Joined: May 2007
Posts: 75
Likes: 11
Yeah my entire engine bay was rustproofed with oil ! once the crankseal starts leaking the flywheel acts like a blender and shoots oil everywear, in fact there was so much oil leaking it caused grounding problems, when I discovered the top starter bolt was loose. oil had seeped down between the mating surfaces of the starter/bellhousing so I was getting "click click" when I went to start it, untill I pulled the starter, cleaned the mating surfaces and bolted it back up, now it works perfect.
If everything goes well it shouldn't take more than 3 or 4 hours taking your time. I pulled the rad and the grill to do mine but if yours is an 88 it may be more involved, my old 81 doesn't have AC condenser's or power steering pumps etc.
If everything goes well it shouldn't take more than 3 or 4 hours taking your time. I pulled the rad and the grill to do mine but if yours is an 88 it may be more involved, my old 81 doesn't have AC condenser's or power steering pumps etc.
Nov 30, 2007 | 06:03 AM
#9
Registered User
Joined: Jan 2007
Posts: 330
Likes: 0
I did one on an 80 4x4 20R yesterday and just took the belts off and the fan off. Didn't take the rad out or anything and have done this a few times on different trucks. The fan throws the oil all over the place. We left all the oil there though so things wont rust up.
May 7, 2008 | 12:49 PM
#10

Registered User
Joined: May 2008
Posts: 1
Likes: 0
Pursang - great write-up. You are right about the volume of leakage. I was dripping (spewing?) about one quart per 100mi also. After performed the front seal changeout as you described the leakage was massively reduced. One thing - I only pressed the new 7mm seal flush with the cover housing. Any deeper and the sealing lips would be too close to the groove worn in the pulley hub.
Geez - now I see there are two (?) smaller leaks remaining. Pretty sure it's not still the front crank seal flinging oil.
The larger of the two might be coming from the disributor. That will be easy to check.
But the other smaller leak seems to be originating from the RH side of the timing cover, yet bolts appear tight. Rocker cover / half-moons dry. I changed the gasket on that small cover plate near the lifting hook but no luck. The oil pressure sender SEEMS OK also. Any thoughts on this?
 Oct 17, 2009 | 06:39 AM
#12


/95 seal is an awesome fix .. I have done this for years on my own trucks and customer trucks .. My current DD , when I rebuilt my engine 4 years ago , I used the 95 seal , and it's still bone dry !
.
.
Jan 10, 2011 | 07:57 PM
#14
Registered User
Joined: Apr 2009
Posts: 5,592
Likes: 24
From: Dixon, Ca
Sep 8, 2011 | 11:43 AM
#18
Registered User
Joined: Apr 2009
Posts: 5,592
Likes: 24
From: Dixon, Ca
Sep 8, 2011 | 05:26 PM
#19
.
Last edited by slacker; Sep 8, 2011 at 05:30 PM.


