SAS tips and comments
 01-01-2008, 09:45 PM
#1
Contributing Member
Thread Starter
SAS tips and comments
Been almost 2 years since I completed my swap and I thought I'd post up some tips or improvements I have found along the way for others just starting the process.
Overall, I am very happy with how well the truck performs both on and off road. Trail failures (knock on wood) just haven't happened... but I have run into a few issues.
By the way, the kit I used was Marlin's complete 4" SAS.
Issues and solutions...
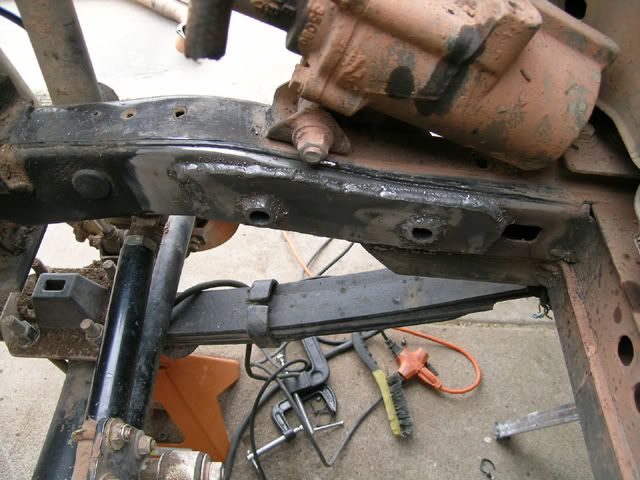
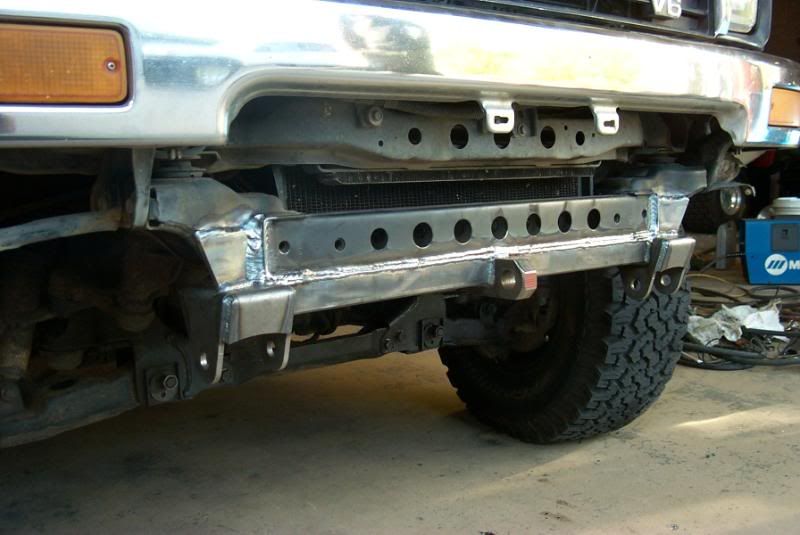
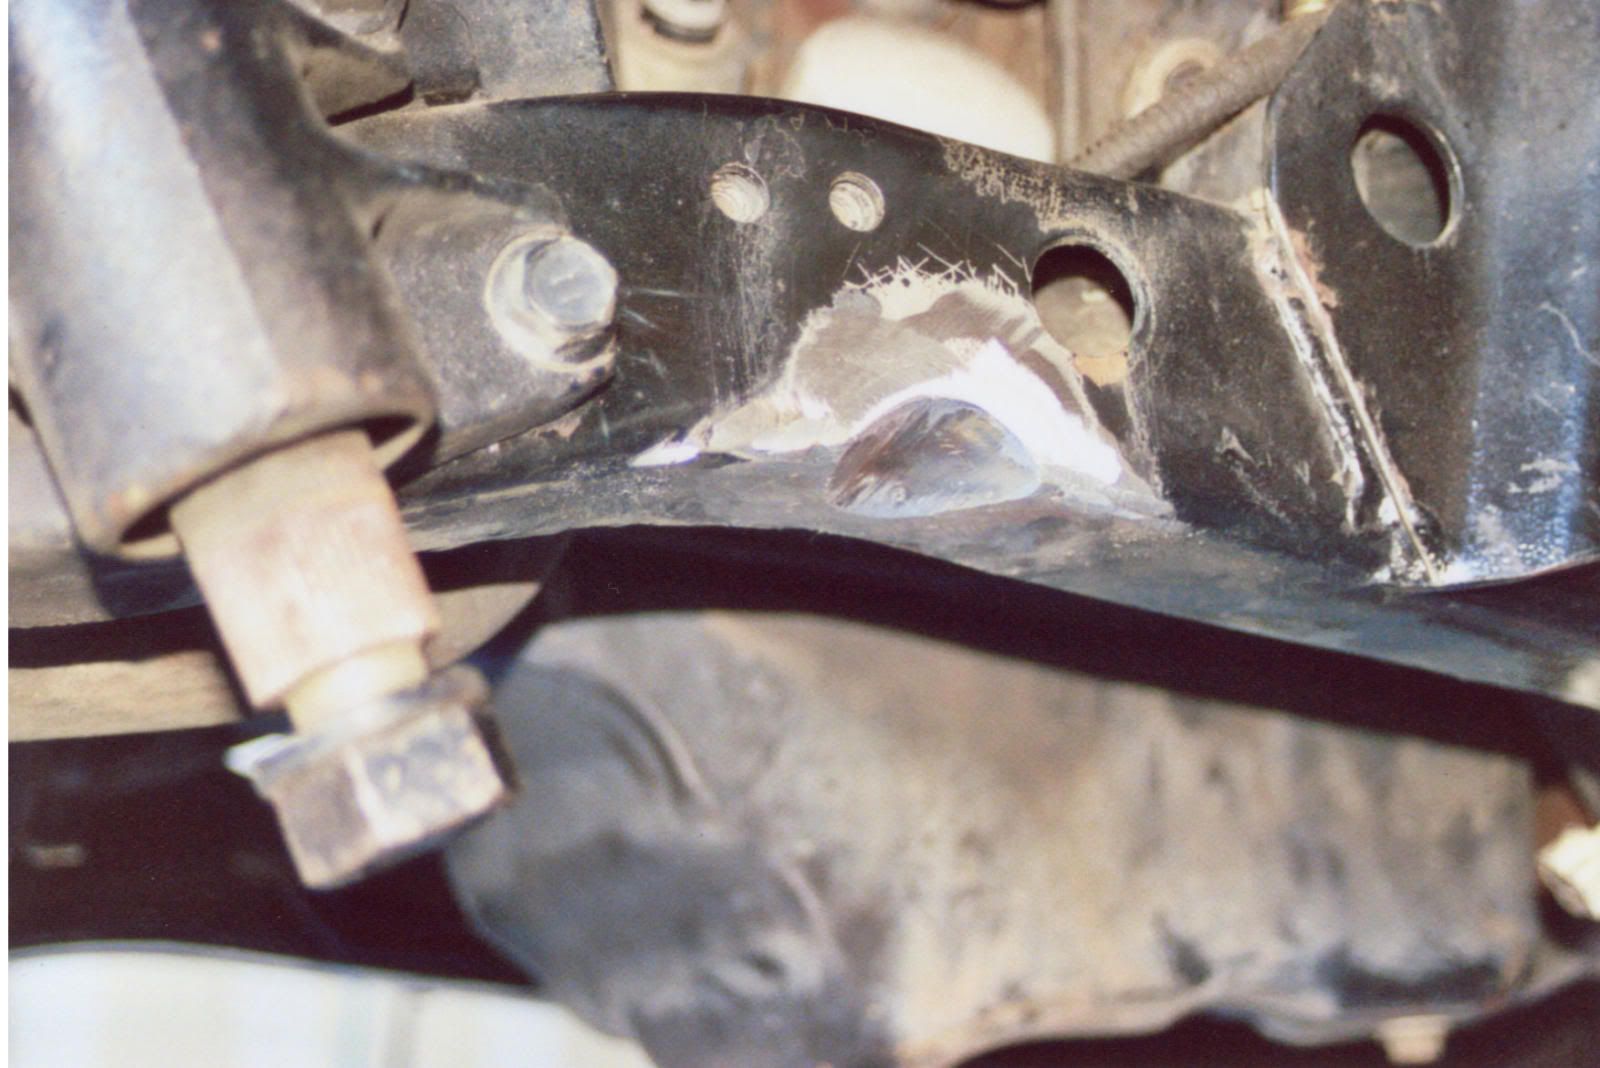
Issue 1: Frame cracked behind factory frame span just behind bumper. While I don't have any pics of the cracks, I do have one of the repair:
This happened even with the SAS hanger fully welded all the way across the frame member. I just used a couple of pieces of trailer hitch stock I had left over to reinforce this section. If I did the swap again, I'd install these gussets or similar on day one. The frame after all wasn't truly designed to carry the vehicle weight at that point. Plus, being a rather heavy 2nd Gen 4Runner I was asking a lot. If you don't gusset, just keep an eye on this part of your frame for failures.
Issue 2: Frame cracked at steering box. Mine started to fail where the nuts are welded on the inside of the frame rail. When I pulled the motor, I took the opportunity to weld this brace on:
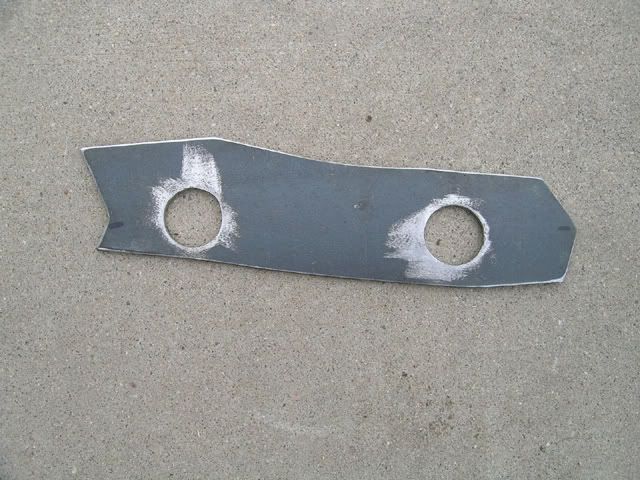
Finished:
Most of the brace kits for the steering boxes seem to require drilling of the bolt holes and longer bolts... to compensate for the added thickness of the plates. By bracing the box the way I did, factory bolts and hole diameters were retained.
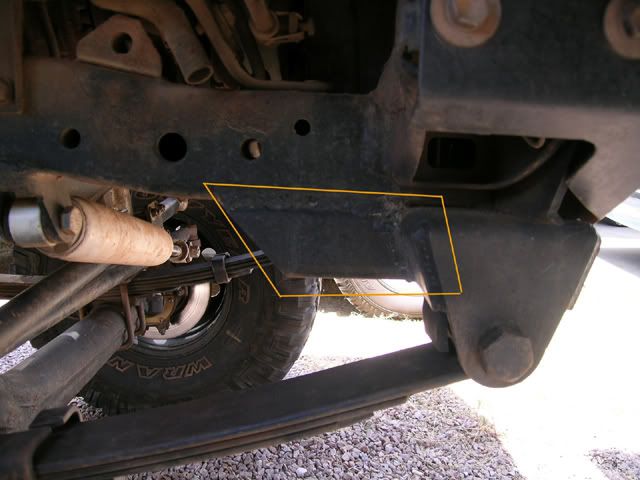
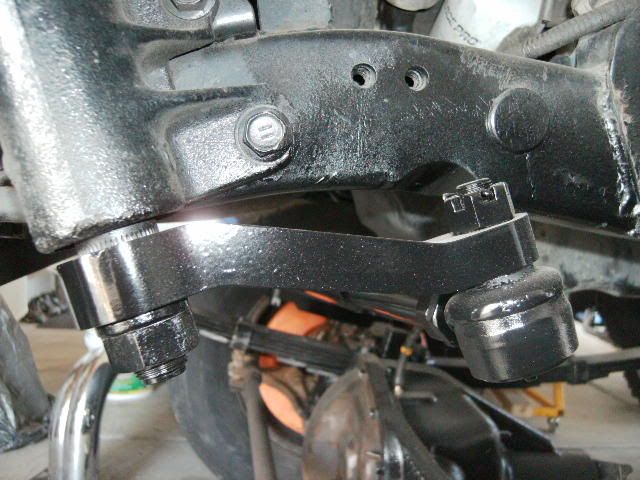
Issue 3: Shackle to body mount interference was tearing my bushings to pieces. You can see where the outer plate was rubbing/ contacting in this pic:
What was happening is when spring was compressed in a slow crawl/ full stuff situation, the shackle would fold backward and the outer plate would contact the body mount. From that point, the outer shackle would be stopped, while the inner shackle would continue to travel back. This was causing everything to warp and twist... shredding the bushings and giving we an awful wobble on the road after harder sections of trail.
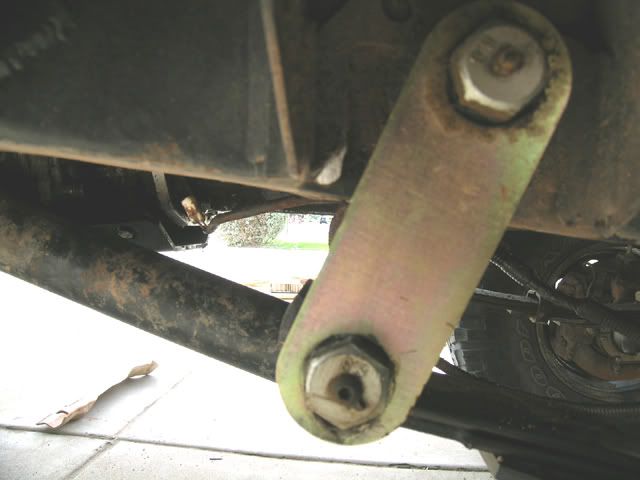
Pic of the aftermath (rubbing evidence can also be seen on shackle plate):
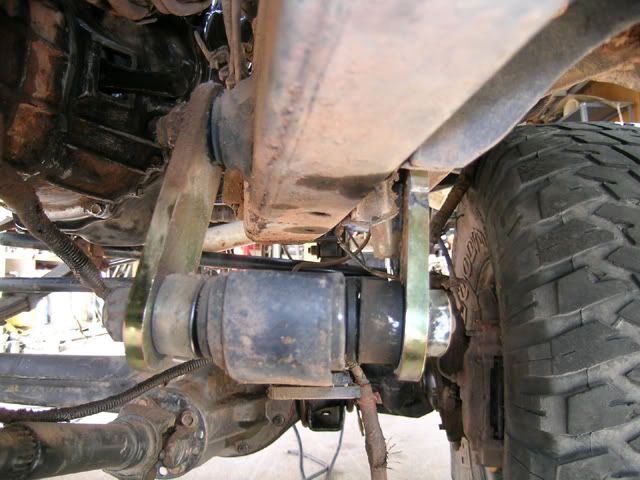
To stop this from happening I removed a small portion of the body mount, which allows the plates to both move backward without binding. This is a recent fix, but so far seems to be working. I'll post an update after more trail miles.
Another option would have been to lower my bumpstops, but that would have prevented the leaves from going flat and cause a loss of travel. This problem was happening for me before springs went into a negative arch.
Sky's Dogleg shackles would also have worked, but they were only available in to long a length.
My suggestion would be to watch this point of contact and correct if needed.
Following are just some tips...
One can weld all of the necessary SAS swap parts to the frame before any of the IFS has been removed. Vehicle is still fully driveable after welding, and can allow you to visit a welder for the fab... and then do the rest of the swap in your own garage.
Hanger on, shackle holes drilled and welded... still IFS:
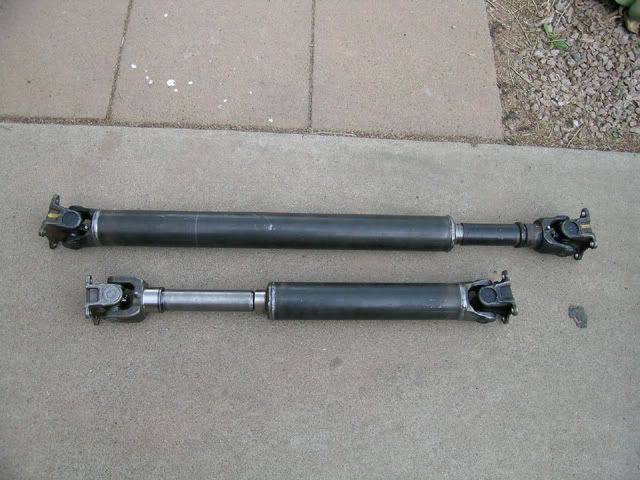
For a cheap long travel driveshaft, get two lengths of trailer stock and weld some Toyota U-Joints on the ends. Wallah... $35 dollar DS with over 12" of slip.

Incredibly tough and the perfect solution if you think you might be adding dual cases in the future. But, I never could get mine to work well over 25 MPH.
After the dual case install, I bought the long spline DS kit from Marlin (MC-12900) and then got a hold of some 4th Gen 4Runner driveshafts that where warranty take offs. A local performance BMW driveline shop in my area chopped and welded them all together.
Sick welds:

4th Gen U-Joints are much bigger than the rest of the Toyota U-Joints. They will not (at least currently) mate to the multiple drilled flanges from Marlin. You can make them work though... just takes some welding and re-drilling.
Marlin HD internal axle seals are the bomb. Highly recommended upgrade when you have your knuckles torn apart. Part number MC-12149.
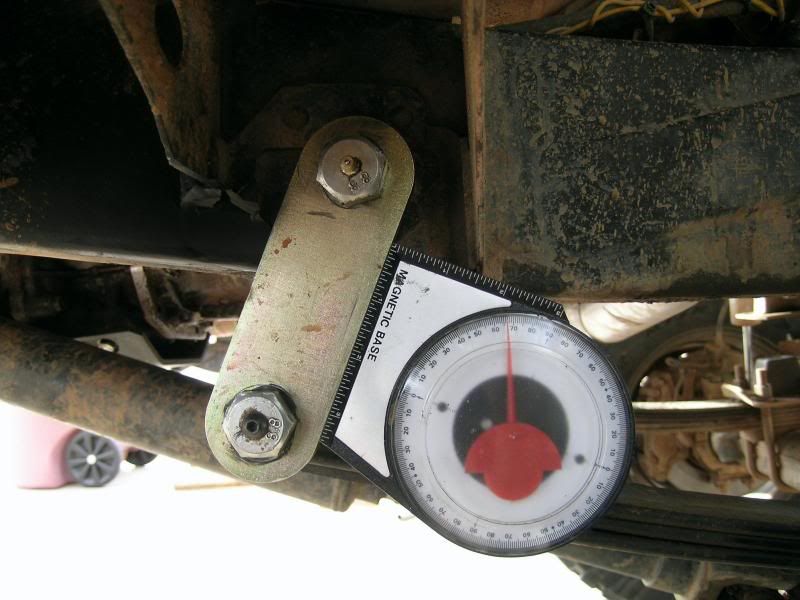
Trail Gear greasable shackle bolts make maintenance a snap. I used the M18 X 150mm (110019-1) for both the upper and lower shackle bolts.
My front shackle angle for reference:
Another thing I learned is that you don't need a 1" body lift to fully stuff 35" tires. I originally had installed one, but removed it to keep my COG as low as possible. Even dropping the 4Runner by 1" has helped a lot on off camber or tricky sections of trail.
A lot of this stuff can be found on the web when you search SAS, but I thought I'd just throw together some ideas I had or things that had been problems for me in an effort to help others.
Hopefully this thread will grow will similar tips and hints from other SAS installers as well. Post 'em if you got 'em!!
Overall, I am very happy with how well the truck performs both on and off road. Trail failures (knock on wood) just haven't happened... but I have run into a few issues.
By the way, the kit I used was Marlin's complete 4" SAS.
Issues and solutions...
Issue 1: Frame cracked behind factory frame span just behind bumper. While I don't have any pics of the cracks, I do have one of the repair:
This happened even with the SAS hanger fully welded all the way across the frame member. I just used a couple of pieces of trailer hitch stock I had left over to reinforce this section. If I did the swap again, I'd install these gussets or similar on day one. The frame after all wasn't truly designed to carry the vehicle weight at that point. Plus, being a rather heavy 2nd Gen 4Runner I was asking a lot. If you don't gusset, just keep an eye on this part of your frame for failures.
Issue 2: Frame cracked at steering box. Mine started to fail where the nuts are welded on the inside of the frame rail. When I pulled the motor, I took the opportunity to weld this brace on:
Finished:
Most of the brace kits for the steering boxes seem to require drilling of the bolt holes and longer bolts... to compensate for the added thickness of the plates. By bracing the box the way I did, factory bolts and hole diameters were retained.
Issue 3: Shackle to body mount interference was tearing my bushings to pieces. You can see where the outer plate was rubbing/ contacting in this pic:
What was happening is when spring was compressed in a slow crawl/ full stuff situation, the shackle would fold backward and the outer plate would contact the body mount. From that point, the outer shackle would be stopped, while the inner shackle would continue to travel back. This was causing everything to warp and twist... shredding the bushings and giving we an awful wobble on the road after harder sections of trail.
Pic of the aftermath (rubbing evidence can also be seen on shackle plate):
To stop this from happening I removed a small portion of the body mount, which allows the plates to both move backward without binding. This is a recent fix, but so far seems to be working. I'll post an update after more trail miles.
Another option would have been to lower my bumpstops, but that would have prevented the leaves from going flat and cause a loss of travel. This problem was happening for me before springs went into a negative arch.
Sky's Dogleg shackles would also have worked, but they were only available in to long a length.
My suggestion would be to watch this point of contact and correct if needed.
Following are just some tips...
One can weld all of the necessary SAS swap parts to the frame before any of the IFS has been removed. Vehicle is still fully driveable after welding, and can allow you to visit a welder for the fab... and then do the rest of the swap in your own garage.
Hanger on, shackle holes drilled and welded... still IFS:
For a cheap long travel driveshaft, get two lengths of trailer stock and weld some Toyota U-Joints on the ends. Wallah... $35 dollar DS with over 12" of slip.
Incredibly tough and the perfect solution if you think you might be adding dual cases in the future. But, I never could get mine to work well over 25 MPH.
After the dual case install, I bought the long spline DS kit from Marlin (MC-12900) and then got a hold of some 4th Gen 4Runner driveshafts that where warranty take offs. A local performance BMW driveline shop in my area chopped and welded them all together.
Sick welds:
4th Gen U-Joints are much bigger than the rest of the Toyota U-Joints. They will not (at least currently) mate to the multiple drilled flanges from Marlin. You can make them work though... just takes some welding and re-drilling.
Marlin HD internal axle seals are the bomb. Highly recommended upgrade when you have your knuckles torn apart. Part number MC-12149.
Trail Gear greasable shackle bolts make maintenance a snap. I used the M18 X 150mm (110019-1) for both the upper and lower shackle bolts.
My front shackle angle for reference:
Another thing I learned is that you don't need a 1" body lift to fully stuff 35" tires. I originally had installed one, but removed it to keep my COG as low as possible. Even dropping the 4Runner by 1" has helped a lot on off camber or tricky sections of trail.
A lot of this stuff can be found on the web when you search SAS, but I thought I'd just throw together some ideas I had or things that had been problems for me in an effort to help others.
Hopefully this thread will grow will similar tips and hints from other SAS installers as well. Post 'em if you got 'em!!
 01-02-2008, 06:51 AM
#3
Contributing Member
Thread Starter

Actually, no matter what you do there is more play and less alignments than a well made splined shaft. There is just to much slop between the tubes. I built up the inside tube with some weld and then ground down for a tighter fit and that helped a lot.
Living in AZ I really only used 4WD on the trail where speeds are slow, so the 25MPH barrier was never that big of an issue. It just felt bad and sounded like a tank running on tracks if I pushed the limit, no matter how much grease.
01-02-2008, 08:03 AM
#4
Check your parts when you get them, not the day you start your SAS.
Read the install instructions and understand them. Read other sources for info on a swap on your model truck to know about known issues up front.
If you cant weld, dont learn on a SAS.
Measure three times, cut once.
Tack weld and check fitment, alignment and angles and make sure things are right. Then and only then fully weld.
Bribe your friends to help you with free beer and food to be consumed AFTER you finish.
Plan on 20+ hours to do a SAS and a matching rear lift.
No such thing as a cheap SAS done right considering all the other mods that will be required as additions. If you have to worry about cost you cannot afford it.
01-03-2008, 04:23 AM
#5
Registered User
Join Date: Jul 2004
Location: Barcelona (Spain)
Posts: 917
Likes: 0
Received 0 Likes
on
0 Posts
This is so *ng true... I haven't finished my SAS yet and I've multiplied per 2 the initial budget I stimated, but I prefer to spend more now and be sure I do the things right the first time.
Elvota, this is a very very useful info and would have to be made sticky. Thanks for it. I was planning on the steering box mounting plating, now I'm fully convinced.
David
Elvota, this is a very very useful info and would have to be made sticky. Thanks for it. I was planning on the steering box mounting plating, now I'm fully convinced.
David
01-03-2008, 05:22 AM
#6
Contributing Member
Thread Starter
Yeah... I just figured if YT could get a list going of things they've learned from or after their SAS it would be pretty helpful.
01-04-2008, 11:10 AM
#7
Registered User
Join Date: Aug 2004
Location: HBCA
Posts: 160
Likes: 0
Received 0 Likes
on
0 Posts
Steering Problems?
Great Post, Thanks for the tip on the frame cracking near the hanger.
Curious if you had any pitman arm clearance problems? I used mostly Marlin stuff and mine hit bad, wound up moving the steering box forward to solve the problem. I was a little upset at Marlin for not mentioning this might be problem, they were absolutely no help in trying to resolve the problem. I really thought that the kit should come with a shorter pitman arm.
Curious if you had any pitman arm clearance problems? I used mostly Marlin stuff and mine hit bad, wound up moving the steering box forward to solve the problem. I was a little upset at Marlin for not mentioning this might be problem, they were absolutely no help in trying to resolve the problem. I really thought that the kit should come with a shorter pitman arm.
Trending Topics
01-04-2008, 12:39 PM
#8
Contributing Member
Thread Starter
01-04-2008, 01:35 PM
#9
Registered User

Join Date: Nov 2006
Location: Oregonian in Utah
Posts: 71
Likes: 0
Received 0 Likes
on
0 Posts
Great Post, Thanks for the tip on the frame cracking near the hanger.
Curious if you had any pitman arm clearance problems? I used mostly Marlin stuff and mine hit bad, wound up moving the steering box forward to solve the problem. I was a little upset at Marlin for not mentioning this might be problem, they were absolutely no help in trying to resolve the problem. I really thought that the kit should come with a shorter pitman arm.
Curious if you had any pitman arm clearance problems? I used mostly Marlin stuff and mine hit bad, wound up moving the steering box forward to solve the problem. I was a little upset at Marlin for not mentioning this might be problem, they were absolutely no help in trying to resolve the problem. I really thought that the kit should come with a shorter pitman arm.
Ooo, and plan on working on it for about a year if you decide to do a 1 ton running gear swap with a rear 4 link!
Last edited by smashmetal; 01-04-2008 at 01:38 PM.
01-04-2008, 02:04 PM
#10
Contributing Member
Thread Starter

 01-05-2008, 06:43 PM
#13
Contributing Member
Thread Starter
Really trying to keep this thread more about unique tips or things that have been learned doing a SAS to help others do theirs easier or better. A search will reveal all sorts of cost options.
Thing is, the cost is not just the SAS alone. It's the bigger tires, gearing, lockers, armor... all of that is basically required to get the most out of your SAS.
The SAS kits run $1000 or so, but my guess is most will spend closer to $5000 or more once it's all added up.
Thing is, the cost is not just the SAS alone. It's the bigger tires, gearing, lockers, armor... all of that is basically required to get the most out of your SAS.
The SAS kits run $1000 or so, but my guess is most will spend closer to $5000 or more once it's all added up.
01-05-2008, 06:49 PM
#14
Contributing Member
Join Date: Oct 2002
Location: Santee, CA
Posts: 2,724
Likes: 0
Received 0 Likes
on
0 Posts
The problem with the pitman arm must be a 4runner thing...I had the same issue with mine. Fixed with the Sky 3/4 drop arm
Elvota your runner is sick...cool color too
Elvota your runner is sick...cool color too
Last edited by Marc P; 01-05-2008 at 06:57 PM.
01-05-2008, 07:07 PM
#15
Originally Posted by waskillywabbit
No such thing as a cheap SAS done right considering all the other mods that will be required as additions. If you have to worry about cost you cannot afford it.
01-05-2008, 07:42 PM
#16
Contributing Member
Thread Starter
Lot of "sick" 4Runners on this board... that is for sure. We'll have to arrange a "Golden Glory" run sometime soon. Would be interesting to compare notes with such similiar vehicles.
I'll have to take a closer look at my pitman arm. Maybe I am just clearing the frame by microns.
I'll have to take a closer look at my pitman arm. Maybe I am just clearing the frame by microns.
01-05-2008, 09:37 PM
#17
Registered User
Join Date: Aug 2004
Location: HBCA
Posts: 160
Likes: 0
Received 0 Likes
on
0 Posts
Mine wasn't hitting the frame, it was hitting the Tie Rod when compressing the drives side suspension. When I talked to Dave and Marlin Crawler he said that he had almost a credit card thickness clearance on his truck. This was the only real problem that I had.
01-26-2008, 08:54 AM
#18
Registered User
Join Date: Nov 2006
Location: Oregonian in Utah
Posts: 71
Likes: 0
Received 0 Likes
on
0 Posts
I used Sky's 3/4 drop pitman arm on mine. I think the biggest problem why mine hit the frame is bacause I used GM TRE's, there a bit bigger than yota TRE's. I will be relocating the steering box foward and a bit more vetical position so I can fit a high steer in there some where.
On another note! toyota steering systems don't like turning 40" tires on a locked front axle. Budget in a ram assist or full hydro if your build is going beyond a not so streetable rig.
On another note! toyota steering systems don't like turning 40" tires on a locked front axle. Budget in a ram assist or full hydro if your build is going beyond a not so streetable rig.

Thread
Thread Starter
Forum
Replies
Last Post
hiluxinargentina
86-95 Trucks & 4Runners
0
09-30-2015 11:12 PM
hiluxinargentina
86-95 Trucks & 4Runners
3
09-30-2015 05:51 PM
JookUpVandetti
86-95 Trucks & 4Runners
10
09-30-2015 08:58 AM
Toys4parts
86-95 Trucks & 4Runners (Build-Up Section)
2
09-26-2015 01:56 PM


