
Replacing a rear U-joint, w/pics
 09-04-2014, 08:31 PM
#1
Registered User
Thread Starter

Join Date: Aug 2014
Posts: 3
Likes: 0
Received 0 Likes
on
0 Posts
Hey everybody - I just joined yotatech after years of lurking around. Freaking phenomenal resource you lot are! Originally I was going to make my first thread something really awesome, like "My truck is breaking. What should I do to make it look cooler?". But my rearmost u-joint was toast and it was a nice day to take pics of replacing it so instead I'm gonna show you how I did that.
Basically I was getting some really scary-sounding driveline vibration and crunching - so the first thing I did was ignore it for a couple hundred miles till I was afraid to drive to the store. Then I poked my head under there and shoved some stuff and when I shoved the drive shaft down by the third member it slopped around a bit and I knew that was that. I'm gonna make a GIF of it slopping someday. It's gonna be sweet. wobble wobble.
So I called up NWOR and asked if they had U-joints and the guy said yeah. Then I asked him a bunch of totally noobish questions about how to actually do it, and if their u-joint was totally awesome, and what else I would need and whatnot, and he basically said I should take it to a shop and stop trying to learn how to fix ˟˟˟˟˟ over the telephone and hung up without closing the sale. I think he didn't want to advise me to hit it with a hammer until it falls apart, which is obviously what you have to do here. What the NWOR rep doesn't know about me is that I wield a hammer with the might of Thor, the precision of a watchmaker, and the grace of a Russian ballerina. I just couldn't think of a polite way to explain all that to him over the telephone.
In any case, at that point I knew I was gonna HAVE to do it myself, what with my honor being besmirched and all. I found a a couple of extremely helpful videos on youtube, got the part for 13 bucks at autozone, and set to work. (I got the Duralast non-gold because it had a zerk and was cheaper. The Gold one was not greasable, but did come with a lifetime warranty. I figure If I break this one I'll get a badass part from NWOR or something and in the meantime I can at least grease it. Plus, the 7 dollar difference corresponds roughly to the price of a chicken burrito with guacamole, so that's a plus)
It took 2.5 hours, not counting the drive to autozone and back which took kind of a long time because at speeds over about 40 it sounded like Chewbacca was gargling and even worse all the quarters in my change bin would start making a really annoying chattering sound from the vibration.
I used a 12mm socket wrench, 14mm combination/box end wrench, a 15mm for the double wrench trick, a can of florescent orange marking paint just for kicks, a log, a couple other chunks of wood, a 3 pound hammer, a flathead screwdriver, a 27mm socket (which was too small but kinda worked), a 5/8ths plug socket that I could sacrifice but didn't end up having to, and a broken piece of inch thick styrofoam insulation board to lie on (By far the best ground-protection ever. It can stay out in the rain forever, never gets soggy, is just the right amount of soft on your spine, wipes clean easily, gives you a place to drop bolts and stuff where you can find 'em easy, keeps your back warm, and weighs basically nothing. Just sayin)
Here's pics. Text after respective pic
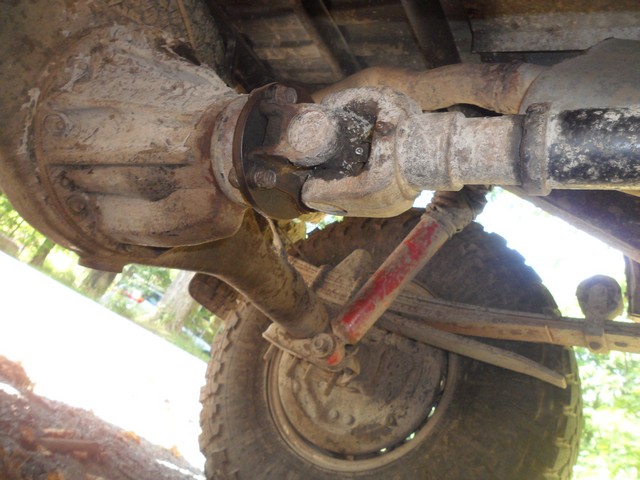
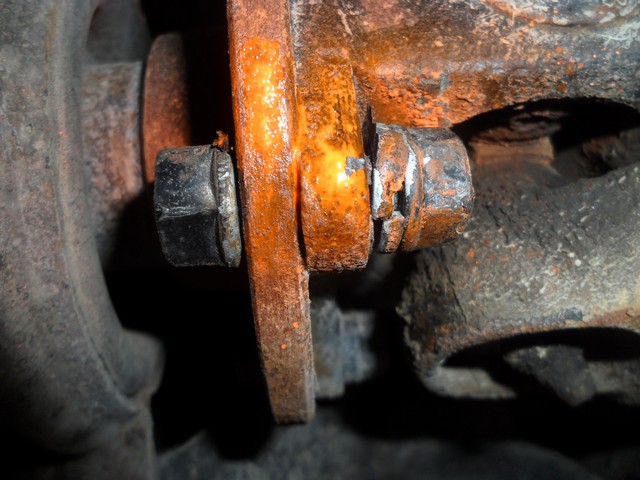
This is how pretty my truck is. That's the joint in question there. In the background those are KYB monomax heavy duty shocks and there's a heavy-load bearing type AAL in there too. 33x10.5x15 TOYO M/T tires at 40-50 psi seems to keep the wear even. Resulting ride, in case you were wondering, is bone jarring until you get about 1500 pounds in the back, then it's real nice. I get compliments when it doesn't squat under a load of wood, and I smile and take Advil for my poor bruised kidneys. On the subject of U-joint failure: I've heard that a gnarly u-joint and the resulting vibration can shake up the pinion gear and seal at the third member. I poked the nose a little and gave it a wiggle when I got the drive shaft off. It seemed pretty okay so I decided not to worry about it.
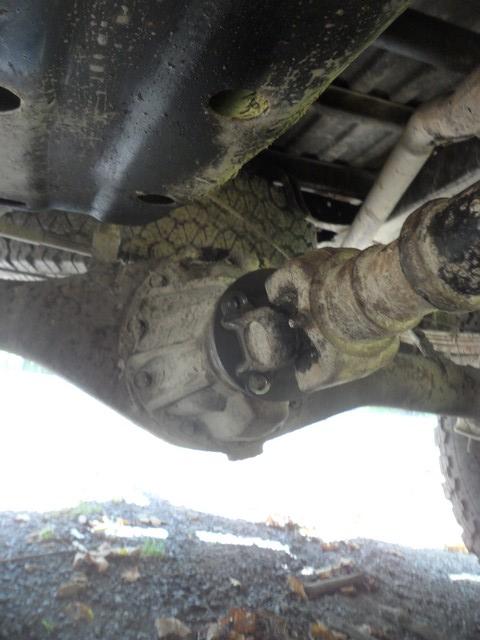
Took dem bolts out with a 14mm wrench (you might want one for the back too) using the double wrench trick and intense Jedi focus. They were tight, but access was good. (Yeah, my garage has a lift in it! har har) At this point the truck is in gear and the e-brake is on. I left one bolt in loosely. Later I would come back and put a second one in loosely so i could roll the truck a bit and bring the front bolts to an accessible position.
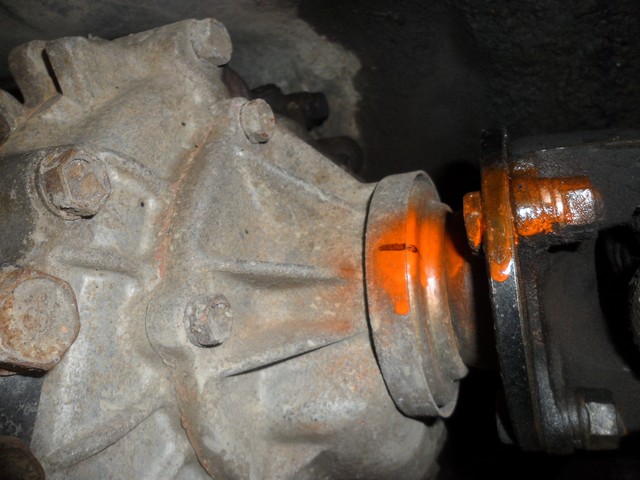
This is how I marked the front of the shaft because I found a marker and a can of spray paint in my driveway. In the end I didn't have to pull this part out and worry about the splines and gear oil because......
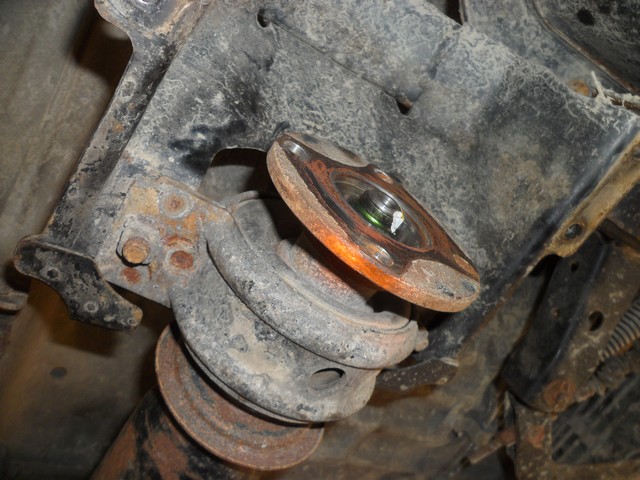
When i took the shield off the middle section there I realized the back half just bolted up to the cardone joint here. So ˟˟˟˟˟˟ yeah that's a big ole' shortcut.
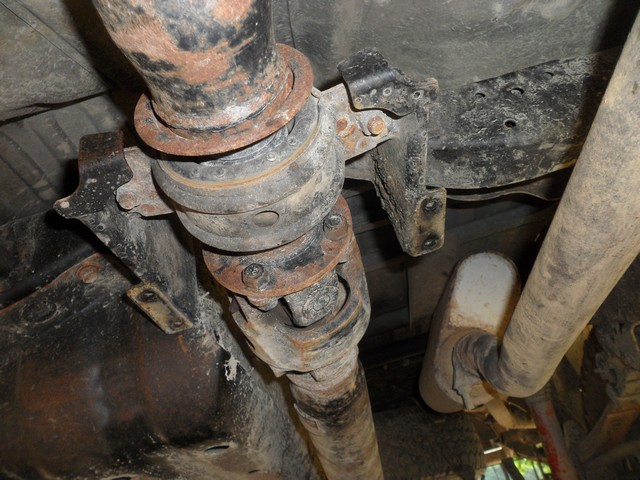
Hit it with a little paint for reference and busted one loose - double wrenching saved the day here those buggers were snug but civilized enough once they knew who the boss was. I ended up rolling the truck a few feet to get to the topmost bolt here - the one's facing the ground are really easy to get to. Just make sure you got a couple bolts in the back too when you roll it and everything stays together.
He ain't goin' nowhere! He's goin' ˟˟˟˟˟˟in' nowhere! Where you goin? Nowhere!
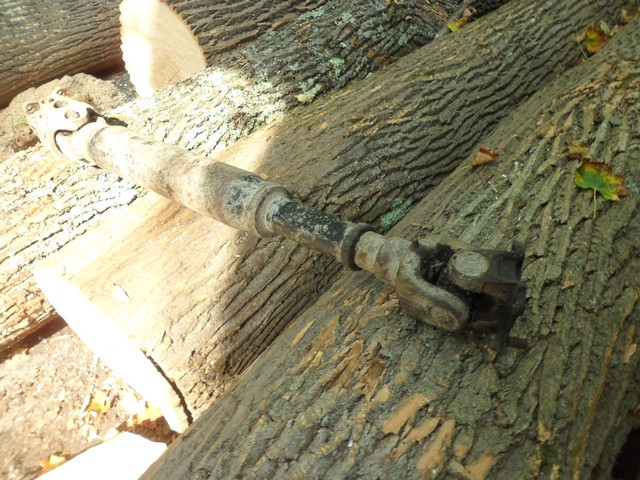
I'll just put this over here on these logs for a sec....
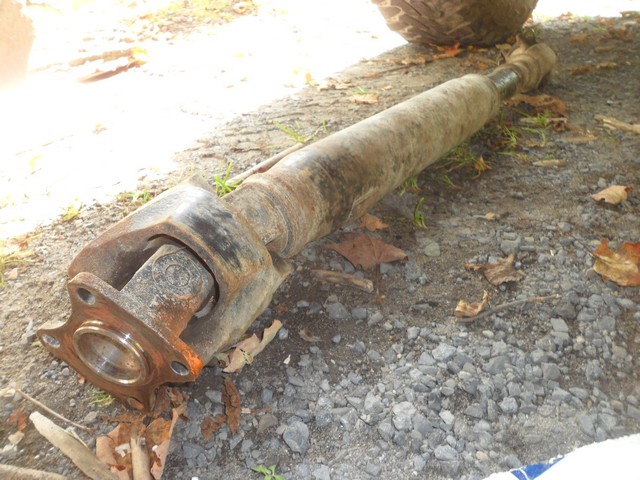
This is what stayed on the truck. I am so stoked NOT to have to pull a splined shaft out of the transfer case. The NWOR guy said all ex-cabs have the two piece drive shaft. Dunno about 'runners.
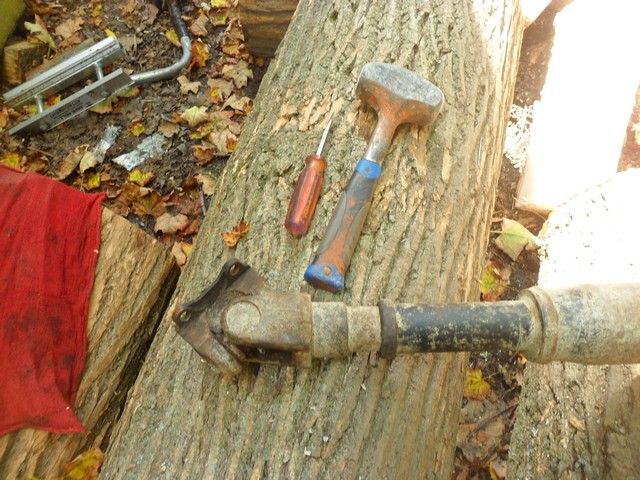
The mini-BFH. My U-joint had clip rings on the inside, so i just tapped 'em out with the screwdriver. The hardest part was finding the ends of the rings 'midst the grime.
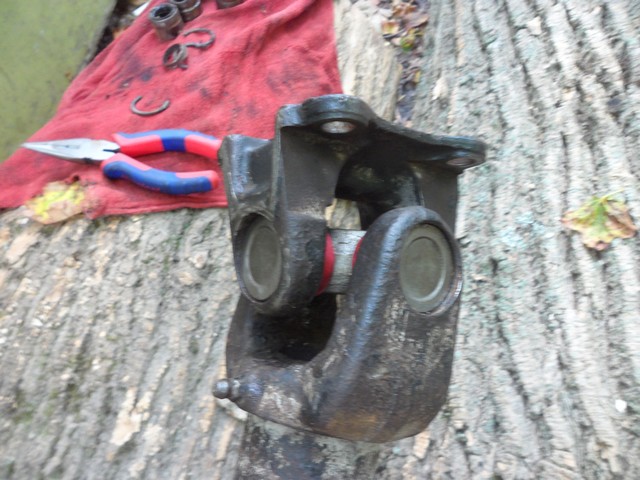
This is how I set it up. Better than a vise, I think, because the wood wont mar up the yolks. Anyway, there's a strategy here to hitting the right part the right way to make it want to pop apart in order. Search youtube. There was a little puzzling, not too bad. Just think it through - the driveshaft part ain't goin anywhere, and the u-joint part is attached to that crosswise, so then the end piece is the part that's gotta move, and you're gonna slide it down off the two caps there. You gotta hit it right where the cap is so it slides off straight, but not on the cap cause the cap's not going anywhere either. So grab a big socket, put it over where the cap is and hit it hard. The biggest socket I had was 27mm, which wasn't quite large enough to get all the way around the cap - so be advised that when they guy in the video says "big socket" he means 29mm or larger. I made this work but it could have gone just a little more smoothly.
I got stuck here for a little bit - you can hammer the yolks down off the caps to this point and then your luck runs out. I found a couple of half inch nuts on the ground and snuck one into the inside of the cap like a spacer so It could push out that last quarter inch or whatever. Man if I didn't have nuts this would have been so much more difficult. Once the first set is done, you do the other pair of caps. Those bad boys get a socket (or a big punch) right on 'em cause you're gonna push them right out of their little holes while the yolk stays put on the two bits of ash there.
So after a little while I got to this point, which felt pretty good. maybe an hour or so of hammering. I see why most people do this once and then send the rest out to the shop. It is totally doable with a hammer, but the whole time you're just thinking how a press does this in about 12 seconds, and you're here wailing on this thing like Conan playing bongos hoping it's not gonna be all ˟˟˟˟˟˟ed up when it comes time to put it back in. The best philosophy I found for getting good results with the BFH is "Pray sweetly and hit real hard". I tried "Hail Satan and hit real hard" but too much stuff broke.
That's the old one. This is the worst of the four ends.
And the caps.
Here's a strategy that almost didn't work. I would recommend NOT doing it this way, you might end up with the cap lodged firmly and not enough clearance to get the u-joint back into the middle and now you've got this new, clean cap full of needle bearings you gotta hammer back out. Thankfully that didn't quite happen but another mm and it would have been bad. Stick the u-joint part in place first, then push the caps on either end from the outside and once the needle bearings are seated around the shaft you can hammer it back together.
Then it looks like that.
Then it looks like that.
Then you put it back in, line up the paint with the other paint, and crank dem bolts tight.
The split ring lock washer on all the bolts I took out was on the bolt head end of things, not over by the nut. So that's how I put it back. But on front section of drive shaft, it's the other way round, so I dunno.
Sorry, no pics of it back in - I just hopped in and started driving!
The big scary crunching noises went away! No driveline wobbles that I can tell so I must not have done too much damage. The best part is now that the universal is quiet I can hear all the other scary crunching sounds coming from other places!
Coming up in the next week I got reman calipers to put on, CV's on both sides up front, and BJ spacers and shackles from 4crawler. Right now I'm using torsions alone to clear those 33's which I run at 50 PSI. My rig smashes through tiny pavement imperfections like they were brick walls in a war zone. I'm hoping the bj spacers and switching from AAL to shackles in the rear will a) improve articulation a little in the woods and b)make for a more comfortable ride around town.
One thing is I'm kinda gonna miss having the super stiff non-squatting truck bed. I'm thinking about just softening up the front and leaving the back how it is. Any thoughts? Anyone running AAL with a BJ spacer on 33's? hows the ride?
The other thing I was thinking I could do is build about 800 pounds of armor and racks for the back - then it'll ride real smooth and I woudn't need the shackles
Speaking of shackles I have another question. If I'm lifted 2 inches on an AAL right now, and switch to 4 inch longer shackles for about the same lift, should I be getting axle shims to compensate for the change in the angle of the spring? What happens if I don't?
Basically I was getting some really scary-sounding driveline vibration and crunching - so the first thing I did was ignore it for a couple hundred miles till I was afraid to drive to the store. Then I poked my head under there and shoved some stuff and when I shoved the drive shaft down by the third member it slopped around a bit and I knew that was that. I'm gonna make a GIF of it slopping someday. It's gonna be sweet. wobble wobble.
So I called up NWOR and asked if they had U-joints and the guy said yeah. Then I asked him a bunch of totally noobish questions about how to actually do it, and if their u-joint was totally awesome, and what else I would need and whatnot, and he basically said I should take it to a shop and stop trying to learn how to fix ˟˟˟˟˟ over the telephone and hung up without closing the sale. I think he didn't want to advise me to hit it with a hammer until it falls apart, which is obviously what you have to do here. What the NWOR rep doesn't know about me is that I wield a hammer with the might of Thor, the precision of a watchmaker, and the grace of a Russian ballerina. I just couldn't think of a polite way to explain all that to him over the telephone.
In any case, at that point I knew I was gonna HAVE to do it myself, what with my honor being besmirched and all. I found a a couple of extremely helpful videos on youtube, got the part for 13 bucks at autozone, and set to work. (I got the Duralast non-gold because it had a zerk and was cheaper. The Gold one was not greasable, but did come with a lifetime warranty. I figure If I break this one I'll get a badass part from NWOR or something and in the meantime I can at least grease it. Plus, the 7 dollar difference corresponds roughly to the price of a chicken burrito with guacamole, so that's a plus)
It took 2.5 hours, not counting the drive to autozone and back which took kind of a long time because at speeds over about 40 it sounded like Chewbacca was gargling and even worse all the quarters in my change bin would start making a really annoying chattering sound from the vibration.
I used a 12mm socket wrench, 14mm combination/box end wrench, a 15mm for the double wrench trick, a can of florescent orange marking paint just for kicks, a log, a couple other chunks of wood, a 3 pound hammer, a flathead screwdriver, a 27mm socket (which was too small but kinda worked), a 5/8ths plug socket that I could sacrifice but didn't end up having to, and a broken piece of inch thick styrofoam insulation board to lie on (By far the best ground-protection ever. It can stay out in the rain forever, never gets soggy, is just the right amount of soft on your spine, wipes clean easily, gives you a place to drop bolts and stuff where you can find 'em easy, keeps your back warm, and weighs basically nothing. Just sayin)
Here's pics. Text after respective pic
This is how pretty my truck is. That's the joint in question there. In the background those are KYB monomax heavy duty shocks and there's a heavy-load bearing type AAL in there too. 33x10.5x15 TOYO M/T tires at 40-50 psi seems to keep the wear even. Resulting ride, in case you were wondering, is bone jarring until you get about 1500 pounds in the back, then it's real nice. I get compliments when it doesn't squat under a load of wood, and I smile and take Advil for my poor bruised kidneys. On the subject of U-joint failure: I've heard that a gnarly u-joint and the resulting vibration can shake up the pinion gear and seal at the third member. I poked the nose a little and gave it a wiggle when I got the drive shaft off. It seemed pretty okay so I decided not to worry about it.
Took dem bolts out with a 14mm wrench (you might want one for the back too) using the double wrench trick and intense Jedi focus. They were tight, but access was good. (Yeah, my garage has a lift in it! har har) At this point the truck is in gear and the e-brake is on. I left one bolt in loosely. Later I would come back and put a second one in loosely so i could roll the truck a bit and bring the front bolts to an accessible position.
This is how I marked the front of the shaft because I found a marker and a can of spray paint in my driveway. In the end I didn't have to pull this part out and worry about the splines and gear oil because......
When i took the shield off the middle section there I realized the back half just bolted up to the cardone joint here. So ˟˟˟˟˟˟ yeah that's a big ole' shortcut.
Hit it with a little paint for reference and busted one loose - double wrenching saved the day here those buggers were snug but civilized enough once they knew who the boss was. I ended up rolling the truck a few feet to get to the topmost bolt here - the one's facing the ground are really easy to get to. Just make sure you got a couple bolts in the back too when you roll it and everything stays together.
He ain't goin' nowhere! He's goin' ˟˟˟˟˟˟in' nowhere! Where you goin? Nowhere!
I'll just put this over here on these logs for a sec....
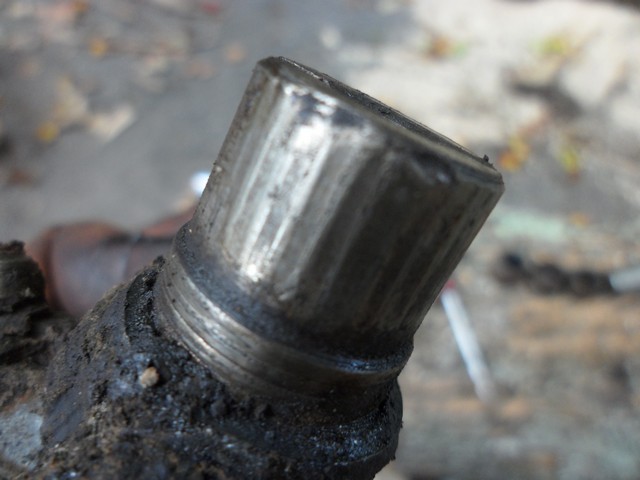
This is what stayed on the truck. I am so stoked NOT to have to pull a splined shaft out of the transfer case. The NWOR guy said all ex-cabs have the two piece drive shaft. Dunno about 'runners.
The mini-BFH. My U-joint had clip rings on the inside, so i just tapped 'em out with the screwdriver. The hardest part was finding the ends of the rings 'midst the grime.
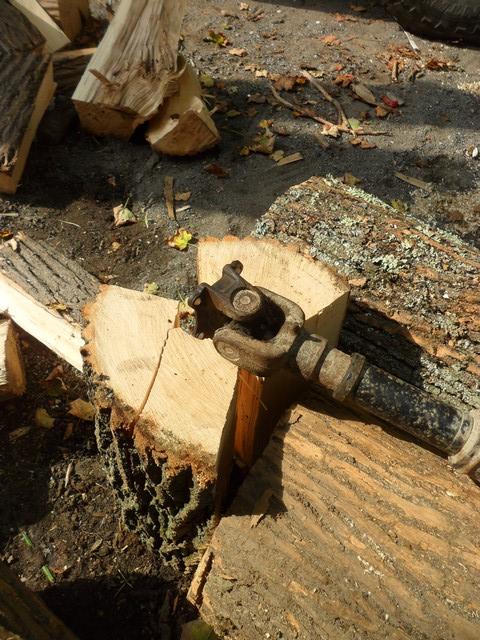
This is how I set it up. Better than a vise, I think, because the wood wont mar up the yolks. Anyway, there's a strategy here to hitting the right part the right way to make it want to pop apart in order. Search youtube. There was a little puzzling, not too bad. Just think it through - the driveshaft part ain't goin anywhere, and the u-joint part is attached to that crosswise, so then the end piece is the part that's gotta move, and you're gonna slide it down off the two caps there. You gotta hit it right where the cap is so it slides off straight, but not on the cap cause the cap's not going anywhere either. So grab a big socket, put it over where the cap is and hit it hard. The biggest socket I had was 27mm, which wasn't quite large enough to get all the way around the cap - so be advised that when they guy in the video says "big socket" he means 29mm or larger. I made this work but it could have gone just a little more smoothly.
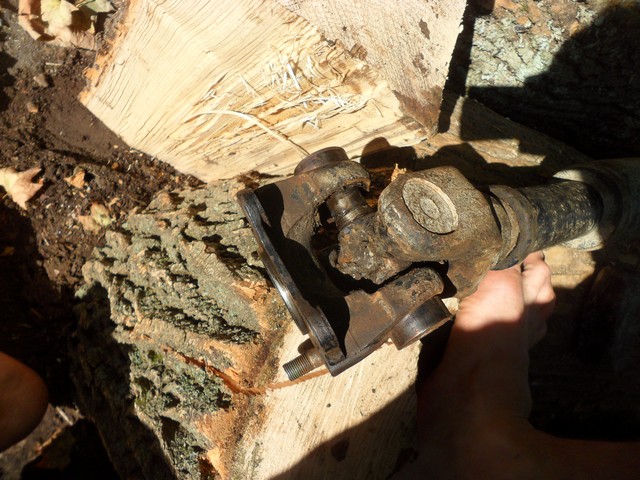
I got stuck here for a little bit - you can hammer the yolks down off the caps to this point and then your luck runs out. I found a couple of half inch nuts on the ground and snuck one into the inside of the cap like a spacer so It could push out that last quarter inch or whatever. Man if I didn't have nuts this would have been so much more difficult. Once the first set is done, you do the other pair of caps. Those bad boys get a socket (or a big punch) right on 'em cause you're gonna push them right out of their little holes while the yolk stays put on the two bits of ash there.
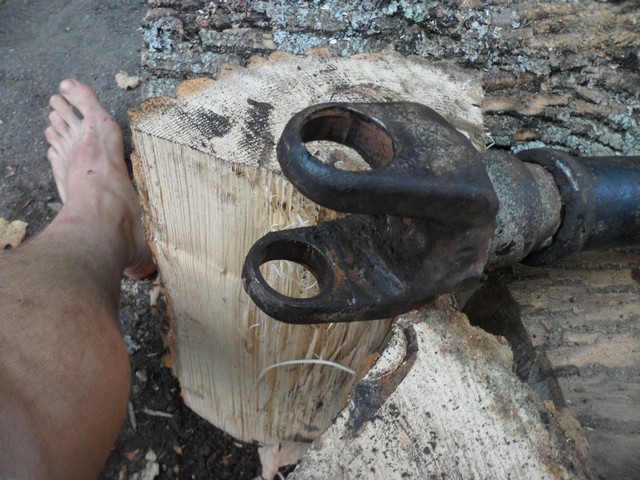
So after a little while I got to this point, which felt pretty good. maybe an hour or so of hammering. I see why most people do this once and then send the rest out to the shop. It is totally doable with a hammer, but the whole time you're just thinking how a press does this in about 12 seconds, and you're here wailing on this thing like Conan playing bongos hoping it's not gonna be all ˟˟˟˟˟˟ed up when it comes time to put it back in. The best philosophy I found for getting good results with the BFH is "Pray sweetly and hit real hard". I tried "Hail Satan and hit real hard" but too much stuff broke.
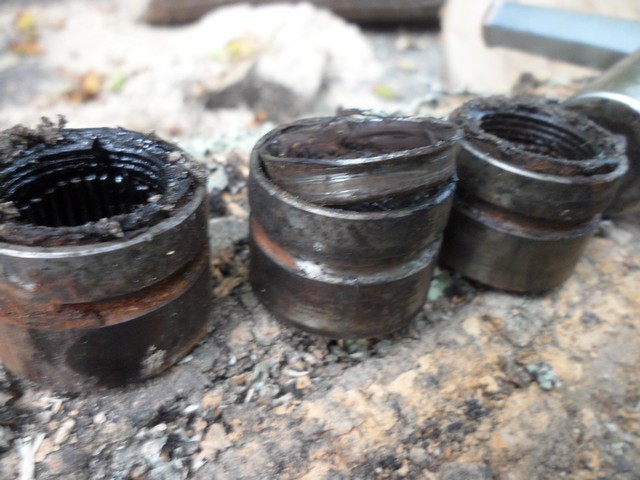
That's the old one. This is the worst of the four ends.
And the caps.
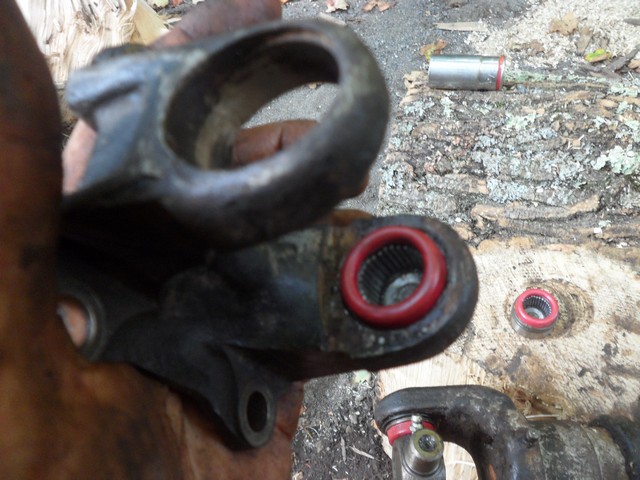
Here's a strategy that almost didn't work. I would recommend NOT doing it this way, you might end up with the cap lodged firmly and not enough clearance to get the u-joint back into the middle and now you've got this new, clean cap full of needle bearings you gotta hammer back out. Thankfully that didn't quite happen but another mm and it would have been bad. Stick the u-joint part in place first, then push the caps on either end from the outside and once the needle bearings are seated around the shaft you can hammer it back together.
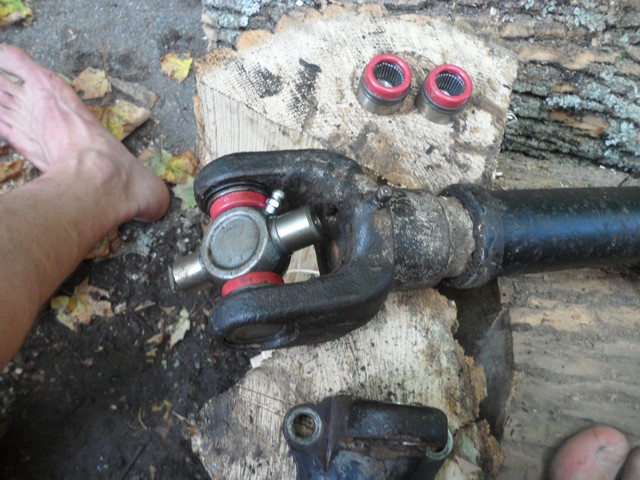
Then it looks like that.
Then it looks like that.
Then you put it back in, line up the paint with the other paint, and crank dem bolts tight.
The split ring lock washer on all the bolts I took out was on the bolt head end of things, not over by the nut. So that's how I put it back. But on front section of drive shaft, it's the other way round, so I dunno.
Sorry, no pics of it back in - I just hopped in and started driving!
The big scary crunching noises went away! No driveline wobbles that I can tell so I must not have done too much damage. The best part is now that the universal is quiet I can hear all the other scary crunching sounds coming from other places!
Coming up in the next week I got reman calipers to put on, CV's on both sides up front, and BJ spacers and shackles from 4crawler. Right now I'm using torsions alone to clear those 33's which I run at 50 PSI. My rig smashes through tiny pavement imperfections like they were brick walls in a war zone. I'm hoping the bj spacers and switching from AAL to shackles in the rear will a) improve articulation a little in the woods and b)make for a more comfortable ride around town.
One thing is I'm kinda gonna miss having the super stiff non-squatting truck bed. I'm thinking about just softening up the front and leaving the back how it is. Any thoughts? Anyone running AAL with a BJ spacer on 33's? hows the ride?
The other thing I was thinking I could do is build about 800 pounds of armor and racks for the back - then it'll ride real smooth and I woudn't need the shackles
Speaking of shackles I have another question. If I'm lifted 2 inches on an AAL right now, and switch to 4 inch longer shackles for about the same lift, should I be getting axle shims to compensate for the change in the angle of the spring? What happens if I don't?


Thread
Thread Starter
Forum
Replies
Last Post
RedRunner_87
95.5-2004 Tacomas & 96-2002 4Runners (Build-Up Section)
84
06-01-2021 01:51 PM
Avenged
95.5-2004 Tacomas & 96-2002 4Runners
4
07-09-2015 07:55 AM
Jnkml
95.5-2004 Tacomas & 96-2002 4Runners
3
07-06-2015 01:20 PM
Vargntucson
95.5-2004 Tacomas & 96-2002 4Runners
0
07-04-2015 12:15 PM


