22RE 4x4 Radiator/T-Stat Replacement W/ Pics!
 03-19-2012, 03:57 PM
#1
Registered User
Thread Starter
Hello everyone! I'm contributing (and hopefully in the right place) something I couldn't find on this site yet, a 22RE radiator replacement walk-through with T-Stat and Flush line 'T'-Joint installed as well!
I'll do my best to cover all the things I did, and every tool used!
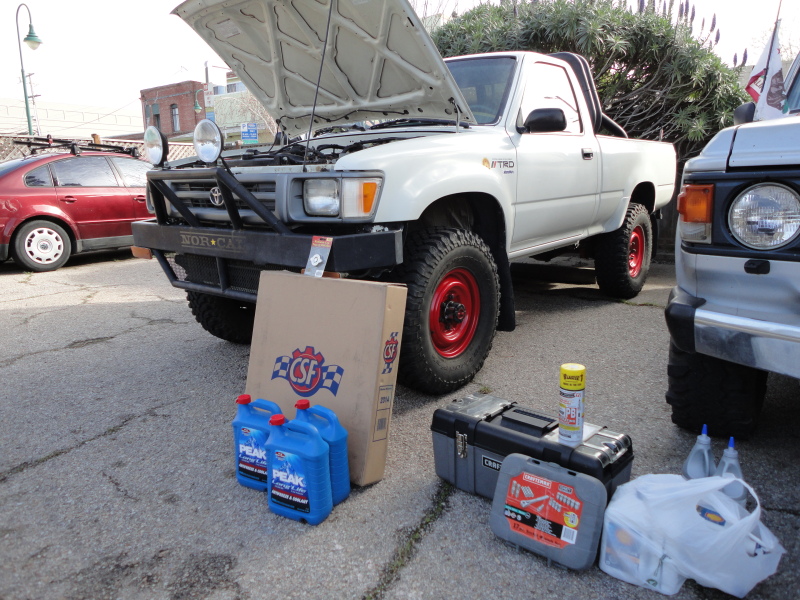
Required Parts!
Radiator (obviously! Preferably a CSF 3-Row Metal, heh heh)
New Radiator Cap!
OEM Thermostat. (Opening at 80-103'f)
OEM Thermostat Gasket.
2.2 U.S. Gallons of AntiFreeze (Non Diluted)
T-Joint (Optional)
Required Tools!
PB BLASTER liquid Wrench (Or similar)
10-14mm Wrench and Socket Set (Deep/Regular)
2-3 2'in to 5'in Extensions for Socket Set.
Large Flathead Screwdriver
Utility Knife
Needle Nose Pliers
Small Channel Locks
(Step 0)
THE NIGHT BEFORE you plan to do this job... go outside and spray down ANY and ALL bolts you plan on taking off with the PB Blaster. This stuff works wonders with rusty old OEM Chassis and Engine hardware, and is a wicked degreaser too. AT LEAST spray the two 12mm Water Intake bolts where the thermostat lives... because if you don't, you could break one... like I did. And Enjoy a 135$ fix or a extra 3hr Helicoiling / Taping experience!
(Step 1)
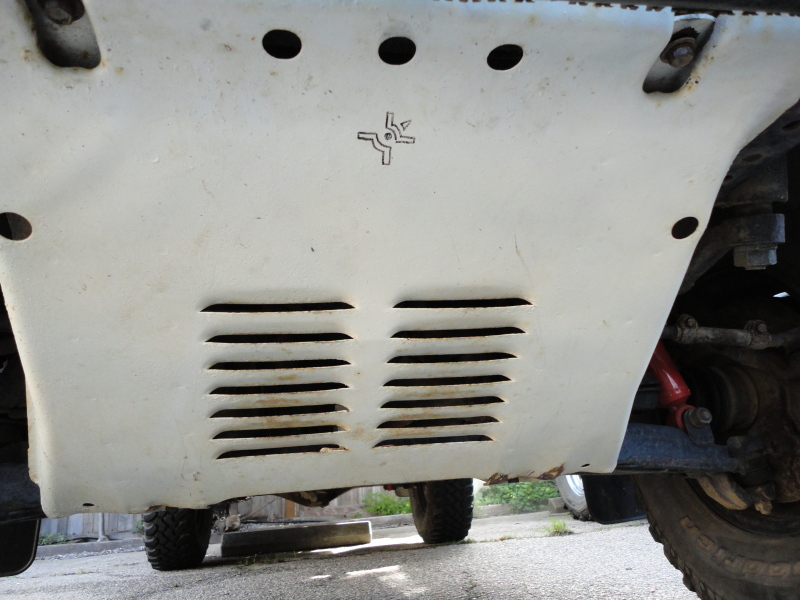
Remove the x4 12mm Bolts Holding the Skid Plate On!
(Step 2)
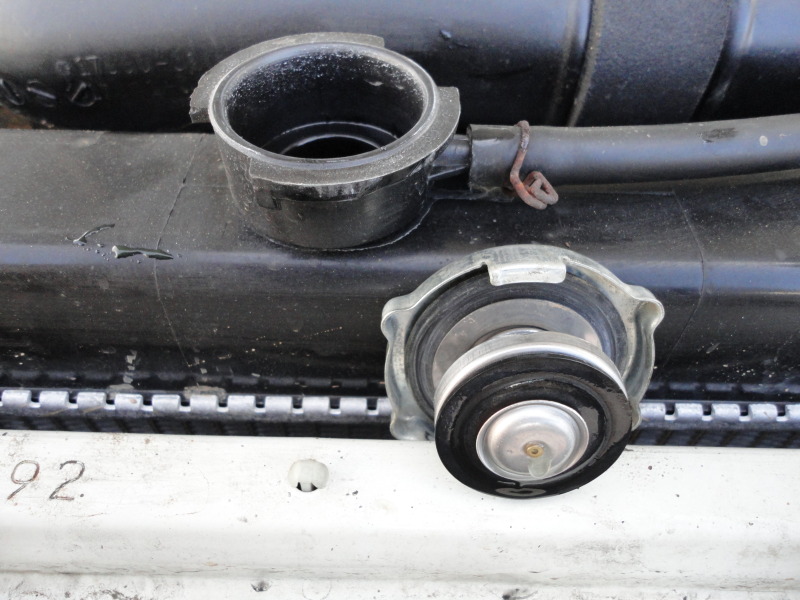
---AND---
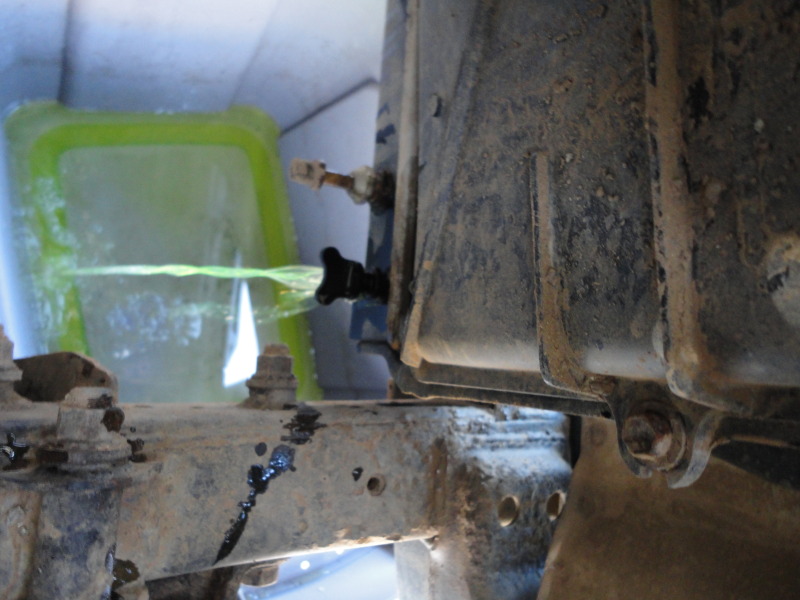 Open Radiator Cap, Purge contents with either the Lower hose or the Purge Valve.
(Step 3)
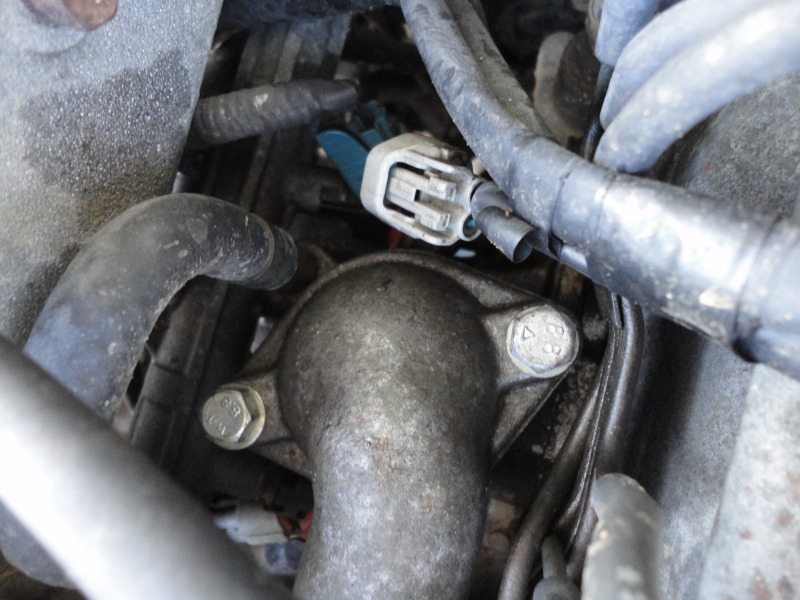
Remove the two 12mm Thermostat Housing / Water Intake pipe bolts, and remove old thermostat (you can choose to completely disconnect this pipe now, if you want)
(Step 4)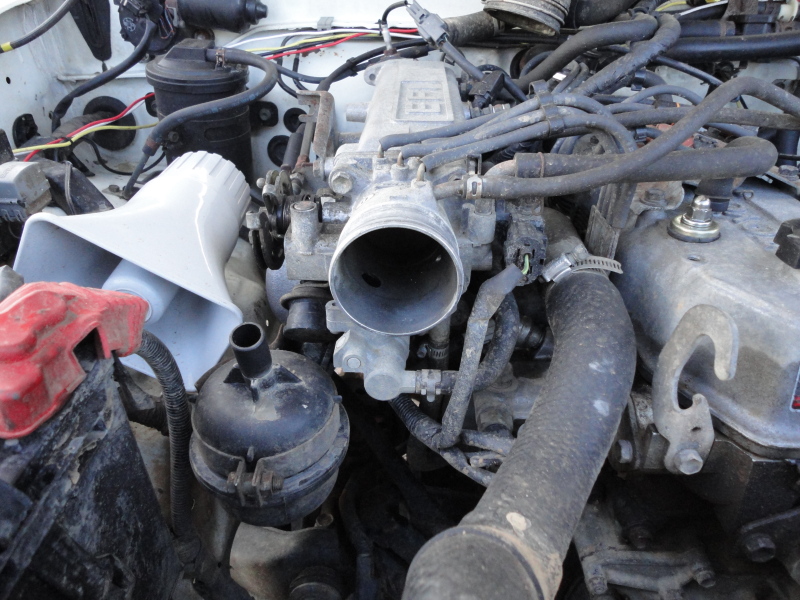
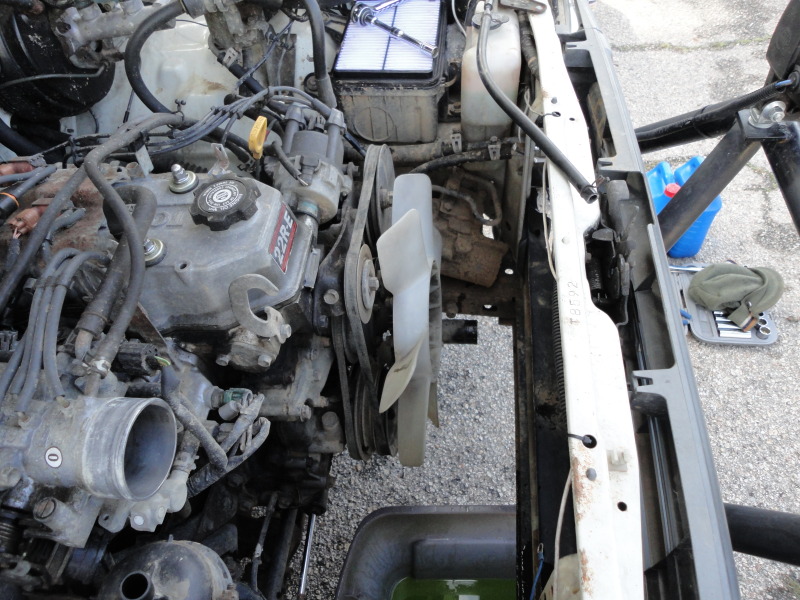
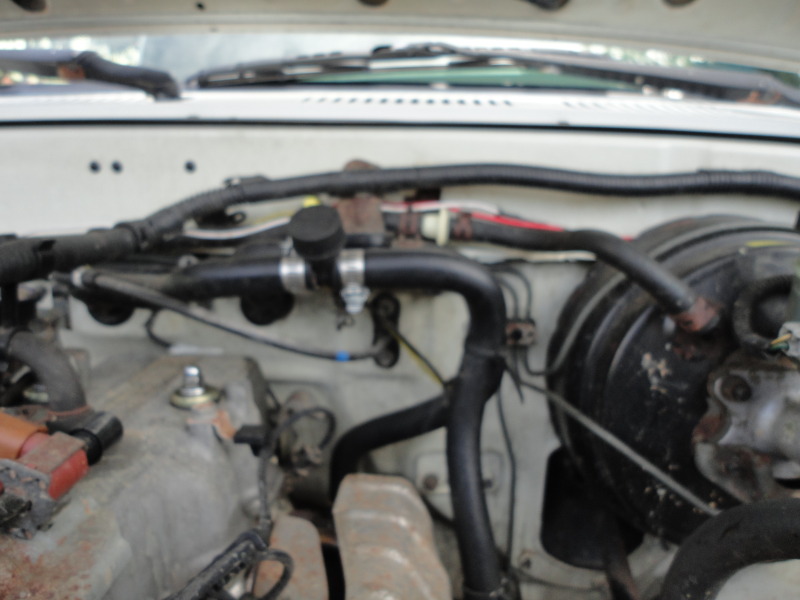
Disconnect the 10mm clam on the Air Intake line from the Airbox, and plier off the Clamp of the little bauble lookin' thing bellow it, and move out of the way for ease of removal.
At this point, you should have an engine bay looking like this! VVVVV
(Step 5)
Remove the 4 12mm Bolts holding the radiator to the front cab crossmember. BE AWARE! Some radiators are not supported once these bolts are loose and could fall the the floor! Make sure you catch it!
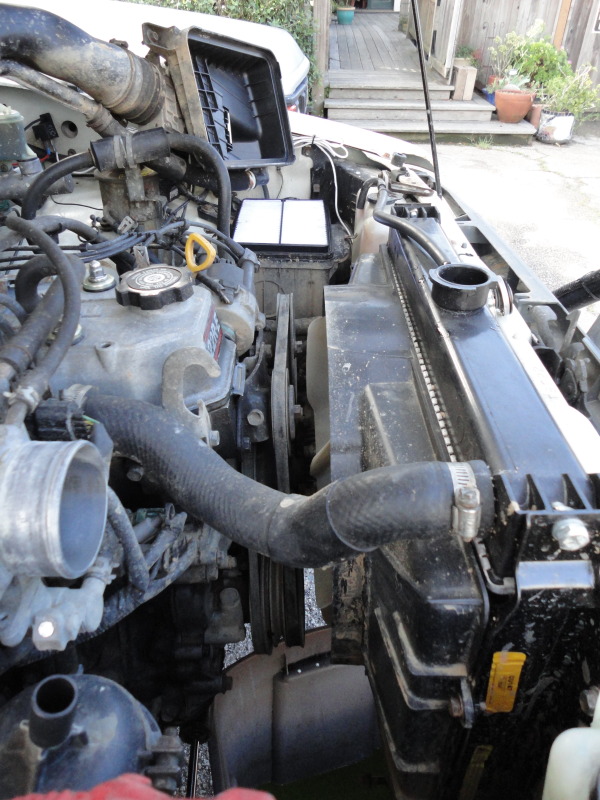
(Step 6)
Unclamp the TOP and BOTTOM radiator intake / outflow lines, and... REMOVE RADIATOR!
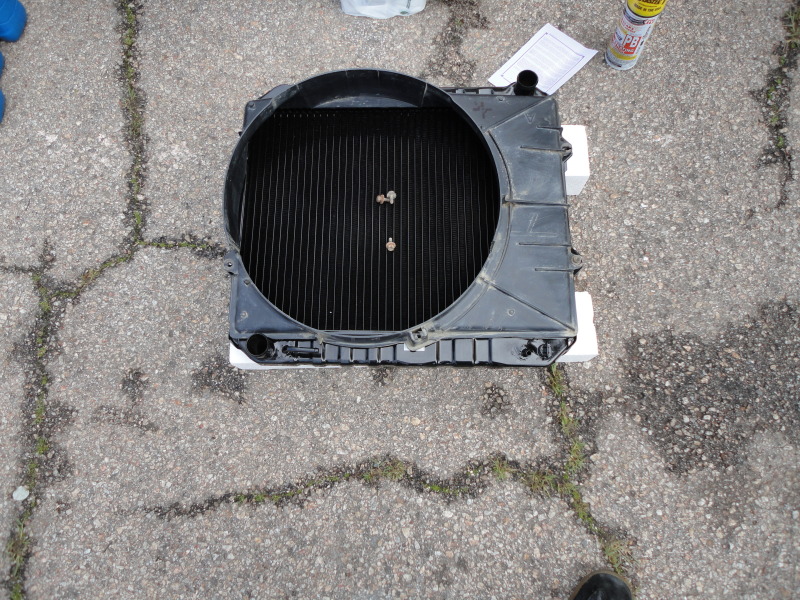
(Step 7 OPTIONAL)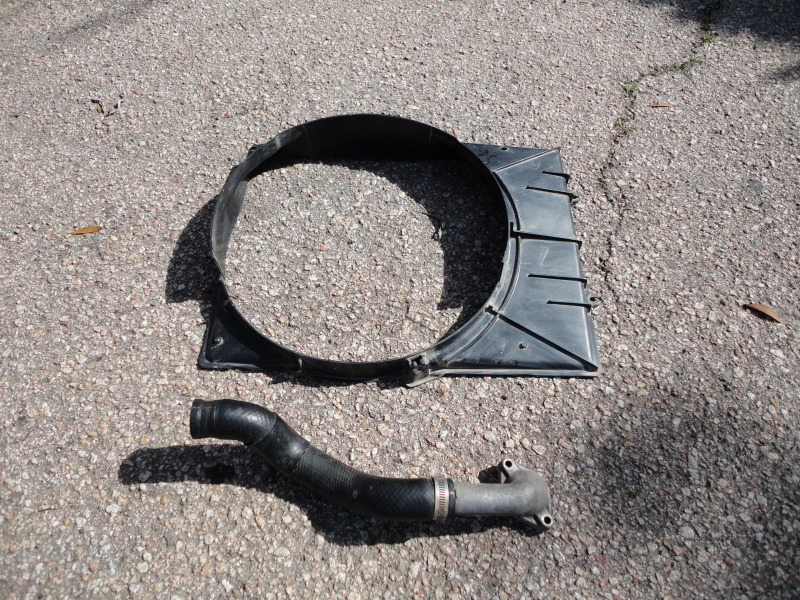
Unbolt and Clean your Intake Hose / T-Stat housing / Fan Shroud.
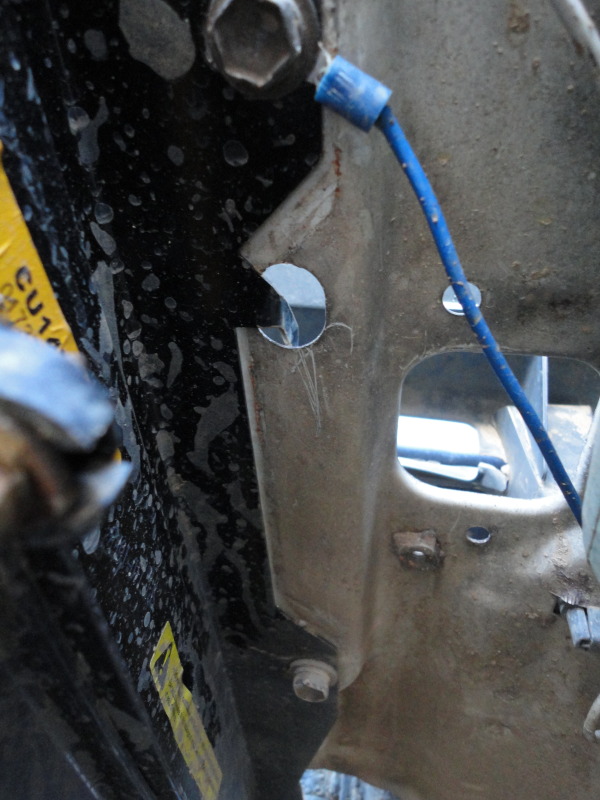
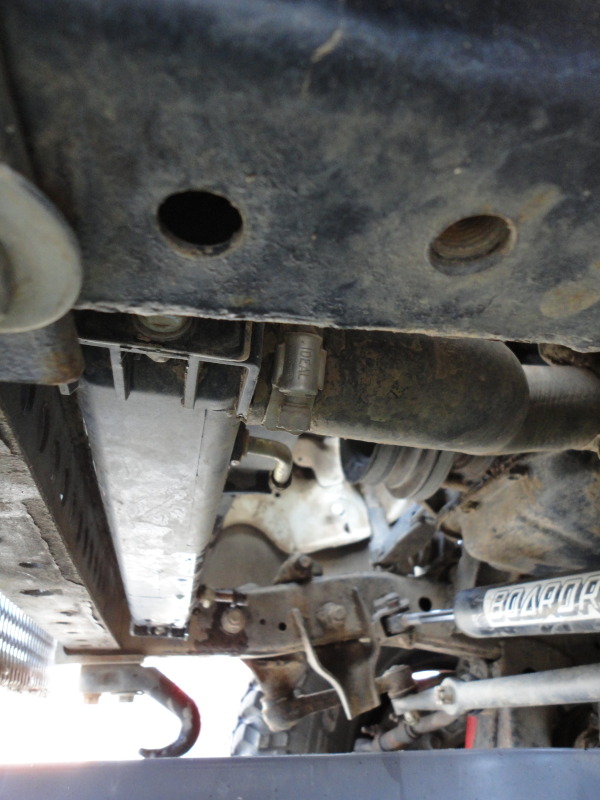
(Step 8 OPTIONAL 'T-JOINT' INSTALL)
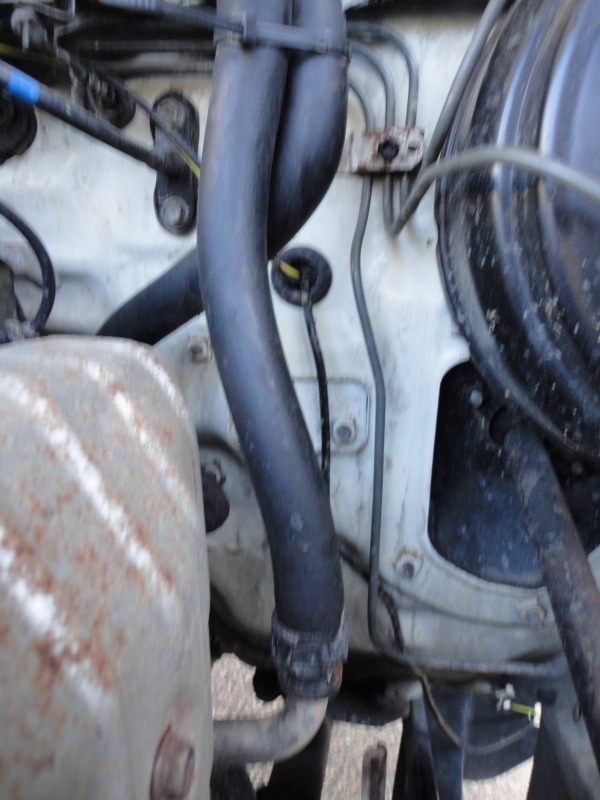
The line on the LEFT is the Highest point of the Cooling System, and is difficult to 'burp'. By inserting a T-Joint with a Cap, you can easily add extra coolant to deep in the line and burp the system more effectively.
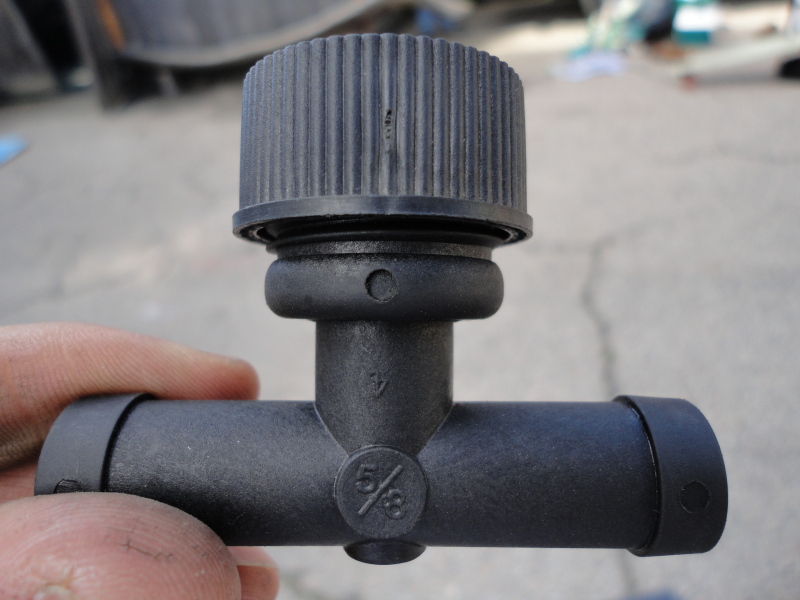
I used a 5/8th T, and inserted it thusly.
(Step 9)
Re-Bolt the Intake Hose/ Thermostat Housing line, TORQUE TO 14ft-lbs.
(Step 10)
Bolt Fan Shroud to New Radiator. (note the length of extension required for the Drivers Side Lower Bolt!)
(Step 11)
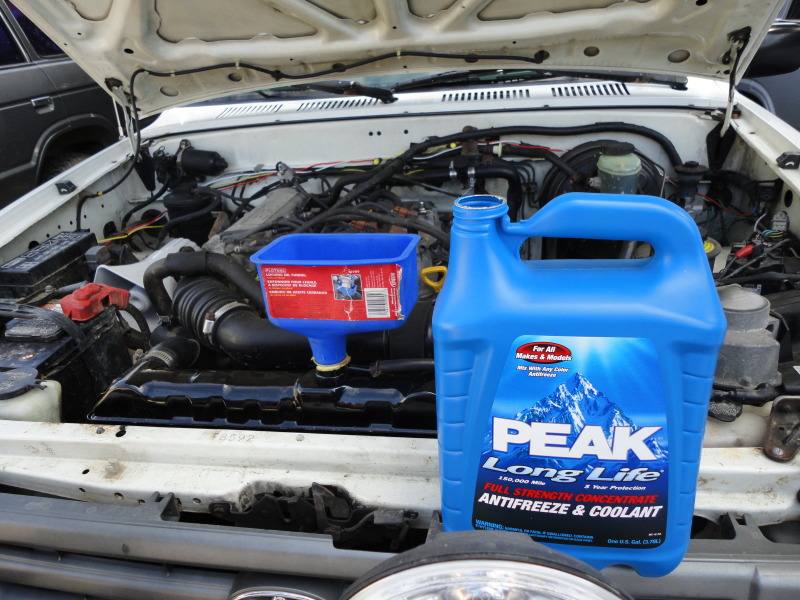
Fill with Coolant SLOWLY, Continually squeezing the lower Radiator hose for 'burping' the air bubbles out!
(Step 12)
Start truck/4runner/celica. Turn on HEATER to FULL, and watch temperature gauge. Take for test drive. Enjoy!
Watch out for any...
I'll do my best to cover all the things I did, and every tool used!
Required Parts!
Radiator (obviously! Preferably a CSF 3-Row Metal, heh heh)
New Radiator Cap!
OEM Thermostat. (Opening at 80-103'f)
OEM Thermostat Gasket.
2.2 U.S. Gallons of AntiFreeze (Non Diluted)
T-Joint (Optional)
Required Tools!
PB BLASTER liquid Wrench (Or similar)
10-14mm Wrench and Socket Set (Deep/Regular)
2-3 2'in to 5'in Extensions for Socket Set.
Large Flathead Screwdriver
Utility Knife
Needle Nose Pliers
Small Channel Locks
(Step 0)
THE NIGHT BEFORE you plan to do this job... go outside and spray down ANY and ALL bolts you plan on taking off with the PB Blaster. This stuff works wonders with rusty old OEM Chassis and Engine hardware, and is a wicked degreaser too. AT LEAST spray the two 12mm Water Intake bolts where the thermostat lives... because if you don't, you could break one... like I did. And Enjoy a 135$ fix or a extra 3hr Helicoiling / Taping experience!
(Step 1)
Remove the x4 12mm Bolts Holding the Skid Plate On!
(Step 2)
---AND---
Open Radiator Cap, Purge contents with either the Lower hose or the Purge Valve.(Step 3)
Remove the two 12mm Thermostat Housing / Water Intake pipe bolts, and remove old thermostat (you can choose to completely disconnect this pipe now, if you want)
(Step 4)
Disconnect the 10mm clam on the Air Intake line from the Airbox, and plier off the Clamp of the little bauble lookin' thing bellow it, and move out of the way for ease of removal.
At this point, you should have an engine bay looking like this! VVVVV
(Step 5)
Remove the 4 12mm Bolts holding the radiator to the front cab crossmember. BE AWARE!
Some radiators are not supported once these bolts are loose and could fall the the floor! Make sure you catch it!(Step 6)
Unclamp the TOP and BOTTOM radiator intake / outflow lines, and... REMOVE RADIATOR!
(Step 7 OPTIONAL)
Unbolt and Clean your Intake Hose / T-Stat housing / Fan Shroud.
(Step 8 OPTIONAL 'T-JOINT' INSTALL)
The line on the LEFT is the Highest point of the Cooling System, and is difficult to 'burp'. By inserting a T-Joint with a Cap, you can easily add extra coolant to deep in the line and burp the system more effectively.
I used a 5/8th T, and inserted it thusly.
(Step 9)
Re-Bolt the Intake Hose/ Thermostat Housing line, TORQUE TO 14ft-lbs.
(Step 10)
Bolt Fan Shroud to New Radiator. (note the length of extension required for the Drivers Side Lower Bolt!)
(Step 11)
Fill with Coolant SLOWLY, Continually squeezing the lower Radiator hose for 'burping' the air bubbles out!
(Step 12)
Start truck/4runner/celica. Turn on HEATER to FULL, and watch temperature gauge. Take for test drive. Enjoy!
Watch out for any...

The following 2 users liked this post by _RaStA_RoCkEt_:
hybridchemistry (01-02-2022),
RAD4Runner (05-07-2020)


Thread
Thread Starter
Forum
Replies
Last Post
LittleUgly
86-95 Trucks & 4Runners (Build-Up Section)
15
01-02-2020 01:30 PM
justdifferentials
Vendors Build-Ups (Build-Up Section)
14
06-11-2017 08:36 PM
Dale Johnston
86-95 Trucks & 4Runners (Build-Up Section)
11
10-31-2015 10:22 PM
1965chevy
86-95 Trucks & 4Runners (Build-Up Section)
1
09-20-2015 07:33 PM


