Toyota Tundra: How to Install Amplifier Power Wire
Get the most out of your amplifier by giving it power the right way. This article will show you how.
This article applies to the Toyota Tundra (2000-2015).
So you've just bought an aftermarket amplifier and you've got your head unit and speakers all hooked up, but how do you power the thing? An amplifier takes a lot more power than what can run through your head unit or speakers, so it needs to be hooked in directly to the truck battery. The rest of this article will show you how to properly power and ground your amplifier and how to route the wiring through your truck.

Materials Needed
- 4 - 10 gauge wire (wire size depending on the current draw of your amplifier)
- Inline fuse holder with fuse (fuse size depending on wire size)
- Ring terminals
- Phillips head screwdriver
- Flat head screwdriver
- Drill with a wire brush attachment
- Wire stripper and wire crimper
- Soldering iron and solder
- Electrical tape or heat shrink wrap
- Zip ties
Deciding on wire and fuse size depends on how powerful the amplifier. For most aftermarket amplifiers, a 10 or 8 gauge wire with 25 or 50 amp fuse will be more than sufficient.
Step 1 – Set up the inline fuse
Whenever you're doing electrical work, you should always disconnect the battery first. For this project, disconnect the negative and then the positive battery cables. The power wire should have an inline fuse attached. Cut a strip of wire no longer than six inches. You're going to need to solder one end of your inline fuse holder to the smaller wire and the other end to the rest of the power wire.

To solder a wire, you first strip away the wire cover so you can see the bare copper wiring inside. Then, twist the two wires you'll be soldering around each other so they're properly entangled. Then, you apply the solder to the two wire ends which will melt the wires together. After that, wrap electrical tape or heat shrink around the bare copper. This is especially important for wires in the engine compartment where they will be more exposed to the environment.
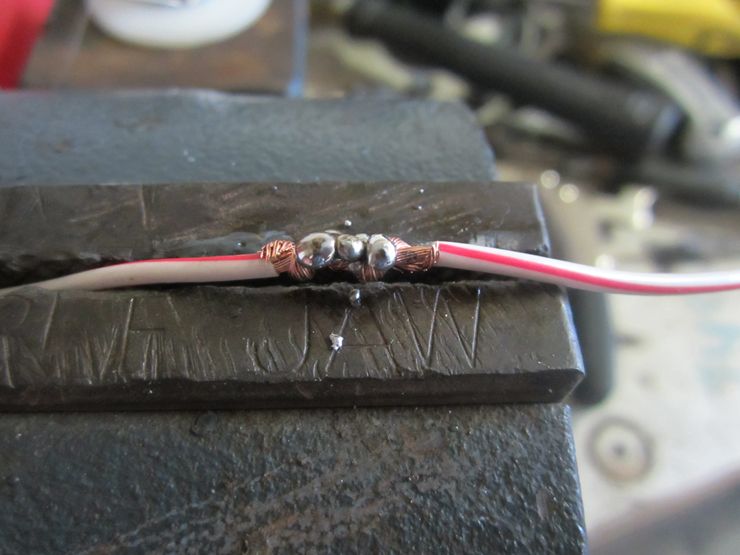
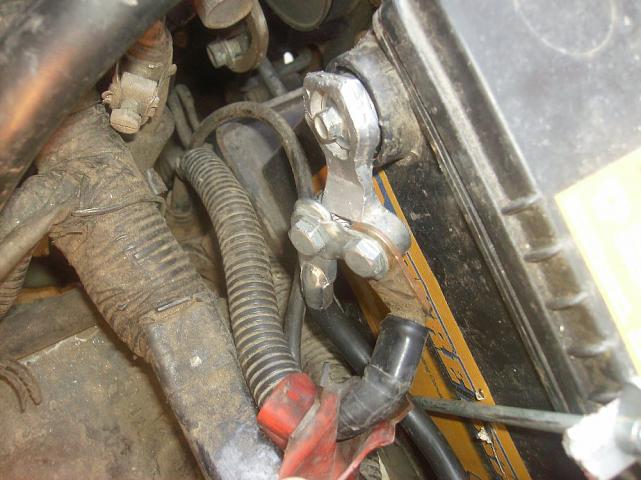
Once you have the inline fuse holder attached to your power wire, go ahead and insert the fuse. Then, take the other end of the short wire, strip the cover, and slide a ring terminal over the end. Use your crimp tool to crimp the terminal with the wire. Give it a tug to make sure the terminal is firmly attached. Take the ring terminal and attach it to your positive battery cable.
Step 2 – Route your power wire to the amplifier
You now need to get your power wire across the truck to wherever you've mounted the amplifier. If you want to keep your engine bay looking clean and prevent the power wire from dangling, you should use zip ties and tie the wire up.
Warning
Be careful what you tie it to. Some parts get very hot when the engine is on and could melt the wire.
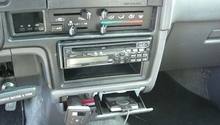
There will be a rubber grommet on the driver's side and the passengers side of the firewall. You may need to poke a hole through it first. Once you have your wire routed into the cab, you'll need to start prying loose the kick panels, the door trim and the column panels. These are all relatively easy to pry loose. Start routing the wire behind where the panels will go. It may be necessary to pull up some of the carpet as well. Once you've got the power wire to the amplifier, cut the wire and crimp on another ring terminal. Then, attach the terminal to the amplifier.
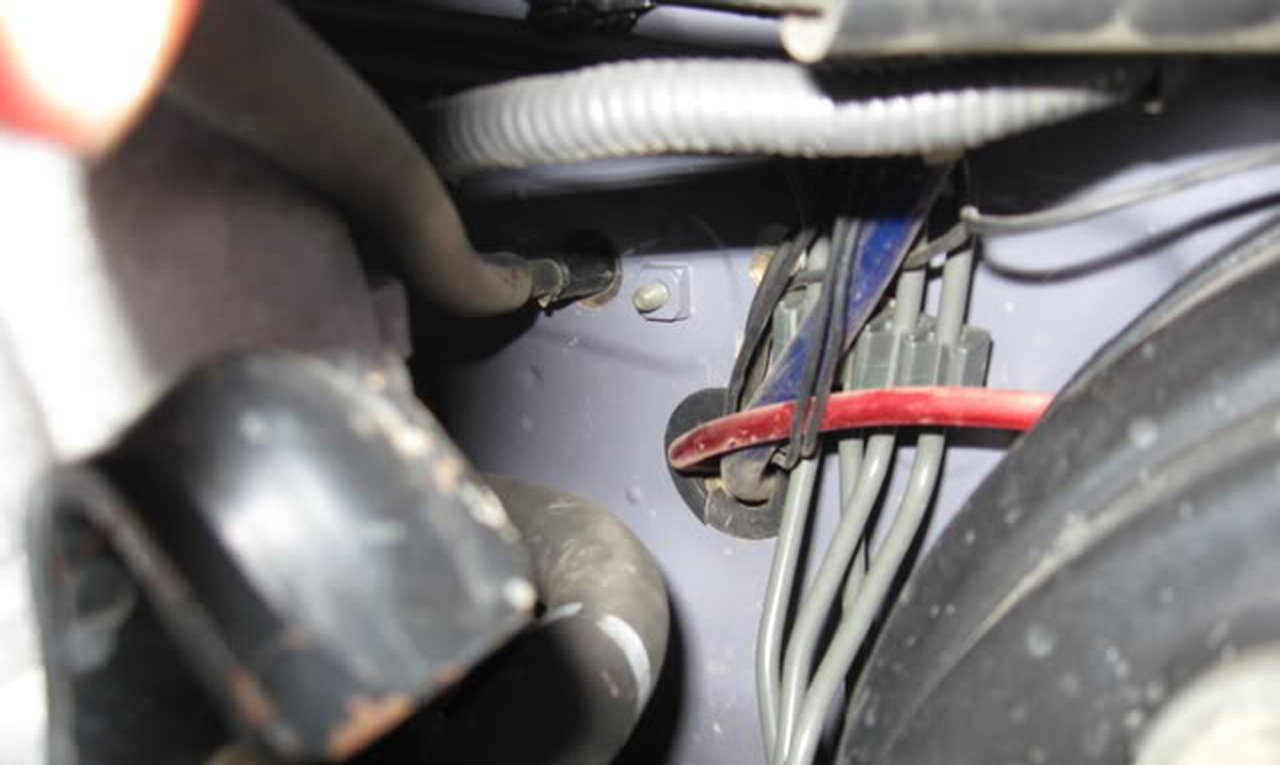
Figure 4. Pass your power wire through the grommet in the firewall. 
Figure 5. Route your wiring under the door trim for a clean looking install.
Step 3 – Connect the ground wire
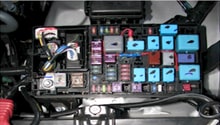
You still need to connect a ground wire to your amplifier if you ever want it to actually work. Find the closest ground point to the amplifier. This is typically a bolt that goes directly to the truck's chassis. If you can't find one, you'll have to drill one yourself. Make sure that the ground point is touching nothing but bare metal. Remove any paint with a wire brush.
Once you have your ground point, prepare another strip of wire with two more terminals. Attach one terminal to the ground and the other to the amplifier. Make sure that the ground terminal is tightly screwed down. A loose ground can cause all sorts of problems with an audio system.

Once you have your amplifier's power and ground wires connected, it's time to reconnect the battery and give the amplifier a try. If you have any problems, recheck your power and ground connections and your fuse.
Related Discussions
- Installed amp/sub & new door speakers, battery dead in the morning - YotaTech.com
- Aftermarket radio install no rear speaker - YotaTech.com
- How to run power wire from battery to amp - YotaTech.com
- Amp/sub install - YotaTech.com
- Stock head unit & amp wiring - YotaTech.com