Toyota Tacoma: How to Install Heated Side Mirrors
Just because your Tacoma didn't come from the factory with heated side mirrors doesn't mean you can't have them! Check out our DIY guide on installing heated mirrors on your truck.
This article applies to the Toyota Tacoma (1996-2015).
Heated side mirrors are one of those little luxuries that you never knew you needed until you see them in action. But when things get foggy or icy outside, it's a nice little feature to have and it gives you one less thing to worry about when you're trying to brush off snow or scrape ice off your windshield. Even if you didn't have the foresight to buy a truck with factory installed heated side mirrors, you can swap a set onto your Tacoma. All it takes is the better part of an afternoon and a laundry list of parts.

Materials Needed
- Toyota Highlander or Sienna mirrors (one left and one right)
- Highlander mirror switch
- Highlander mirror switch plug
- Toyota or Sumitomo terminal leads (5)
- 10 amp fuse tap
- SPST or SPDT relay and plug
- 14-16 gauge quick splices, butt connectors, and 1/4" ring terminals
- .110" 16 gauge female spade connectors
- .187" 16-22 gauge male and female connectors
- 30" 16 AWG primary wire
- Heatshrink tubing
- Wire crimping tool
- Needle nose pliers
- Phillips head screwdriver
- Flat head screwdriver
- Panel removal tool
- Zip ties
- Electrical tape
- Coat hanger
- Scissors or knife
- Torx bit driver/wrench
- Dremel
- Vice grips
- 10mm socket
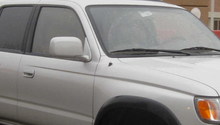
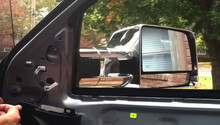
Step 1 – Remove the factory mirror glass
Pop the hood and disconnect your battery before getting started, which will prevent any "shocking" surprises later on. Press down on the top of your side mirror gently until there is a gap on the bottom. Slide a flat head screwdriver into the gap and pop the mirror glass out from the mounting plate.
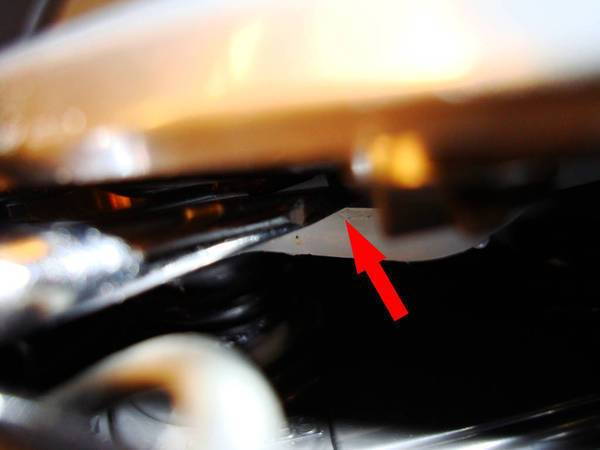
Figure 1. Push down on the side mirrors and insert a flat head screwdriver to the point shown. 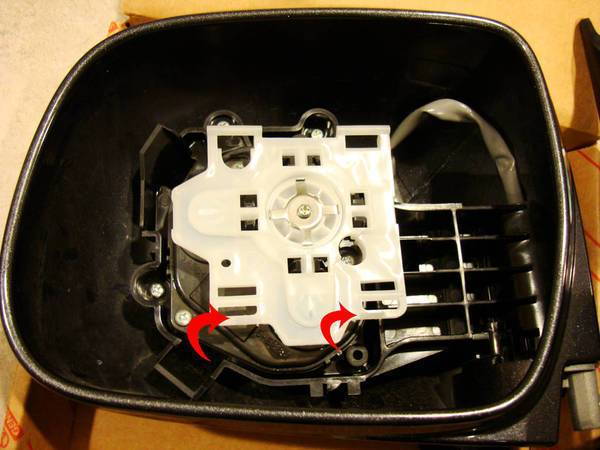
Figure 2. A better view of the white mounting tabs.
Step 2 – Prepare/modify new mirrors for installation
If you are using the Sienna mirrors, you can skip this step because the 2012 Highlander heated mirror glass is a direct replacement for the Tacoma. Otherwise, you must first remove the back plates from the mirrors and modify them to fit. Heating them with a heat gun or hair dryer makes them a little easier to remove, and a credit card can be used to pry the glass off the backers. Next, you will need to widen the hole on the Tacoma back plate to accommodate the terminal leads on the Sienna mirror using a Dremel or similar tool. Install the Sienna mirrors on the Tacoma back plates.
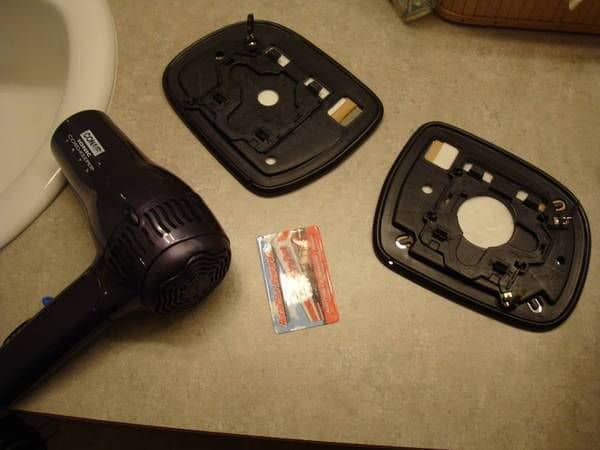
Figure 3. Remove the back plates from all the mirrors. 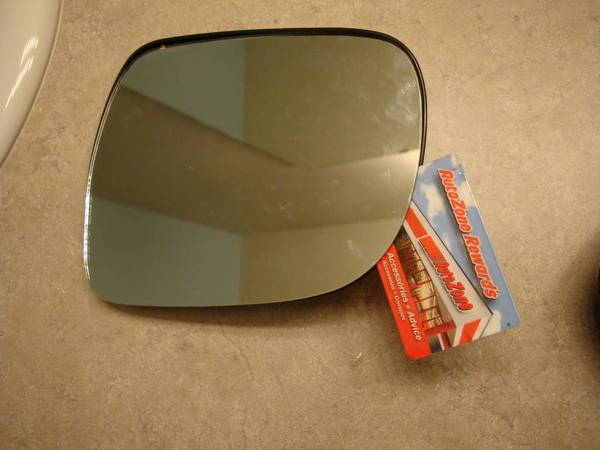
Figure 4. Remove the glass from the new mirrors. 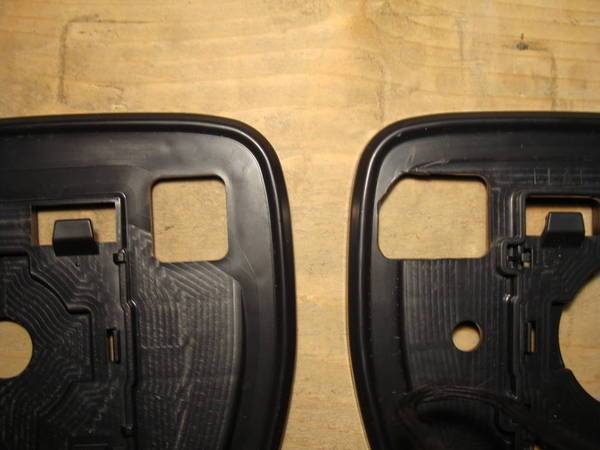
Figure 5. Widen the holes on the Tacoma back plates.
Step 3 – Assemble the circuit
Use the schematic in Figure 6 to properly wire up the relay for this circuit. Quick splices make this a much cleaner and easier job. You will need to splice into the dimmer wires from the fog light switch to connect the switch plugs. If desired, you can heat shrink these connections and solder them for a little more secure connection.
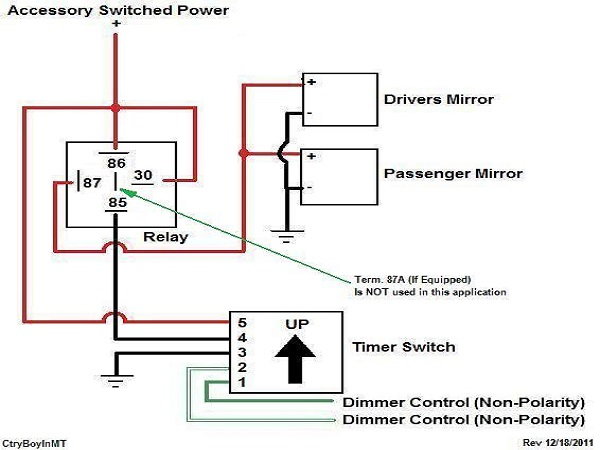
Figure 6. Use this schematic to wire up your relay. 
Figure 7. Use a quick splice, as shown, to speed up the process.
Step 4 – Run mirror leads
Remove the door panels, kick plates, dash, and glove box. Remove the speakers from each door and unplug the mirror plugs. Remove the side mirrors from each door, take them apart, and remove the plug cover. Connect the .110" female spade terminals to the Sienna mirror tab terminals and feed both leads through the shield. Crimp a 1/4" ring terminal on each 30" mirror ground lead, then ground each mirror to a bolt inside the door (see Figure 9). Feed the 12 volt mirror lead through the door into the cab.
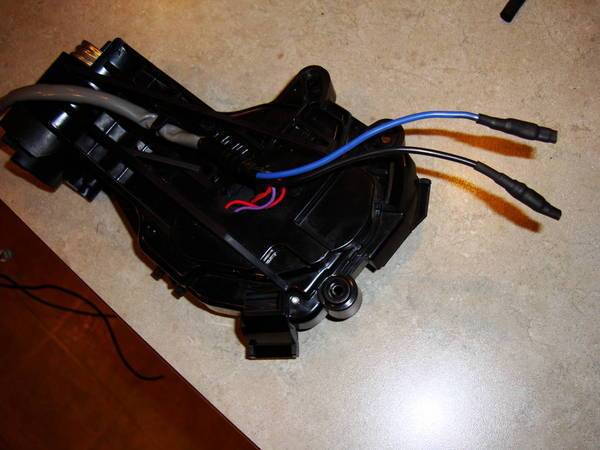
Figure 8. Connect the spade terminals to the tab terminals. 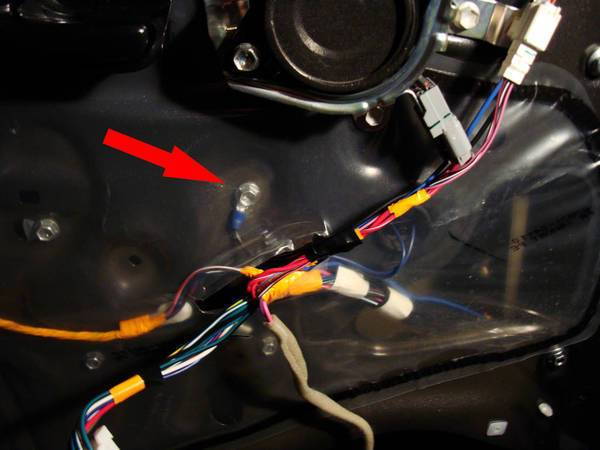
Figure 9. Ground each mirror to a bolt in the door.
Step 5 – Install the circuit
Mount the relay to the left of the brake pedal, where you will find an empty hole on a metal mount. Connect the driver's side lead into the plastic retainer of the hood clip cable (Figure 10). Use another quick connect splice to connect wire #5 (Figure 11). Secure the ground wire on a nearby metal plate and plug in the switch. Use the fuse tap to tap into the gauges fuse on the fuse box. Connect an 8" lead from the fuse tap butt connector to the quick splice from the #5 switch lead. Go back and make sure all wires are secure and zip tied out of the way, then reassemble your interior components and enjoy!
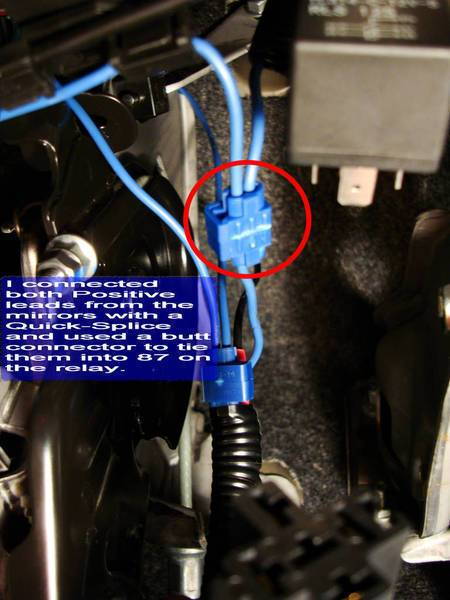
Figure 10. Connect the positive leads from the mirrors to a quick splice. 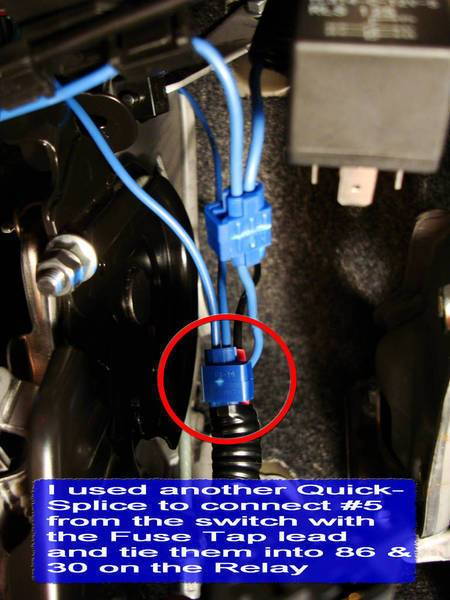
Figure 11. Connect the #5 wire from the switch to a quick splice. 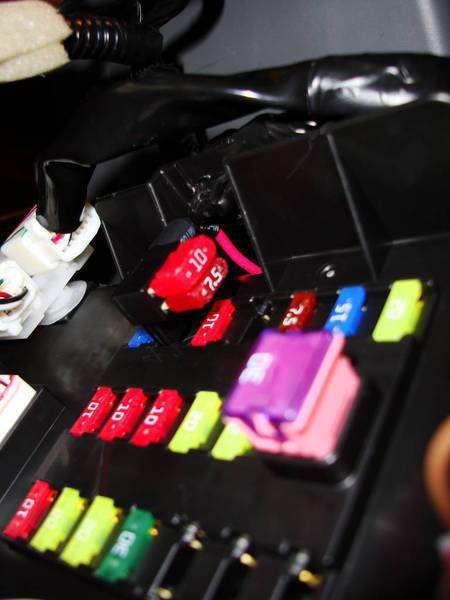
Figure 12. Connect the fuse tap to the gauges fuse.
Related Discussions
- OEM Heated Mirrors for 2nd Generation Tacomas - YotaTech.com
- 4runner Heated Mirrors Retrofitted to Tacoma - YotaTech.com
- How to Make Heated Rearview Mirror - YotaTech.com