Toyota Tacoma and 4Runner: How to Powder Coat Calipers
Powder coating is a great way to make these parts of your truck stand out, and it keeps them from rusting. This article will show you what steps to take before powder coating brake calipers.
This article applies to the Toyota Tacoma (1996-2015) and Toyota 4Runner (1984-2002).
So you just got your brand new set of calipers, but the color just doesn't quite go with your truck. What do you do? Do you paint it or powder coat it? Powder coating has several advantages over painting. Powder coating creates a much more durable finish than paint and it's less prone to chipping. This is especially important if you're working on a part that will be receiving plenty of punishment, like the brake caliper. We'll be going over how to powder coat brake calipers, but you can follow these steps for just about any part.

Materials Needed
- Powder coating powder and gun
- Electric oven (not one used for food)
- Ratchet with socket set
- Breaker bar
- Flat head screwdriver
- Hammer
- C-clamp
- Metal hanger
- Air compressor
- High temperature tape
- Silicone plugs
- Degreaser
- Denatured alcohol
- Clean cloth
- Protective eyewear and gloves
The proceeding steps will assume that you have already removed the calipers or have not yet installed them to your truck. If you need to remove them, check out the article Tundra 231mm Brake Upgrade.
Step 1 – Disassemble the caliper
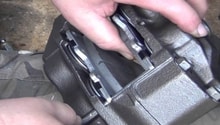
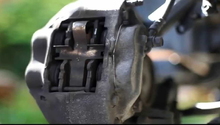
Before you can spray on the coating, you need to remove all the smaller and moving parts on the caliper. This means removing all of the bolts, pins, retaining clips, and of course the brake pads. You'll also need to remove the pistons and seals from the caliper. The seals can be pried off once the pistons are out, but the pistons will not be nearly that easy.
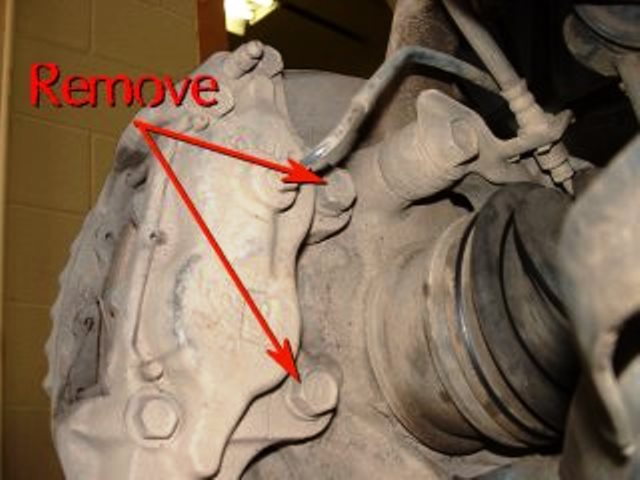
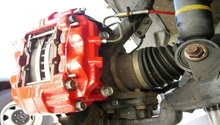
Figure 1. Remove and disassemble the caliper. 
Figure 2. Exploded diagram of Tacoma 4-piston caliper.
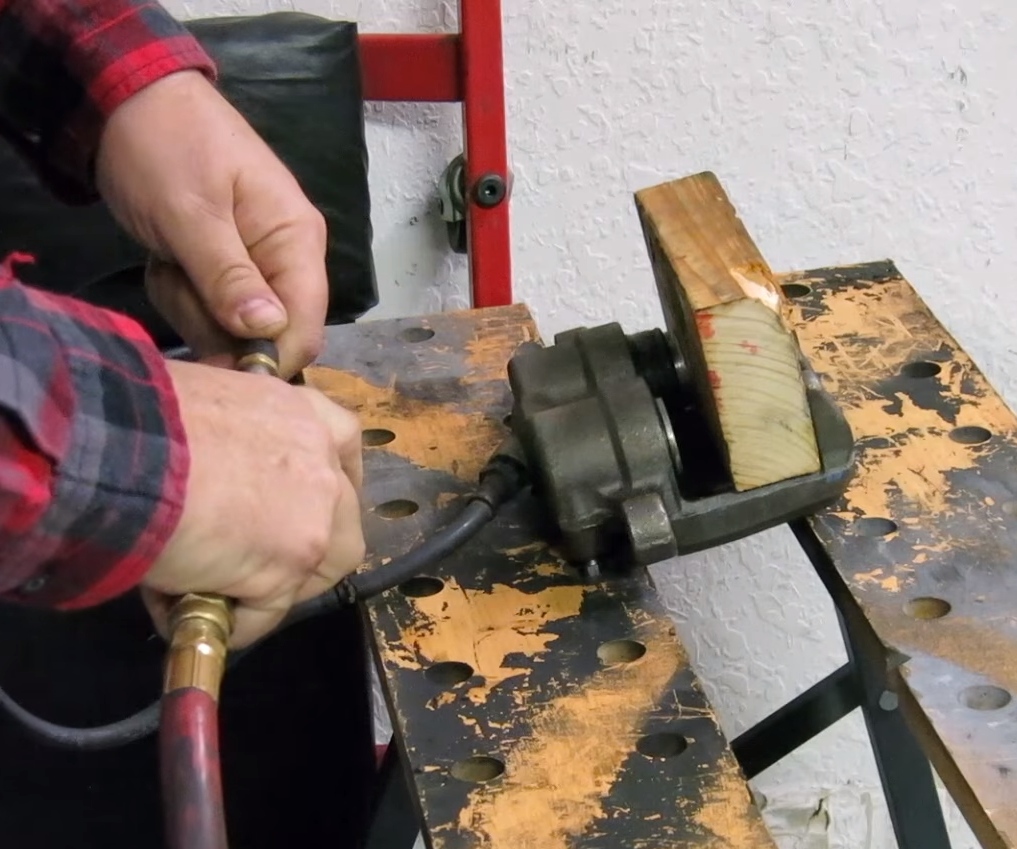
There are a couple different ways you can remove the caliper pistons. If you haven't disconnected it from the brake line already, you can pump the brakes to push the pistons out enough to remove them. Or, you can use an air compressor to force air through the brake caliper and push out the pistons. If you use an air compressor, make sure that you have a block of wood or something to stop the pistons from launching out of the caliper. When you're finished disassembling, all you should have left is the big metal lump that is the main portion of the caliper.
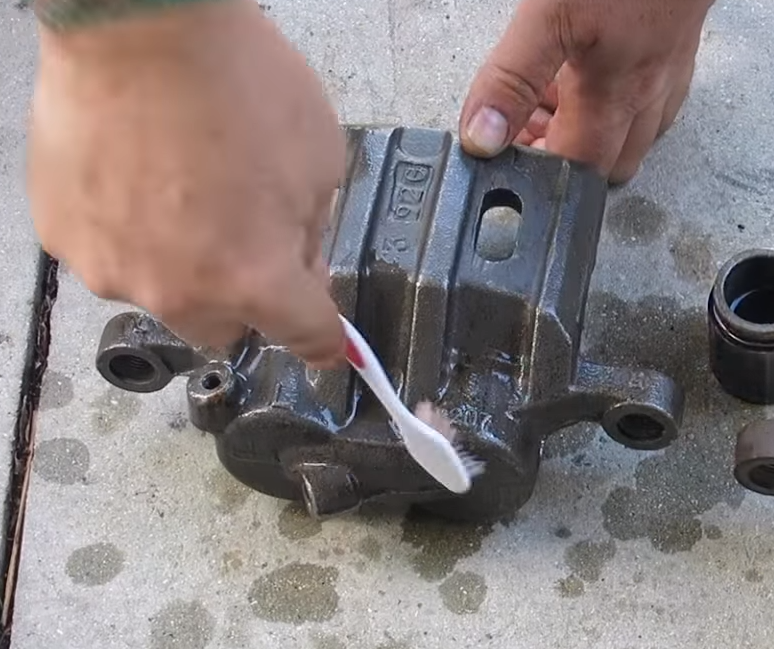
Step 2 – Cleaning the caliper
For the powder coating to stick and look good, the caliper needs to be as clean as possible. You'll first want to make the caliper is as smooth as possible. The best method for doing this is sandblasting the caliper, but not everyone will have access to that kind of equipment. You may want to use a wire wheel mounted in a drill, or your bench grinder.
Once you have it smoothed down and rust free, you should wipe the caliper down with soap and water, then scrub it as much as you can. For harder to remove stains use a degreaser. Put the caliper in the oven and let it warm for about 30 minutes at 400 degrees Fahrenheit. This will cause all the oils inside the caliper to boil up to the surface. Scrub the caliper a second time until it's spotless and free of residue.
Step 3 – Powder coating the caliper
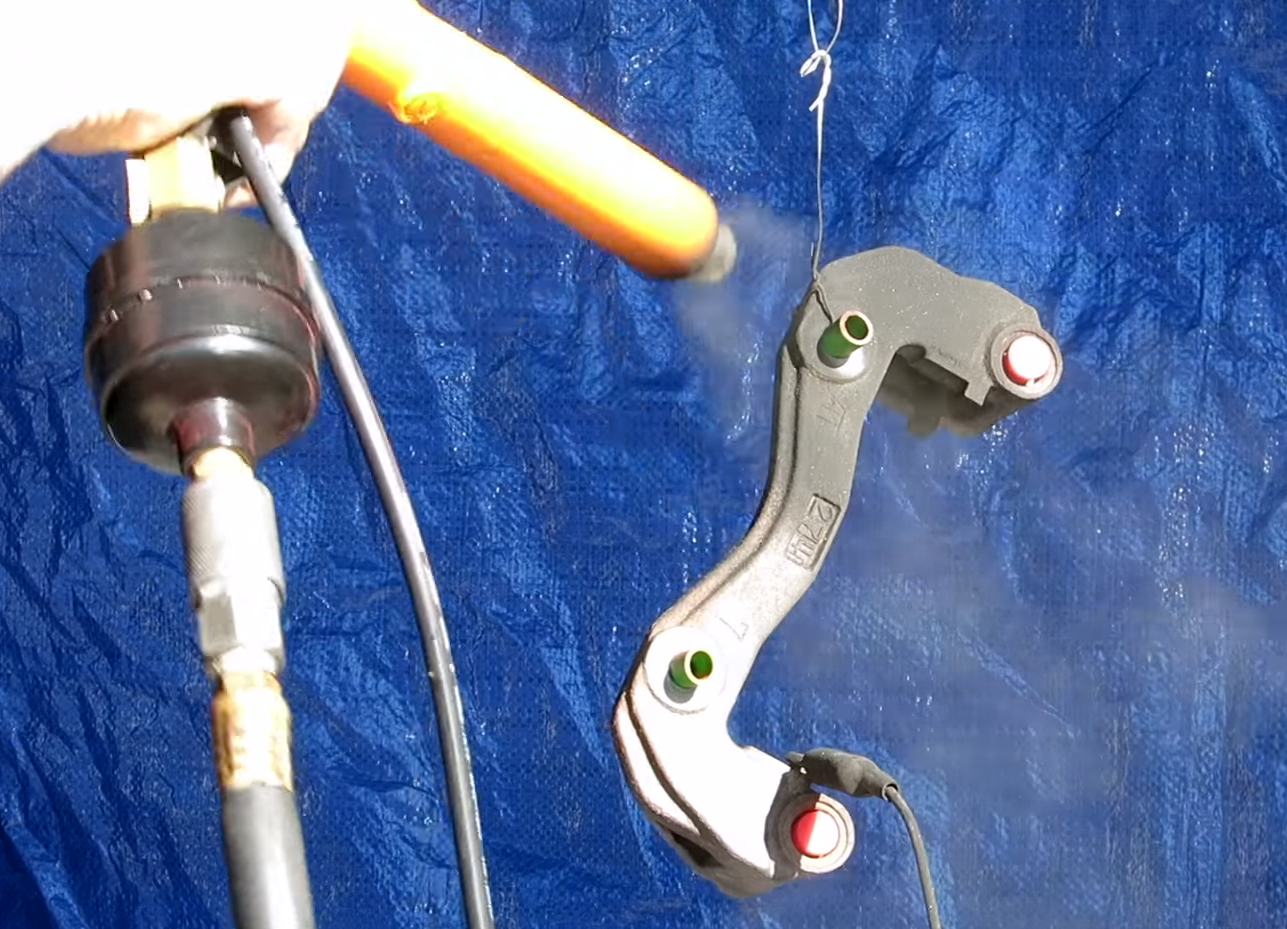
To prepare the caliper for coating, you should first cover piston holes so the coating doesn't get inside and cause problems. Then you'll also need to plug in the holes for the pins and brake fluid with silicone plugs. Hang up the caliper so you can properly coat it from all angles.
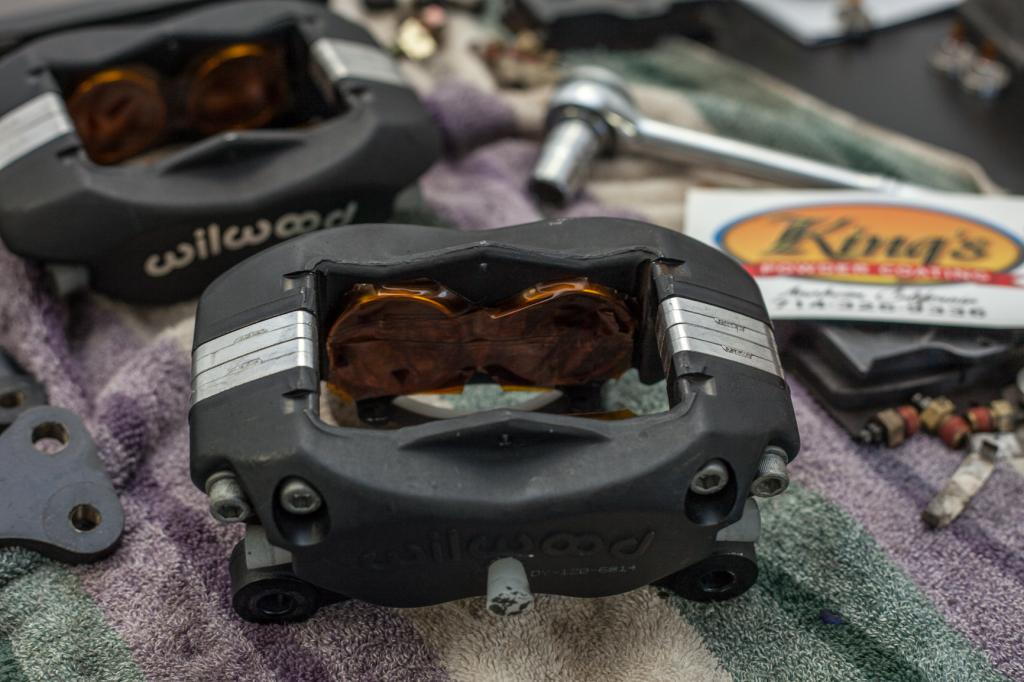
In order to make the coating stick to the caliper you'll need to give the caliper an electrostatic charge. Your powder coating gun should've come with a charger. Clip one of the charger wires to the caliper, and plug in the coating gun and charger. Attach your desired powder canister. Connect your air compressor to the gun and set it to the psi recommended for the gun. Give the caliper a charge, then start spraying the powder onto the caliper. Be sure to go around the caliper to get all of it coated.
Pro Tip
If you want add a name or make to your caliper, you can use a stencil and spray on a different powder over the stencil.
Step 4 – Curing the powder coat
Set the oven to the curing temperature recommended for the powder. Carefully place the piece in the over, making sure not to bump it or touch it, otherwise you will have to coat it again. Hang the caliper with your coat hanger inside the oven. Let the coating cure for 15 to 20 minutes. Then take it out and let it cool for a while. Remove the tape and plugs, then reassemble the pistons and pins. Reinstall it on the truck and bleed the fluid. That's it, you've just powder coated your brake calipers.

Warning
Do not use the same oven you cook food in to cure the powder coating. The powder fumes will get into the food and make it toxic.
Featured Video: How to Powder Coat Brake Calipers
Related Discussions
- Tundra Brake Upgrade - PC'd My Calipers High Gloss Red - YotaTech.com
- Tundra Brake Upgrade FAQ - YotaTech.com