Toyota Tacoma: Brakes Diagnostics Guide
There are a few components that can go wrong and affect your Toyota Tacoma's brake system. Read on to learn how to diagnose brake issues.
This article applies to the Toyota Tacoma (1996-2015).
As obvious as it may sound, the brake system is the most important system in the Toyota Tacoma when it comes to your safety. There are various components that can go wrong with your brake system: some will affect the feel of your brake pedal, some will affect the sound, and others may affect the performance of your brake system. If you feel there is anything wrong with your brake system, from squeaking to a spongy brake pedal, read on to learn how you can diagnose it yourself.

Materials Needed
- Flashlight
- Socket set
- Tire iron
- Jack
- Jack stands
Step 1 – Check for leaks
Your brake system could be leaking.
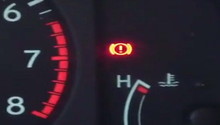
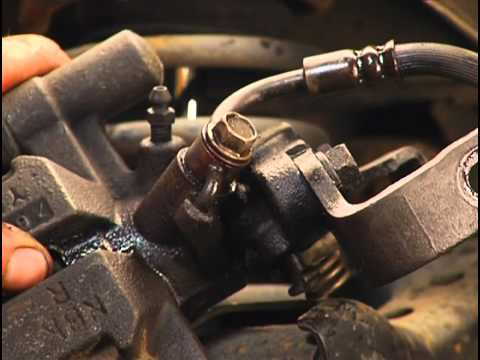
The brake system is a pressurized system. If you get any air altering that system, you will notice an immediate change in the brake pedal feel and a noticeable decrease in performance. The first step to take when trying to detect a brake leak is to check the master cylinder. If the brake fluid is low in the reservoir, then you obviously have a leak. Once you check the reservoir, use your flashlight to check the brake lines. Look at the connections between the lines and other components, such as the brake calipers. If you have a leak, you will have to change the leaking line, then bleed the brake system from air.
If you have no brake leak, proceed to Step 2.
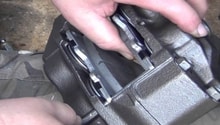
Step 2 – Check brake pads
They could be worn.
The brake pads' minimum legal thickness is 2mm to 3mm; anything less than that is considered illegal, and it could start harming your brake rotors. Worn brake pads are often accompanied with squeaking noises as the truck comes to a stop. As it wears out more, the squeaking and grinding increases, and at some point, it will sound like a high pitch whistle when you put your foot on the brake pedal. It's recommended you replace the brake pads as soon as they start wearing out, so you can save yourself from replacing the rotors as well. To inspect the pads, loosen the lug nuts on the wheel, raise the car, secure it with jack stands, and then remove the wheel. Remove the two bolts on the back of the brake caliper, then pull the caliper out. Check the brake pads' thickness, and replace if needed.
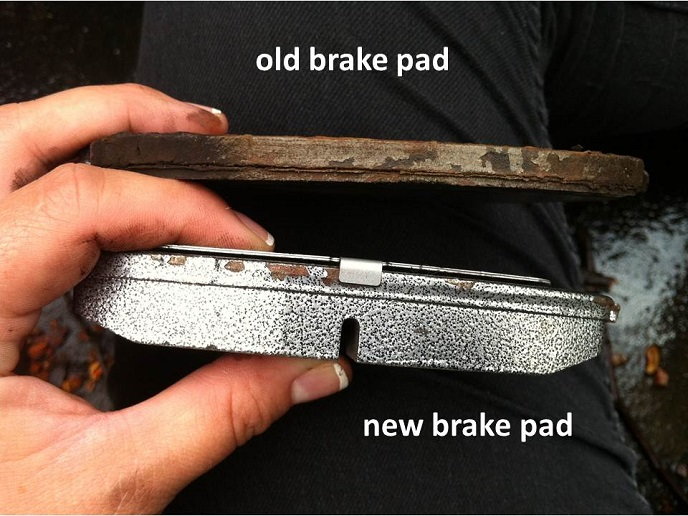
If the pads are thick enough, proceed to Step 3.
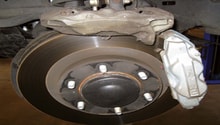
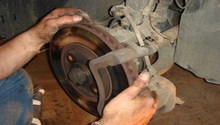
Step 3 – Check brake rotors
They could be cracked, grooved, or rusted.
Whether you waited too long to change the pads this time, or if you have grooved brake rotors, you will need to replace them. Bad brake rotors will make similar sounds as the brake pads, but with more of a grinding sound to it as the truck comes to a complete stop. To replace the rotors, once the calipers have been removed, simply tap on it with a rubber mallet until it comes loose. Then pull it straight out.
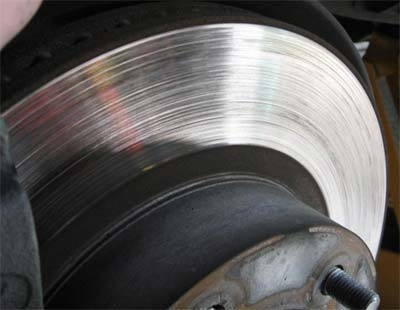
If the rotors are in good shape, proceed to Step 4.
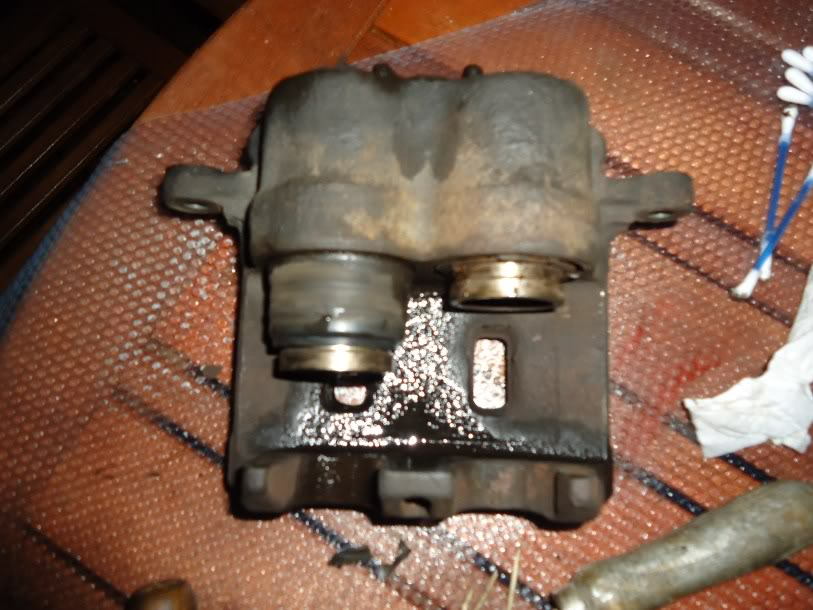
Step 4 – Check brake caliper
It could be stuck.
The brake calipers are not known to need changing; however, there is always the chance of a caliper's piston getting stuck. If one of your calipers' piston gets stuck, the brake pads will touch the rotor and consistently rub together. This will create awful sounds, unnecessary wear, and even a burning smell. It's crucial that you replace the bad caliper immediately, or else you will need to replace the pads and the rotor with it. To replace the pads, you will need to remove the line from the old one, and install it onto the new one, then bleed the brakes.
Related Discussions
- Strong Pull While Braking - YotaTech.com
- Vibration When Braking - YotaTech.com
- Brakes Dragging - YotaTech.com