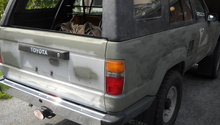
Toyota 4Runner: How to Plasti Dip Chrome Bumper
Spruce up the chrome bumper on your 4Runner using a wide selection of DIY paints.
This article applies to the Toyota 4Runner (1984-present).
Plasti Dip is a popular paint product that is made from rubber and works just like paint. It provides a flexible color coating that adheres to most surfaces, including the chrome on a Toyota 4Runner. Largely considered an 'easy' alternative to painting a car or truck, Plasti Dip is cheap, safe and requires no special applicators or tools. Simply purchase the color you want in the number of cans you need to complete the job using a steady, back-and-forth motion. If you mess up an area or simply wish to switch to a different color later on down the line, don't worry. Plasti Dip is just as easy to remove.

Materials Needed
- Plasti Dip cans
- Automotive cleaner
- Wax and grease remover (optional)
- Sandpaper (optional)
- Plastic covering
- Masking tape
Step 1 – Prep the bumper
Prepare your bumper for painting by cleaning it with an automobile cleaner. Follow with a few swipes of alcohol or a wax and grease remover, particularly if road film buildup is an issue.

Step 2 – Wet sand chrome (optional)
To ensure the strongest adhesion, it's recommended that you wet sand your bumper using high-grit sandpaper. Depending on the condition of your bumper, it's highly suggested that you start by using 1,500- or 2,000-grit sandpaper and then making any adjustments as needed. Wet sanding your bumper will 'rough up' your bumper for stronger adhesion and longer-lasting results once the paint is applied.
Pro Tip
- Some 4Runner owners avoid this step altogether, while others rely on it as a safe and effective way to achieve better results.
Step 3 – Apply at least four coats of paint
For chrome surfaces, you'll want to apply at least four coats of paint using a steady, back-and-forth motion. Allow each coat to completely dry before applying the next coat of paint. Apply 4-5 coats (minimum), and then allow the paint to cure for at least four hours. If possible, allow the paint to cure overnight.

Pro Tip
- It's highly recommended that you protect the areas around your bumper from stray paint by covering them with pieces of plastic (taped down) or strips of masking tape.
Step 4 – Remove the paint after dulling
Should you want to remove the paint from your bumper later on, all you'll need to do is grab hold of one corner and peel it back until it's completely removed. If a piece breaks off, don't worry. Simply grab another corner and start peeling. Specially formulated Plasti Dip removal products are on the market and cost approximately $20.

Pro Tip
- Many 4Runner owners swear by kite string, saying it's an effective way to lift dried Plasti Dip paint and remove it without much hassle.
Related Discussions
- Plasti Dip in the Long Run - Yotatech.com
- Removal Tips - Yotatech.com

