Toyota 4Runner 1996-2002: How to Replace Your Power Window Actuator
Here's how to replace a defunct power window actuator and get it moving once again.
This article applies to the Toyota 4Runner (1996-2002).
When your power windows decide to quit working, leaving you open to the elements (or unable to pay for your drive-through food order), the problem can be coming from a few different places – the motor, an electrical issue, or the actuator/regulator assembly. If you press the window switch and don't hear anything, your power window motor is probably bad or you might have a wiring issue somewhere along the line. If you press the switch and hear the humming sound, your motor is working, meaning that your actuator is probably the culprit. Here's how to replace the actuator assembly, an easy job that most anyone can do with a little effort and some basic tools.

Materials Needed
- Flat head screwdriver
- Phillips screwdriver
- Door panel removal tool or putty knife
- 10mm socket and ratchet
- Painter's tape
Step 1 – Remove door panel
- Begin by using a small flat head screwdriver to pry and loosen the door lock/window control panel.
- Disconnect the three wiring harnesses from the back of the control panel and set it aside.
- Use the screwdriver to pry the arm pad rest loose and pull it off.
- Use a Phillips screwdriver to remove the screw located behind the door handle and the two screws behind the arm pad rest.
- Push in the center of the pin located in the back of the door panel (Figure 4) and then pull it out. Pull the door handle out. Use a door panel removal tool or putty knife to pry the door panel off its retaining clips, working your way around the outside edges of the panel.
- Push in on the center of the pin located on the upper inside portion of the door panel and pull it out. Lift up on the door panel to remove it.

Figure 1. Remove the control panel. 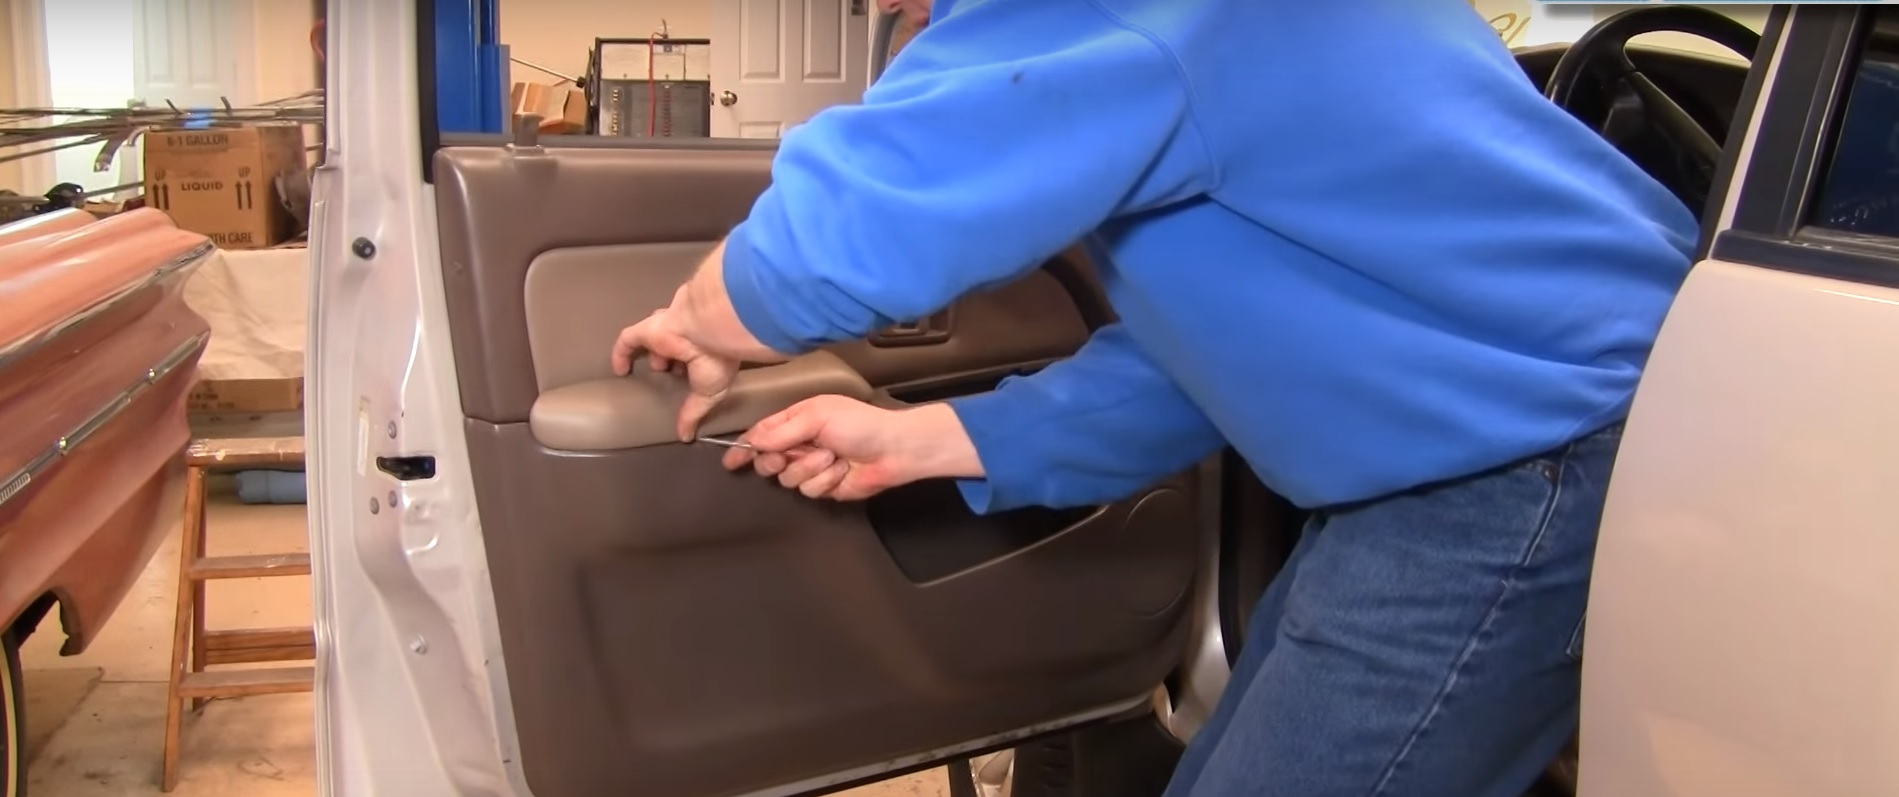
Figure 2. Remove the arm pad rest. 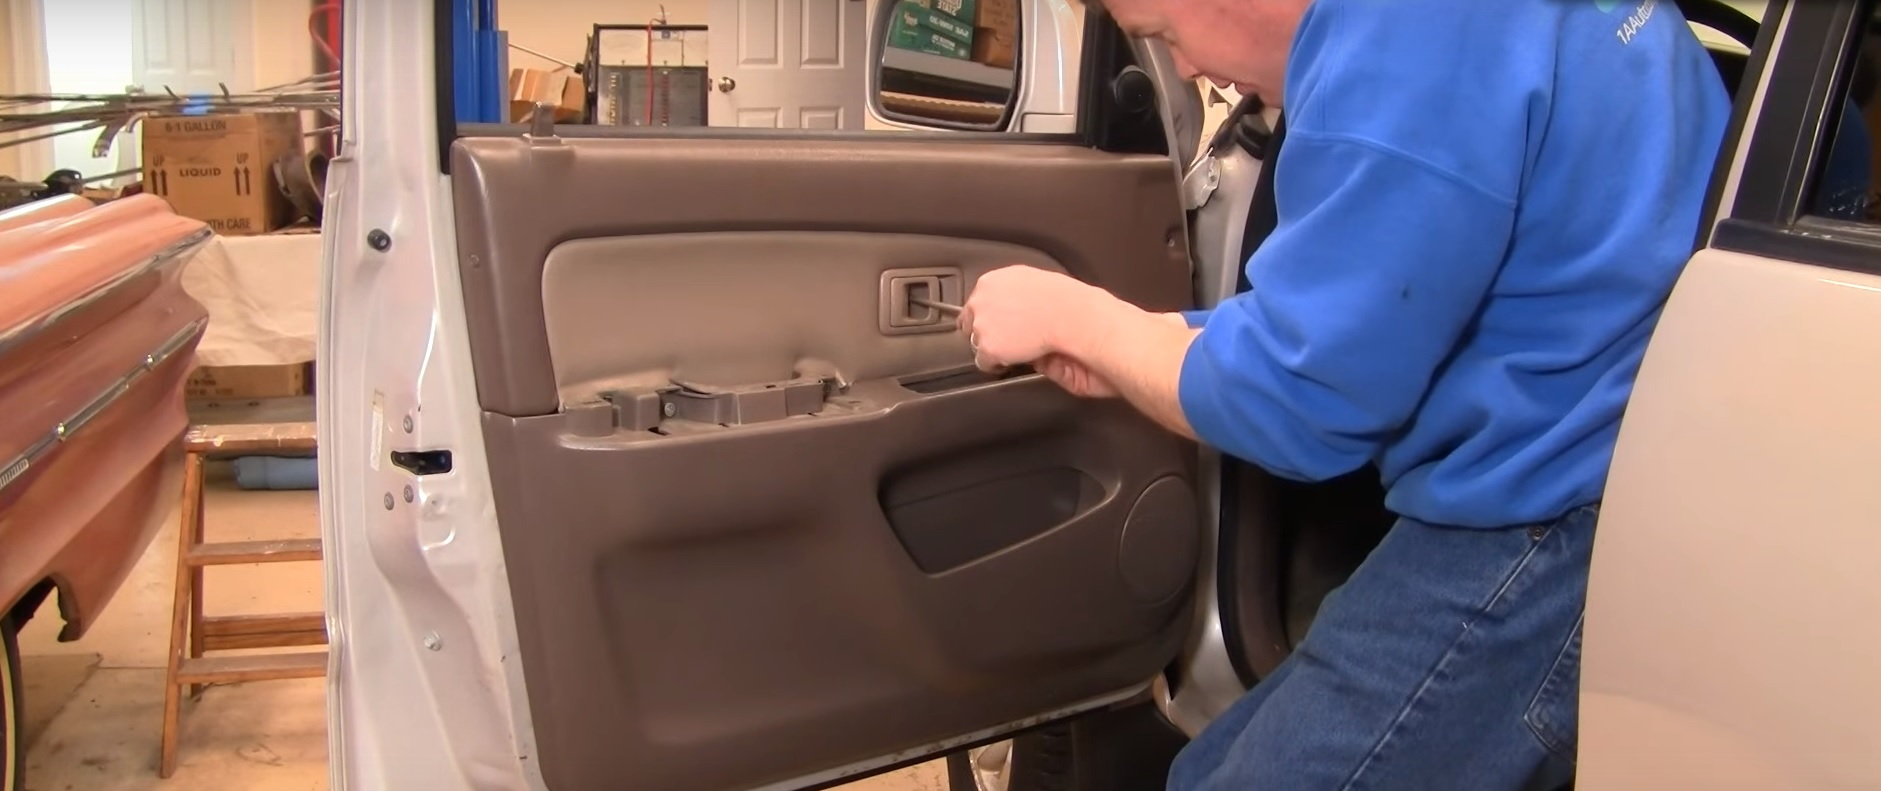
Figure 3. Remove the three Phillips screws from the door panel. 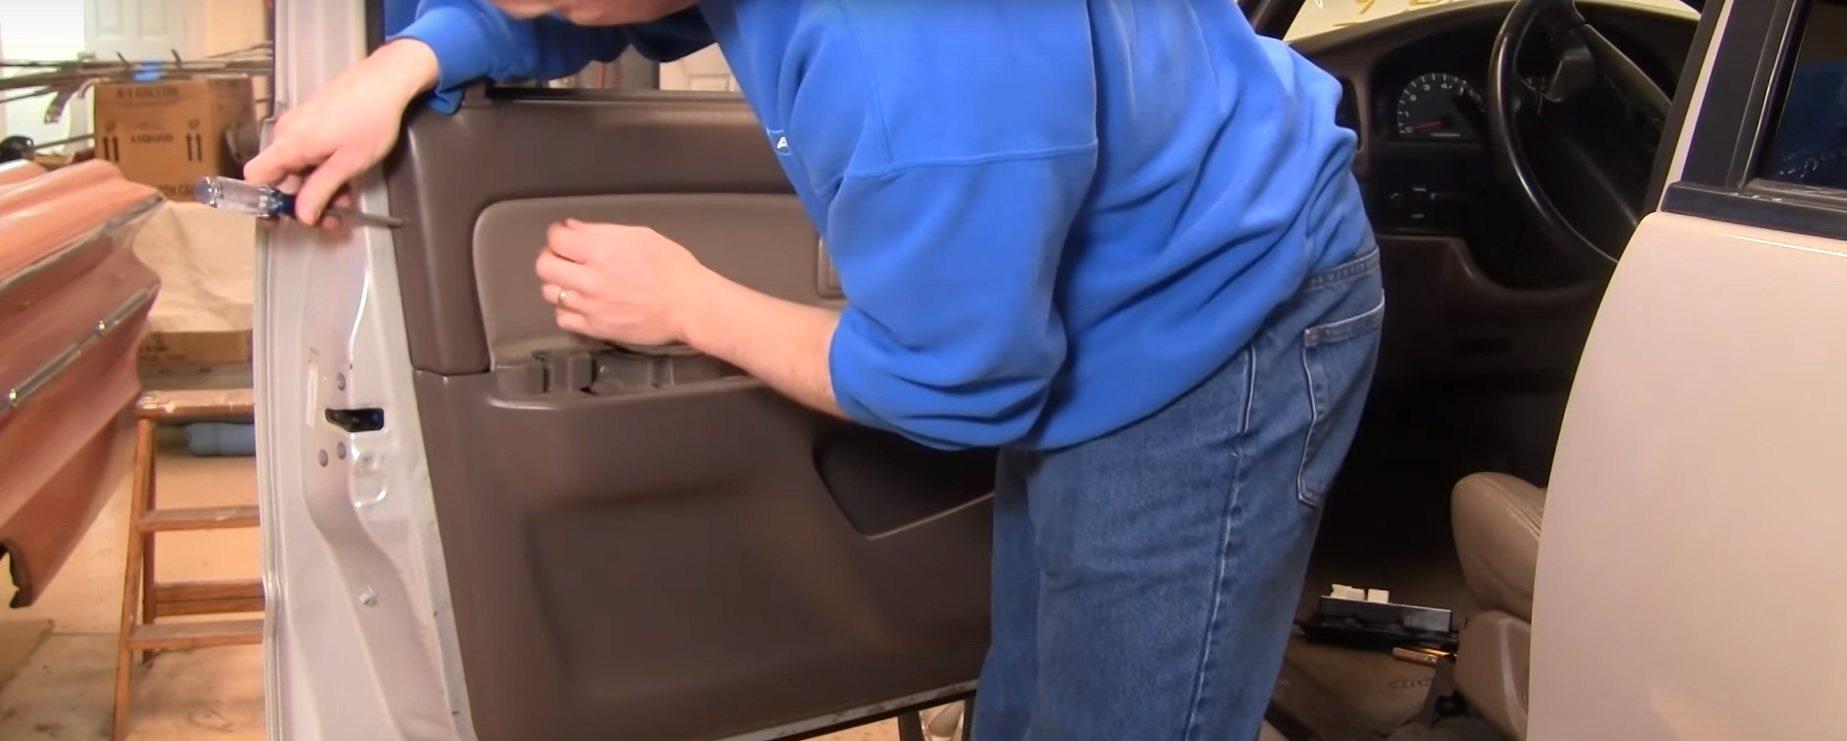
Figure 4. Push in on the center of the two pins, then pull the pins out. 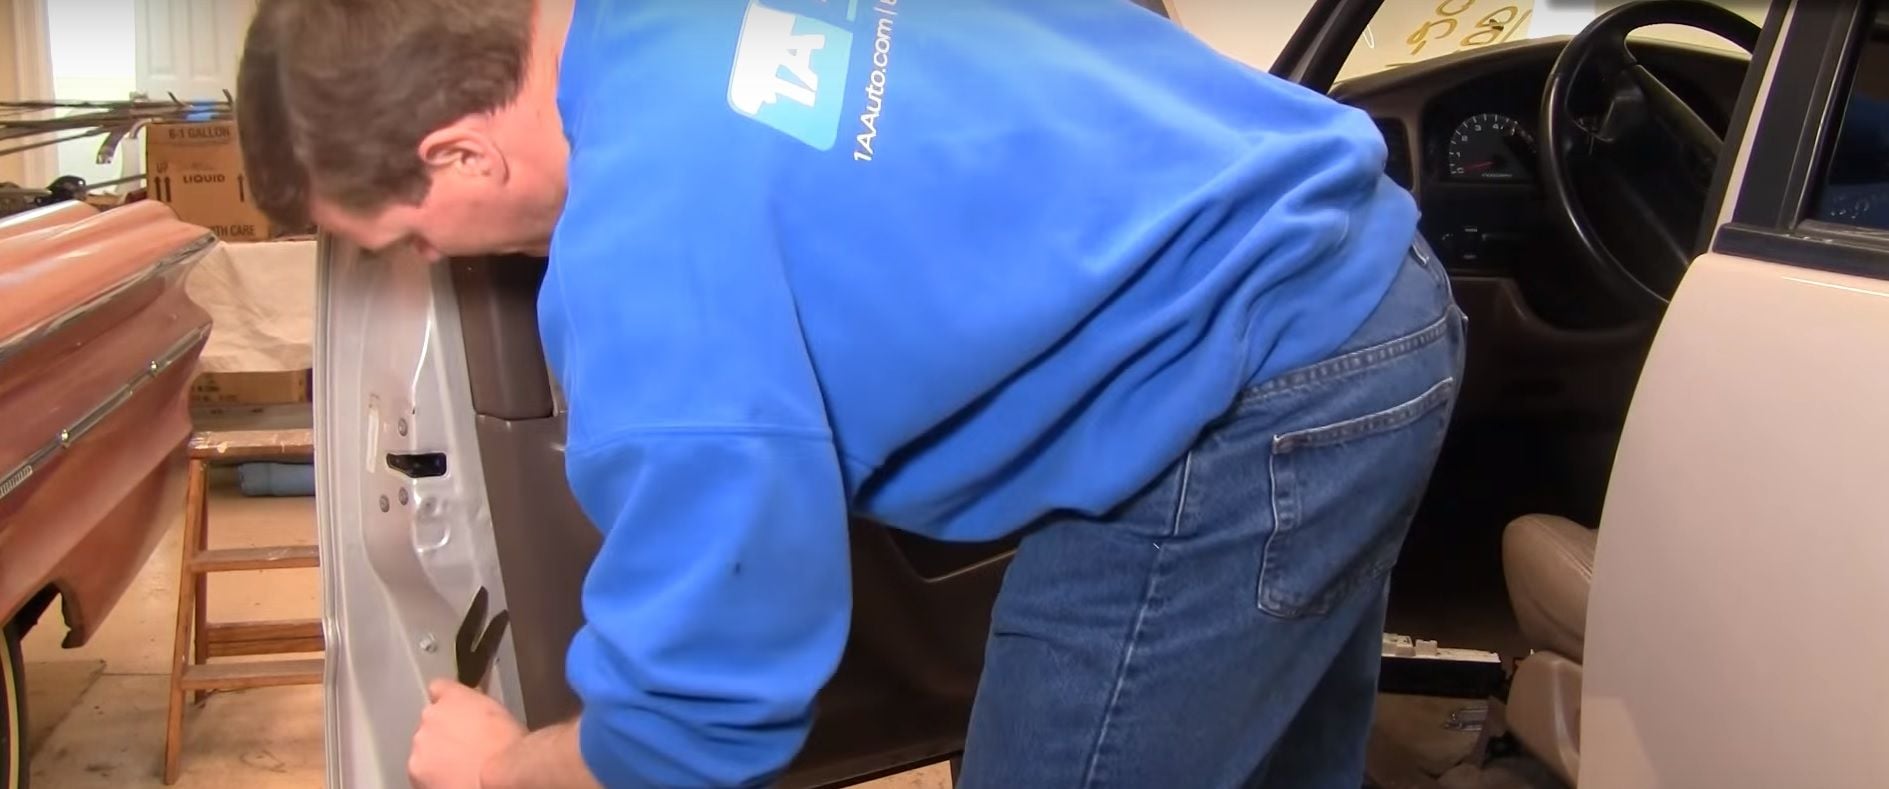
Figure 5. Pry the door panel loose, then remove it.
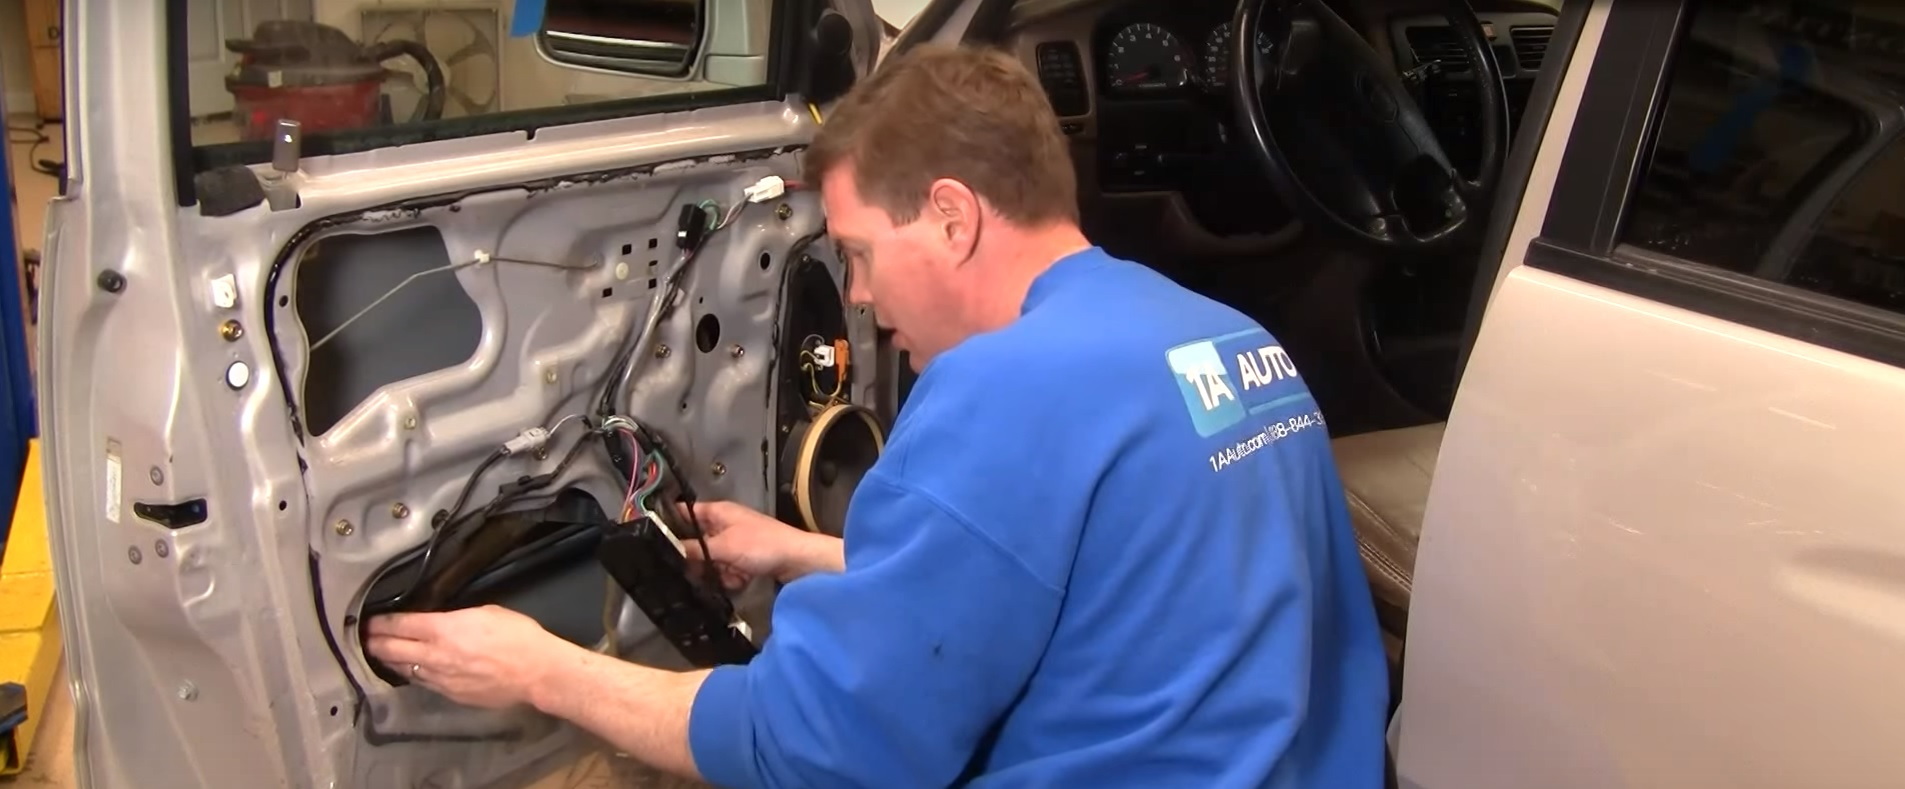
Step 2 – Remove window actuator
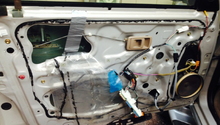
- Slowly peel off the plastic window shield, being very careful not to tear it.
- Disconnect the wiring harness located near the top of the panel.
- Use a flat head screwdriver to pry out the clips holding the wiring harness in place.
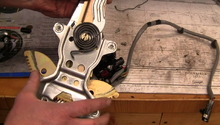
- Remove the six 10mm bolts holding the actuator in place, using your other hand to hold the actuator once you remove the last bolt so it won't fall down.
- Lift up the window and remove the two bolts holding the window track to the window.
- Pull the window all the way up and use painter's tape to hold it in place. Pull the actuator out of the door.
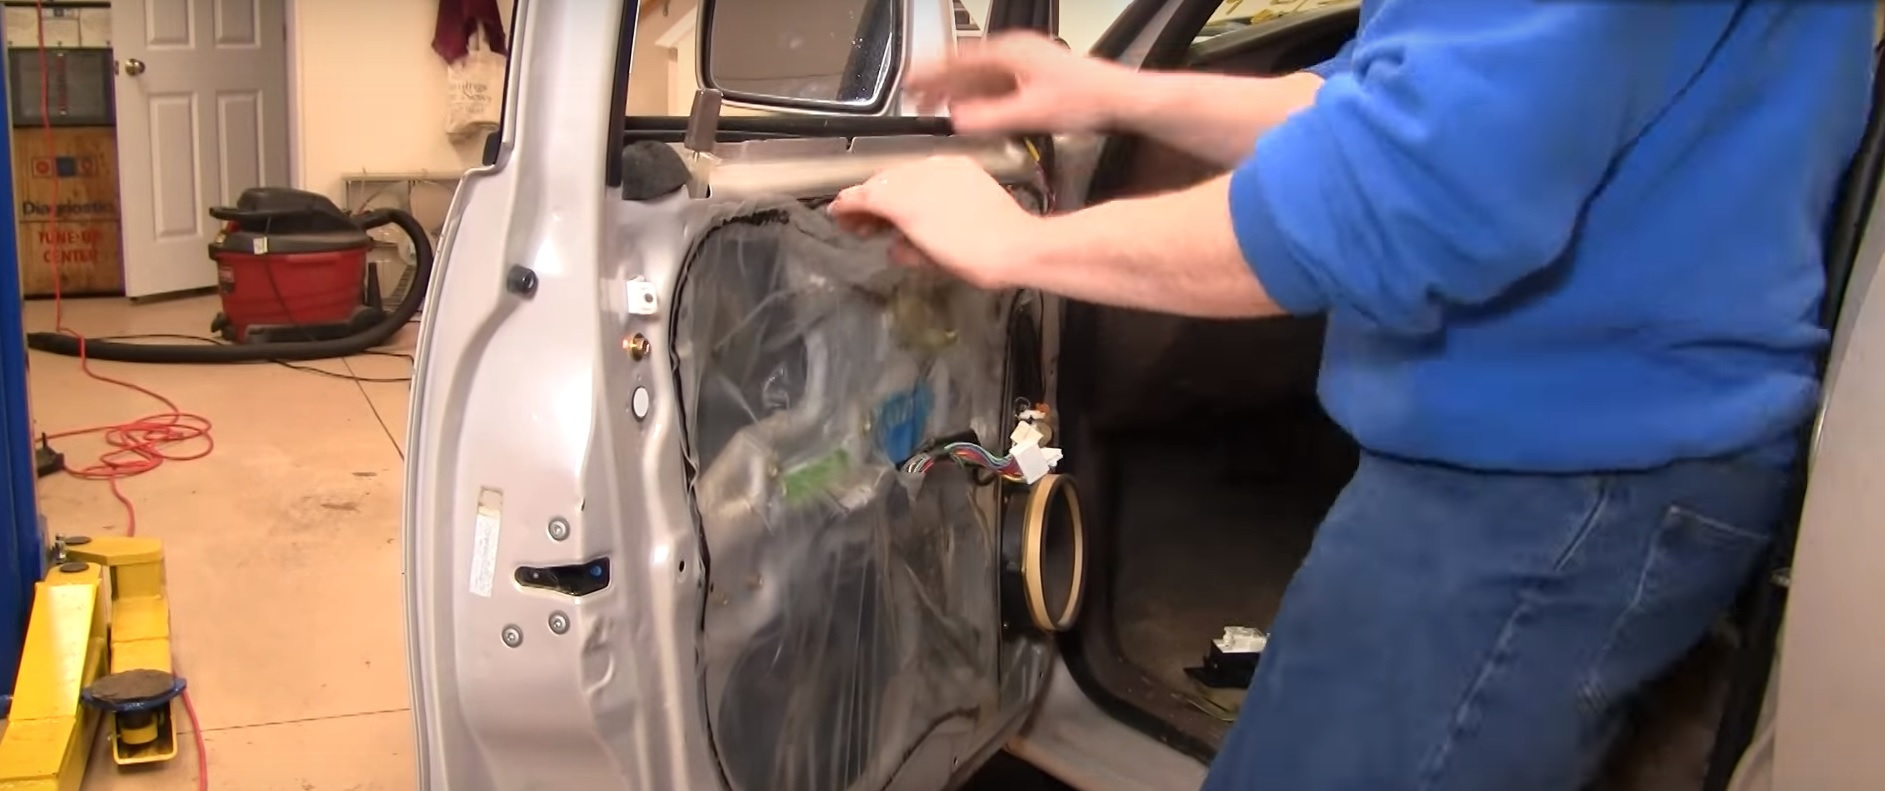
Figure 6. Carefully remove the plastic shield. 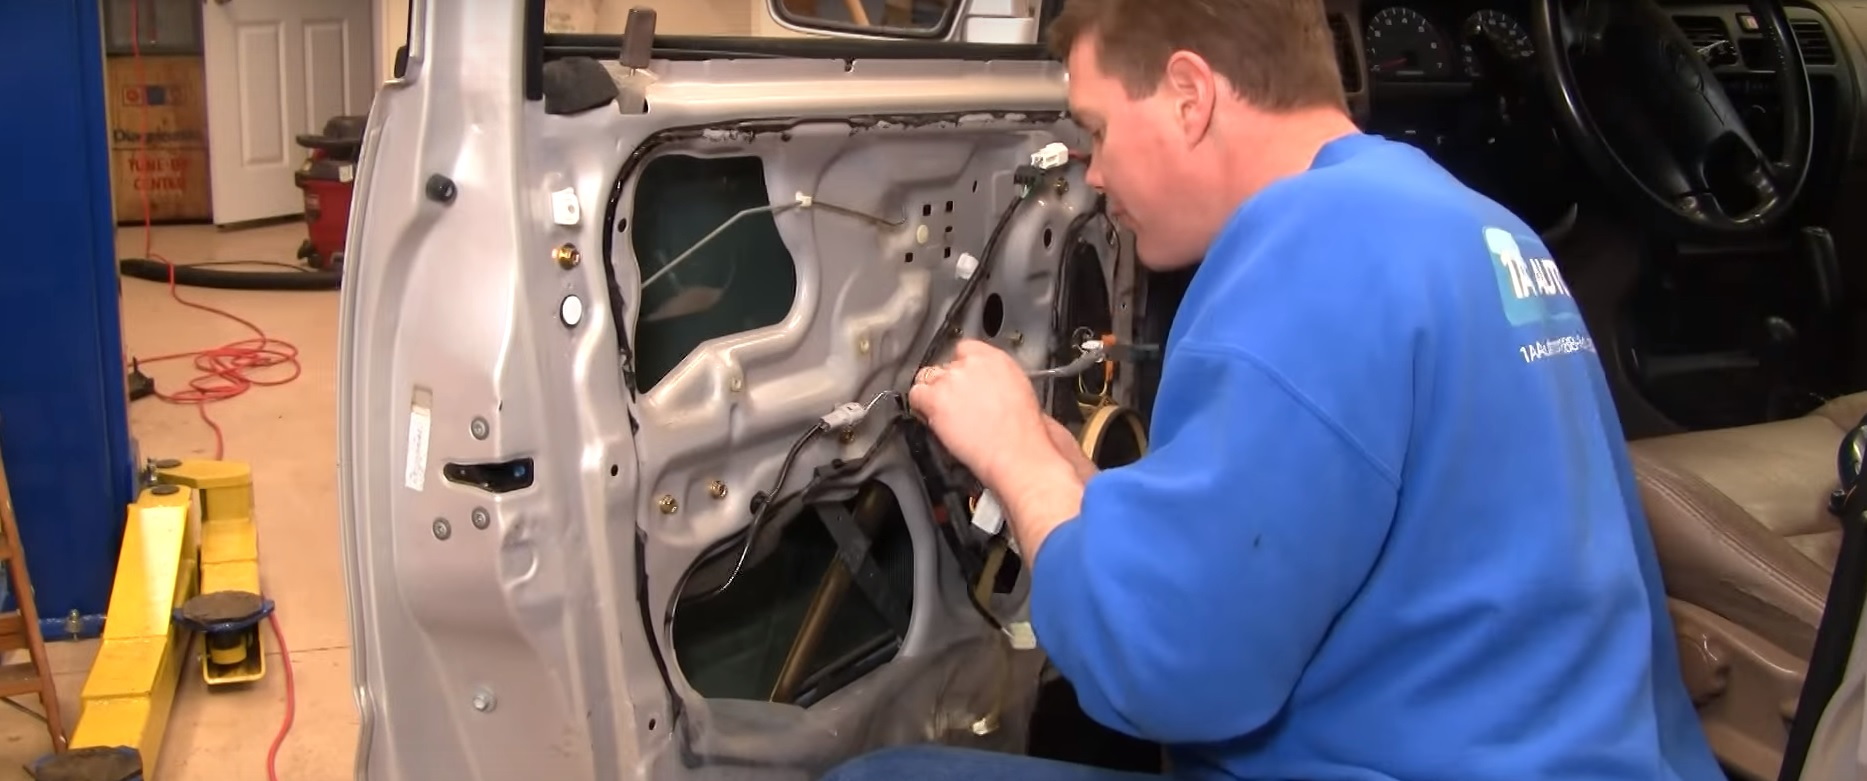
Figure 7. Disconnect the wiring harness, then pry the clips off. 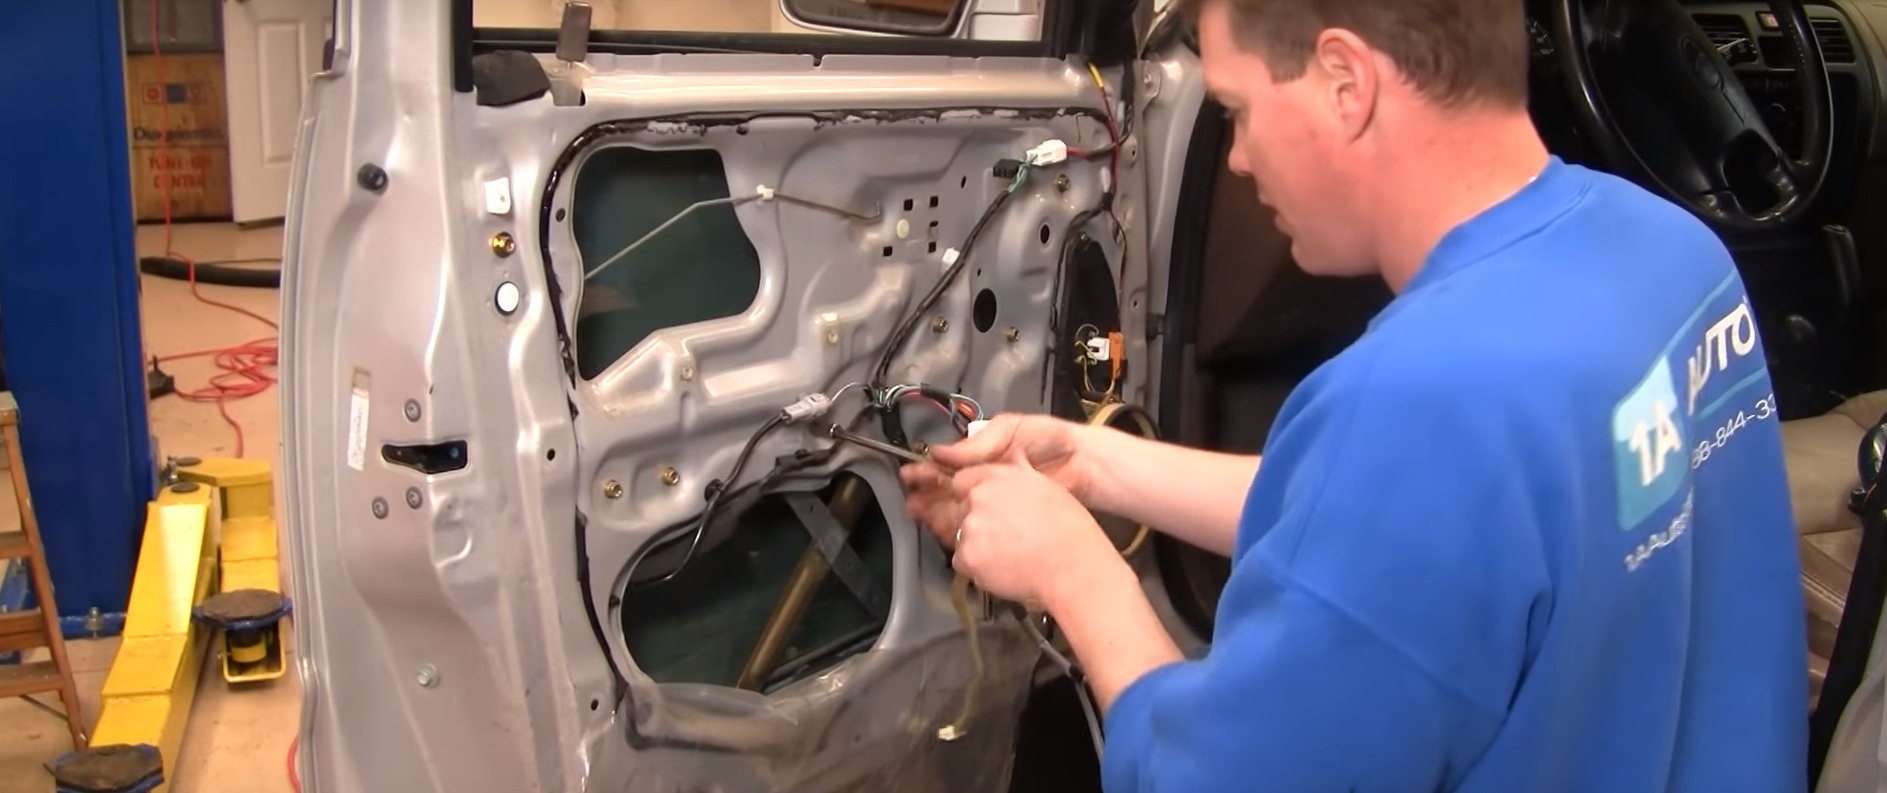
Figure 8. Remove the six 10mm bolts holding the actuator assembly in place. 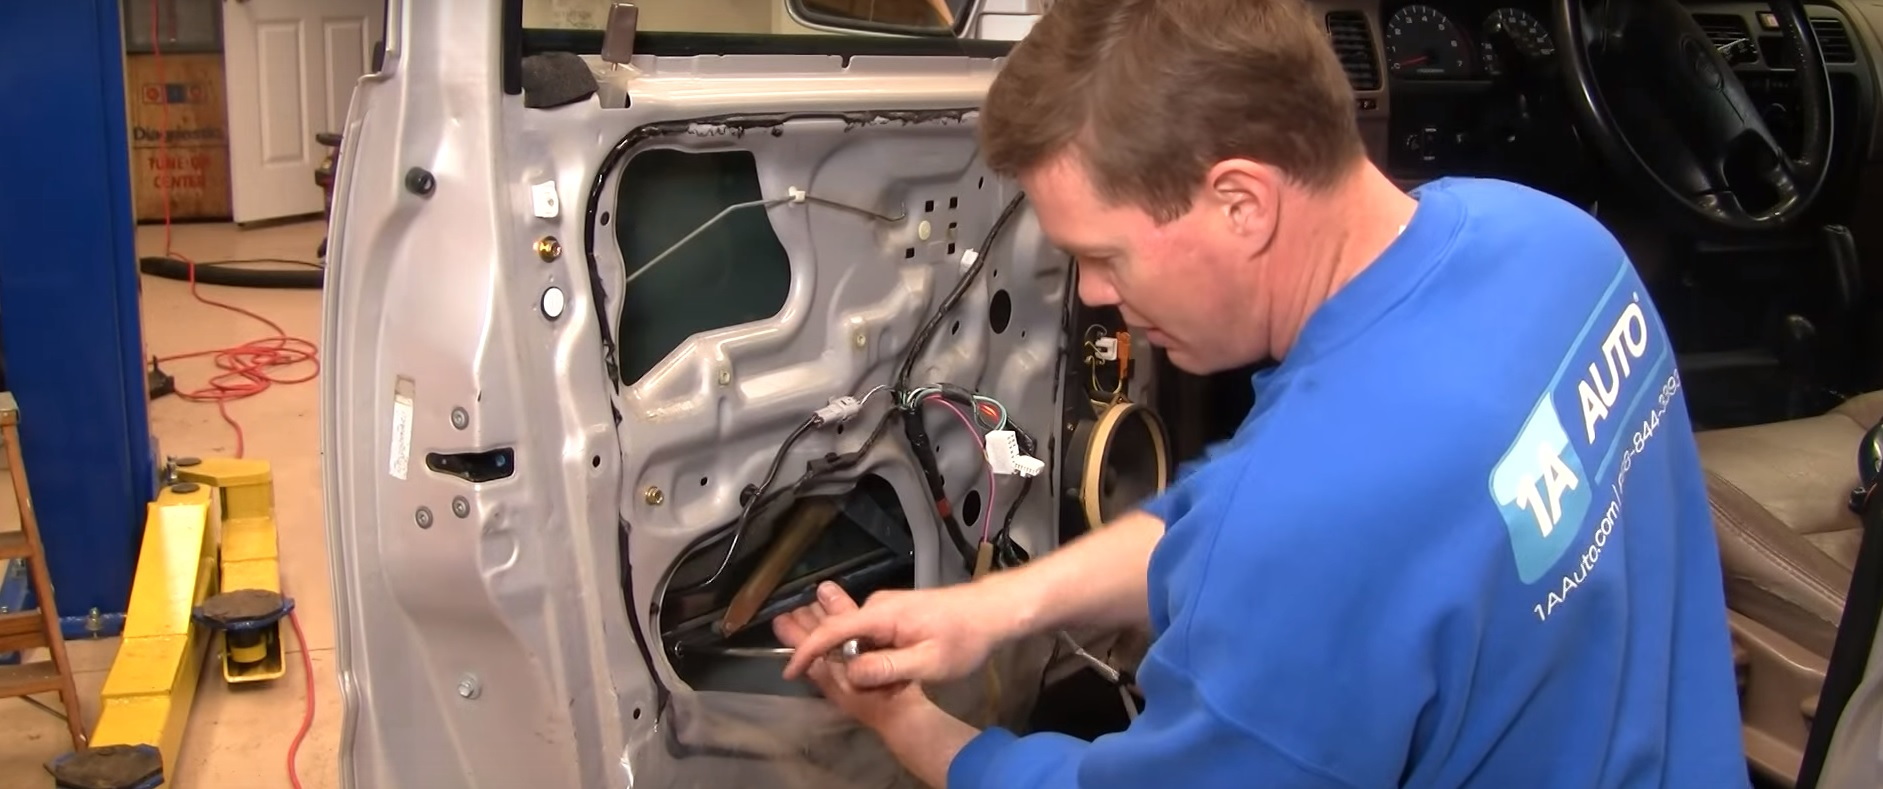
Figure 9. Remove the two bolts holding the window track to the window. 
Figure 10. Pull the window all the way up and secure it using painter's tape.
Step 3 – Install new actuator
- Slide the new actuator assembly into place and feed the wiring harness through the hole in the door.
- Reinstall the six bolts and hand tighten, then tighten with the ratchet once all are in place.
- Plug in the new actuator to the wiring harness, then hook up the control panel's three wiring harnesses, as this will allow you to move the regulator into a good position for reinstalling the window glass.
- Move the regulator down until you can access the window track.
- Remove the painter's tape from the glass and lower it onto the track, then install the two bolts.
- Remove the control panel. Reinstall the plastic shield, then push the door panel back into the retaining clips.
- Reinstall the three door panel screws, the door handle, and the arm rest pad.
Related Discussions and Video
- How to install/replace power window regulator Toyota 4Runner - YouTube.com
- Power window regulator replacement - YotaTech.com
- 4Runner rear window motor replacement - YotaTech.com