Toyota 4Runner 1996-2002: How to Replace Thermostat
Replacing the thermostat is critical as soon as it stops working in your 4Runner. Learn how to replace the thermostat here to ensure your engine stays cool.
This article applies to the Toyota 4Runner (1996-2002).
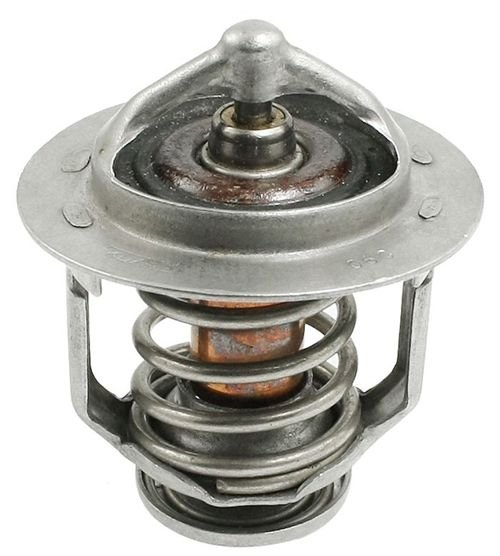
The thermostat is a little device that is located between the radiator and the engine of your Toyota 4Runner. The thermostat is designed to block the coolant flow to the engine until the engine reaches its operating temperature. When the engine is warm enough, the thermostat opens up to let the coolant flow through the engine and keeps it from overheating. If your car is overheating, you can probably blame your thermostat. If you discover your thermostat needs replacement, then read on to learn how to change it yourself on the Toyota 4Runner.

Materials Needed
- 3/8" drive ratchet
- Socket set (12mm and 17mm)
- Pliers
- Drain pan
- Thermostat
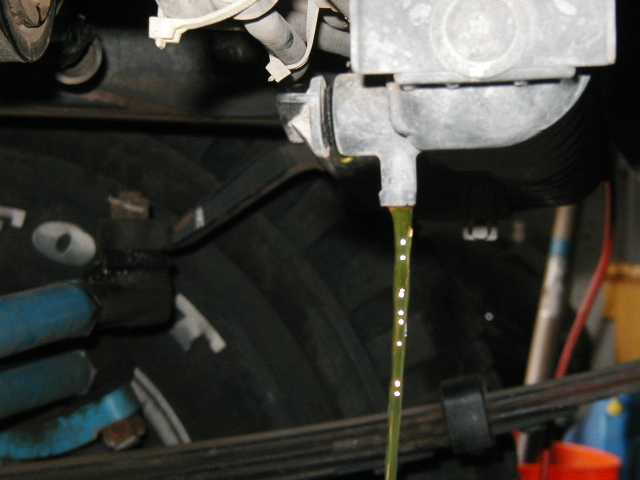
Step 1 – Drain radiator
To drain the radiator, remove the skid plate on the bottom of the radiator by removing the bolts holding it in place. Place the drain pan under the radiator's drain plug, then turn it counterclockwise to loosen it. Let the radiator drain completely. Open the radiator's fill cap on top to allow it to breathe, so it drains faster.
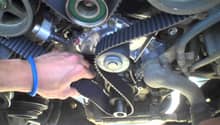
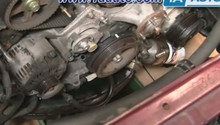
Step 2 – Remove belt
To remove the drive belt, use your 3/8" ratchet to turn the tensioner counterclockwise. Once you push down on the tensioner, the belt will have no tension, pull it off the pulleys and set it aside. Then remove the tensioner by removing the 17mm bolt holding it in place.
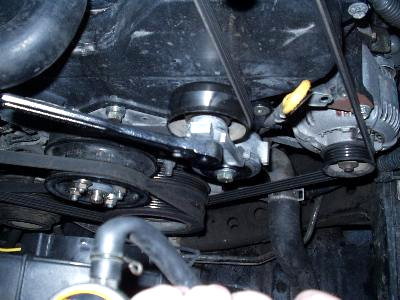
Figure 3. Remove belt. 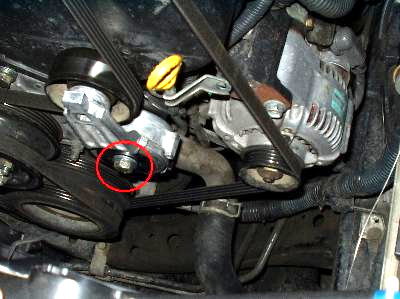
Figure 4. Remove tensioner.
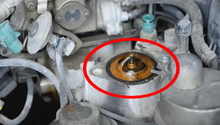
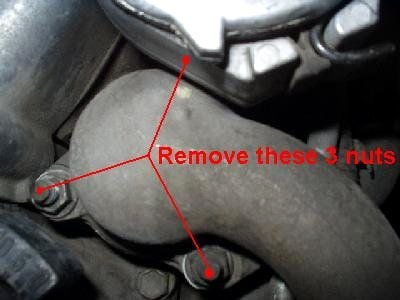
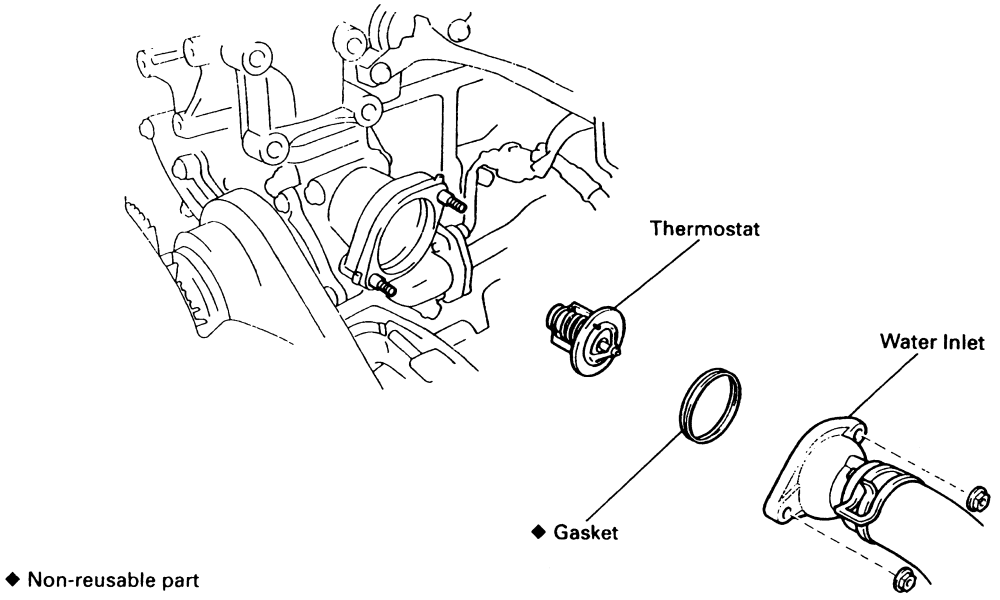
Step 3 – Remove thermostat
Before removing the thermostat, remove the lower radiator hose attached to the thermostat assembly. Use your pliers to slide the clamp away from the assembly, then pull the hose off. Remove the three 12mm nuts holding the thermostat assembly in place. Pull the housing off and expect some coolant to drip. Clean off the old gasket from the assembly and remove the thermostat from it, but be sure to note how it was positioned so you install the new one correctly.
Step 4 – Install new thermostat
Install the new thermostat the same way the old one was installed, then install the thermostat housing with a fresh new gasket.
- Install the lower radiator hose, then slide the clamp on it.
- Install the tensioner in place, push down on it, then install the drive belt in place.
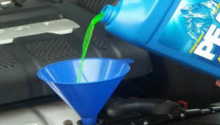
- Make sure the radiator's drain plug is closed, then fill the radiator with the coolant, and install the skid plate.
- With the radiator cap off, start the engine and let it run for about 10 to 15 minutes. This is enough time to get the coolant up to the temperature and open the thermostat, bleeding the cooling system of any air. Top off the coolant as necessary and ensure that the truck isn't overheating. If everything checks out, then you are done.
Related Discussions
- Thermostat Replacement - YotaTech.com
- Replacing the Thermostat - YotaTech.com
- 170* Thermostat Mod - YotaTech.com