Toyota 4Runner 1984-1995: How to Flush Radiator
Much like engine oil, as coolant ages, the constant heat-cycling that it experiences reduces its cooling and lubricating properties.
This article applies to the Toyota 4Runner (1984-1995).
Your cooling system is extremely essential to the longevity of your engine. Over time, the coolant gathers contaminants and other harmful agents, even though the coolant is a sealed system. If you find an abnormal amount of contaminants or oil in your coolant, then research possible causes like a blown head gasket. However, for normal service, the coolant should be fairly clear, but not as transparent as the new coolant. The most important part of flushing your coolant is properly refilling the coolant and running it through the system to eliminate bubbles. As always, do not work on the cooling system if the car is hot, this can lead to serious injury!

Materials Needed
- Needle nose pliers
- Funnel
- New coolant
- Rags and container for old coolant
Step 1 – Drain coolant
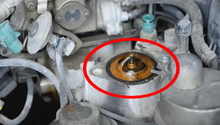
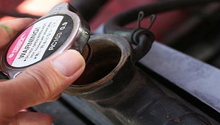
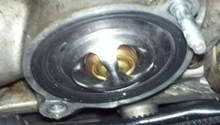
Draining the coolant from your radiator is extremely straightforward. You should not need to lift your car, but it is optional if you want more access. First, remove the radiator cap, which is located on top of the radiator under the hood. The location of the radiator cap is shown in Figure 1. Then, locate your radiator from underneath the car and find the stopcock located on the driver's side of the 4Runner. The location of this stopcock is shown in Figure 2. Open the stopcock slowly by turning it counterclockwise with a set of needle nose pliers. Make sure you have your container ready underneath the stopcock when you open it. After the radiator is drained, make sure you tighten the stopcock. That's it, the new coolant is ready to be added.

Figure 1. Radiator cap location (red circle). 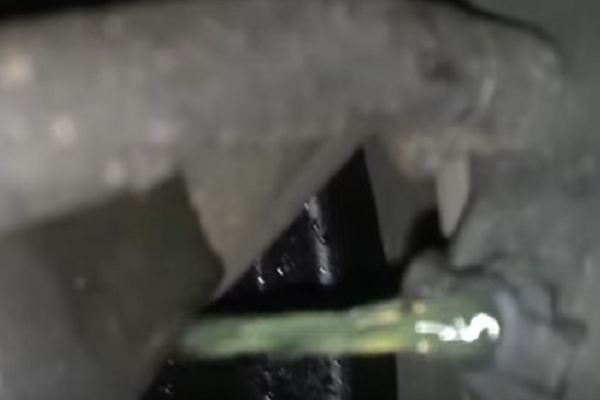
Figure 2. Stopcock draining.
Pro Tip
Run some fresh coolant through the system with the stopcock open to flush the system more.
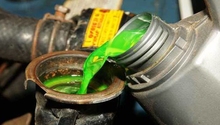
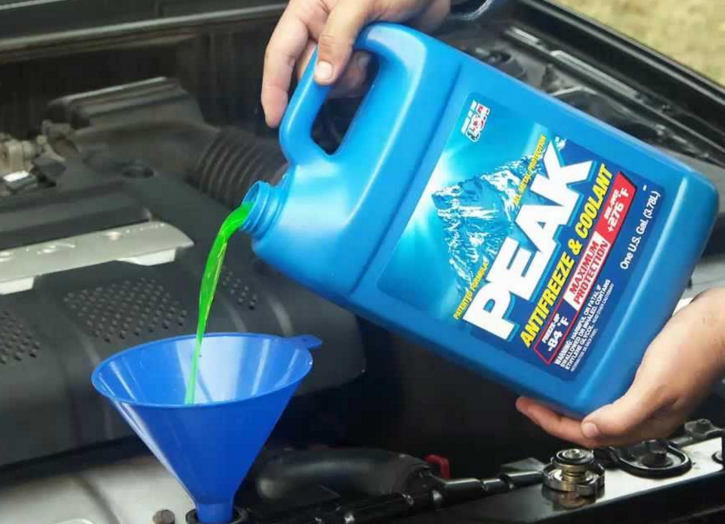
Step 2 – Refill your cooling system
This is the most critical step in a coolant flush. Use your owner's manual to determine the proper amount of coolant that your system requires. Then, fill your radiator until you can see the coolant coming up near the radiator cap. Now, turn your heater to maximum temperature, low fan speed, and leaving the radiator cap off, you have to run your car so that it warms up past the thermostat temperature. You will see a rapid drop in the level of coolant when the thermostat opens and allows coolant to flow throughout the cooling system. Then, you can start to add more coolant and fill to the marked line. Put the radiator cap back on and check for leaks and if the car maintains temperature. The next day check your coolant level after the car is cool and fill if needed. That's it, you are done with your coolant flush!
Featured Video: Oil and Radiator Drain on 22RE Engine
Related Discussions
- Thick Brown Oily Sludge My Radiator - YotaTech.com
- Mixing Regular Coolant Toyota Red Coolant - YotaTech.com