Toyota 4Runner 1984-1995: Why Won't My Seat Belt Disengage?
There are a number of potential causes, and solutions, for these problems. We'll look at the most common reasons why your seat belts may not work properly, and we'll look at some of the best solutions.
This article applies to the Toyota 4Runner (1984-1995).
It's not fun to be stuck in your 4Runner because the seat belt won't unlatch. If you're lucky, you can wiggle out of the belt and then address the problem. Sometimes, the belt won't rewind or the latch mechanism gets stuck in either the open or closed position. The cause for a stuck seat belt could be as simple as dirt and debris in the the locking mechanism. But the problem could also be so complex that you will end up replacing the seat belt altogether.

Materials Needed
- Ratchet
- 14mm socket
- Flat head screwdriver
- Phillips screwdriver
- Super glue
- Tape
- Rubber mallet (optional)
Step 1 – Seat belt won't rewind
It could be that the belt is simply at the wrong angle so it won't rewind. Don't laugh; some belts are finicky that way.
- Grasp the belt near the rewinder.
- Pull the belt at various angles until the rewinder begins to draw the belt in.
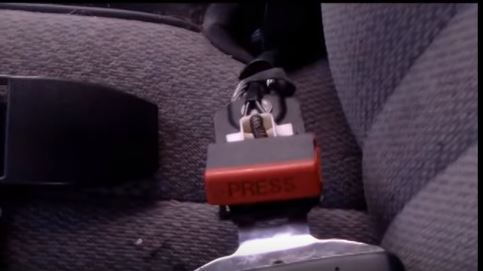
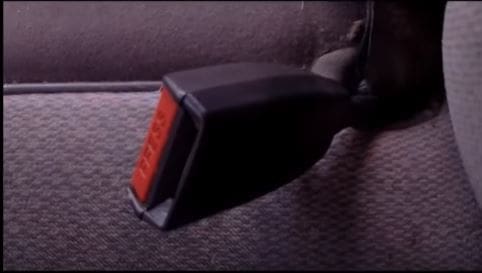
Step 2 – Dirt and debris in the latching mechanism
If you haul stuff that can leave dust and dirt in the passenger's compartment, or if you have kids or other passengers in your 4Runner who drag in dirt and debris, some of that may get into the latching mechanism and prevent it from doing its job. Try any or all of these fixes.
- Push the unlatch button down. Use a tweezers to reach in and pull out any dust balls or other debris that may be lodged in the mechanism.
- Use compressed air and blow any dust or debris out of the latching mechanism.
- Turn the latching mechanism upside down and shake out anything that is stuck inside.
Step 3 – Latching mechanism not operating properly
The pins that allow the latching mechanism to work properly can get out of alignment. You can fix this.
- Pry open the latch cover to expose the inner workings of the latching mechanism.
- If you notice a pin on one side is not sliding into the housing as it should, use a screwdriver or similar object to push the pin into the housing.
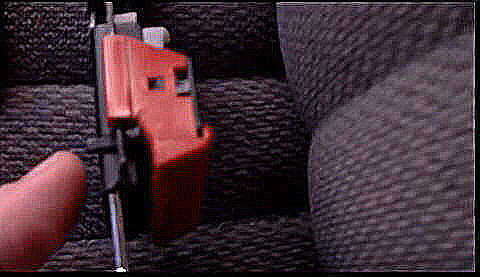
- Make sure the belt latches and unlatches as it should. Reassemble cover using tape and super glue.
Step 4 – Install new seat belt (last resort)
If the above remedies don't work, it might be best to install a new seat belt assembly. Follow this procedure:
- Use your ratchet and 14mm socket to remove the bolts that hold the seat in place.
- Tilt the seat back and unlatch the power-seat electrical connection.
- Remove the seat.
- Use the 14mm socket and ratchet to remove the bolt that attaches the loop end of the belt to the floor of the 4Runner.
- With your flat head screwdriver, split the two-piece upper anchor that adjusts belt height.
- Remove the upper anchor hold-down bolt.
- Remove the four Phillips screws that hold the front scuff plate to the door; remove the three Phillips screws that attach the rear scuff plate.
- Pry the scuff plates off, starting at the front and prying up the edge. Caution: be careful not to break the mount tabs.
- Remove the "B" pillar cover by grasping the edge of the front of the base. The pop pins holding the cover in place should just pop out.
- Remove the anchor bolt that holds the take-up reel to the floor.
- Install the new belt (the procedure is the reverse of the removal).
Pro Tip
When you replace the pillar cover, line up the snap pins with their holes. Starting at the base and working your way up, tap the cover at the pin areas firmly with your fist or a rubber mallet; they should easily pop in. Do the same for the scuff plates, while carefully aligning the standoffs with their proper holes.
Featured Video: How to Fix Stuck or Broken Seat Belt
Related Discussions
- Seat Belt Replacement - YotaTech.com
- Seatbelt Tensioners Locked - YotaTech.com
- Seatbelt Won't Disengage - YotaTech.com