
3.8 S/C swap in a 94 yota pickup
 Dec 22, 2014 | 07:12 PM
#1
Thread Starter
Registered User
Joined: Aug 2006
Posts: 39
Likes: 0
3.8 S/C swap in a 94 yota pickup
Ok so im going to call it! I (as far as I know) am the first to complete the 3.8 S/C motor swap in this gen yota. I will do the best I can to explain what and how I did it.
[img]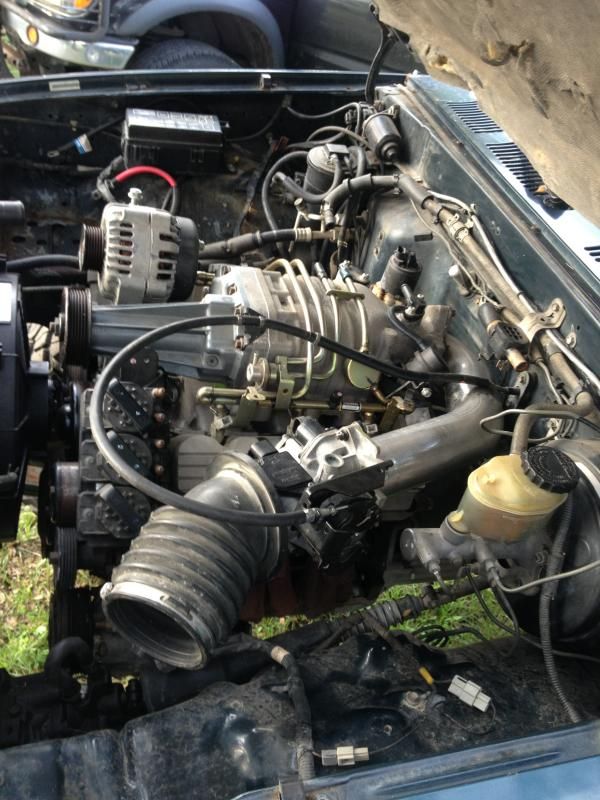 [/img]
[img]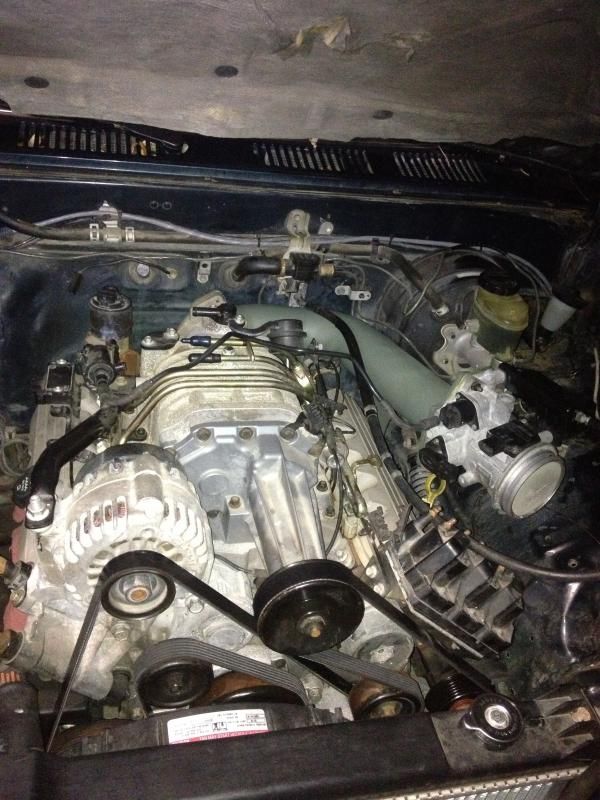 [/img]
[img]
 [/img]
[img]
 [/img]
Last edited by trd4runner; Jan 2, 2015 at 03:32 PM.
Dec 26, 2014 | 12:15 PM
#5
Thread Starter
Registered User
Joined: Aug 2006
Posts: 39
Likes: 0
http://i87.photobucket.com/albums/k1...IMG_7169-1.jpg
Here is the link to my photobucket page. Im doing something wrong when trying to post pics. take a look and have fun with the pics
Here is the link to my photobucket page. Im doing something wrong when trying to post pics. take a look and have fun with the pics
Last edited by trd4runner; Dec 26, 2014 at 12:20 PM.
Jan 2, 2015 | 12:48 PM
#6
Thread Starter
Registered User
Joined: Aug 2006
Posts: 39
Likes: 0
Ok so one of the first parts you will need to find is a bell housing from a 97 dodge Dakota 4banger 2.5 with a AX15 5 speed. Don't forget the clutch fork. bolts from the housing to the gear box and the through out bearing and the front cover from the AX15. There will have to be milling to the bell housing. This comes from kiwipushrod on pirate4x4.com. take .250'' off the motor side and .120 off the gearbox side. While your at the machine shop get your input shaft milled down to the I.D. of a GM pilot from a 01 3.8 fire chicken and have them make the pilot bearing longer @ 3/16 . Input shaft is from allstargear.com part # AX15-16A 10 tooth. Now to the flywheel, get one from a 01 3.8 fire chicken. THERE is a difference in balance from N/A to S/C rotating assembly, what you should do is take both flywheel and flex plate to get balanced and have them take the N/A flywheel balanced to the S/C flex plate spec.
Last edited by trd4runner; Jan 3, 2015 at 10:33 AM.

Trending Topics

 Jan 2, 2015 | 03:27 PM
#10
Thread Starter
Registered User
Joined: Aug 2006
Posts: 39
Likes: 0
[img]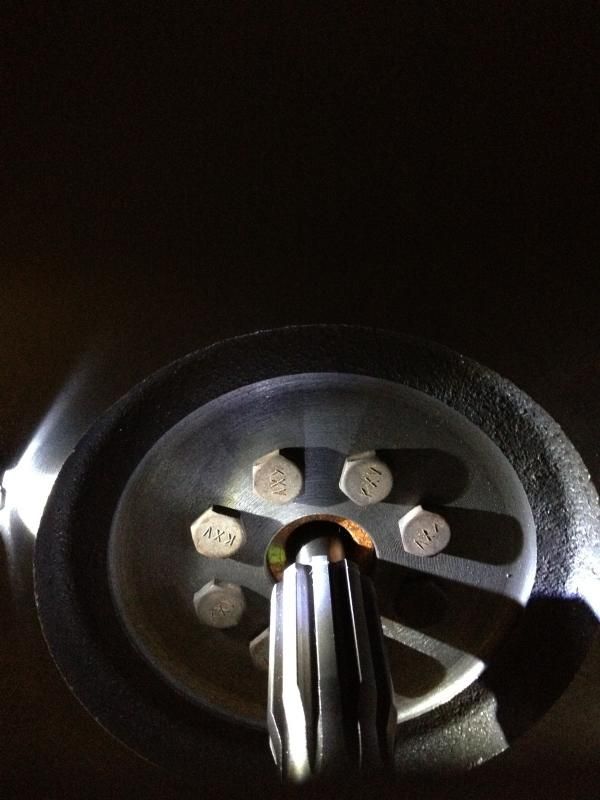 [/img]
This is why you will need tot get the pilot bearing made longer. Also I forgot to say you MUST get the cover plate from at AX15 trans. ( the part where the throw-out bearing rides on)
 [/img]
This is why you will need tot get the pilot bearing made longer. Also I forgot to say you MUST get the cover plate from at AX15 trans. ( the part where the throw-out bearing rides on)
Last edited by trd4runner; Jan 3, 2015 at 06:26 AM.
Jan 2, 2015 | 04:01 PM
#11
Thread Starter
Registered User
Joined: Aug 2006
Posts: 39
Likes: 0
Now to install the input shaft from the AX15 into the R150 trans
[img] [/img]
Remove the bolt that holds shift selector
[img]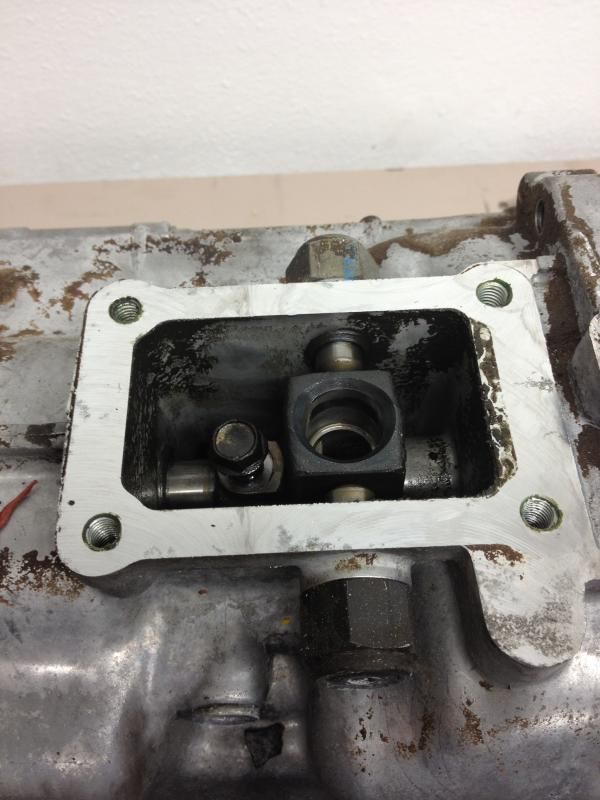 [/img]
Next remove the alen or torks head on the side that hold a spring and ball in it. Tap the rear section off
[img]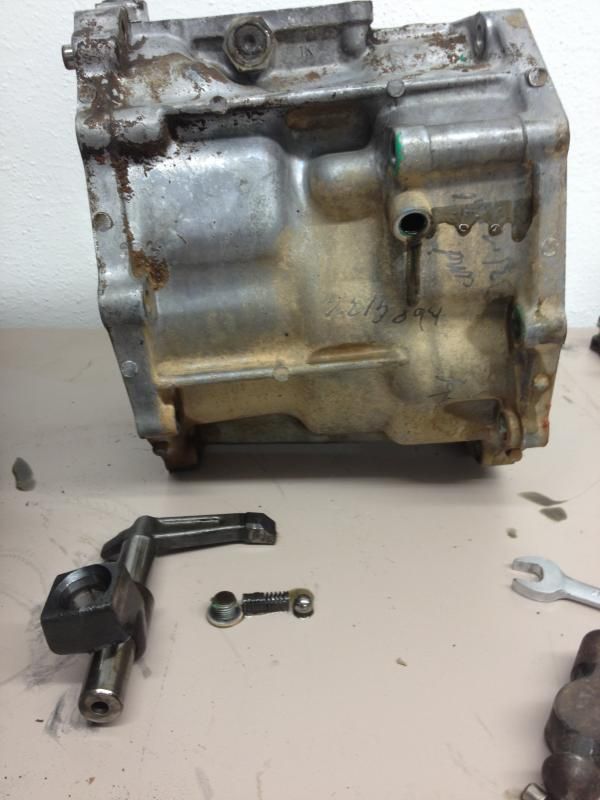 [/img]
[img]
 [/img]
Remove the bolt that holds shift selector
[img]
 [/img]
Next remove the alen or torks head on the side that hold a spring and ball in it. Tap the rear section off
[img]
 [/img]
Last edited by trd4runner; Jan 2, 2015 at 04:02 PM.
Jan 2, 2015 | 04:04 PM
#13
Thread Starter
Registered User
Joined: Aug 2006
Posts: 39
Likes: 0
Remove the cover from the R150 where the thought out bearing rides on, 2 big snap rings hold the big bearings in place, remove snap rings tap the front section off.
[img]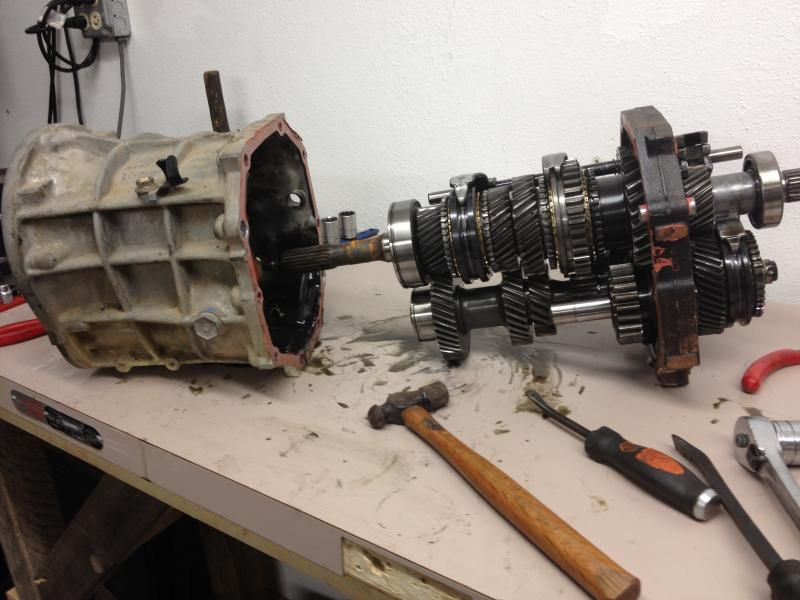 [/img]
[img]
 [/img]
Last edited by trd4runner; Jan 3, 2015 at 10:38 AM.


 Jan 2, 2015 | 05:15 PM
#17
Thread Starter
Registered User
Joined: Aug 2006
Posts: 39
Likes: 0
For what im looking for I wont need to upgrade the charger unless I gain some awesome results in the efficiency. Im guessing the way im set up now I should be @ 285HP close to 300 FT. Im trying to set this truck up for expedition style camping.
Jan 2, 2015 | 05:41 PM
#18
Thread Starter
Registered User
Joined: Aug 2006
Posts: 39
Likes: 0
Now to get this all together
Remove the big nut with an impact.
[img] [/img]
PLACE in order and be carful!!!
[img]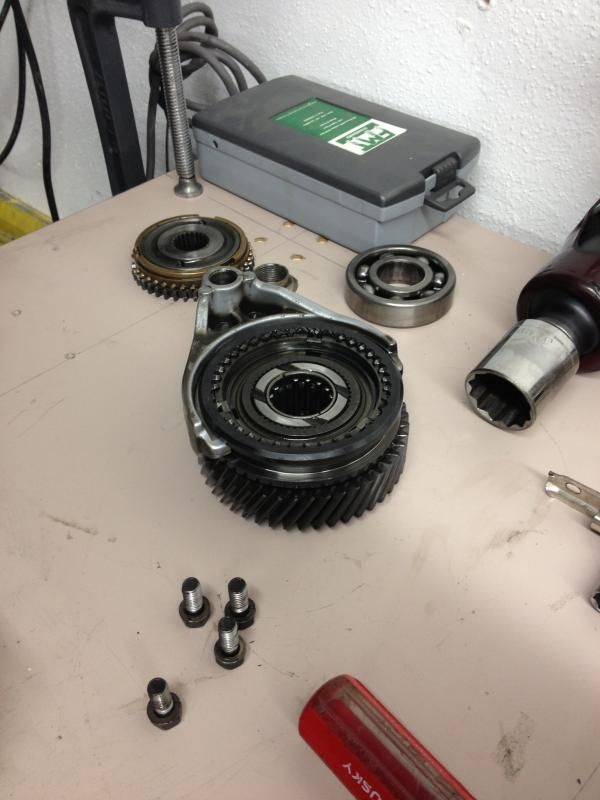 [/img]
[img]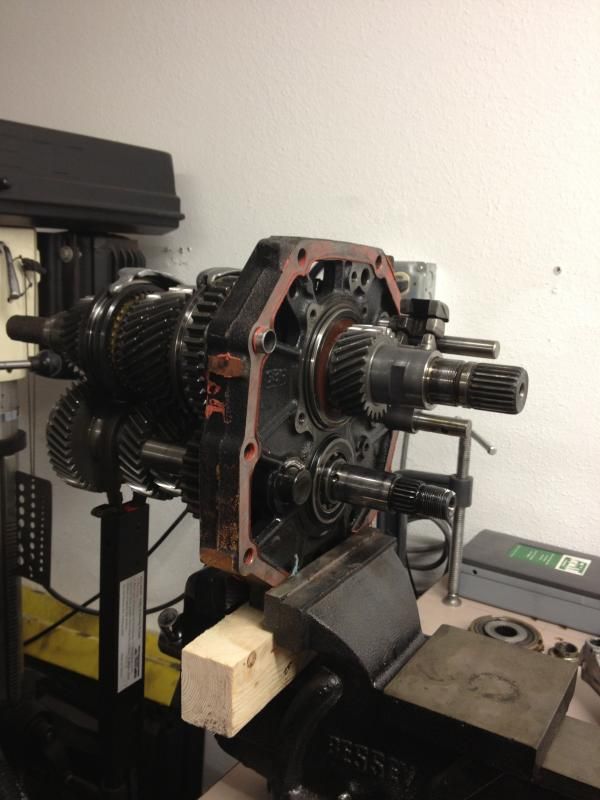 [/img]
[img] [/img]
Now the input shaft can be removed!! I bet you where thinking how the hell does this come out.
reverse the steps to re assemble
Remove the big nut with an impact.
[img]
 [/img]
PLACE in order and be carful!!!
[img]
 [/img]
[img]
 [/img]
[img]
 [/img]
Now the input shaft can be removed!! I bet you where thinking how the hell does this come out.
reverse the steps to re assemble
Last edited by trd4runner; Jan 2, 2015 at 05:43 PM.
Jan 2, 2015 | 05:49 PM
#19
Registered User
Joined: May 2013
Posts: 400
Likes: 0
From: San Antonio, Tx.
That is exactly what it will do for you. The thing that kills the m90 and blowers like it is their lack of efficiency. They have 3 lobes where as the TVS style blowers have 4, they move the same amount of air (if not more) but can do so at a lower RPM thereby reducing parasitic loss and heat that will be generated. I did a very similar swap on my saturn (went from the m62 to a tvs 1320) and noticed huge gains in efficiency and lower iat2's.


