3.8 S/C swap in a 94 yota pickup
 01-02-2015, 06:02 PM
#21
Registered User
Thread Starter
Join Date: Aug 2006
Posts: 39
Likes: 0
Received 0 Likes
on
0 Posts
That is exactly what it will do for you. The thing that kills the m90 and blowers like it is their lack of efficiency. They have 3 lobes where as the TVS style blowers have 4, they move the same amount of air (if not more) but can do so at a lower RPM thereby reducing parasitic loss and heat that will be generated. I did a very similar swap on my saturn (went from the m62 to a tvs 1320) and noticed huge gains in efficiency and lower iat2's.


 01-02-2015, 07:08 PM
#23
Registered User
Thread Starter
Join Date: Aug 2006
Posts: 39
Likes: 0
Received 0 Likes
on
0 Posts
So placement of trans stayed the same. One key thing I did before I removed the old motor was made a jig that would tell me the placement of the trans as in height not front to back. This is pretty important as the motor with all the accessories get really close to the hood when closed. I don't have a body lift.
01-03-2015, 04:57 AM
#24
Registered User
Join Date: May 2013
Location: San Antonio, Tx.
Posts: 400
Likes: 0
Received 0 Likes
on
0 Posts
As for the pics, I have pics of my m62 vs my TVS1320, but I don't have any personal ones of the 1900.
01-03-2015, 05:54 AM
#25
Registered User
Join Date: May 2013
Location: San Antonio, Tx.
Posts: 400
Likes: 0
Received 0 Likes
on
0 Posts
This thread is fantastic man. Now you've got me thinking of putting an LSJ in my 84 that needs a motor. I've owned an LSJ powered car for almost 10 years now and wrenched extensively on it. They're forged already and can handle in excess of 400hp with stock internals. (for the gen 2 lsj) and the gen3 LSJ is good for over 5, again, completely stock. Looks like I need to do tons of research and figure out the best means of doing either a 3800 or LSJ/LNF/LDK swap! Oh the possibilities!
01-03-2015, 06:37 AM
#26
Registered User
Thread Starter
Join Date: Aug 2006
Posts: 39
Likes: 0
Received 0 Likes
on
0 Posts
Hell ya get to fabing, its all just nuts and bolts! I found 95% of the info for this swap from a guy named kiwipushrod on pirate4x4.com. I give him a lot of credit for doing all the grunt work as for what will work and not when it comes to the trans.
Last edited by trd4runner; 01-03-2015 at 06:42 AM.
 01-03-2015, 07:09 AM
#28
Registered User
Thread Starter
Join Date: Aug 2006
Posts: 39
Likes: 0
Received 0 Likes
on
0 Posts
Ok back on track. So trans is finished and placed back in the truck with the jig you where suppose to have made before you remove the old motor so good height placement can some what be made. 
[img]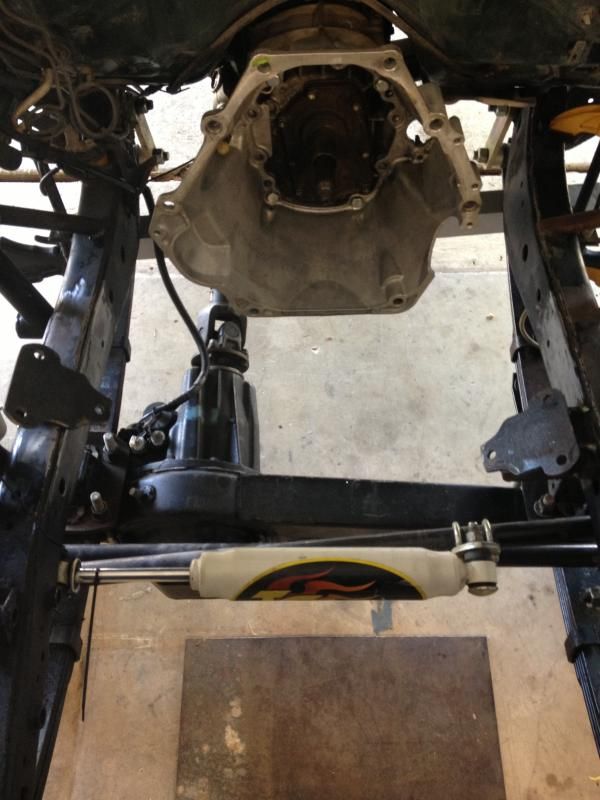 [/img]
If you can zoom in where the shackles are you can get an idea of the jig im talking about. Pretty simple, angle iron and shims.
[img]
 [/img]
If you can zoom in where the shackles are you can get an idea of the jig im talking about. Pretty simple, angle iron and shims.
Last edited by trd4runner; 01-03-2015 at 07:11 AM.
01-03-2015, 07:20 AM
#29
Registered User
Thread Starter
Join Date: Aug 2006
Posts: 39
Likes: 0
Received 0 Likes
on
0 Posts
You will have to remove the old motor mounts form the frame as they will not work. Find a motor mount (motor side) from the passenger side of a 01 3.8 fire chicken.
[img]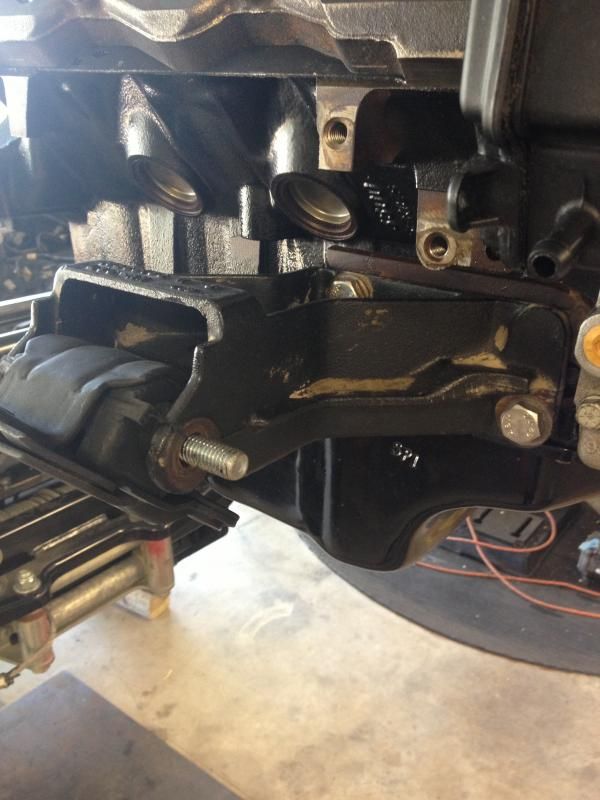 [/img]
[img]
 [/img]
01-03-2015, 08:27 AM
[/img]
01-03-2015, 08:27 AM
#30
Registered User
Thread Starter
Join Date: Aug 2006
Posts: 39
Likes: 0
Received 0 Likes
on
0 Posts
Now as for the rubber motor mounts what I used are 2 motor mounts from a 01 3.8 fire chicken. I don't remember what side but here is the part # duralast P# 2465 or A2465 or 108910, all of there # should pull that mount.
Last edited by trd4runner; 01-03-2015 at 08:32 AM.
01-03-2015, 08:55 AM
#31
Registered User
Thread Starter
Join Date: Aug 2006
Posts: 39
Likes: 0
Received 0 Likes
on
0 Posts
Ok so now is where you need to put your thinking cap on. Get some 1/4 plate and trace and cut out your motor mount out, 2 of them. (look back on the pic where just the trans is in and look at the motor mounts for an idea)
[img]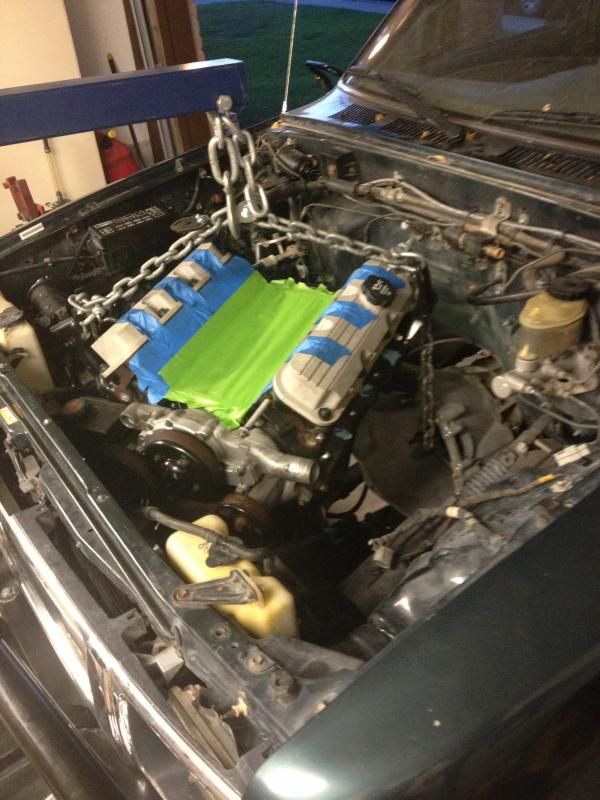 [/img]
Drop your motor in for fitment Let the fun begin!
You only have one motor mount so WTF......This is where the fun starts. you will be pilling that 3.8 a couple times so be patient. Now that your 3.8 is hovering in there mate it to the bell housing. You will notice the steering box is in the way of the A/C compressor What I did was space the box off with 1/2 plate. (2, 1/4'' plate placed together )
[img] [/img]
[img]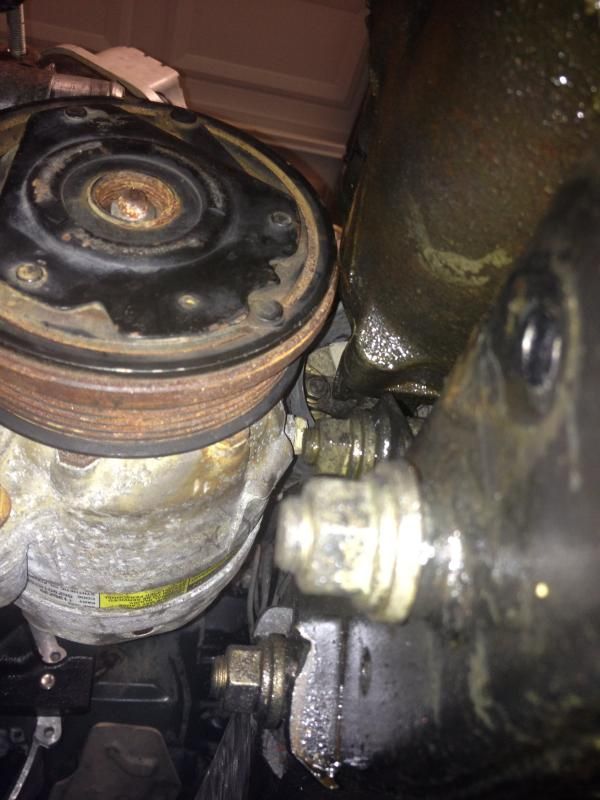 [/img]
[img]
 [/img]
Drop your motor in for fitment
Let the fun begin!You only have one motor mount so WTF......This is where the fun starts. you will be pilling that 3.8 a couple times so be patient. Now that your 3.8 is hovering in there mate it to the bell housing. You will notice the steering box is in the way of the A/C compressor
What I did was space the box off with 1/2 plate. (2, 1/4'' plate placed together )[img]
 [/img]
[img]
 [/img]
Last edited by trd4runner; 01-03-2015 at 09:44 AM.
01-03-2015, 09:59 AM
#32
Registered User
Thread Starter
Join Date: Aug 2006
Posts: 39
Likes: 0
Received 0 Likes
on
0 Posts
Now you have the steering box spaced off, center your motor up and tack wield your passenger side motor mount plate to the frame. From what I under stand the motor mounts should sit @ a 45*, that how mine are. ( again look back on the pic with just the trans sitting in there )
01-03-2015, 10:12 AM
#33
Registered User
Thread Starter
Join Date: Aug 2006
Posts: 39
Likes: 0
Received 0 Likes
on
0 Posts
Time for the driver side motor side bracket.  All the mounts are made from 1/4'' plate.
[img]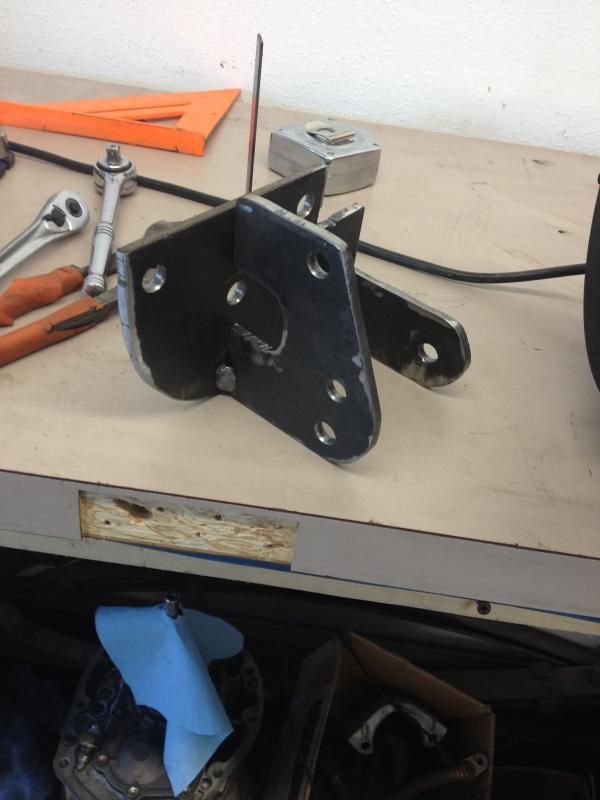 [/img]
[img]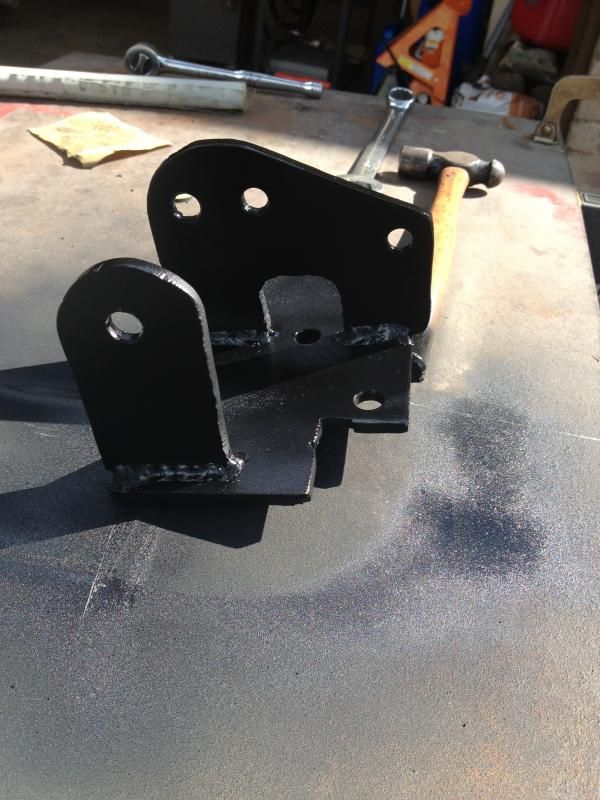 [/img]
[img] [/img]
[img]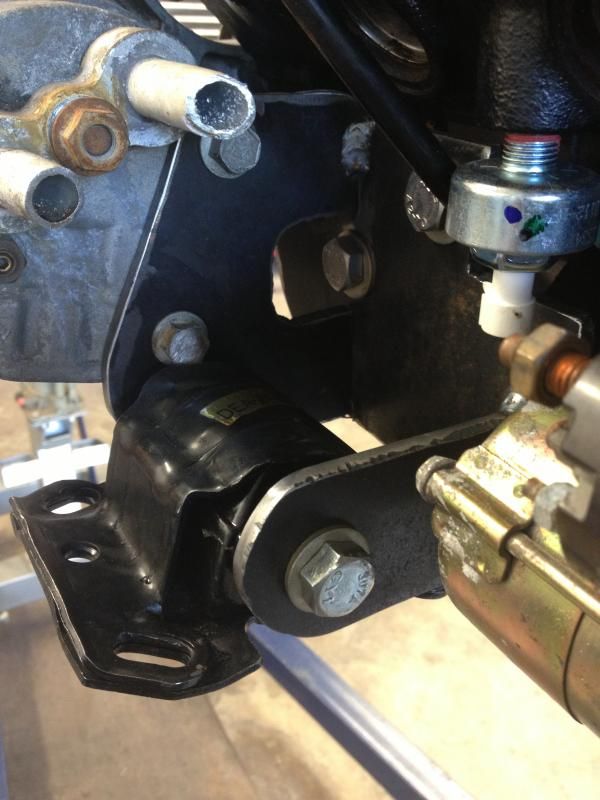 [/img]
[img]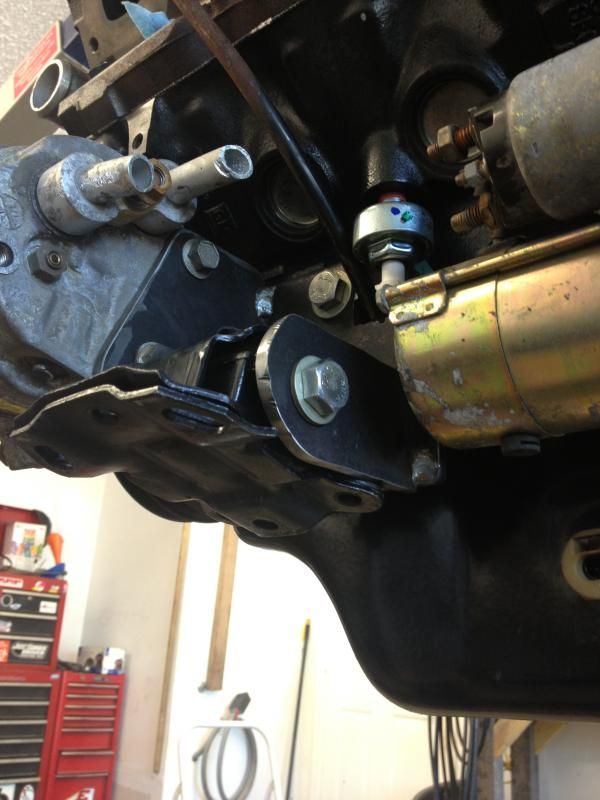 [/img]
[img]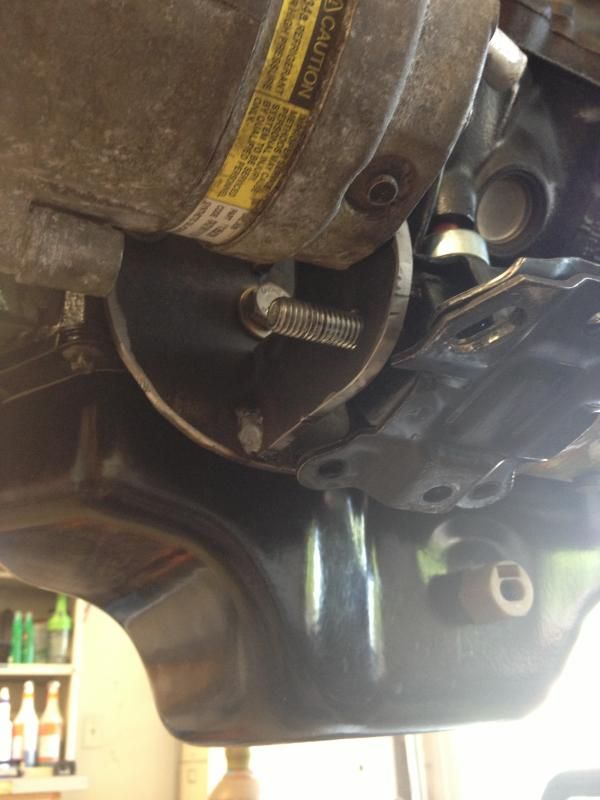 [/img]
[img]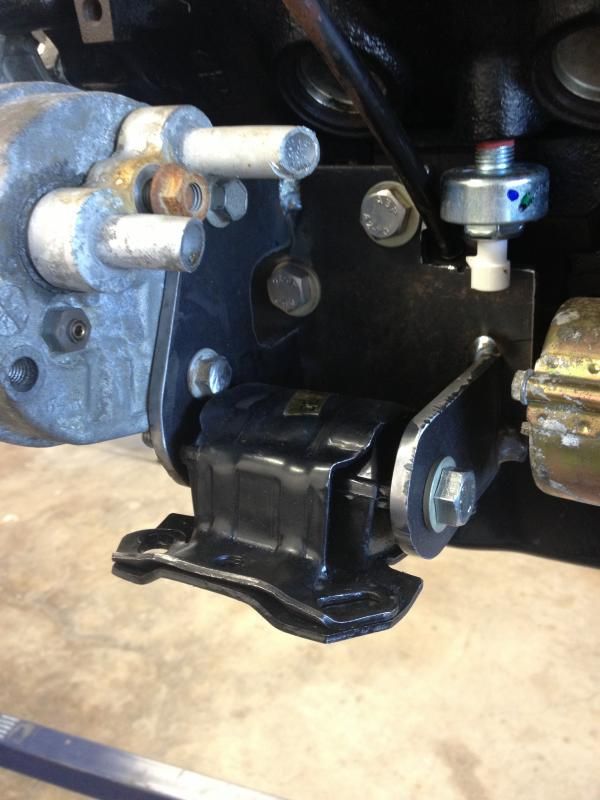 [/img]
[img]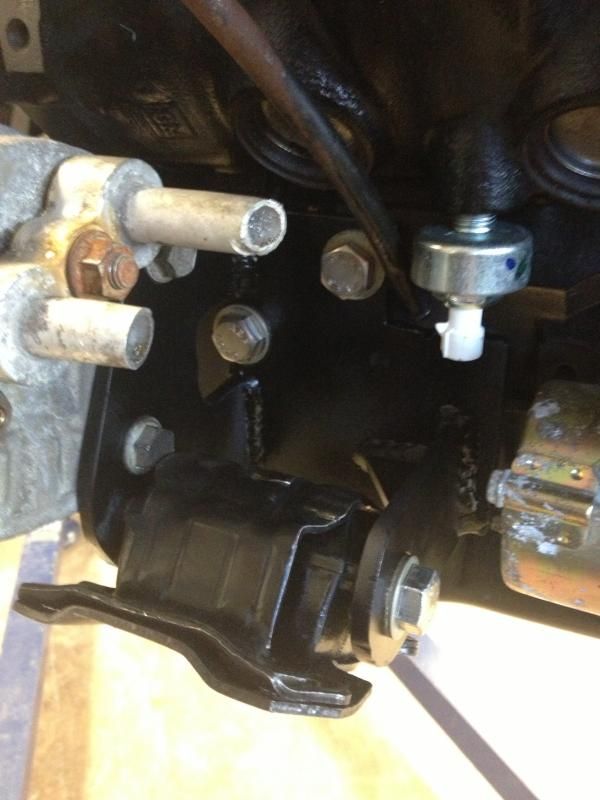 [/img]
All the mounts are made from 1/4'' plate.[img]
 [/img]
[img]
 [/img]
[img]
 [/img]
[img]
 [/img]
[img]
 [/img]
[img]
 [/img]
[img]
 [/img]
[img]
 [/img]

 04-01-2016, 06:10 AM
#35
Registered User

Join Date: Dec 2015
Posts: 12
Likes: 0
Received 0 Likes
on
0 Posts
BUMP! bringing this back.
Any updates?!?!?!
i am getting one of these motors, non - supercharged and more info i can get the better. My truck is just RWD so i will use a camaro/firebird trans.
Any updates?!?!?!
i am getting one of these motors, non - supercharged and more info i can get the better. My truck is just RWD so i will use a camaro/firebird trans.

Thread
Thread Starter
Forum
Replies
Last Post
Bob_98SR5
95.5-2004 Tacomas & 96-2002 4Runners
10
10-17-2002 09:52 AM


