
Pop & Lock PL8521 install with new bracket
 Oct 15, 2014 | 11:24 AM
#1
Thread Starter
Registered User
Joined: Jun 2014
Posts: 10
Likes: 0
Pop & Lock PL8521 install with new bracket
Howdy,
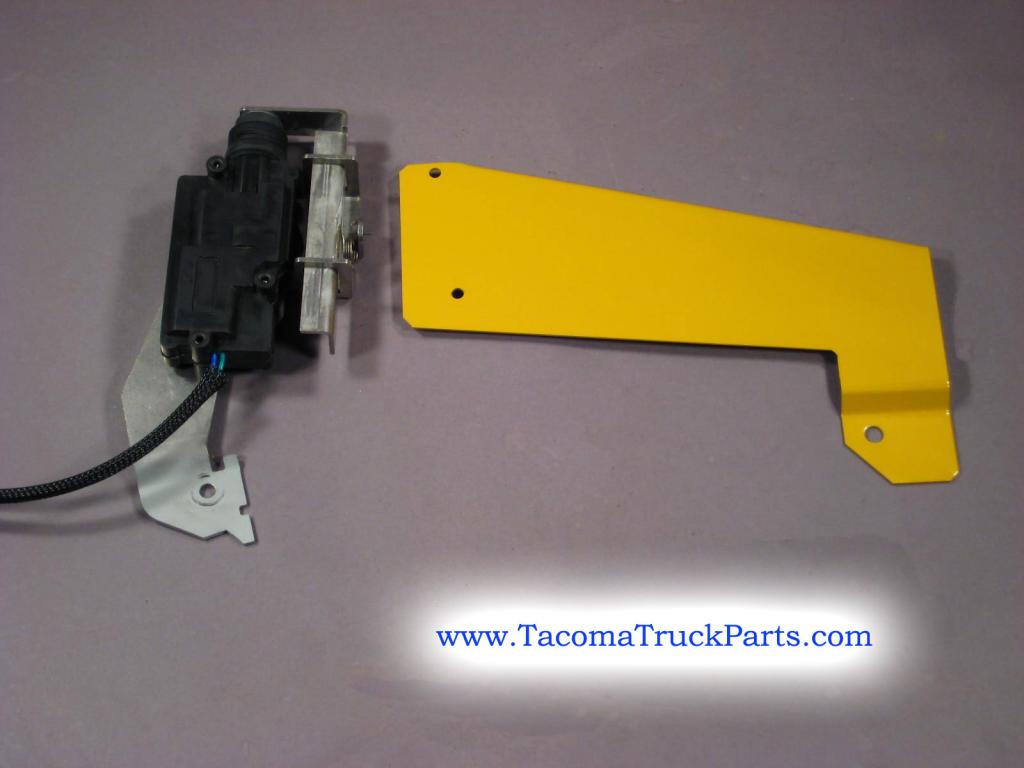
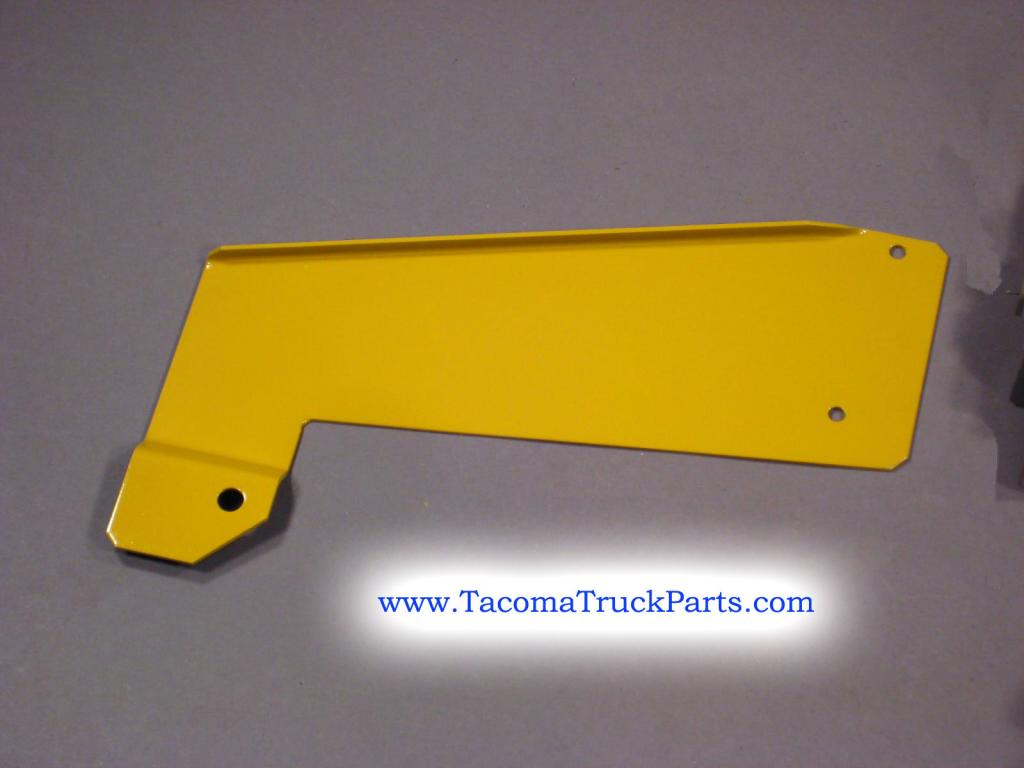
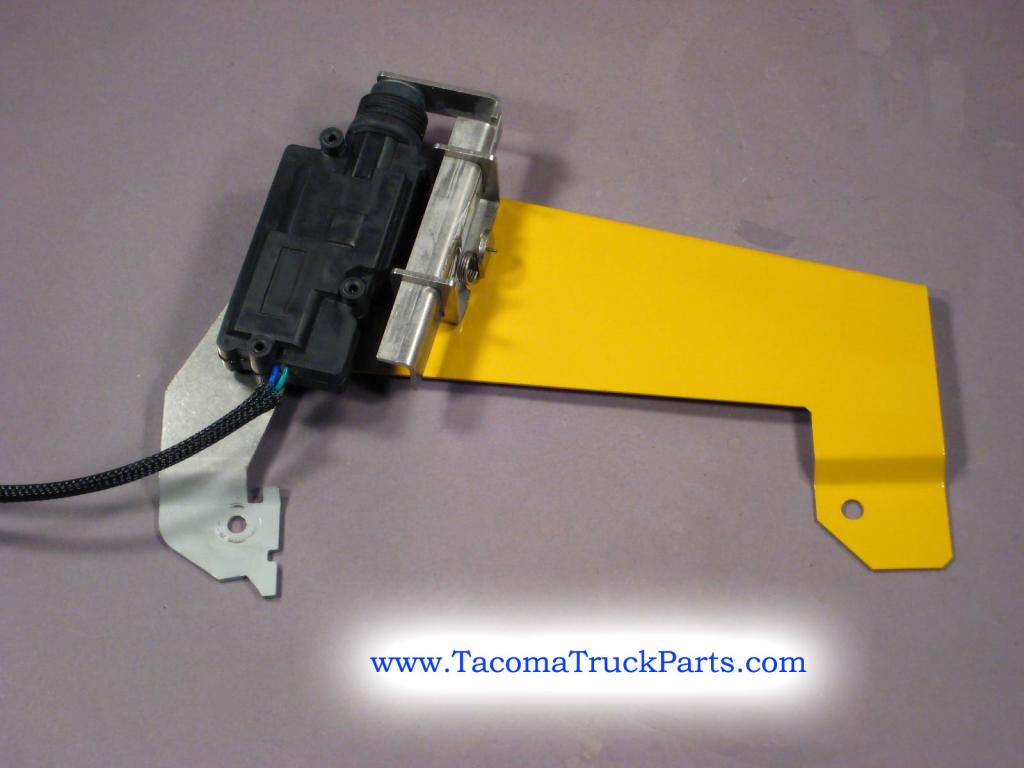
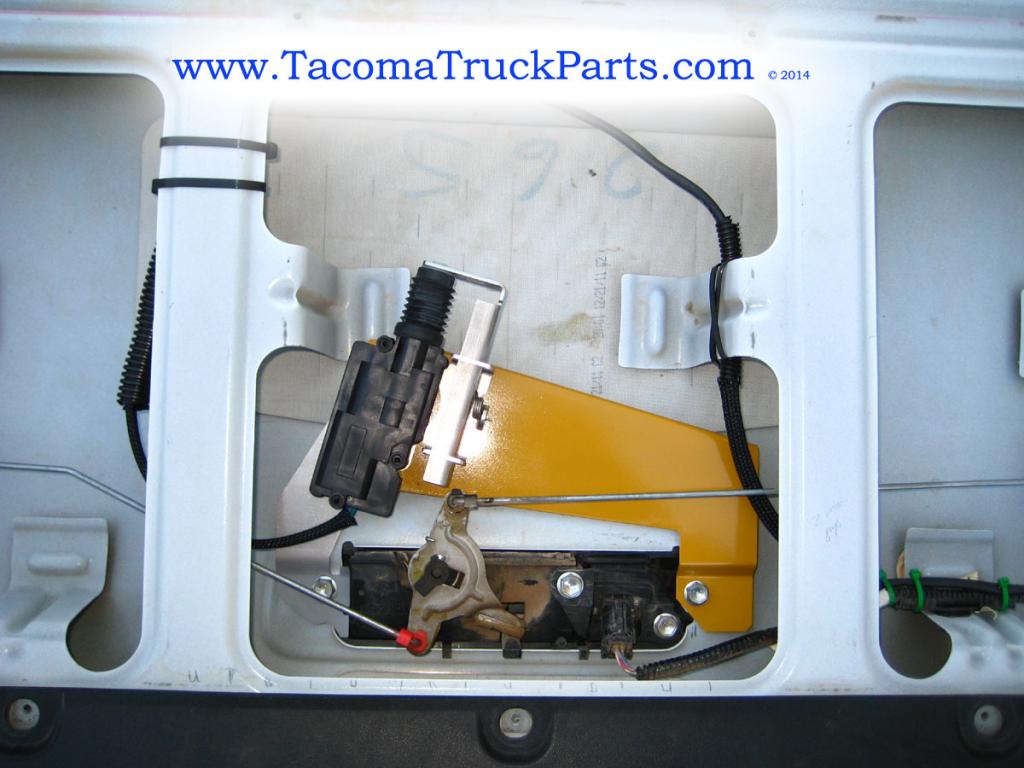
I recently bought and installed the Pop & Lock PL8521 Power Tailgate Lock for my 2012 DCLB 4x4..... I liked it, but the mounting design seemed like it could be improved upon. I ended up designing the bracket you see in the pictures below. I also added two foam blocks to keep the power lock in place and to minimize noise and vibration.
I am offering up a few of these reinforcement brackets for the 2005 - 2015 Toyota Tacoma. They will be available on a limited basis. $17.00 includes free S&H. to the lower 48 states. You can purchase with pay pal at TacomaTruckParts.com*I painted the one in the pictures "Caterpillar Yellow". The ones I am selling are NOT painted.
Designed to fit all PL8521 power tailgate locks on all Toyota Tacoma models 2005 - 2015, with and w/o the back-up camera.
Let me know what you all think....
Jesse
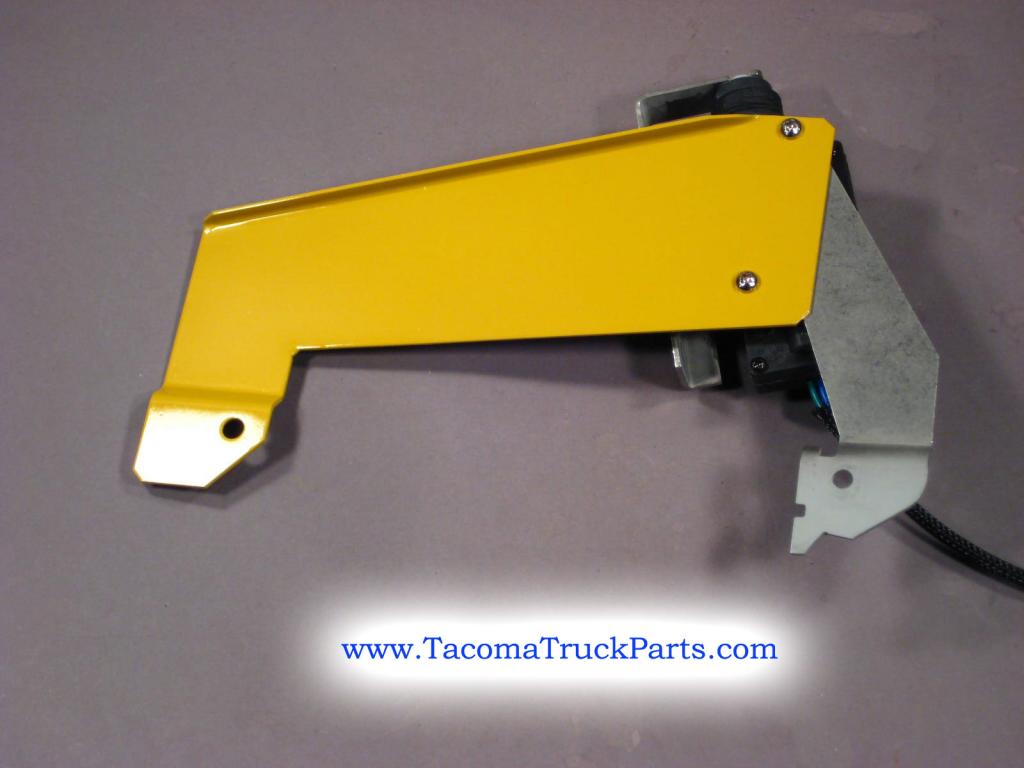
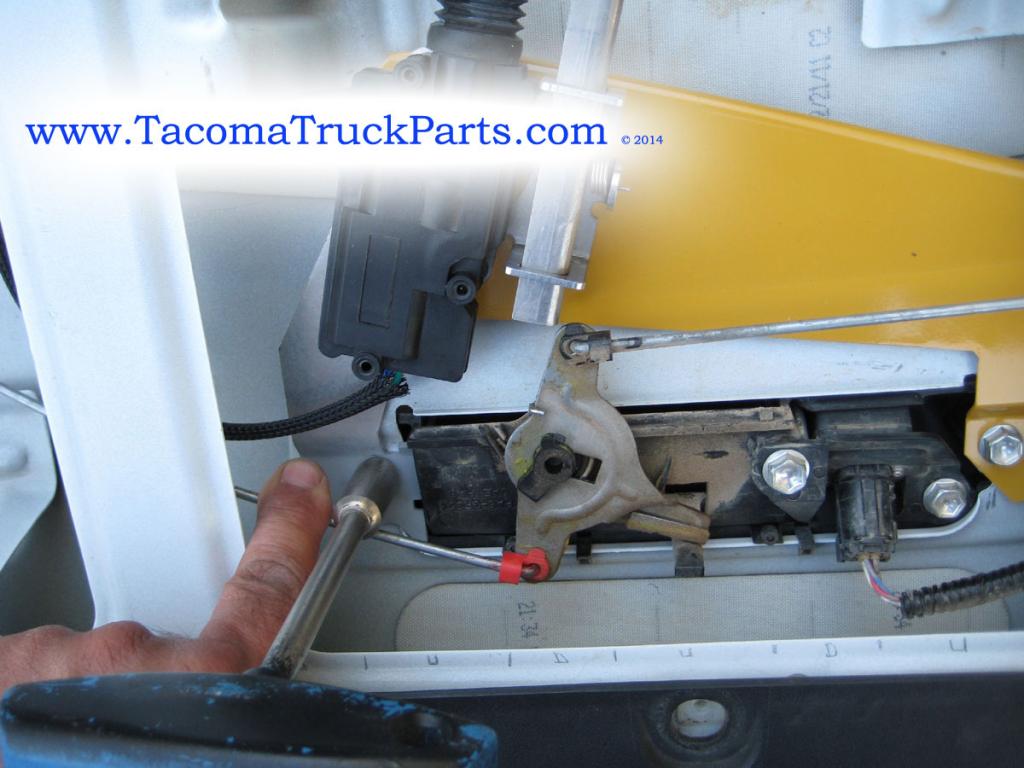
You can see the two screws on the PL8521 which we will attach the new bracket with. Do not remove both screws at the same time. Attach the bracket with one screw first, only tighten after both screws are attaching the new bracket.
Remove both outer 10mm bolts. These will be re-used. You should not need any thread locking compound; If you do use any, a low strength is recommended.
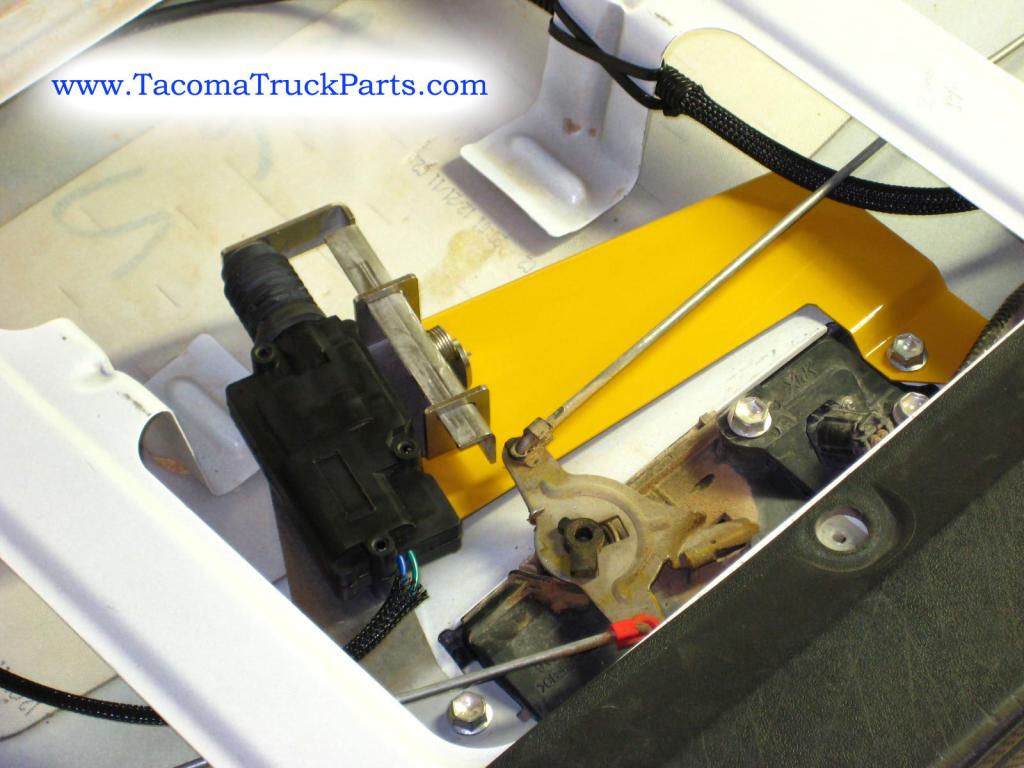
You can see that with-out the reinforcement bracket, the PL8521 is attached with a single bolt. Not the best design.
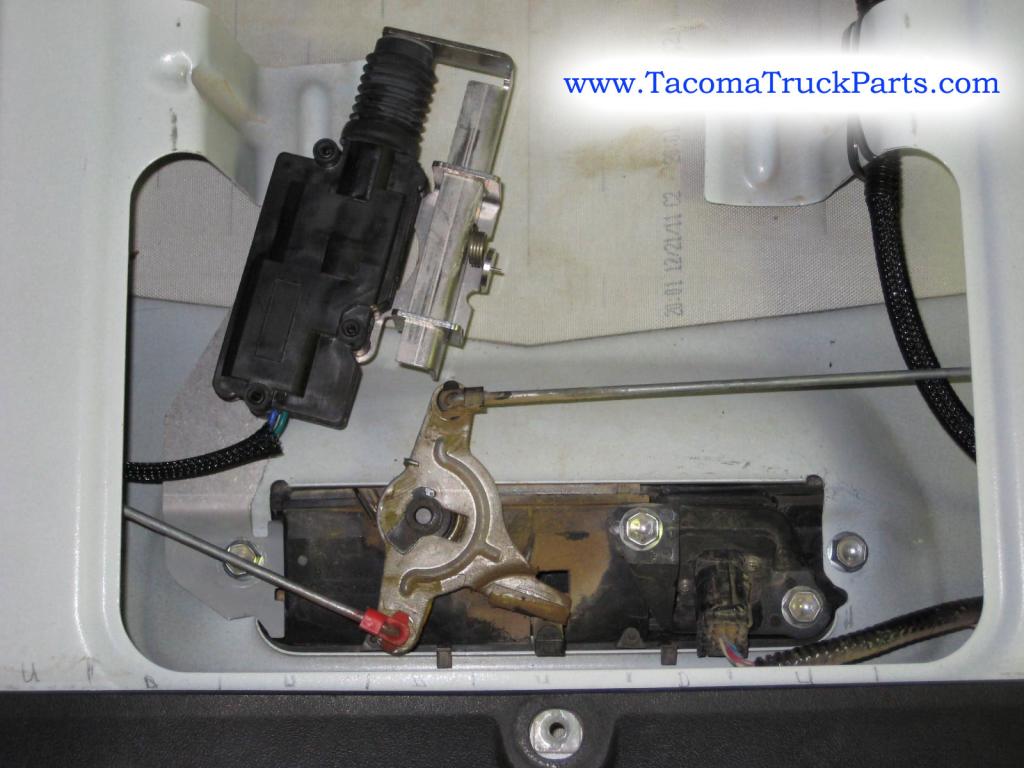
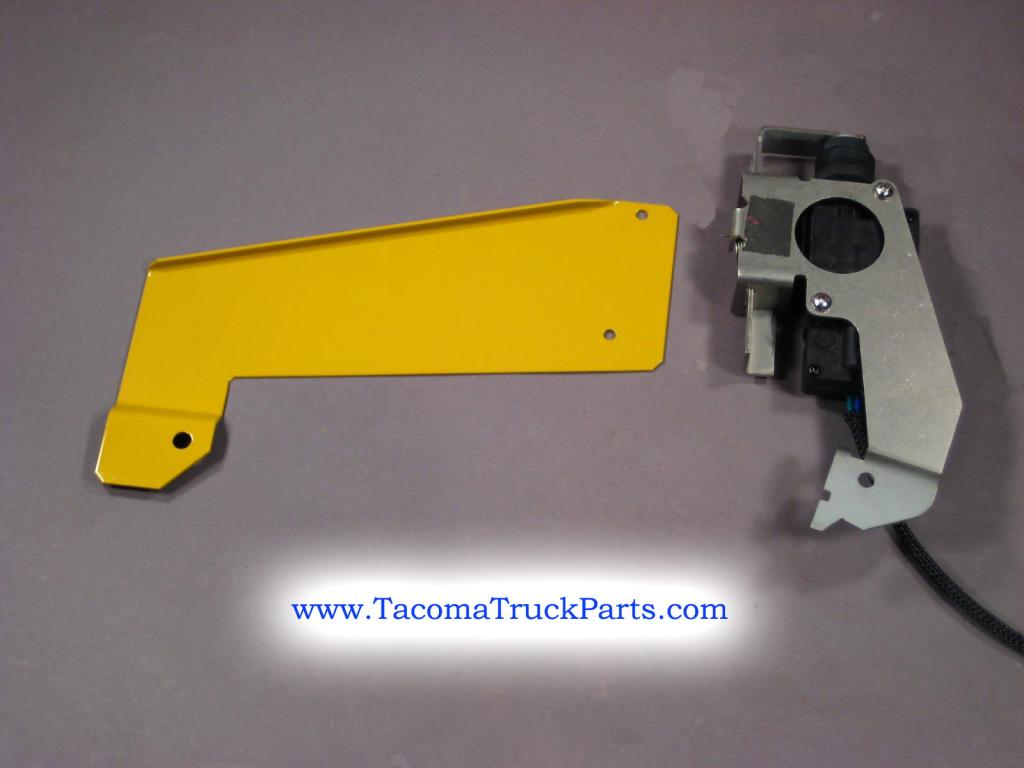
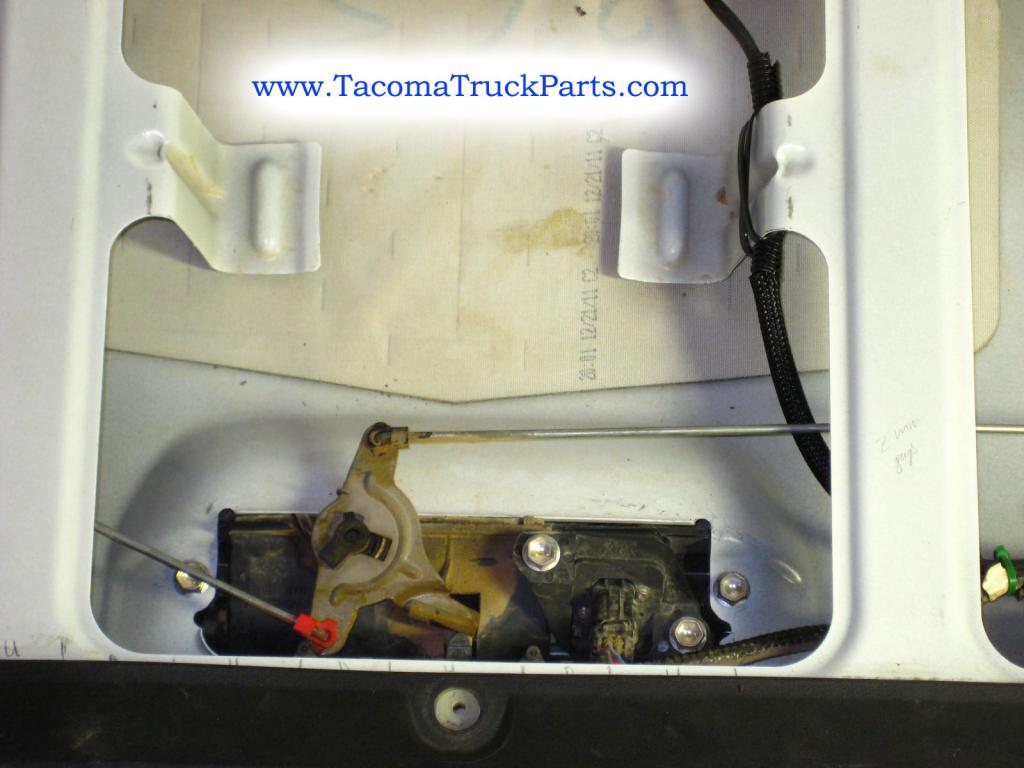
A much better design and a more solidly mounted power tailgate lock. The TacomaTruckParts bracket does not interfere with the back-up camera or the tailgate latch mechanism.

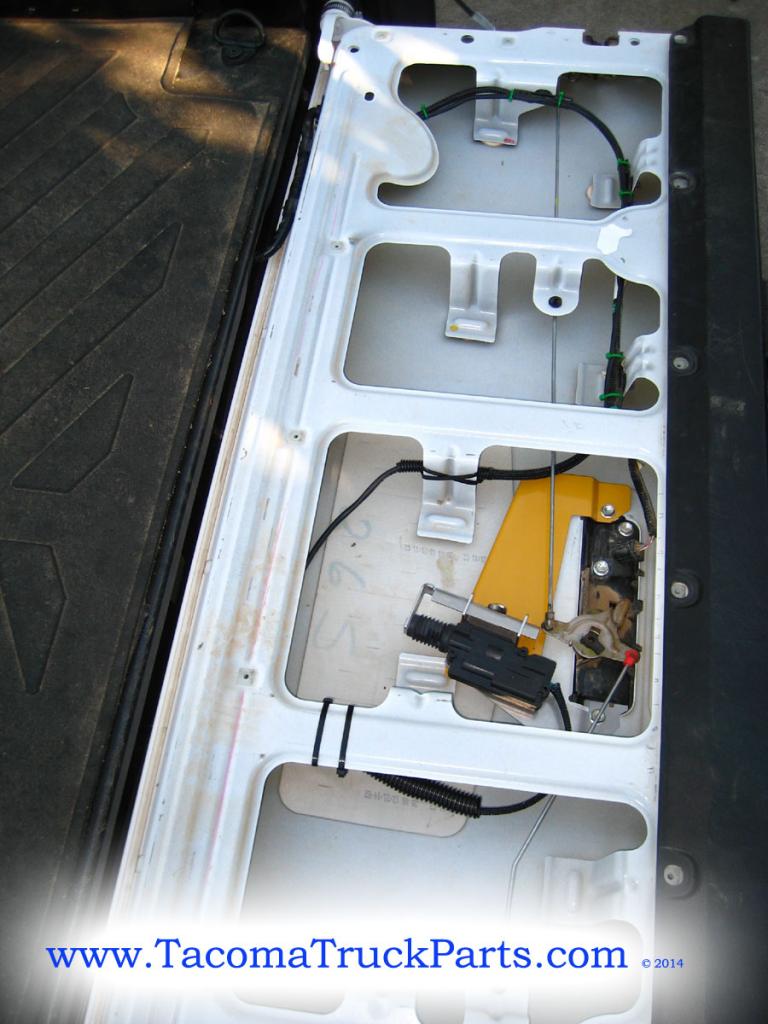
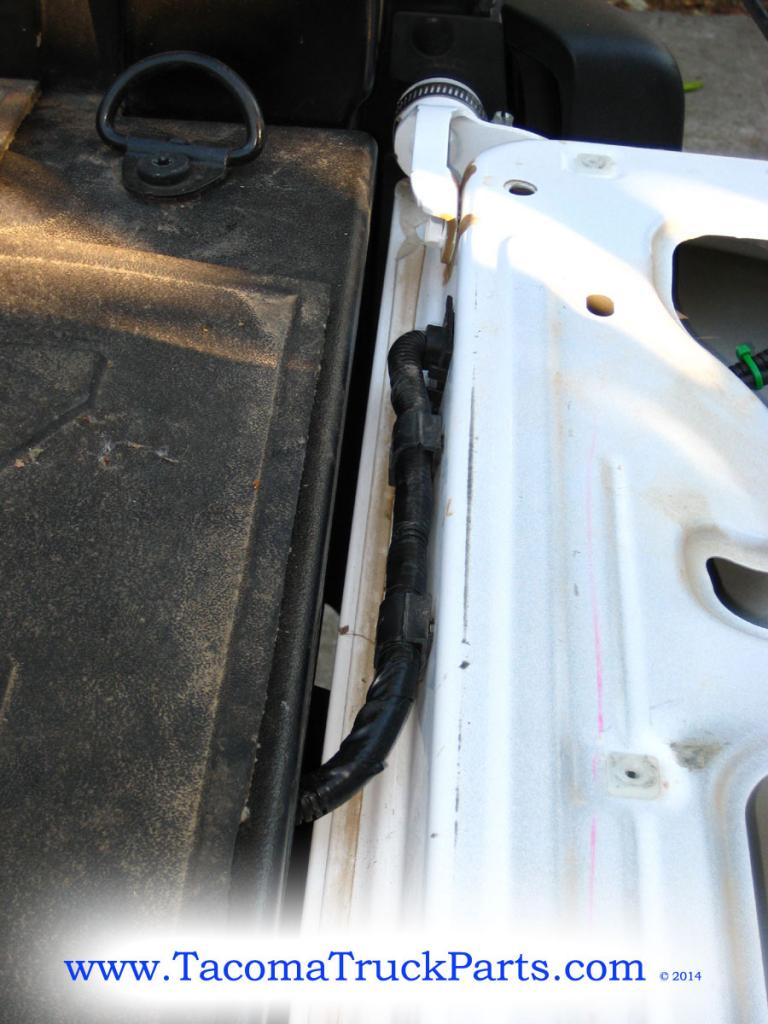
I bundled the PL8521 wires into the plastic sleeve that the back-up camera wires are in, so that I had only one wire bundle going from the tailgate to the body.... for a cleaner look.
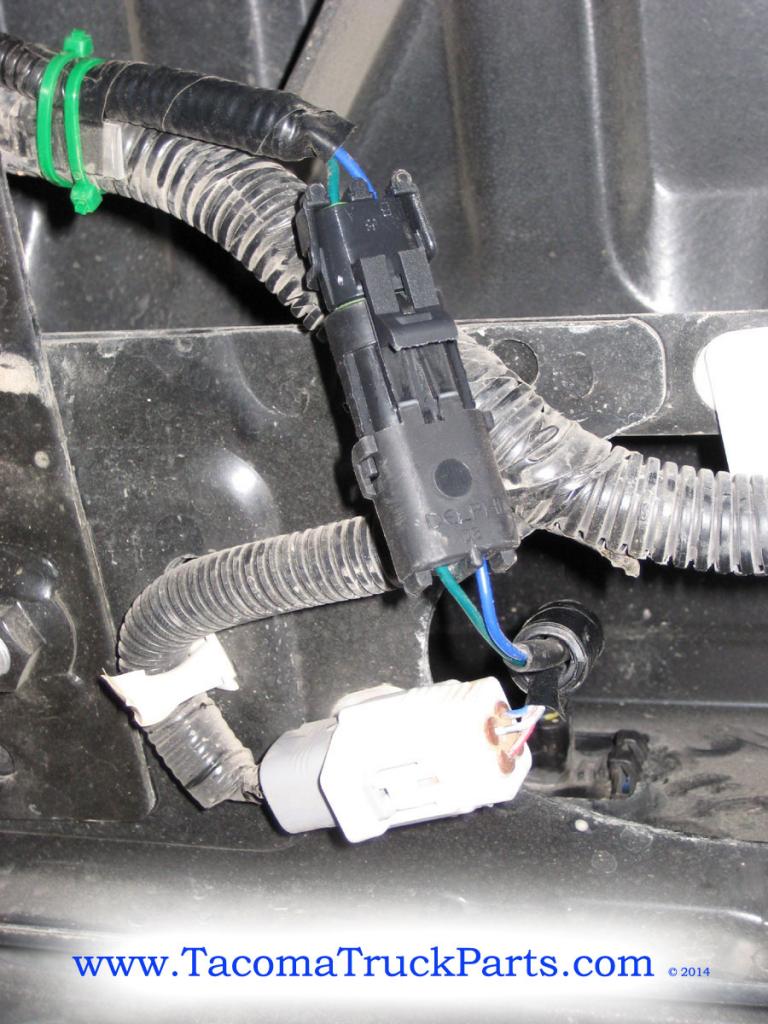
The black PL8521 power connector right above the white back-up camera connector plug.
Run the wires along the top of the passenger side frame rail. Make sure to zip-tie through frame holes every 6" or so. This is where the PL8521 wires enter the cab on a 2012 DCLB SR5 4x4 - under the front passenger seat.
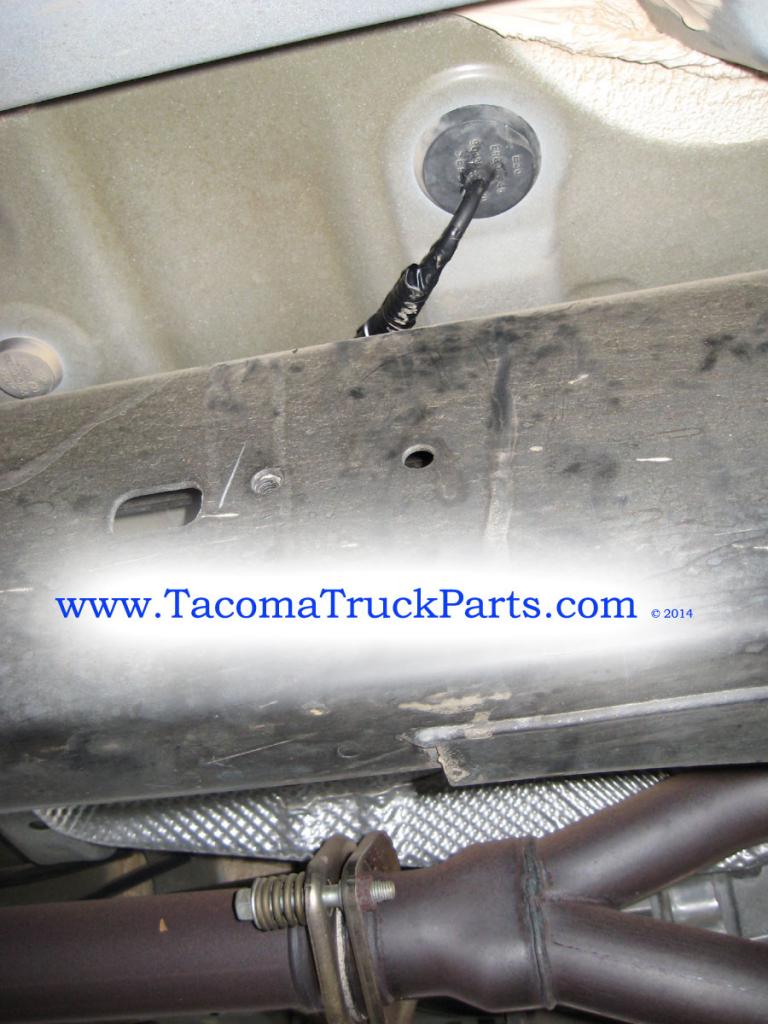
Right under the forward end of the front passenger seat is where this rubber body plug is. Perfect location to enter the cab and easy to seal with RTV.
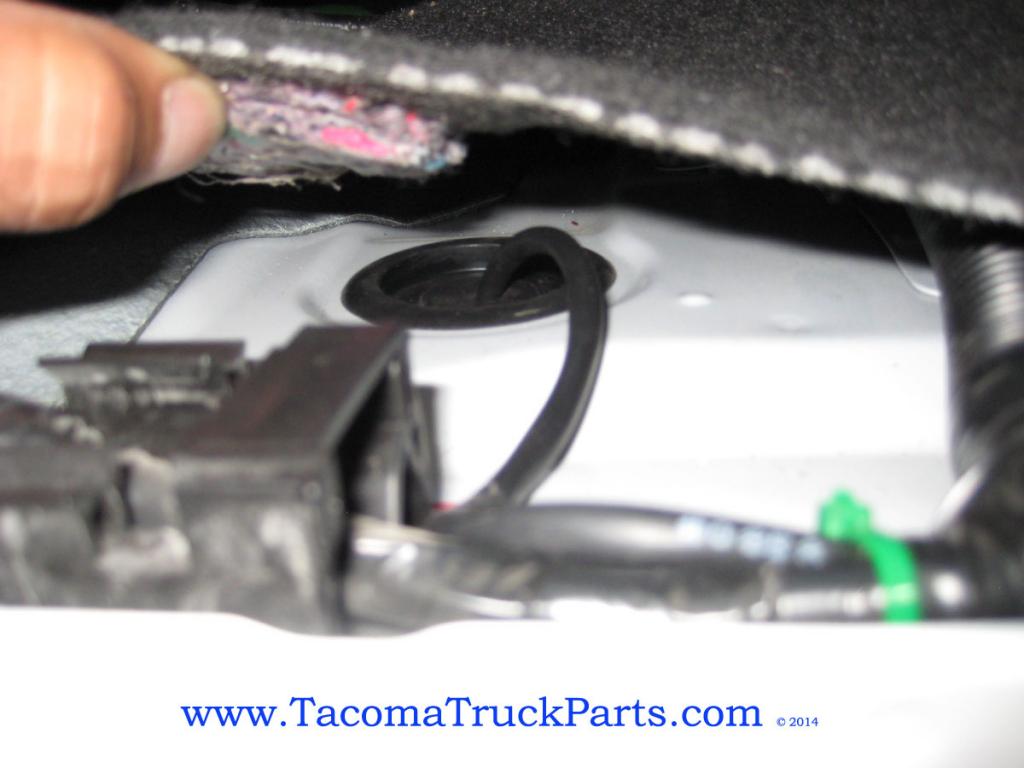
Running along the door wire-harness frame to the front passenger foot well / lick panel. Remove the plastic sill, starting at the back end, by pulling straight up.
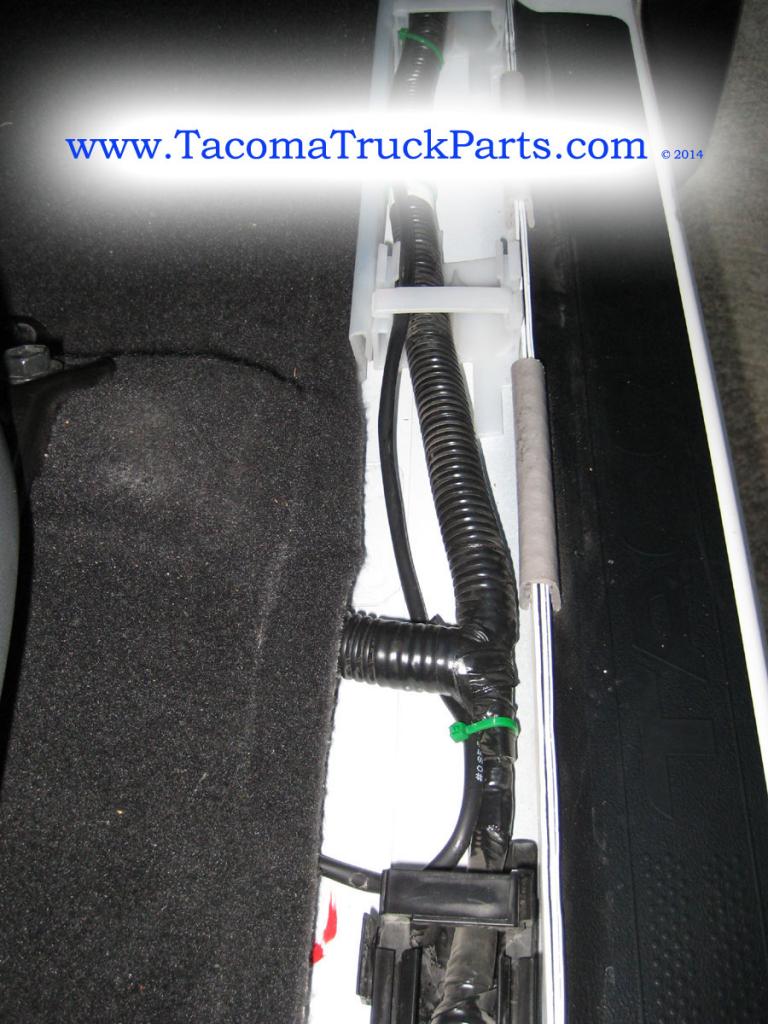
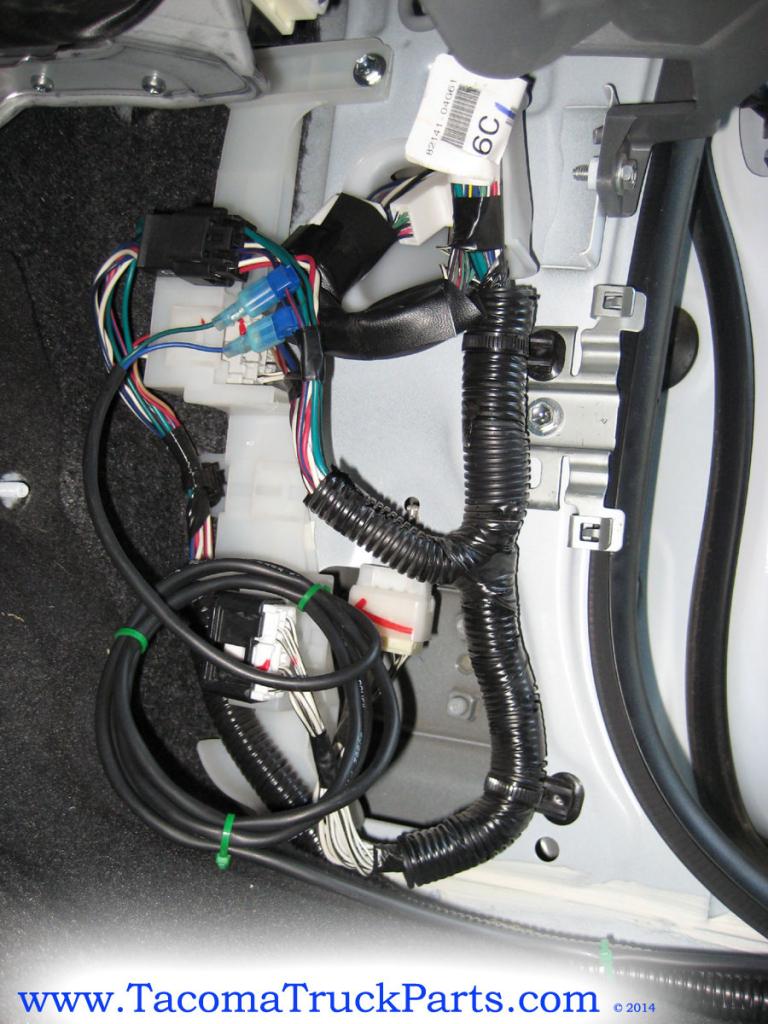
Remove the kick panel by first removing the black plastic nut with the three holes in it - just unscrew it by hand. Then pull the panel rearward with a quick tug. You can see the wire bundle you need to tap into. I coiled up the extra length of wire.
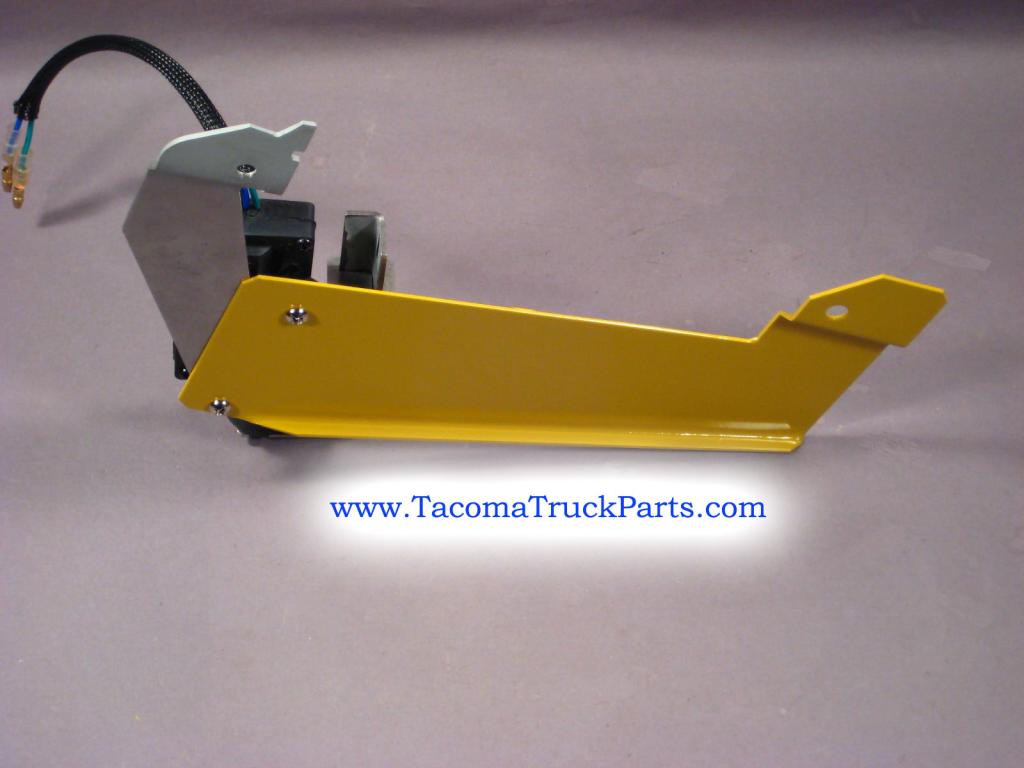
Now back to the tailgate. Using a 10mm. wrench, remove the two bolts attaching the PL8521/bracket.
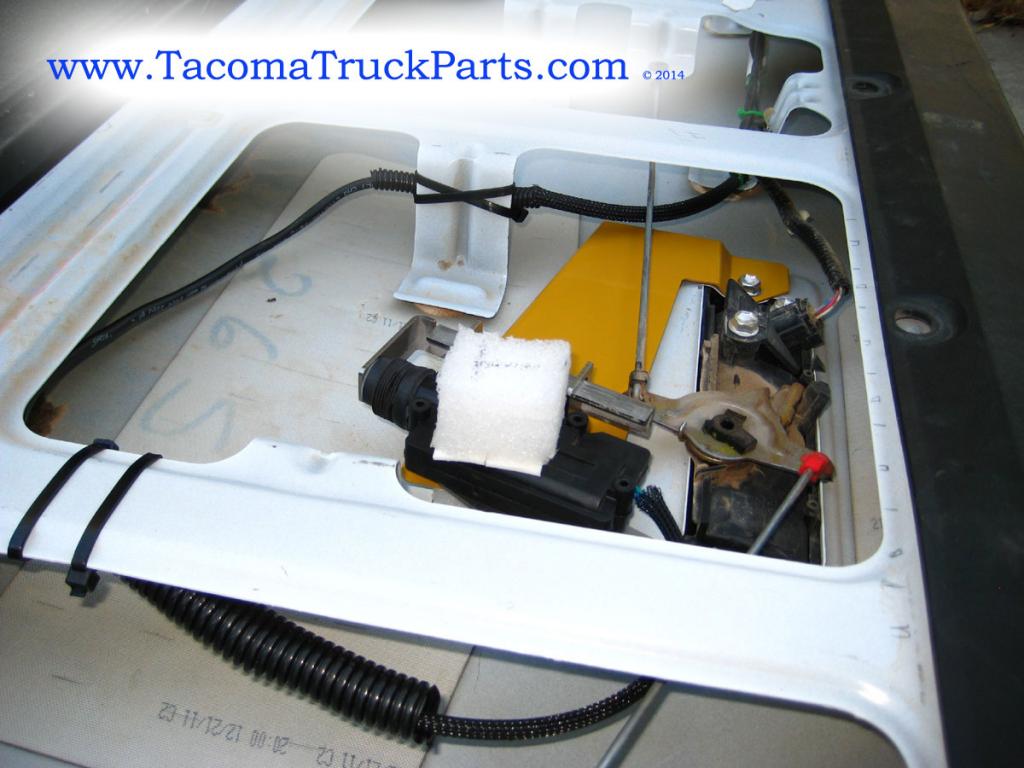
Flip the PL8521 over and attach a piece of foam (about 25mm thick) with double-stick tape to the metal bracket, under the plastic solenoid housing.

Flip the PL8521 back over and re-attach the two 10mm bolts, make sure to properly torque the bolts. Now attach another piece of foam (about 29mm thick) with double-stick tape to the plastic solenoid housing. Align it so that the top foam is directly over the bottom foam.
I recently bought and installed the Pop & Lock PL8521 Power Tailgate Lock for my 2012 DCLB 4x4..... I liked it, but the mounting design seemed like it could be improved upon. I ended up designing the bracket you see in the pictures below. I also added two foam blocks to keep the power lock in place and to minimize noise and vibration.
I am offering up a few of these reinforcement brackets for the 2005 - 2015 Toyota Tacoma. They will be available on a limited basis. $17.00 includes free S&H. to the lower 48 states. You can purchase with pay pal at TacomaTruckParts.com*I painted the one in the pictures "Caterpillar Yellow". The ones I am selling are NOT painted.
Designed to fit all PL8521 power tailgate locks on all Toyota Tacoma models 2005 - 2015, with and w/o the back-up camera.
Let me know what you all think....
Jesse

You can see the two screws on the PL8521 which we will attach the new bracket with. Do not remove both screws at the same time. Attach the bracket with one screw first, only tighten after both screws are attaching the new bracket.


Remove both outer 10mm bolts. These will be re-used. You should not need any thread locking compound; If you do use any, a low strength is recommended.

You can see that with-out the reinforcement bracket, the PL8521 is attached with a single bolt. Not the best design.

A much better design and a more solidly mounted power tailgate lock. The TacomaTruckParts bracket does not interfere with the back-up camera or the tailgate latch mechanism.


I bundled the PL8521 wires into the plastic sleeve that the back-up camera wires are in, so that I had only one wire bundle going from the tailgate to the body.... for a cleaner look.


The black PL8521 power connector right above the white back-up camera connector plug.

Run the wires along the top of the passenger side frame rail. Make sure to zip-tie through frame holes every 6" or so. This is where the PL8521 wires enter the cab on a 2012 DCLB SR5 4x4 - under the front passenger seat.

Right under the forward end of the front passenger seat is where this rubber body plug is. Perfect location to enter the cab and easy to seal with RTV.

Running along the door wire-harness frame to the front passenger foot well / lick panel. Remove the plastic sill, starting at the back end, by pulling straight up.

Remove the kick panel by first removing the black plastic nut with the three holes in it - just unscrew it by hand. Then pull the panel rearward with a quick tug. You can see the wire bundle you need to tap into. I coiled up the extra length of wire.


Now back to the tailgate. Using a 10mm. wrench, remove the two bolts attaching the PL8521/bracket.

Flip the PL8521 over and attach a piece of foam (about 25mm thick) with double-stick tape to the metal bracket, under the plastic solenoid housing.

Flip the PL8521 back over and re-attach the two 10mm bolts, make sure to properly torque the bolts. Now attach another piece of foam (about 29mm thick) with double-stick tape to the plastic solenoid housing. Align it so that the top foam is directly over the bottom foam.
 Nov 17, 2014 | 06:25 PM
#2
Thread Starter
Registered User
Joined: Jun 2014
Posts: 10
Likes: 0
The first run is all gone - I didnt think these would be gone so quick.
Another batch will be finished in a day. I will keep these available on the website.
Cost is still $17.00 with free S&H to the lower 48 states.
Jesse
Another batch will be finished in a day. I will keep these available on the website.
Cost is still $17.00 with free S&H to the lower 48 states.
Jesse

Thread
Thread Starter
Forum
Replies
Last Post
FS[PacNorWest]: 1987 Toyota 4Runner $1800 Whidbey Island, WA
coreyedwards7611
Vehicles - Trailers (Complete)
4
Jan 16, 2016 06:38 PM
WTB[MidAtl]: WTB: 89-95 radio brackets/standard cab carpet 2wd
mtb_taco
Items Wanted
0
Jul 15, 2015 08:36 AM


