
1990 2 Door 3.4 Swap
 Jan 25, 2012 | 08:15 PM
#1
Thread Starter
Registered User
Joined: Jul 2007
Posts: 301
Likes: 0
From: guam
1990 2 Door 3.4 Swap
Hi All,
Doing my swap now and think I'm almost done. I'll try to keep this short and simple.
I had to get the motor rebuilt (gaskets from ebay; really cheap with pistons,rings, bearings new oil pump ect... $280 - selller: domesticgaskets) I'm almost done, so I felt it was time to share...PLEASE if you have any suggestions or ideas let me know. I know I will be running into problems when I do the EVAP this weekend.
-1990 4x4 2 door 4runner
-3.0 Automatic converted to manual
-4 linked T100 rear with detroit
-SAS TG 3", Diamond with Ausie locker,Longfield inners and dirty 30s
-Duel Ultimate from Marlin - 23 spline throughout
-Bobbed 3 feet!! I think lol IDK
-3" body lift....hated it but it's working good on this swap lol, I might end up cutting it to 1.5 inches for a little clearance on hood.
Donor:
-1997 T100
-2wd Manual
Things I've done and will be doing (ongoing):
-Kept the 3.0 alt ( high output 130amps)
-installed Doug thorley header (passenger side drop... had to modify - see pics)
-installed new radiator - ebay (metal tank not plastic $125 - seller :mysourcedepot)
-made a bracket for a "pull" slave cylinder
-made a battery tray
-completed Big 3 upgrade
-installed pull slave cylinder (had to make a bracket, see pics - ebay - $65)
-high flow catalytic magnaflow (ebay -$71.89)
-Air intake (ebay - $40)
-installed stage 2 clutch, pedal feels like stock (ebay - $165 seller: eclutchmaster)
-completed tach mod
-Magnaflow muffler - 14356
-ORS wire harness
-installed new wires and spark plugs
-installed electric fan (had this on my 3.0 for over 10 yrs! great upgrade)
-bypassed heater hoses (don't need a heater where I live)
now time for some boring pics...like I said, simple
Doing my swap now and think I'm almost done. I'll try to keep this short and simple.
I had to get the motor rebuilt (gaskets from ebay; really cheap with pistons,rings, bearings new oil pump ect... $280 - selller: domesticgaskets) I'm almost done, so I felt it was time to share...PLEASE if you have any suggestions or ideas let me know. I know I will be running into problems when I do the EVAP this weekend.
-1990 4x4 2 door 4runner
-3.0 Automatic converted to manual
-4 linked T100 rear with detroit
-SAS TG 3", Diamond with Ausie locker,Longfield inners and dirty 30s
-Duel Ultimate from Marlin - 23 spline throughout
-Bobbed 3 feet!! I think lol IDK
-3" body lift....hated it but it's working good on this swap lol, I might end up cutting it to 1.5 inches for a little clearance on hood.
Donor:
-1997 T100
-2wd Manual
Things I've done and will be doing (ongoing):
-Kept the 3.0 alt ( high output 130amps)
-installed Doug thorley header (passenger side drop... had to modify - see pics)
-installed new radiator - ebay (metal tank not plastic $125 - seller :mysourcedepot)
-made a bracket for a "pull" slave cylinder
-made a battery tray
-completed Big 3 upgrade
-installed pull slave cylinder (had to make a bracket, see pics - ebay - $65)
-high flow catalytic magnaflow (ebay -$71.89)
-Air intake (ebay - $40)
-installed stage 2 clutch, pedal feels like stock
(ebay - $165 seller: eclutchmaster)-completed tach mod
-Magnaflow muffler - 14356
-ORS wire harness
-installed new wires and spark plugs
-installed electric fan (had this on my 3.0 for over 10 yrs! great upgrade)
-bypassed heater hoses (don't need a heater where I live)
now time for some boring pics...like I said, simple
Last edited by 4x4runr; Jan 26, 2012 at 05:50 PM. Reason: updates
Jan 25, 2012 | 08:22 PM
#2
Thread Starter
Registered User
Joined: Jul 2007
Posts: 301
Likes: 0
From: guam
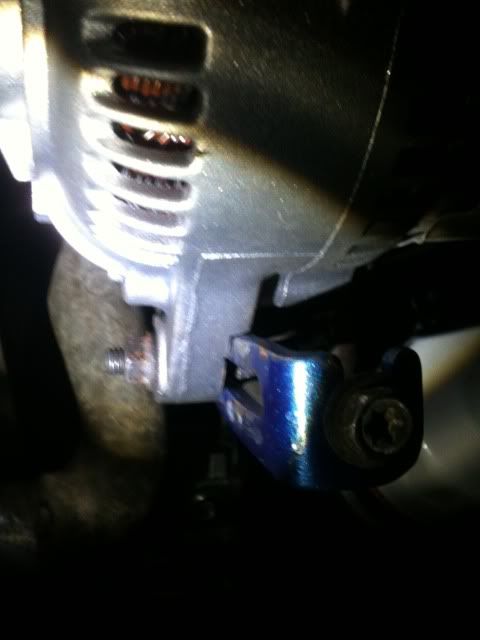
Pic of the alt, you can see where I grinded the back of the ear to fit. Works great! Bracket is on the way but I'll be getting rid of my power steering 
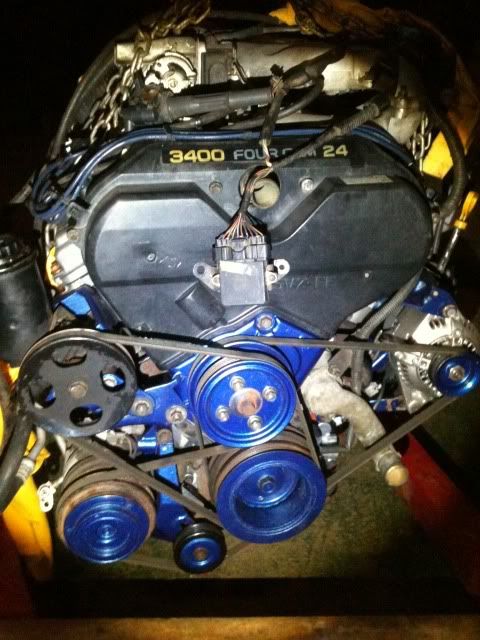
3.4 after getting rebuilt and about to drop in the engine bay...
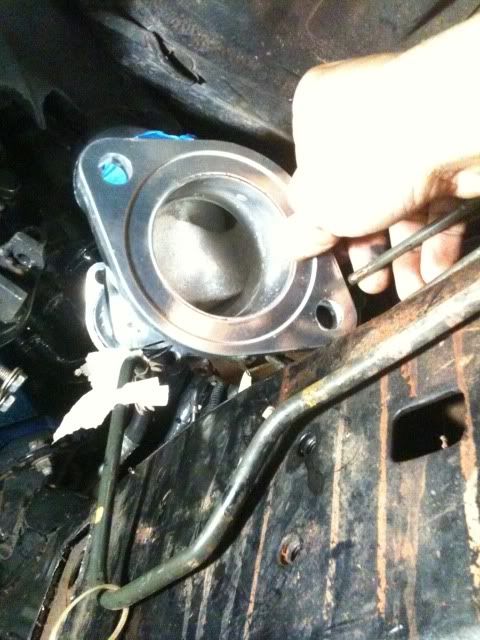
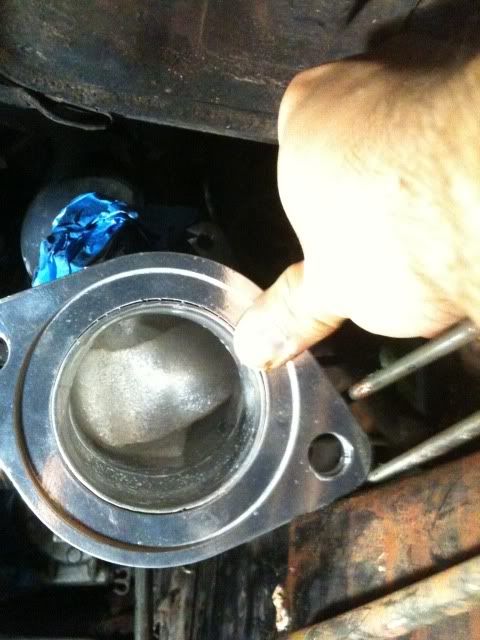
Pics of the header before the mod, you can see where the flange hits also, fuel and brake lines in the way....not to mention the fork also hits the header collector.

3.4 after getting rebuilt and about to drop in the engine bay...
Pics of the header before the mod, you can see where the flange hits also, fuel and brake lines in the way....not to mention the fork also hits the header collector.
Jan 25, 2012 | 08:27 PM
#3
Thread Starter
Registered User
Joined: Jul 2007
Posts: 301
Likes: 0
From: guam
Modded header....hope this doesnt void the warranty.... LOL
Bought a 90* mandrel bent tube ($44!!! dang that was expensive)
tacked it on and had the guys at the shop weld them in... along with the flex pipe
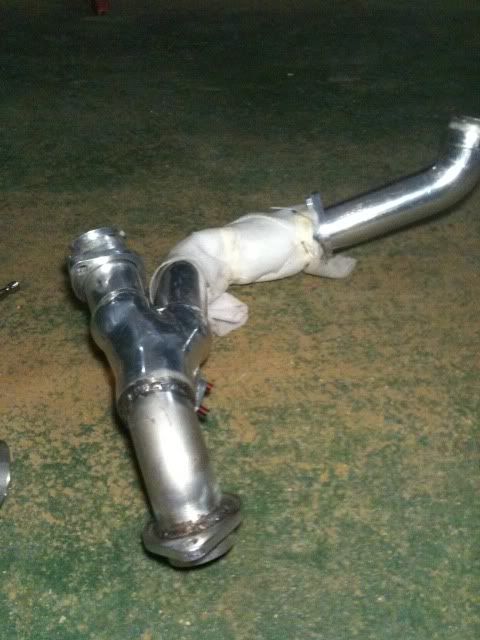
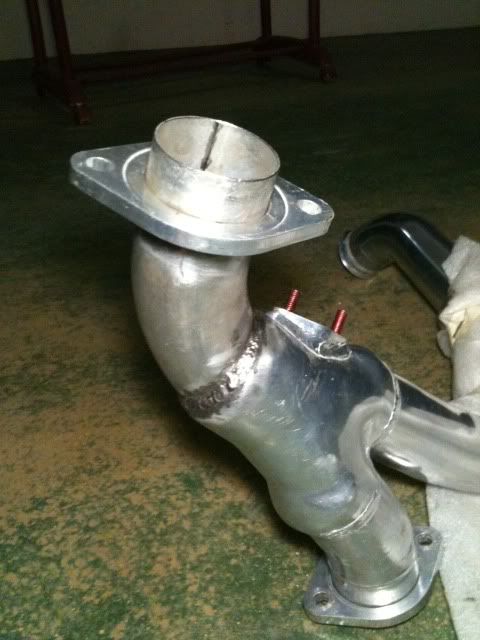
flex pipe....


Bought a 90* mandrel bent tube ($44!!! dang that was expensive)
tacked it on and had the guys at the shop weld them in... along with the flex pipe
flex pipe....
Jan 25, 2012 | 08:37 PM
#5
Thread Starter
Registered User
Joined: Jul 2007
Posts: 301
Likes: 0
From: guam
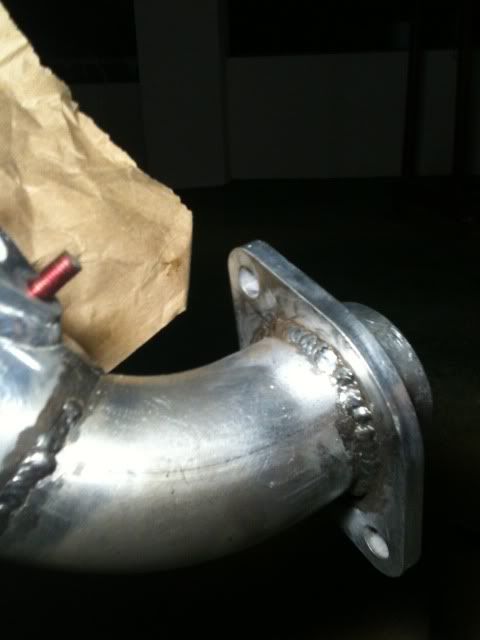
Flanges weren't hitting the chassis but was really close, so I decided to shave them, down a bit. Good thing the flex pipe is sleeved a little gasket to go on after the cat back install...
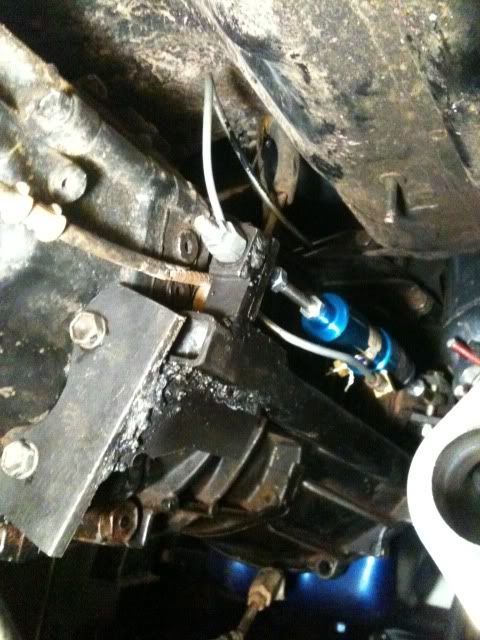
Slave cylinder and bracket.....this bracket has gone over several mistakes...please ignore the welds....I can't do flux core....too many popping. Flux core are for pros lol.....
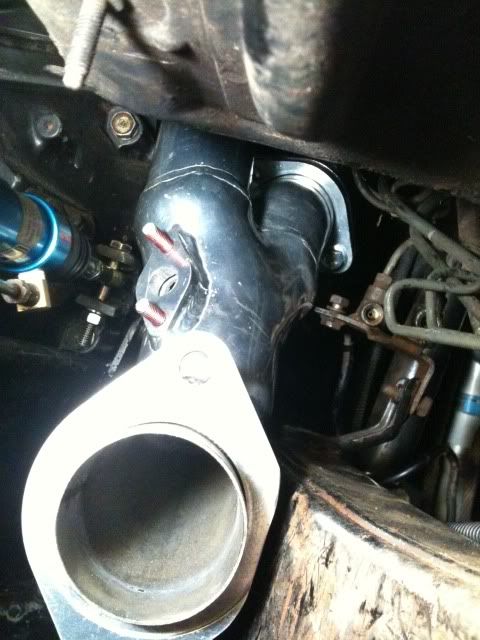
You can see how close the fork is to the collector but it doesn't get any closer. Even when pressing the clutch, all clear!!

Another angle of the bracket I made..again ignore the welds
Bracket is on the original slave cylinder mount and then braced on the trans for rear support. When pressed, the 1" box actually flexes lol, with the new support thing doesn't move at all. I'm thinking I might go back and redo this bracket and make it simpler now that I know what to do..
and my new radiator
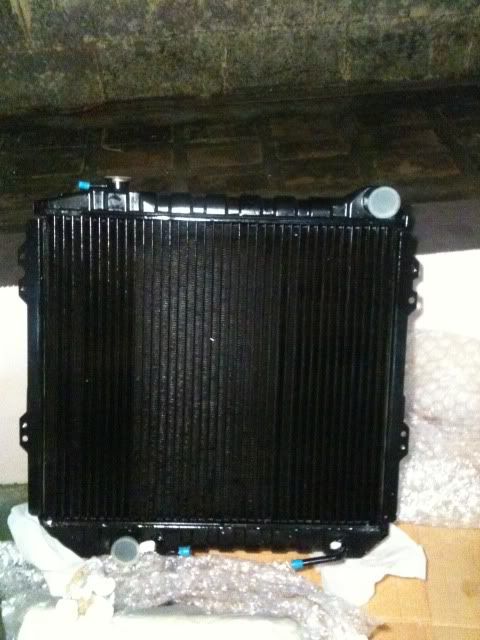
That's all for now...
I'll let you know when I run into trouble..Hope I can get the EVAP going. Hoping to turn key this Sunday!
Slave cylinder and bracket.....this bracket has gone over several mistakes...please ignore the welds....I can't do flux core....too many popping. Flux core are for pros lol.....
You can see how close the fork is to the collector but it doesn't get any closer. Even when pressing the clutch, all clear!!
Another angle of the bracket I made..again ignore the welds
Bracket is on the original slave cylinder mount and then braced on the trans for rear support. When pressed, the 1" box actually flexes lol, with the new support thing doesn't move at all. I'm thinking I might go back and redo this bracket and make it simpler now that I know what to do..
and my new radiator
That's all for now...
I'll let you know when I run into trouble..Hope I can get the EVAP going. Hoping to turn key this Sunday!
Last edited by 4x4runr; Jan 25, 2012 at 08:50 PM.
Jan 25, 2012 | 08:41 PM
#6
Thread Starter
Registered User
Joined: Jul 2007
Posts: 301
Likes: 0
From: guam
Powder coated? No, I left it with original polish.... I have some really nice header wrap though but was thinking of using it on some of the wiring stuff above the header.
Jan 30, 2012 | 04:32 PM
#7
Thread Starter
Registered User
Joined: Jul 2007
Posts: 301
Likes: 0
From: guam
Is there something wrong with breknraj's pics on his sticky thread? I can't seem to open/view them.
Anyway, I was able to figure out the EVAP using Elvota's thread but wanted to get more info using breknraj's but no luck. Just a few more things to do then turn key day
Anyway, I was able to figure out the EVAP using Elvota's thread but wanted to get more info using breknraj's but no luck. Just a few more things to do then turn key day
Trending Topics
Jan 31, 2012 | 03:30 PM
#11
Thread Starter
Registered User
Joined: Jul 2007
Posts: 301
Likes: 0
From: guam
 Feb 2, 2012 | 04:23 PM
#15
Thread Starter
Registered User
Joined: Jul 2007
Posts: 301
Likes: 0
From: guam
Thanks, I'm thinking it's the reverse light. And since the donor is a 2wd, there is no other wire for the 4wd light. The ORS wire harness has a reverse light on it so I guess I'll be using that instead.
Feb 2, 2012 | 04:30 PM
#16
Registered User

Joined: Jan 2009
Posts: 1,908
Likes: 5
From: Fresno, Ca.

 Feb 2, 2012 | 04:46 PM
#18
Thread Starter
Registered User
Joined: Jul 2007
Posts: 301
Likes: 0
From: guam
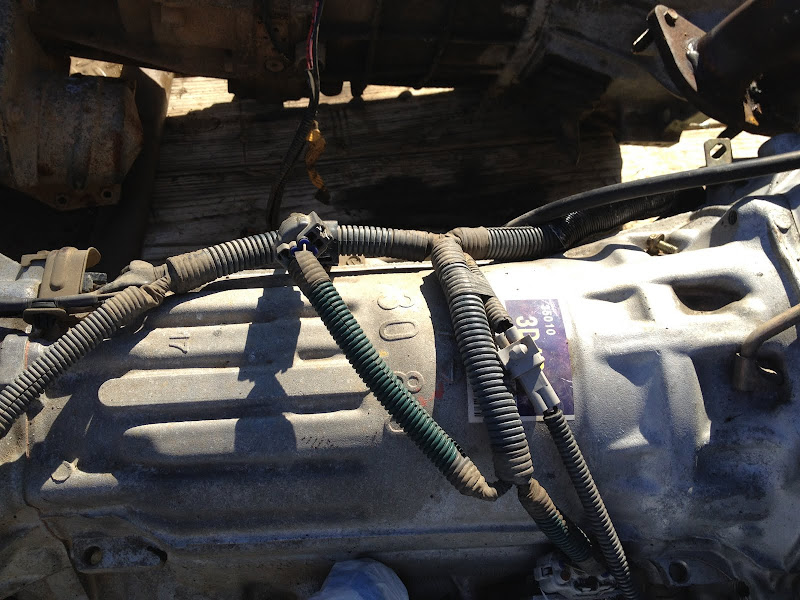
Worked on the EVAP last night. Thanks to Elvota's thread I was able to complete it all.
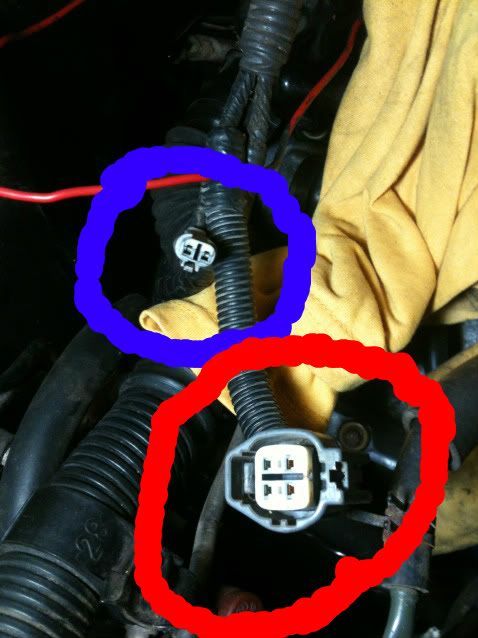
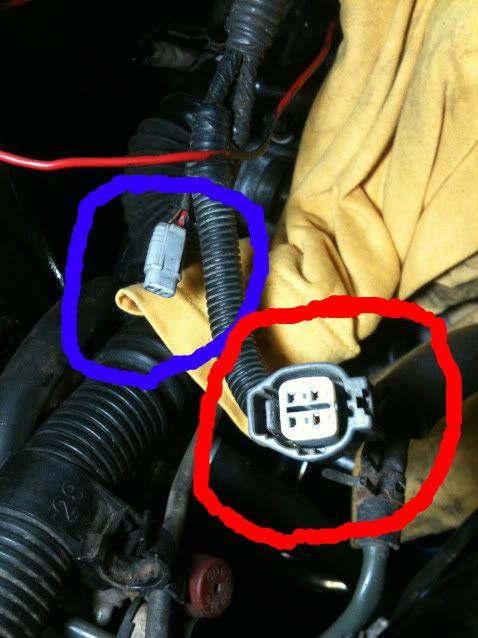
I cut a bracket off the '97 EVAP canister for the '97 VPS bracket...
I cut off the bracket in blue, and grinded a little off the sides so the VPS can slide in red (you may want to double check your VPS first before you grind to make sure it's not too loose), then locked it in place with a zip tie, kind of like a carter pin.
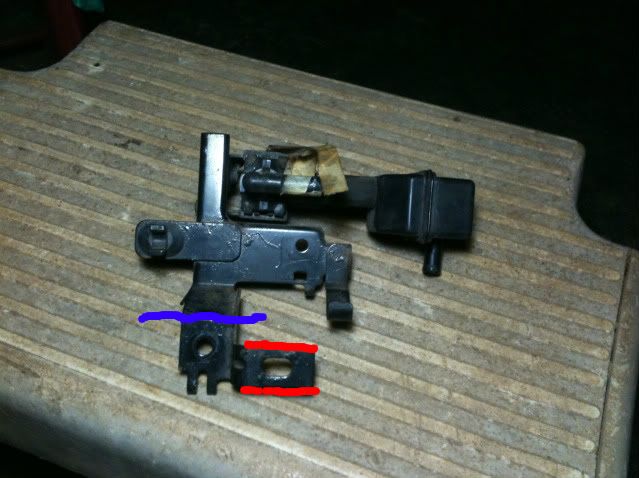
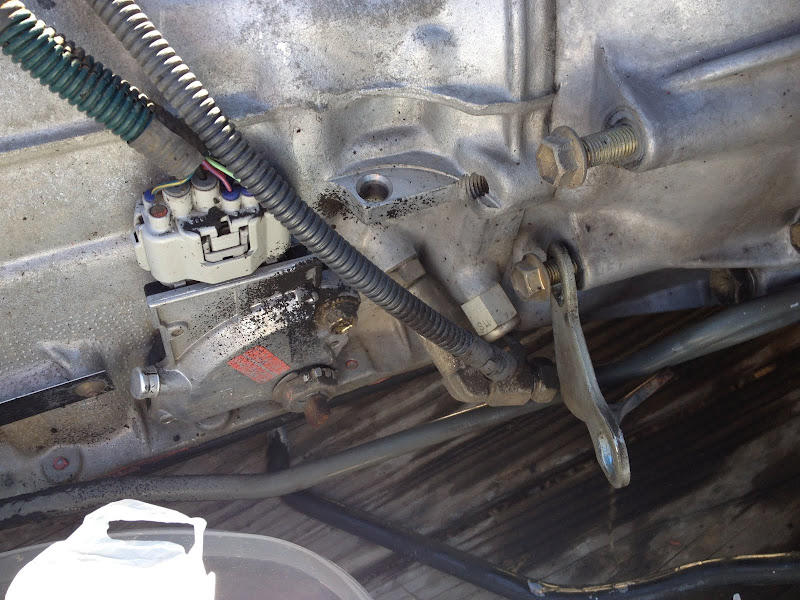
Here you can see that there is enough space between the VPS and VSV...
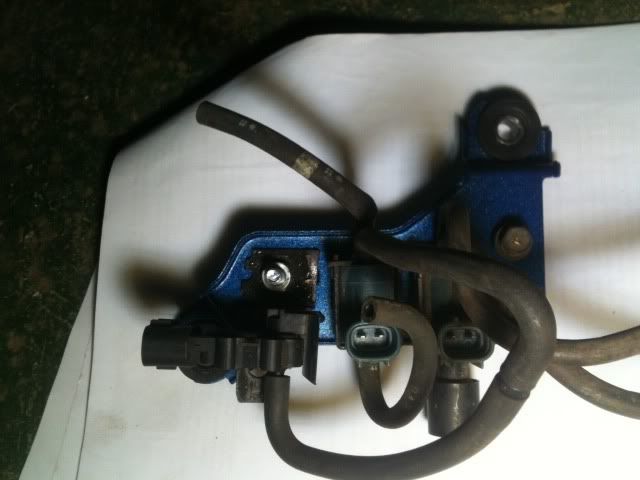
All hosed up...
I cut a bracket off the '97 EVAP canister for the '97 VPS bracket...
I cut off the bracket in blue, and grinded a little off the sides so the VPS can slide in red (you may want to double check your VPS first before you grind to make sure it's not too loose), then locked it in place with a zip tie, kind of like a carter pin.
Here you can see that there is enough space between the VPS and VSV...
All hosed up...
Feb 2, 2012 | 04:53 PM
#19
Thread Starter
Registered User
Joined: Jul 2007
Posts: 301
Likes: 0
From: guam
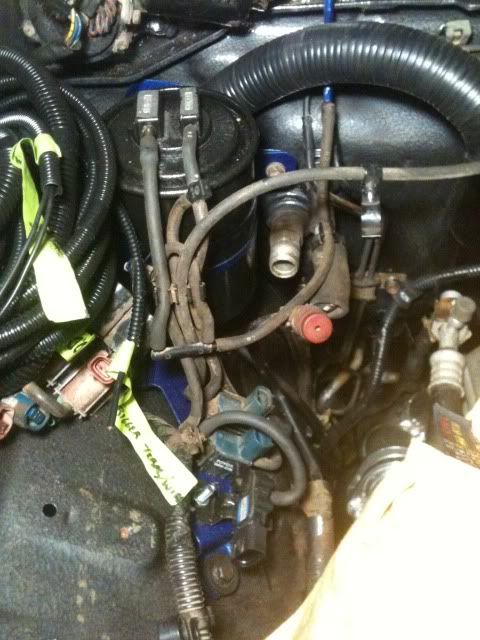
I also noticed that with this new EVAP setup I'm not using the second canister on the bottom of the wheel well...is that correct? I always wanted to hack that thing off....I guess now is my chance! hahaha
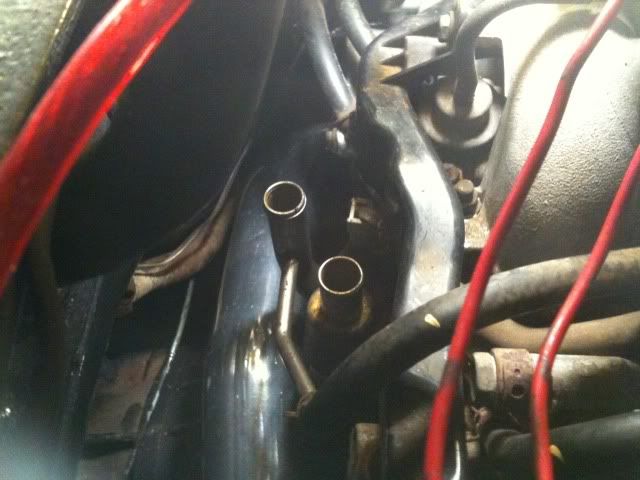
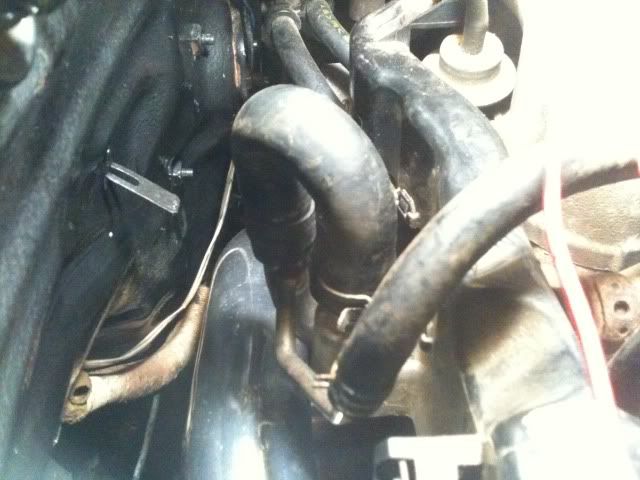
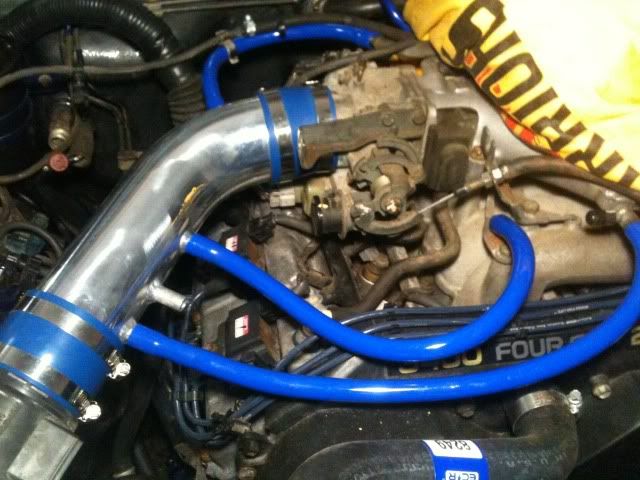
Here is a pic of my air intake....I'm not sure where the other port is supposed to be hooked up....can anyone please tell me...I couldn't figure it out.
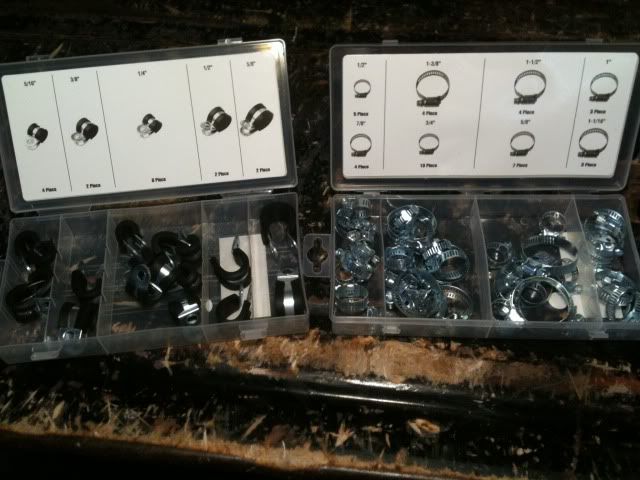
Also got some stuff from Harbor Freight the other day....
Here is a pic of my air intake....I'm not sure where the other port is supposed to be hooked up....can anyone please tell me...I couldn't figure it out.
Also got some stuff from Harbor Freight the other day....


