
Transmission removal tips

 May 20, 2009 | 11:15 AM
#2
Registered User
Joined: Jul 2007
Posts: 1,705
Likes: 12
From: Yotatech, because Pirate is too expensive. NorCal.
IDK never done it but you could try unbolting the engine and trans mounts and pulling the trans down to angle the engine up. Might get better access with a cheater bar and long extension.
 May 20, 2009 | 02:06 PM
#7
Registered User
Joined: Mar 2008
Posts: 4,371
Likes: 6
From: Texas
I did this a few weeks ago on the 89 runner. What I did was pull the X member out (jack under the tranny) and then lower the tranny/t-case down about 4 inches. It gave me enough room to access the top two bolts through the shifter plate (with the plate and shifters removed). I think it was about 2 feet of extensions and a deep socket with a 3/8 drive ratchet and a small cheater pipe. You can feel your way to the bolts if you're familiar with the location of them.
Put them back in the same way.
Oh and if you don't have a tranny jack then go rent one. That thing saved my bacon, and saving bacon is paramount as we all know.
Put them back in the same way.
Oh and if you don't have a tranny jack then go rent one. That thing saved my bacon, and saving bacon is paramount as we all know.
Trending Topics
May 20, 2009 | 02:29 PM
#8
Registered User

Joined: Oct 2008
Posts: 373
Likes: 2
From: Ellensburg, WA
I was able to get to mine with 24" extension and a wobbly adapter. Passenger side was almost easy the drivers side was a pita but if you remove the exhaust shield it is a little easier.
I was way to afraid to lower the engine like Junkers did but the tranny jack is a must, or the adapter like I got from the local auto parts store.
I was way to afraid to lower the engine like Junkers did but the tranny jack is a must, or the adapter like I got from the local auto parts store.
May 20, 2009 | 02:59 PM
#10
Contributing Member
Joined: Feb 2007
Posts: 9,055
Likes: 10
From: maple ridge, British Columbia, Canada
I did this a few weeks ago on the 89 runner. What I did was pull the X member out (jack under the tranny) and then lower the tranny/t-case down about 4 inches. It gave me enough room to access the top two bolts through the shifter plate (with the plate and shifters removed). I think it was about 2 feet of extensions and a deep socket with a 3/8 drive ratchet and a small cheater pipe. You can feel your way to the bolts if you're familiar with the location of them.
Put them back in the same way.
Oh and if you don't have a tranny jack then go rent one. That thing saved my bacon, and saving bacon is paramount as we all know.
Put them back in the same way.
Oh and if you don't have a tranny jack then go rent one. That thing saved my bacon, and saving bacon is paramount as we all know.
x2!!!
tranny jack all the way. Or make an adaptor for your floor jack. Trying to bench press it, or balence it on a floor jack is not fun...
You can also put a bottle jack under the front of the motor and slightly jack it up. We did this for added clearance when we did my clutch..
May 20, 2009 | 03:04 PM
#11
Registered User
Joined: Mar 2008
Posts: 12,723
Likes: 6
From: Temecula Valley, CA
Just to add to the 'fire'- adding extensions between the bolt and the ratchet or impact or whatever increases the amount of torque required to break the bolt free since the extensions will act exactly like the torsion bars on the front suspension and will absorb some of the torque and twist applied thus requiring more torque than necessary.
My little ratchet above works fine, no extensions on the socket and can break the bolt free with little more than moderate effort... or a 24" cheater.
My little ratchet above works fine, no extensions on the socket and can break the bolt free with little more than moderate effort... or a 24" cheater.
May 20, 2009 | 03:15 PM
#12
Registered User
Joined: Oct 2007
Posts: 832
Likes: 0
From: B.C
You can always detach the body mount bolts and jack the body up like 3-4 inches(just making sure nothing gets overly tight like lines and wires) but its pretty easy with extensions and a swivel socket and someone to sit in the engine bay and guide/hold your socket on the bolt while your unscrewing it.
May 20, 2009 | 03:25 PM
#13

Registered User
Joined: May 2009
Posts: 3
Likes: 0
the first time we did it with a bunch of extensions the impact would not break them loose.
Thats when we got the 20" extension. we didnt have to lower trans or take off the crossmember. you can slide your hand and touch the top bolts through the side. for the drivers side we had the exhaust removed it took us about five minutes
to do all the trans bolts.
Thats when we got the 20" extension. we didnt have to lower trans or take off the crossmember. you can slide your hand and touch the top bolts through the side. for the drivers side we had the exhaust removed it took us about five minutes
to do all the trans bolts.
May 20, 2009 | 03:32 PM
#14
Contributing Member
Joined: Feb 2008
Posts: 12,248
Likes: 33
From: Lake City, Fl
after getting an engine torn down to this:
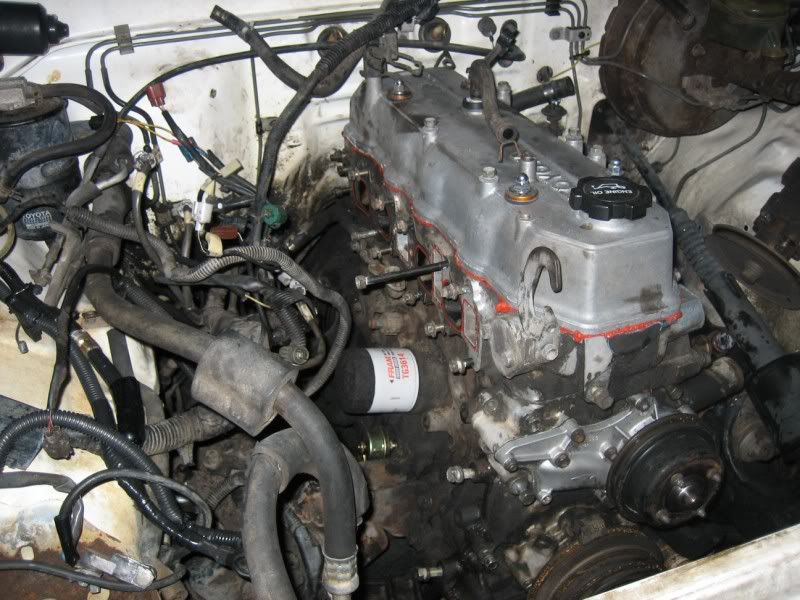
you can reach right around the back of the head and put a ratchet with a swivel-head on it, similar to the one Abe showed; the one I used is like this:

although, the tare-down might be the long process to do so, lol
you can reach right around the back of the head
and put a ratchet with a swivel-head on it, similar to the one Abe showed; the one I used is like this:although, the tare-down might be the long process to do so, lol
May 20, 2009 | 03:47 PM
#15
Registered User
Joined: Feb 2006
Posts: 1,730
Likes: 0
From: Barrie, Ontario CANADA
jesus, buy a 5 dollar rubber gasket.................

Last edited by Flash319; May 20, 2009 at 03:48 PM.
May 20, 2009 | 03:56 PM
#16
Registered User
Joined: Mar 2008
Posts: 12,723
Likes: 6
From: Temecula Valley, CA

The difference between a straight handled ratchet with swivel head like you used and the one I posted (offset handle with swivel head) is that with mine, when the socket is placed on the head of the bolt, the swivel in the head and bend in the handle puts the grip and pull direction nearly perpindicular to (right angle) and in line with the bolt head, so you are applying torque directly to the bolt head without 'spring' or 'torsional' loss due to extensions: if you drew a line through the grip to the socket, the socket and swivel combined with the bend in the handle put your hand in a place where it's less likely to cause the socket to kick or shift off the head as if you were pulling at an angle to the socket and reduces rounding of the bolt head as well.
It's a little frustrating because the swivel in the head lets the socket move while you're placing it on the bolt, but once you get it on the bolt, as long as you pull straight, there's no problem.
But it's nice to see someone else thinking beyond using extensions and more towards using the right tool for the job.
Last edited by abecedarian; May 20, 2009 at 03:57 PM.
May 20, 2009 | 04:04 PM
#17

Registered User
Joined: Sep 2007
Posts: 8,380
Likes: 871
From: San Francisco East Bay

Thread
Thread Starter
Forum
Replies
Last Post
Tigbucket
99+ Tundra, 00+ Sequoia, 98+ Land Cruiser/LX470
0
Jul 30, 2015 07:29 PM
crashburnoveride
86-95 Trucks & 4Runners
1
Jul 10, 2015 06:39 AM


