
MY poor-mans bumper build!
 Dec 23, 2008 | 01:28 PM
#1
Thread Starter
Registered User
Joined: Mar 2008
Posts: 272
Likes: 0
From: Minnesota
MY poor-mans bumper build!
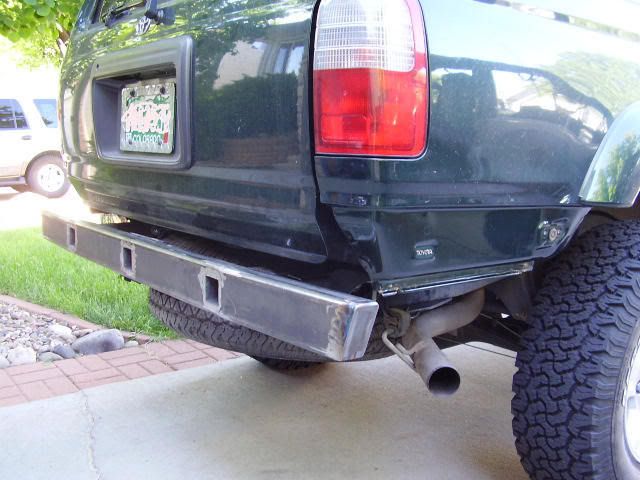
Well, here she is!
I used 3x4 x 3/16 x 63 1/4 steel.
The connecting brackets are made of 4x1/4 channel steel.
The connecting plates are bolted on using 5/8'' grade 5 bolts.
I used the stock receiver brackets that hook into the frame. I just cut them where I wanted them and viola!
Thanks to WillRadford and this thread https://www.yotatech.com/forums/f88/...18/index2.html for the awesome idea of using the stock receiver brackets!
Total cost in materials so far is about $55


I'm not finished with it yet, but as it sits now, it should be just fine for destroying anything that hits it
I still want to add:
Receiver
Two loops for d-ring shackles.
There will be more things added to it, but it will be slow going since the weather has been pretty crappy here...
Oh, and this was my first REAL welding project, so I think I did pretty well on a few of those welds
What do you guys think?
Last edited by JohnRaven; Dec 23, 2008 at 02:08 PM.
Dec 23, 2008 | 01:45 PM
#2
Registered User
Joined: Oct 2008
Posts: 41
Likes: 0
From: austin, TX
Def. beefy looking.
You might try and cut the ends at an angle to give it a look that is less boxy, and wont hang down so much on the corners.
Your welds...umm...are welds, im not gonna lie they arent pretty, but if you got good penetration then you should be golden. Try practicing on some scrap getting the metal to flow in the direction you are welding. Just takes repetition and knowing what your doing.
(i just noticed i said beefy and penetration in the same post..haha.."Good things Ruben")
-scott-
Dec 23, 2008 | 01:53 PM
#3
Contributing Member
Joined: Nov 2005
Posts: 8,875
Likes: 3
From: Longmont, CO
I think the welds look pretty good. One thing for sure - WAYYYY better to be too hot than too cold on this stuff.
The big thing? Ditch that grade 5 hardware and get grade 8 like NOW. Grade 5 is not anywhere near strong enough for a bumper.
Overall, I think it looks awfully, ummm, "utilitarian". Personally, I would have used a thinner tube (like 2x4) and kept it closer to the body. With 2nd gens though, the looks of a rear bumper seem to depend A LOT on what you do with the sides. Match them up nice and it will be a great looking bumper... Do it poorly and it will look like a hack job.
I really like the way BruceTS did the sides and underneath of his bumper.
Dec 23, 2008 | 03:17 PM
#5
Thread Starter
Registered User
Joined: Mar 2008
Posts: 272
Likes: 0
From: Minnesota
I'll be replacing them with grade 8's! I did a little reading on grade 5 & grade 8 bolts...Even if grade 5 would be enough, if grade 8 is better (and it is) then thats what I should be using! Thanks!
I'm gonna look into cutting the angles on the ends of the bumper... (It will probably be a PITA to cut it now though...) Not sure how I'm going to tackle the sides, though. (if I even attempt to lol)
I'm fairly creative, but I'm lacking metal fabricating tools and the skills to use them
 Dec 23, 2008 | 03:33 PM
#7
Thread Starter
Registered User
Joined: Mar 2008
Posts: 272
Likes: 0
From: Minnesota
Yeah, taking it off is easy enough, its just the cutting part! I've only got a small Delta chop-saw and a die-grinder or two. I could have someone locally cut it, but that would dip into my small budget for this project
we'll see though!
Last edited by JohnRaven; Dec 23, 2008 at 05:09 PM.
Trending Topics
Dec 23, 2008 | 04:20 PM
#8
Registered User
Joined: Nov 2005
Posts: 1,205
Likes: 1
From: SouthWest Littleton, Colorado
It reminds me of something.......
Mine started like this. Mine has a couple of subtle bends in it. Mine looks long also but after I stasted building the sides things came into perspective. My main beam is 2x4x 3/16. My sides are 2x4x .120. I still have to finish the sides. Yeah I know mine is a 3rd gen and yours is a 2nd. I have 3 receivers in mine for towing and recovery.
This is the only picture that I have of the sides.
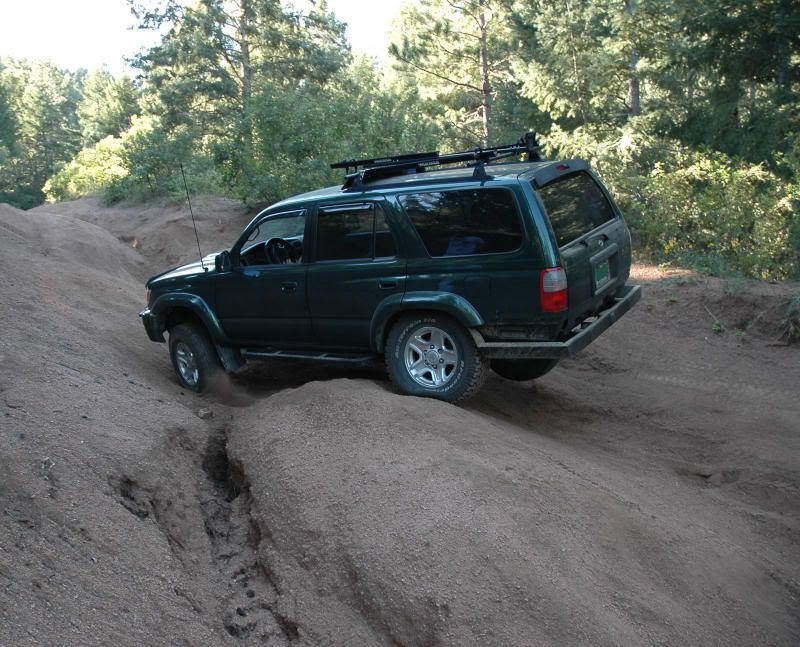
About 4 months ago I was rearended and the only damage, to mine, was scuffed paint. The car that hit me wasn't so lucky. It was towed away.
Looks good. Keep it tight so you don't hurt your departure angle. The weak point looks like the hitch brackets. Any way to reinforce them laterally?
Mine started like this. Mine has a couple of subtle bends in it. Mine looks long also but after I stasted building the sides things came into perspective. My main beam is 2x4x 3/16. My sides are 2x4x .120. I still have to finish the sides. Yeah I know mine is a 3rd gen and yours is a 2nd. I have 3 receivers in mine for towing and recovery.
This is the only picture that I have of the sides.
About 4 months ago I was rearended and the only damage, to mine, was scuffed paint. The car that hit me wasn't so lucky. It was towed away.
Looks good. Keep it tight so you don't hurt your departure angle. The weak point looks like the hitch brackets. Any way to reinforce them laterally?
Dec 23, 2008 | 05:07 PM
#9
Thread Starter
Registered User
Joined: Mar 2008
Posts: 272
Likes: 0
From: Minnesota
^ Yep! I remember seeing pictures of your bumper awhile back! I like the idea of having 3 receivers... Hmmm...
As for reinforcing the receiver plates... Hmm, not sure! Any one else care to comment on that?
As for reinforcing the receiver plates... Hmm, not sure! Any one else care to comment on that?
Dec 23, 2008 | 07:02 PM
#13
Contributing Member
Joined: Nov 2005
Posts: 8,875
Likes: 3
From: Longmont, CO
Ummm - no. 3 dashes = grade 5, 6 marks = grade 8
NOTE: In metric, they are marked with the grade - it will say "8.8" or "10.9" on the head. Metric 8.8 is roughly equivalent to SAE Grade 5, and 10.9 is similar to SAE Grade 8
NOTE: In metric, they are marked with the grade - it will say "8.8" or "10.9" on the head. Metric 8.8 is roughly equivalent to SAE Grade 5, and 10.9 is similar to SAE Grade 8
Dec 24, 2008 | 06:37 AM
#14
Registered User
Joined: Nov 2005
Posts: 1,205
Likes: 1
From: SouthWest Littleton, Colorado
TC
I wouldn't be overly worried about 6-grade 5 bolts holding the bumper on. Sure, grade 8 are stronger but grade 5 are still stupid strong. What grade are the 4 little bolts that the driveshaft is bolted to the pinion flange?
Here is some great info on bolts and their strength.
Dec 24, 2008 | 09:10 AM
#15
Contributing Member
Joined: Nov 2005
Posts: 8,875
Likes: 3
From: Longmont, CO
I hear what you're saying, but for the cost, there is absolutely no reason to risk it. If that bumper comes off during a recovery, I don't want to be anywhere near it!
Dec 24, 2008 | 04:45 PM
#16
Registered User
Joined: Nov 2005
Posts: 1,205
Likes: 1
From: SouthWest Littleton, Colorado
I was shocked that the driveshaft bolts are so small (something like 6mm or 8mm). I'll bet that you, TC, have broken some tho. Ha Ha.

Thread
Thread Starter
Forum
Replies
Last Post
RedRunner_87
95.5-2004 Tacomas & 96-2002 4Runners (Build-Up Section)
84
Jun 1, 2021 01:51 PM
Peevedkitten
86-95 Trucks & 4Runners (Build-Up Section)
11
Aug 31, 2015 06:57 PM
priest16
84-85 Trucks & 4Runners (Build-Up Section)
15
Aug 6, 2015 07:43 AM


