Terrys87 88 4Runner Restoration/Build thread
 01-29-2017, 05:54 AM
#1441

oh more tips and tricks, thank you sir!
It's been so long since I put that fender tear back together I have no idea what I was using for a feed rate, I should have took notes, my welder at home is just the HF basic model and I'll be using the spool it came with forever based on how much it gets used I think those are .35 but maybe the smaller diameter. It's good for what I've used it for so far, in my very very Very limited experience.
I've never needed to clean the feed tip, there just isn't enough of a gap for anything to get in there. The cup will be horrible from all the splatter and I need to clean it often. I've never invested in the jelly it's a good purchase I am seeing now how much time saves.
I think exposed length and timing are going to be personal style preferences mostly. I do try to keep my wire short, the rule I work from is no larger than the cup width which is supposed to keep the shielding gas produced from the flux core on the work piece, but it makes it very hard sometimes to hit exactly where you thought you were aiming. Adjusting the auto darkening masks are quite fiddly also, like wire speeds a small change makes a lot of difference, but I err on the cautious side and would rather it was a smidge too dark than get a burn.
Terry I'd like to make some more tool suggestions.
First I feel safety goggles are much better than the glasses, these are something you two shouldn't share as they're worn essentially all the time. Safety glasses need to fit extremely well to keep materials out, so much so they are essentially goggles. You'll certainly pay more for them but it's worth every penny to keep hot metal out of the eye, we've all had the stray dust particles just imagine that with molten metal.
Second would be the welding mask, you'll both have your own preferences not only in fit but in then shade (cautious adjustment, I couldn't stress enough remembering the suggested darkness level from the manual). I think the HF one is adequate. If you do buy a more expensive shade take care you can get replacement lenses, even with the cheaper one it wouldn't be a bad idea to purchase a spare or two just to have on hand. Some of the ones they have at my boys shop I guess are not a standard size and they have been unable to locate new lenses and they are showing lots of wear. Of course they are in use there from start to finish of a day, so for us at home, you might never open a spare but like everything you wouldn't want to have to stop and clean up and wait for one to arrive via post from China.


 01-29-2017, 09:05 AM
#1443
Registered User

Join Date: Jun 2015
Location: WI
Posts: 147
Likes: 0
Received 0 Likes
on
0 Posts
I stand corrected by you guys. Good to have a community to correct it. Looks like the frame code I used to look up those part numbers were for the newer gen as was pointed out. Here is the IPB for the correct generation and there are in fact only 2 screens;
http://www.japan-parts.eu/toyota/us/...ndshield-glass
Strange they didn't make them. I see people use rigid wire mesh that sits into it like a basket. Maybe put some silicone on the wire that rest on the outer cowl wall so it doesn't scratch?
http://www.japan-parts.eu/toyota/us/...ndshield-glass
Strange they didn't make them. I see people use rigid wire mesh that sits into it like a basket. Maybe put some silicone on the wire that rest on the outer cowl wall so it doesn't scratch?
01-29-2017, 09:41 AM
#1444
There are two types of FCAW (flux core arc welding) wire, one is self shielding one is not.
hobart product selector link, goes by the trade name Fabshield.
Willing to bet the roll that came with my HF 90 is not that fancy, but I think it was producing less splatter and cleaner welds less splatter could entirely be just due to the cup catching it with a lower extended length, and cleaner could have been the equivalent of the old "butt dyno"
Thanks guys!
01-29-2017, 02:02 PM
#1445
Registered User

Join Date: Oct 2009
Location: Maryville, TN.
Posts: 19
Likes: 0
Received 0 Likes
on
0 Posts
The best way to get good at welding sheet metal is to get some scrap metal that is the same thickness as what you are attempting to repair. The next time you hit the scrap yard, get an old beat up fender off of the same vehicle and go crazy practicing your welds. Again, practice, practice, PRACTICE!!! I currently don't have a welder but have welded off and on for 20+ years on all of my own junk and friends. Took a few classes and really learned a lot.
All great tips from 92, CO and others! Great info here guys!!! I'm really beginning to like it here!
All great tips from 92, CO and others! Great info here guys!!! I'm really beginning to like it here!
01-31-2017, 11:49 PM
#1446
Super Moderator
Staff
Thread Starter
iTrader: (1)
Join Date: Aug 2008
Location: Anderson Missouri
Posts: 11,788
Likes: 0
Received 22 Likes
on
20 Posts
Hello Co 94 PU.... Thanks for the tips. We are just going to have to get a lot of welding time in and get the experience. Wish it would just come naturally but going to have to do it the hard way. We are getting our own mask for each other as our settings are completely different from each other.
Hello 92ehatch. I will give that a try on without using the cup. I know these Hobarts are some good welders. The problem on our end is the people operating the welder, lol I eventually want to get where it comes second nature and just a few moments of welding so I can move to the next stage, going to take a lot of practice.
Thanks duckhead..... I will copy that link to my parts page. I like being able to have different sources for the information and that is one I have not been too. I like this community as there is all kinds of expertise in so many areas to help get me going in the right direction.
Hello Bighammer.. First of all Welcome to Yotatech, glad to have you around.I missed that earlier. There are other sites but Yotatech is the best by far. There is a ton of information and so many wide skilled people on here that are willing to help. We have been practicing. I am going to look and see if my local community college offers a welding class. Would be great to get to go to a weekend class with my kid and show him learning never stops and school can be fun.
I think you will like being here and what you can learn on these trucks. I was a complete noob to Toyotas when I first started. I suggest to new comers to start a build thread on their trucks. You will be surprised at how fast time flies and what all you get done to your truck as the years roll by. I have really enjoyed going back and reading thru my threads as it has brought a lot of great memories of where I am at and where I started.
01-31-2017, 11:56 PM
#1447
Super Moderator
Staff
Thread Starter
iTrader: (1)
Join Date: Aug 2008
Location: Anderson Missouri
Posts: 11,788
Likes: 0
Received 22 Likes
on
20 Posts
The stinking internet at home has been acting up and the wife raised enough cane to finally get the technicians out and get it fixed. When it was all said and done, we had 5 guys at one time and they got several issues fixed that we have been dealing with. Now the internet at work is slower then Christmas. grrrr.
I got my bumper off of ebay in today and it is from Taiwan and I will say it looks to be great quality. The bumper brackets are a little thinner then the factory brackets but look like they are great quality as well. I have a Taiwan fender in my storage shed and I will say that I think it is actually a better fender then the factory. Waiting on the Grill and another Welding Helment to arrive in the mail hopefully soon.
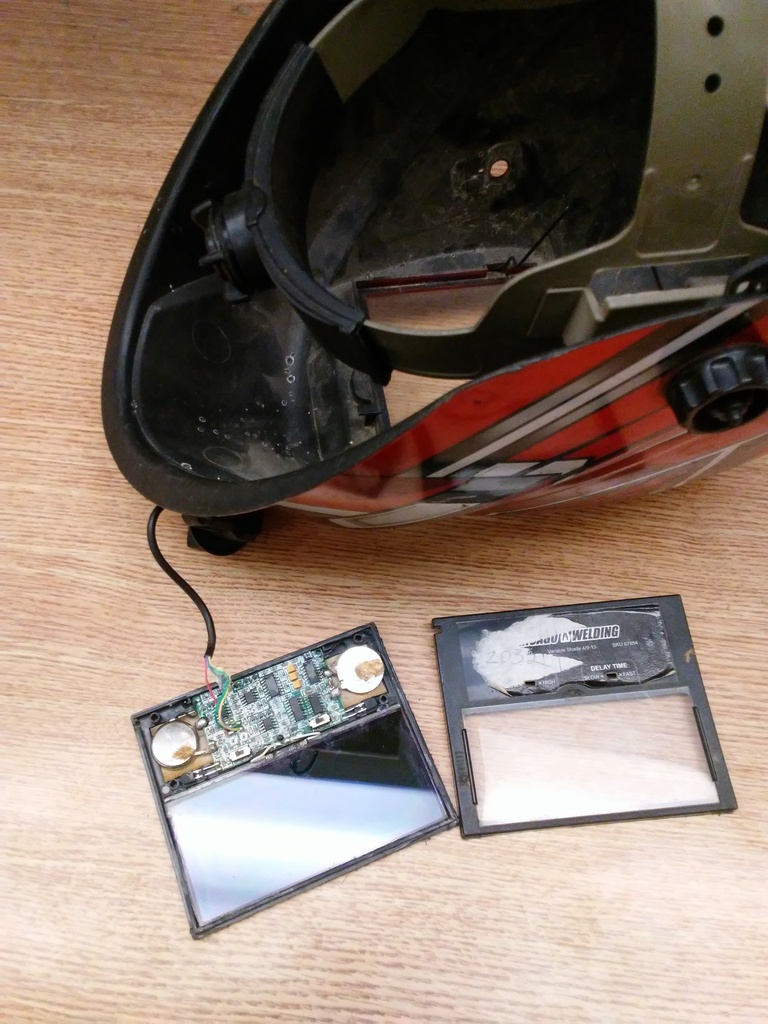
We were practicing welding and the auto darkening stopped working. I did some Youtube searching and the solar power does have batteries. I have had this helmet for a long time and it sits in the dark and the batteries finally died. The Youtube video showed how to replace the batteries. I am going to get some battery holders with an On/Off Switch and mount them inside the hood. I will get the switch from ebay or my local Radio Shack if they have them.The batteries are 2032 and require some soldering to make work. It seems to be working again.
I got my bumper off of ebay in today and it is from Taiwan and I will say it looks to be great quality. The bumper brackets are a little thinner then the factory brackets but look like they are great quality as well. I have a Taiwan fender in my storage shed and I will say that I think it is actually a better fender then the factory. Waiting on the Grill and another Welding Helment to arrive in the mail hopefully soon.
We were practicing welding and the auto darkening stopped working. I did some Youtube searching and the solar power does have batteries. I have had this helmet for a long time and it sits in the dark and the batteries finally died. The Youtube video showed how to replace the batteries. I am going to get some battery holders with an On/Off Switch and mount them inside the hood. I will get the switch from ebay or my local Radio Shack if they have them.The batteries are 2032 and require some soldering to make work. It seems to be working again.
 02-01-2017, 12:05 AM
#1448
Super Moderator
Staff
Thread Starter
iTrader: (1)
Join Date: Aug 2008
Location: Anderson Missouri
Posts: 11,788
Likes: 0
Received 22 Likes
on
20 Posts
The wife was going to fund some things for me on this truck and I acted to late that now she is going to work on some of her projects around the house. I should of jumped on it when I had the chance, Oh well so I am back down to my massive budget of $25 a week for my projects. Between tools and truck parts, things move a little slower then I would like. I still got plenty to keep me busy.
I have the next couple of days off and want to start getting the Core Support on, fix a radiator leak, start cleaning the blower assembly,give the interior a good cleaning by pulling the seats out and seems like some other things I can not think of at the time. ( Practice welding) One thing I know is the heater core is going to be dirty and my best time is 4 hours from pulling the dash and installing it back in. Not hard to do but it is time consuming but will make a difference in the freshness of the interior.
To Do:
Core Support
Fix Radiator
Pull Seat and clean
Pull Blower Assembly
Pull Dash
Clean motor of leaks if weather permits.
02-01-2017, 05:25 AM
#1449
Contributing Member
Too slow! Oh, all the things we miss out on because of too slow. Looks like you're making do just fine. Great job on the helmet fix too. 
02-01-2017, 08:00 AM
#1450
Welding masks
Hey guys hope you're all warm, seems someone sent us some more cold weather.
I recall my unit having an on/off switch aswell a rotary dial to set the darkness level. It's a Chicago welding also from harbor freight. The local trade school for me only had a full welding course the last time I looked, I would wager thier instructor might be coaxed into giving you guys some pointers on site there in your garage if no weekend classes are offered. Just let him know what you are up to, emphasis the connecting with Justin and he'll bite if he's an empty nester were kind of soft like that.
Like was mentioned lots of practice can be had on otherwise ruined body panels, smash them cut them and away you go.
Even doing welding for a living I think takes some warm up time before the welds come out perfectly just to get the muscles going by memory.
02-02-2017, 08:29 AM
#1451
Super Moderator
Staff
Thread Starter
iTrader: (1)
Join Date: Aug 2008
Location: Anderson Missouri
Posts: 11,788
Likes: 0
Received 22 Likes
on
20 Posts
Thanks hab... Seems like I am stuck in slow motion at times but really looking back I do get some things done a quick pace. I like the helmet fix. Saved me buying another helmet.
Hello Co 94 PU... I think it would be great for Justin and me get some school time together. I really want to get to where doing patch panel repair has been a long time goal of mine. I did go meet with my local welding supply shop and they seem really great. A lot of information there.
Hello Co 94 PU... I think it would be great for Justin and me get some school time together. I really want to get to where doing patch panel repair has been a long time goal of mine. I did go meet with my local welding supply shop and they seem really great. A lot of information there.
02-02-2017, 08:38 AM
#1452
Super Moderator
Staff
Thread Starter
iTrader: (1)
Join Date: Aug 2008
Location: Anderson Missouri
Posts: 11,788
Likes: 0
Received 22 Likes
on
20 Posts
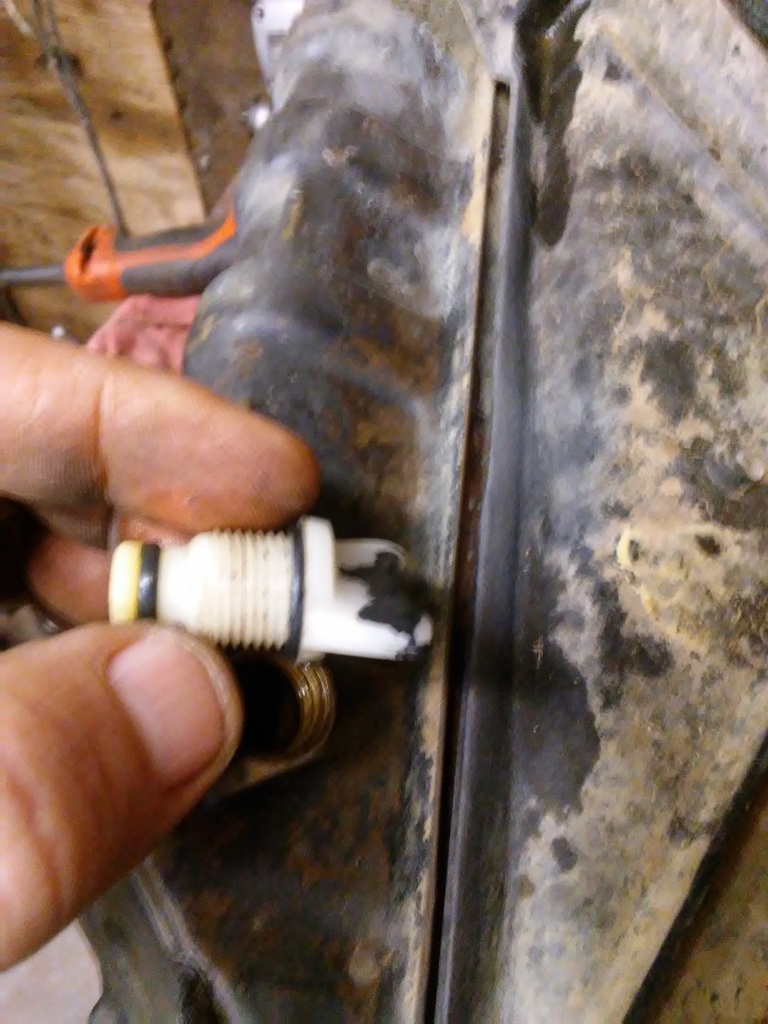
I have a radiator leak. One thing I have fixed many times on these radiators is putting an O-ring on the valve. I have never seen one on one from Toyota. It is the bigger O-ring that I installed.
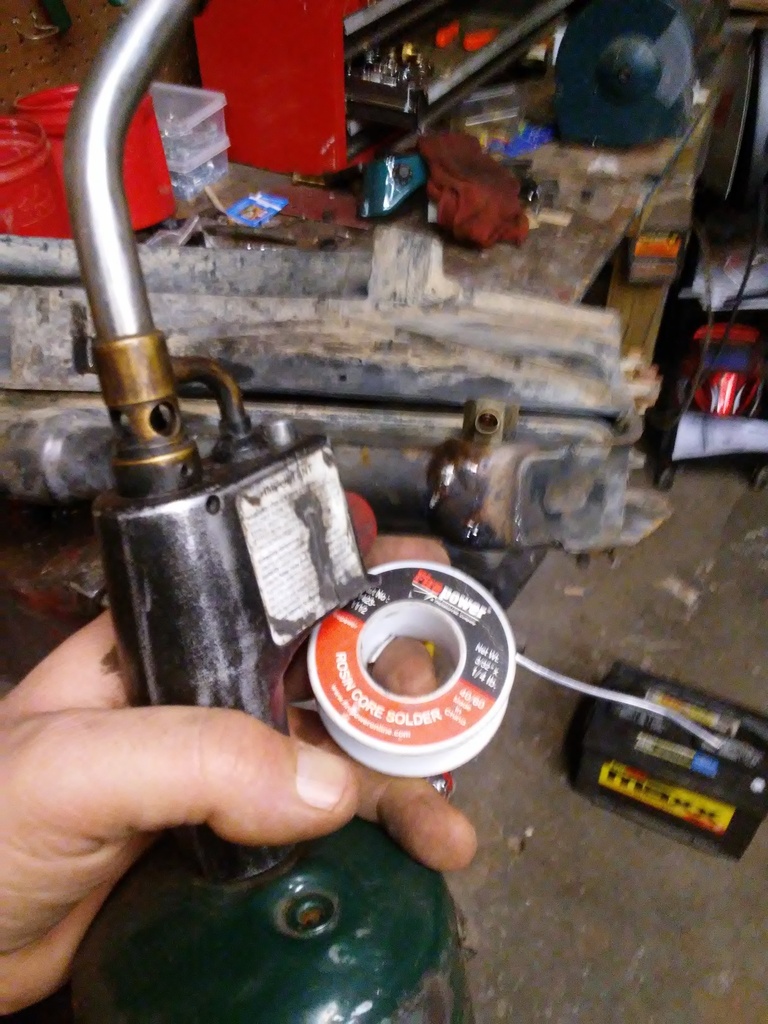
I have never soldered a radiator to fix a leak. You may not be able to see it but it is a small crack.
Here I tried to use Rosin Solder and a torch to seal the crack. I am hoping it fixes it. If not I will send to the local radiator shop where they can flush out a radiator. If I were keeping this truck, I would suggest having these radiators professionally flushed as these get a lot of build up in them. I have seen flushing drop the temperture gauge by 25%.
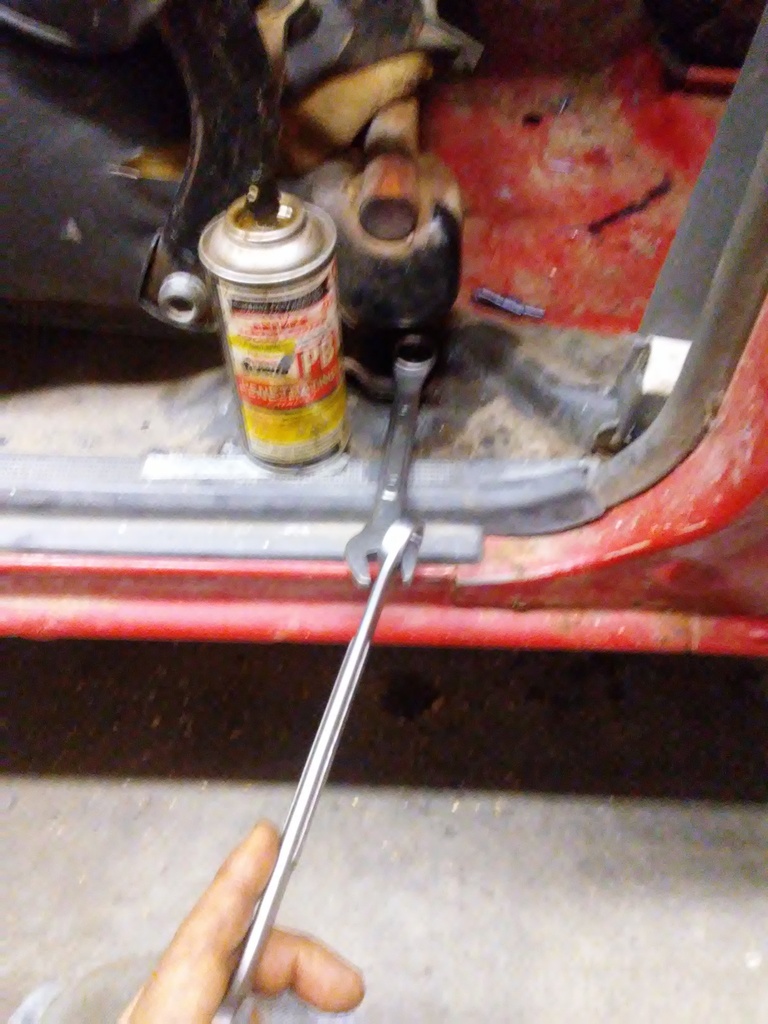
Another fix I am working on is the seat is not sliding on the passenger side. I am sure the cable just need to be fixed to the slider. This sucks not being able to get a ratchet on the bolt and I am using one of my Tools,Tips, and Tricks, to get enough leverage on the wrench to get the bolt loose. I have the bolts soaking in PB Blaster and it is still being a pain in the rear. Working my way on getting the interior cleaned up and will get to the dash here soon.
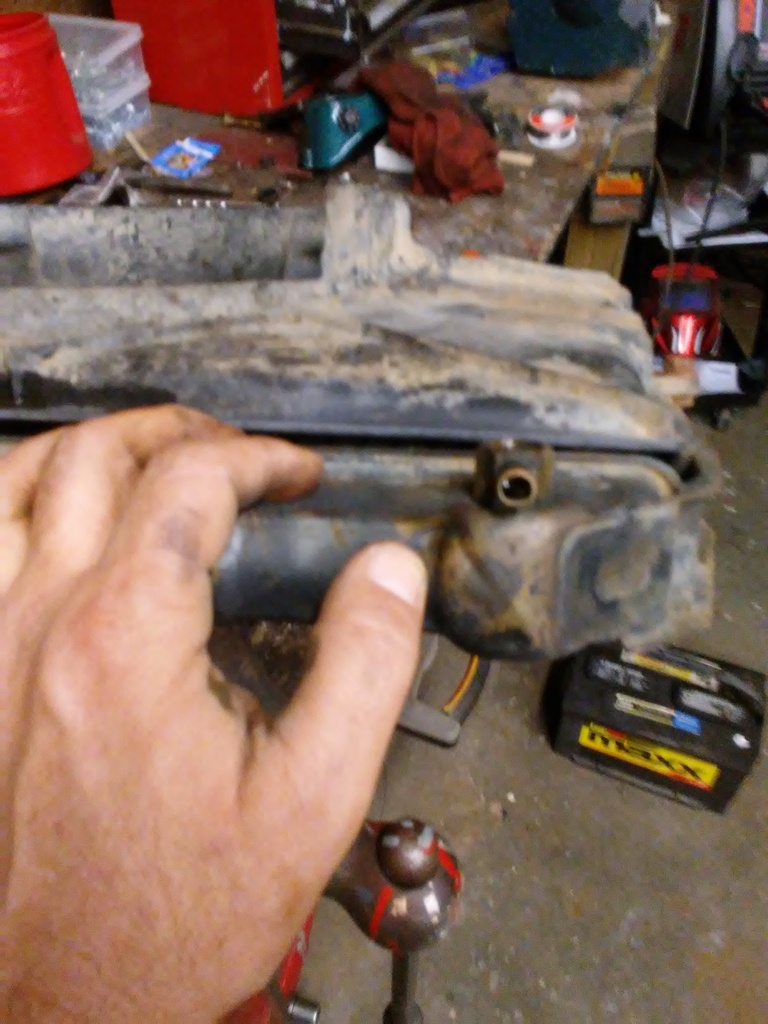
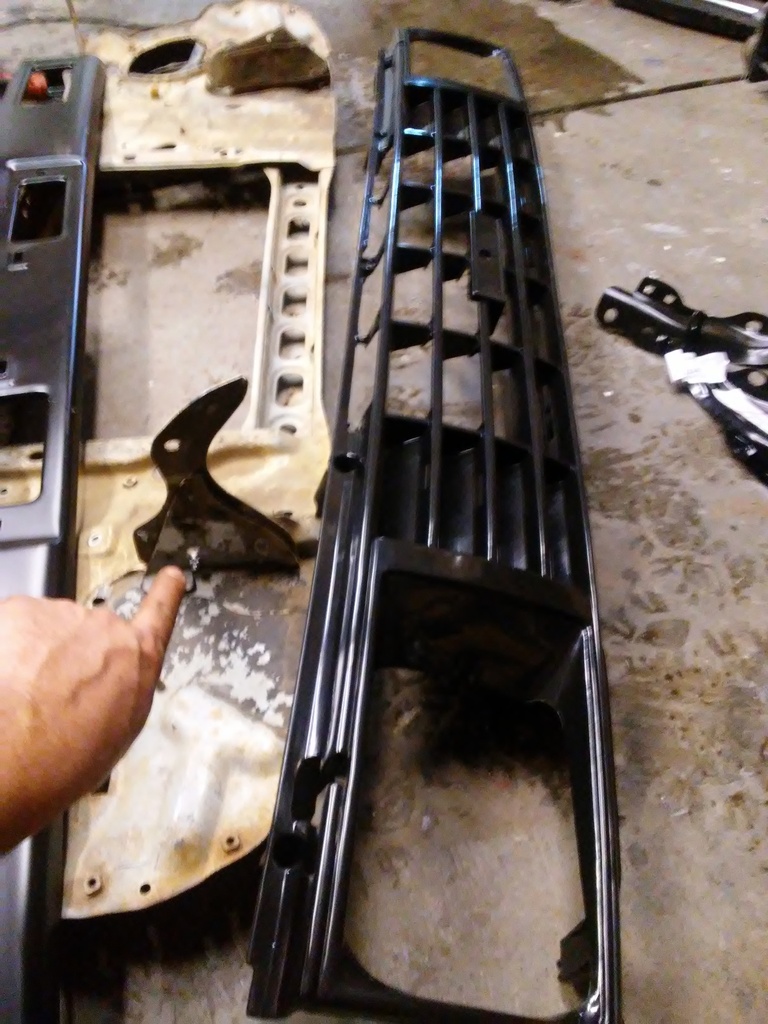
I got my bumper, brackets, and grill in. Getting the spot welds off of my replacement Core Support is being difficult as the spot welds go thru three sheets of metal. My spot weld cutter is having a tough time getting thru the spot welds.

I have never soldered a radiator to fix a leak. You may not be able to see it but it is a small crack.

Here I tried to use Rosin Solder and a torch to seal the crack. I am hoping it fixes it. If not I will send to the local radiator shop where they can flush out a radiator. If I were keeping this truck, I would suggest having these radiators professionally flushed as these get a lot of build up in them. I have seen flushing drop the temperture gauge by 25%.

Another fix I am working on is the seat is not sliding on the passenger side. I am sure the cable just need to be fixed to the slider. This sucks not being able to get a ratchet on the bolt and I am using one of my Tools,Tips, and Tricks, to get enough leverage on the wrench to get the bolt loose. I have the bolts soaking in PB Blaster and it is still being a pain in the rear. Working my way on getting the interior cleaned up and will get to the dash here soon.

I got my bumper, brackets, and grill in. Getting the spot welds off of my replacement Core Support is being difficult as the spot welds go thru three sheets of metal. My spot weld cutter is having a tough time getting thru the spot welds.
 02-02-2017, 09:17 AM
#1453
I have snapped a few HF wrenches doing the lever trick, there is more meat on the other side if you can cope with the bend on the closed end. Using a brass brush on the outside of the self tapping bolt helps get the gunk off and better penetration for the lube.
Your spot weld drill gets a lot of use maybe it's getting dull? I wonder if they have carbide tipped ones for a reasonable price. Will have to look around when I get to this part on mine.
Can you try maybe hitting it from both sides so it doesn't have to cut two pieces? That would cut down on heat buildup on the tool, not cutting multiple pieces. Not clear how those assemble, I got very lucky on the 94 there was no damage inboard and didn't have to do much but bend and dolly some more than they originally did after the accident.
Looking great sir!
I'm totally jealous of your enclosed and heated shop today, it's wicked cold here today I'm very glad I missed the below zero stuff back in December.
02-02-2017, 10:52 AM
#1454
Super Moderator
Staff
Thread Starter
iTrader: (1)
Join Date: Aug 2008
Location: Anderson Missouri
Posts: 11,788
Likes: 0
Received 22 Likes
on
20 Posts
Thanks CO 94 PU...It was a work out and I was finally able to get the lever to operate that I was able to slide the seat up and get access to the passenger side. It was a pain to do. I have already wore out a spot weld cutter and been trying to get to the other side. It is some tough metal. I did go buy two more cutters just for this job. My one cutter lasted several years.
My 88 runner I had to restore it out side under my car port. It was all out side except to use a friends barn to paint it. I remember those days of working outside in the cold. I love my wood heat stove. My shop has been a slow on going project in itself. You can see parts of it that is not finished such as the roof. It is on the list but is going to be a ways off from getting finished. I posted on one of my builds about my shop. One regret I have is the roll up door. Get the normal garage door if you ever build a shop. I still see several years before I get mine finished. Still working on getting some of the basic tools. I really love my shop in the winter as all winters before all I could do was sit in the house. You ever build a shop, hit me up as I can tell you some things that will save you from learning the hard way as I have. Also several things you can do to save a lot of money on building a shop.
My 88 runner I had to restore it out side under my car port. It was all out side except to use a friends barn to paint it. I remember those days of working outside in the cold. I love my wood heat stove. My shop has been a slow on going project in itself. You can see parts of it that is not finished such as the roof. It is on the list but is going to be a ways off from getting finished. I posted on one of my builds about my shop. One regret I have is the roll up door. Get the normal garage door if you ever build a shop. I still see several years before I get mine finished. Still working on getting some of the basic tools. I really love my shop in the winter as all winters before all I could do was sit in the house. You ever build a shop, hit me up as I can tell you some things that will save you from learning the hard way as I have. Also several things you can do to save a lot of money on building a shop.
02-02-2017, 10:58 AM
#1455
Super Moderator
Staff
Thread Starter
iTrader: (1)
Join Date: Aug 2008
Location: Anderson Missouri
Posts: 11,788
Likes: 0
Received 22 Likes
on
20 Posts
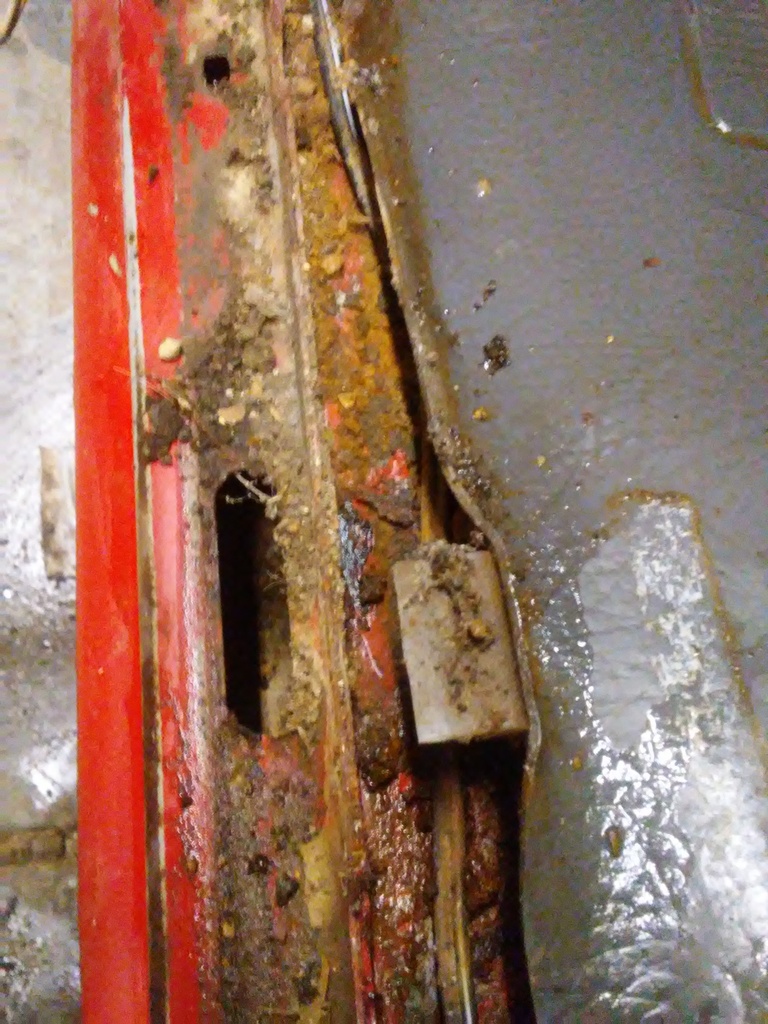
I am in cleaning mode of the truck. One thing that causes the rocker panels to rot out is the drain holes plug up. Pull up the door trim and you can get access to the body holes and blow out the dirt and clear the drain holes.
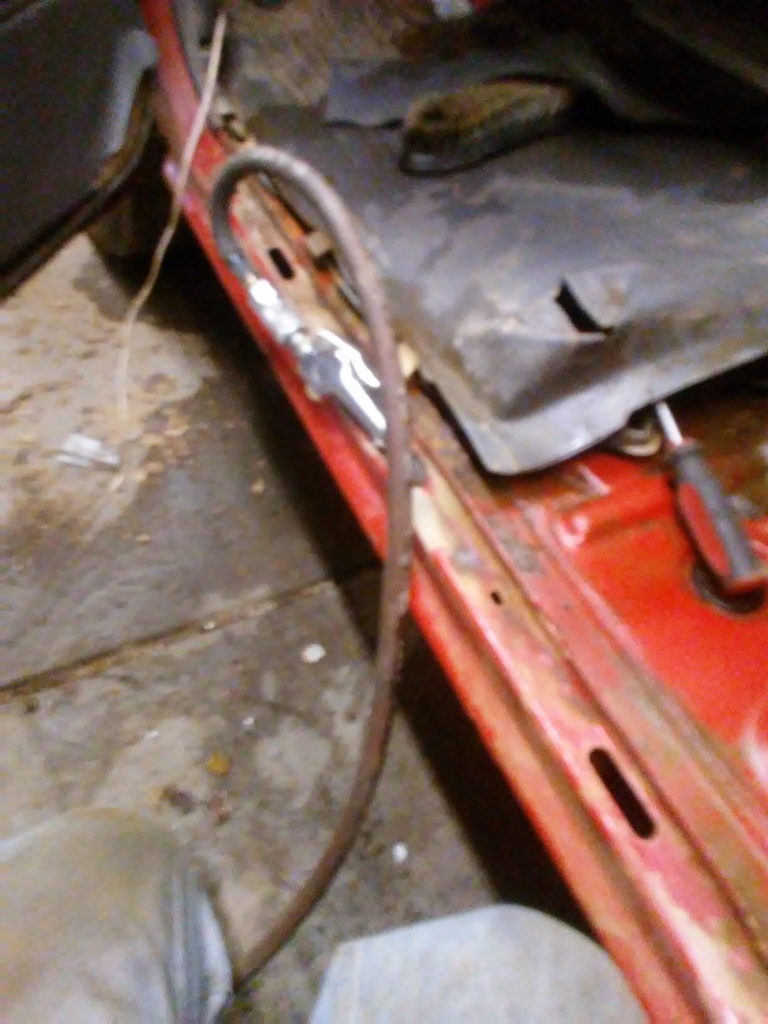
What I am trying to show here is my air gun is in a factory hole with a rubber plug. The plug is missing on this truck, but you can get your air hose in the hole and blow the dirt back and fourth and I use a shop vacuum to catch the dirt when blowing toward the front.
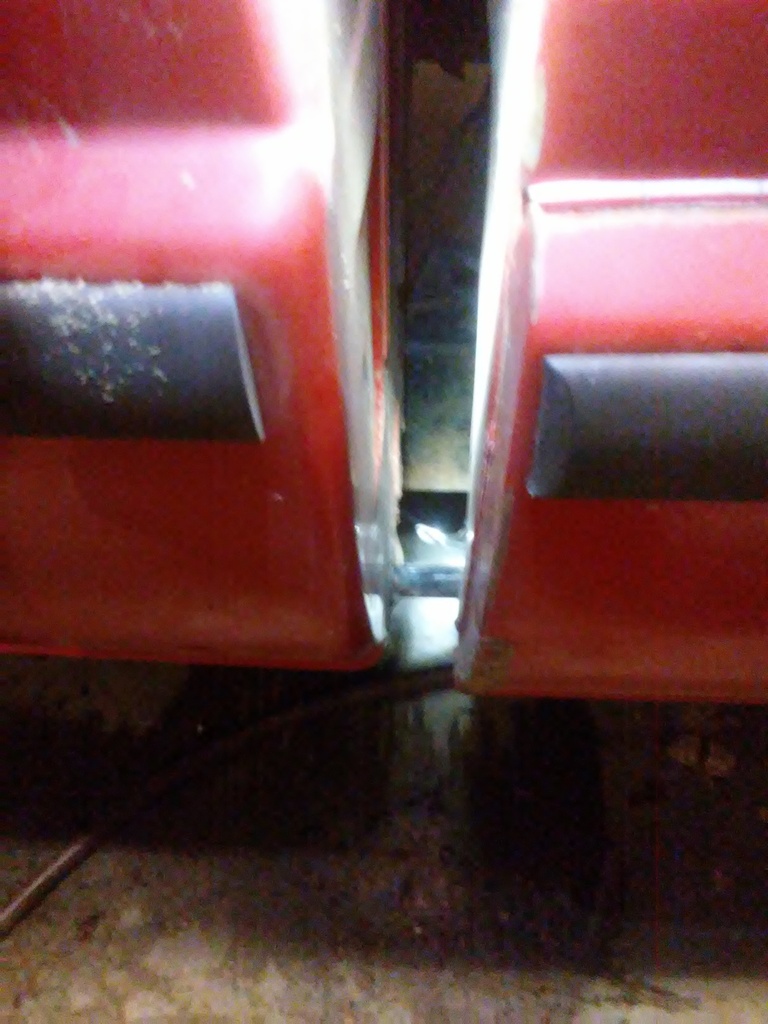
How some of the dirt came out when I blew the dirt from the rear to the front and another view of the access holes.
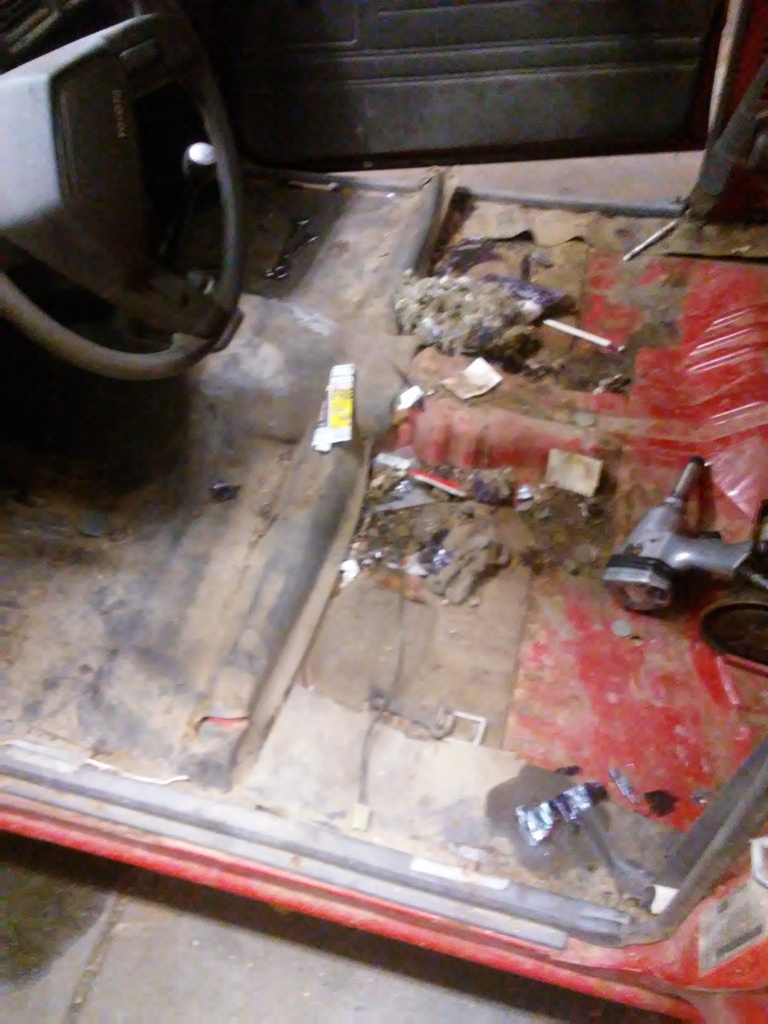
I swap the door bezels from the passenger side to the drivers side to give a not so used look.

Got the seat out and am in process of giving the truck a good cleaning with bleach, soap, and water. I do this on used cars I buy for myself as I know how dirty some can be. Gives a fresh smell inside the truck. I will eventually get to the dash. Got to get this mess cleaned up where I am at so when I pull the dash, I wont catch any diseases. lol
 02-02-2017, 11:13 AM
#1456
Super Moderator
Staff
Thread Starter
iTrader: (1)
Join Date: Aug 2008
Location: Anderson Missouri
Posts: 11,788
Likes: 0
Received 22 Likes
on
20 Posts
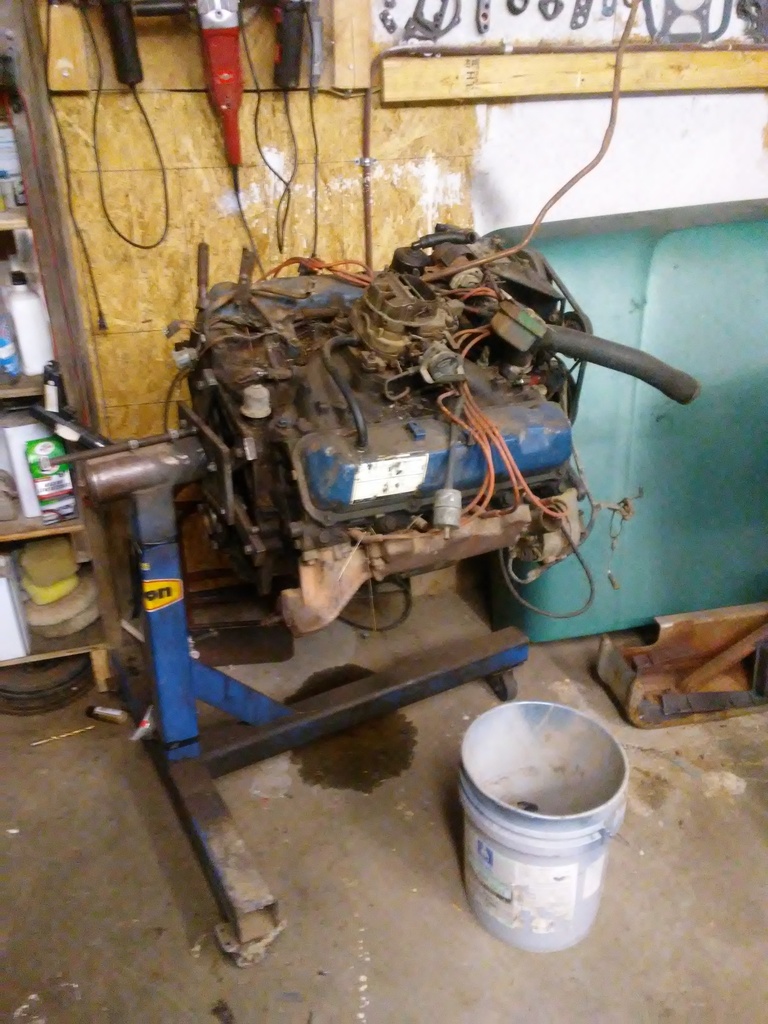
I did get a bit of good news. A guy is going to come by in the morning to buy my 460 motor and transmission. I am going to use those funds to get the welding things I need. .020 wire, gas, wire nozzle, and maybe a few other items welding related. Not sure if I want to use the rest of what I may have left over to buy a motor for my truck or some replacement panels.
Bye bye motor and that will free up some shop space.
Bye bye motor and that will free up some shop space.
 02-03-2017, 12:48 AM
#1459
Super Moderator
Staff
Thread Starter
iTrader: (1)
Join Date: Aug 2008
Location: Anderson Missouri
Posts: 11,788
Likes: 0
Received 22 Likes
on
20 Posts
Hello Cyberhorn... I am still working at them. This project is going south on me. I will explain below but it appears the frame is tweaked in 3 different areas. I may be parting it out if I cant find a reasonable cab and frame. I will up date the information below after I post some other information.
Hello flg822r... It is a hood for a 76 Ford. I do like the older body styles. I like just about anything someone puts their time and effort into. I am slowly building my retirement rig to pull a 5th wheel camper. I am under the 10 year mark until retirement and when it is too hot or cold, I plan on moving around the country for a month or so at a time until the weather gets better here. I like travel but also like being home. I think it would be great to live in an area for a while and see the different sites. When it is cold, I plan on heading south, when it is hot, I want to head for cooler weather. Here is my 76 build>>>> https://www.yotatech.com/forums/f188...estore-296600/
Hello flg822r... It is a hood for a 76 Ford. I do like the older body styles. I like just about anything someone puts their time and effort into. I am slowly building my retirement rig to pull a 5th wheel camper. I am under the 10 year mark until retirement and when it is too hot or cold, I plan on moving around the country for a month or so at a time until the weather gets better here. I like travel but also like being home. I think it would be great to live in an area for a while and see the different sites. When it is cold, I plan on heading south, when it is hot, I want to head for cooler weather. Here is my 76 build>>>> https://www.yotatech.com/forums/f188...estore-296600/
02-03-2017, 01:06 AM
#1460
Super Moderator
Staff
Thread Starter
iTrader: (1)
Join Date: Aug 2008
Location: Anderson Missouri
Posts: 11,788
Likes: 0
Received 22 Likes
on
20 Posts
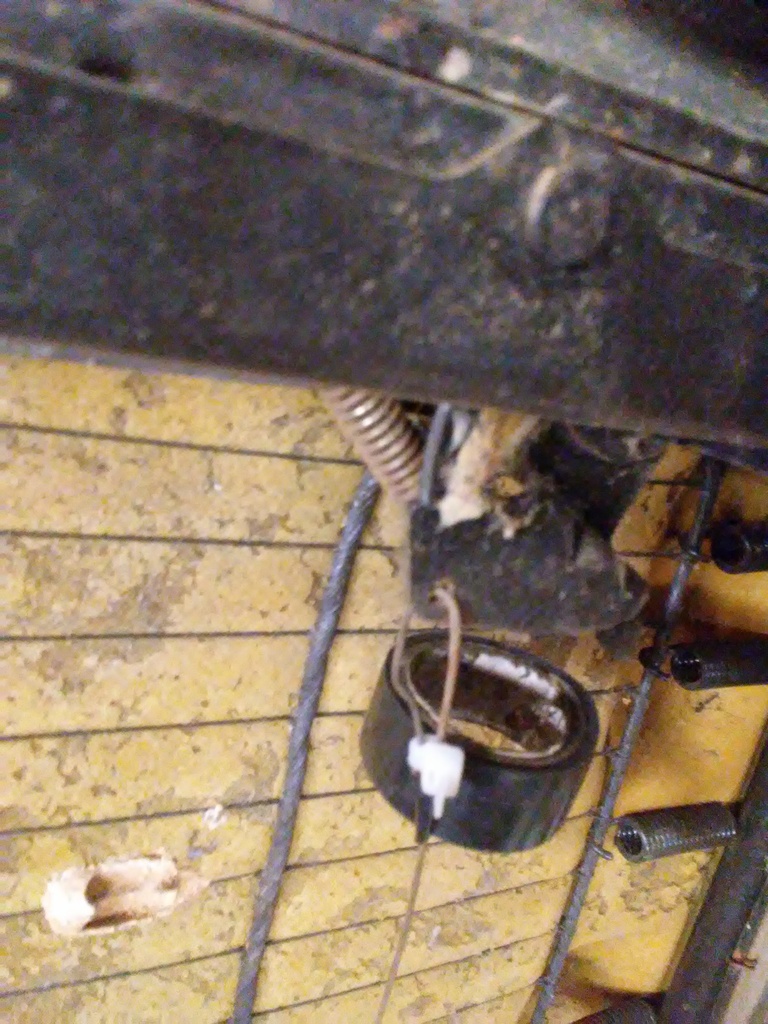
I got the seat fixed. I had to lube the rails and the spring that holds the cable to the release lever had the spring missing. Here is how Toyota did it.

The spring had slid off of the wire.
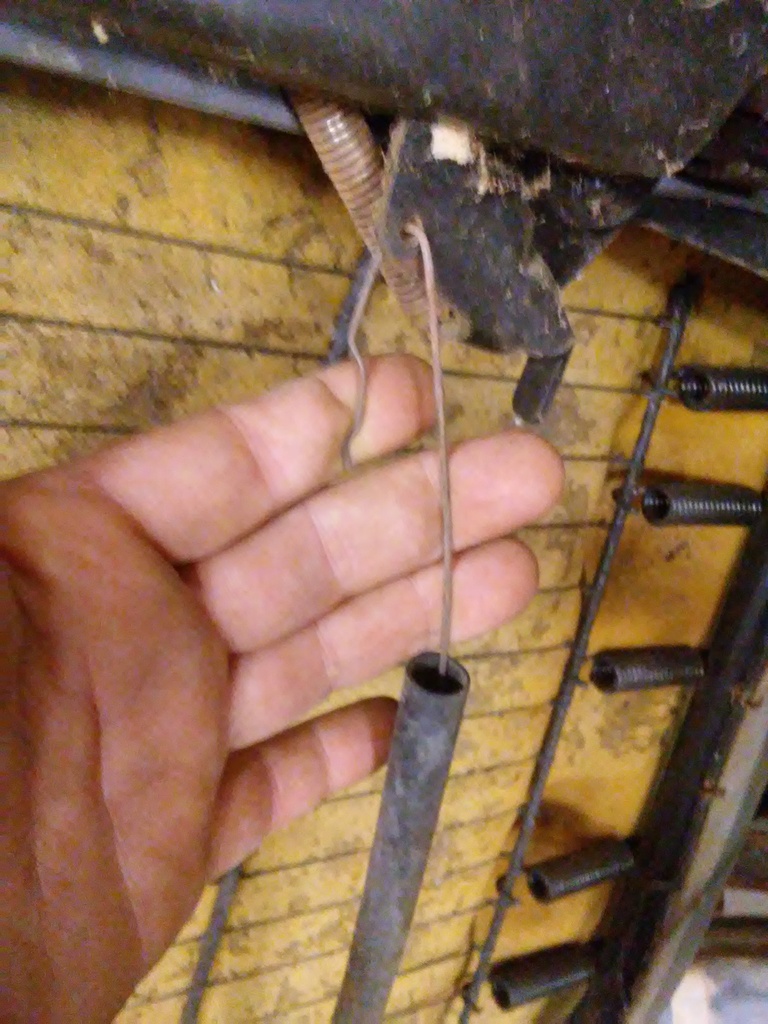
I used a zip tie and then wrapped it with electrical tape which I hope is a better fix then what Toyota did to it. I also did the same to the oppisite side.
For a truck without AC, you will have a square tube that takes the place of the Evaporator.
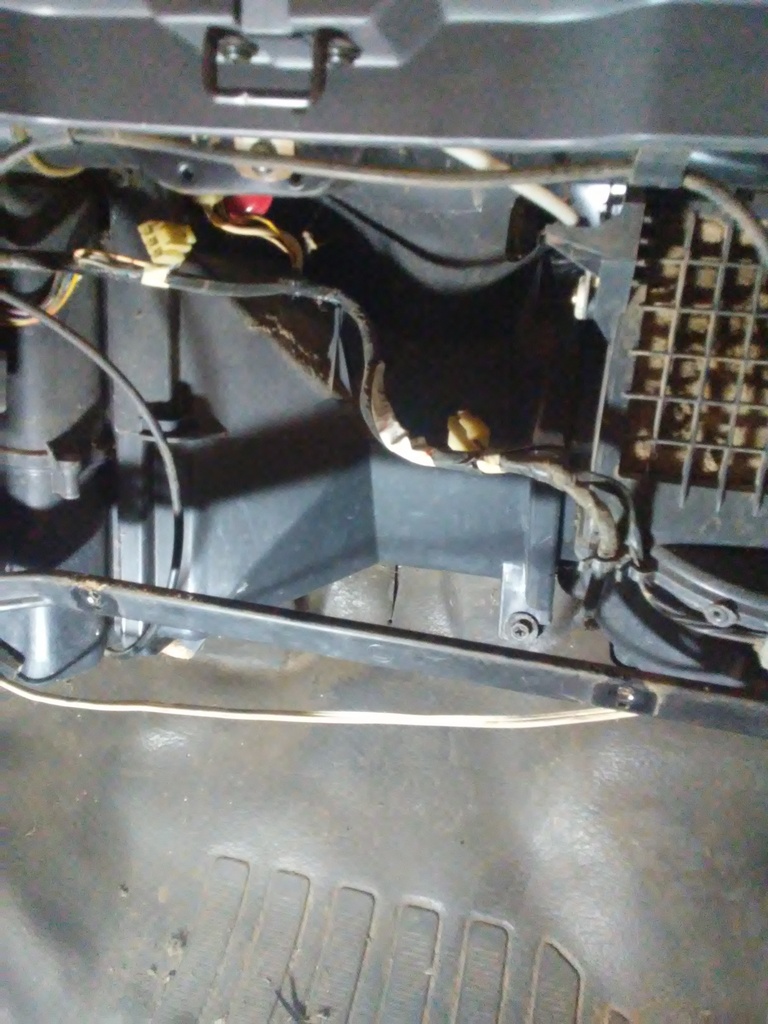
Installing AC in these trucks is easy. Here is the dimple for the drain hole for the Evaporator. Just drill it out.
Just above the drain hole dimple, you will see two pre-cut holes in the insulation and there are dimples there as well to drill out for the Evaporator.
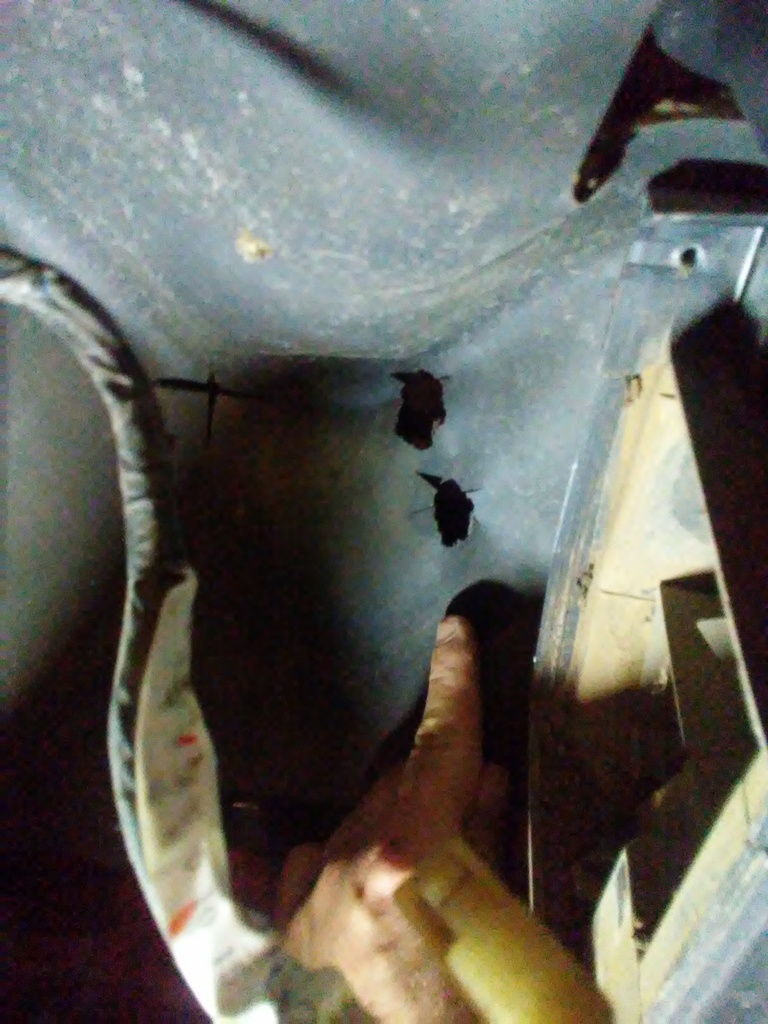
I could not get a good picture of the dimples from inside the truck but here you can see them on the fire wall
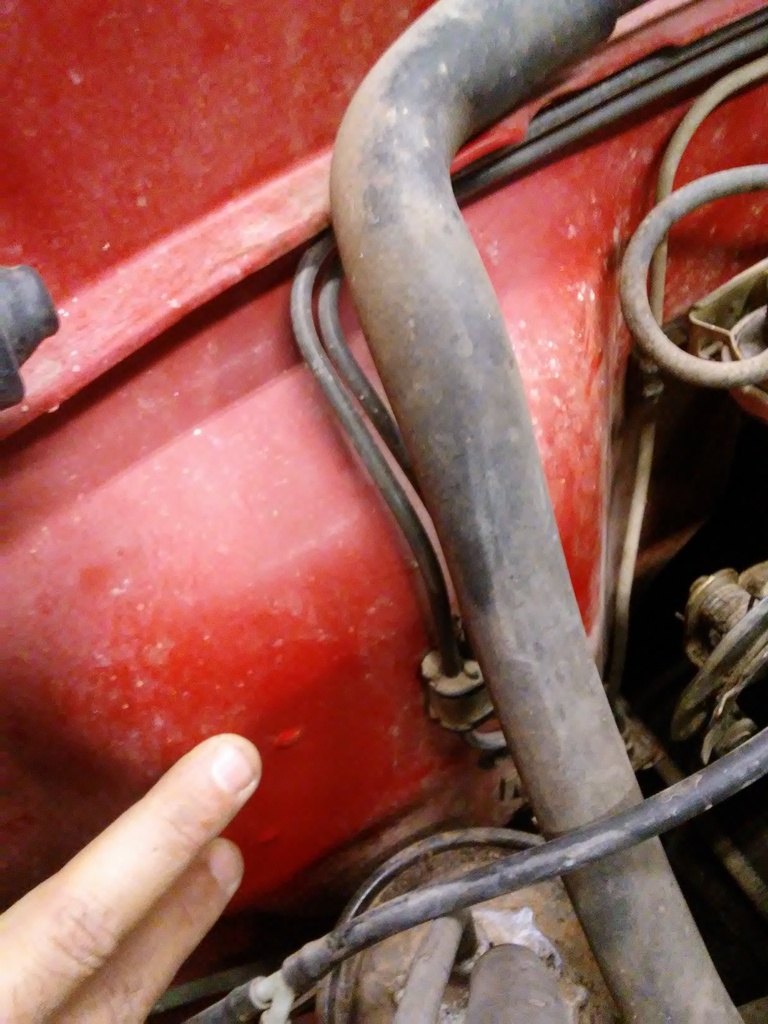
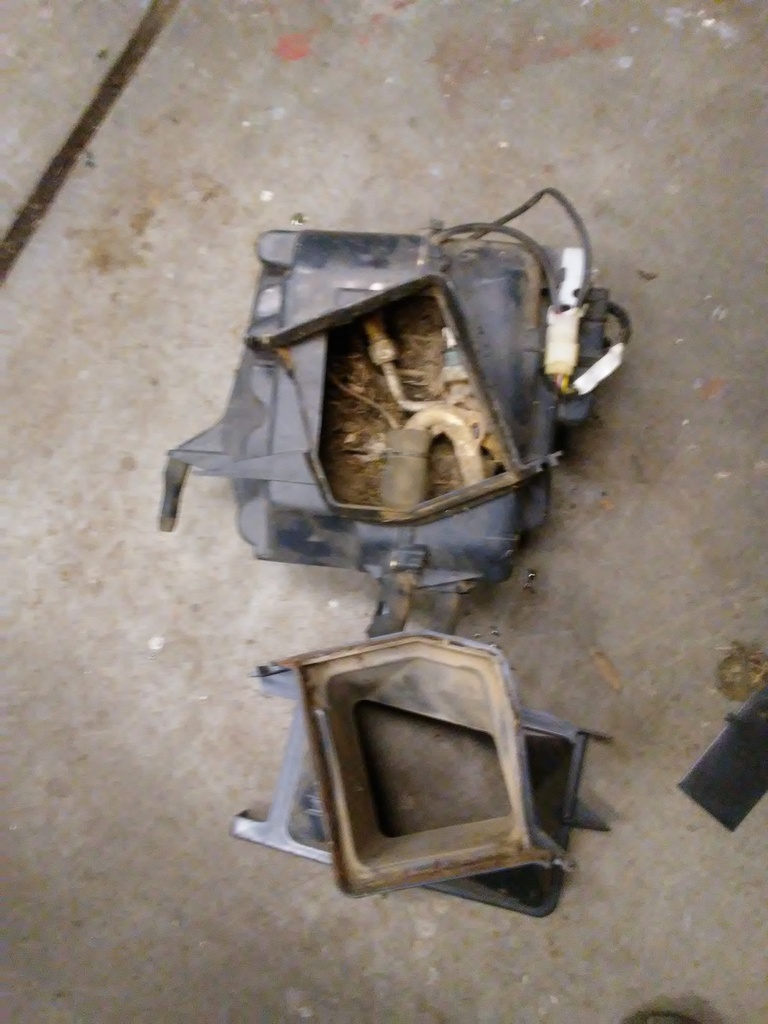
I have a spare Evaporator but wanted to show that without an Evaporator, all of the debris will go to the heater core.

The spring had slid off of the wire.

I used a zip tie and then wrapped it with electrical tape which I hope is a better fix then what Toyota did to it. I also did the same to the oppisite side.

For a truck without AC, you will have a square tube that takes the place of the Evaporator.

Installing AC in these trucks is easy. Here is the dimple for the drain hole for the Evaporator. Just drill it out.

Just above the drain hole dimple, you will see two pre-cut holes in the insulation and there are dimples there as well to drill out for the Evaporator.

I could not get a good picture of the dimples from inside the truck but here you can see them on the fire wall

I have a spare Evaporator but wanted to show that without an Evaporator, all of the debris will go to the heater core.


