
Pretending I'm Slacker
 Jan 8, 2013 | 12:35 AM
#1
Thread Starter
Registered User
iTrader: (1)
Joined: Jul 2012
Posts: 639
Likes: 0
From: Calistoga, CA
Pretending I'm Slacker
I thought I'd share my fiberglassing and electronics journey as it goes, and see just what everybody thinks.
Despite the name, I'm only learning how to glass as I go and really don't hold a candle to Slacker/Toyota Fiberglass' work, but he's the guy that got me thinking about it all in the first place.
Why fiberglass?
Well, it's inexpensive and relatively forgiving. It lends well to the casual tinkerer, like myself, and it's something I can do a little bit at a time, without much trouble.
Here are some of the things I've read on how to glass at home:
https://www.yotatech.com/forums/f123...repair-230891/
Corax's dashboard repair was really what got me thinking about not simply repairing the dash, but modding it, too.
And this guy:
http://microship.com/resources/cardb...omposites.html
Really opened my eyes to how simple and affordable some of the elements can be.
I've basically spent the last two months studying the process in any way I can, and now it's time I put it all together.
Jan 8, 2013 | 12:52 AM
#2
Thread Starter
Registered User
iTrader: (1)
Joined: Jul 2012
Posts: 639
Likes: 0
From: Calistoga, CA
Design, redesign, discard and redisgn (again).
I've spent a good deal of time in Sketchup playing with designs and testing out the mockups, and here are some of my finals:
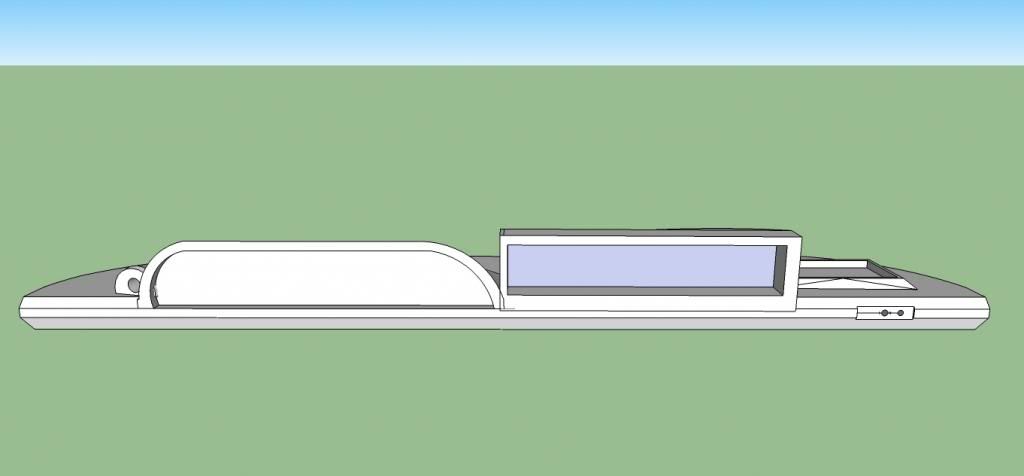
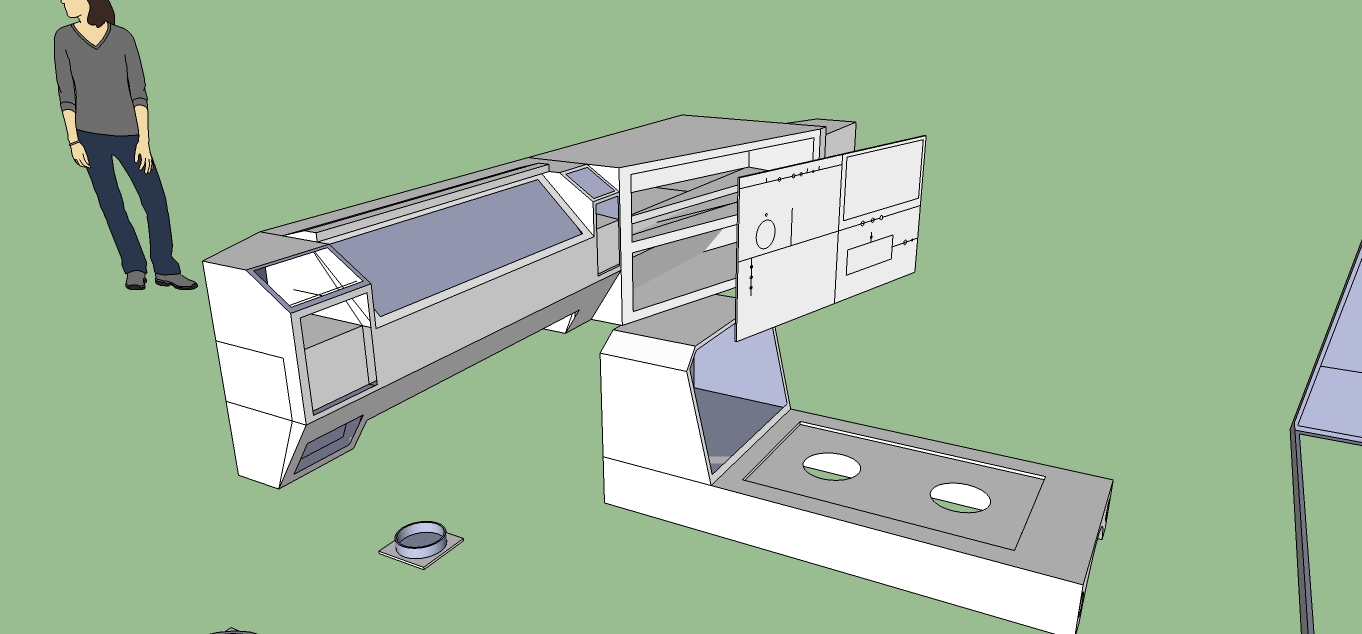
This is the overall dashboard design. The angles aren't perfect, but for a concept, it seems to pass off decently. From L to R, the first bay is the OEM cluster bay, the second bay is where my oil pressure, voltmeter, vacuum gauge, clock and indoor/outdoor thermo will end up. All of them are 2 1/16" form factor pods, so they'll be perched in a frame in the opening with a Plexi-glass window over them.
For the sake of mentioning: I fiddled with one of those ABS plastic gauge pods, and it was complete junk. Cheap plastic might be an improvement for a Honda or a Chevy, but Toyotas deserve better. After realizing how lame the pod was, I started this design.
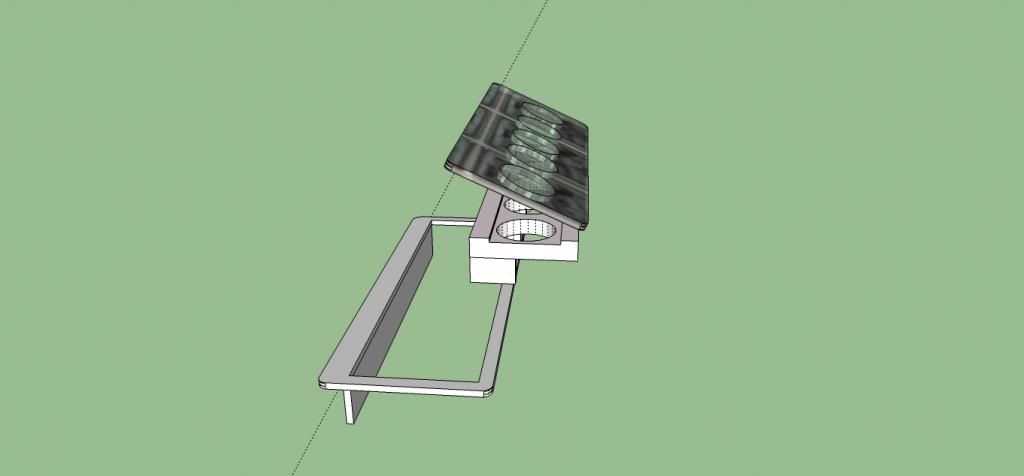
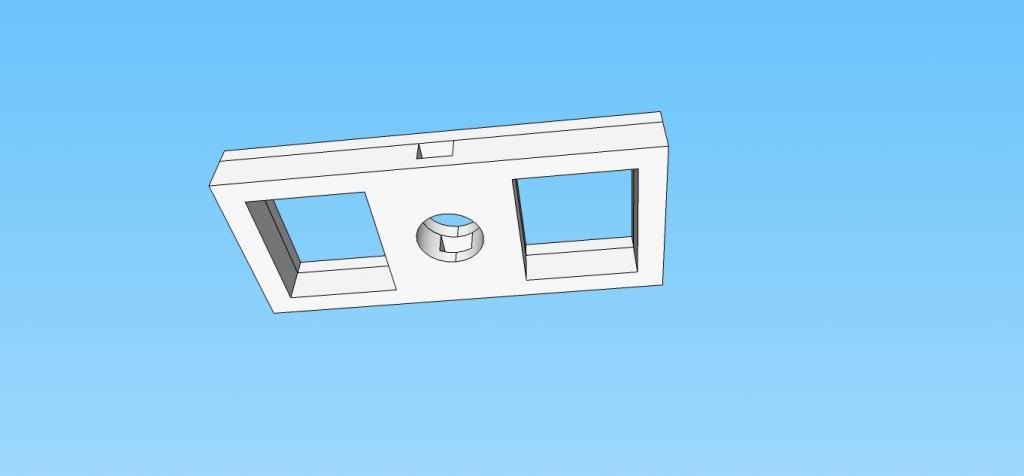
Below is an exploded view of the components for the gauge pod. The actual structure will be MDF with a cardcore composite bolster and face and plex face panel. The whole assembly will be held together with heavy-duty vel-cro.
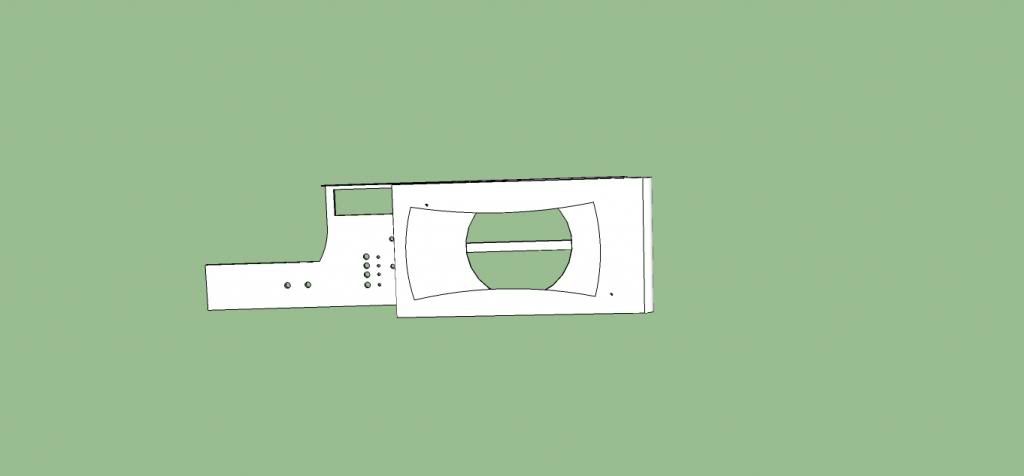
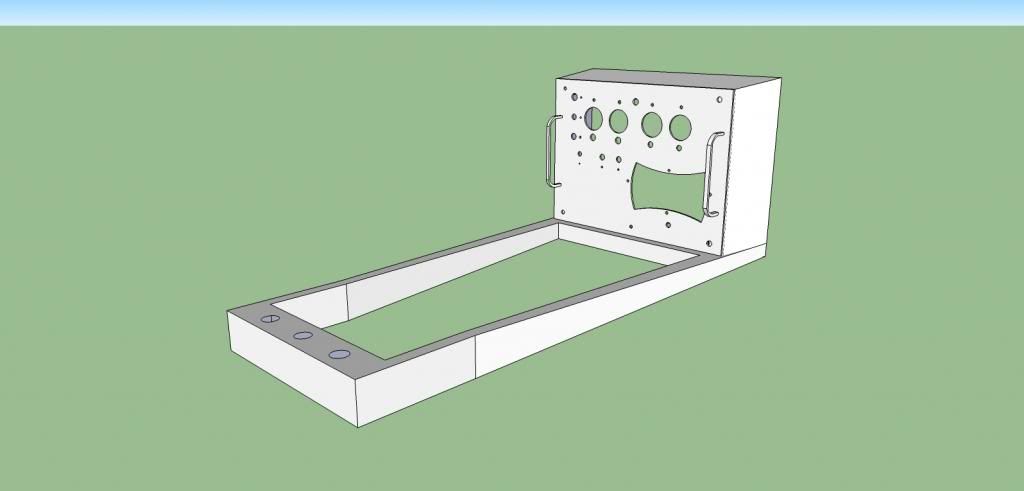
This will be my replacement for the OEM dashboard panel itself. I'm building up a car computer system (I will go into detail later in the thread) and I'd like it to mount up on stock dash. The screen will seat in the box on the right. The heater controls will be reworked to accommodate on the left.
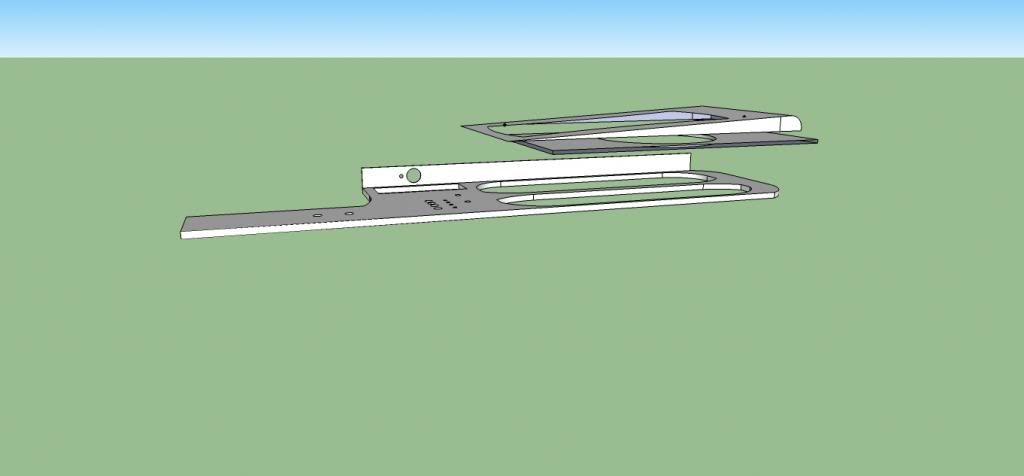
this is a blown up view of the elements of the dash. Topmost is the facade, and then a backing panel then the actual dash bezel.
Finally, I have a rear-view mirror from a third-gen 4Runner with a plywood spacer underneath it. I want to replace the ply spacer with a cardcore composite one with a bulkhead passage and mounting face for a HAM radio's remote face.
Edit:
Here is the floor console design:
I have a shifter cover from a 97 T100 in the truck as it is, and I'll use it and my OEM SR5 gauge pod as the core structures to create it. The face of this will be similarly constructed to the above-dash pod I'm making now.
This is the overall dashboard design. The angles aren't perfect, but for a concept, it seems to pass off decently. From L to R, the first bay is the OEM cluster bay, the second bay is where my oil pressure, voltmeter, vacuum gauge, clock and indoor/outdoor thermo will end up. All of them are 2 1/16" form factor pods, so they'll be perched in a frame in the opening with a Plexi-glass window over them.
For the sake of mentioning: I fiddled with one of those ABS plastic gauge pods, and it was complete junk. Cheap plastic might be an improvement for a Honda or a Chevy, but Toyotas deserve better. After realizing how lame the pod was, I started this design.
Below is an exploded view of the components for the gauge pod. The actual structure will be MDF with a cardcore composite bolster and face and plex face panel. The whole assembly will be held together with heavy-duty vel-cro.
This will be my replacement for the OEM dashboard panel itself. I'm building up a car computer system (I will go into detail later in the thread) and I'd like it to mount up on stock dash. The screen will seat in the box on the right. The heater controls will be reworked to accommodate on the left.
this is a blown up view of the elements of the dash. Topmost is the facade, and then a backing panel then the actual dash bezel.
Finally, I have a rear-view mirror from a third-gen 4Runner with a plywood spacer underneath it. I want to replace the ply spacer with a cardcore composite one with a bulkhead passage and mounting face for a HAM radio's remote face.
Edit:
Here is the floor console design:
I have a shifter cover from a 97 T100 in the truck as it is, and I'll use it and my OEM SR5 gauge pod as the core structures to create it. The face of this will be similarly constructed to the above-dash pod I'm making now.
Last edited by RobotMoose; Jan 9, 2013 at 01:06 AM.
Jan 8, 2013 | 12:57 AM
#3
Thread Starter
Registered User
iTrader: (1)
Joined: Jul 2012
Posts: 639
Likes: 0
From: Calistoga, CA
Construction methods:
The raw structural elements will be regular old corrugated cardboard that's been tacked into shape and sealed with resin and cloth. Once all the structural elements are together, the floor console and dashpad will get a fleece stretch and a healthy slather of resin. Followed by more fiber and resin.
I'm using epoxy resin because it was recommended to me by my local TAP Plastics staff. I'm more familiar with epoxy anyway, so it works out.
Presently, the interior of my truck is almost 100% black, and I'm hoping to update it all to a light grey for better thermal management.
electronics:
- The car computer will be my old Toshiba A215. The video card burned out, and for whatever reason, I never got rid of it. Eventually I saw that it could be useful for this project.
- Screen is a liliput U/M 70. It's kinda puny to the hardcore "carputer" people, but ideally sized for a first-gen owner. In my test fits, it felt as if it was designed for my truck. I chose it because of the size, the price, and the fact that it sources its power from the computer's USB.
- Software is Streetdeck. I've played with all three of the consumer-level front-end systems, and SD seemed to work the best and the most reliably. It also offers a direct plugin for navigation.
The computer will source sound files to be played through either one two-channel marine amplifier, or a pair of smaller ones. Volume will be regulated by a pair of pot switches on the dash, one for the front zone, one for the rear zone.
Last edited by RobotMoose; Jan 8, 2013 at 01:04 AM.
Jan 8, 2013 | 01:42 AM
#4
Thread Starter
Registered User
iTrader: (1)
Joined: Jul 2012
Posts: 639
Likes: 0
From: Calistoga, CA
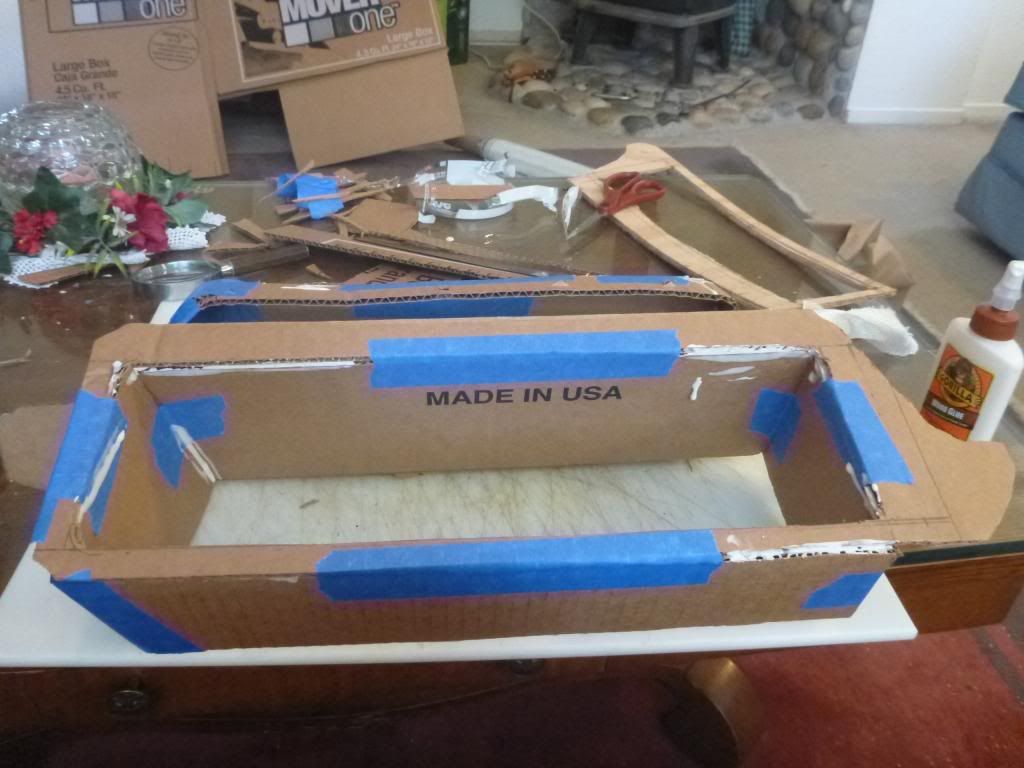
Sanding down both faces of the dashpad.
I've decided to seek alternative mounting methods over those frustrating little clips, so I went through and trimmed back all the old mounting flaps, as well as any raised edges.
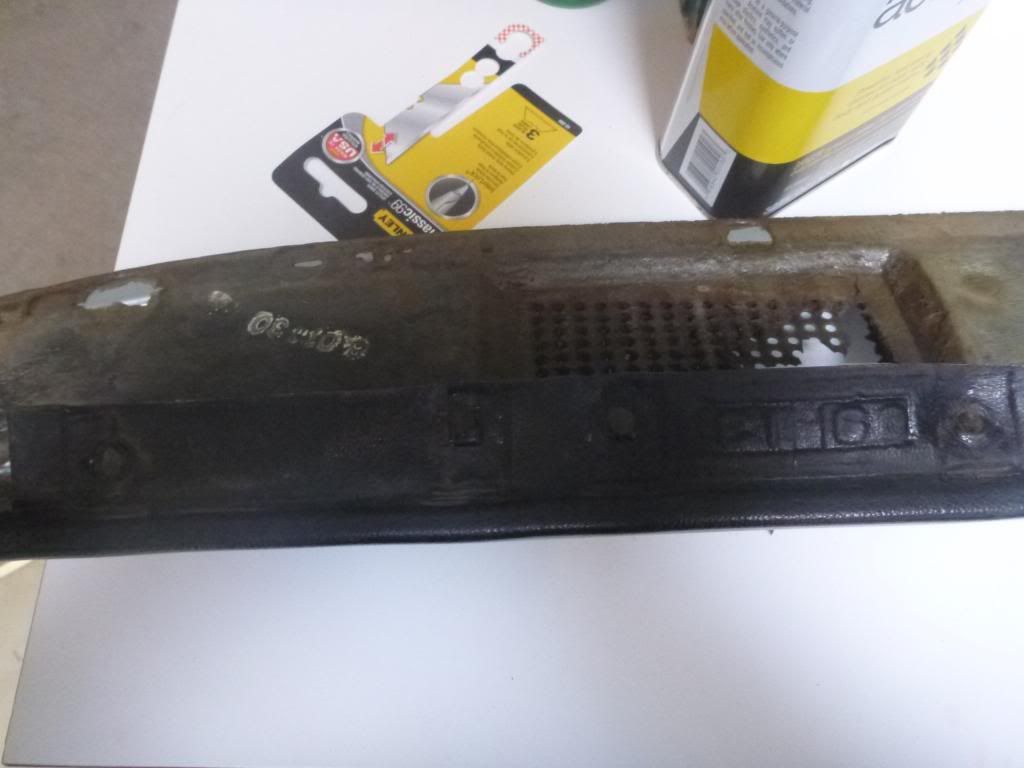
Pretty cool production date stamp on this side.
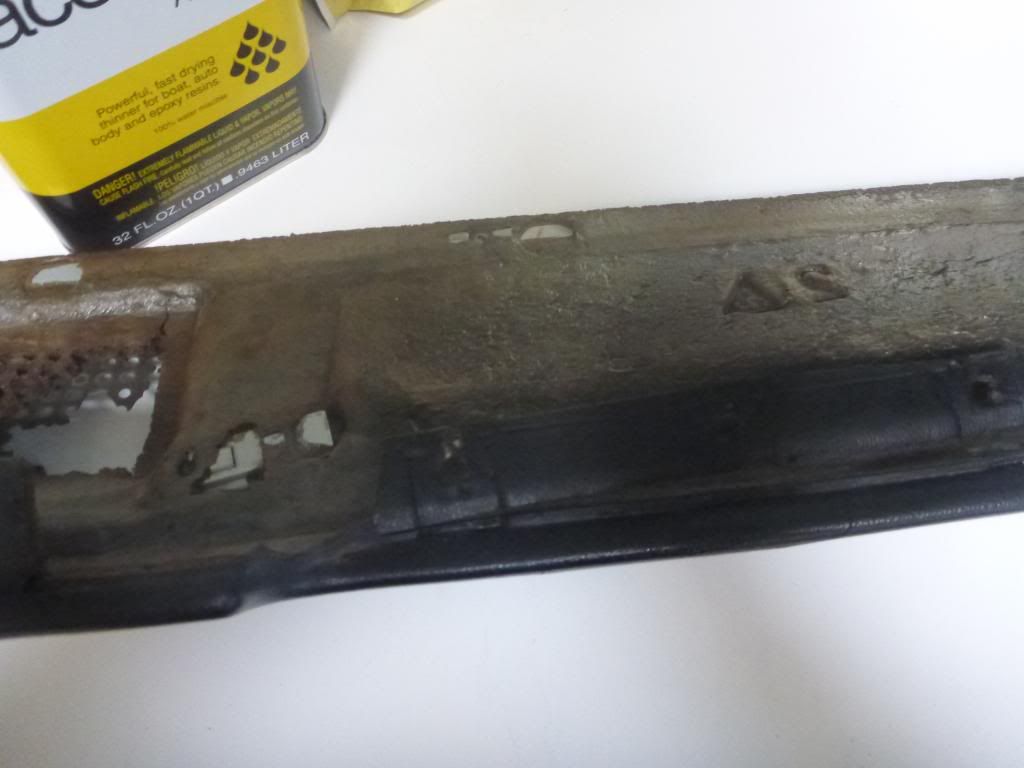
As you can tell, this thing's pretty lunched. The old mono speaker pod hole is crumbling up, and there's a mean couple gashes across the top.
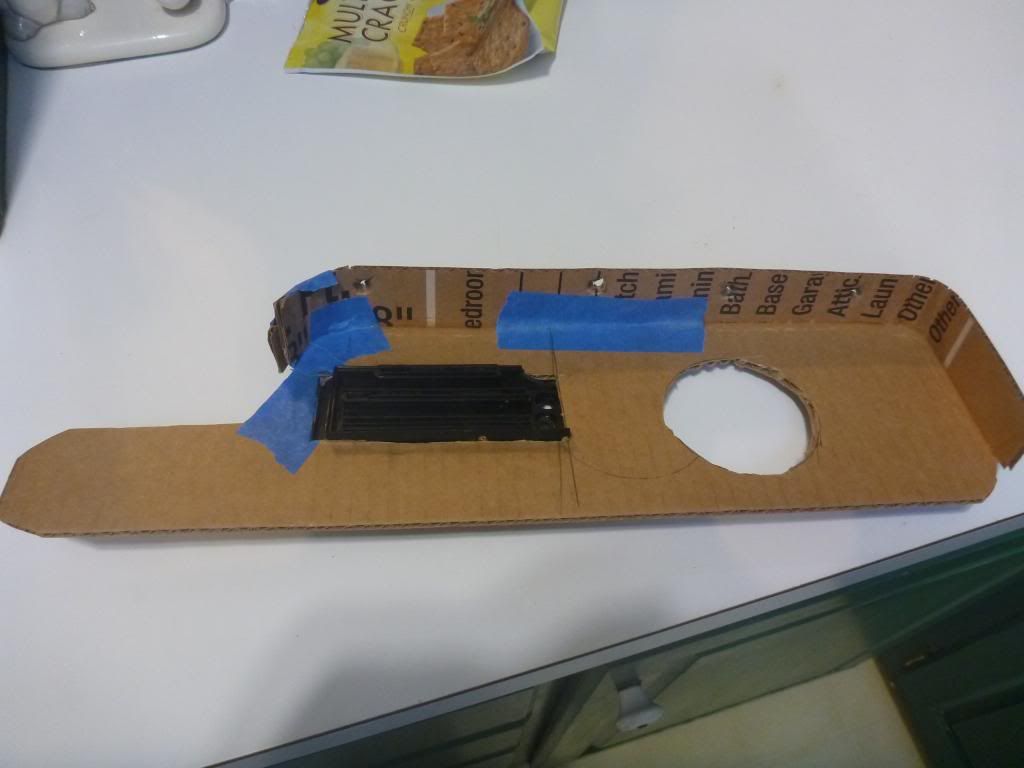
My new Dashboard faceplate:
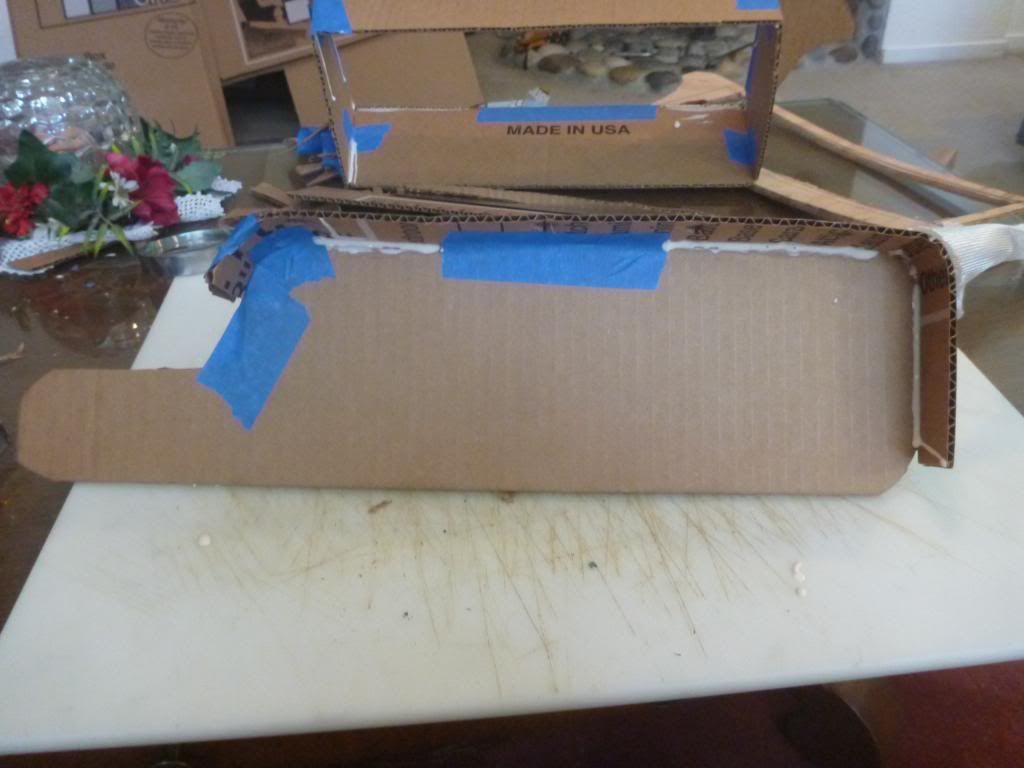
It'll get a second piece of backerboard, and fitted for instruments and switches.
The core structure for the dash pods.
A bolster. This will reinforce the dashpad in the area near the new dash bay, as well as cock the new bay out by 2", cheating the faces of the dials to the driver.
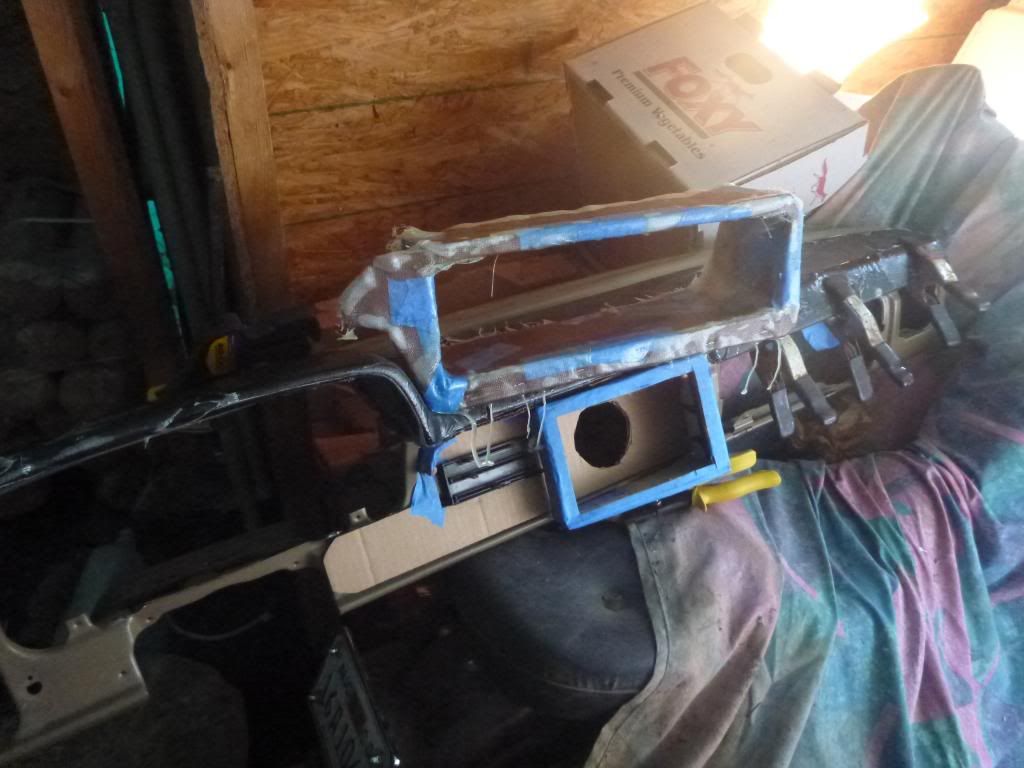
A crappy night pic taken on my way out the door for work tonight. It's curing up in my woodshed. I resined over the blue tape and I haven't seen any troubles yet, but we'll see. A couple more coats of fabric and resin, and it should be plenty strong.
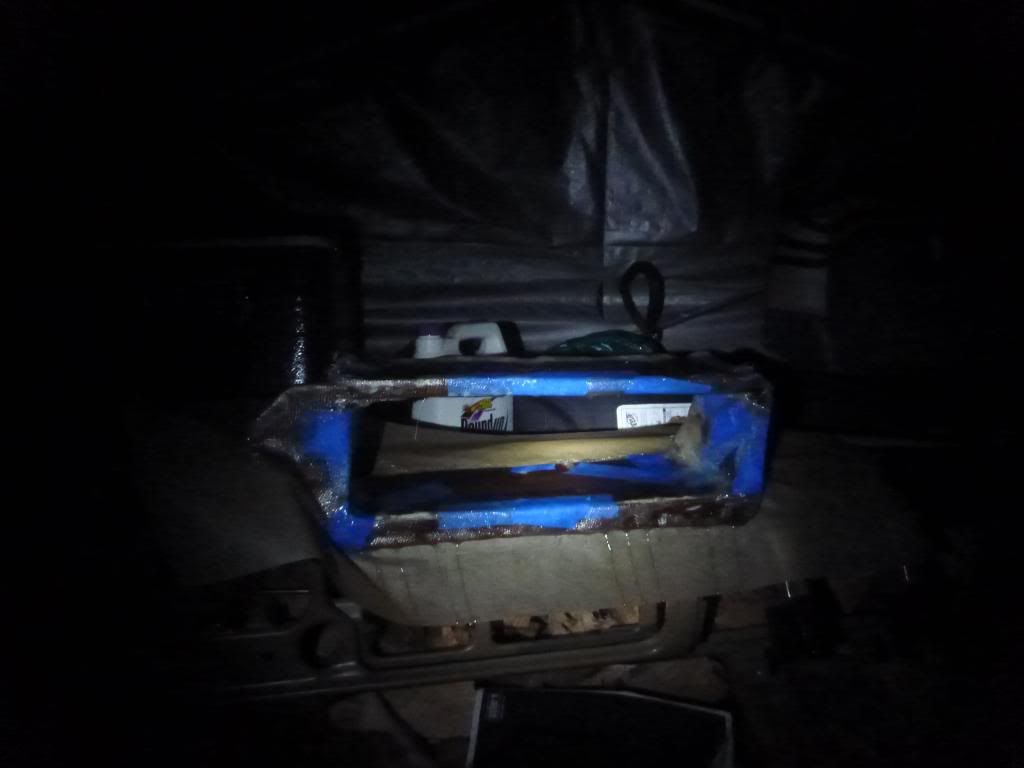
Tomorrow begins the screen panel assembly, as well as refining the dash face. I also need to supply up on resin.
I've decided to seek alternative mounting methods over those frustrating little clips, so I went through and trimmed back all the old mounting flaps, as well as any raised edges.
Pretty cool production date stamp on this side.
As you can tell, this thing's pretty lunched. The old mono speaker pod hole is crumbling up, and there's a mean couple gashes across the top.
My new Dashboard faceplate:
It'll get a second piece of backerboard, and fitted for instruments and switches.
The core structure for the dash pods.
A bolster. This will reinforce the dashpad in the area near the new dash bay, as well as cock the new bay out by 2", cheating the faces of the dials to the driver.
A crappy night pic taken on my way out the door for work tonight. It's curing up in my woodshed. I resined over the blue tape and I haven't seen any troubles yet, but we'll see. A couple more coats of fabric and resin, and it should be plenty strong.
Tomorrow begins the screen panel assembly, as well as refining the dash face. I also need to supply up on resin.
Jan 8, 2013 | 06:32 AM
#5
I would suggest using makrolan or lexan instead of Plexiglas for your guage cluster. Won't scratch as easy or cloud if you get some cleaner on it.
Can't tell but almost looks like you pulled the entire dash...if so good idea.
I have one I am going to use when I redo my dash

Going to be following this..
Can't tell but almost looks like you pulled the entire dash...if so good idea.
I have one I am going to use when I redo my dash
Going to be following this..
Jan 8, 2013 | 10:47 PM
#6
Thread Starter
Registered User
iTrader: (1)
Joined: Jul 2012
Posts: 639
Likes: 0
From: Calistoga, CA
Thanks for the tips, Lexan sounds like the way to go.
I actually snagged a fresh, unmolested dash from an '81 at PnP the other day, seventeen bucks well-spent. It's been a lifesaver for fitting all these bits and shaping parts.
I actually snagged a fresh, unmolested dash from an '81 at PnP the other day, seventeen bucks well-spent. It's been a lifesaver for fitting all these bits and shaping parts.
Jan 9, 2013 | 01:21 AM
#7
Thread Starter
Registered User
iTrader: (1)
Joined: Jul 2012
Posts: 639
Likes: 0
From: Calistoga, CA
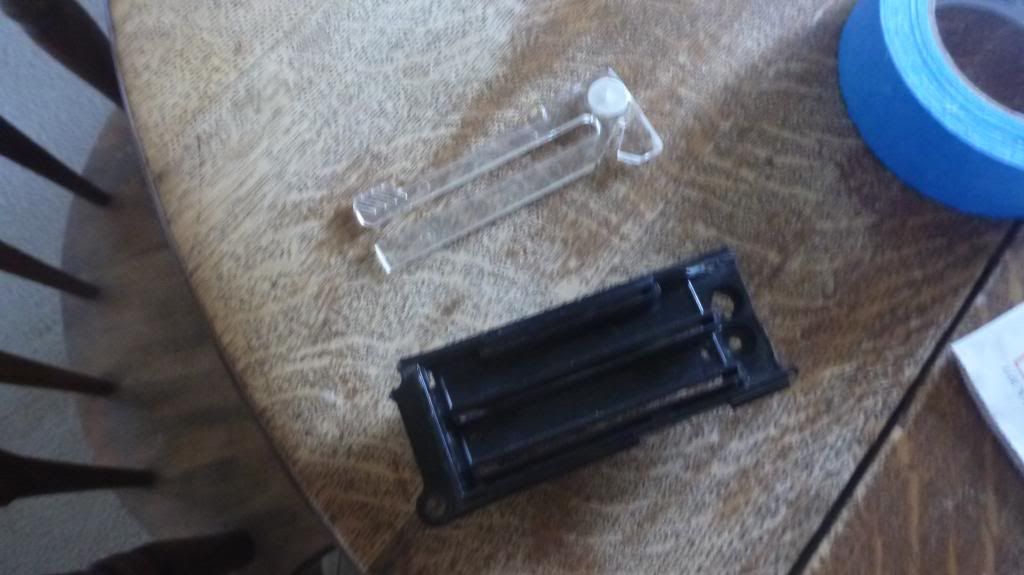
I've trimmed off the pot switch for the heater controls. It will be mounted beneath the control sliders.
For the amount of tinkering it takes to resize this part, I would advise instead switching to pull-knob controls, or notching the monitor bracket to seat it closer to the glove box. Too late for me now, but a good head's up for anyone looking for a monitor system in their rig.
Drawing out my bracket for the monitor. It's alot like one of those box kits you'd make in an elementary school crafts class.
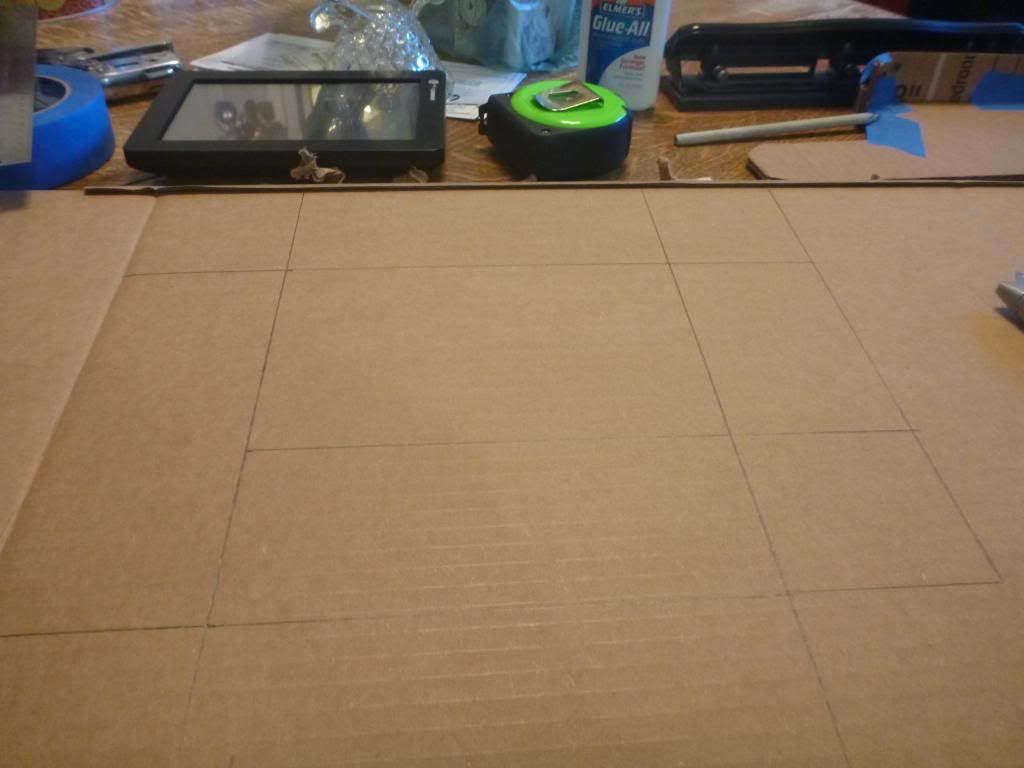
The box is assembled.
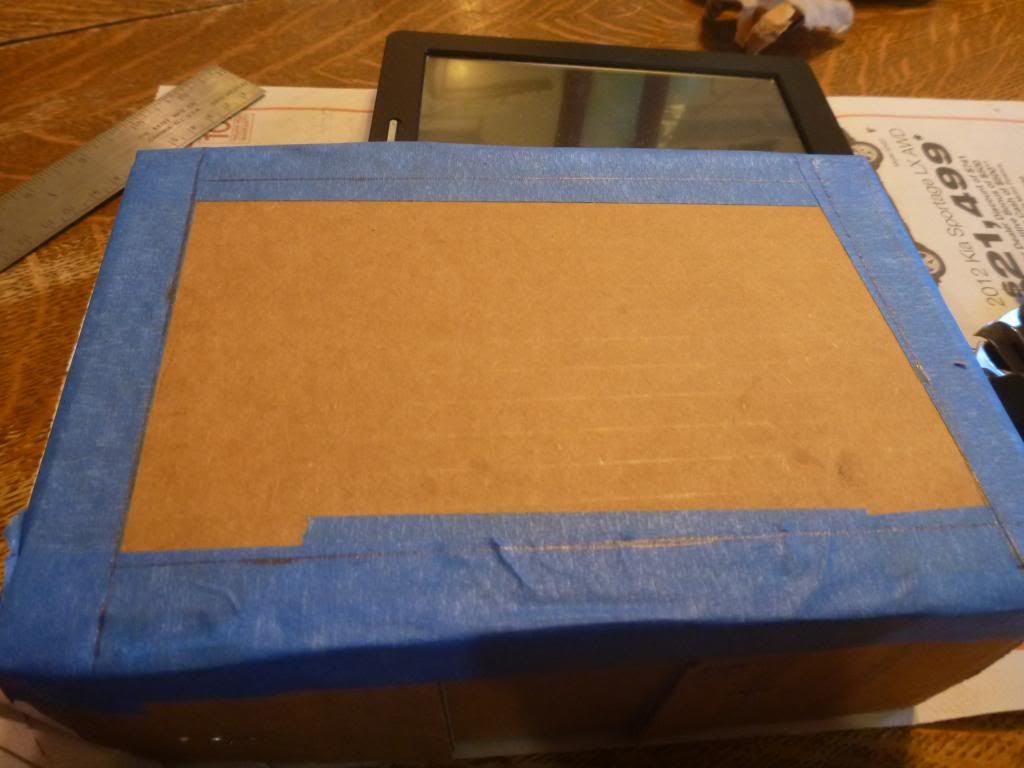
Test fit
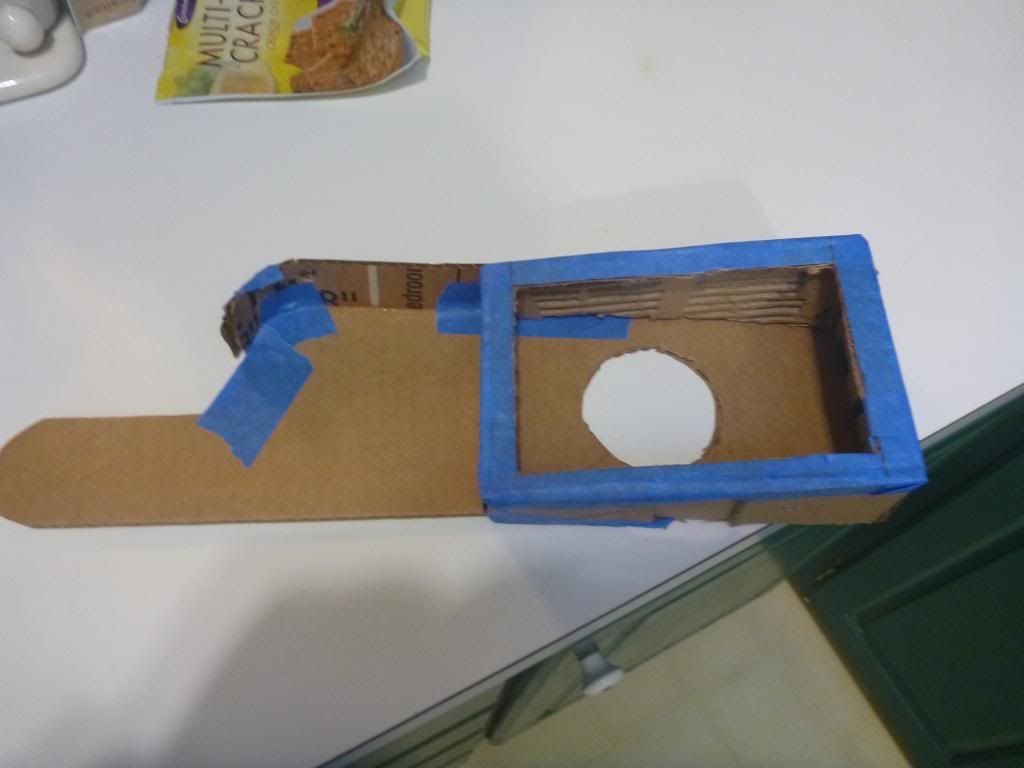
Face panel cut for heater controls:
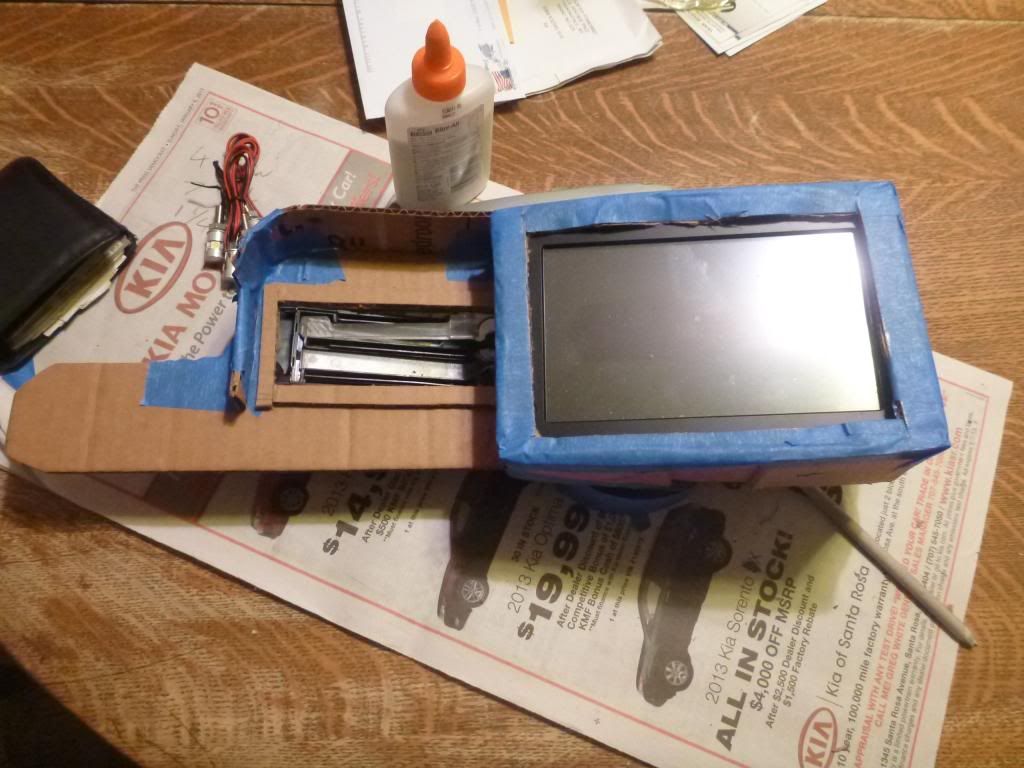
Big test fit.
I haven't trimmed the runoff on the pod bracket yet, so it looks kind of sloppy, but it's a proof of concept showing my conceptual angle of the gauges toward the driver.
A test fit of the screen and heater control bracket. Looking good.
For the amount of tinkering it takes to resize this part, I would advise instead switching to pull-knob controls, or notching the monitor bracket to seat it closer to the glove box. Too late for me now, but a good head's up for anyone looking for a monitor system in their rig.
Drawing out my bracket for the monitor. It's alot like one of those box kits you'd make in an elementary school crafts class.
The box is assembled.
Test fit
Face panel cut for heater controls:
Big test fit.
I haven't trimmed the runoff on the pod bracket yet, so it looks kind of sloppy, but it's a proof of concept showing my conceptual angle of the gauges toward the driver.
A test fit of the screen and heater control bracket. Looking good.
Trending Topics
Oct 31, 2013 | 05:19 AM
#8
Thread Starter
Registered User
iTrader: (1)
Joined: Jul 2012
Posts: 639
Likes: 0
From: Calistoga, CA
Reviving a long-abandoned thread. Due to work and scholastic commitments, I had to step away from this project for a little bit, which gave me a chance to reassess my ideas and progress and I've decided to start the whole thing over from scratch.
I realized that no matter what I did, it lust looked like I'd been adding boxes and bondo to the existing products, resulting in a fairly hackish product. Since then, I've started completely over, using the second dash I have as my skeleton to build off of. Structure will still be added by cardboard (it's cheap and forgiving) acting like a mold in reverse. Additional curves and dimension is coming from spray foam insulation. The goal is to produce a complete drop-in unit that will just replace the whole dash outright.
I'll update when I'm satisfied with the results, but it's definitely a project in the works.
Nov 8, 2013 | 12:43 PM
#10
Thread Starter
Registered User
iTrader: (1)
Joined: Jul 2012
Posts: 639
Likes: 0
From: Calistoga, CA
Well, here is a wee progress picture of it after the resin set into the fabric stretch:
http://www.flickr.com/photos/108081773@N07/10748267026/
I'll upload my design later, but I've settled on aftermarket gauges that will fit into this new structure. I still plan on cutting out the face of the pod on the right and installing my nav screen and heater controls onto a separate face panel, one probably made of ploycarb or aluminum.
The lighter spots indicate areas I didn't apply resin, the glovebox opening ans the opening over the central heater vents. Those vents are now built into this unit, so it's one singular rattle-controlling mass.
Thanks man!
I think Corax did a fantastic job with his, and I had initially wanted to just add a clock onto the OEM dash in a way he had done, but I kept over-thinking it to death and got my overblown earlier design.
If you set out for a result like Corax's, you'll be very happy with the results!
http://www.flickr.com/photos/108081773@N07/10748267026/
I'll upload my design later, but I've settled on aftermarket gauges that will fit into this new structure. I still plan on cutting out the face of the pod on the right and installing my nav screen and heater controls onto a separate face panel, one probably made of ploycarb or aluminum.
The lighter spots indicate areas I didn't apply resin, the glovebox opening ans the opening over the central heater vents. Those vents are now built into this unit, so it's one singular rattle-controlling mass.
I think Corax did a fantastic job with his, and I had initially wanted to just add a clock onto the OEM dash in a way he had done, but I kept over-thinking it to death and got my overblown earlier design.
If you set out for a result like Corax's, you'll be very happy with the results!


 Nov 13, 2013 | 05:25 AM
#12
Thread Starter
Registered User
iTrader: (1)
Joined: Jul 2012
Posts: 639
Likes: 0
From: Calistoga, CA
Thanks man! It's shaping up. Hopefully I'll have more to show in the near future.
Well, I've gotten an additional layer of cloth down on it, and picked up a pneumatic sander to help out. I'm now moving on to applying matting and resin.
If anyone is reading this and wants to do some homebrew fiberglass, matting really beefs up the structure, but it will ruin finer details. It'll take some time with a Dremel and some grinding bits to make them prominent again, but the structural results are fantastic.
In other areas, I'm moving forward with the designs for speaker boxes and the floor and overhead consoles. I'm planning on using the floor console as a convenient wire routing system as well. All in all, it's going well, and I'm glad I've chosen the more difficult and labor intensive portion as the first bit. After this, the other parts will be a dream!
Nov 13, 2013 | 05:45 AM
#14
Thread Starter
Registered User
iTrader: (1)
Joined: Jul 2012
Posts: 639
Likes: 0
From: Calistoga, CA
Fiber can be a rewarding means of dealing with a cracked pad. My route has been... excessive, but for about 30 bucks you could easily patch up an old first gen dash pad over a weekend.
I should try and get my current designs up on this thread, because there have been about six and a half iterations between where I am now and where it began.
I should try and get my current designs up on this thread, because there have been about six and a half iterations between where I am now and where it began.
Nov 13, 2013 | 05:51 AM
#15
Registered User
Joined: May 2010
Posts: 2,587
Likes: 7
From: Ofallon Missouri
Well, here is a wee progress picture of it after the resin set into the fabric stretch:
P1010730 | Flickr - Photo Sharing!
I'll upload my design later, but I've settled on aftermarket gauges that will fit into this new structure. I still plan on cutting out the face of the pod on the right and installing my nav screen and heater controls onto a separate face panel, one probably made of ploycarb or aluminum.
The lighter spots indicate areas I didn't apply resin, the glovebox opening ans the opening over the central heater vents. Those vents are now built into this unit, so it's one singular rattle-controlling mass.
Thanks man!
I think Corax did a fantastic job with his, and I had initially wanted to just add a clock onto the OEM dash in a way he had done, but I kept over-thinking it to death and got my overblown earlier design.
If you set out for a result like Corax's, you'll be very happy with the results!
Nov 13, 2013 | 06:03 AM
#16
Thread Starter
Registered User
iTrader: (1)
Joined: Jul 2012
Posts: 639
Likes: 0
From: Calistoga, CA
The short story is, I hate driving in the town I live in. It's got all the traffic graces of San Francisco and Los Angeles combined, crammed into a stop sign infested podunk burb with delusions of granduer crawling with jerks in CRVs and Foresters that enjoy going a top speed of 2MPH and collecting as many people behind them as humanly possible. That, combined with working the graveyard shift and attending school full time and commuting about 500 miles a week meant that I really didn't want to drive across town to the fabric store for the necessary cloth. So I used a bundle of shop rags from the nearby hardware store. Many of those seams were just the fringes of the shop rags. I attacked the ridges, wrinkles, and seams with my sander and a Dremel and had 'em all knocked down in a few minutes.
You are right, though, it's a good deal easier to break a large structure like that into quarters or so and cover each quarter individually than to try and go after it with one big sheet.
Edit: I'm happy I'm doing this for myself and not for sale or production, because I'd be plenty embarrassed by that particular shortcut.
Last edited by RobotMoose; Nov 13, 2013 at 06:05 AM.
Nov 14, 2013 | 12:25 AM
#17
Thread Starter
Registered User
iTrader: (1)
Joined: Jul 2012
Posts: 639
Likes: 0
From: Calistoga, CA
Here's my most recent re-design. As far as the dash goes it's final, but I have a few tweaks to make to the floor console.
Last edited by RobotMoose; Nov 14, 2013 at 12:46 AM.
 Jan 23, 2014 | 05:50 AM
#19
Thread Starter
Registered User
iTrader: (1)
Joined: Jul 2012
Posts: 639
Likes: 0
From: Calistoga, CA
Well, here's a long-overdue progress update:
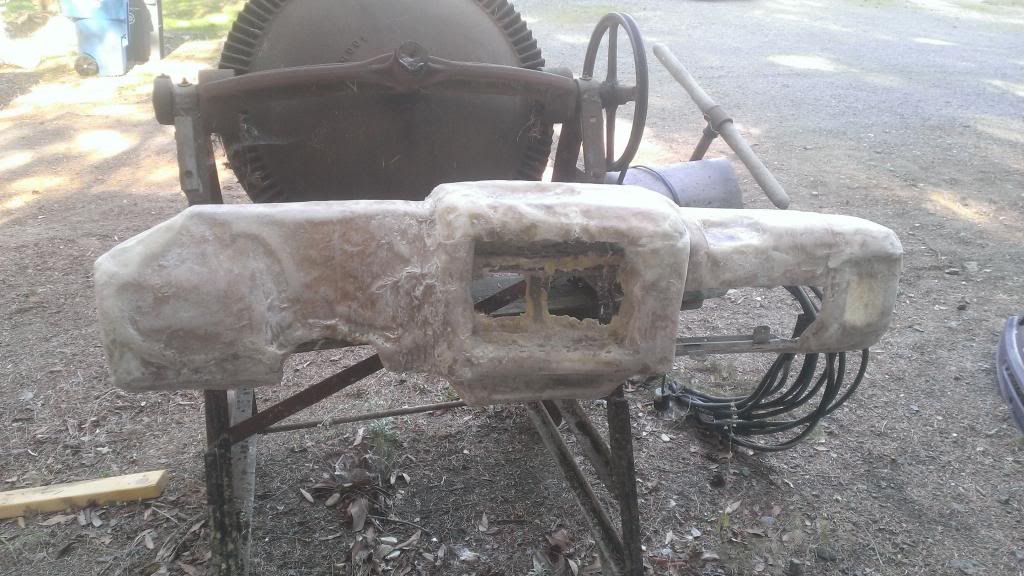
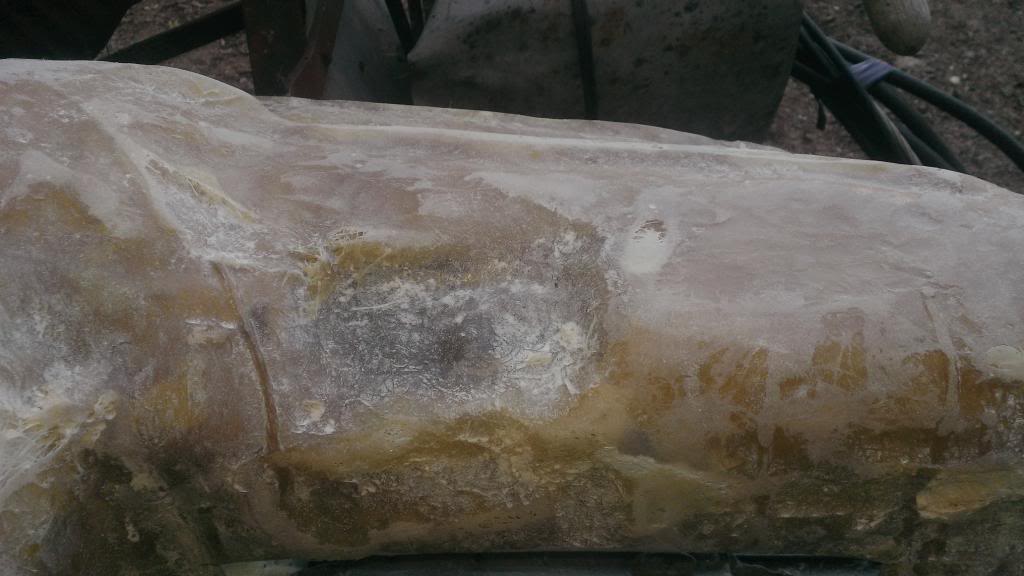
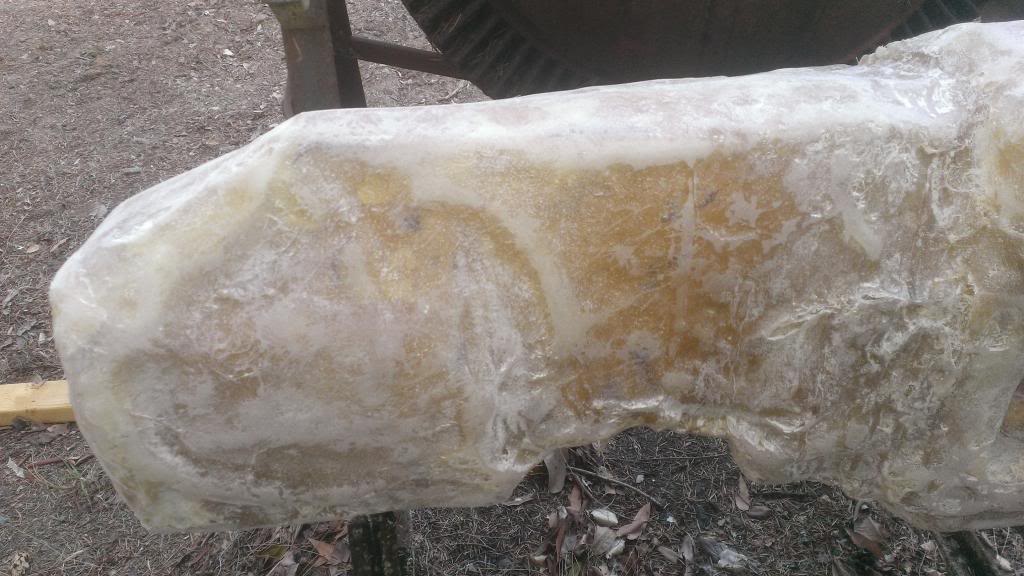
Slowly getting there.
I'm so fed up with fiberglass, I'm considering having then floor console made out of Polypro instead. I also picked up a Hella flexible map-lamp, it'll go in the little dent 1/3 of the way through the passenger's side. It was supposed to be an LED lamp, but it's incandescent, so I'm converting it.
Mar 13, 2014 | 11:27 PM
#20
Registered User
Joined: Apr 2013
Posts: 95
Likes: 1
From: Portland/San Diego


