
My New Sound System Upgrade
 Dec 17, 2015 | 12:30 PM
#1

Thread Starter
Registered User
Joined: Oct 2015
Posts: 186
Likes: 5
From: Fairfield County Connecticut
My New Sound System Upgrade
Hey guys, so a while back I was asking for solutions to be able to play my iPhone in my '94 Pickup being that it has the factory radio with no CD player/changer or tape deck. I didn't want to get a new head unit because I wanted to keep more of a factory look and most head units you buy today look like a Transformer puked on your dash.
Some solutions were an FM transmitter (crap sound most of the time), wiring in an aux cable into my existing radio (over my pay grade and would most likely need a wiring diagram of the radio itself. Plus there's the possibility of ruining my current radio) and finally, my first thought, buy a '94 Pickup radio/tape player and use a tape deck to aux cable (another method which doesn't give you great sound)
What I actually ended up doing was having a separate amp for my iPhone installed behind the dash to connect to and have a switch to choose which I want to play...radio or iPhone. I wanted to make it more seamless than just having cables coming out from behind the dash that I plug into my phone, though. Below is just a little write up on the process with a video at the end showing it in action. Nothing crazy here, but it solved my problem. Thanks to scope103 for helping answer some of my questions.
The goal when I get into my truck was to put my iPhone into a dock and have it charge and play through the speakers while keeping the radio intact.
Parts:
Adafruit MAX9744 Stereo Amp
Male 5.5-2.1mm Power Jack Connector w/Pigtails
1N5400 Diodes (three)
Small project box for amp
Mini 4PDT Switch (ON/OFF/ON)
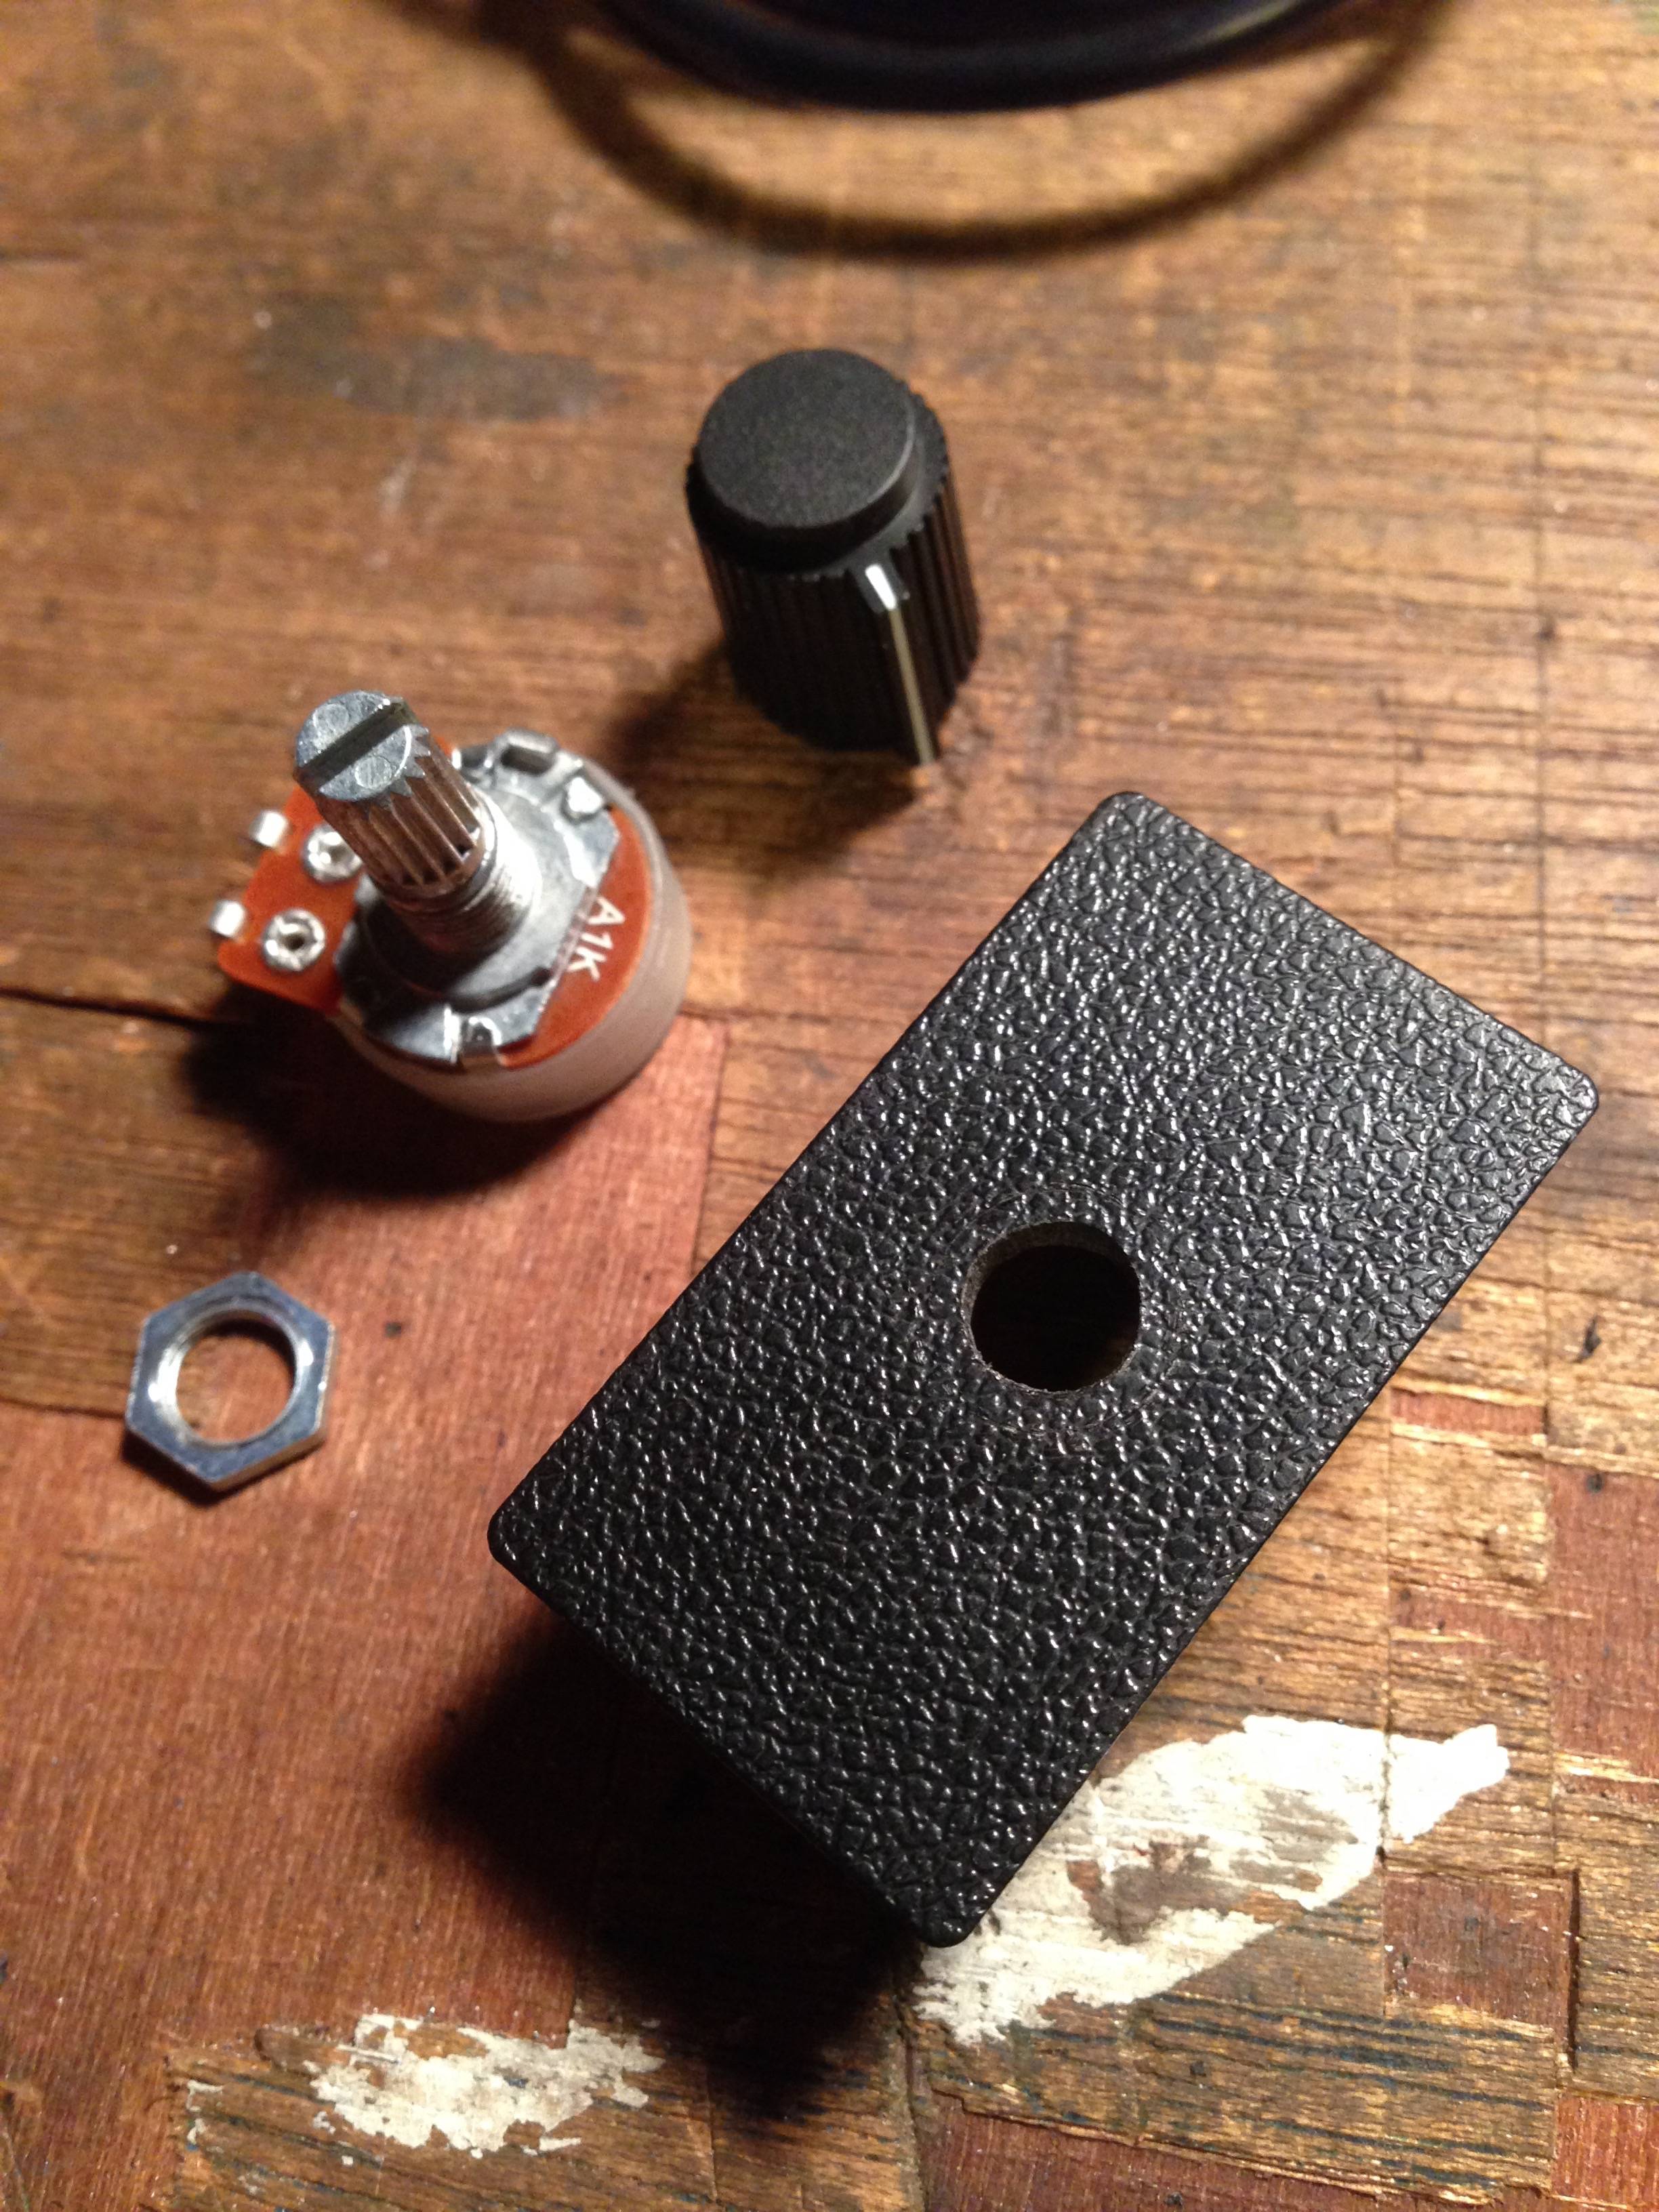
1k Ohm Audio Taper Log Pot (volume control)
Knob for Log Pot
2.1 Amp USB Charger
Aux cable
iPhone Lightning to USB Cable
iPhone dock
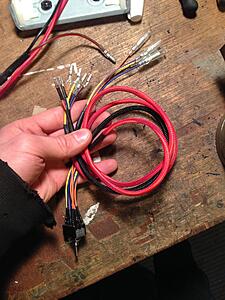
Misc. wire (18 & 22 AWG GXL), terminals and heat shrink
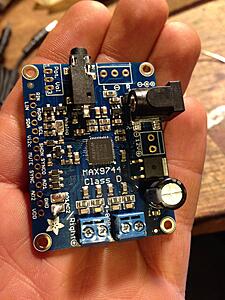
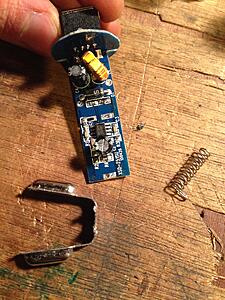
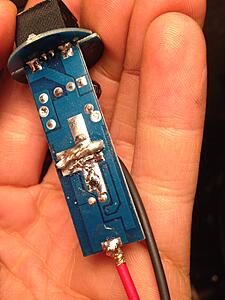
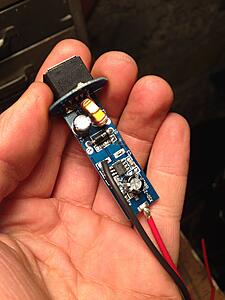
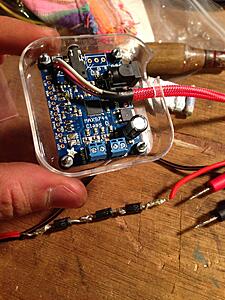
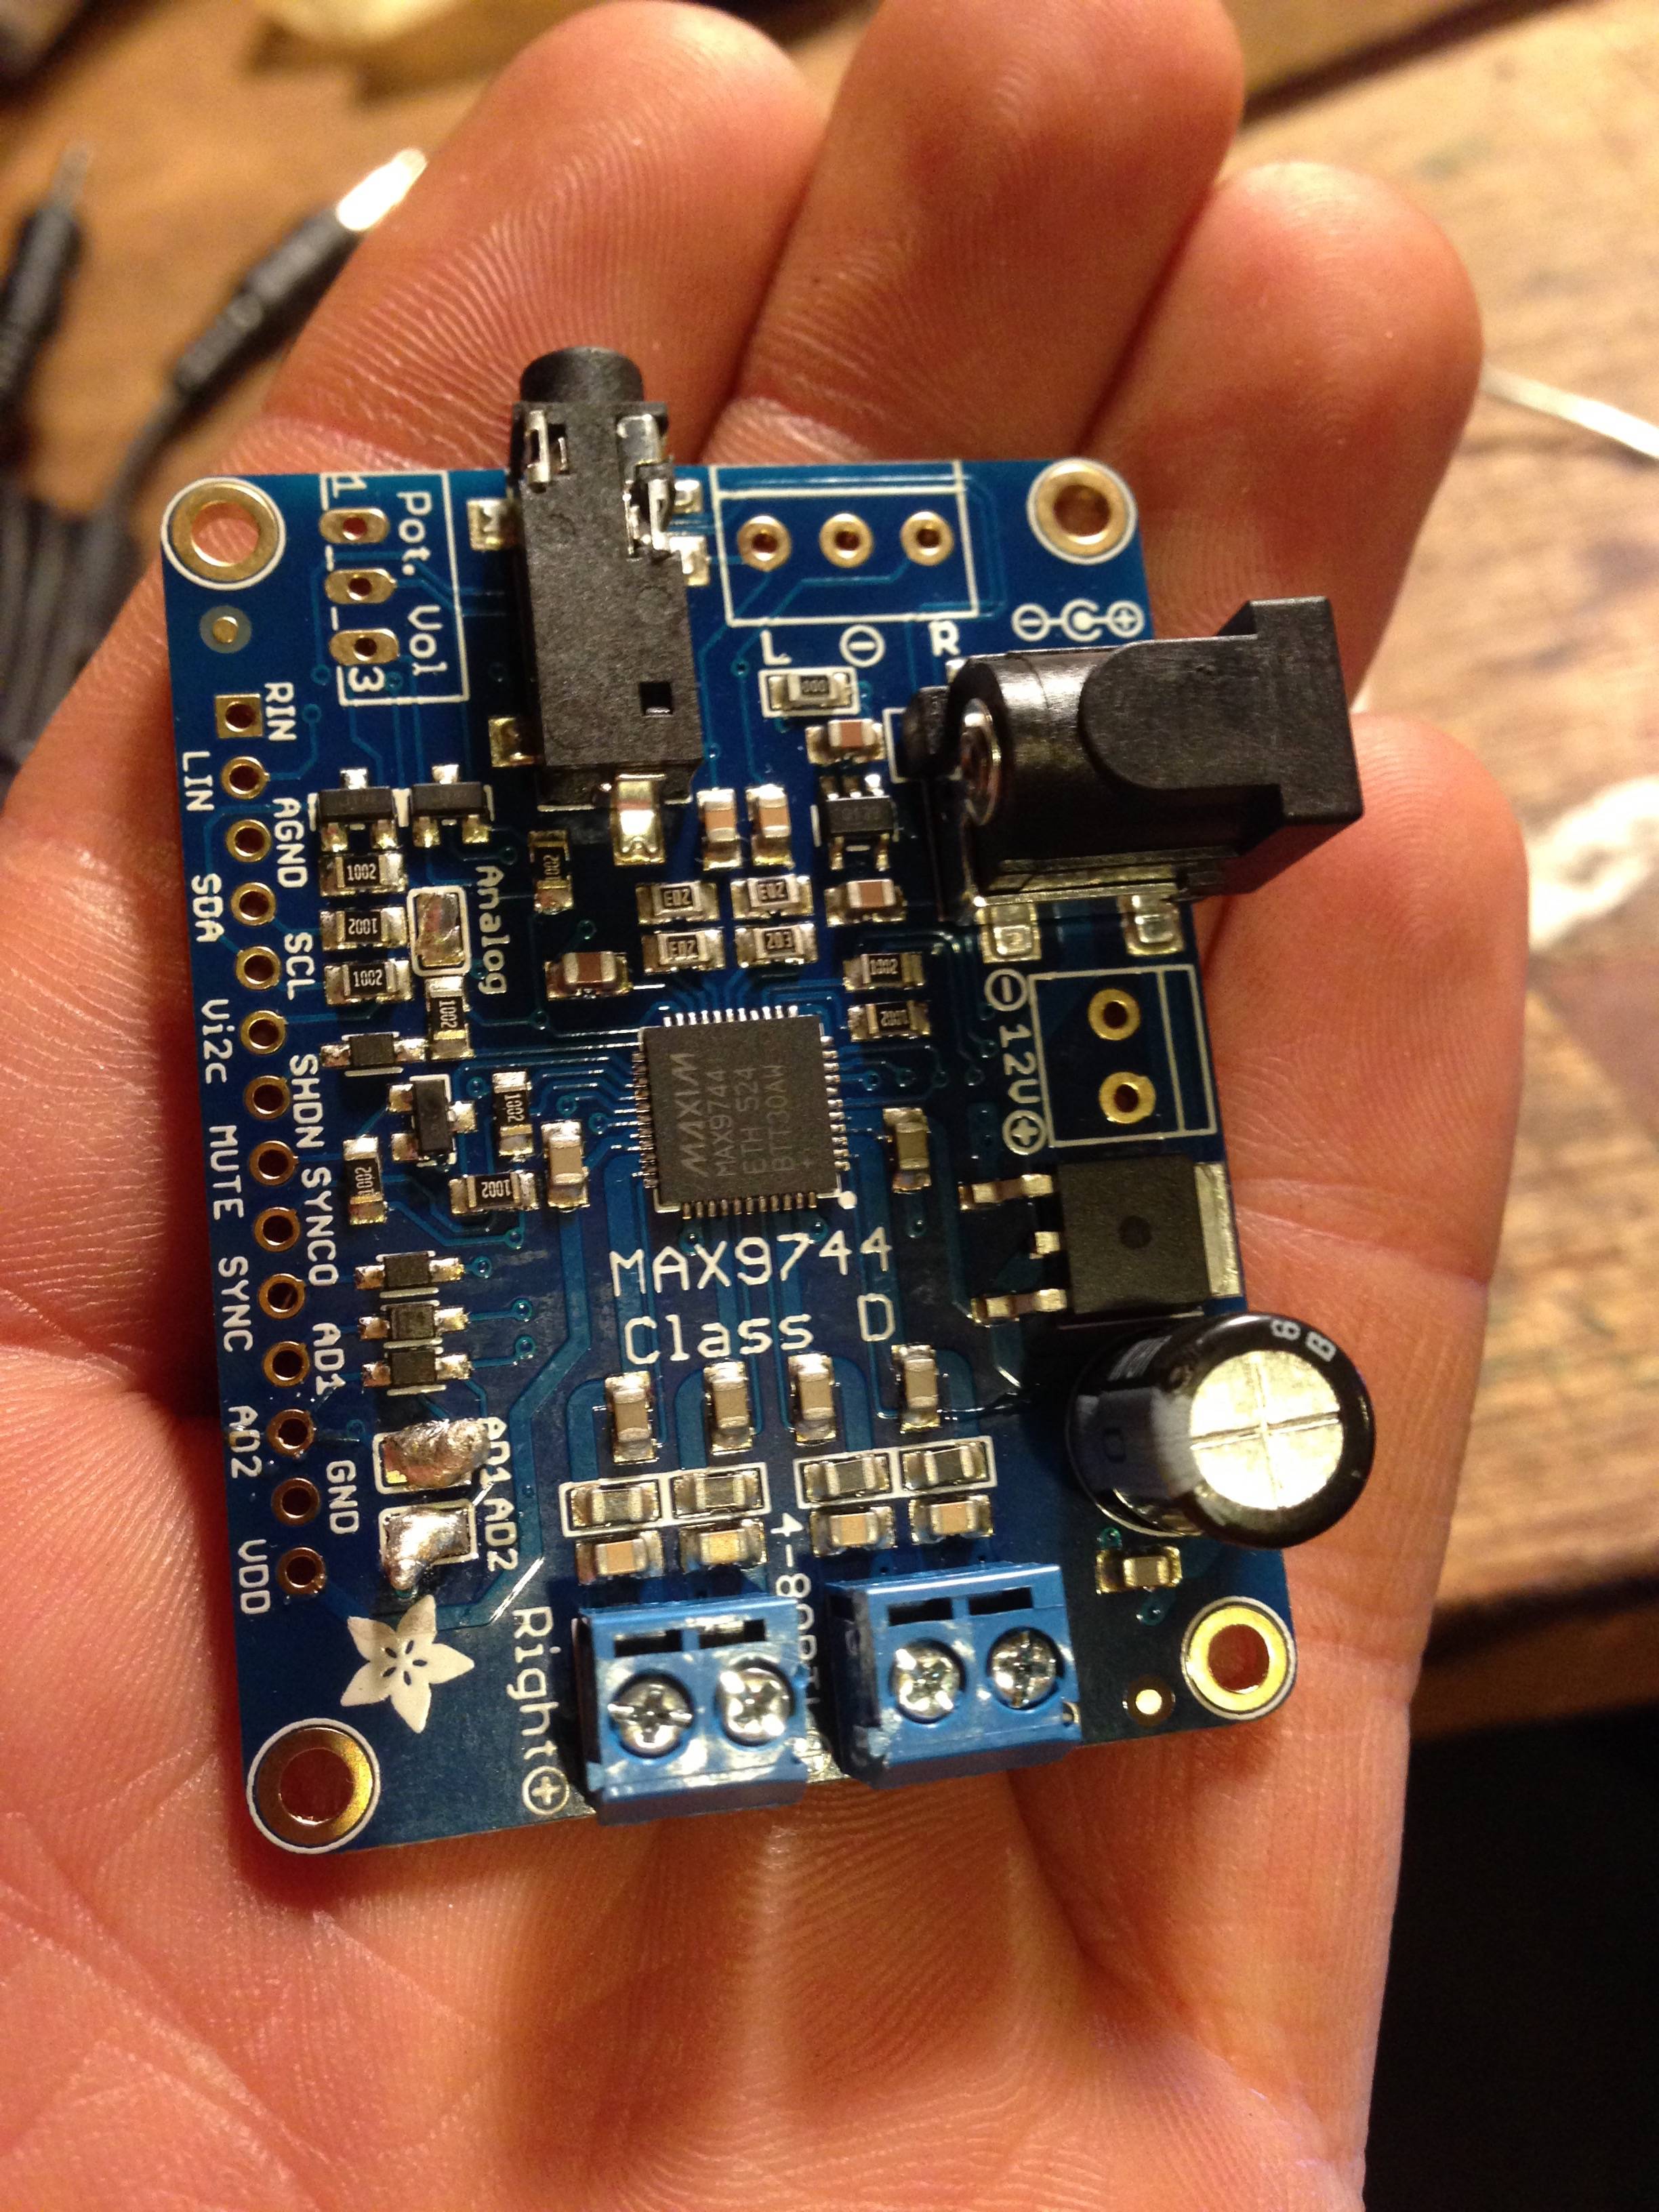
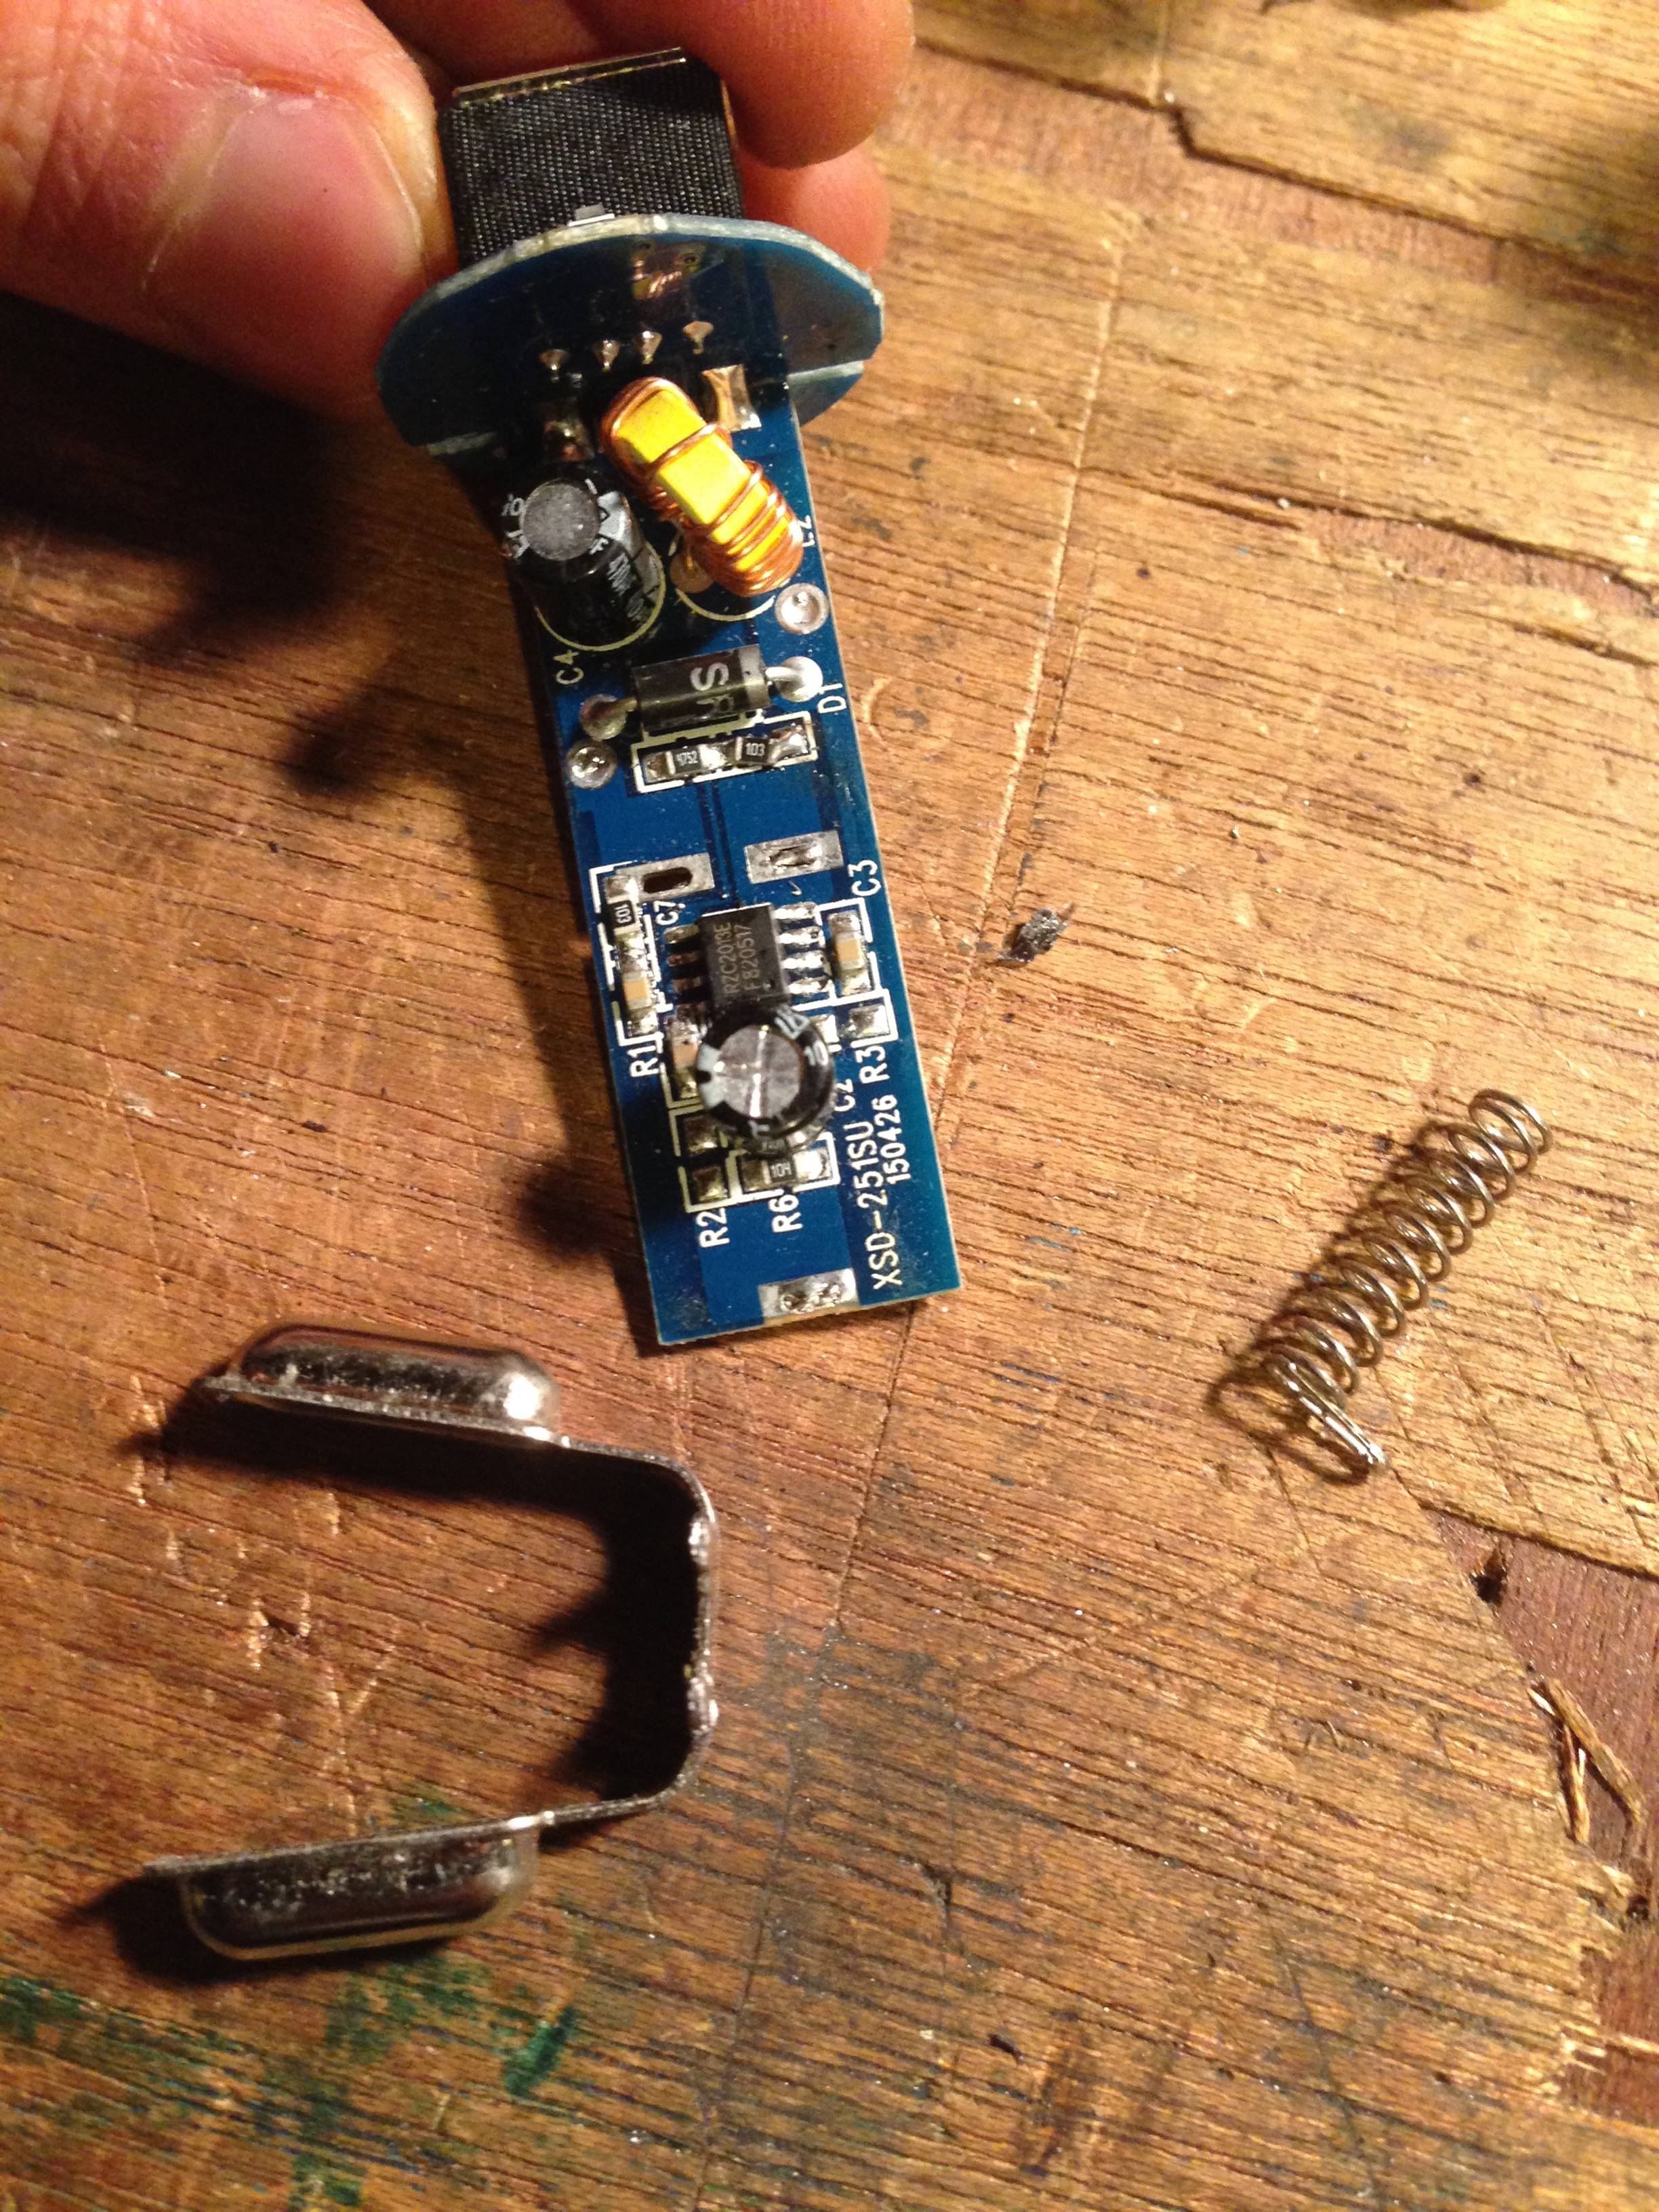
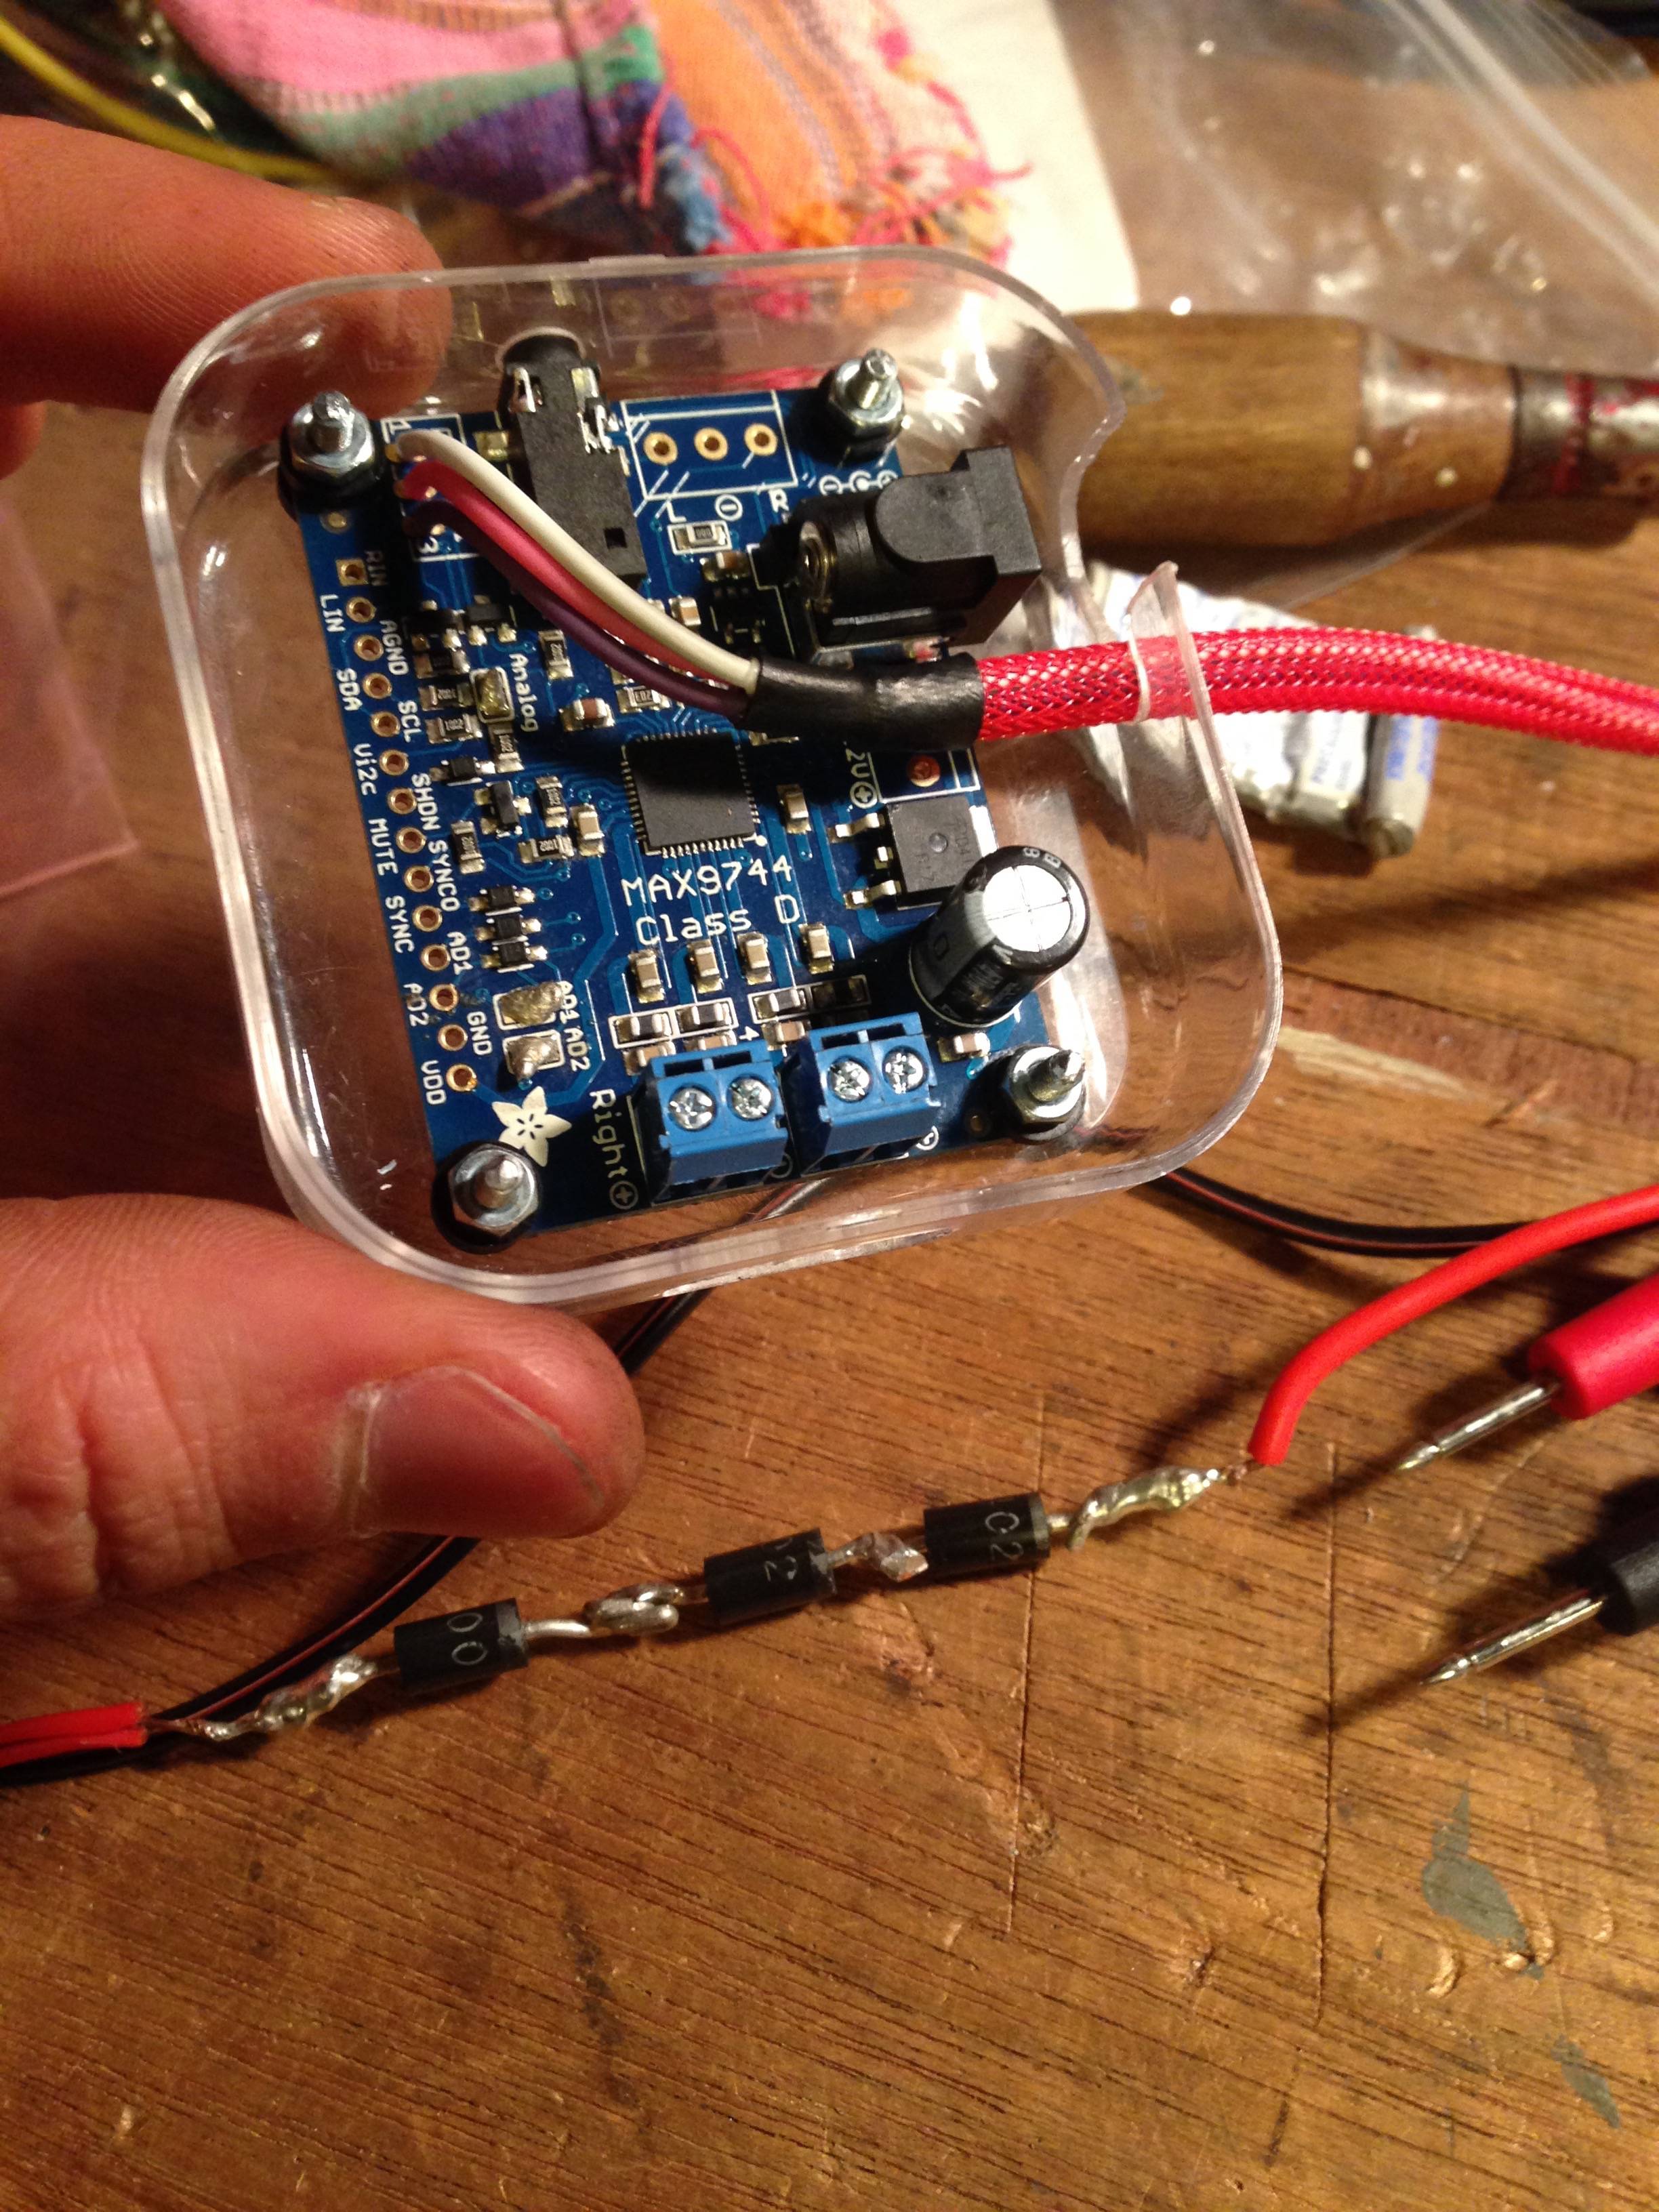
First was to solder together the amp by Adafruit. All that had to be done was add the capacitor, speaker terminals and join some existing contacts. I'm not a great solderer but it wasn't hard. They have great directions on their website.
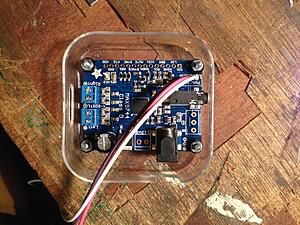
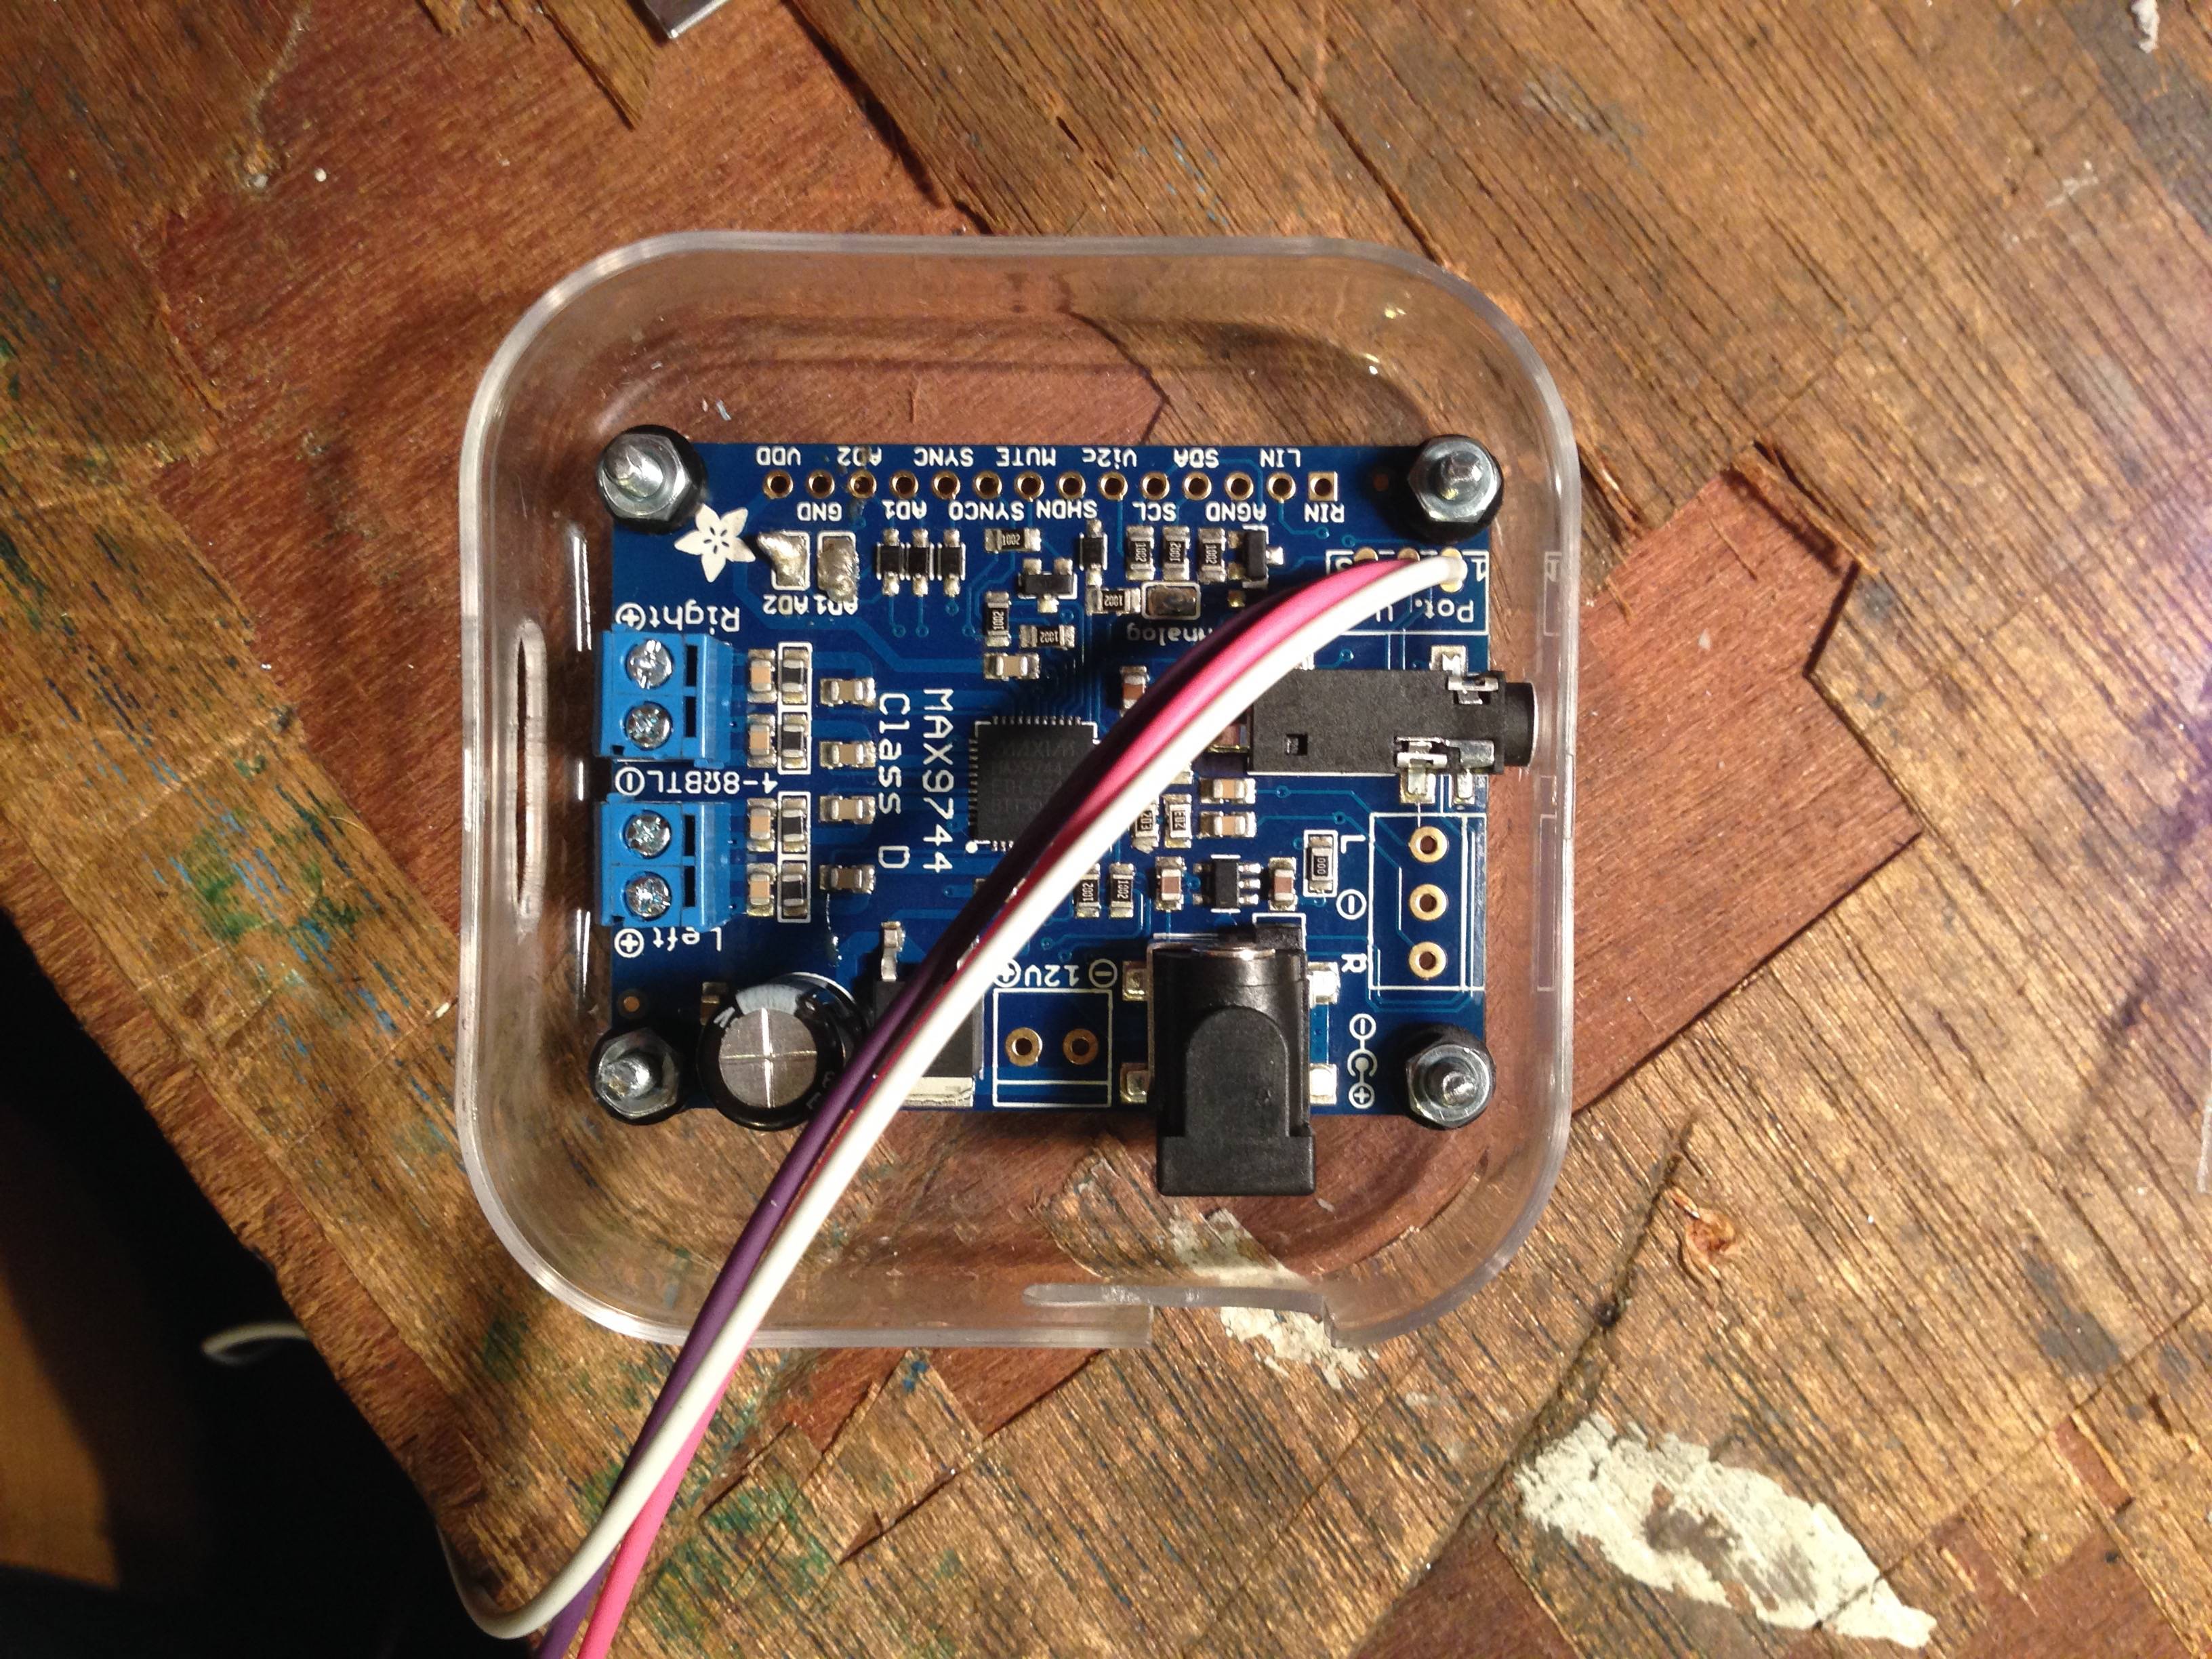
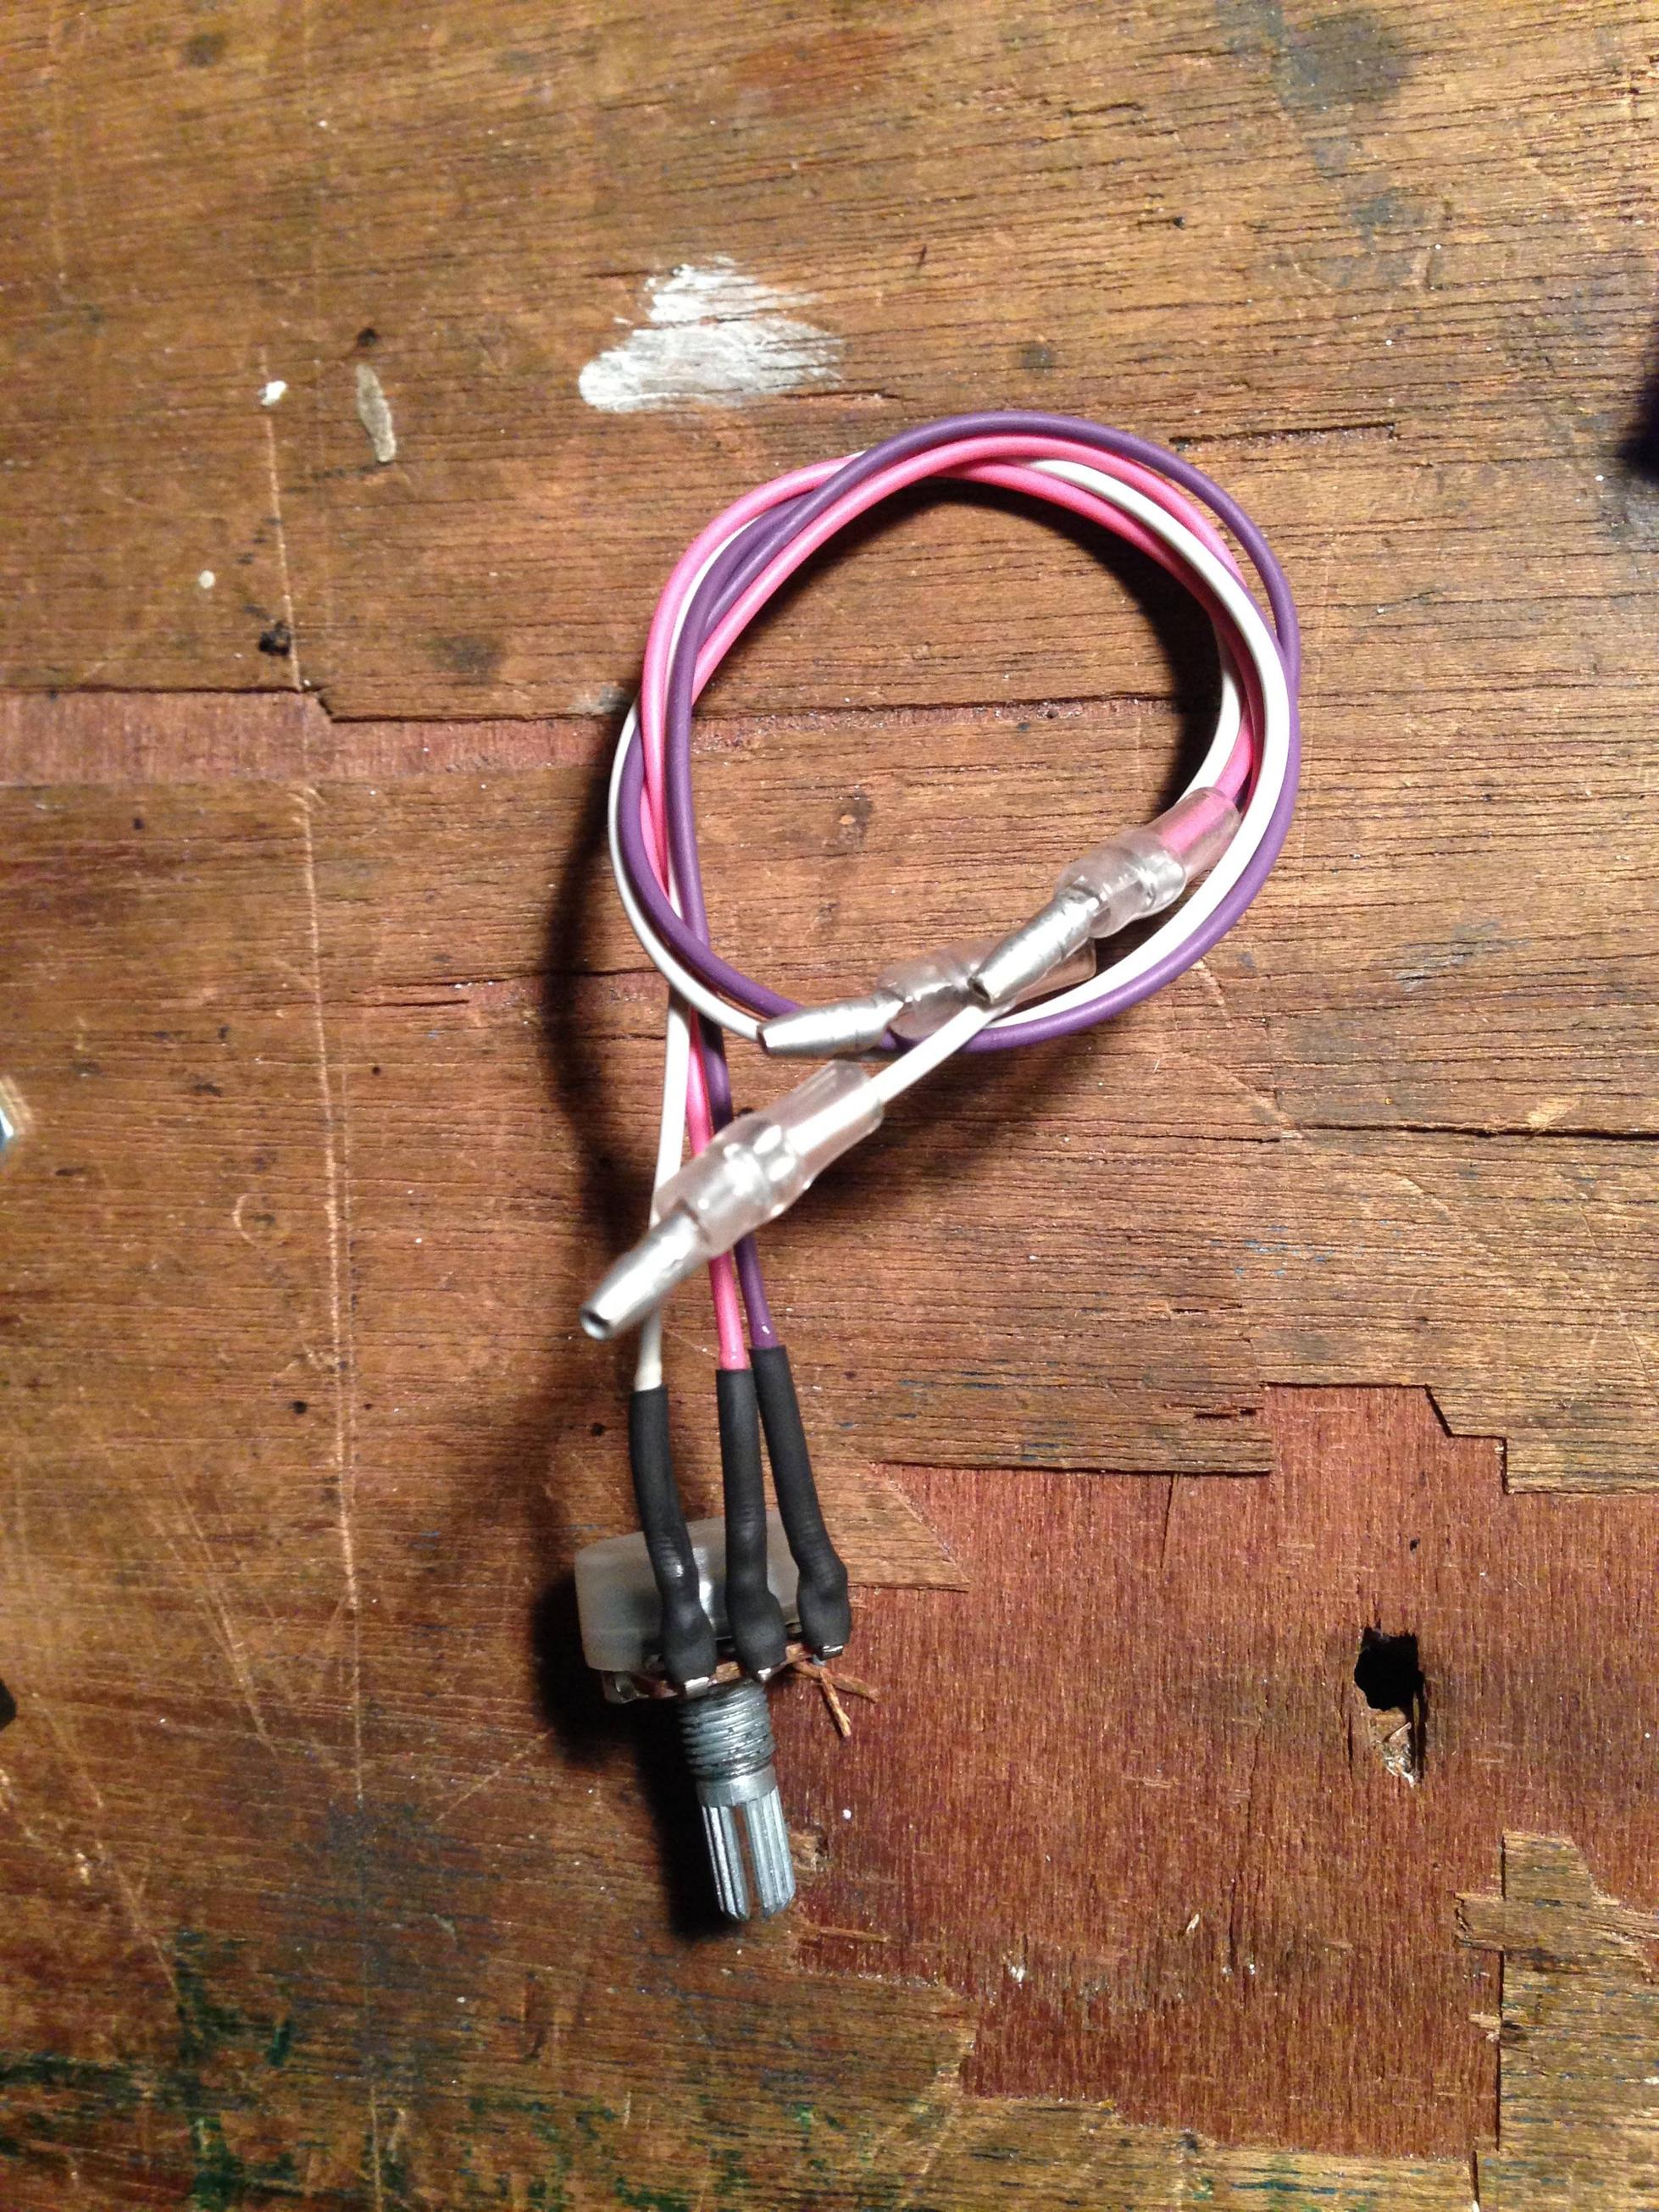
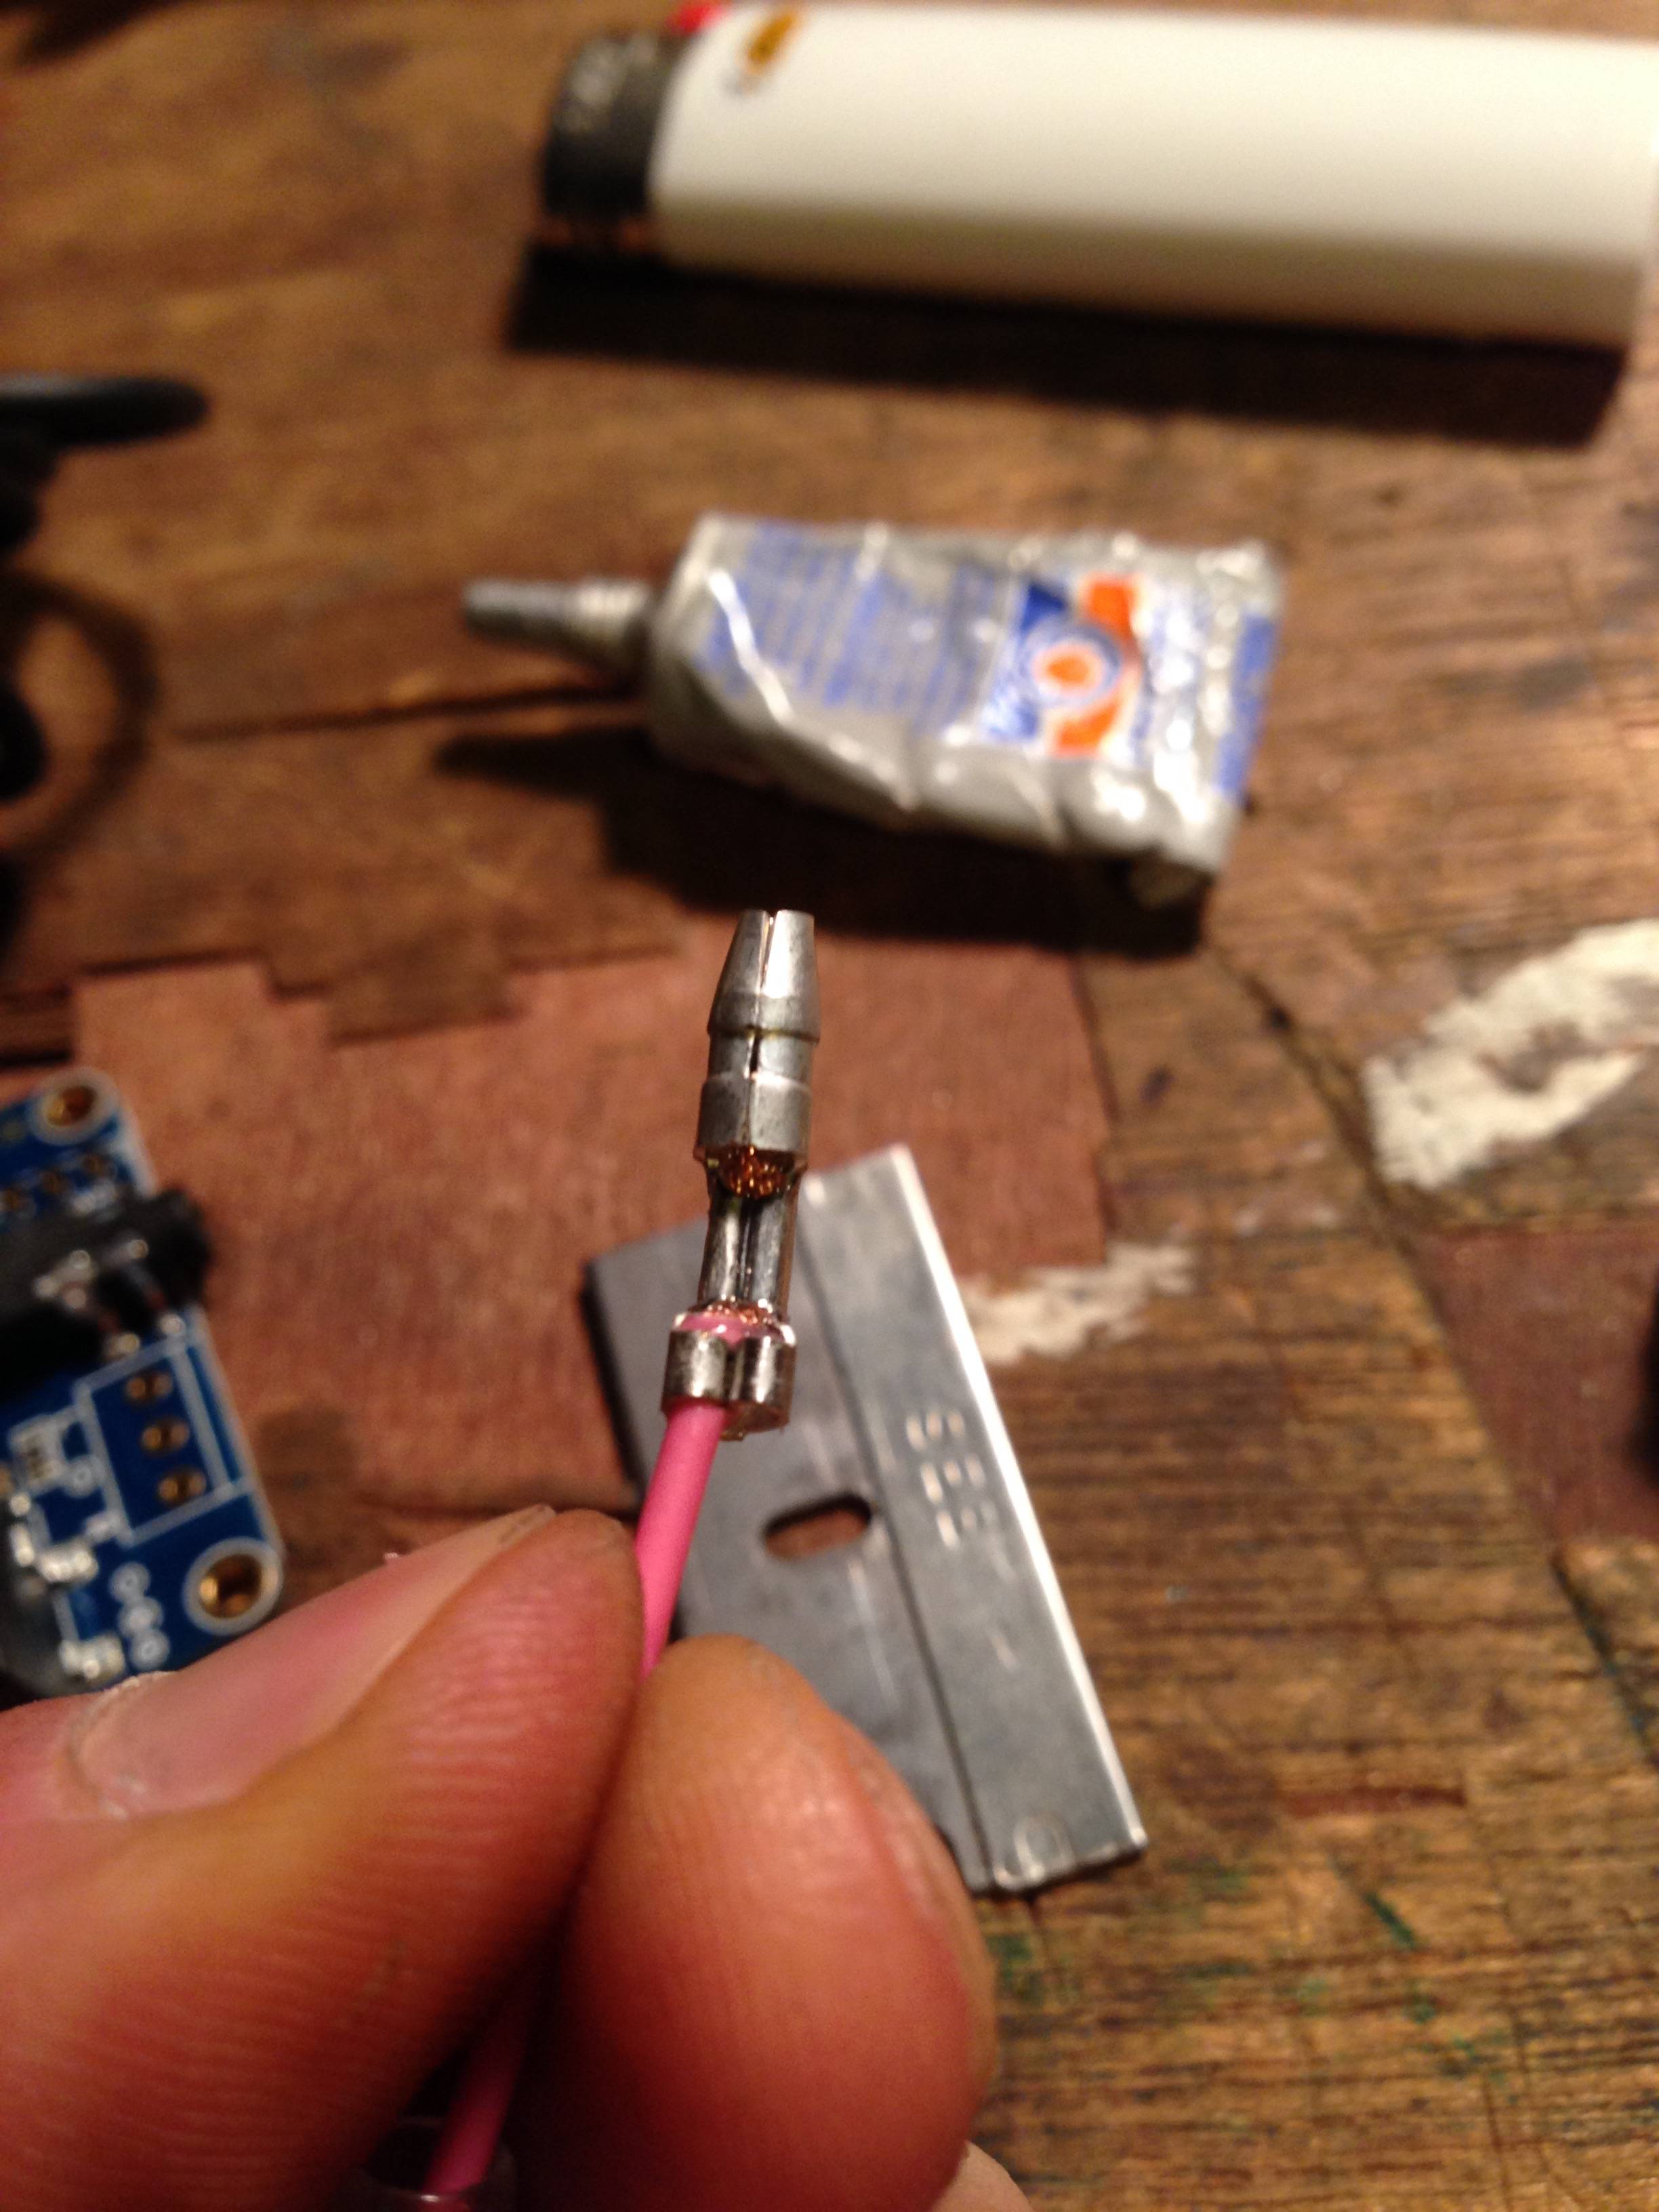
Then I soldered three wires to the vol pot contacts to use the external volume control. I crimped female bullet terminals to the ends and added nice braided wire loom with heat shrinked ends for cleanliness. And finally put it into my plastic project box (old earbud headphone case)

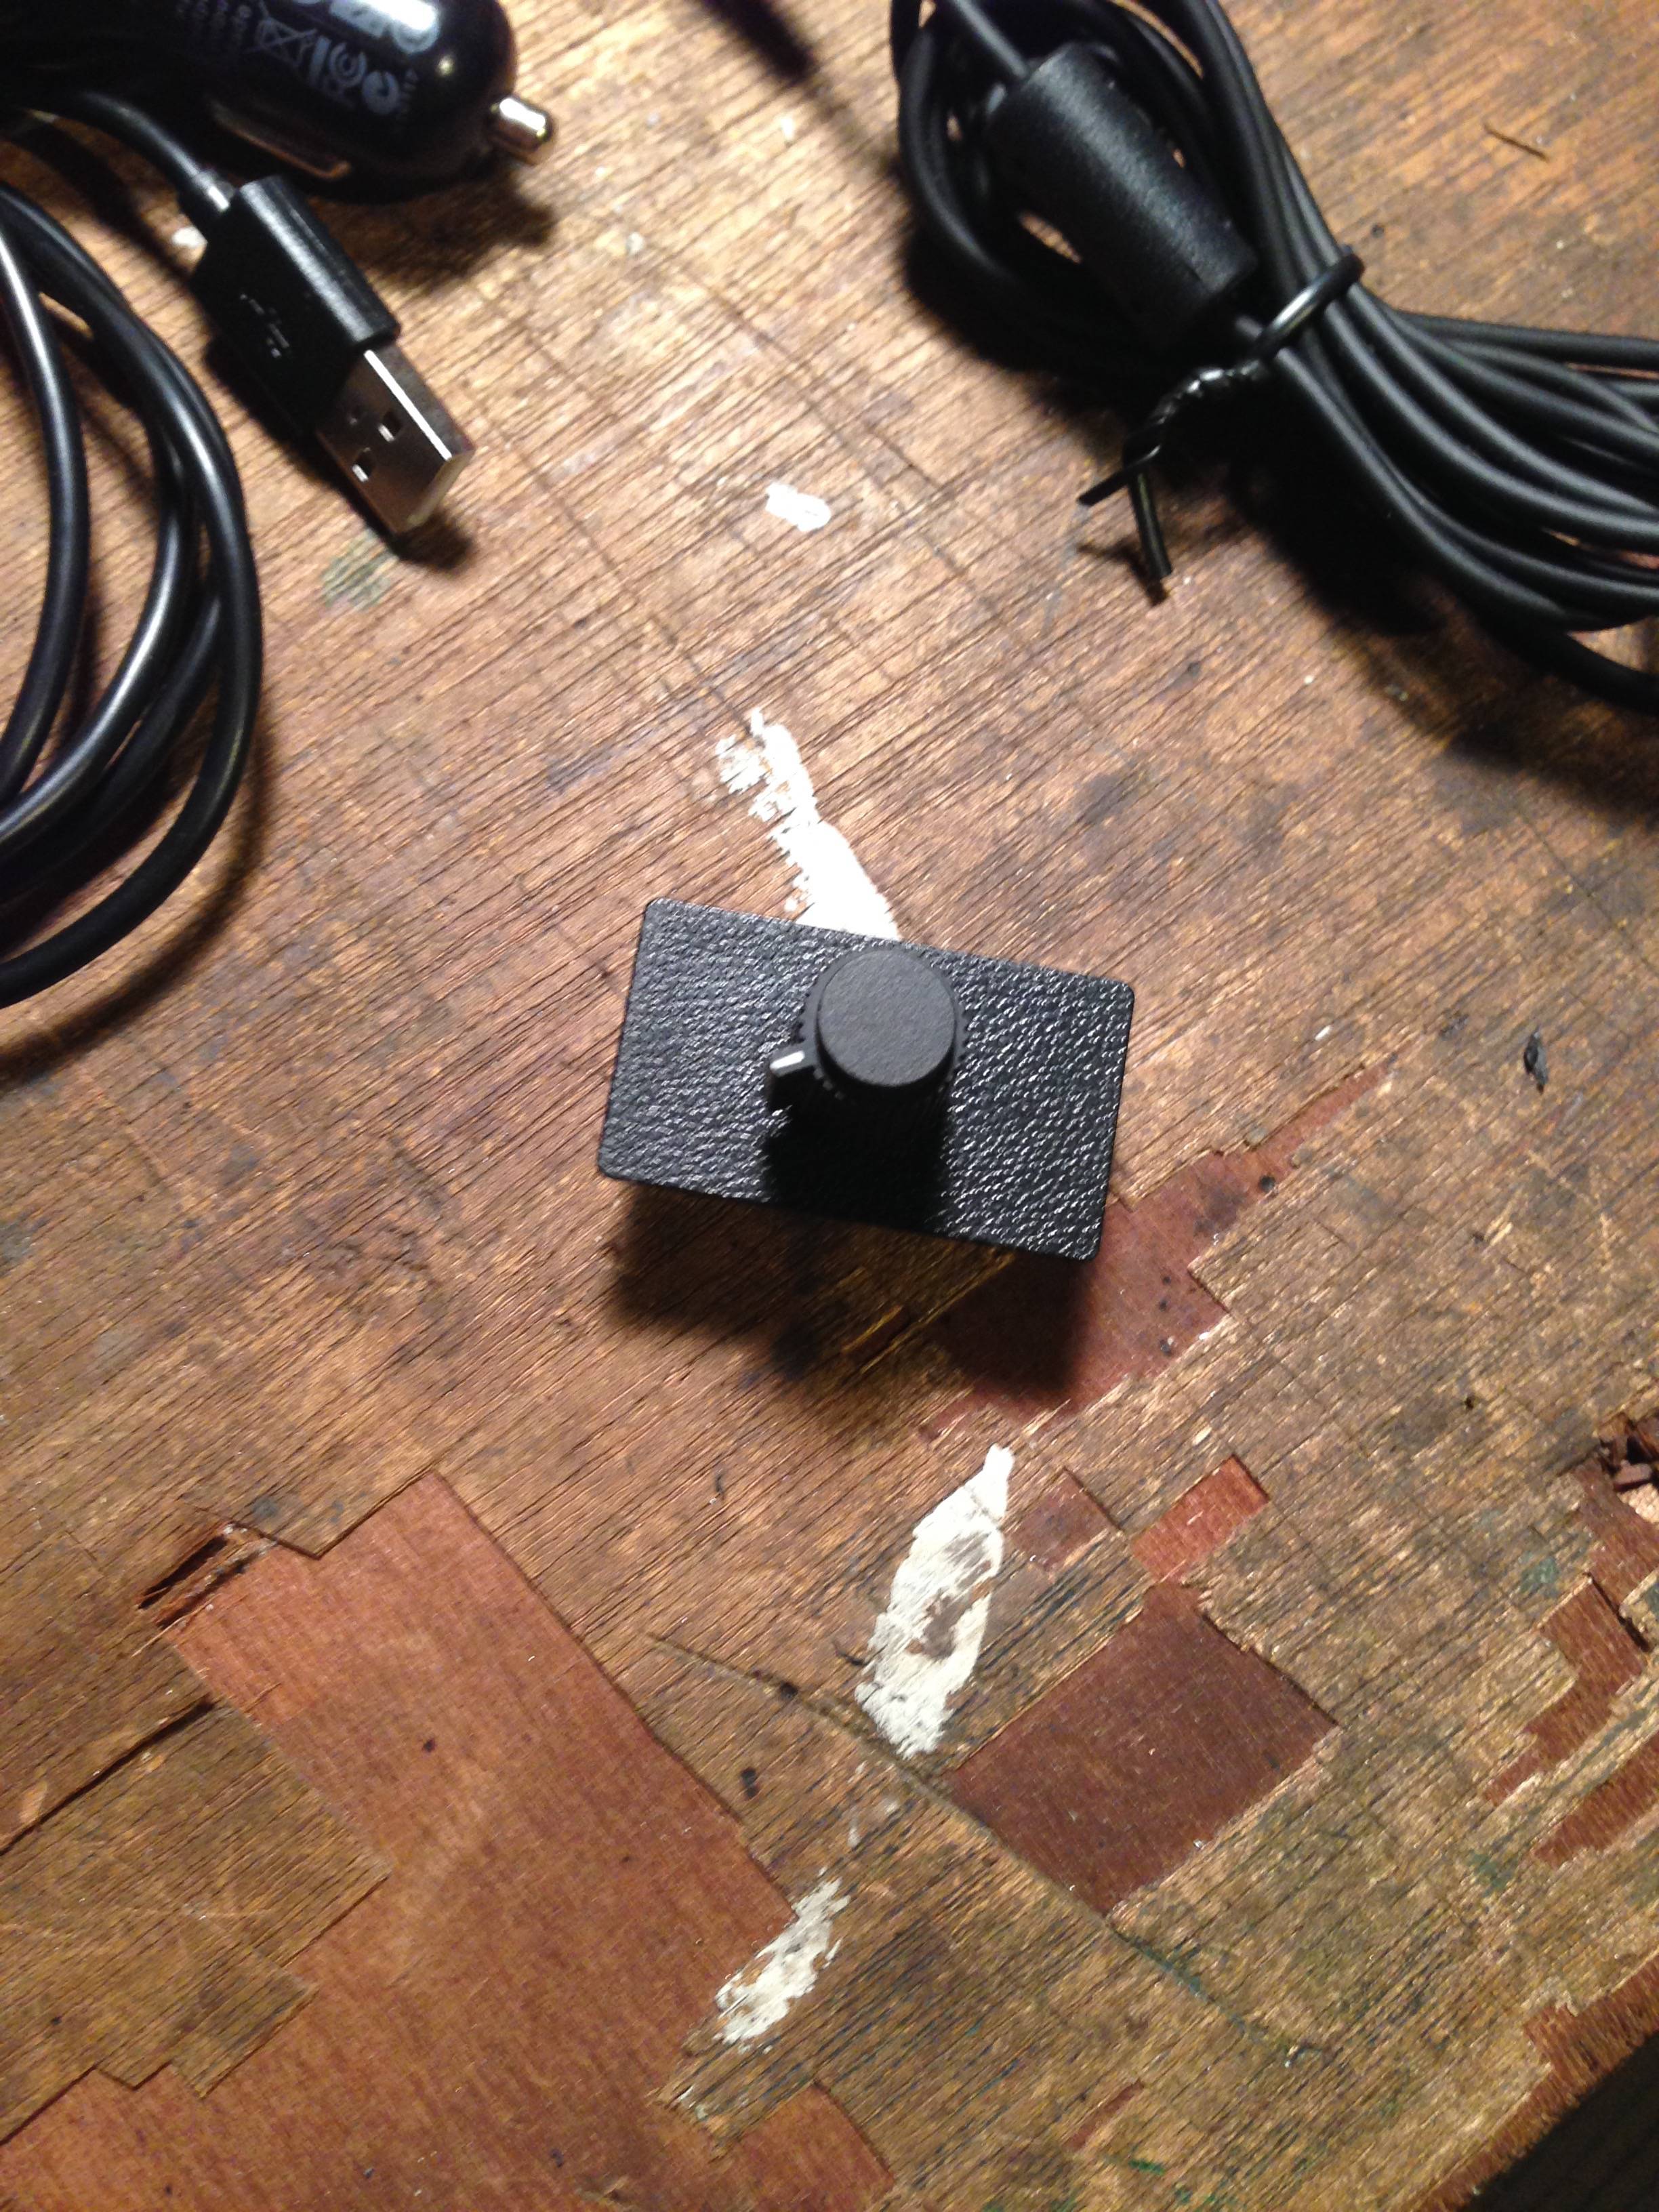
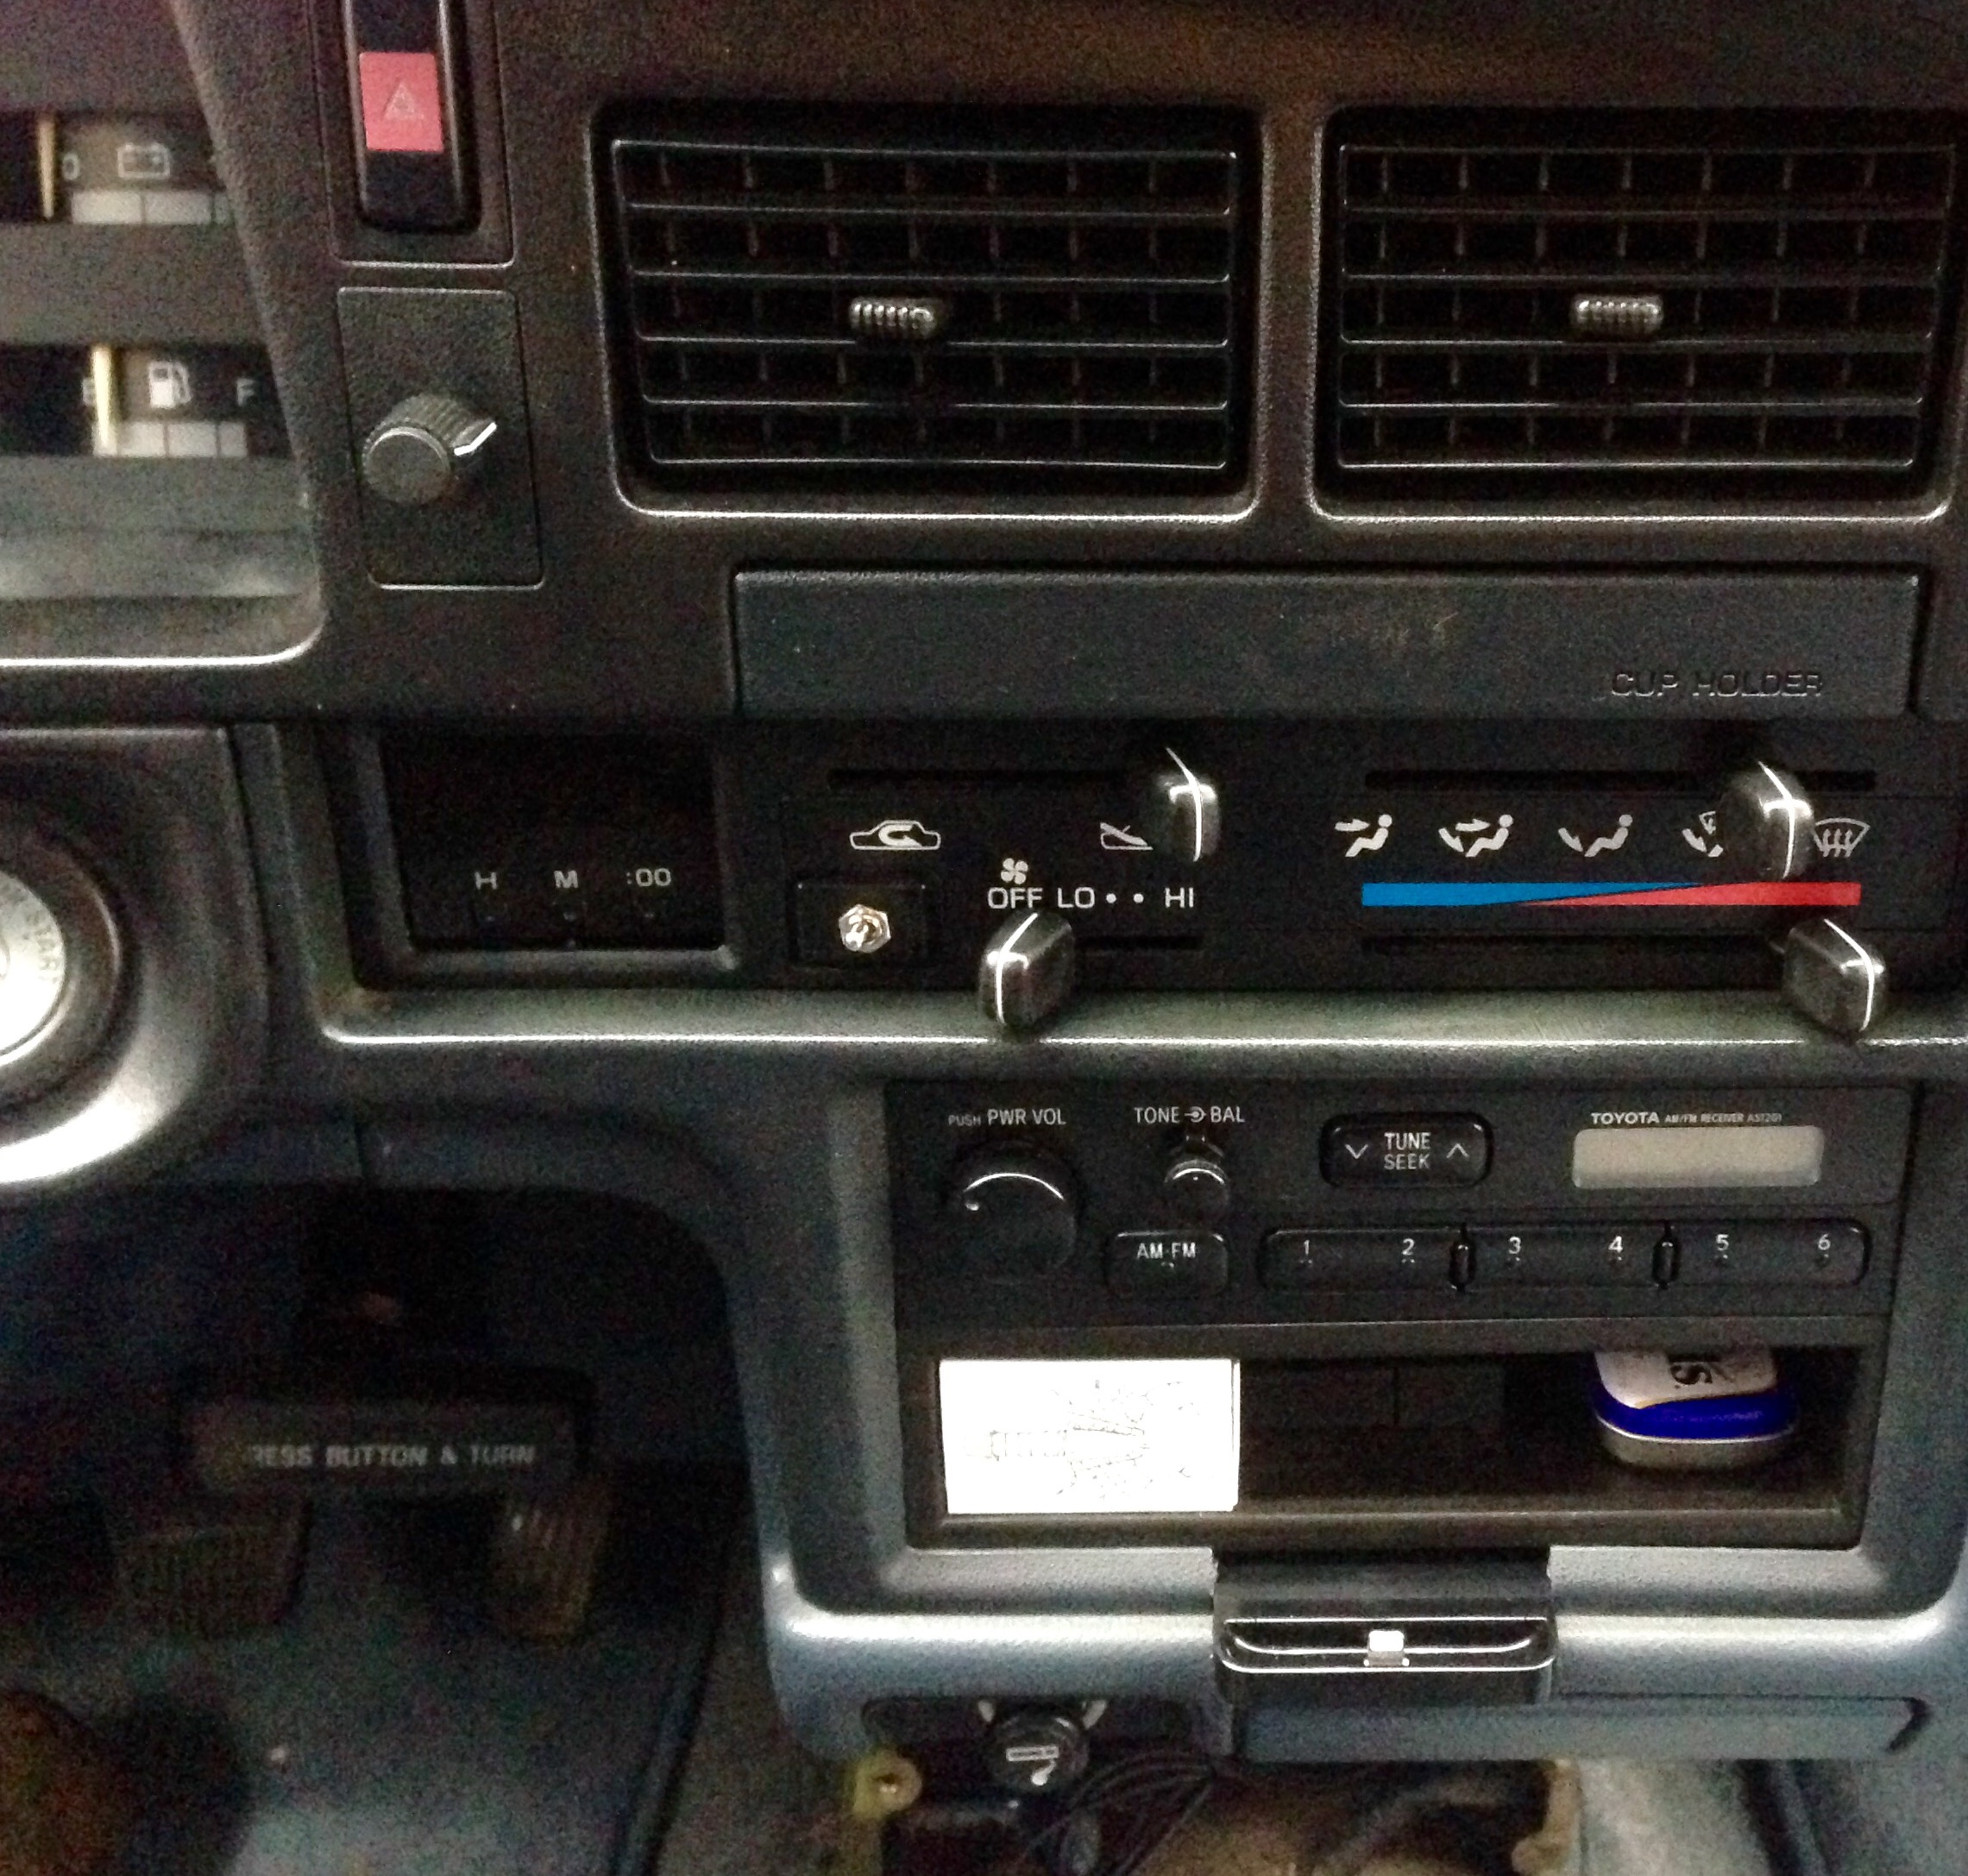
I wanted to put the volume knob in a nice place on the dash. I opted for underneath the hazards button. I drilled that hole in the blank.

Then I soldered and heat shrinked 22 AWG wire to the pot and crimped male bullet terminals to the wires.

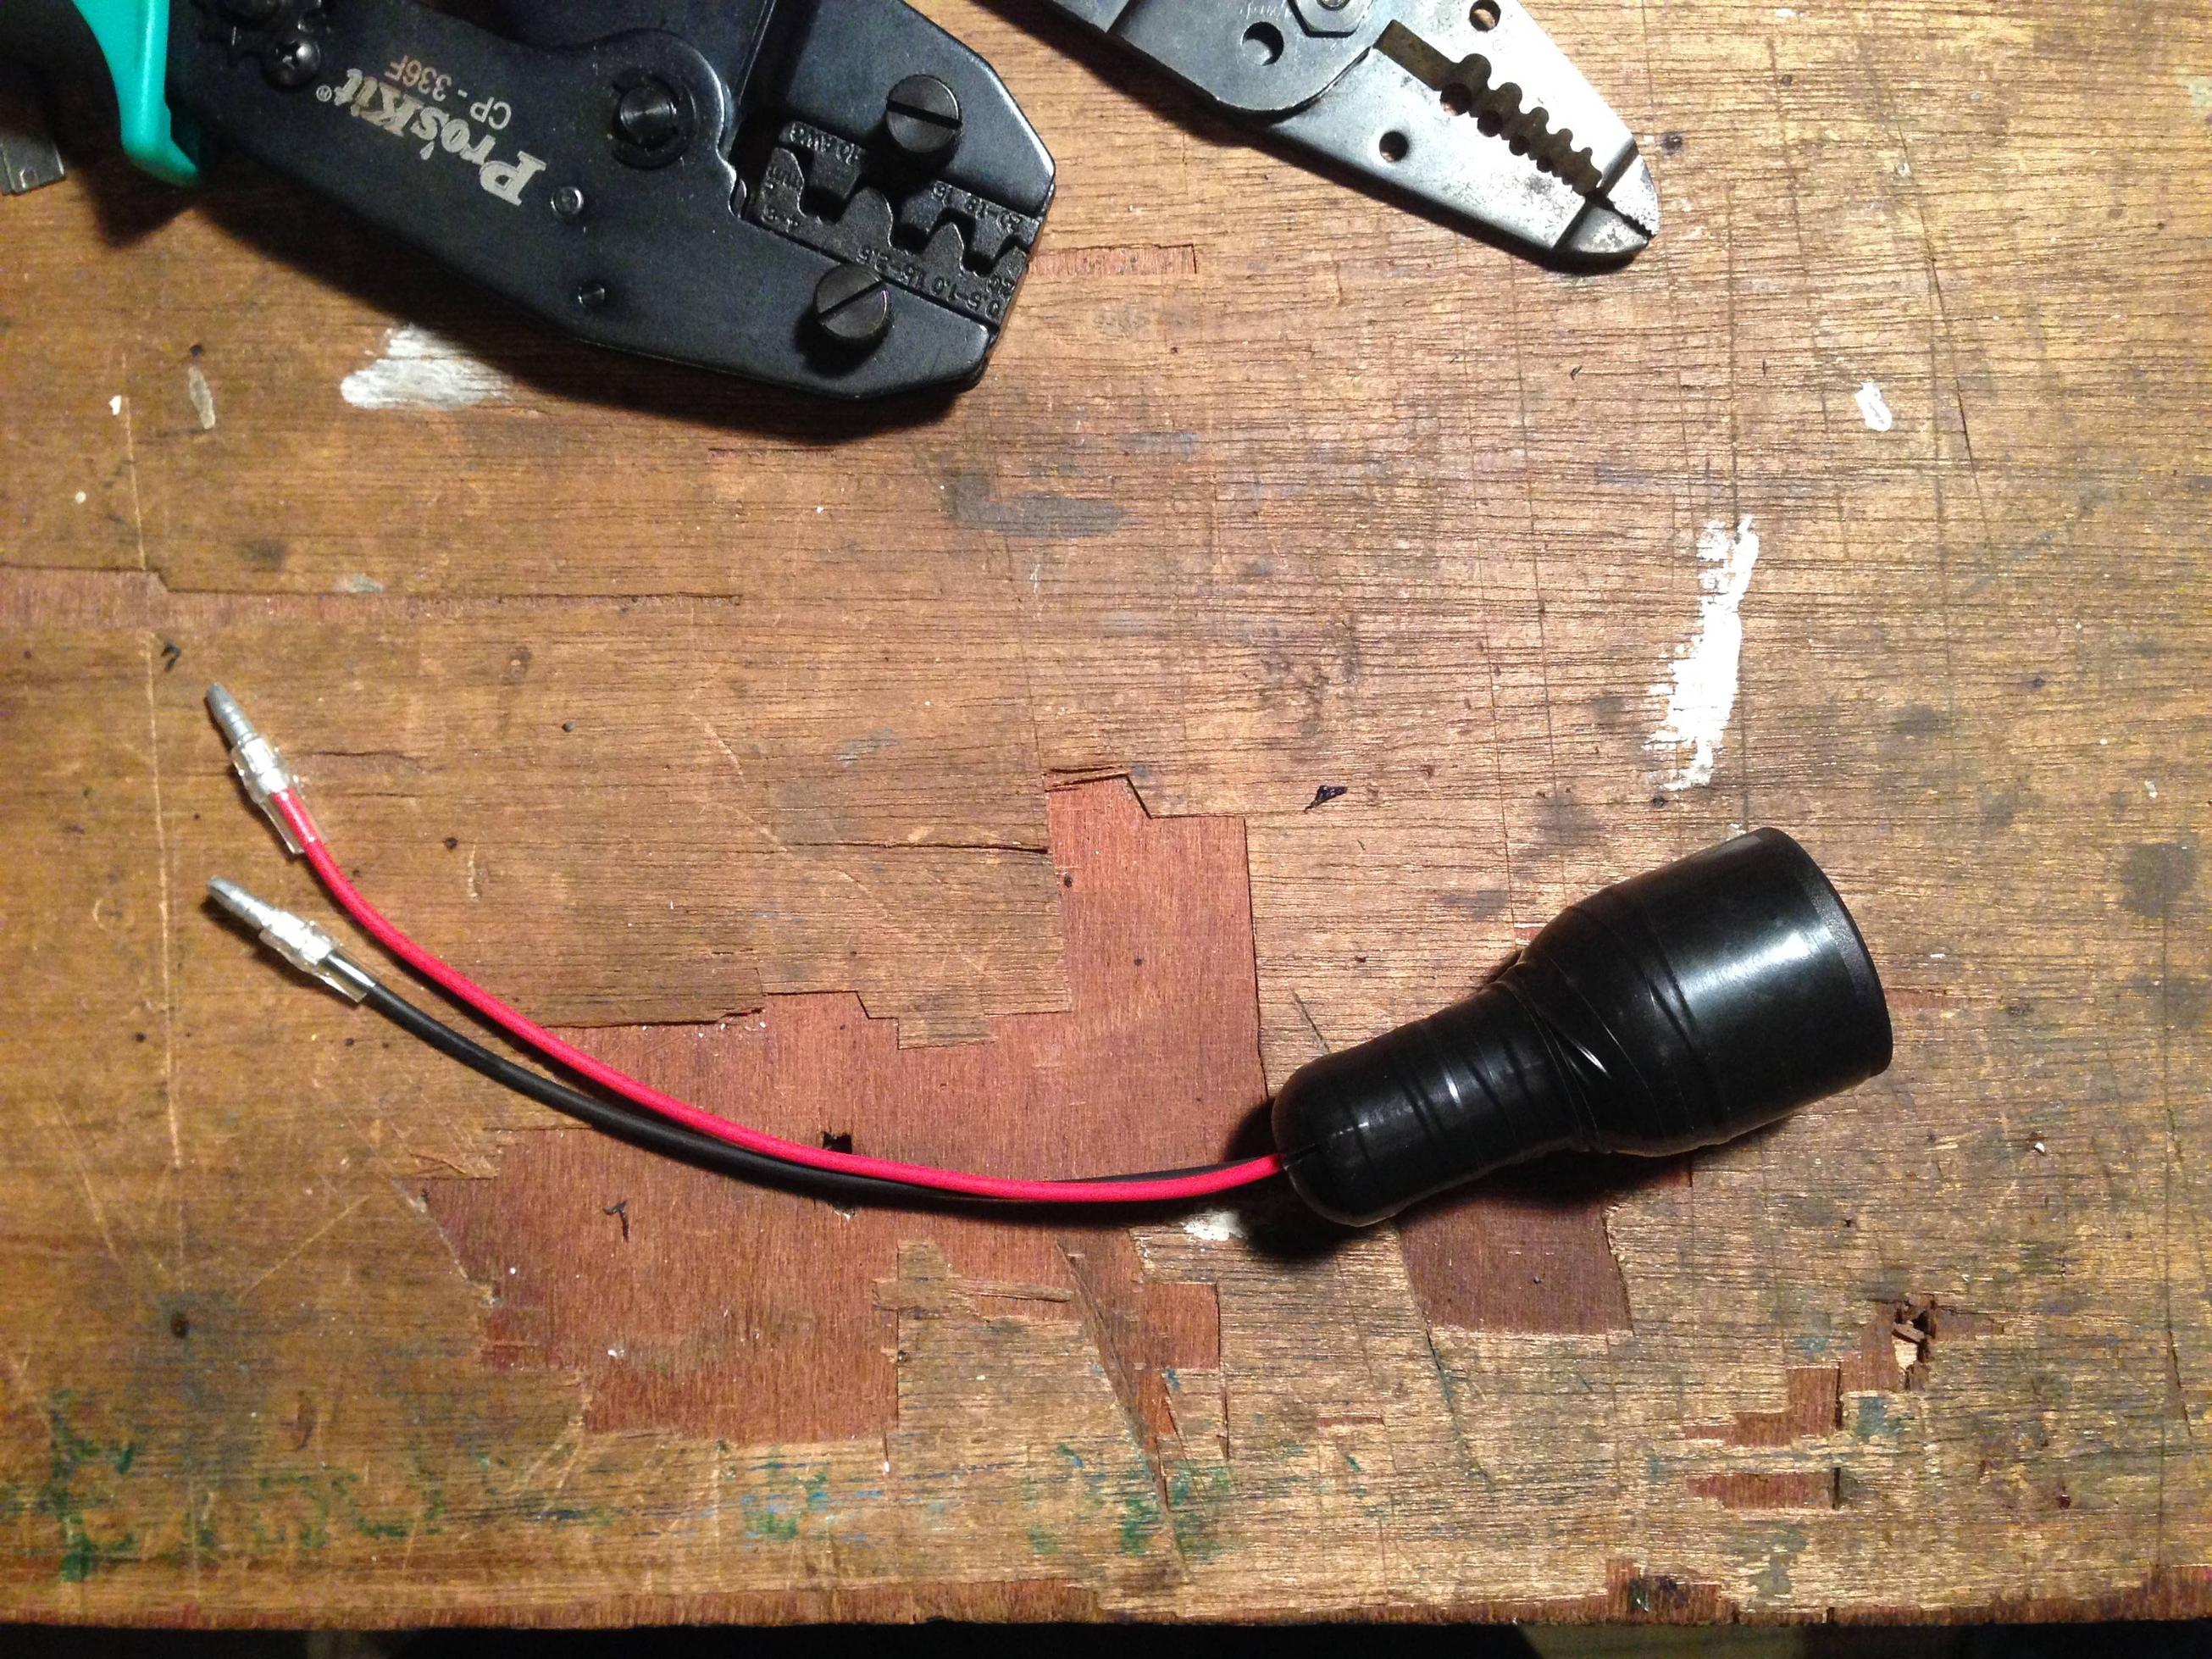
Next was the USB charger. I used a dremel and took it apart and de-soldered the positive and negative charging points. Then soldered in wires to those points so I could connect them to whichever wires in the truck I wanted to. I used 18 AWG for this.
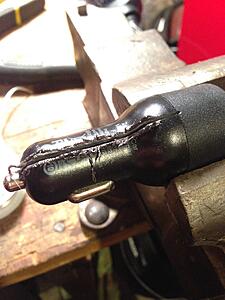
Then I epoxied the shell back together and crimped male bullet terminals on the ends.
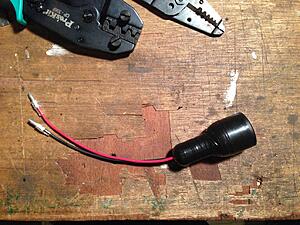
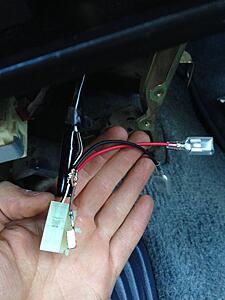
Next was to find where I was going to tap into the truck for power. I used the cigarette lighter because it was right there and it's switched power. I don't want it on while the key is off draining the battery. I soldered those connections and crimped dual female bullet connectors to each. I'm using dual because I'm powering the USB charger and amp via this point.
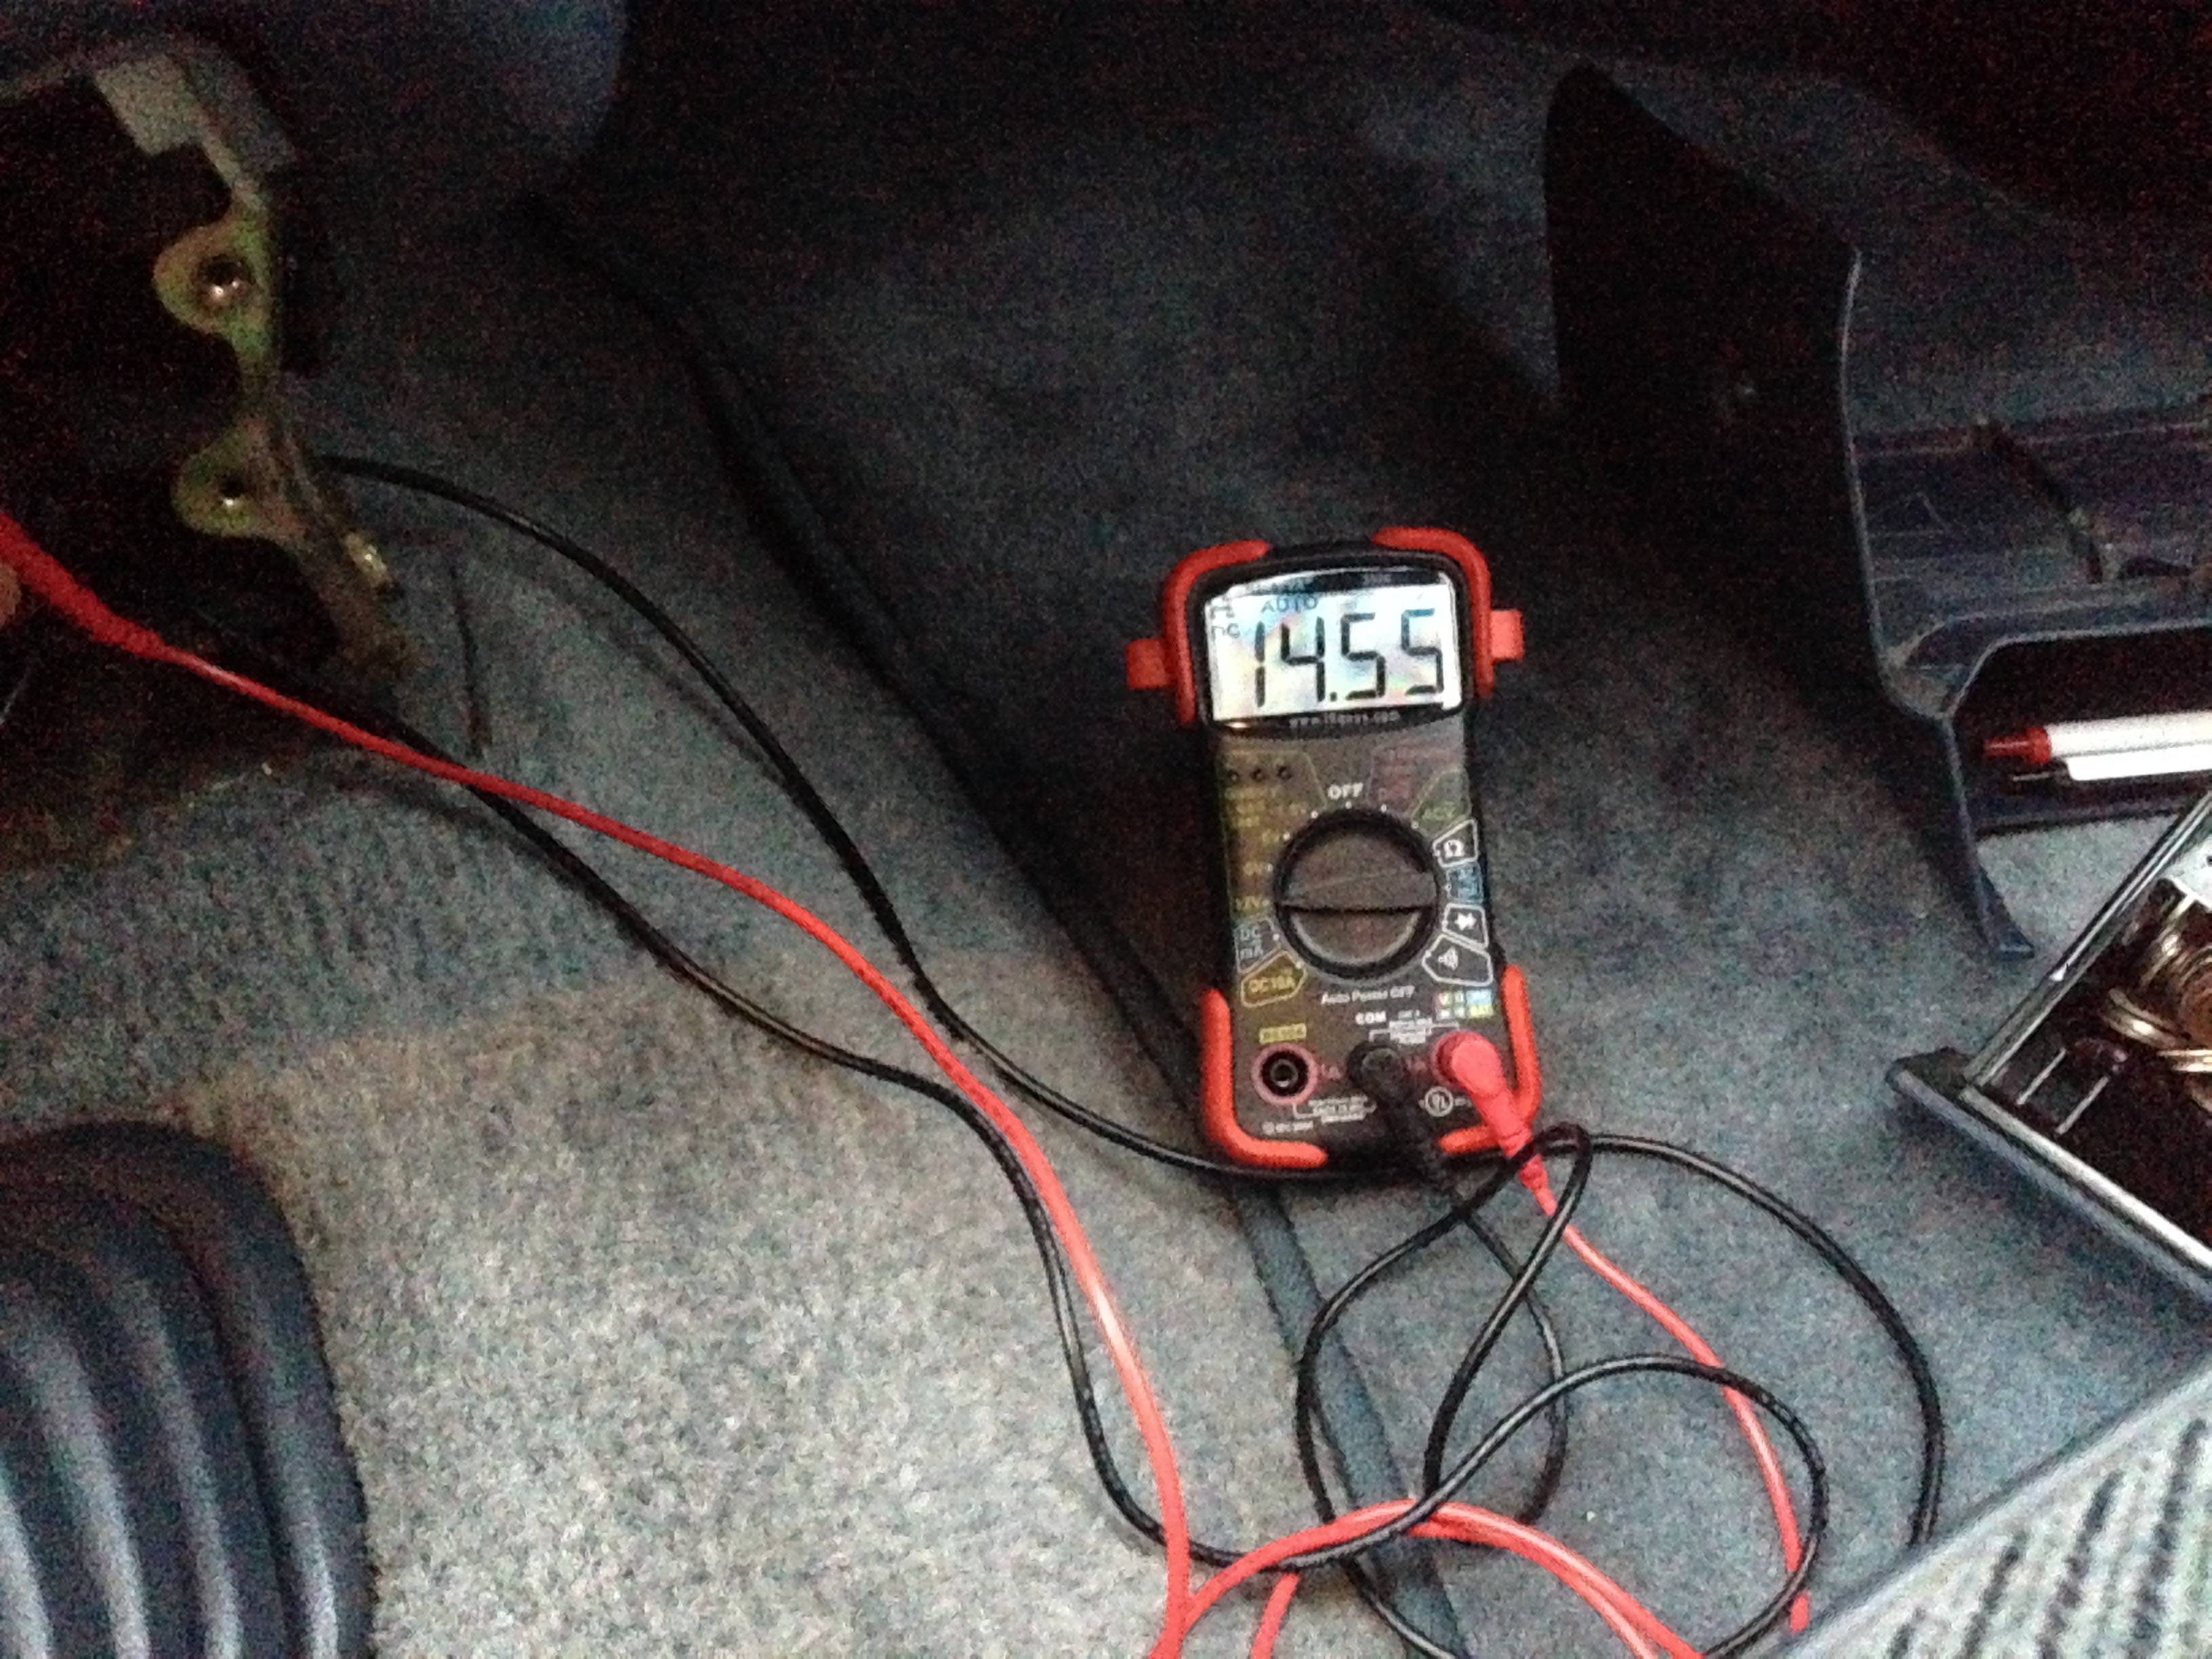
Now I measured the voltage at this point and with the truck running and revving up the voltage was higher than the amp could take. Can't be more than 14 volts max.
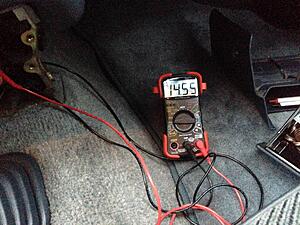
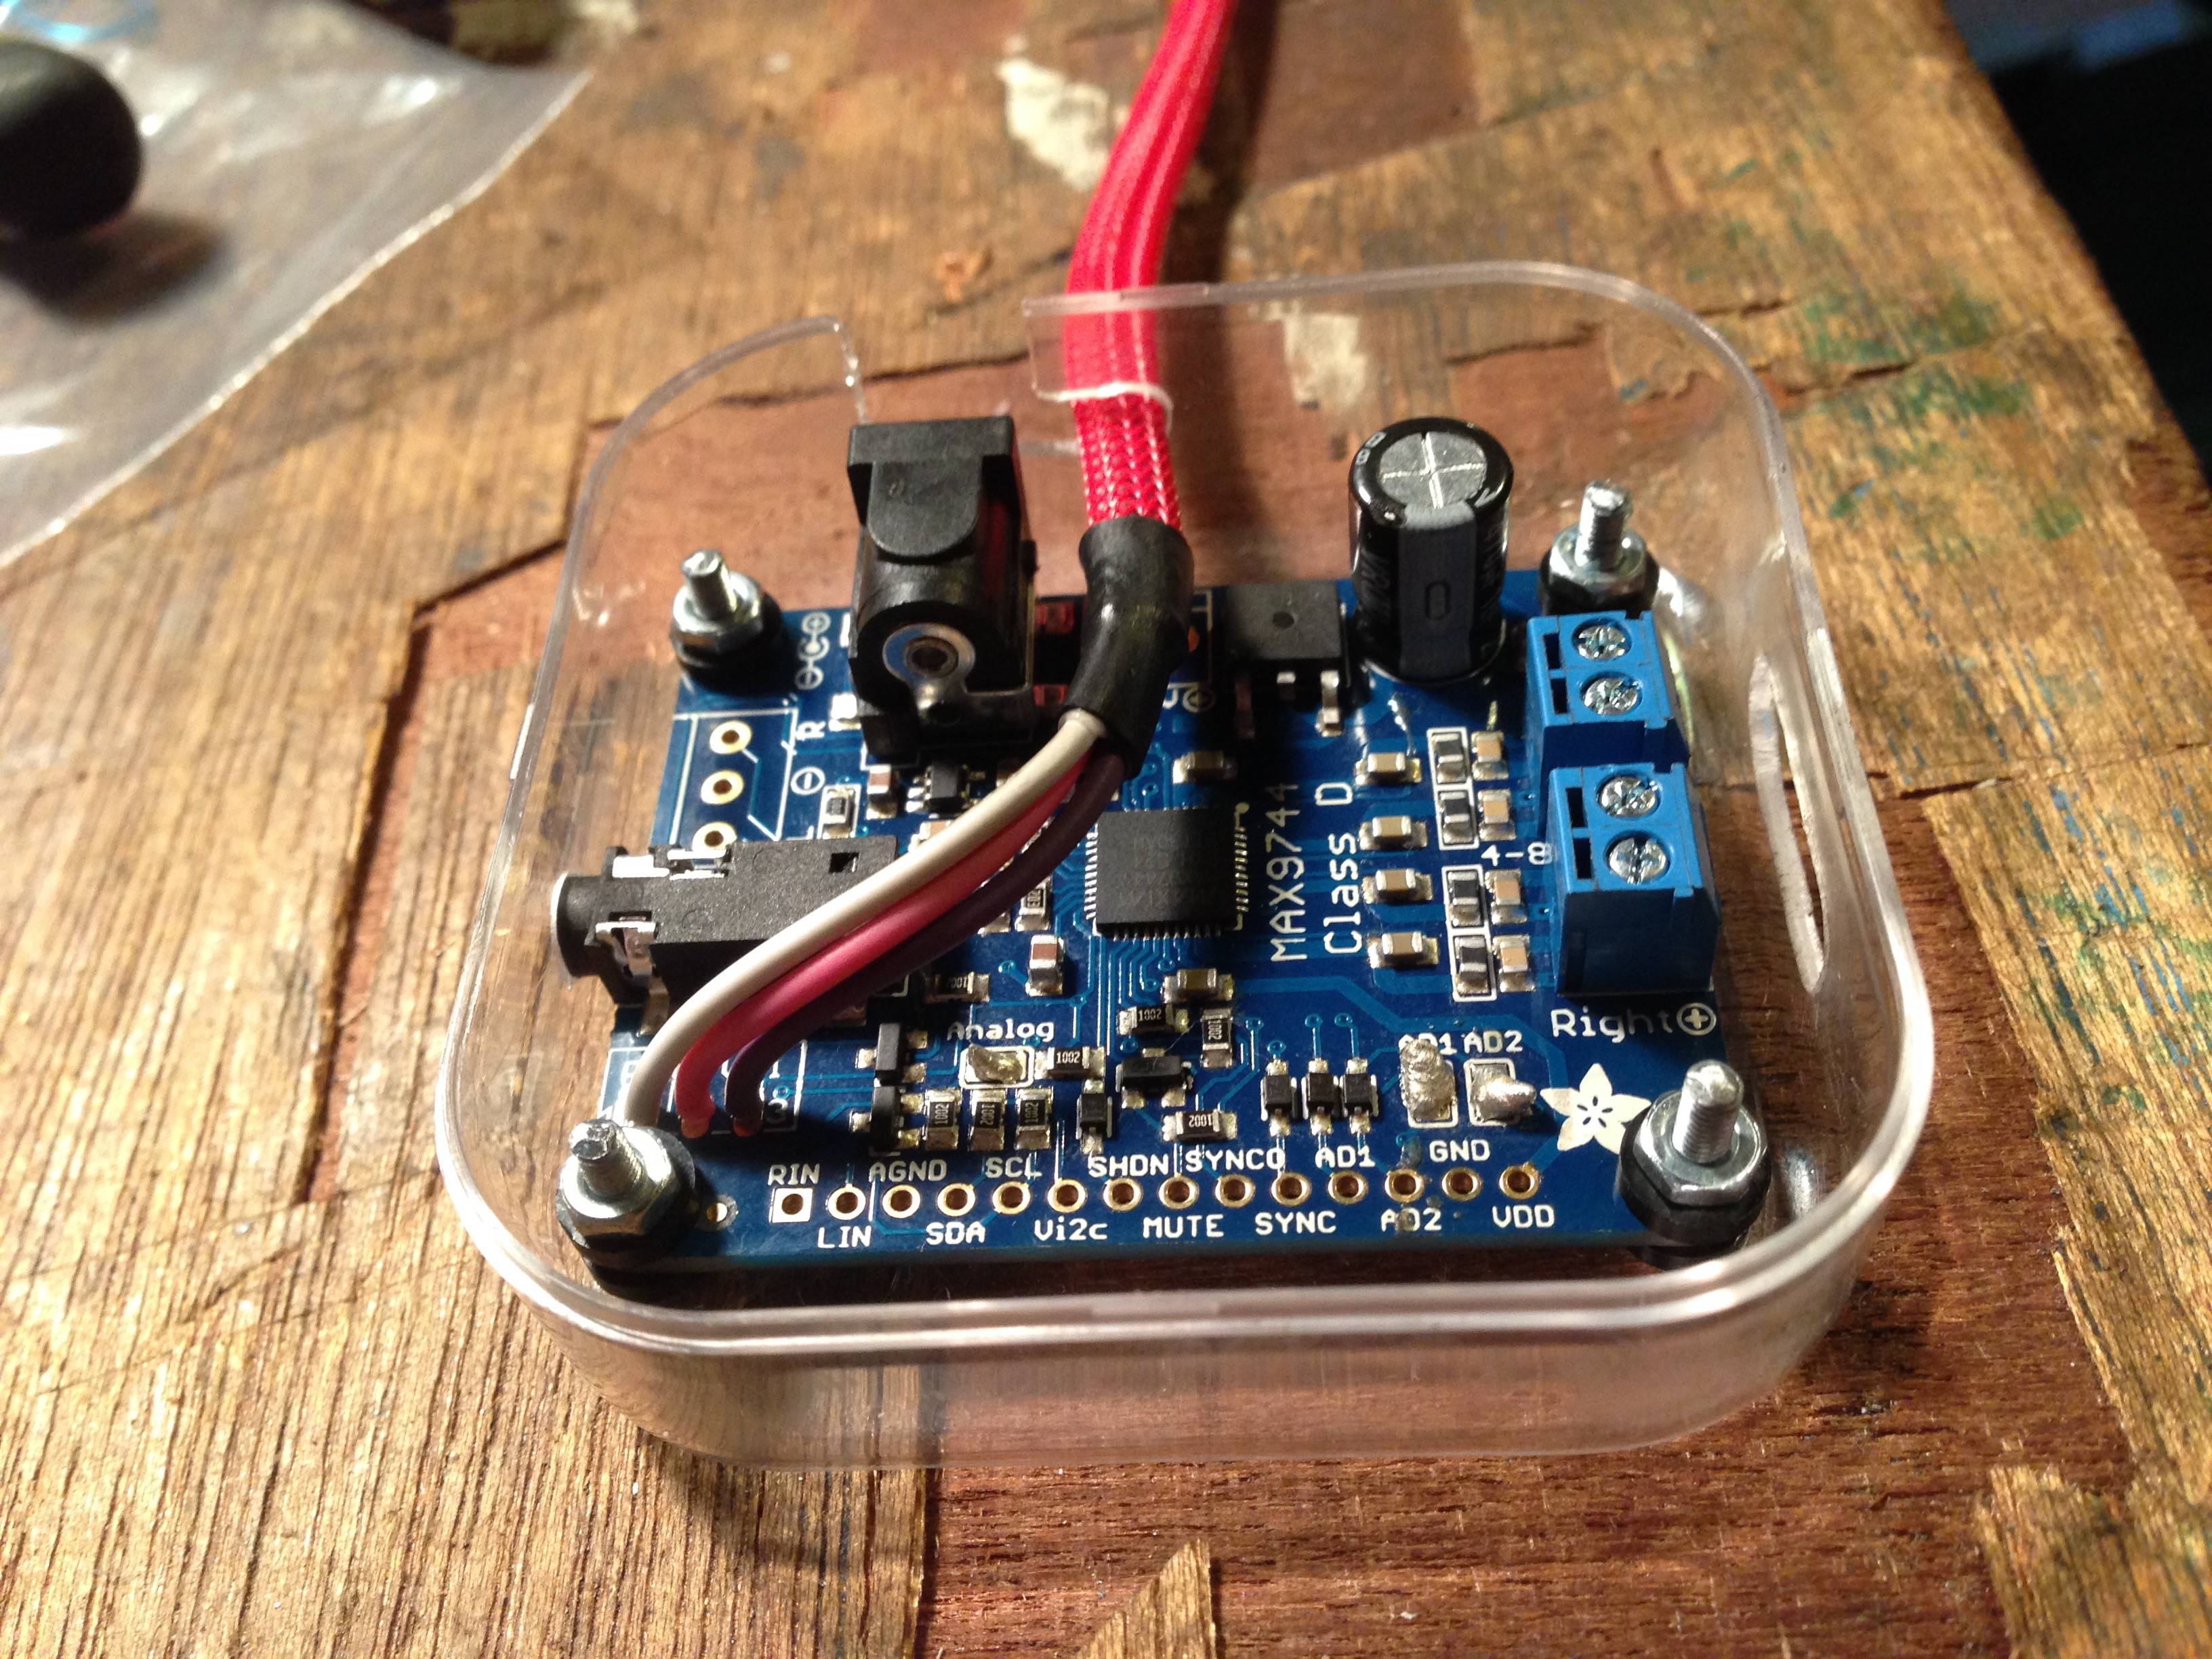
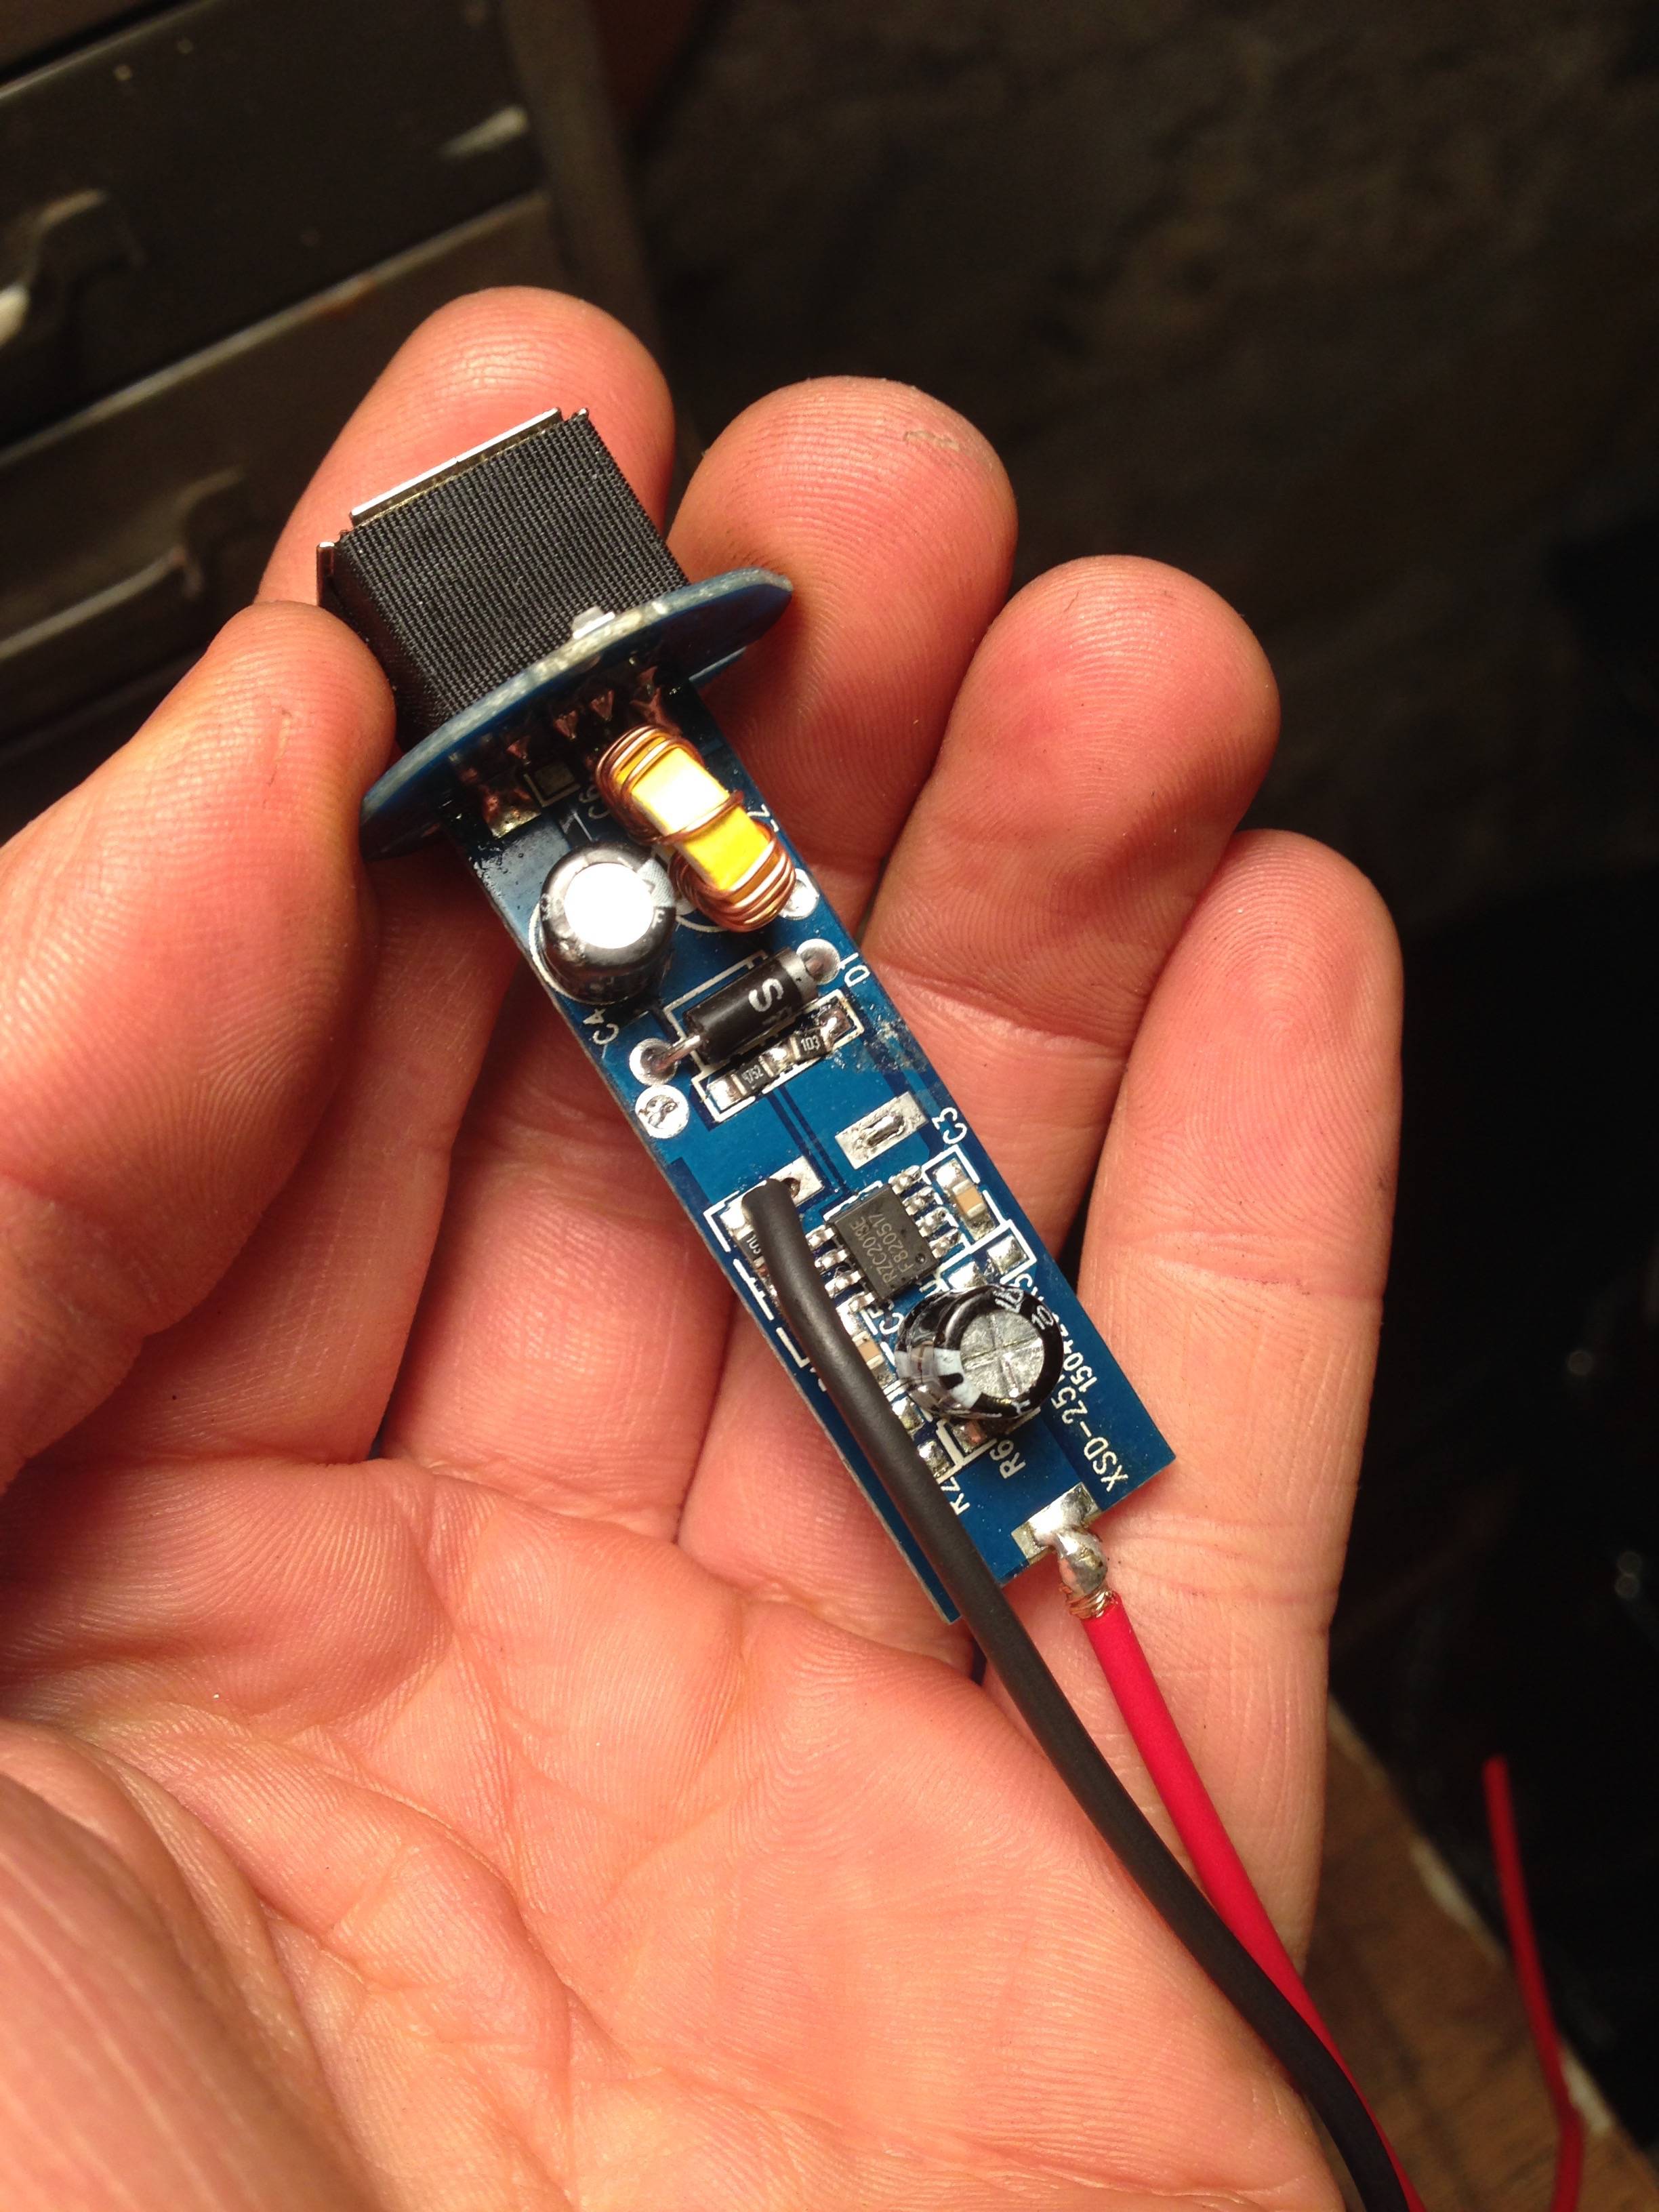
That's where the three diodes come in. You can use them to step down voltage. I used three 1N5400 and that brought the voltage down to 13.75 max. Solder the diodes (polarity matters!) to the positive wire that's going into the amp via the pigtail jack. I don't have a good picture of this but you can see the three capacitors in a line in this picture below the amp in the box.
I also don't have a picture of the voltage reading after so you'll have to trust me. I'm sure there are other diodes you can use which would only require you to use one. Maybe you can improve my method.
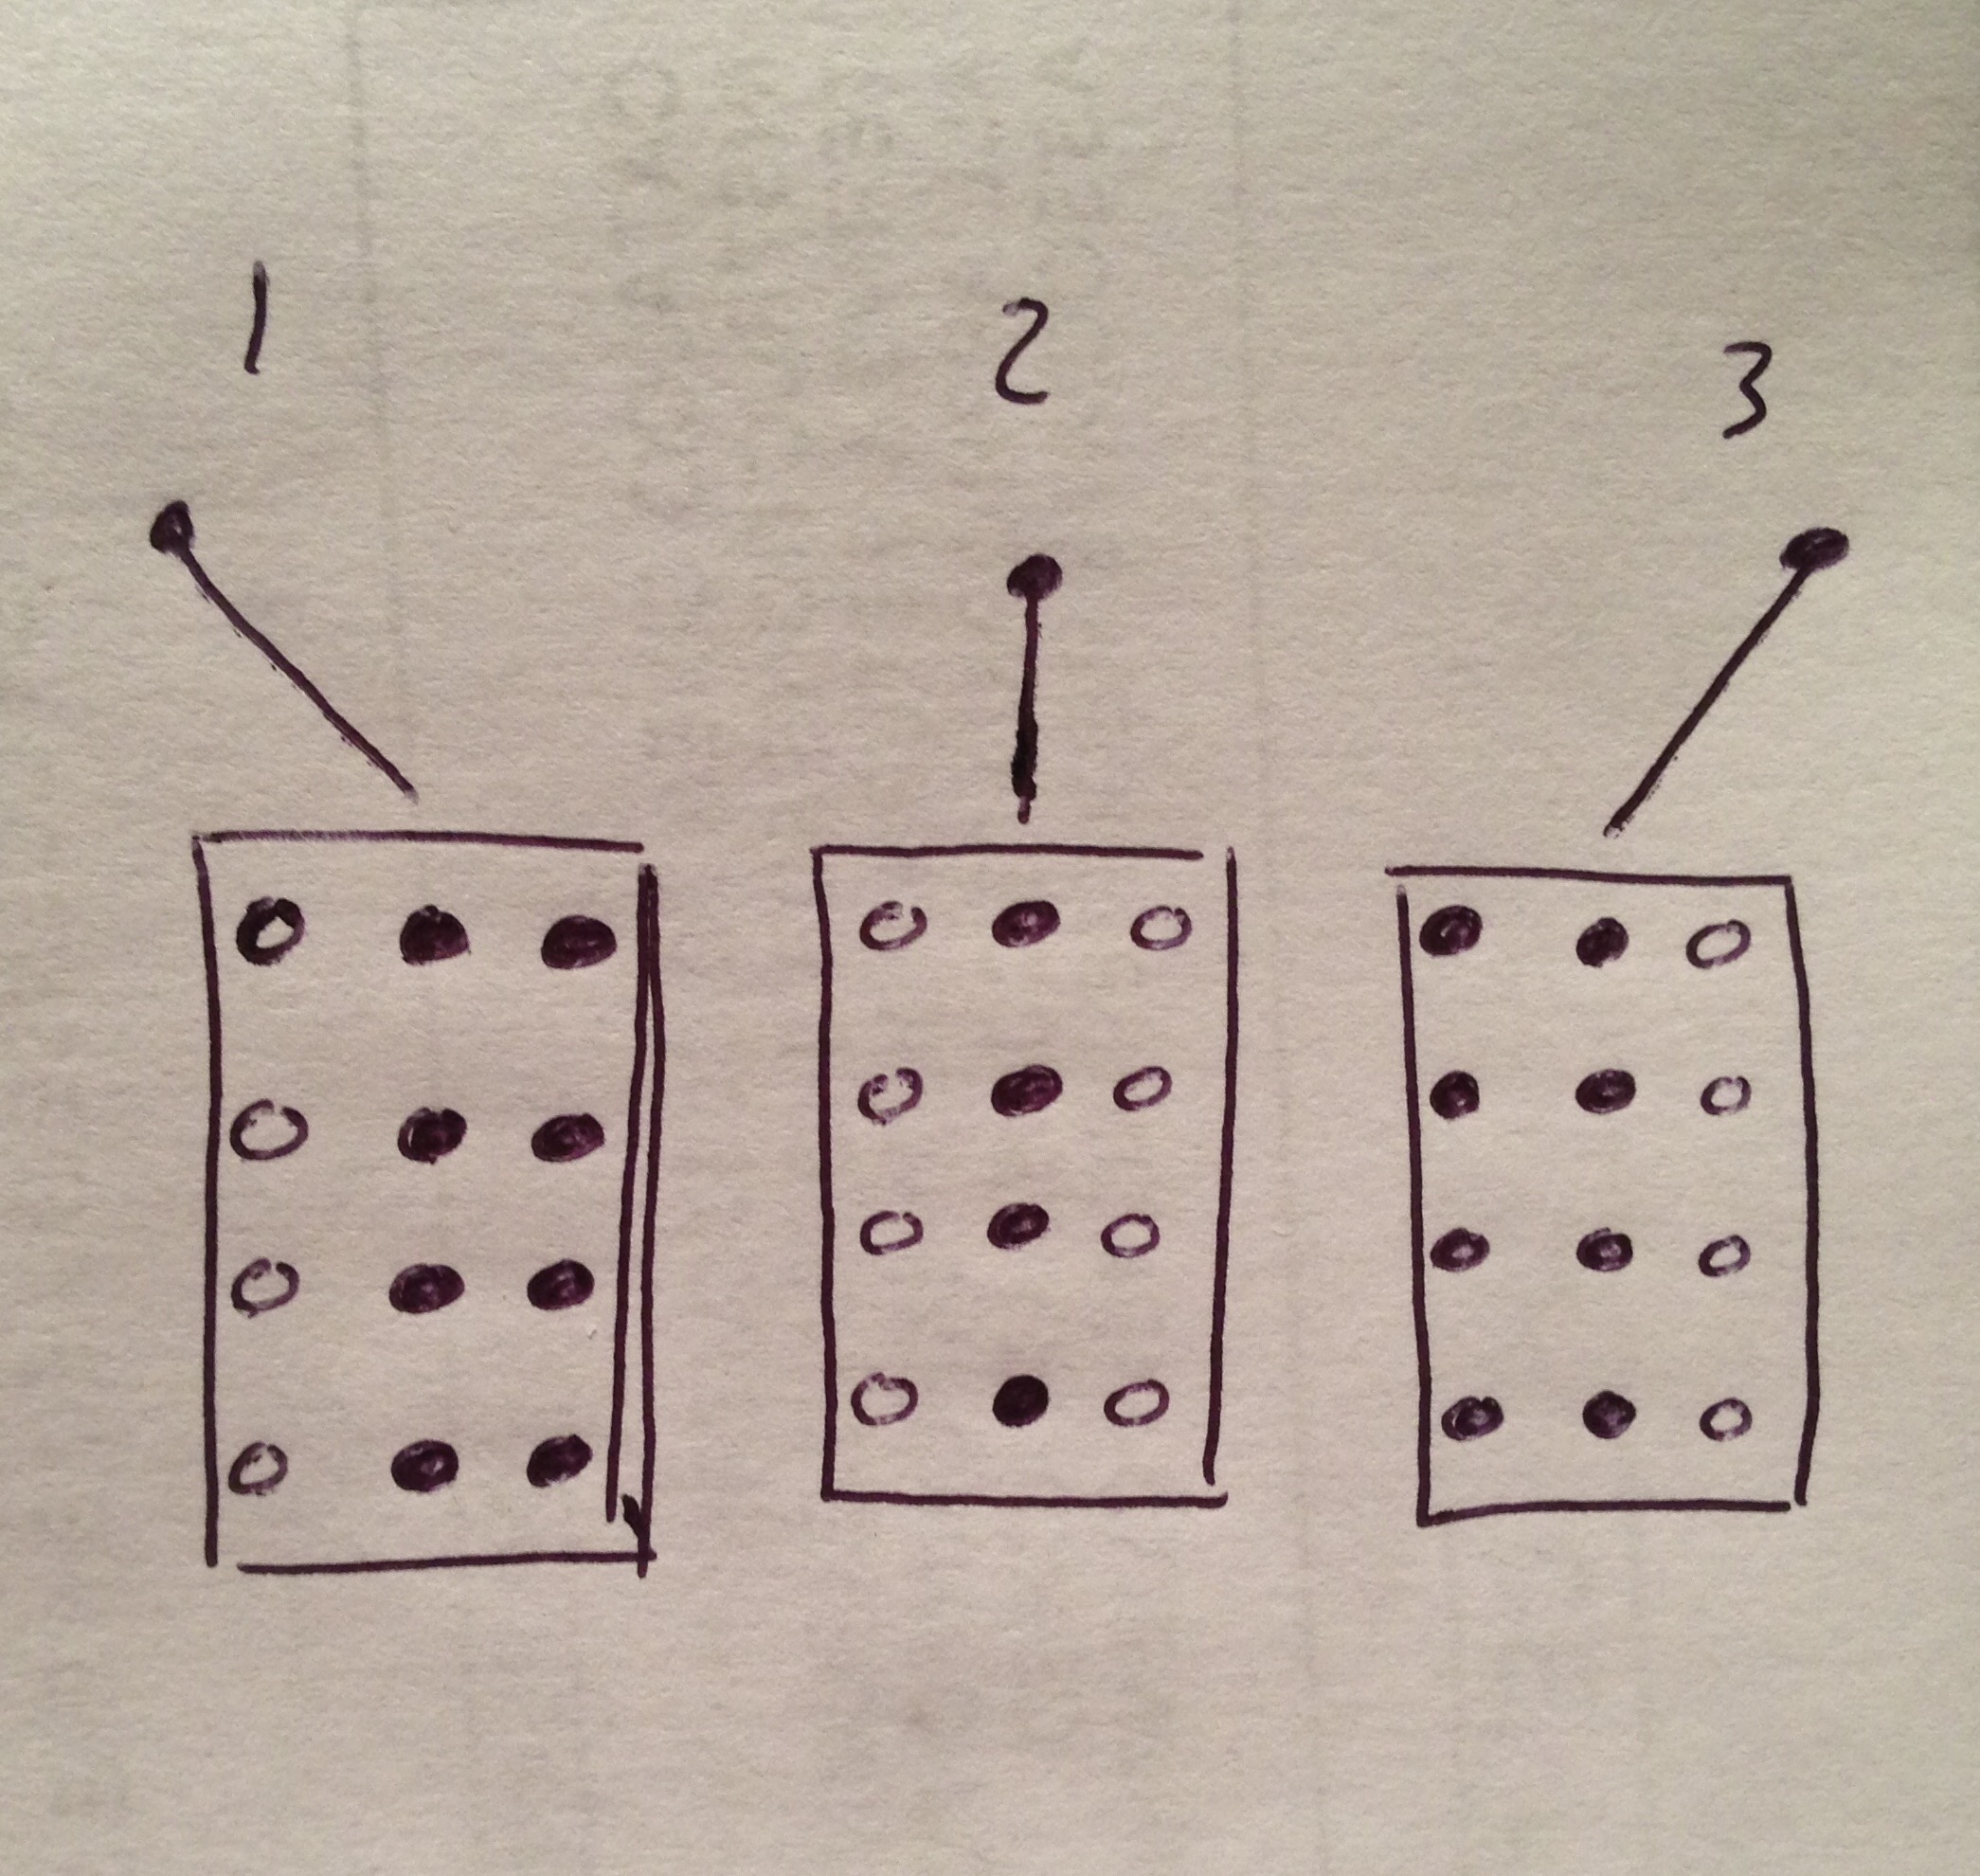
Next is soldering up the 4PDT switch. Here is a little diagram of how the positions are switched that I drew up.
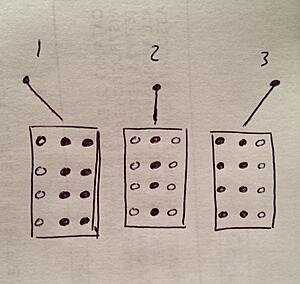
Vertically speaking, the center 4 terminals go out to the speakers, left pos/neg and right pos/neg. The 4 speaker wires coming out from the radio go to the left 4 terminals. The 4 speaker wires coming out of the new amp go to the right set of 4 terminals. Doesn't matter which (new amp or radio) connect to which set of terminals (left or right) as long as the speakers are in the center.
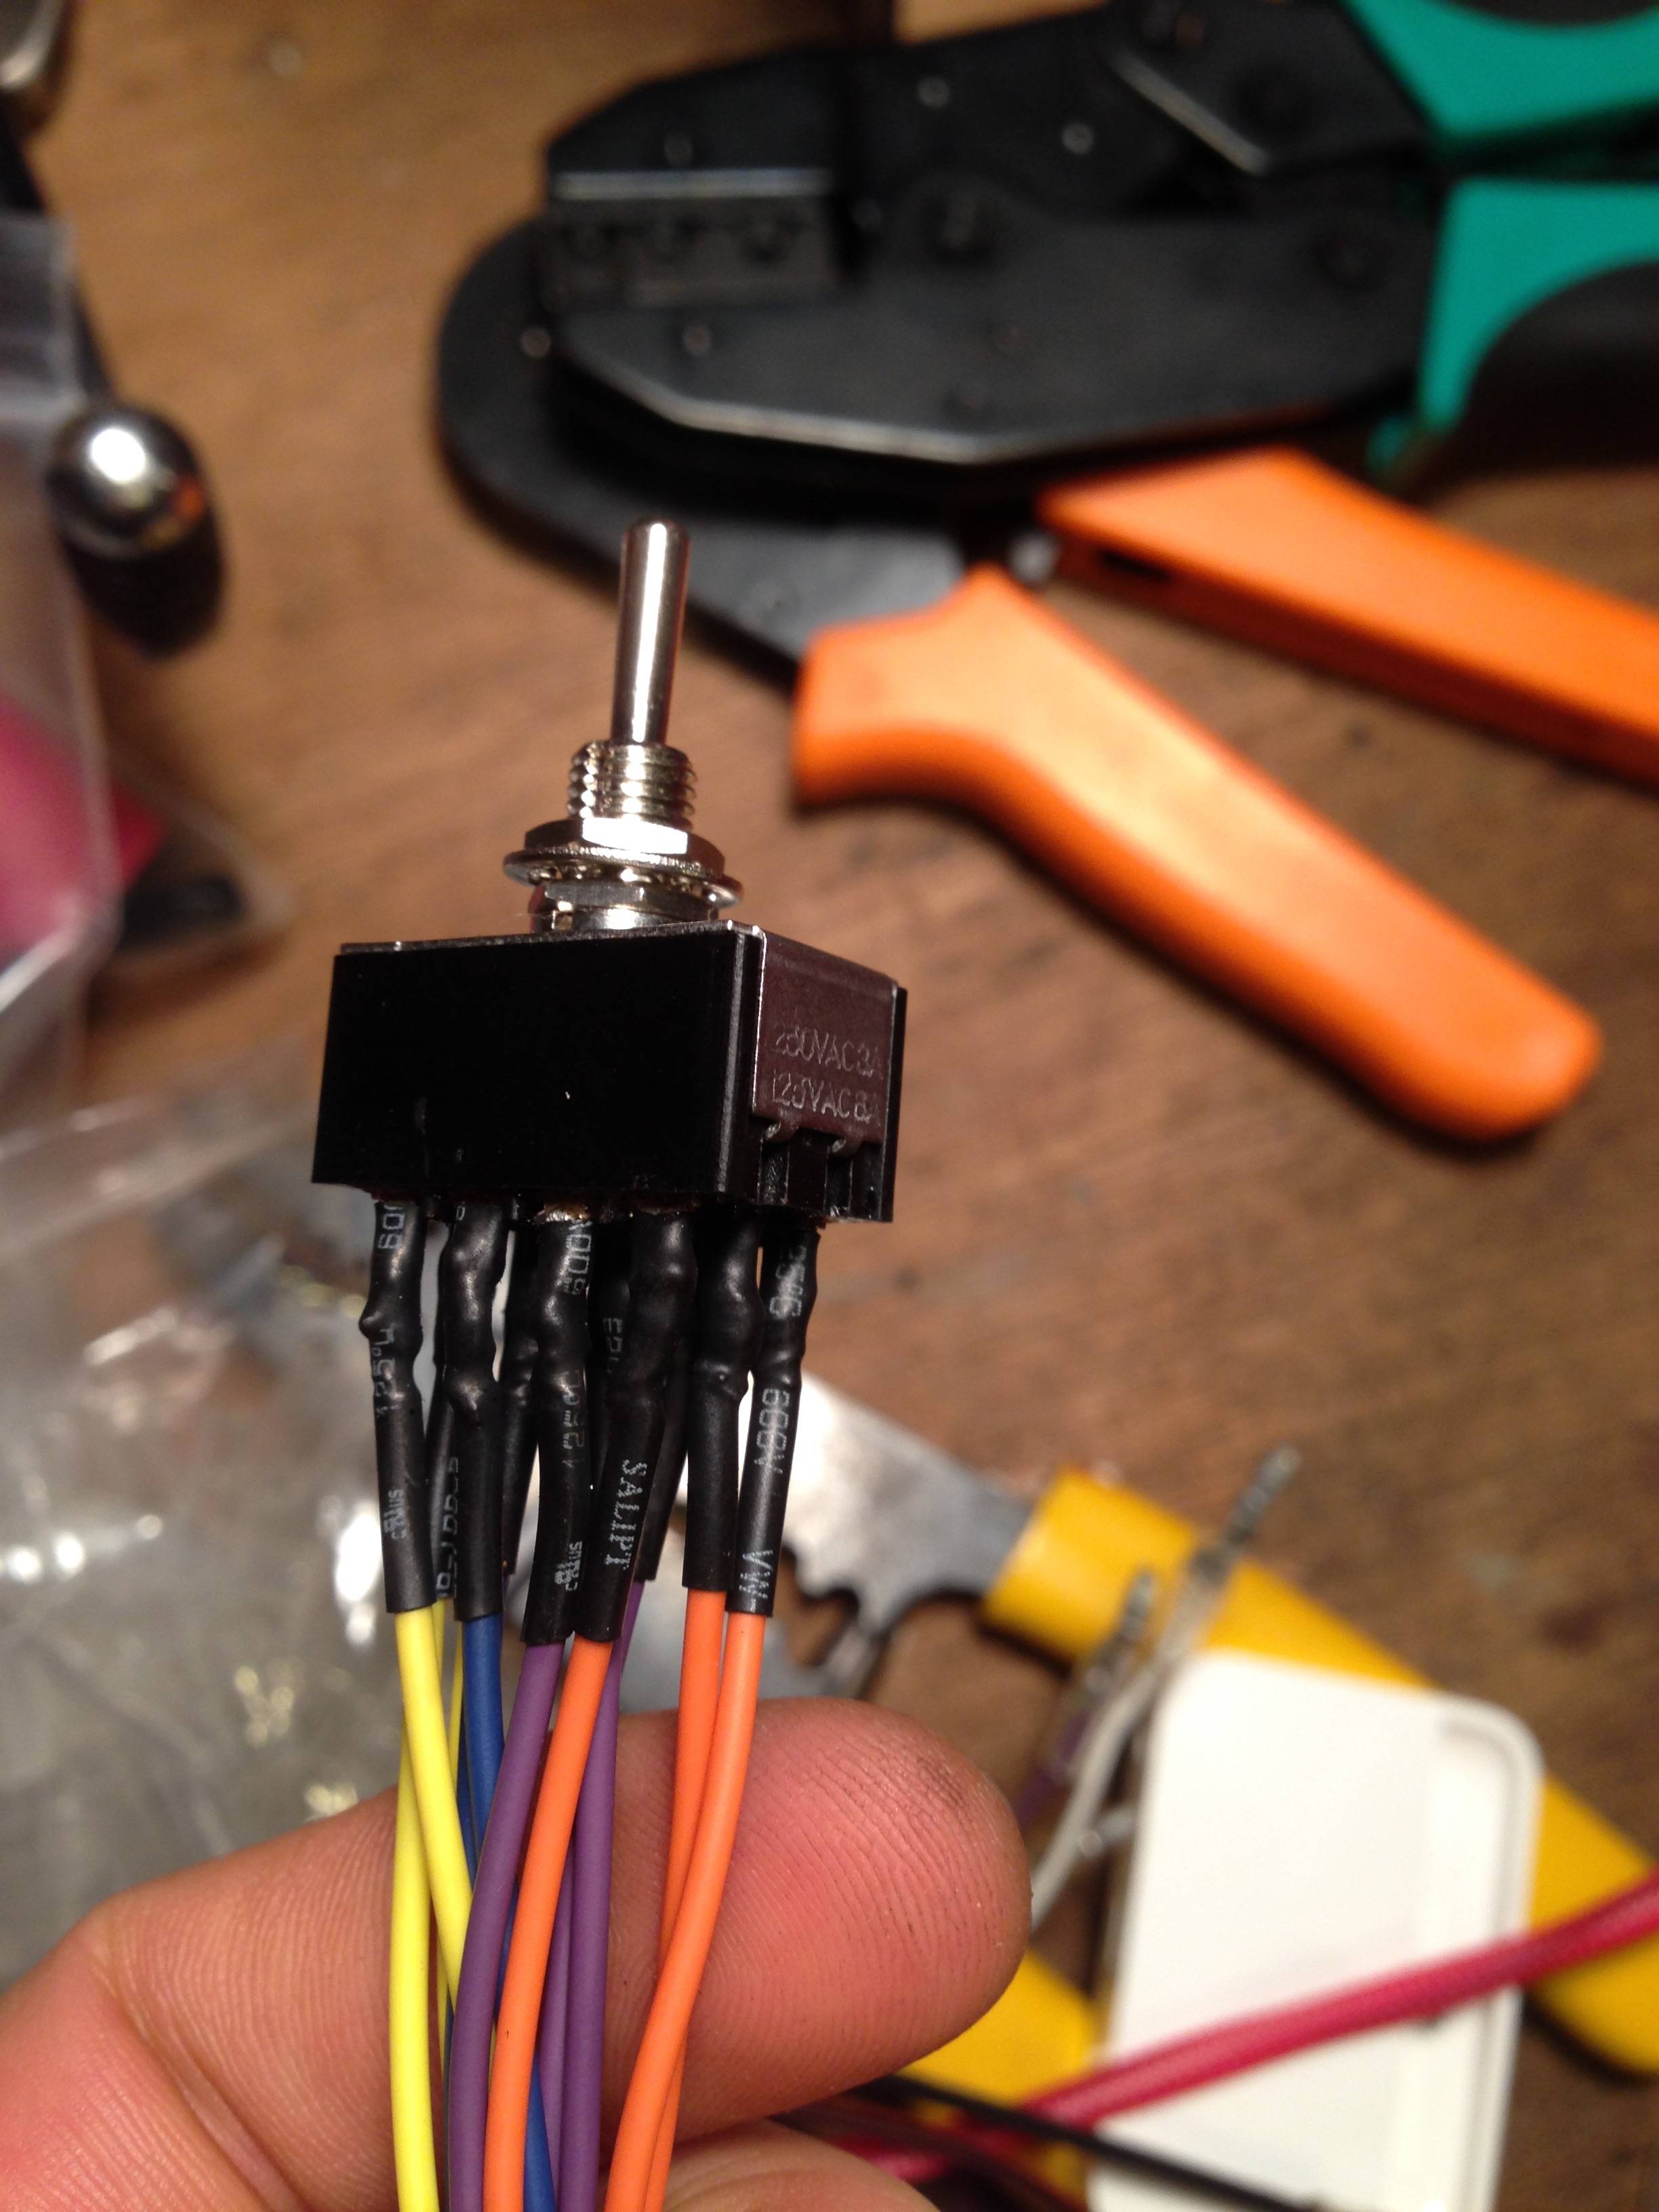
I soldered these tiny terminals up and heat shrinked them.
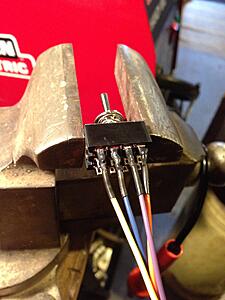
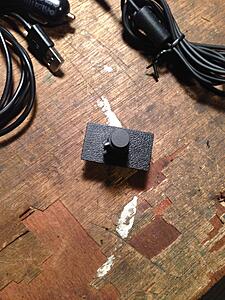
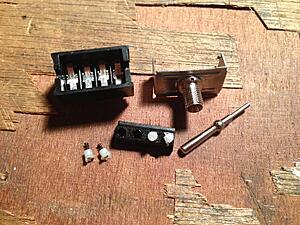
After I soldered it all up I noticed the switch was stuck. It didn't want to toggle. I used too much heat and melted the plastic plungers to the contacts. I opened it up and replaced the innards with a backup switch. Just be aware and maybe don't use a big soldering iron like I did.
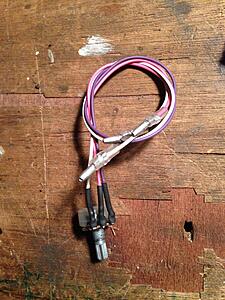
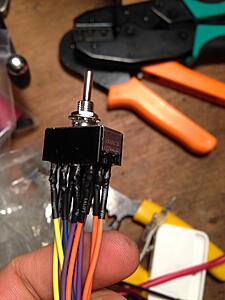
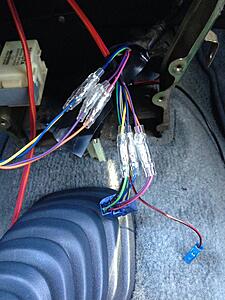
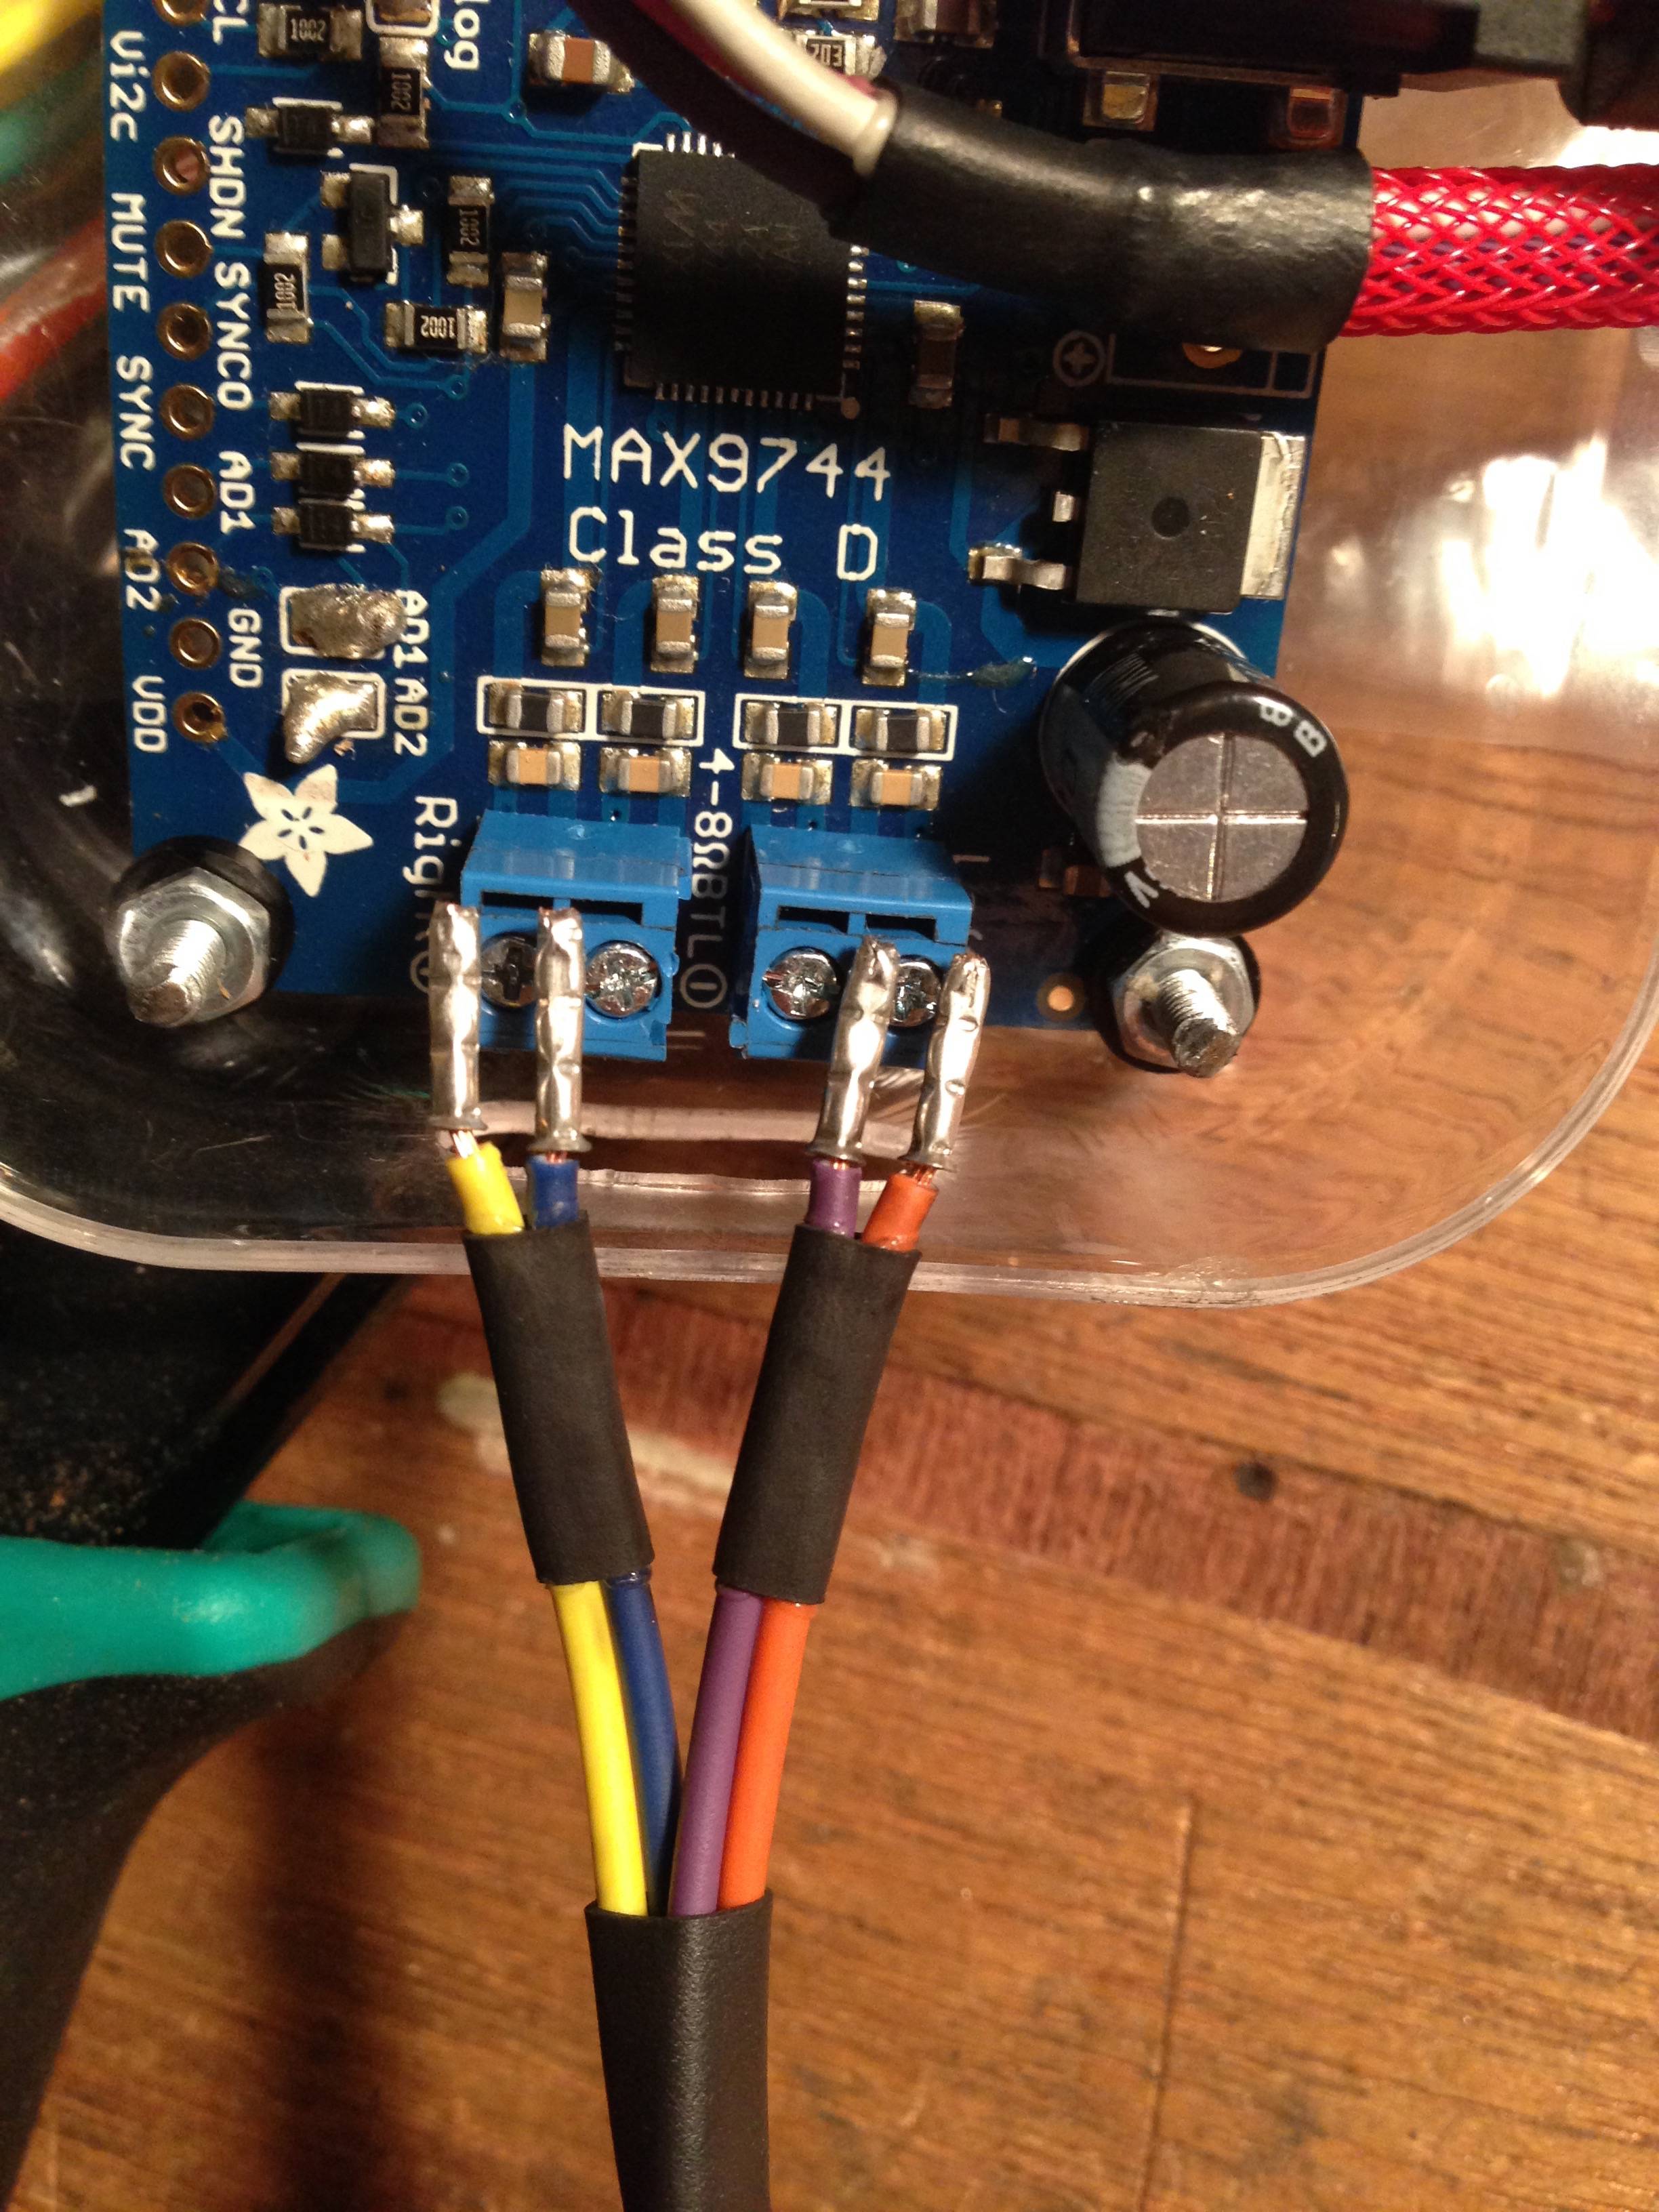
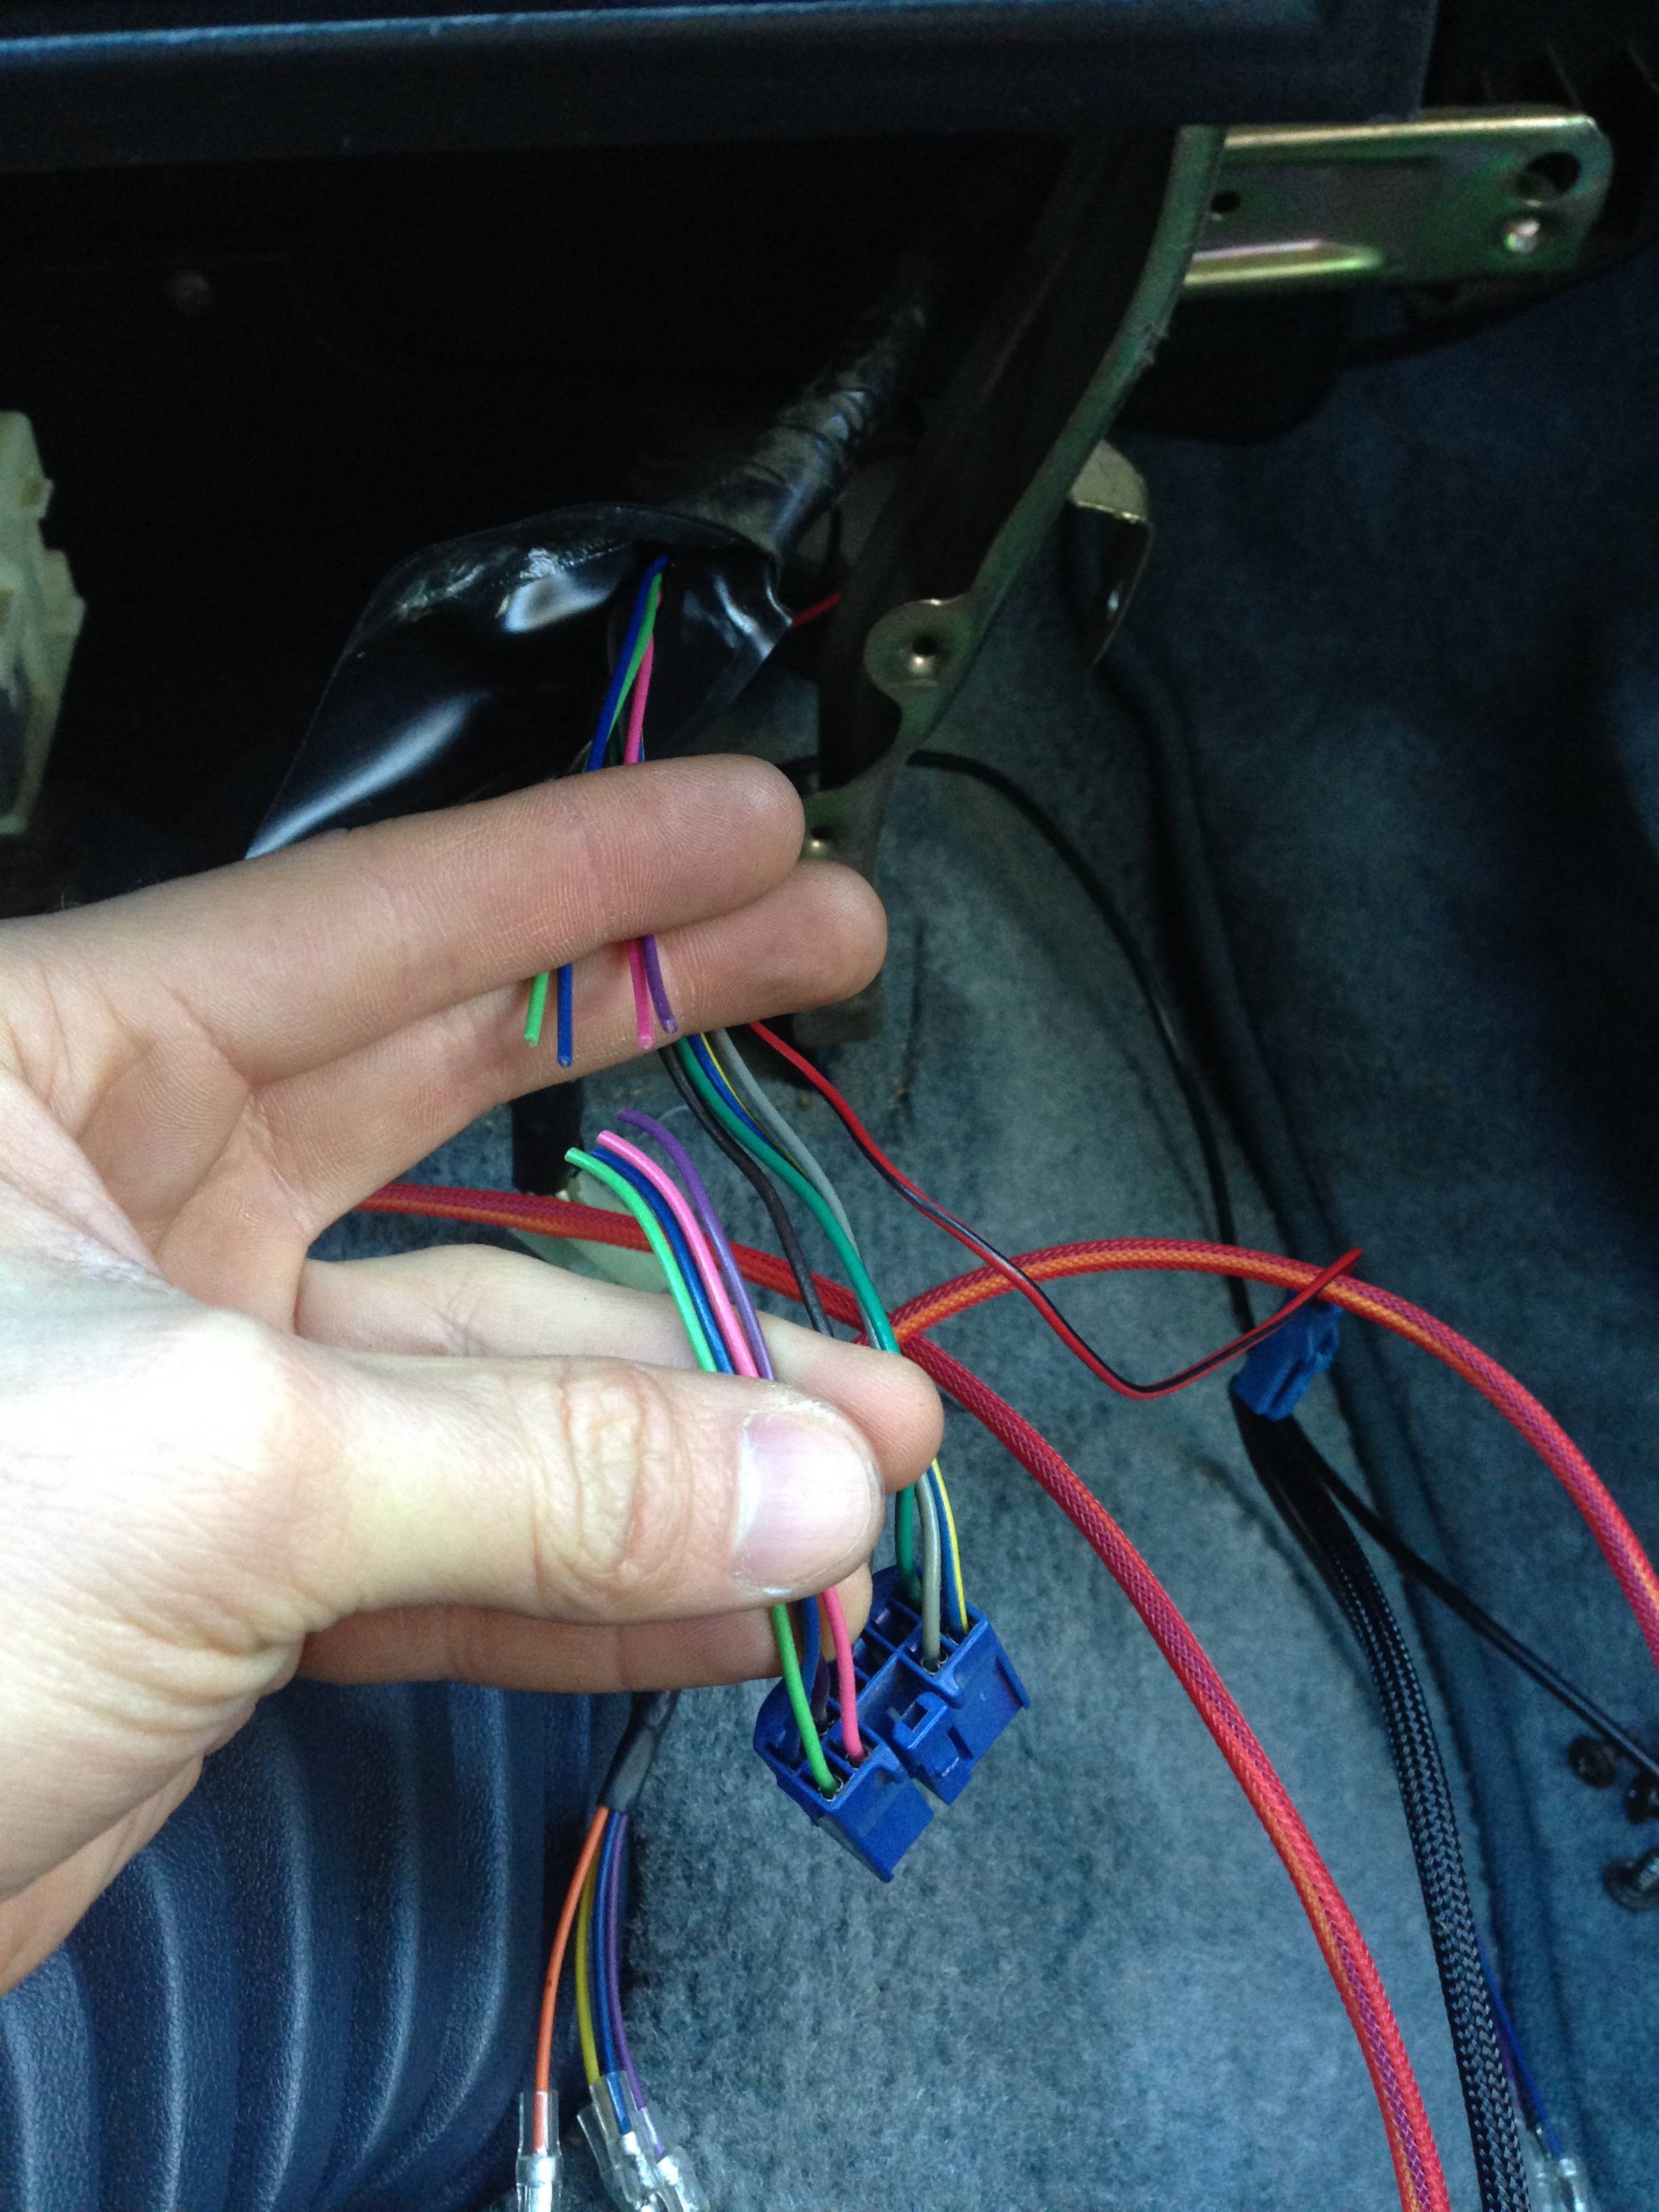
There are three types of terminals on the ends of these 22 AWG wires. I used male bullets coming from the radio side, female bullets going out to the speakers and ferrules coming from the new amp side. I also color coded the wire loom. Red is input from an amp (new amp or radio) and black is out to speakers. It just makes it easier to identify when fishing out from behind the dash. I used 4 colors of wires for these speakers as you can see. Makes it easier to see which is left speaker positive, right speaker negative, and so on and so forth.
Here's a closeup of the ferrule terminals. These are better than shoving bare or tinned wire into the terminal blocks and clamping down on them. With the slight bell mouth of the ferrule it relieves stress on the wire if it's pulled.

Here I cut the wires from the radio connector and added the proper terminals. I lucked out and accidentally matched some wire colors, bonus!

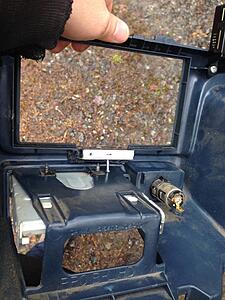
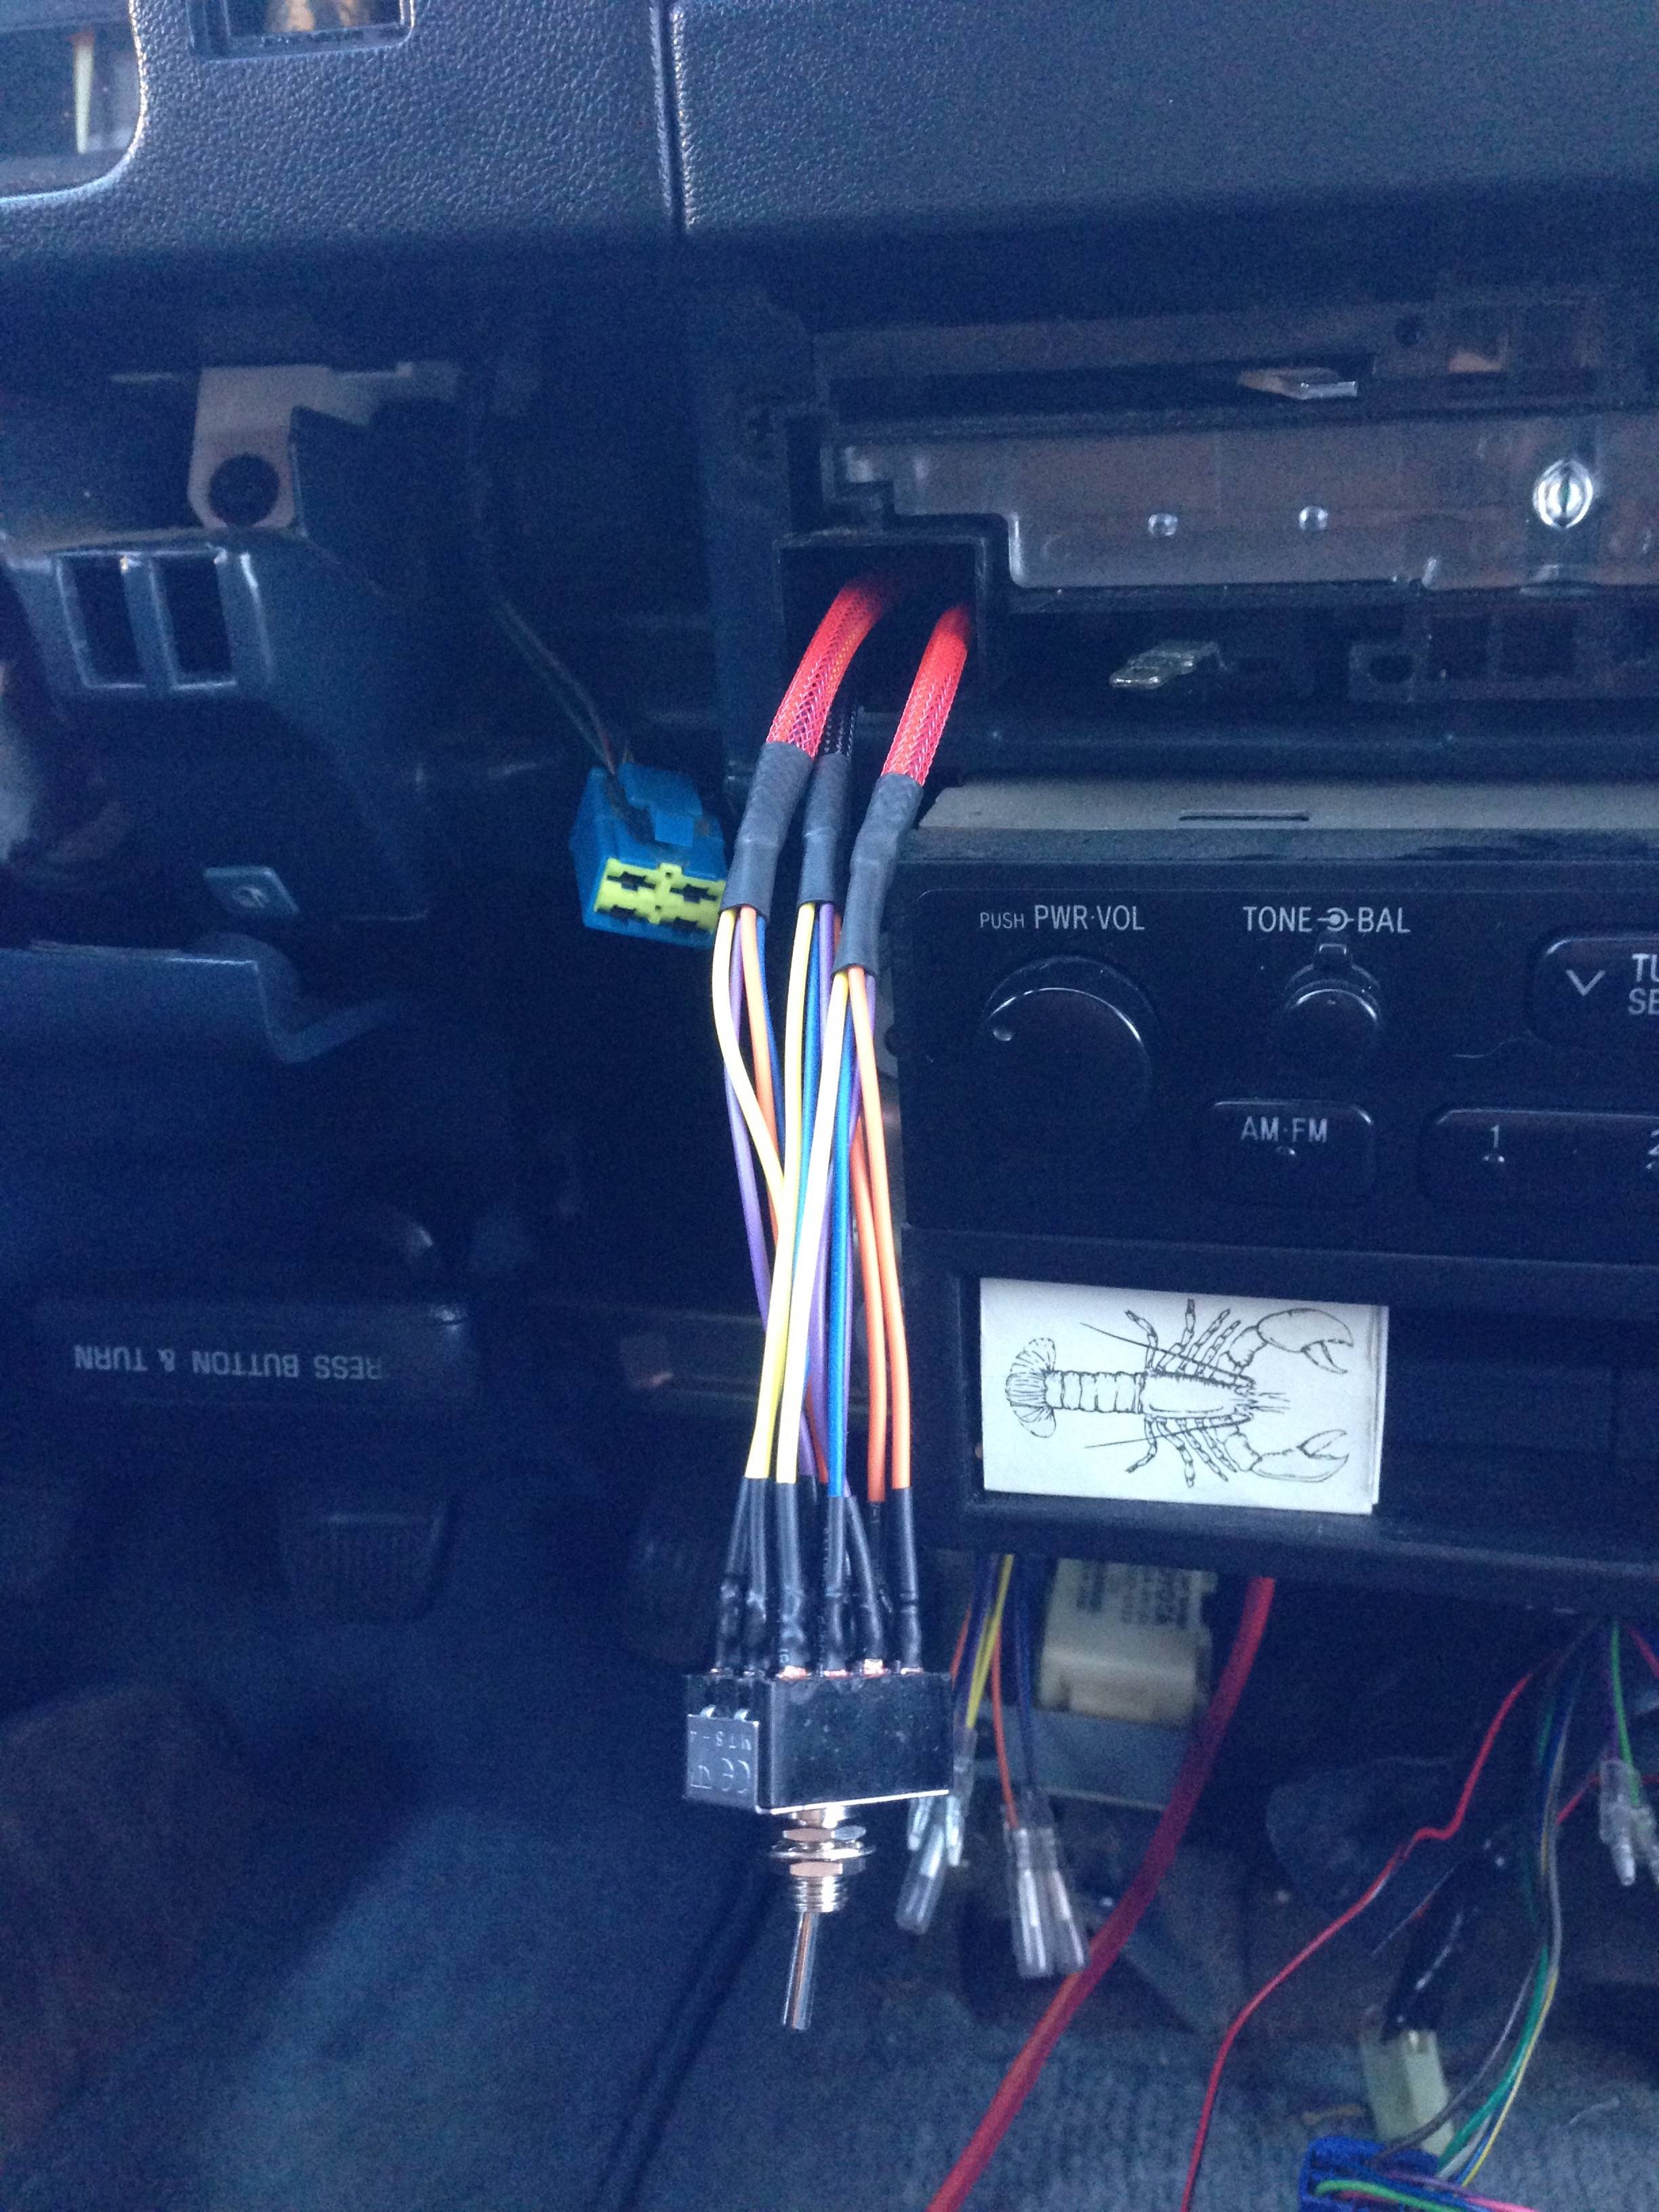
Here is the switch hanging out of its home. Like the lobster matches? Whenever I get a new car the lobster matches come with.

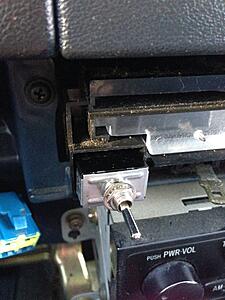
And here it is in its place. I don't have AC so I drilled out the blank for the switch. It fits perfectly...like perfectly. It's crazy.
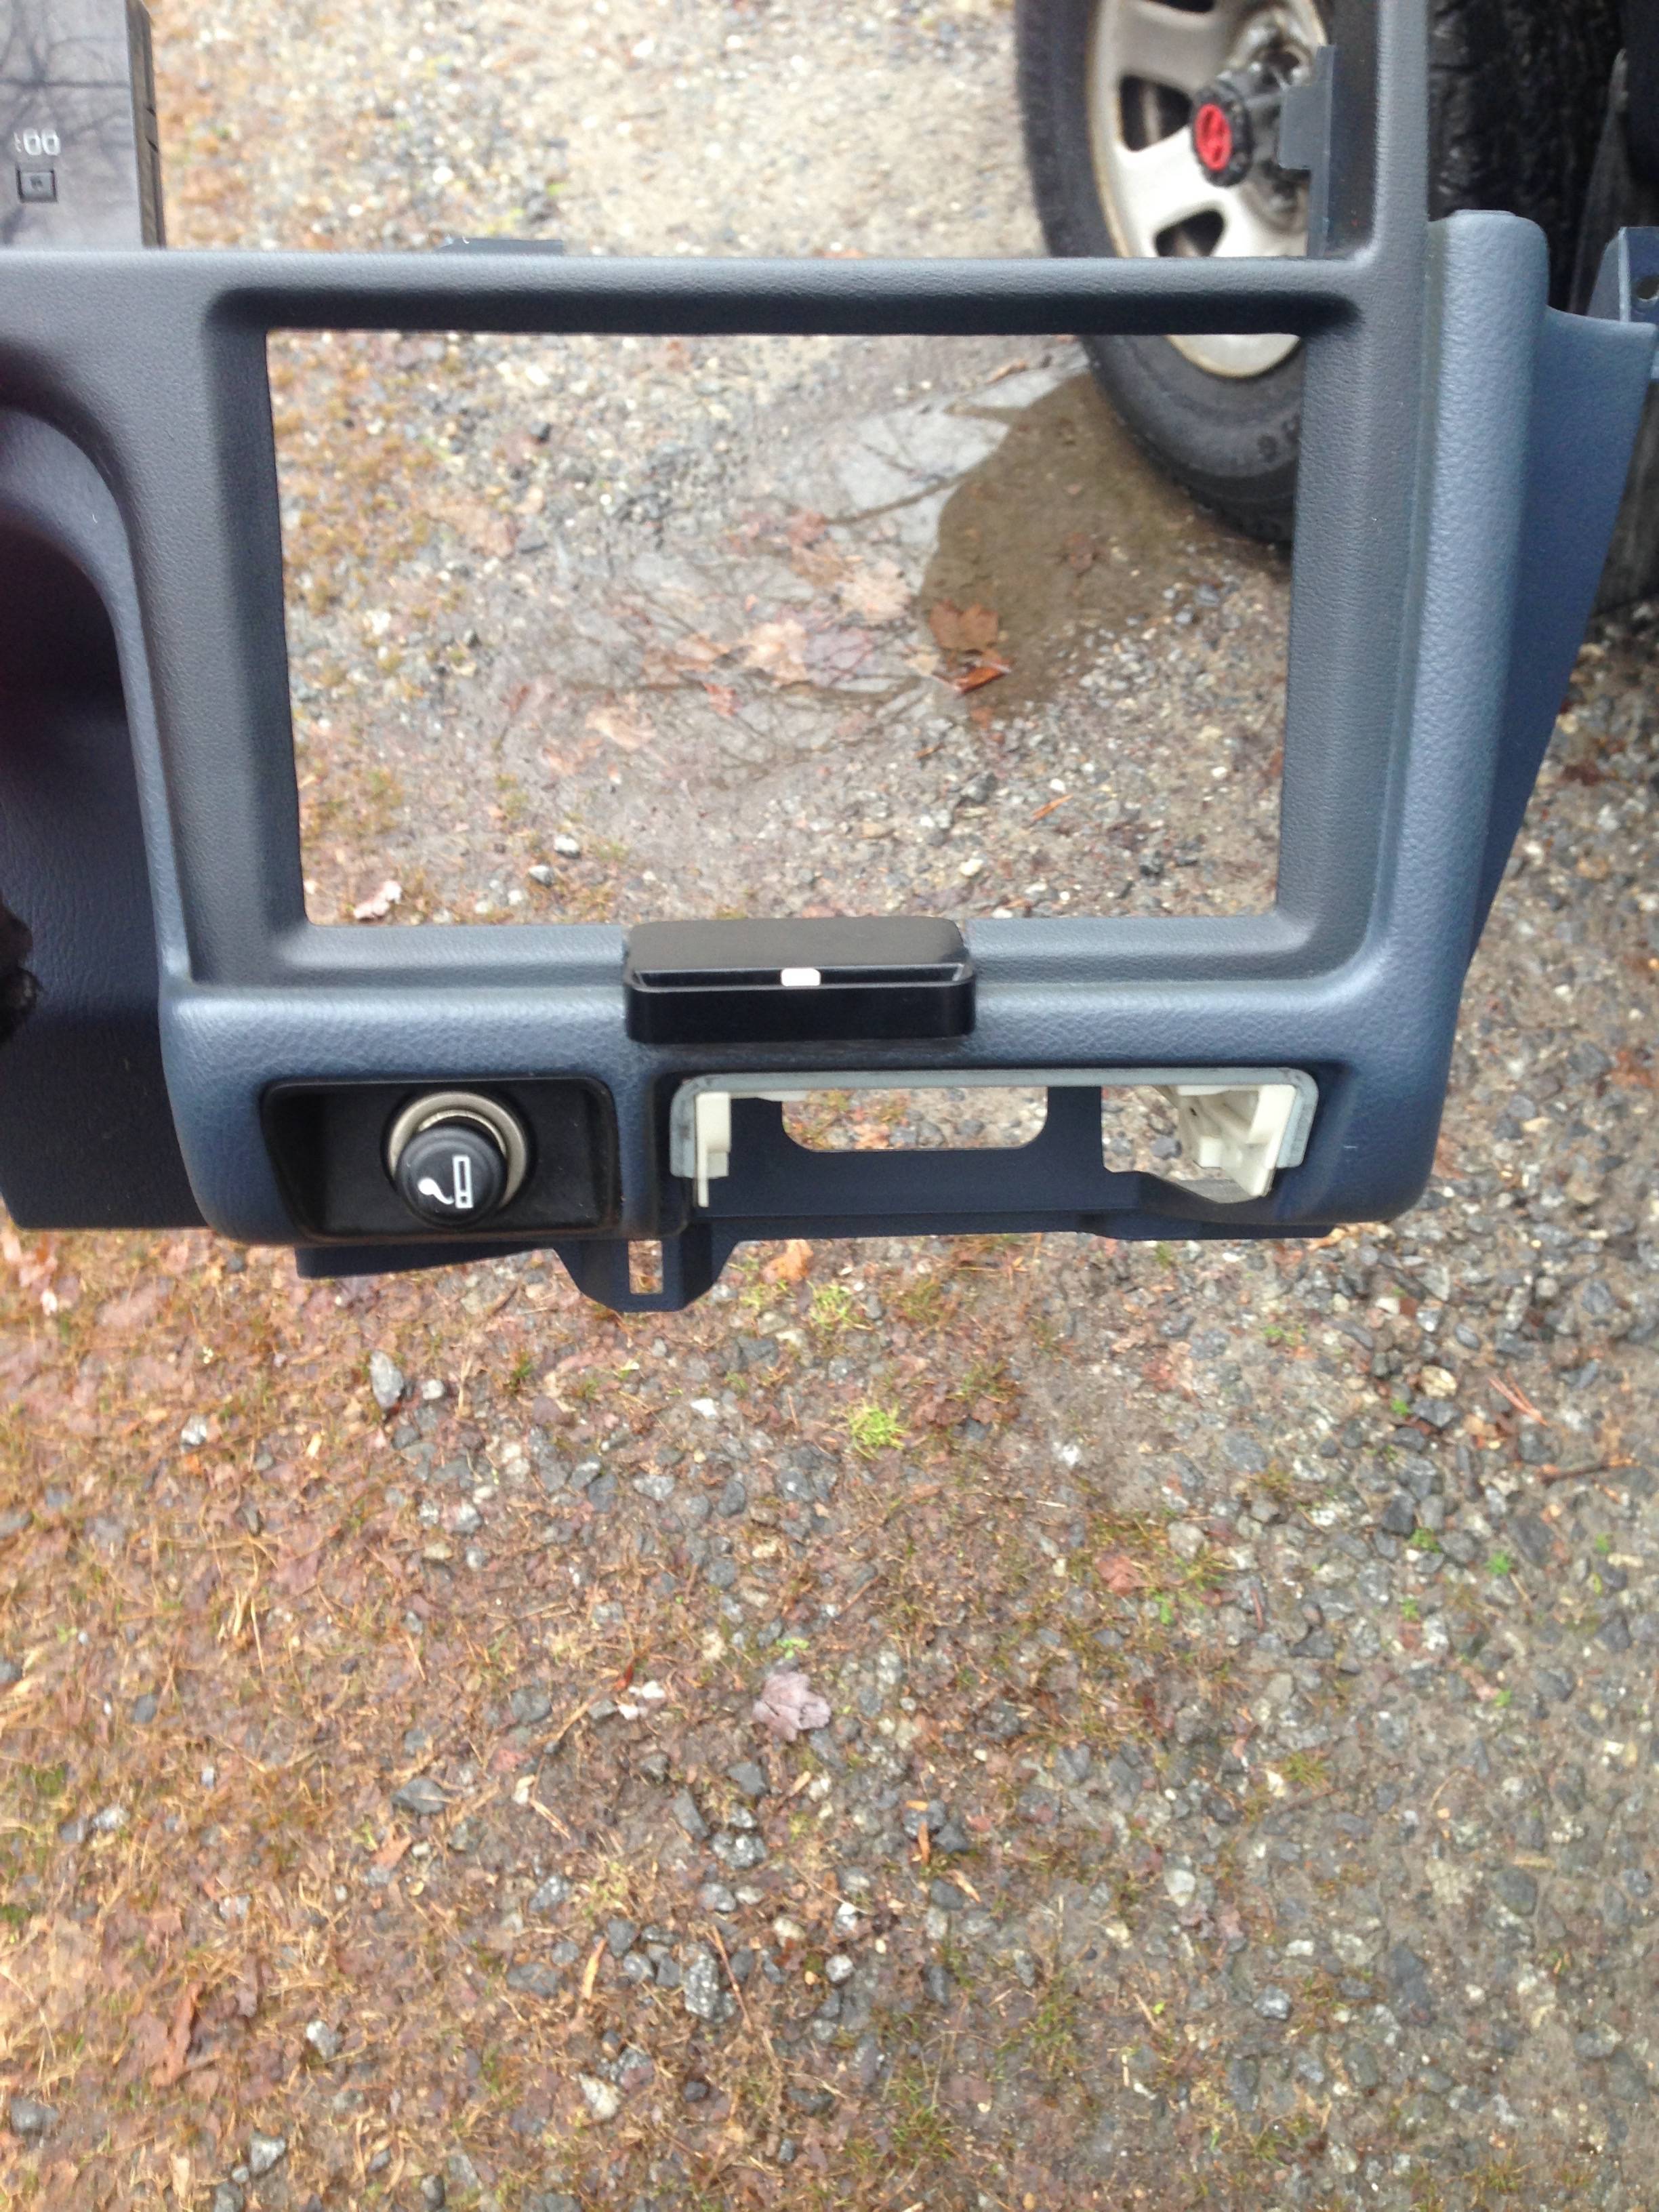
I dremeled out where I wanted the dock to go. Thought front and center was the best. I like it's placement a lot. I painted the white dock satin black and epoxied it in place. The screw holding up the dock was just for fitment purposes. I needed to have the dock angled slightly so it would sit upright against the dash.
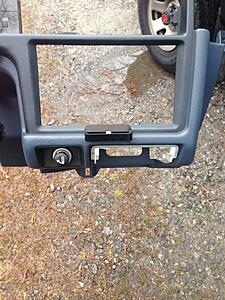
This is how it looks. Pretty nice in my opinion.

Here's a video of how it all works.
That's it, thanks for reading.
Some solutions were an FM transmitter (crap sound most of the time), wiring in an aux cable into my existing radio (over my pay grade and would most likely need a wiring diagram of the radio itself. Plus there's the possibility of ruining my current radio) and finally, my first thought, buy a '94 Pickup radio/tape player and use a tape deck to aux cable (another method which doesn't give you great sound)
What I actually ended up doing was having a separate amp for my iPhone installed behind the dash to connect to and have a switch to choose which I want to play...radio or iPhone. I wanted to make it more seamless than just having cables coming out from behind the dash that I plug into my phone, though. Below is just a little write up on the process with a video at the end showing it in action. Nothing crazy here, but it solved my problem. Thanks to scope103 for helping answer some of my questions.
The goal when I get into my truck was to put my iPhone into a dock and have it charge and play through the speakers while keeping the radio intact.
Parts:
Adafruit MAX9744 Stereo Amp
Male 5.5-2.1mm Power Jack Connector w/Pigtails
1N5400 Diodes (three)
Small project box for amp
Mini 4PDT Switch (ON/OFF/ON)
1k Ohm Audio Taper Log Pot (volume control)
Knob for Log Pot
2.1 Amp USB Charger
Aux cable
iPhone Lightning to USB Cable
iPhone dock
Misc. wire (18 & 22 AWG GXL), terminals and heat shrink
First was to solder together the amp by Adafruit. All that had to be done was add the capacitor, speaker terminals and join some existing contacts. I'm not a great solderer but it wasn't hard. They have great directions on their website.
Then I soldered three wires to the vol pot contacts to use the external volume control. I crimped female bullet terminals to the ends and added nice braided wire loom with heat shrinked ends for cleanliness. And finally put it into my plastic project box (old earbud headphone case)
I wanted to put the volume knob in a nice place on the dash. I opted for underneath the hazards button. I drilled that hole in the blank.
Then I soldered and heat shrinked 22 AWG wire to the pot and crimped male bullet terminals to the wires.
Next was the USB charger. I used a dremel and took it apart and de-soldered the positive and negative charging points. Then soldered in wires to those points so I could connect them to whichever wires in the truck I wanted to. I used 18 AWG for this.


Then I epoxied the shell back together and crimped male bullet terminals on the ends.
Next was to find where I was going to tap into the truck for power. I used the cigarette lighter because it was right there and it's switched power. I don't want it on while the key is off draining the battery. I soldered those connections and crimped dual female bullet connectors to each. I'm using dual because I'm powering the USB charger and amp via this point.

Now I measured the voltage at this point and with the truck running and revving up the voltage was higher than the amp could take. Can't be more than 14 volts max.
That's where the three diodes come in. You can use them to step down voltage. I used three 1N5400 and that brought the voltage down to 13.75 max. Solder the diodes (polarity matters!) to the positive wire that's going into the amp via the pigtail jack. I don't have a good picture of this but you can see the three capacitors in a line in this picture below the amp in the box.
I also don't have a picture of the voltage reading after so you'll have to trust me. I'm sure there are other diodes you can use which would only require you to use one. Maybe you can improve my method.
Next is soldering up the 4PDT switch. Here is a little diagram of how the positions are switched that I drew up.
Vertically speaking, the center 4 terminals go out to the speakers, left pos/neg and right pos/neg. The 4 speaker wires coming out from the radio go to the left 4 terminals. The 4 speaker wires coming out of the new amp go to the right set of 4 terminals. Doesn't matter which (new amp or radio) connect to which set of terminals (left or right) as long as the speakers are in the center.
I soldered these tiny terminals up and heat shrinked them.

After I soldered it all up I noticed the switch was stuck. It didn't want to toggle. I used too much heat and melted the plastic plungers to the contacts. I opened it up and replaced the innards with a backup switch. Just be aware and maybe don't use a big soldering iron like I did.

There are three types of terminals on the ends of these 22 AWG wires. I used male bullets coming from the radio side, female bullets going out to the speakers and ferrules coming from the new amp side. I also color coded the wire loom. Red is input from an amp (new amp or radio) and black is out to speakers. It just makes it easier to identify when fishing out from behind the dash. I used 4 colors of wires for these speakers as you can see. Makes it easier to see which is left speaker positive, right speaker negative, and so on and so forth.

Here's a closeup of the ferrule terminals. These are better than shoving bare or tinned wire into the terminal blocks and clamping down on them. With the slight bell mouth of the ferrule it relieves stress on the wire if it's pulled.
Here I cut the wires from the radio connector and added the proper terminals. I lucked out and accidentally matched some wire colors, bonus!

Here is the switch hanging out of its home. Like the lobster matches? Whenever I get a new car the lobster matches come with.
And here it is in its place. I don't have AC so I drilled out the blank for the switch. It fits perfectly...like perfectly. It's crazy.

I dremeled out where I wanted the dock to go. Thought front and center was the best. I like it's placement a lot. I painted the white dock satin black and epoxied it in place. The screw holding up the dock was just for fitment purposes. I needed to have the dock angled slightly so it would sit upright against the dash.
This is how it looks. Pretty nice in my opinion.
Here's a video of how it all works.
That's it, thanks for reading.
Last edited by Davebarbier; Dec 17, 2015 at 04:17 PM. Reason: adding pictures
Dec 19, 2015 | 06:27 PM
#2
Registered User
Joined: Apr 2013
Posts: 478
Likes: 4
From: Louisiana
Looks good. I put gauges where the radio goes after I did my 4.3 swap. So I mounted an amp under the passenger seat and ran it to the speaker wires where the radio is. Currently I just have an audio cable to hook to my phone but I'm going to set it up for Bluetooth eventually.

Thread
Thread Starter
Forum
Replies
Last Post
alva22re
General Electrical & Lighting Related Topics
5
Nov 4, 2015 11:31 PM


