
Square Drive shaft.
 Jun 25, 2013 | 07:38 AM
#1
Thread Starter
Registered User
Joined: Dec 2012
Posts: 48
Likes: 0
From: King George VA
Square Drive shaft.
I know people say to use 2-1/4'' and 2-1/2''. but I just called six different steel shops and none of them have 2-1/4''. And they all said they didn't know where I could find any. So does any body know if 2'' and 2-1/2'' would work. If not, any other ideas on places that would have 2-1/4'' tube. And I know it varies but could someone tell me like an approximate length.
Thanks, guys.
Thanks, guys.
 Jul 2, 2013 | 08:30 PM
#4
Registered User
Joined: Sep 2008
Posts: 4,355
Likes: 2
From: middle of no where Alaska
I have always heard people using 2" 1/4 wall and 2 1/2" 1/4 wall. But, instead of just regular ol' 2 1/2", get "RECEIVER" tube, which is slightly larger outer dimension (2.53") and is seamless so the 2" sq tube will slide into it.


 Oct 25, 2013 | 11:51 AM
#7
Thread Starter
Registered User
Joined: Dec 2012
Posts: 48
Likes: 0
From: King George VA
So i got one of those cheap autozone hitch receivers off my buddies jeep, and i made the drive shaft but the shaft end wont come all the way down to the diff. I dropped the t-case an inch and still wont work. I know there is a way to grind something down but i didn't quite get the how to thread on pirate. Any suggestions?
Trending Topics
Oct 25, 2013 | 09:18 PM
#9
Thread Starter
Registered User
Joined: Dec 2012
Posts: 48
Likes: 0
From: King George VA
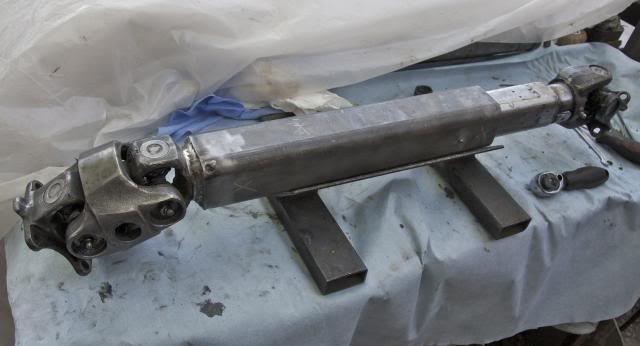
Sorry for not being too clear. I made a square drive-shaft, because I SAS'd my truck and put it up six inches. But when I put the drive-shaft on the truck the the part on the drive-shaft that bolts to the pinion on the diff was about an inch too high. so I dropped the t-case an inch, so it will bolt up now but it binds up when i put it in gear and wont turn the wheels. But I've been reading and searching and reading some more for the past couple hours. And I think I have figured out how to give the double cardan joint more of an angle. But I'm just wondering if going through the work to do it is gonna pay off.
This picture is the method of how I planed on giving the cardan more of an angle. If any body has done this if I could just get some feed back on wether it works or not that would be awesome.

This picture is the method of how I planed on giving the cardan more of an angle. If any body has done this if I could just get some feed back on wether it works or not that would be awesome.
Oct 26, 2013 | 07:01 PM
#16
Registered User
Joined: Apr 2009
Posts: 5,592
Likes: 24
From: Dixon, Ca
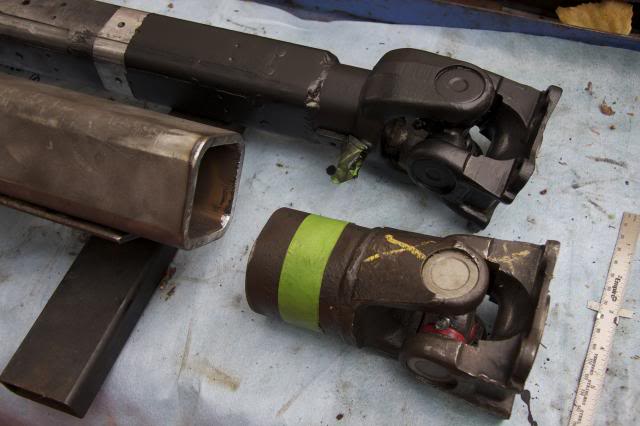
Ok I did a SAS. I then constructed my driveshaft to fit the front.
Then with further study i found out that this works to a degree but that a U joint top and bottom works better when the flange mounts are parallel.
Upon lifting the rear to compliment the front 3 " SAS, my pinion angle then pointed up to the transfer case flange. I knew no better and drove it that way. I had some vibes (subtle) and an off throttle groan upon deceleration. Further study still, said to run a CV on top when the drive U joint angles up to it. that I did and It sound and feels way better.
I know this is drawn out but google (drive shaft angle toyota pickup.) That will help.

http://i561.photobucket.com/albums/s...psd7c83f57.jpg[IMG][/IMG]
Now U joints on front, both ends. updates n install pics soon.
Then with further study i found out that this works to a degree but that a U joint top and bottom works better when the flange mounts are parallel.
Upon lifting the rear to compliment the front 3 " SAS, my pinion angle then pointed up to the transfer case flange. I knew no better and drove it that way. I had some vibes (subtle) and an off throttle groan upon deceleration. Further study still, said to run a CV on top when the drive U joint angles up to it. that I did and It sound and feels way better.
I know this is drawn out but google (drive shaft angle toyota pickup.) That will help.
http://i561.photobucket.com/albums/s...psd7c83f57.jpg[IMG][/IMG]
Now U joints on front, both ends. updates n install pics soon.

Thread
Thread Starter
Forum
Replies
Last Post
jasonty
Pre 84 Trucks (Build-Up Section)
41
Dec 23, 2018 01:00 PM
pyramid
86-95 Trucks & 4Runners
10
Jul 30, 2015 10:05 AM


