
Redeth's Overland Trailer Build
 Jun 22, 2017 | 06:26 AM
#141
Thread Starter
Registered User
Joined: Apr 2012
Posts: 2,817
Likes: 2
From: Los Angeles CA
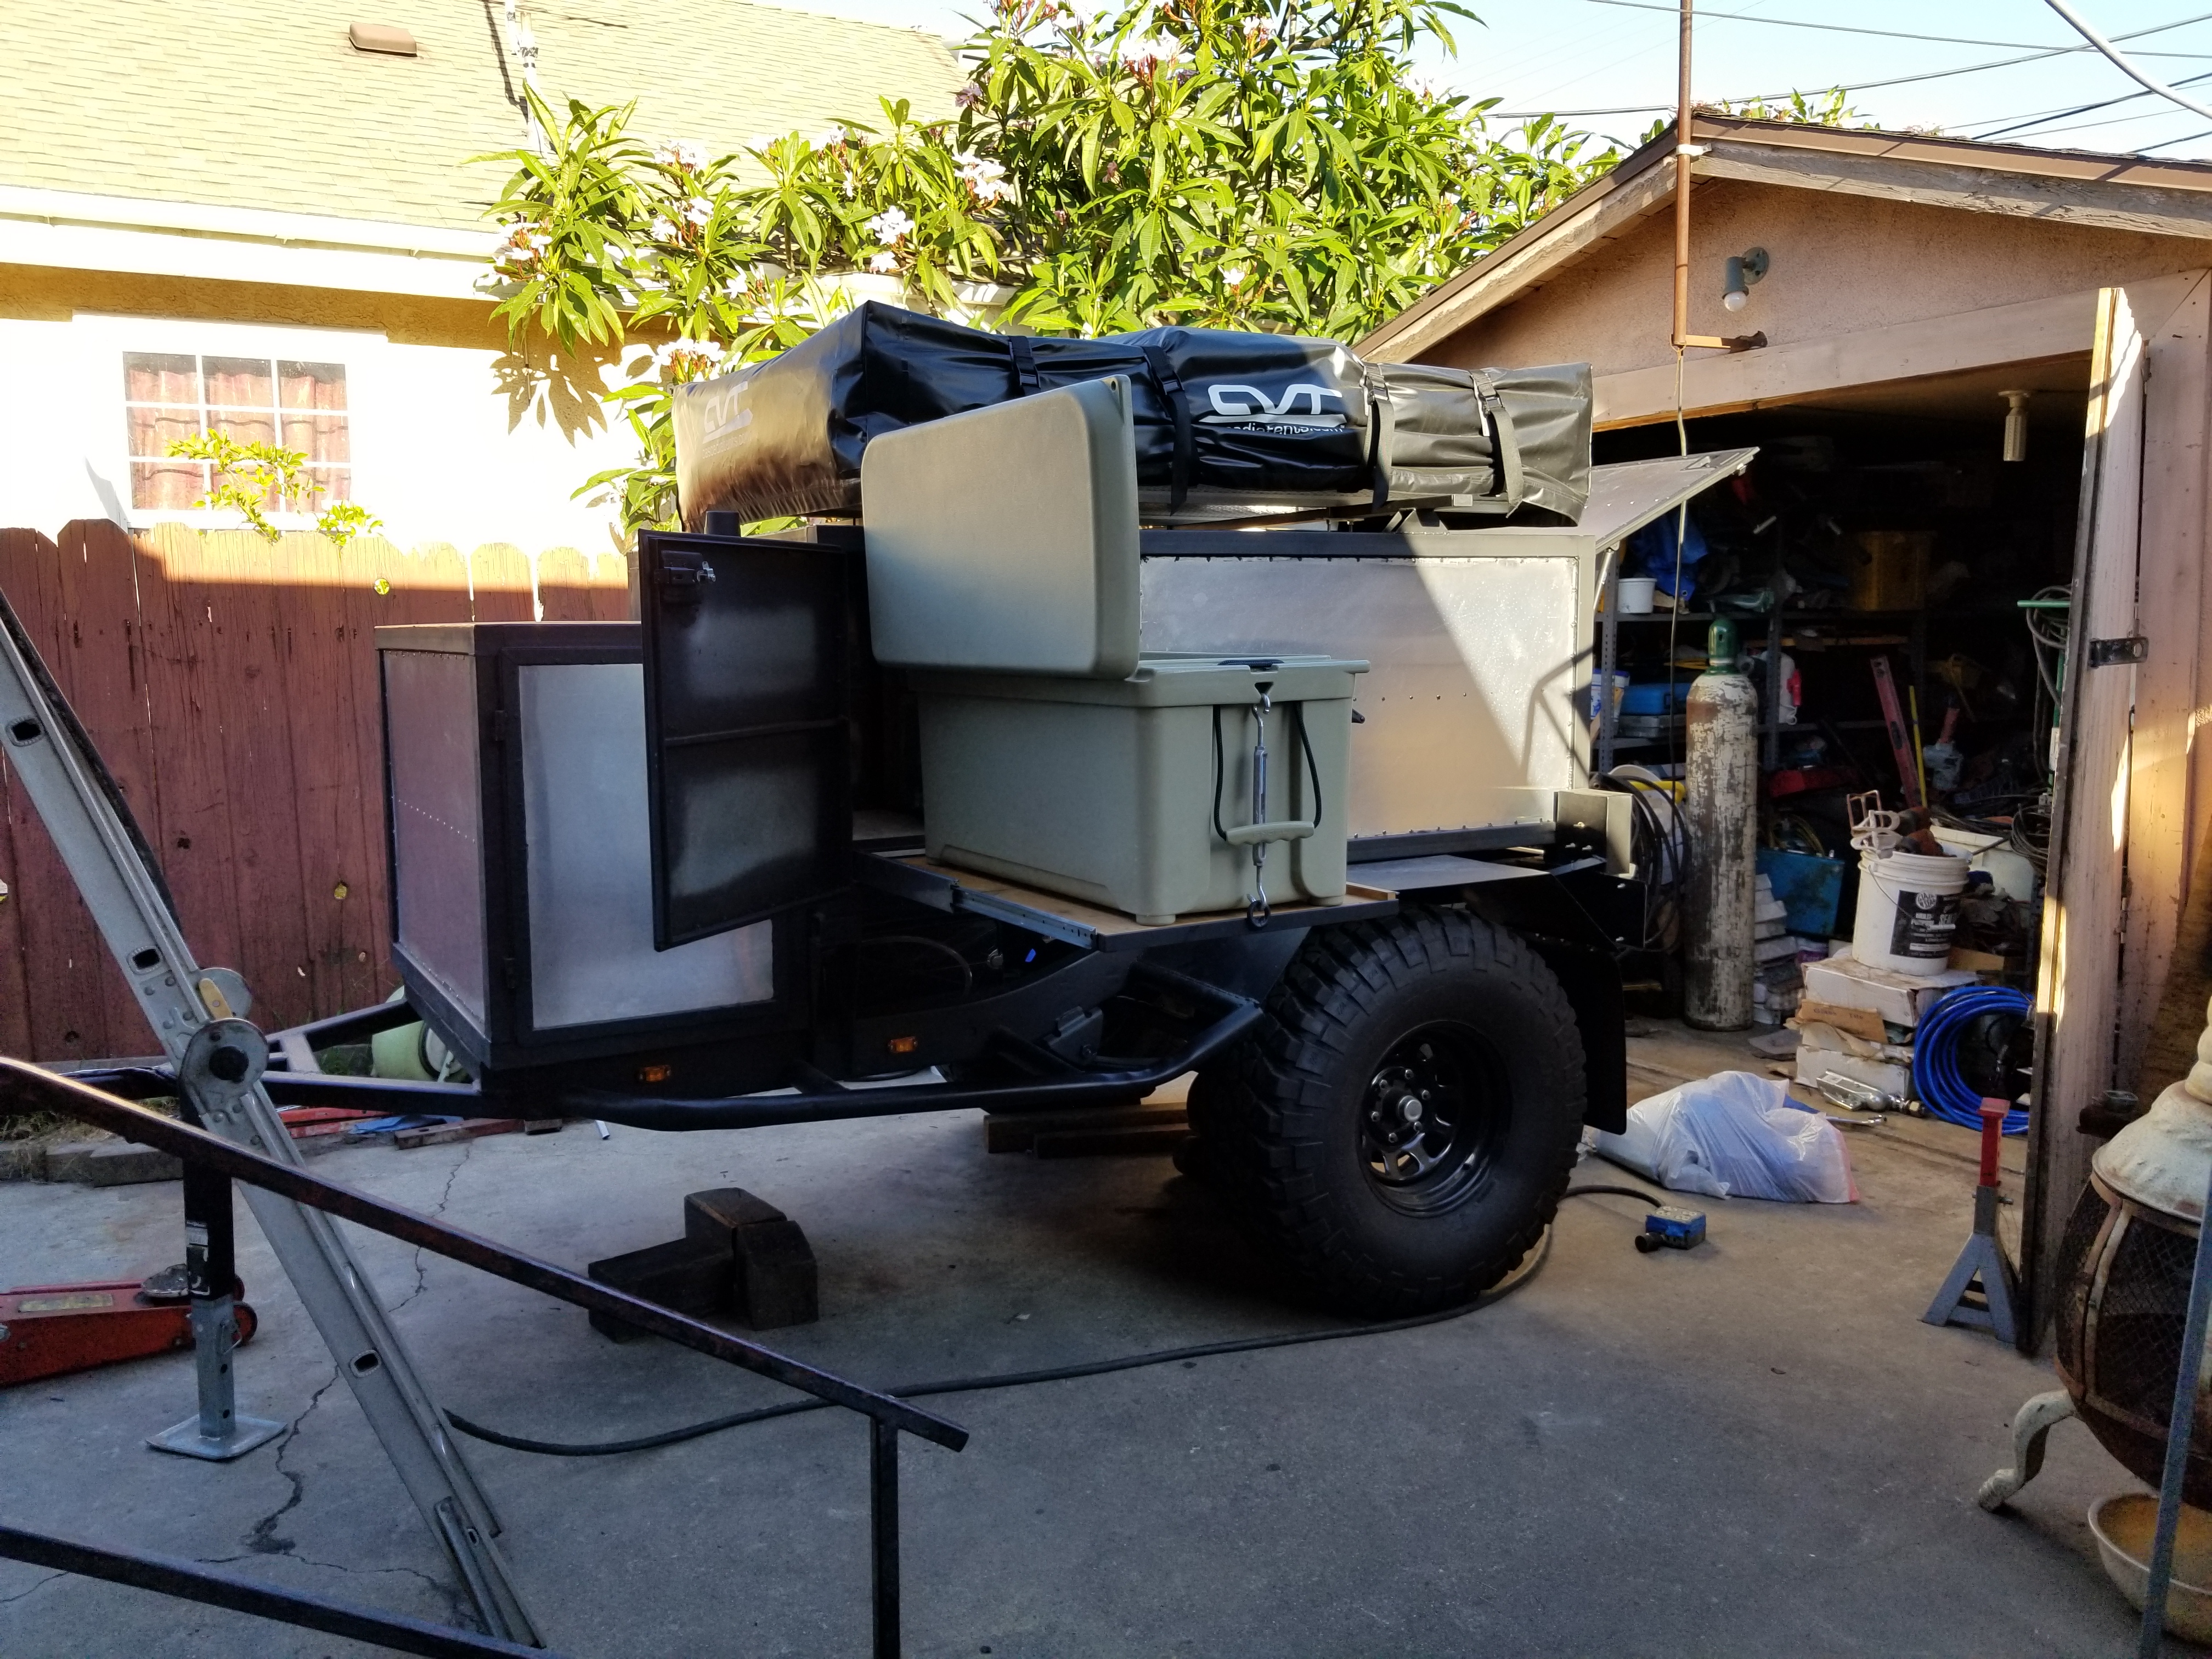
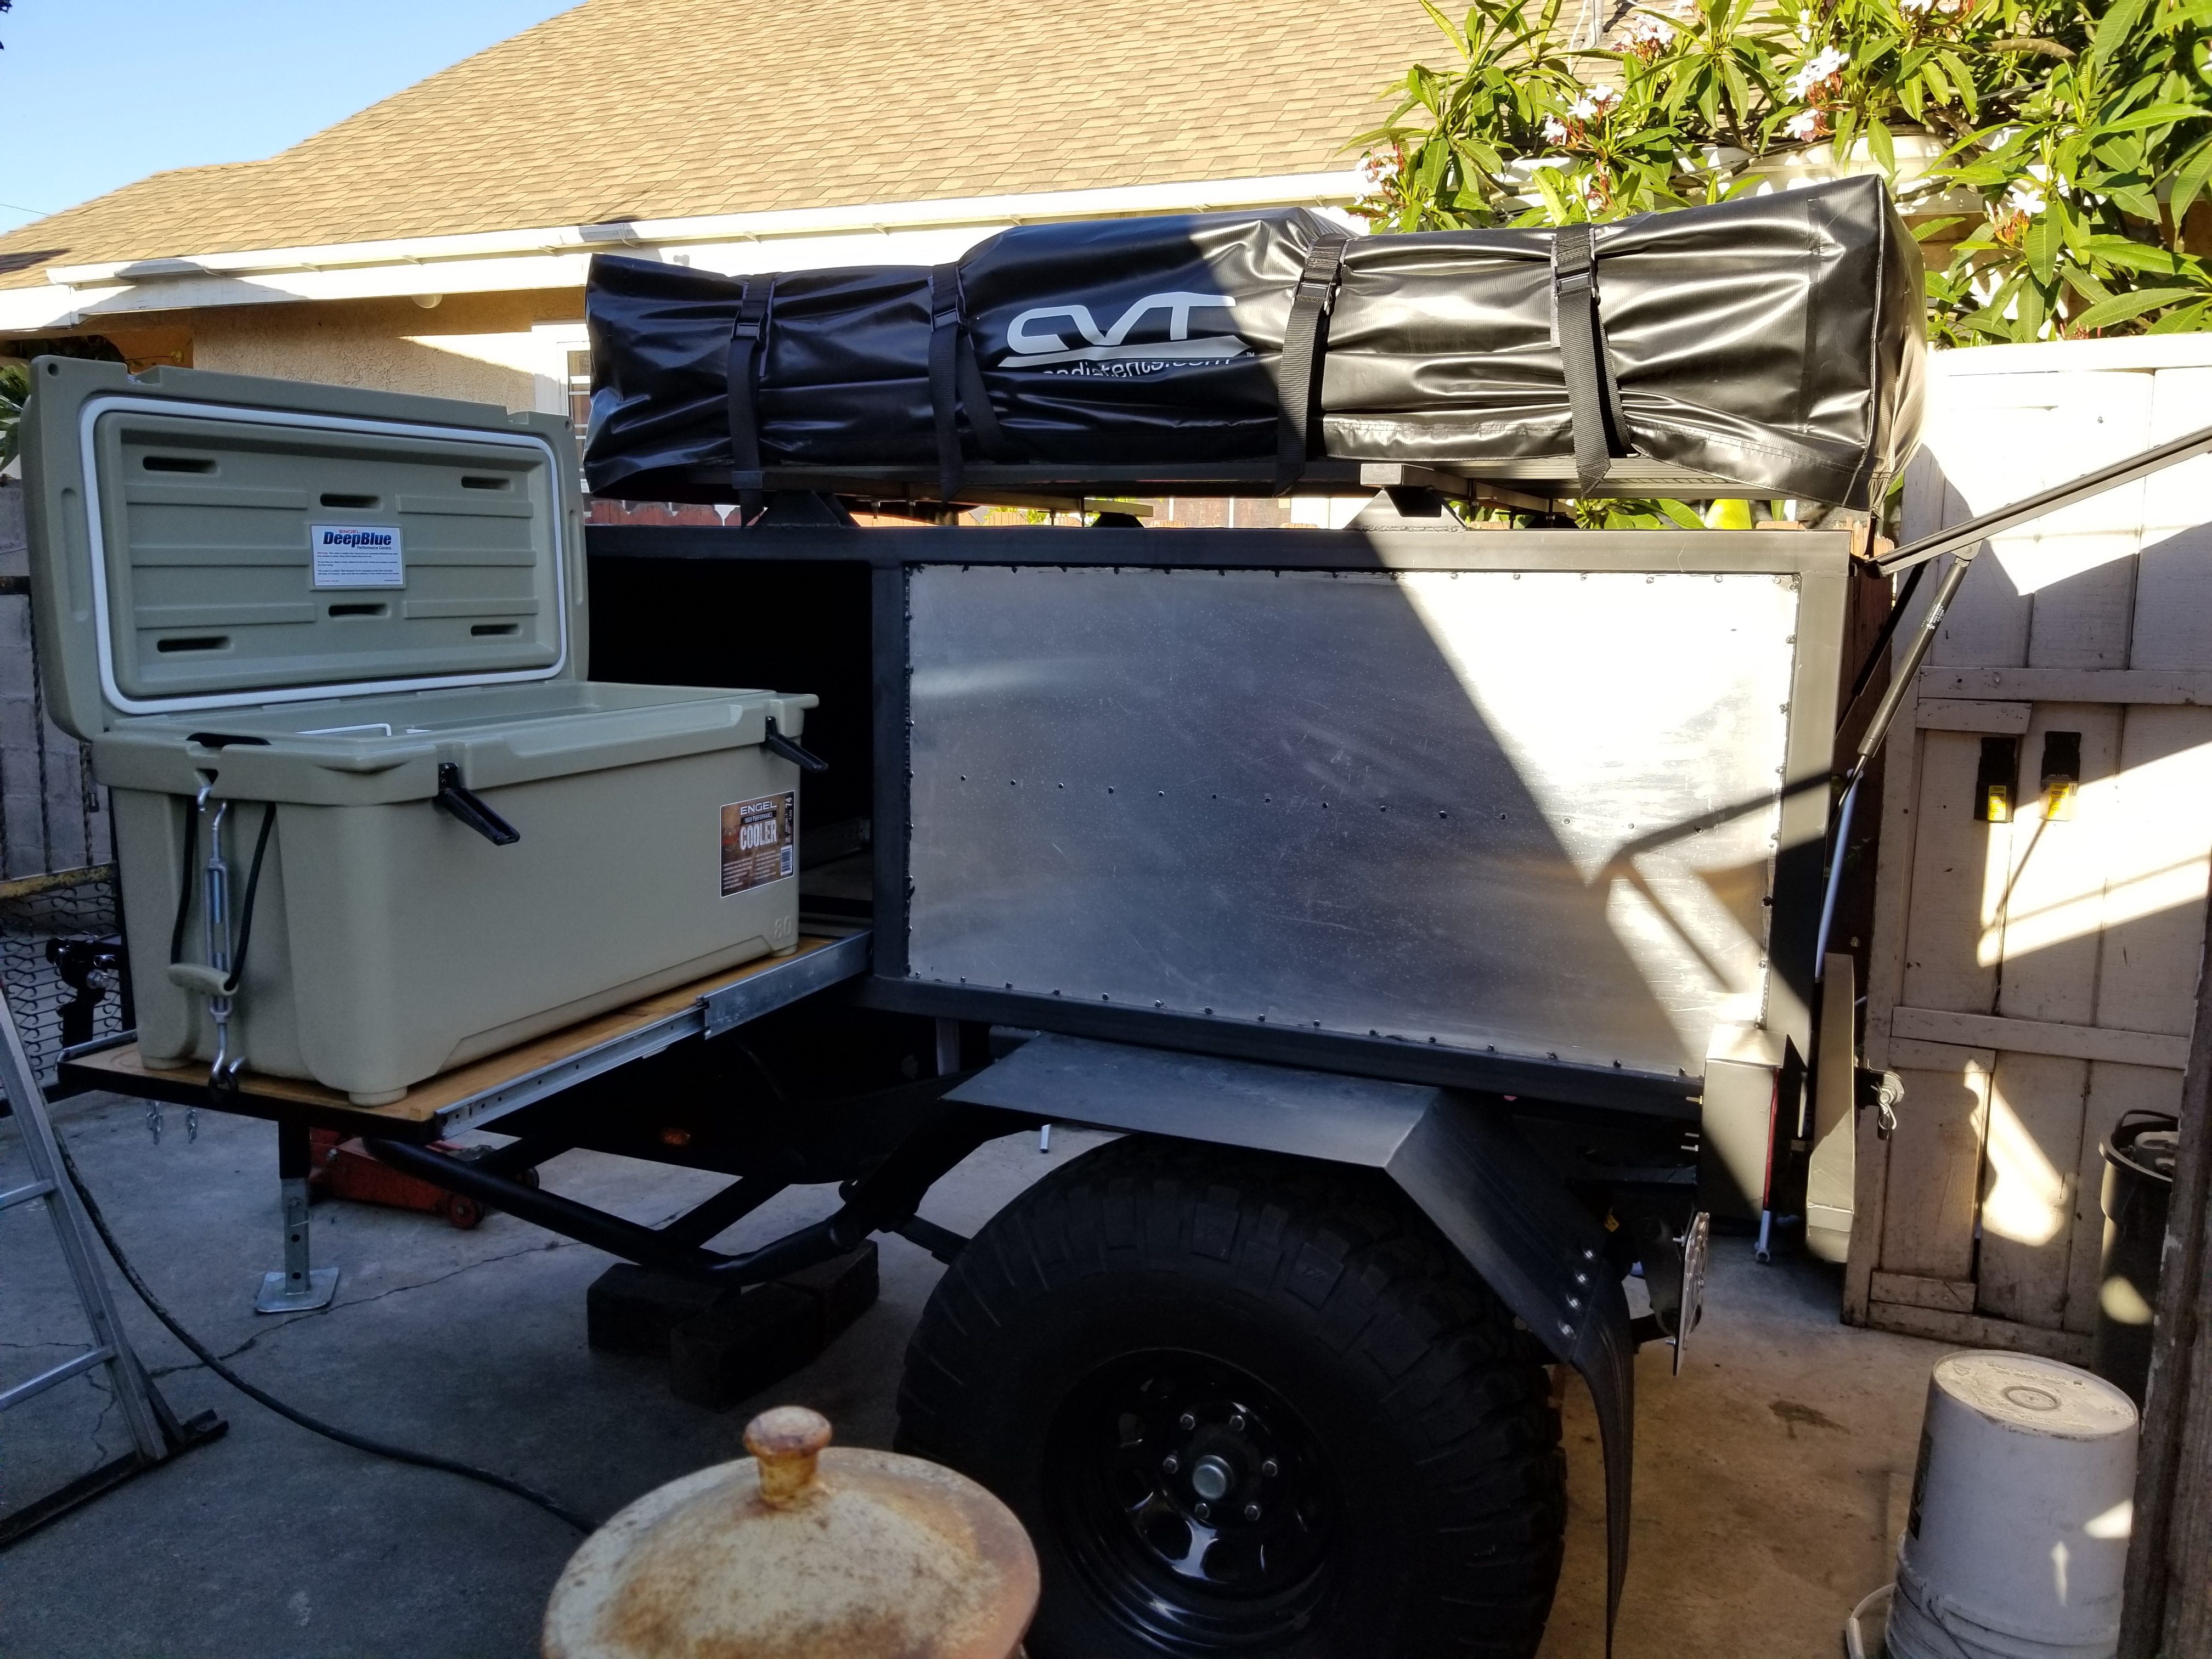
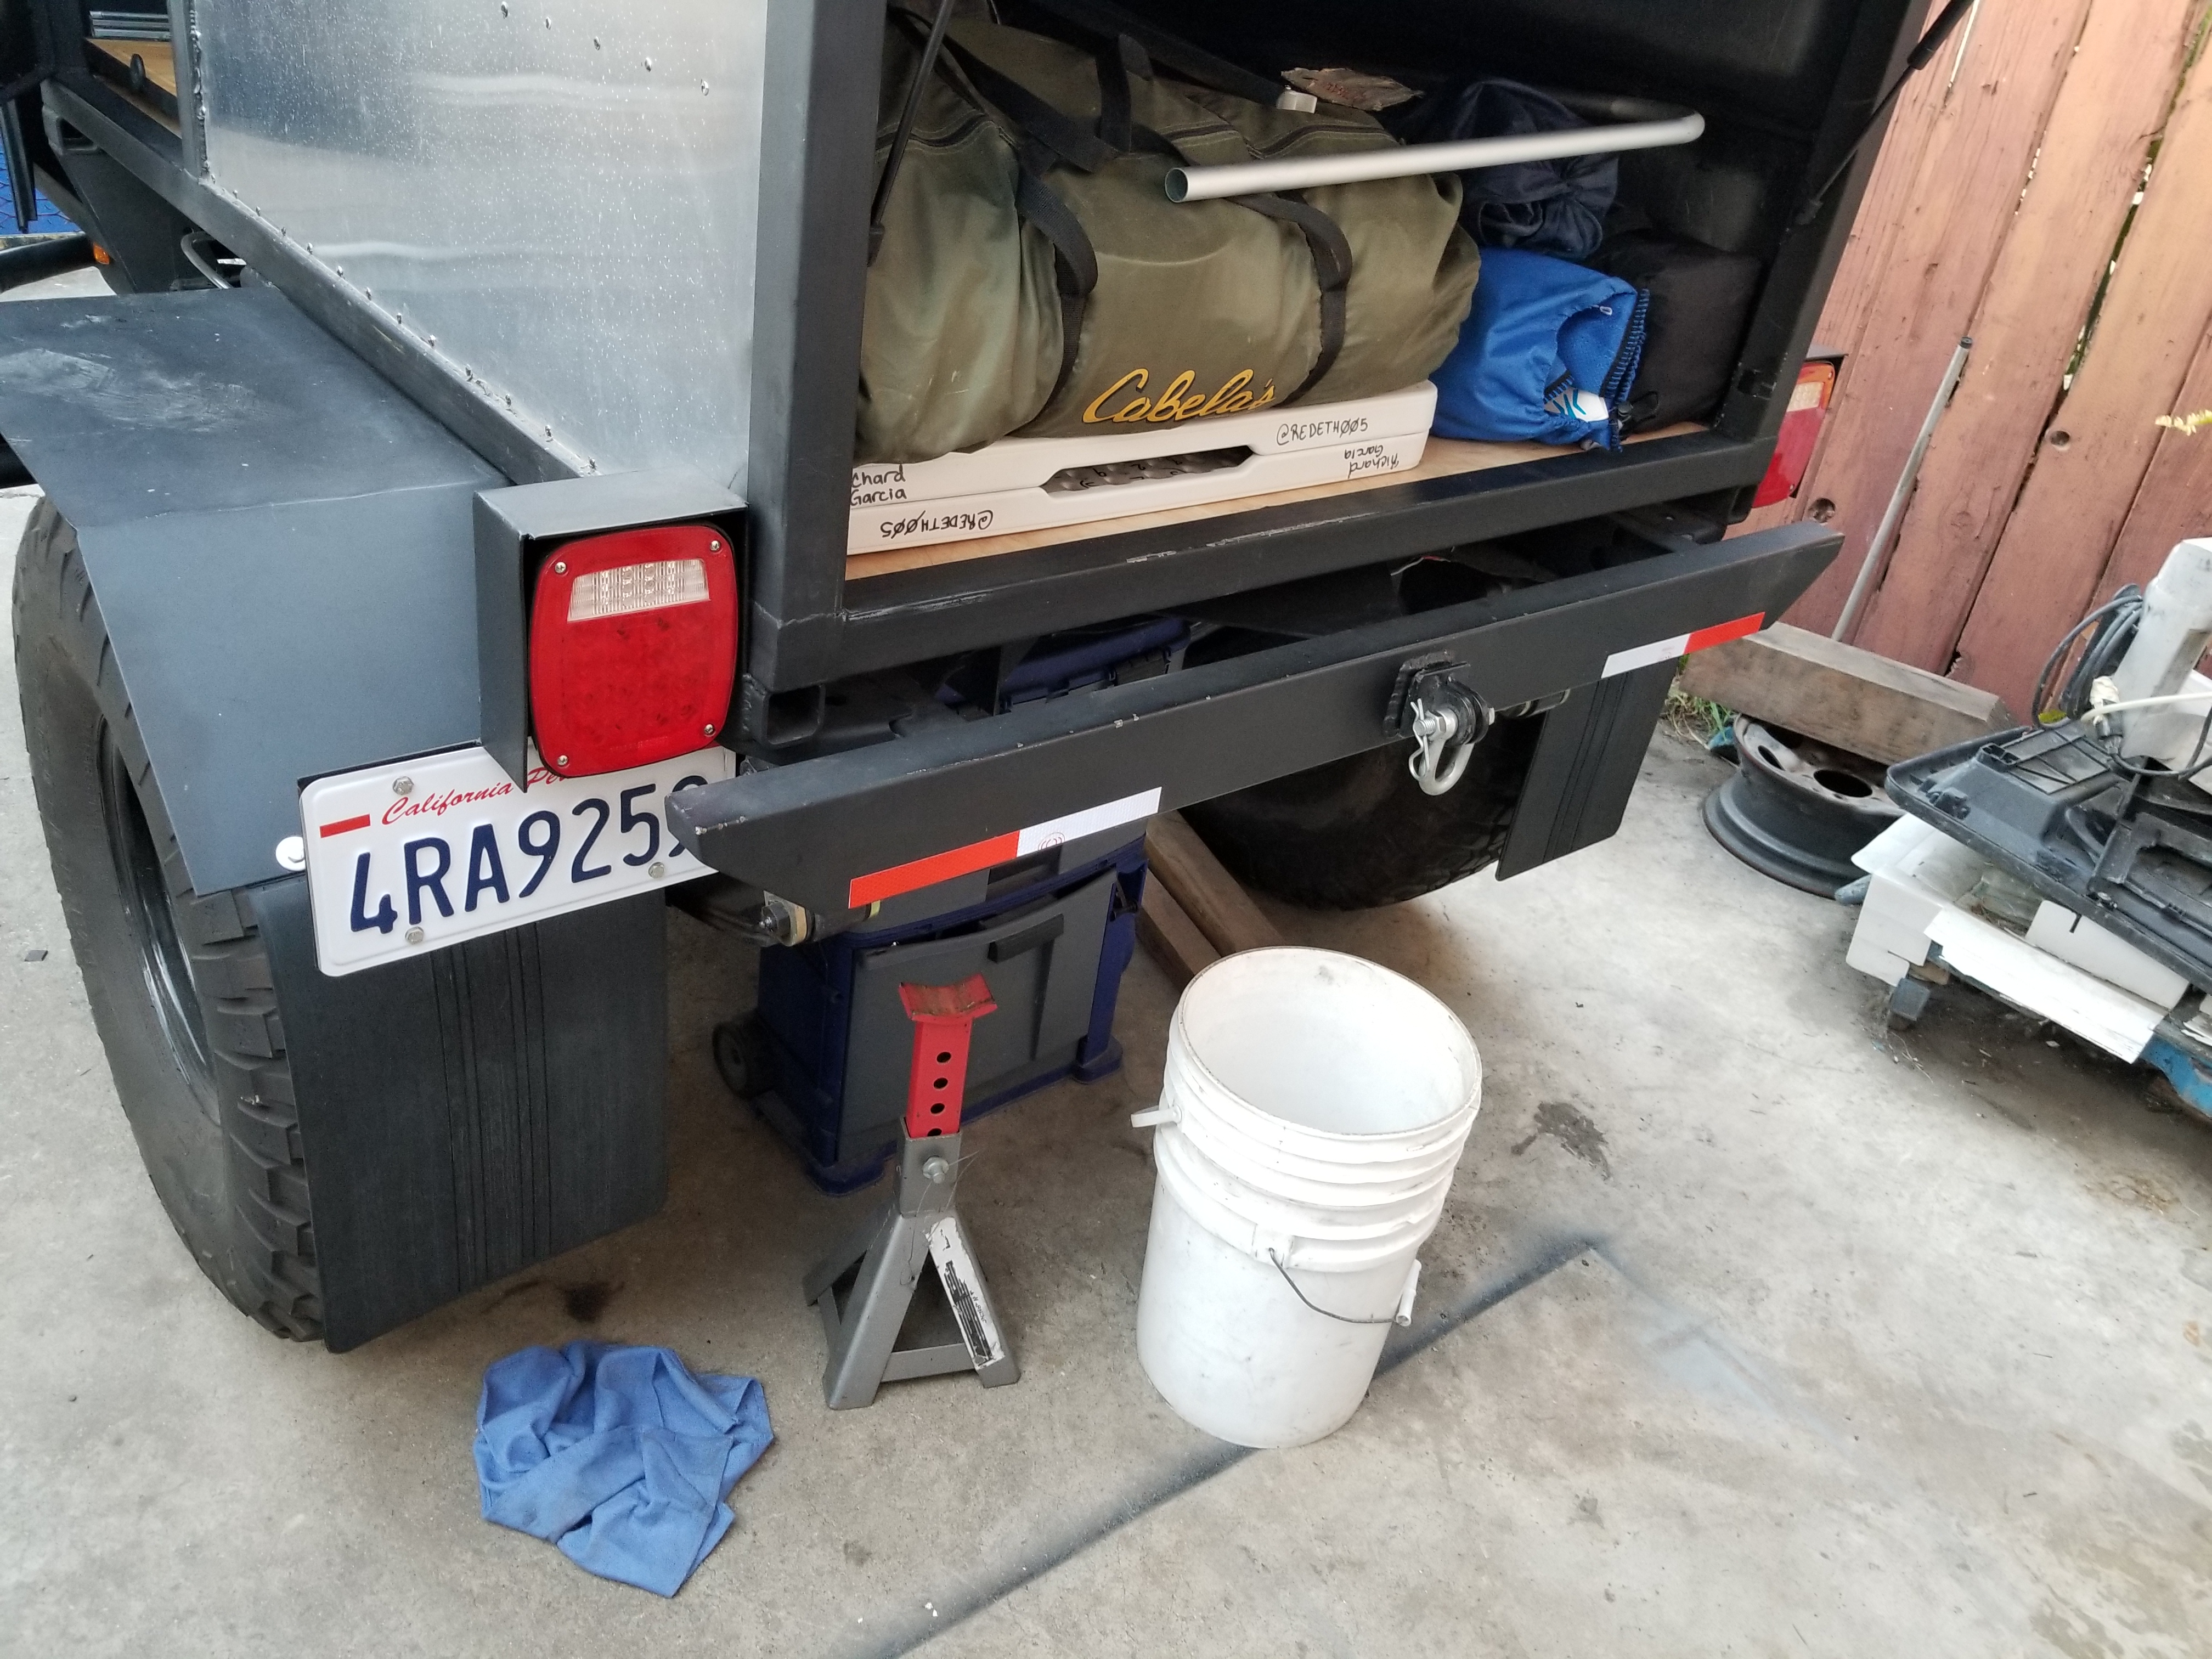
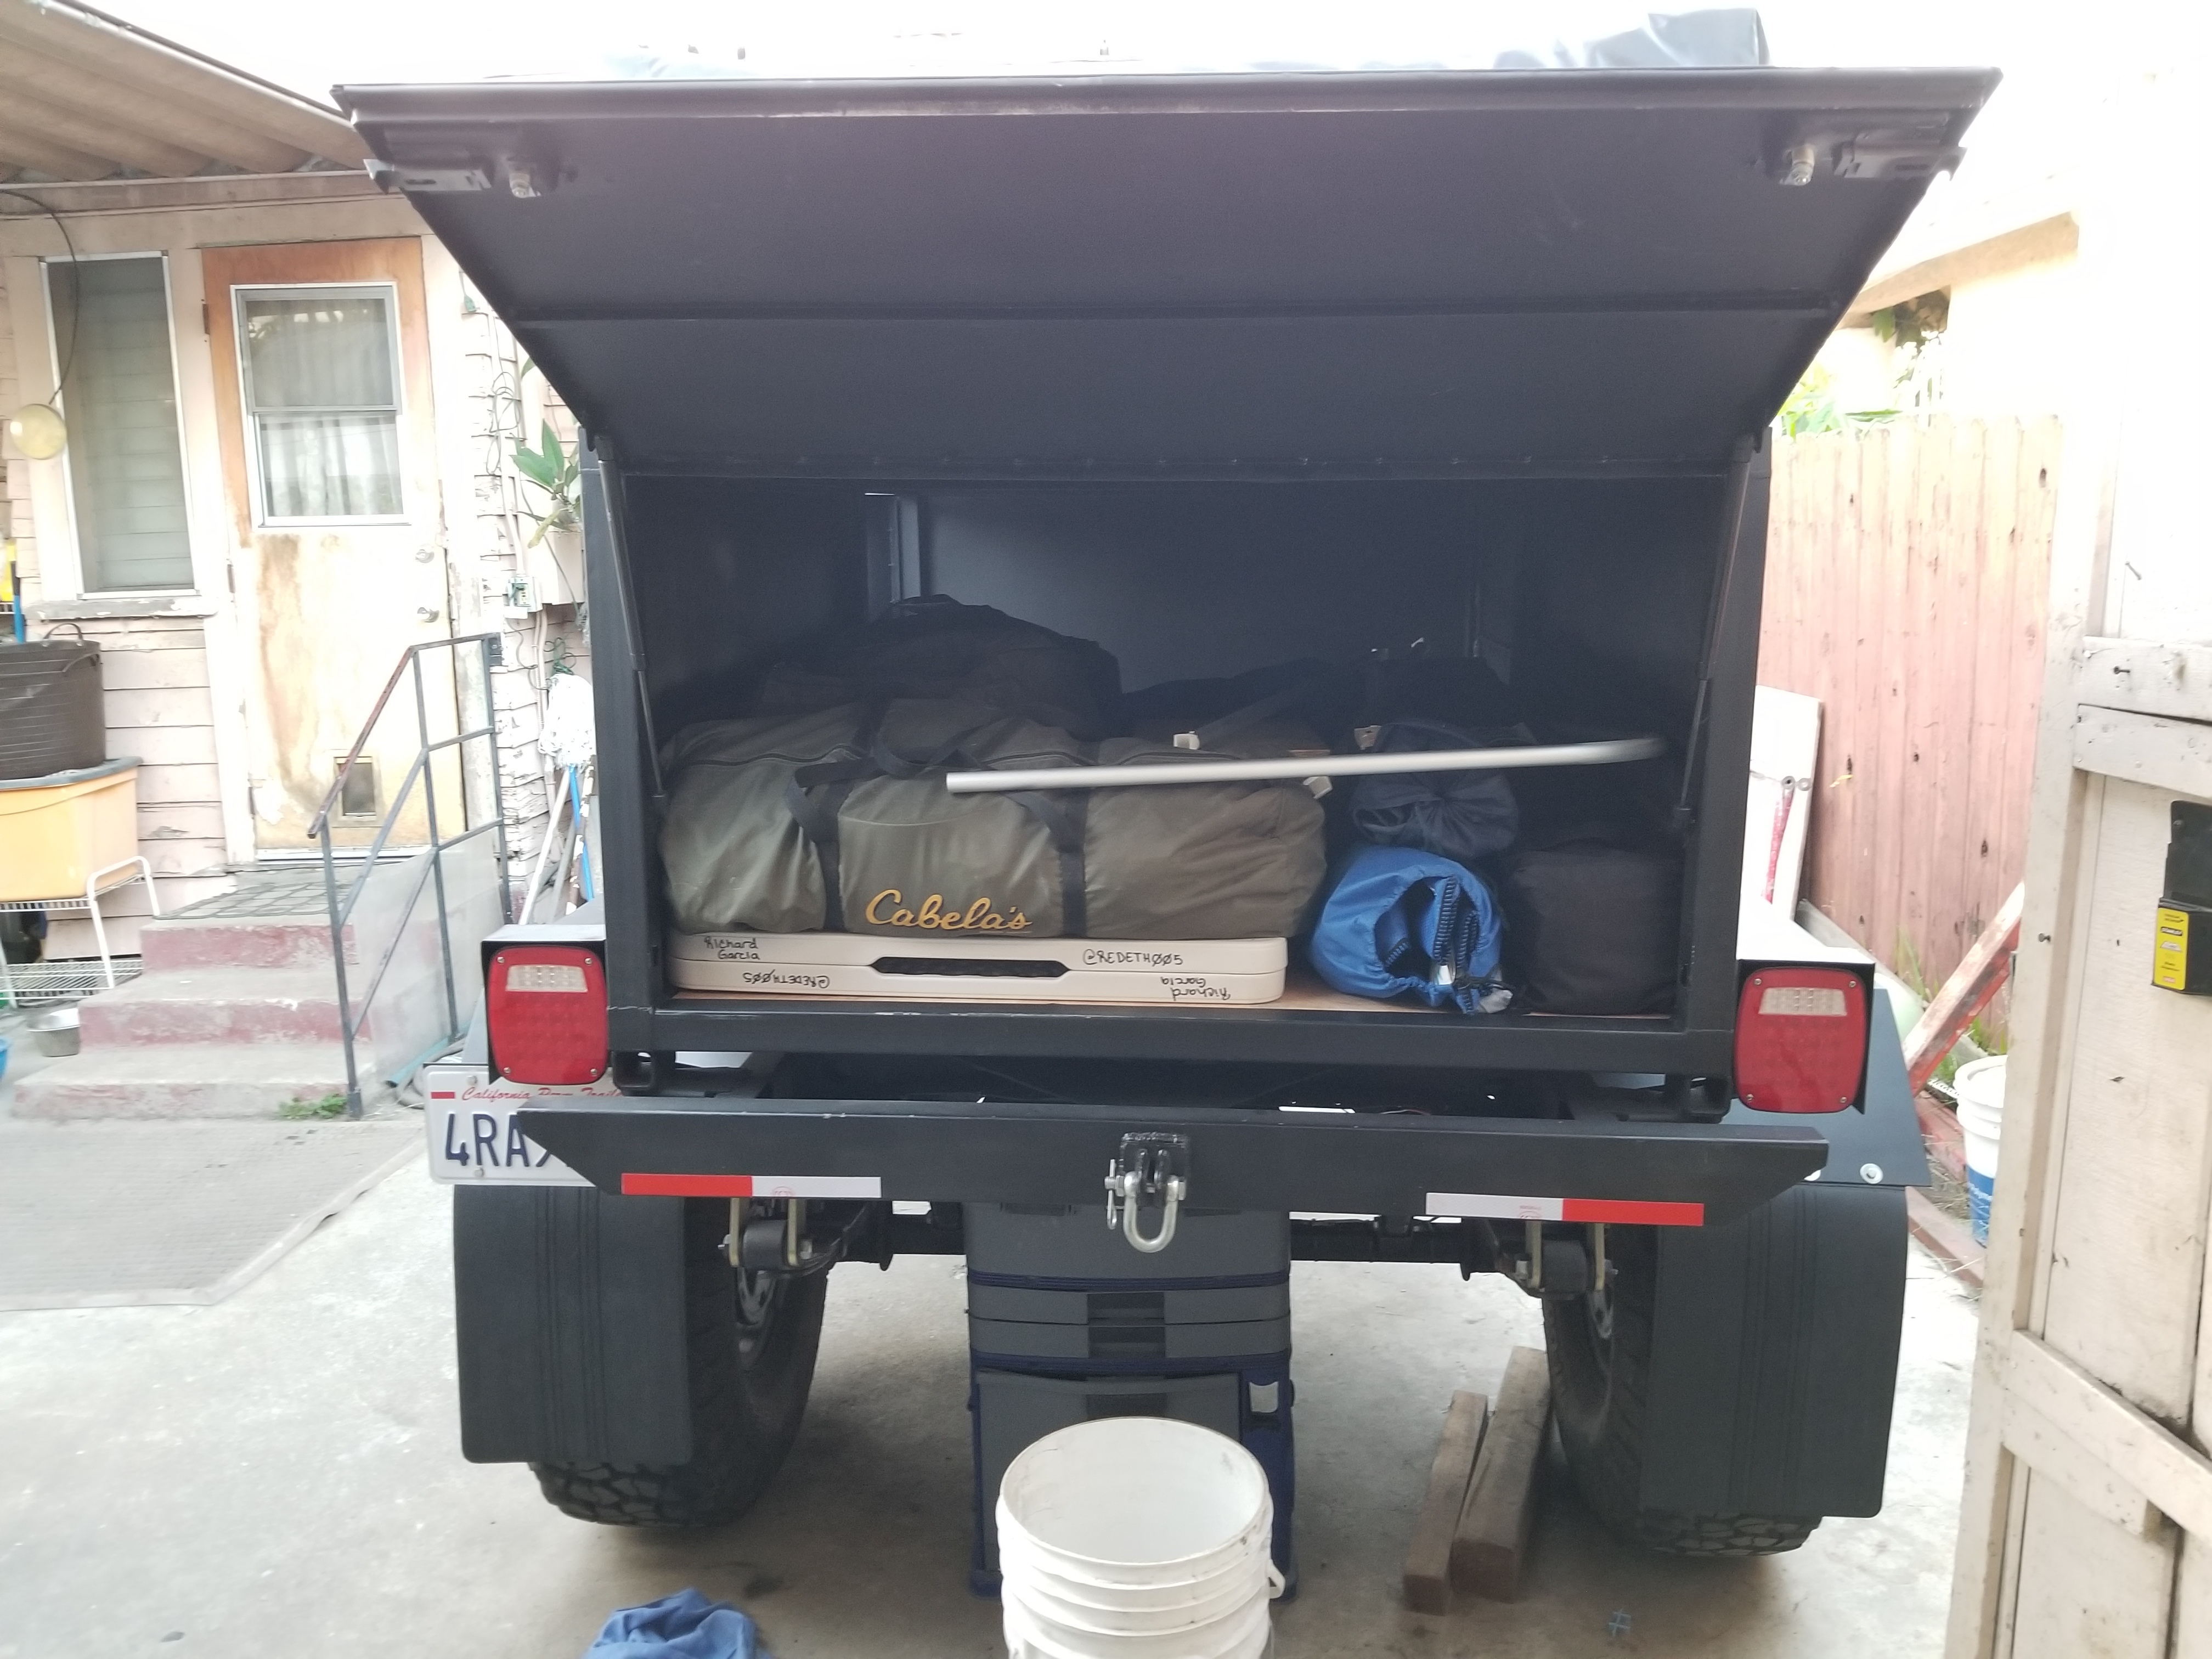
Cooler slide out is done! All set for camping. Now all that is left on my to do list is to fabricate a propane tank holder/mount, install the Propex heatsource forced air heater to warm my cvt roof top tent. Install my @all4offroad rock lights, mount the solar panel and begin with electrical fuse block/wire harness and deep cycle battery bank.
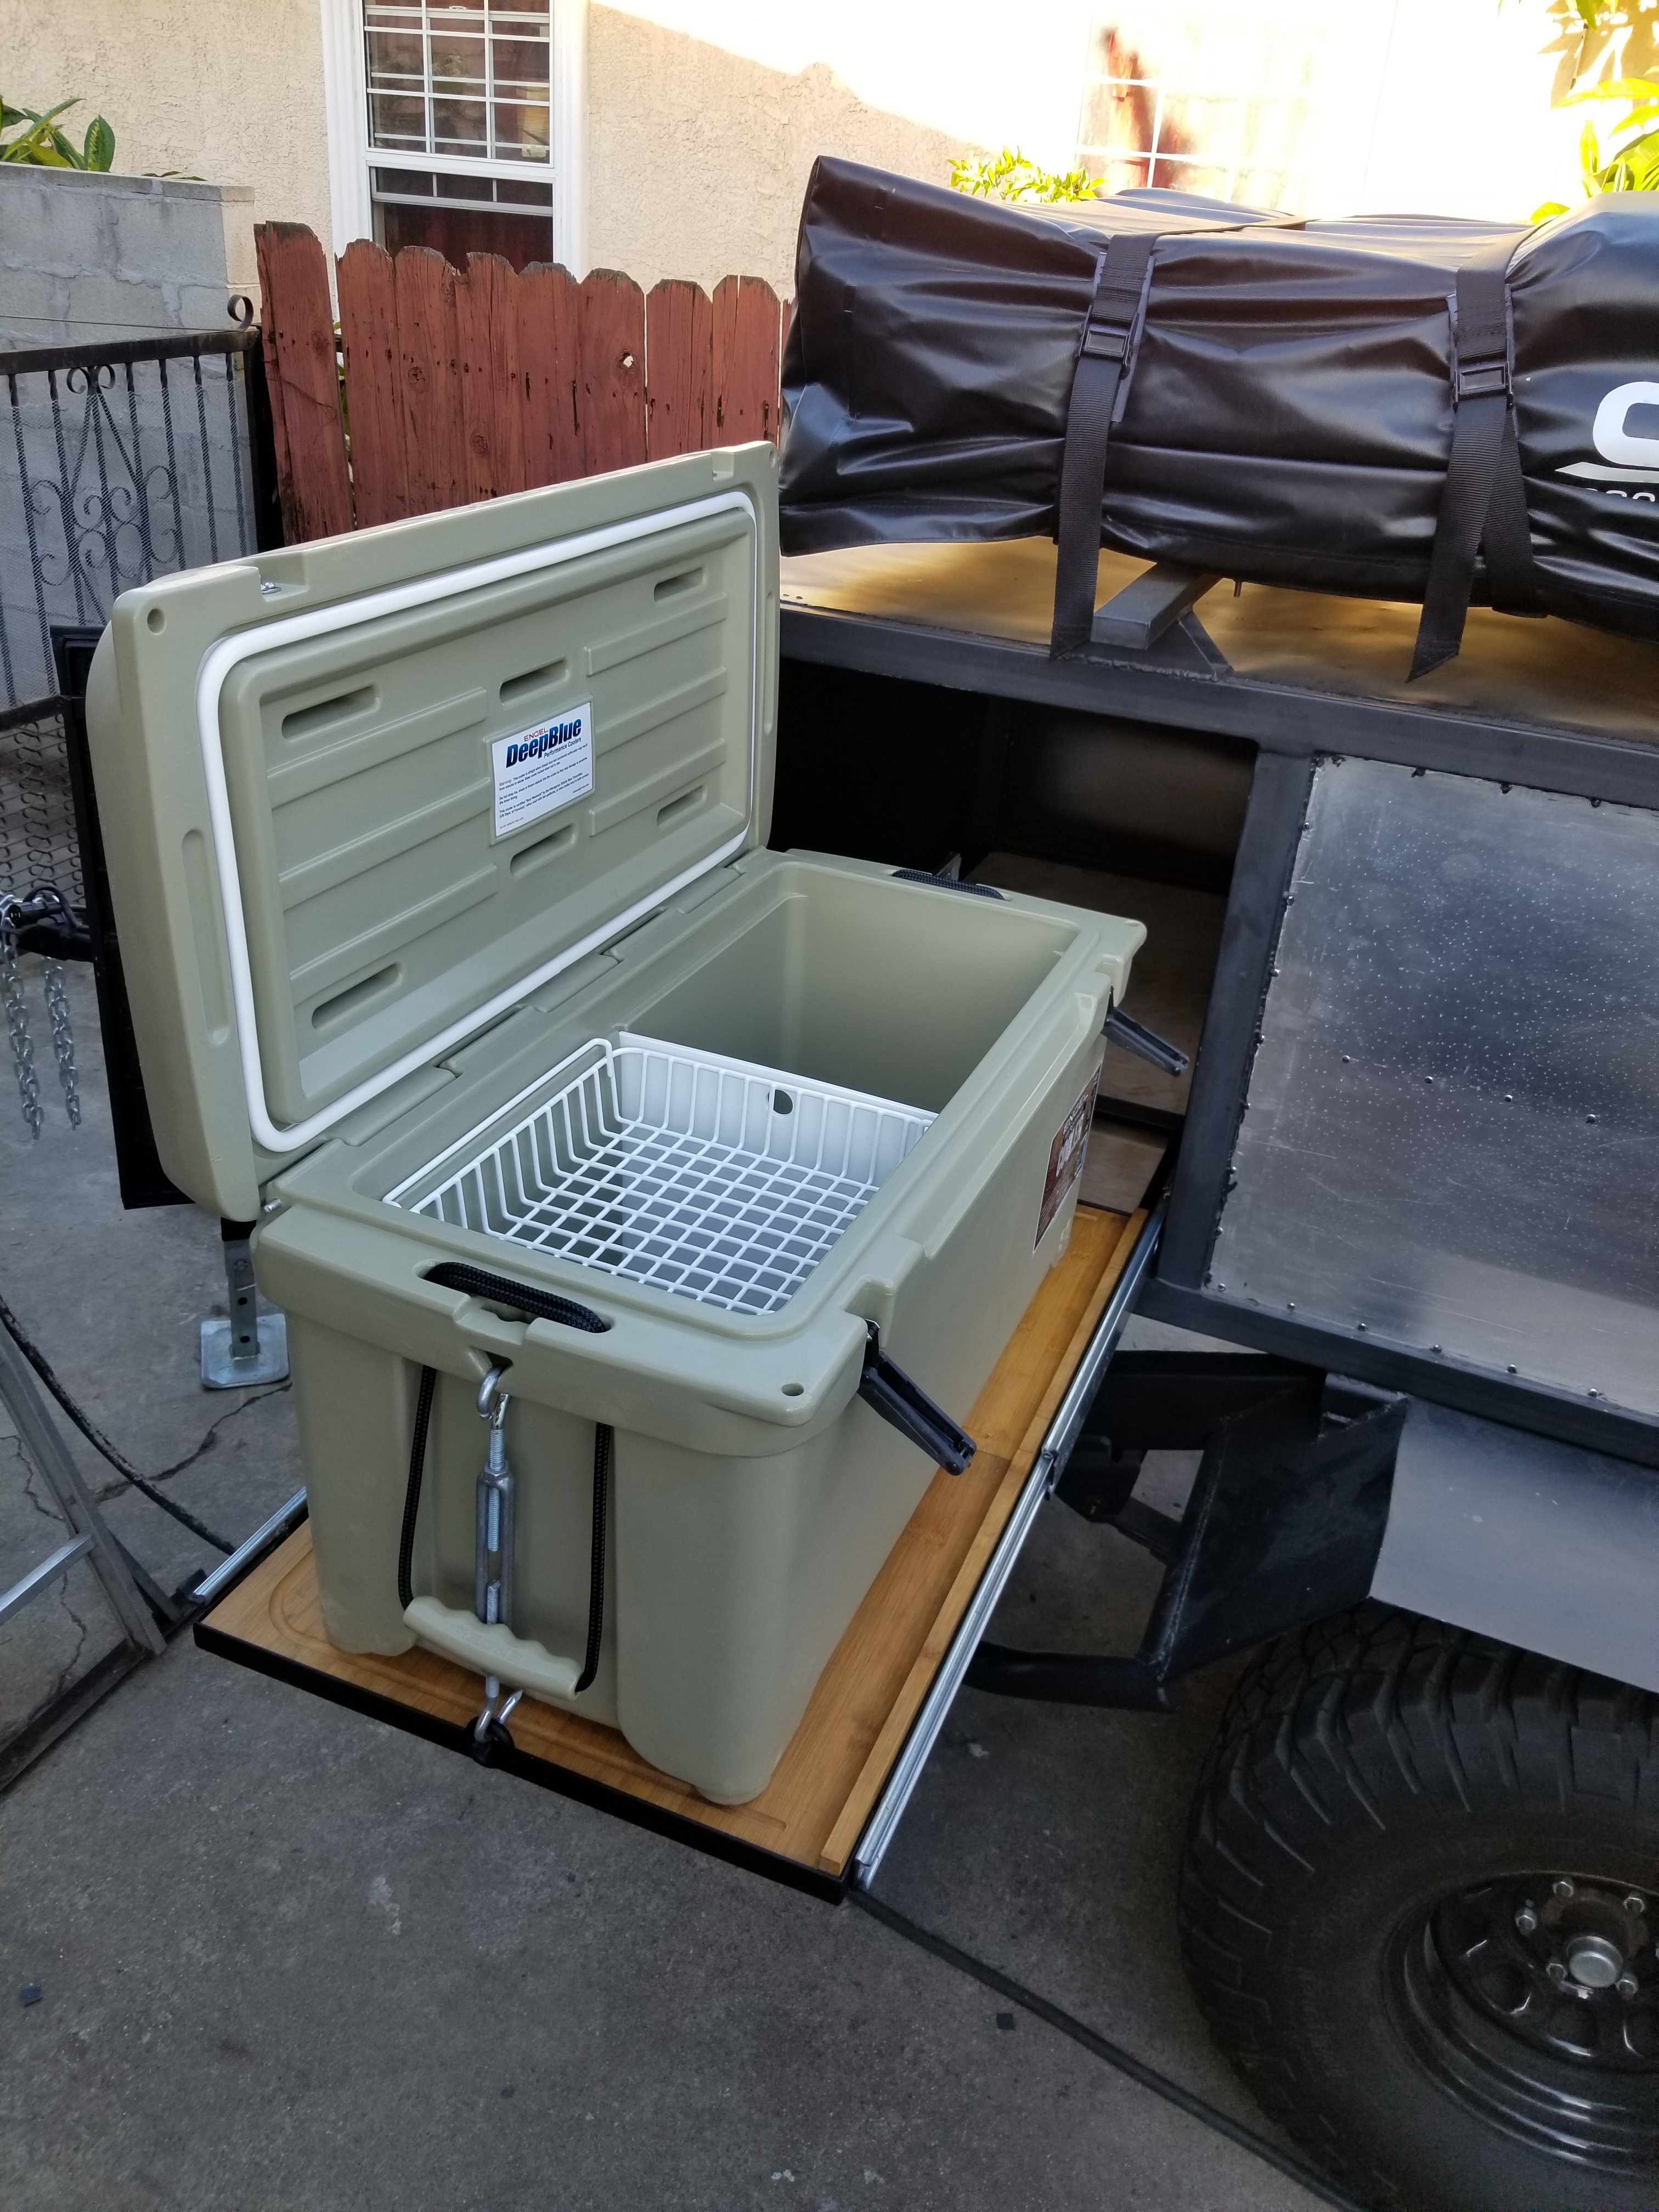
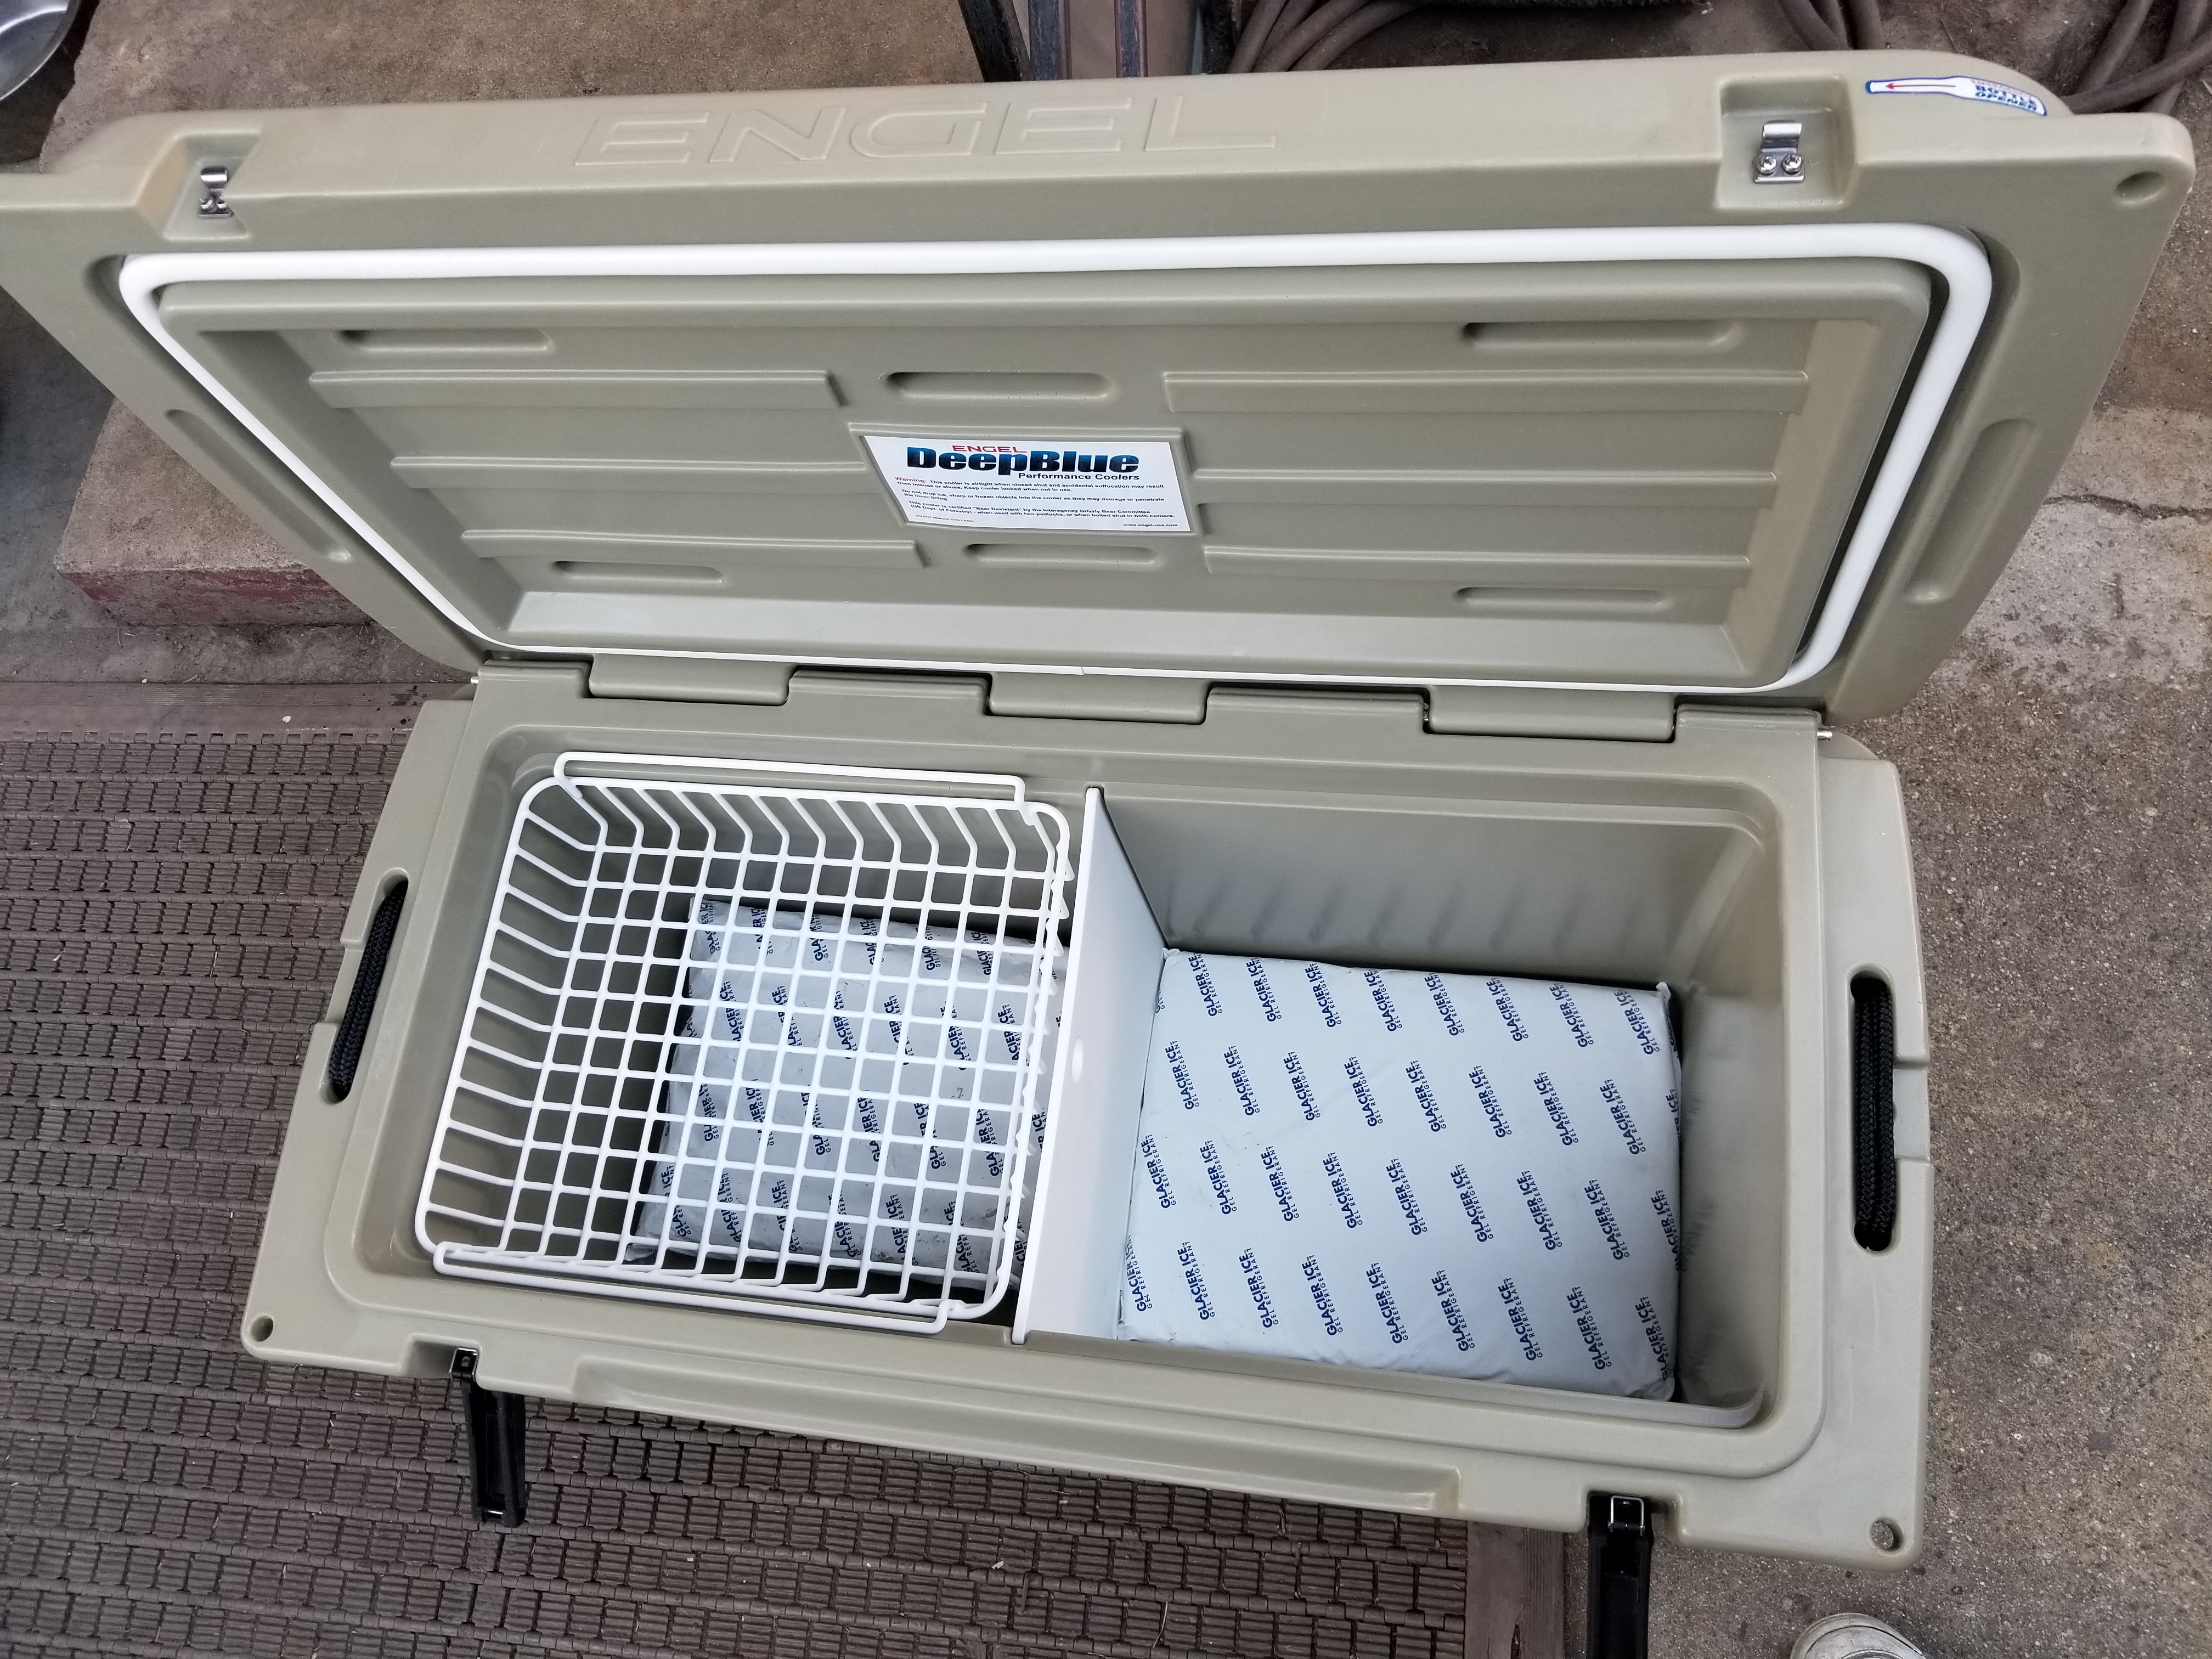
Not sure if any of you guys use BlueApron to order meals online that include everything you need to cook a delicious meal but these 14"�11�1.5" ice blocks that they ship your food with fit perfectly at the base of my 80qt Engel DeepBlue cooler.
I may be able to get away with just one small bag of ice to keep my food cool all throughout a weekend camping trip whenever that time comes.
Cooking station ✔ Check.
I have this awesome old-school Coleman 3 BURNER stove that runs off of coleman lantern fuel. My red Coleman road trip grill with cast iron grill top which runs off of small propane bottles and burns as hot as 20,000btu; I'll eventually have a nice hose to connect that grill to my future propane tank.
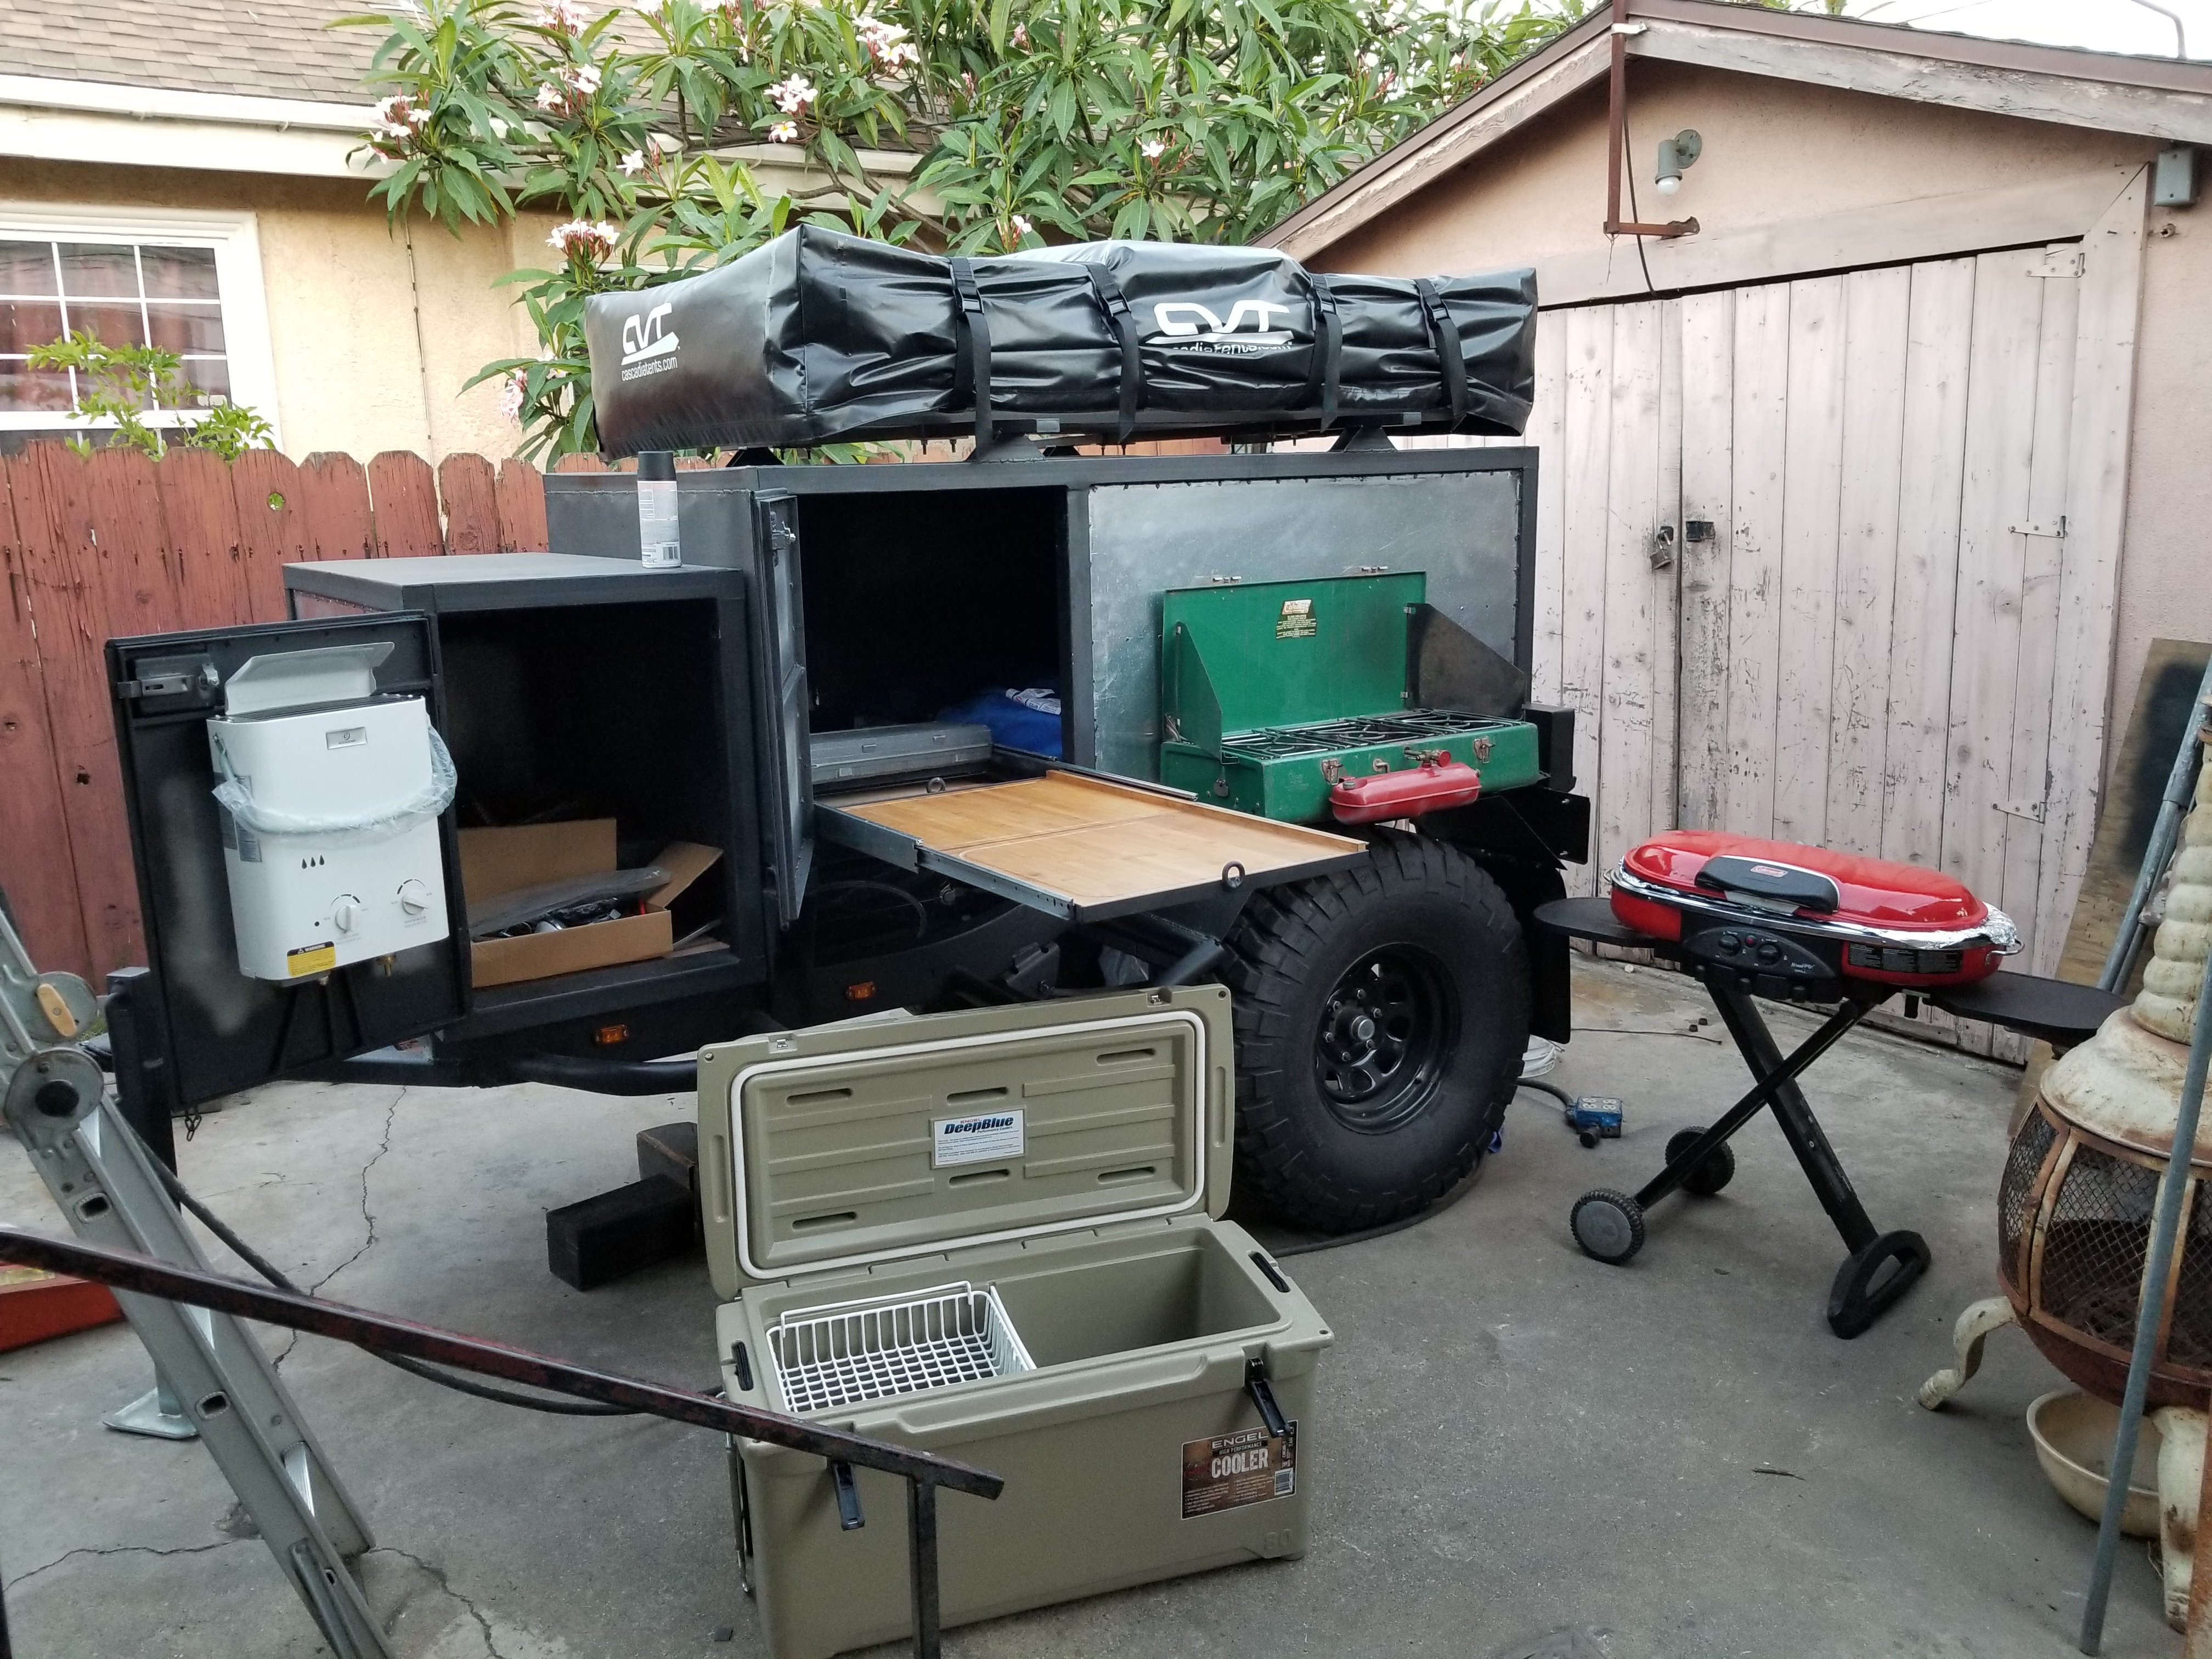
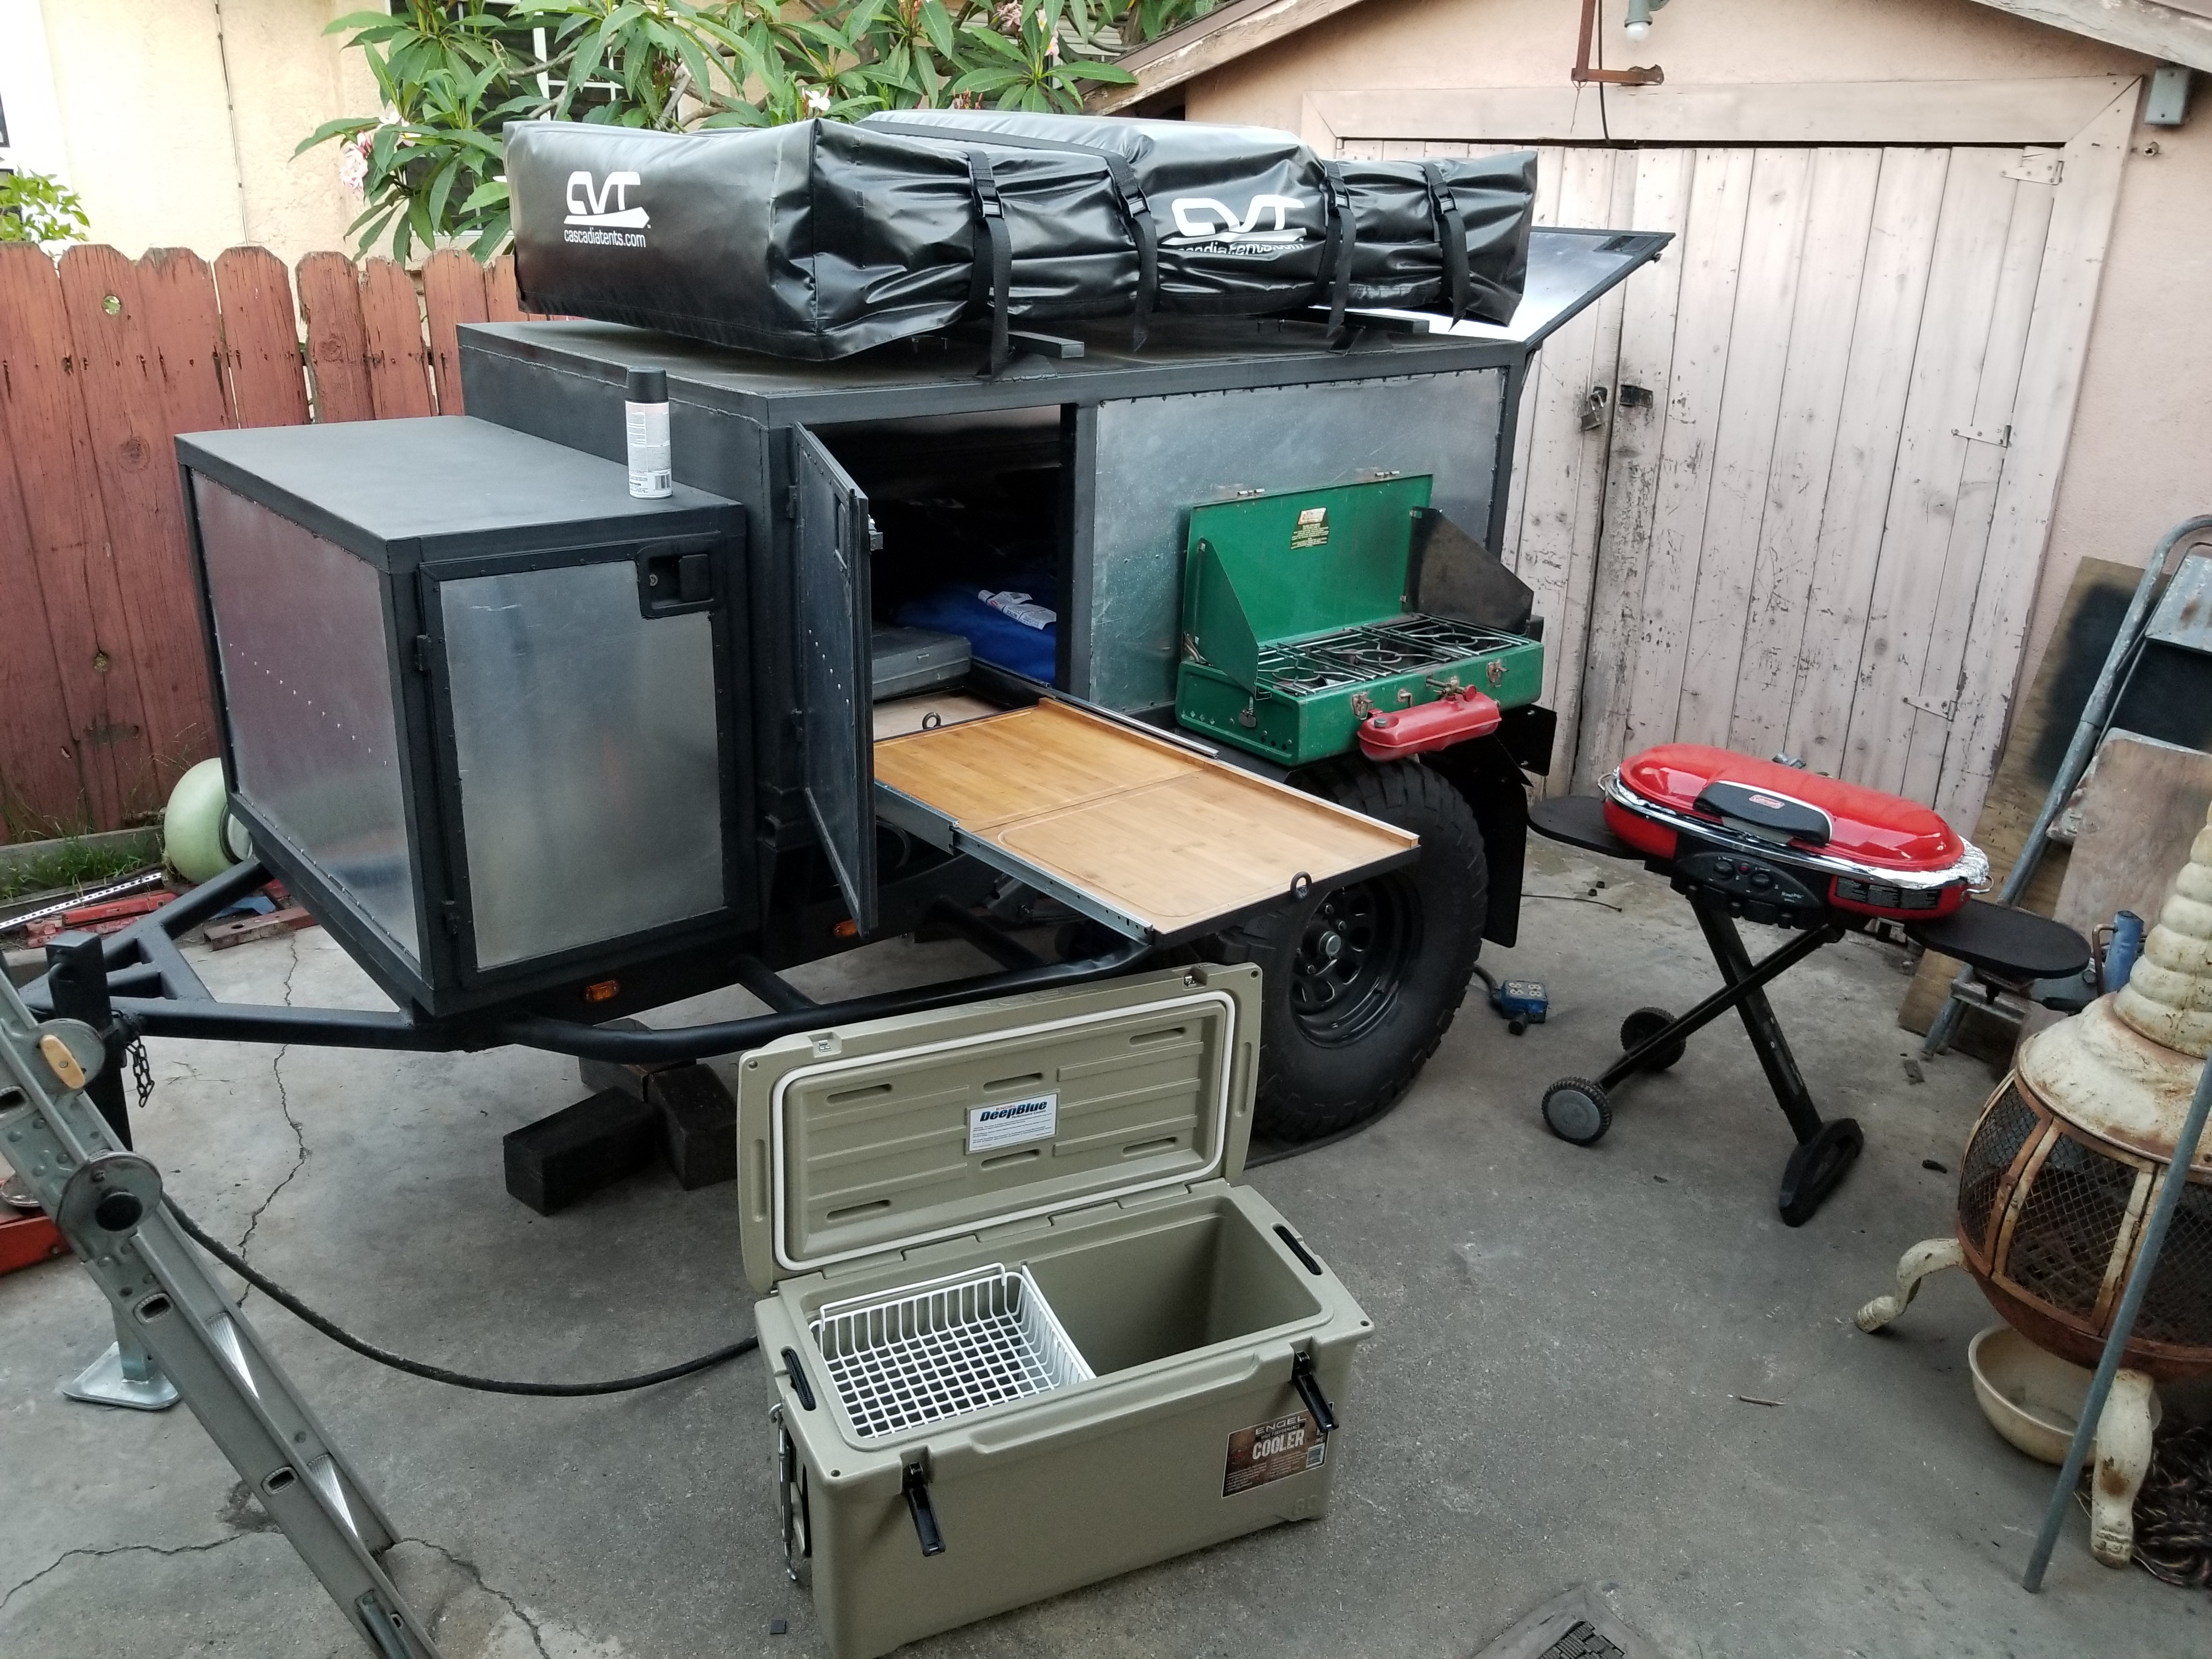
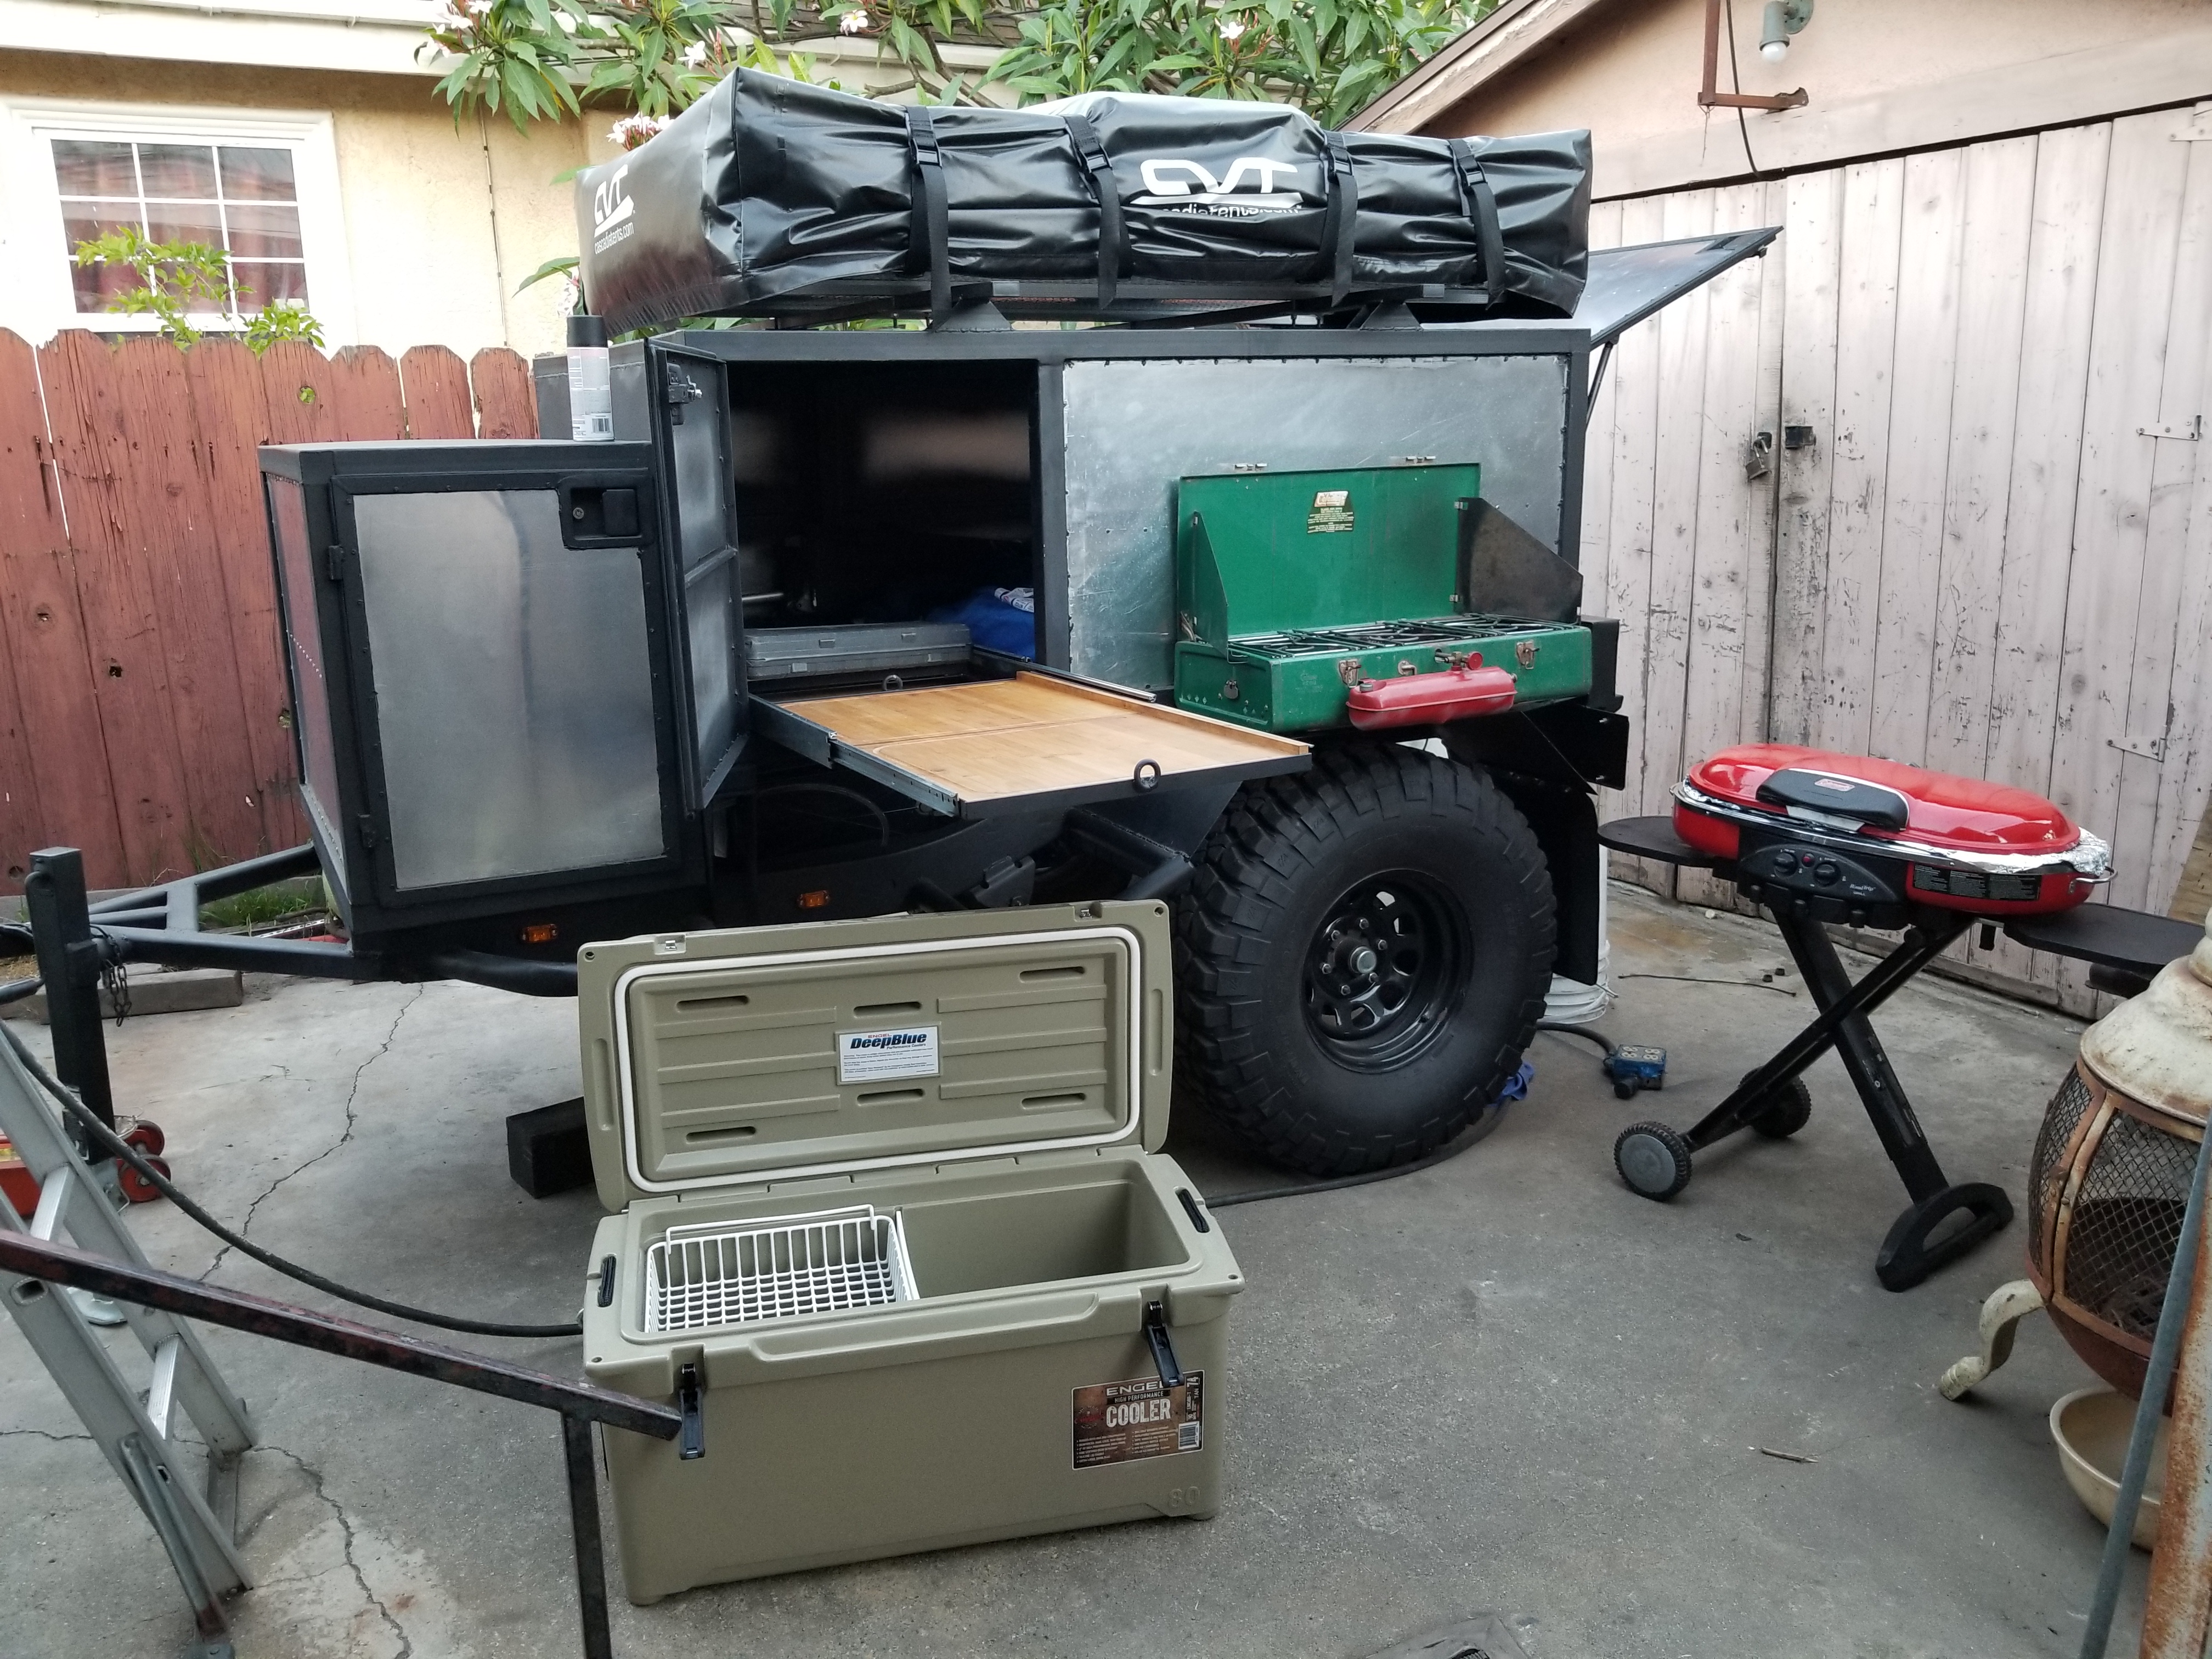
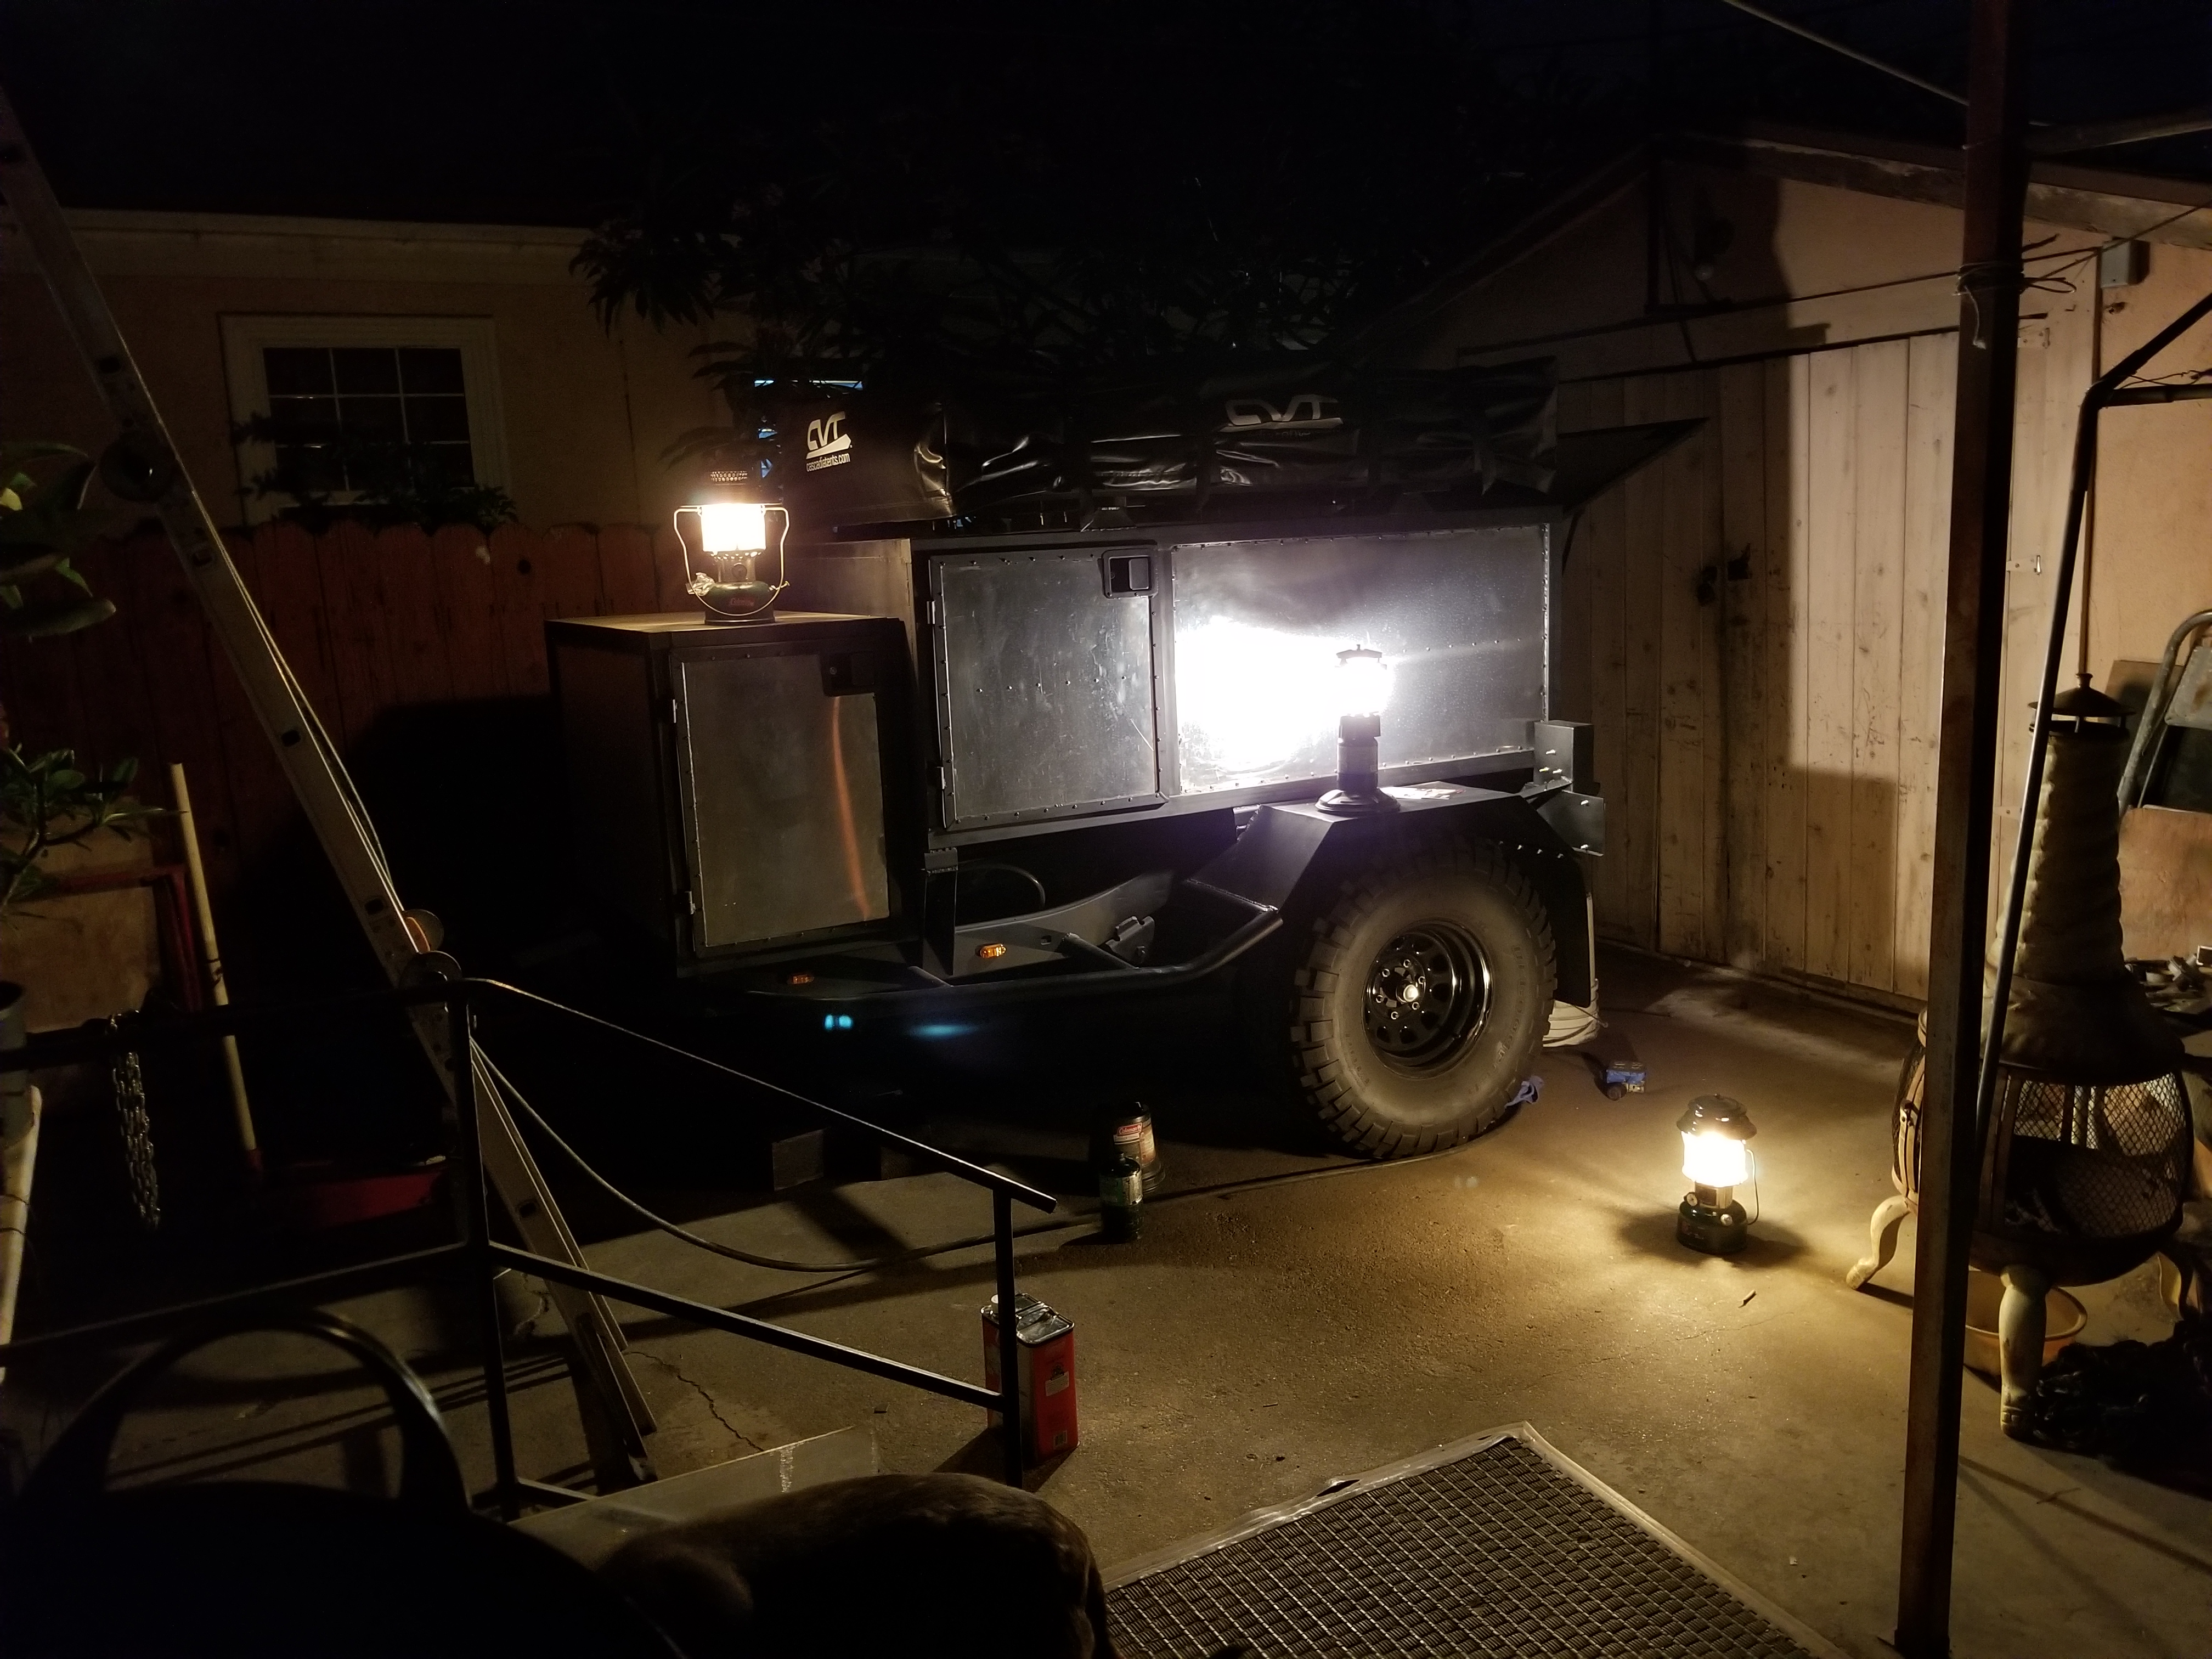
Great thing about having bare aluminum side walls is that you can use the wall as a reflector to enhance how much these Coleman lanterns will light up the camp ground. I found that the newer propane lanterns are much brighter then the old-school liquid fuel lanterns. But the propane ones won't last as long as the old-school ones. just FYI
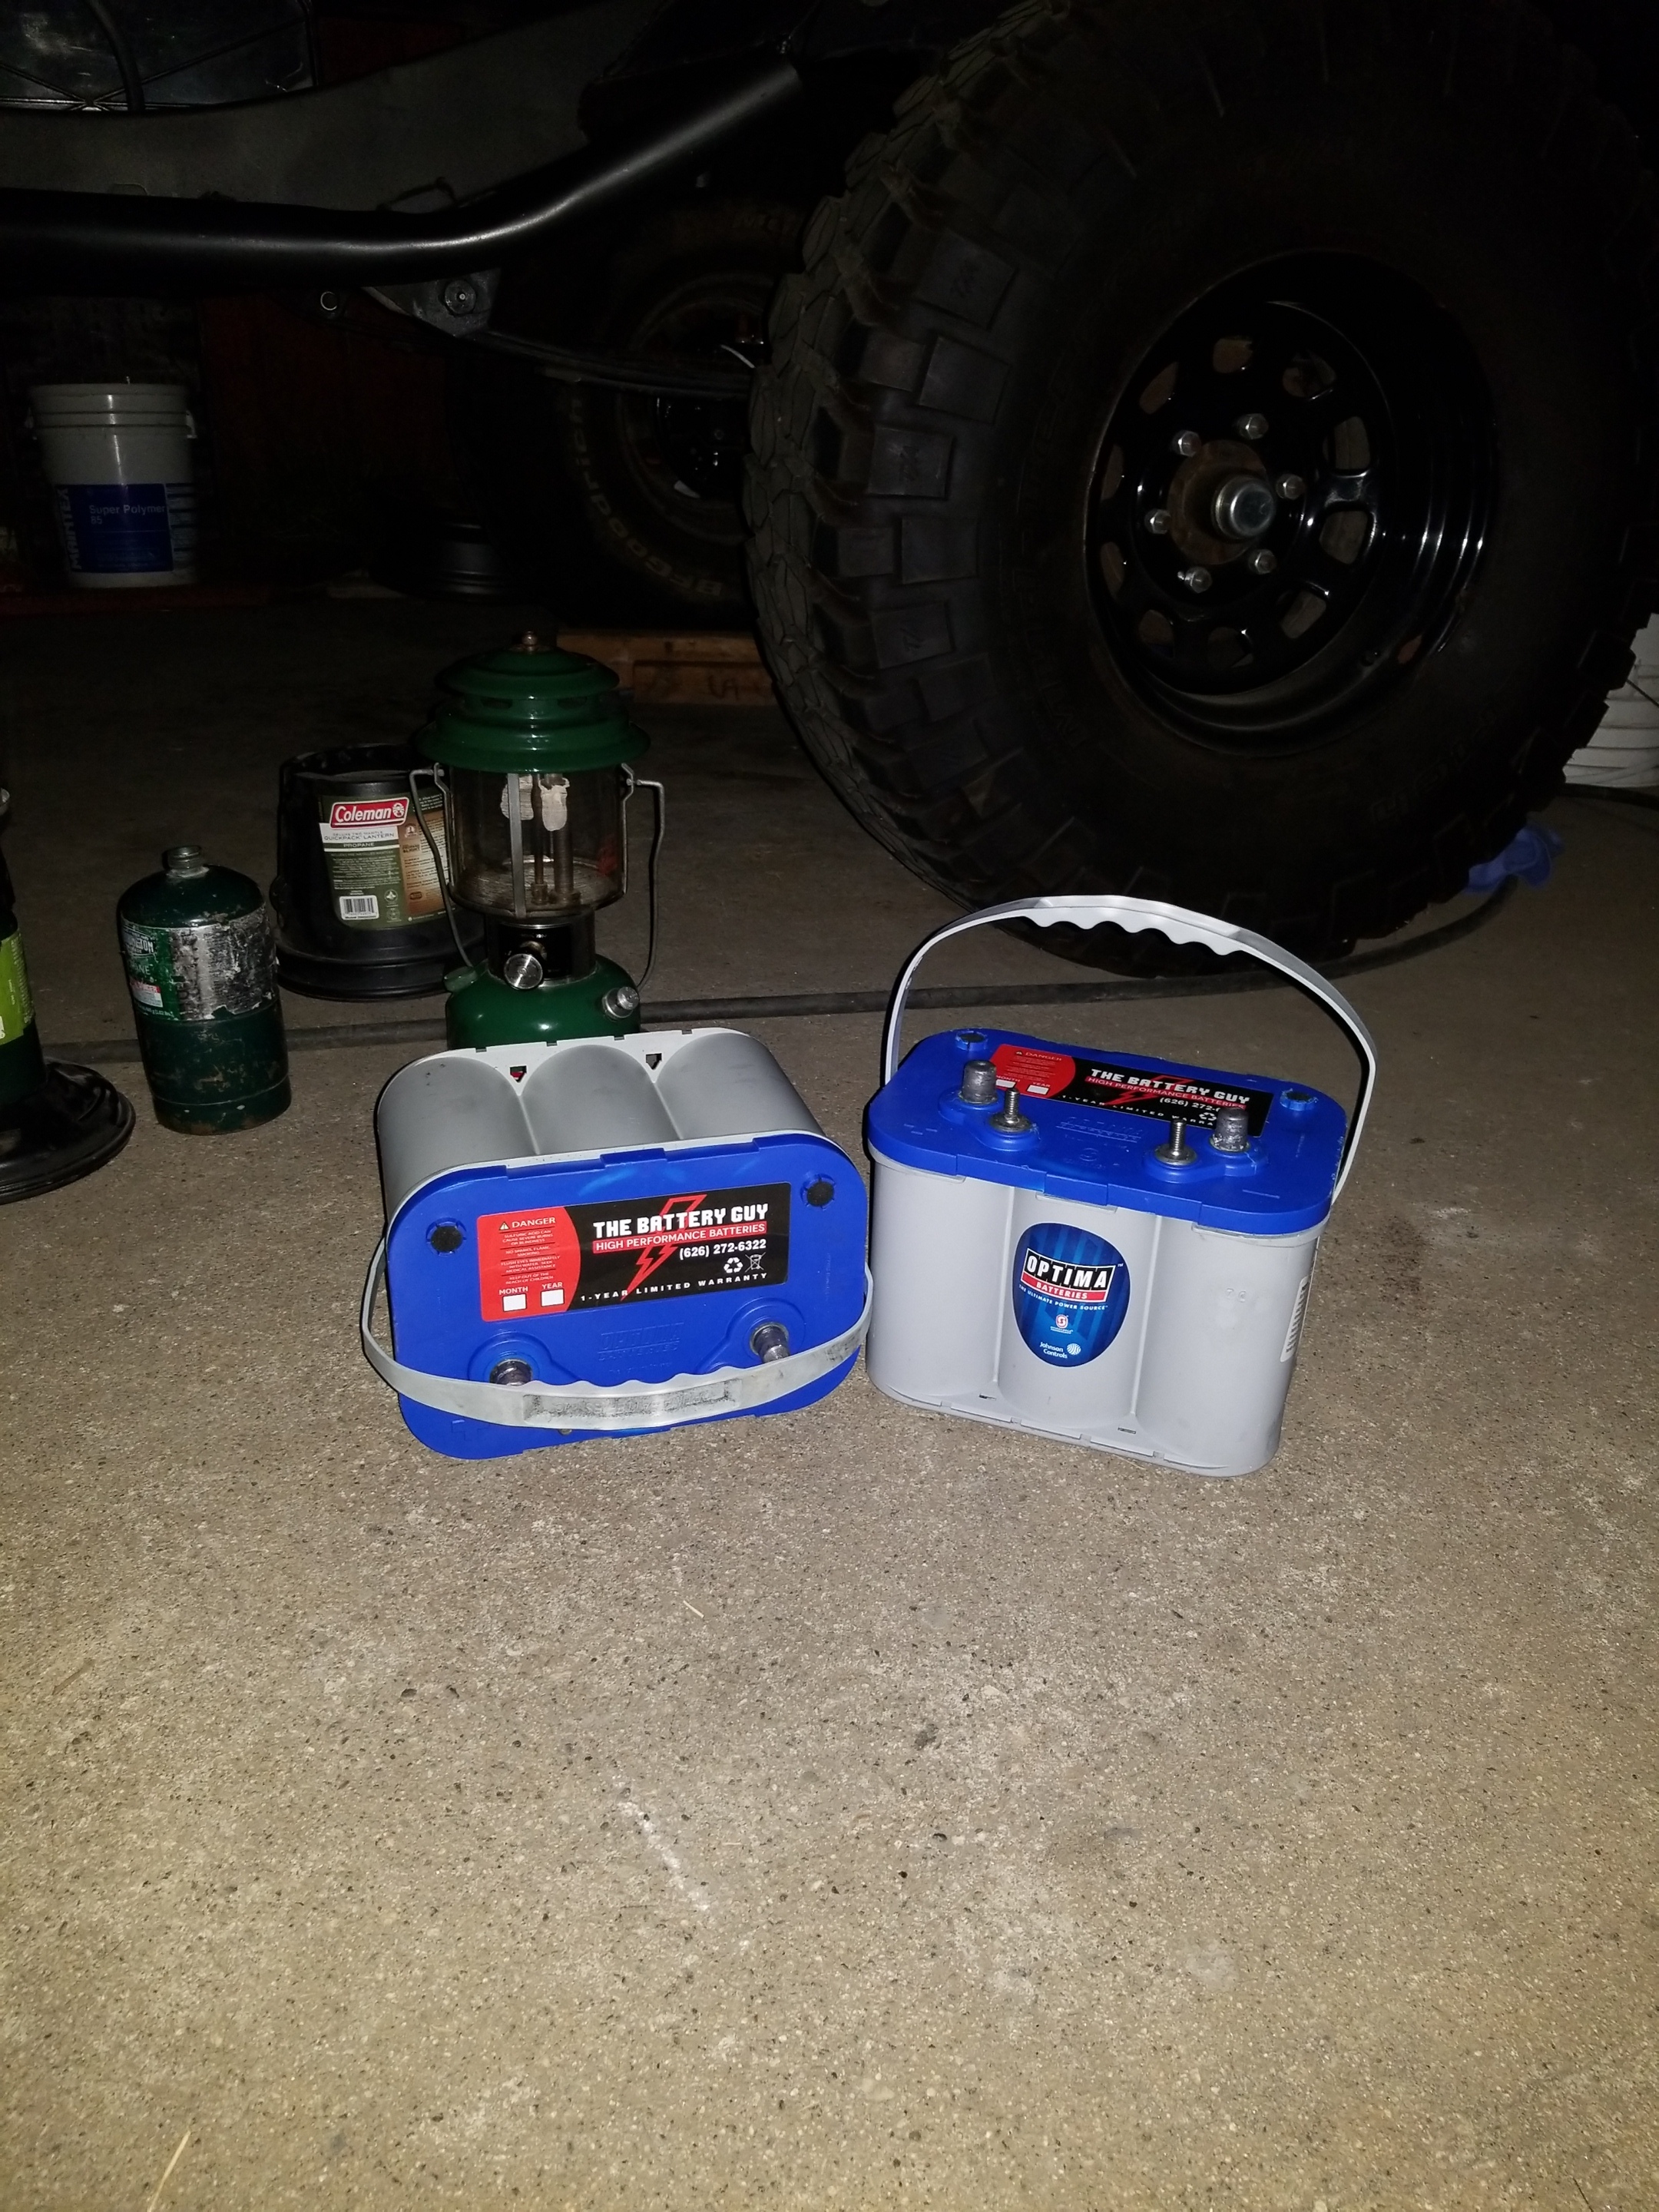
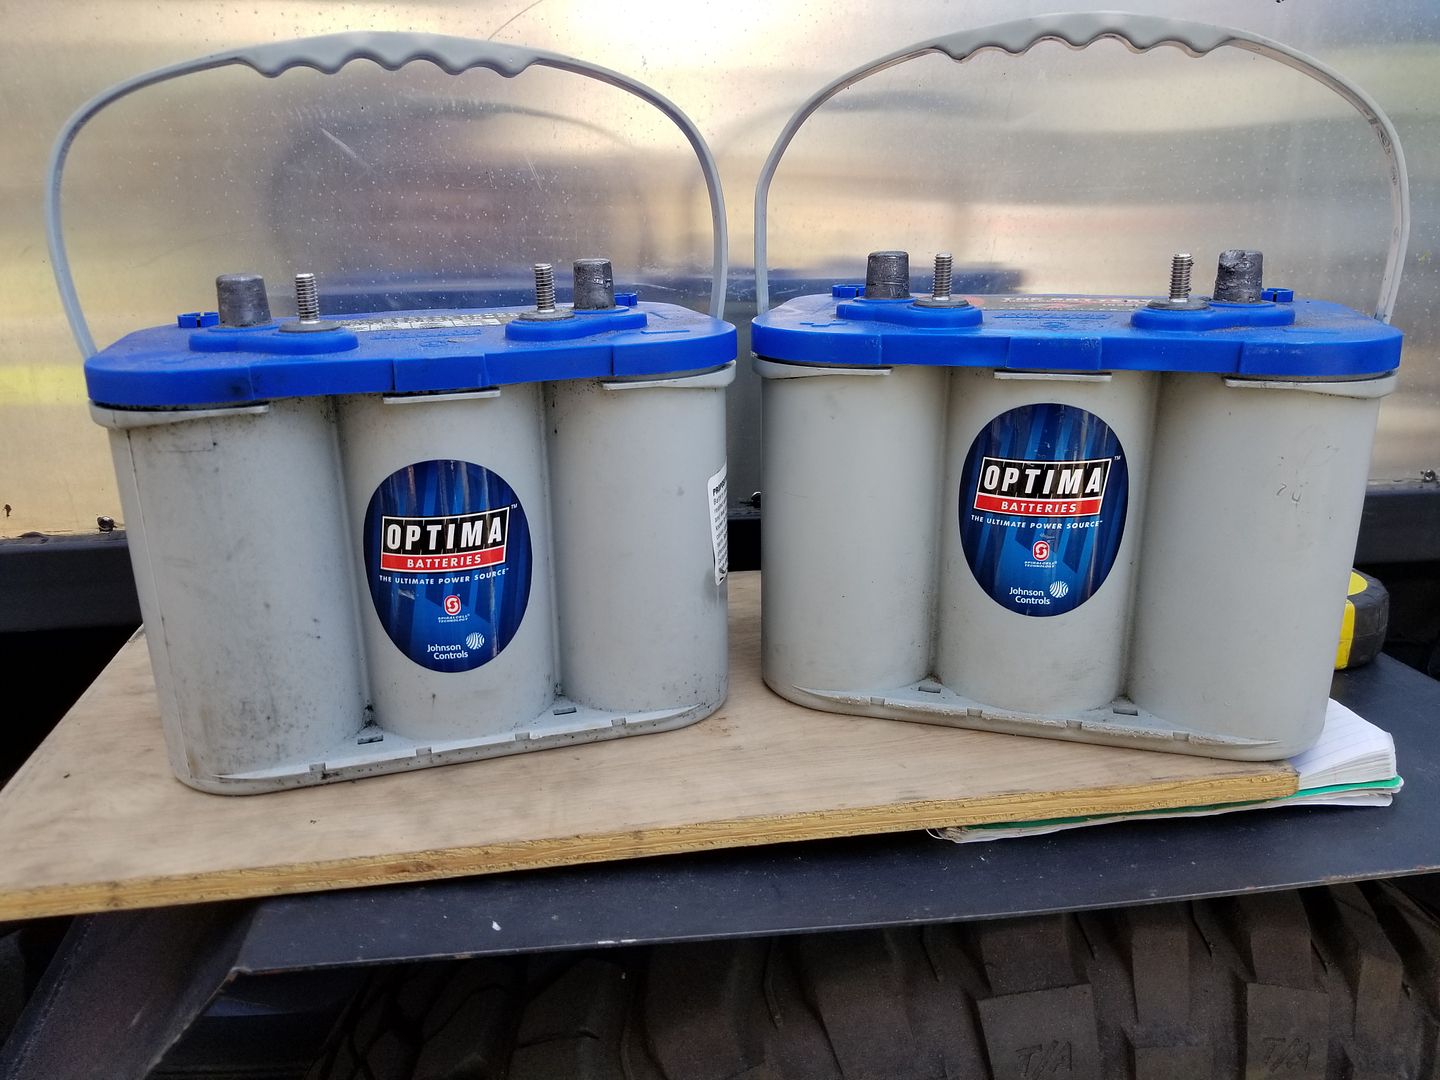
I picked up these 2 babies from a guy who sells blemish Optima batteries out of Long Beach CA. These are optima blue top batteries. He sells both blue and yellow top batteries for 120 each or 220 a pair; with a 1 year warranty on all the batteries he sells. I scored both for 200 since that's all I had on me. Lol. But still a great deal considering it usually costs about $276 plus tax at a local autozone/o'reily auto parts for just 1 of these batteries. I had planned to only buy one. But i really don't want to take a chance at draining the battery past 50%. So 2 should be way more then enough for the applications i plan to run. With my 100watt solar panel and the 12v charging wire going from my 4runner's 7pin tow wire harness I'm sure i will be plenty to keep by batteries charged.


Not sure if any of you guys use BlueApron to order meals online that include everything you need to cook a delicious meal but these 14"�11�1.5" ice blocks that they ship your food with fit perfectly at the base of my 80qt Engel DeepBlue cooler.
I may be able to get away with just one small bag of ice to keep my food cool all throughout a weekend camping trip whenever that time comes.

Cooking station ✔ Check.
I have this awesome old-school Coleman 3 BURNER stove that runs off of coleman lantern fuel. My red Coleman road trip grill with cast iron grill top which runs off of small propane bottles and burns as hot as 20,000btu; I'll eventually have a nice hose to connect that grill to my future propane tank.


Great thing about having bare aluminum side walls is that you can use the wall as a reflector to enhance how much these Coleman lanterns will light up the camp ground. I found that the newer propane lanterns are much brighter then the old-school liquid fuel lanterns. But the propane ones won't last as long as the old-school ones. just FYI

I picked up these 2 babies from a guy who sells blemish Optima batteries out of Long Beach CA. These are optima blue top batteries. He sells both blue and yellow top batteries for 120 each or 220 a pair; with a 1 year warranty on all the batteries he sells. I scored both for 200 since that's all I had on me. Lol. But still a great deal considering it usually costs about $276 plus tax at a local autozone/o'reily auto parts for just 1 of these batteries. I had planned to only buy one. But i really don't want to take a chance at draining the battery past 50%. So 2 should be way more then enough for the applications i plan to run. With my 100watt solar panel and the 12v charging wire going from my 4runner's 7pin tow wire harness I'm sure i will be plenty to keep by batteries charged.
 Jun 28, 2017 | 09:06 PM
#142
Thread Starter
Registered User
Joined: Apr 2012
Posts: 2,817
Likes: 2
From: Los Angeles CA
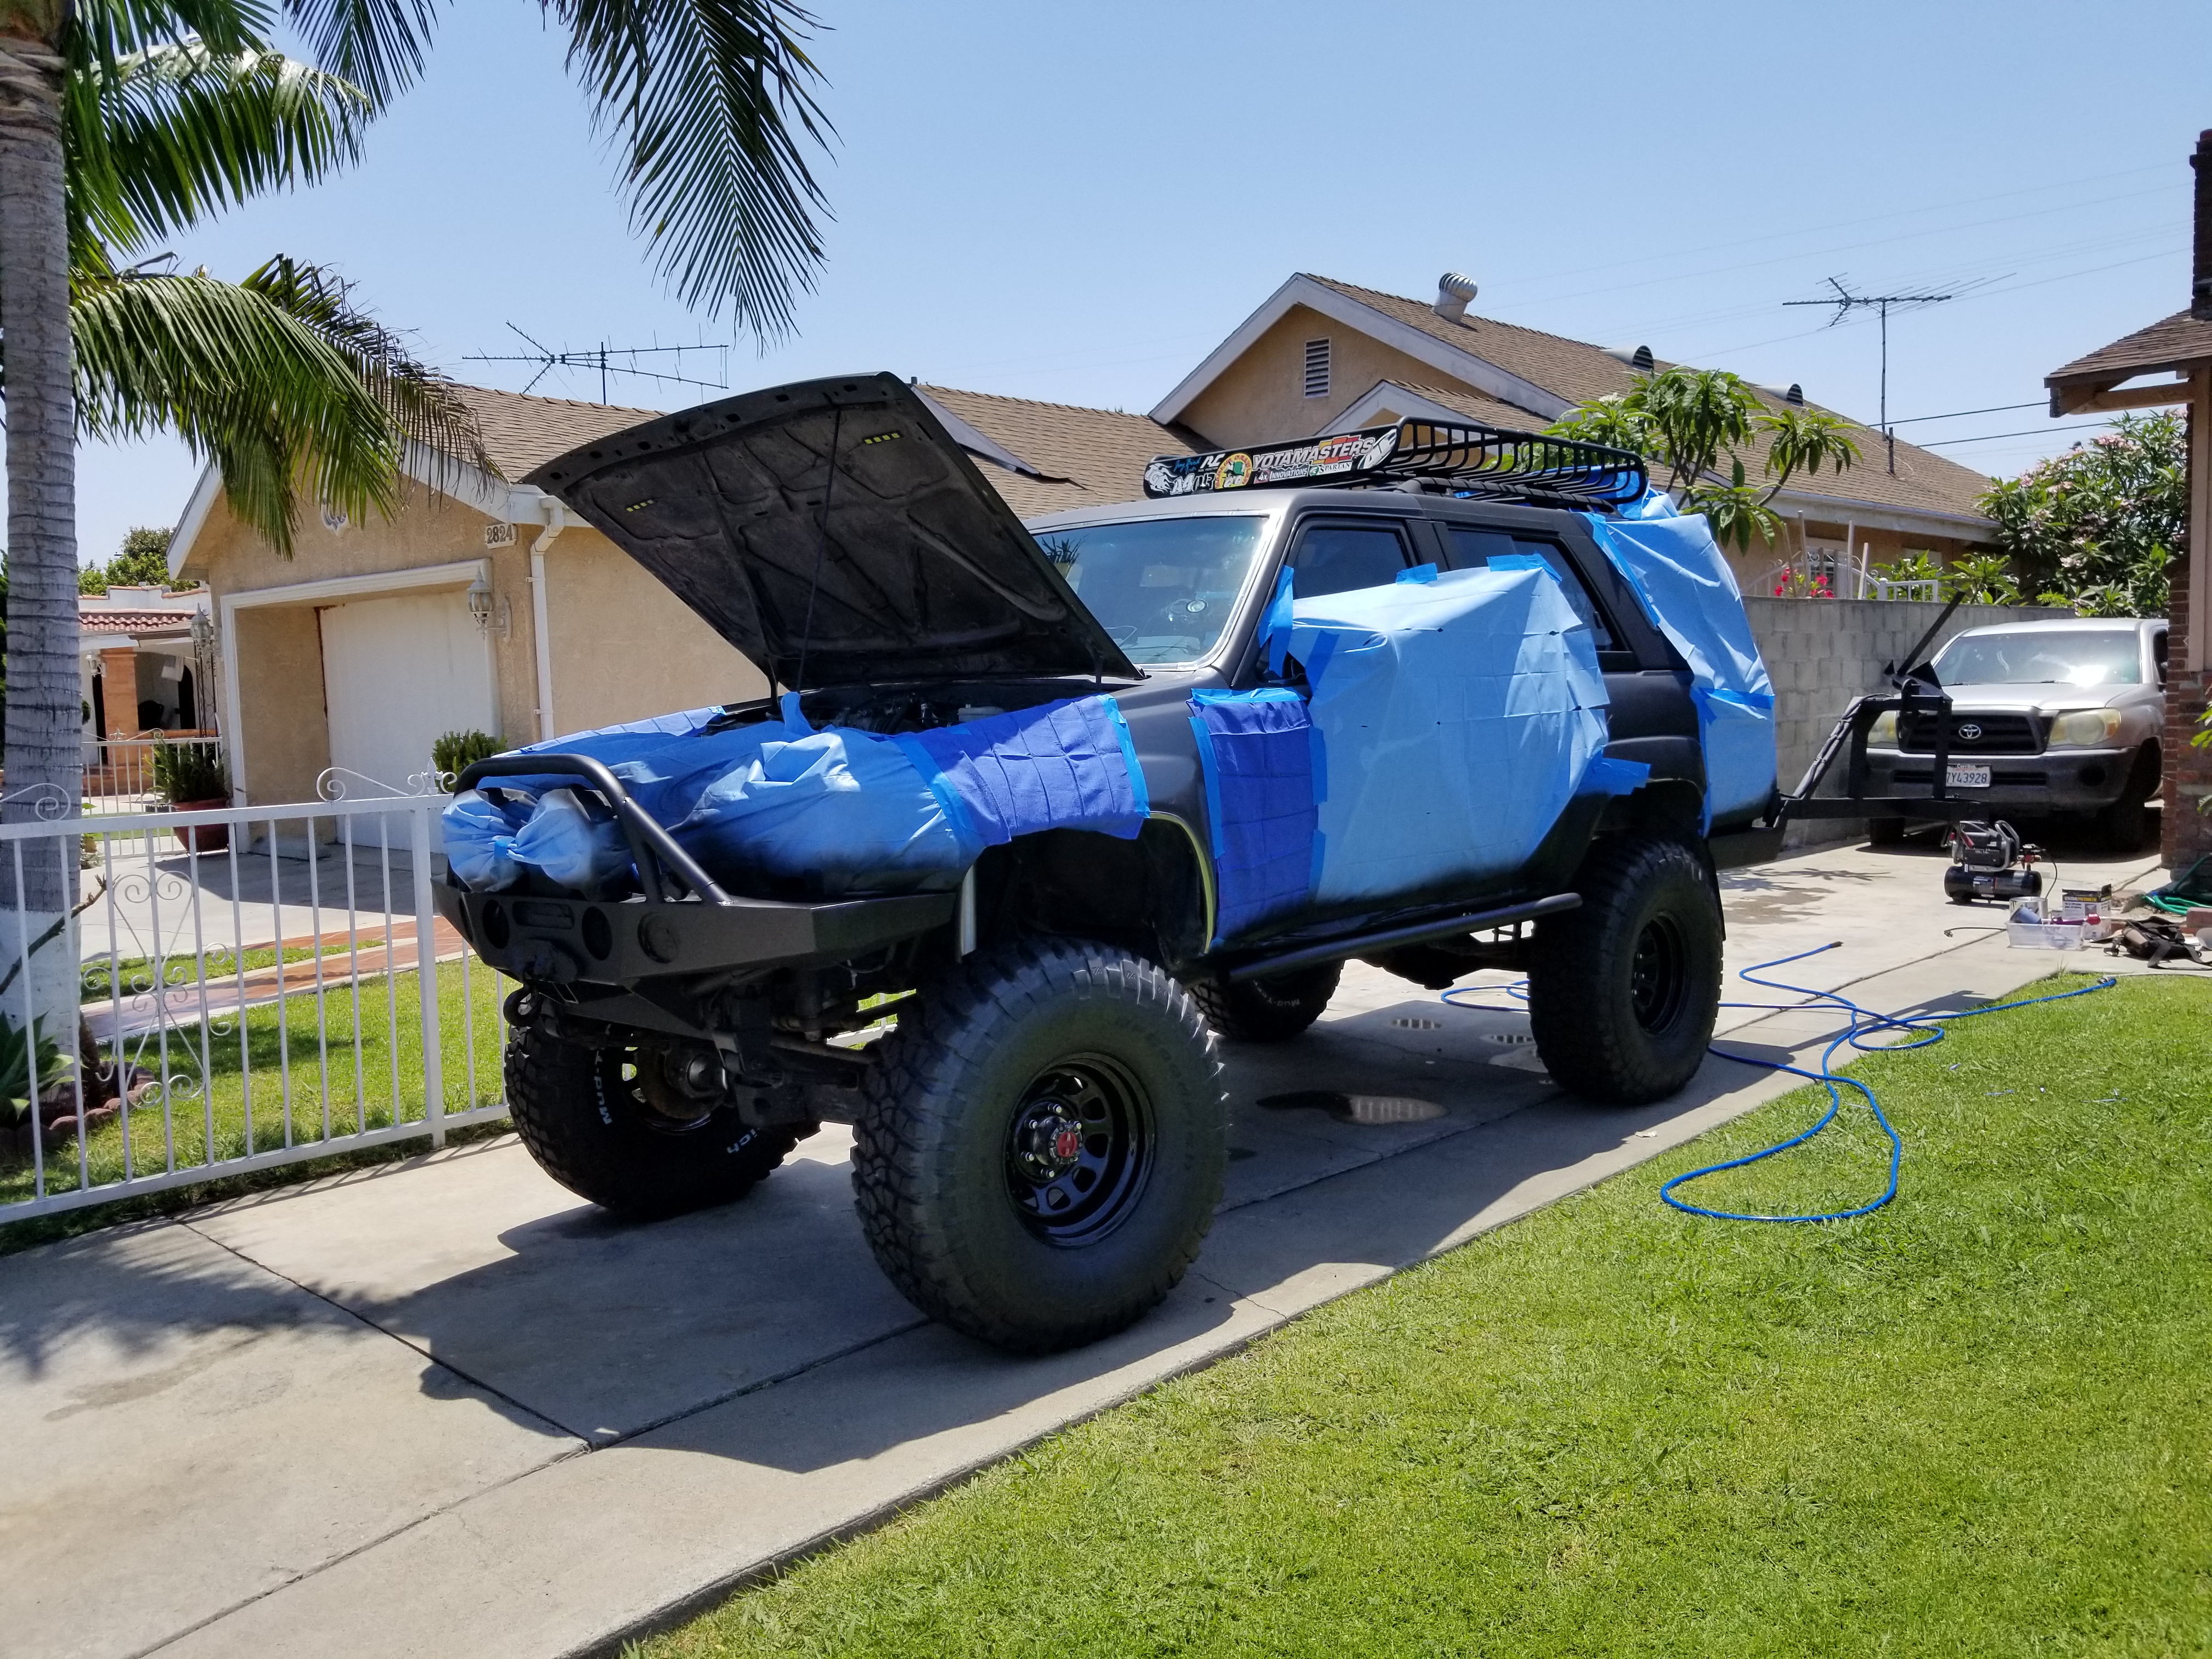
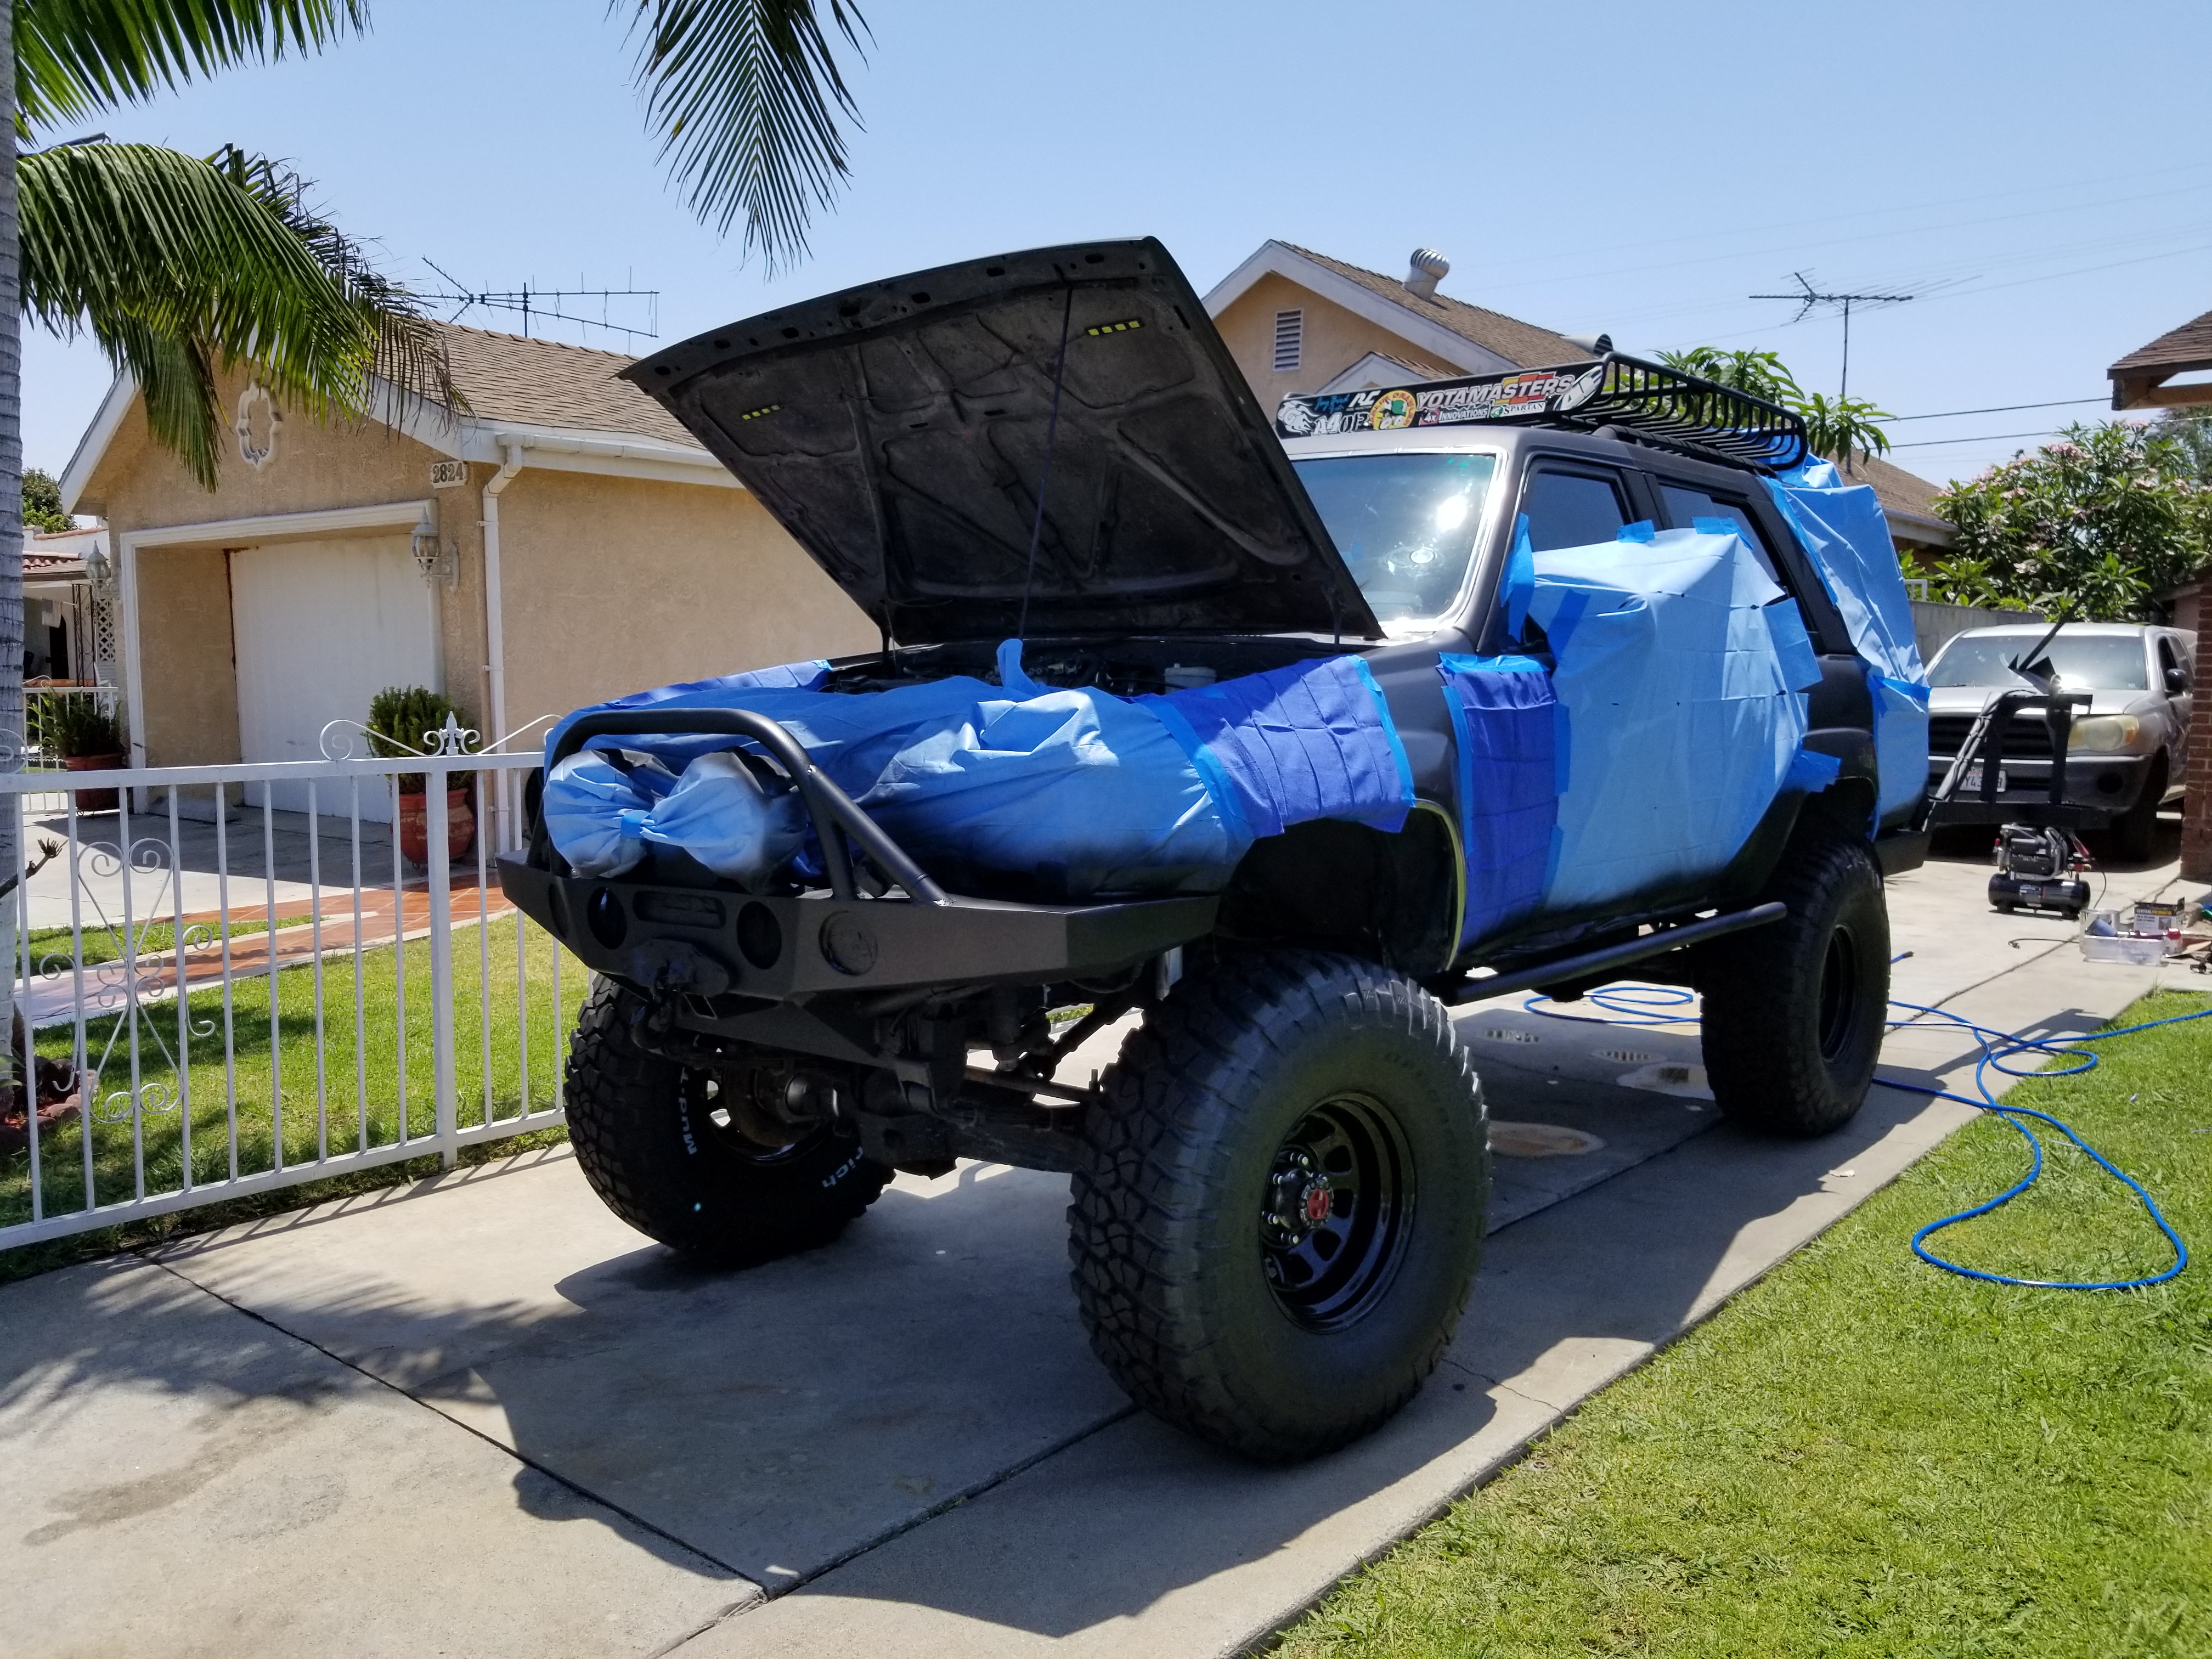
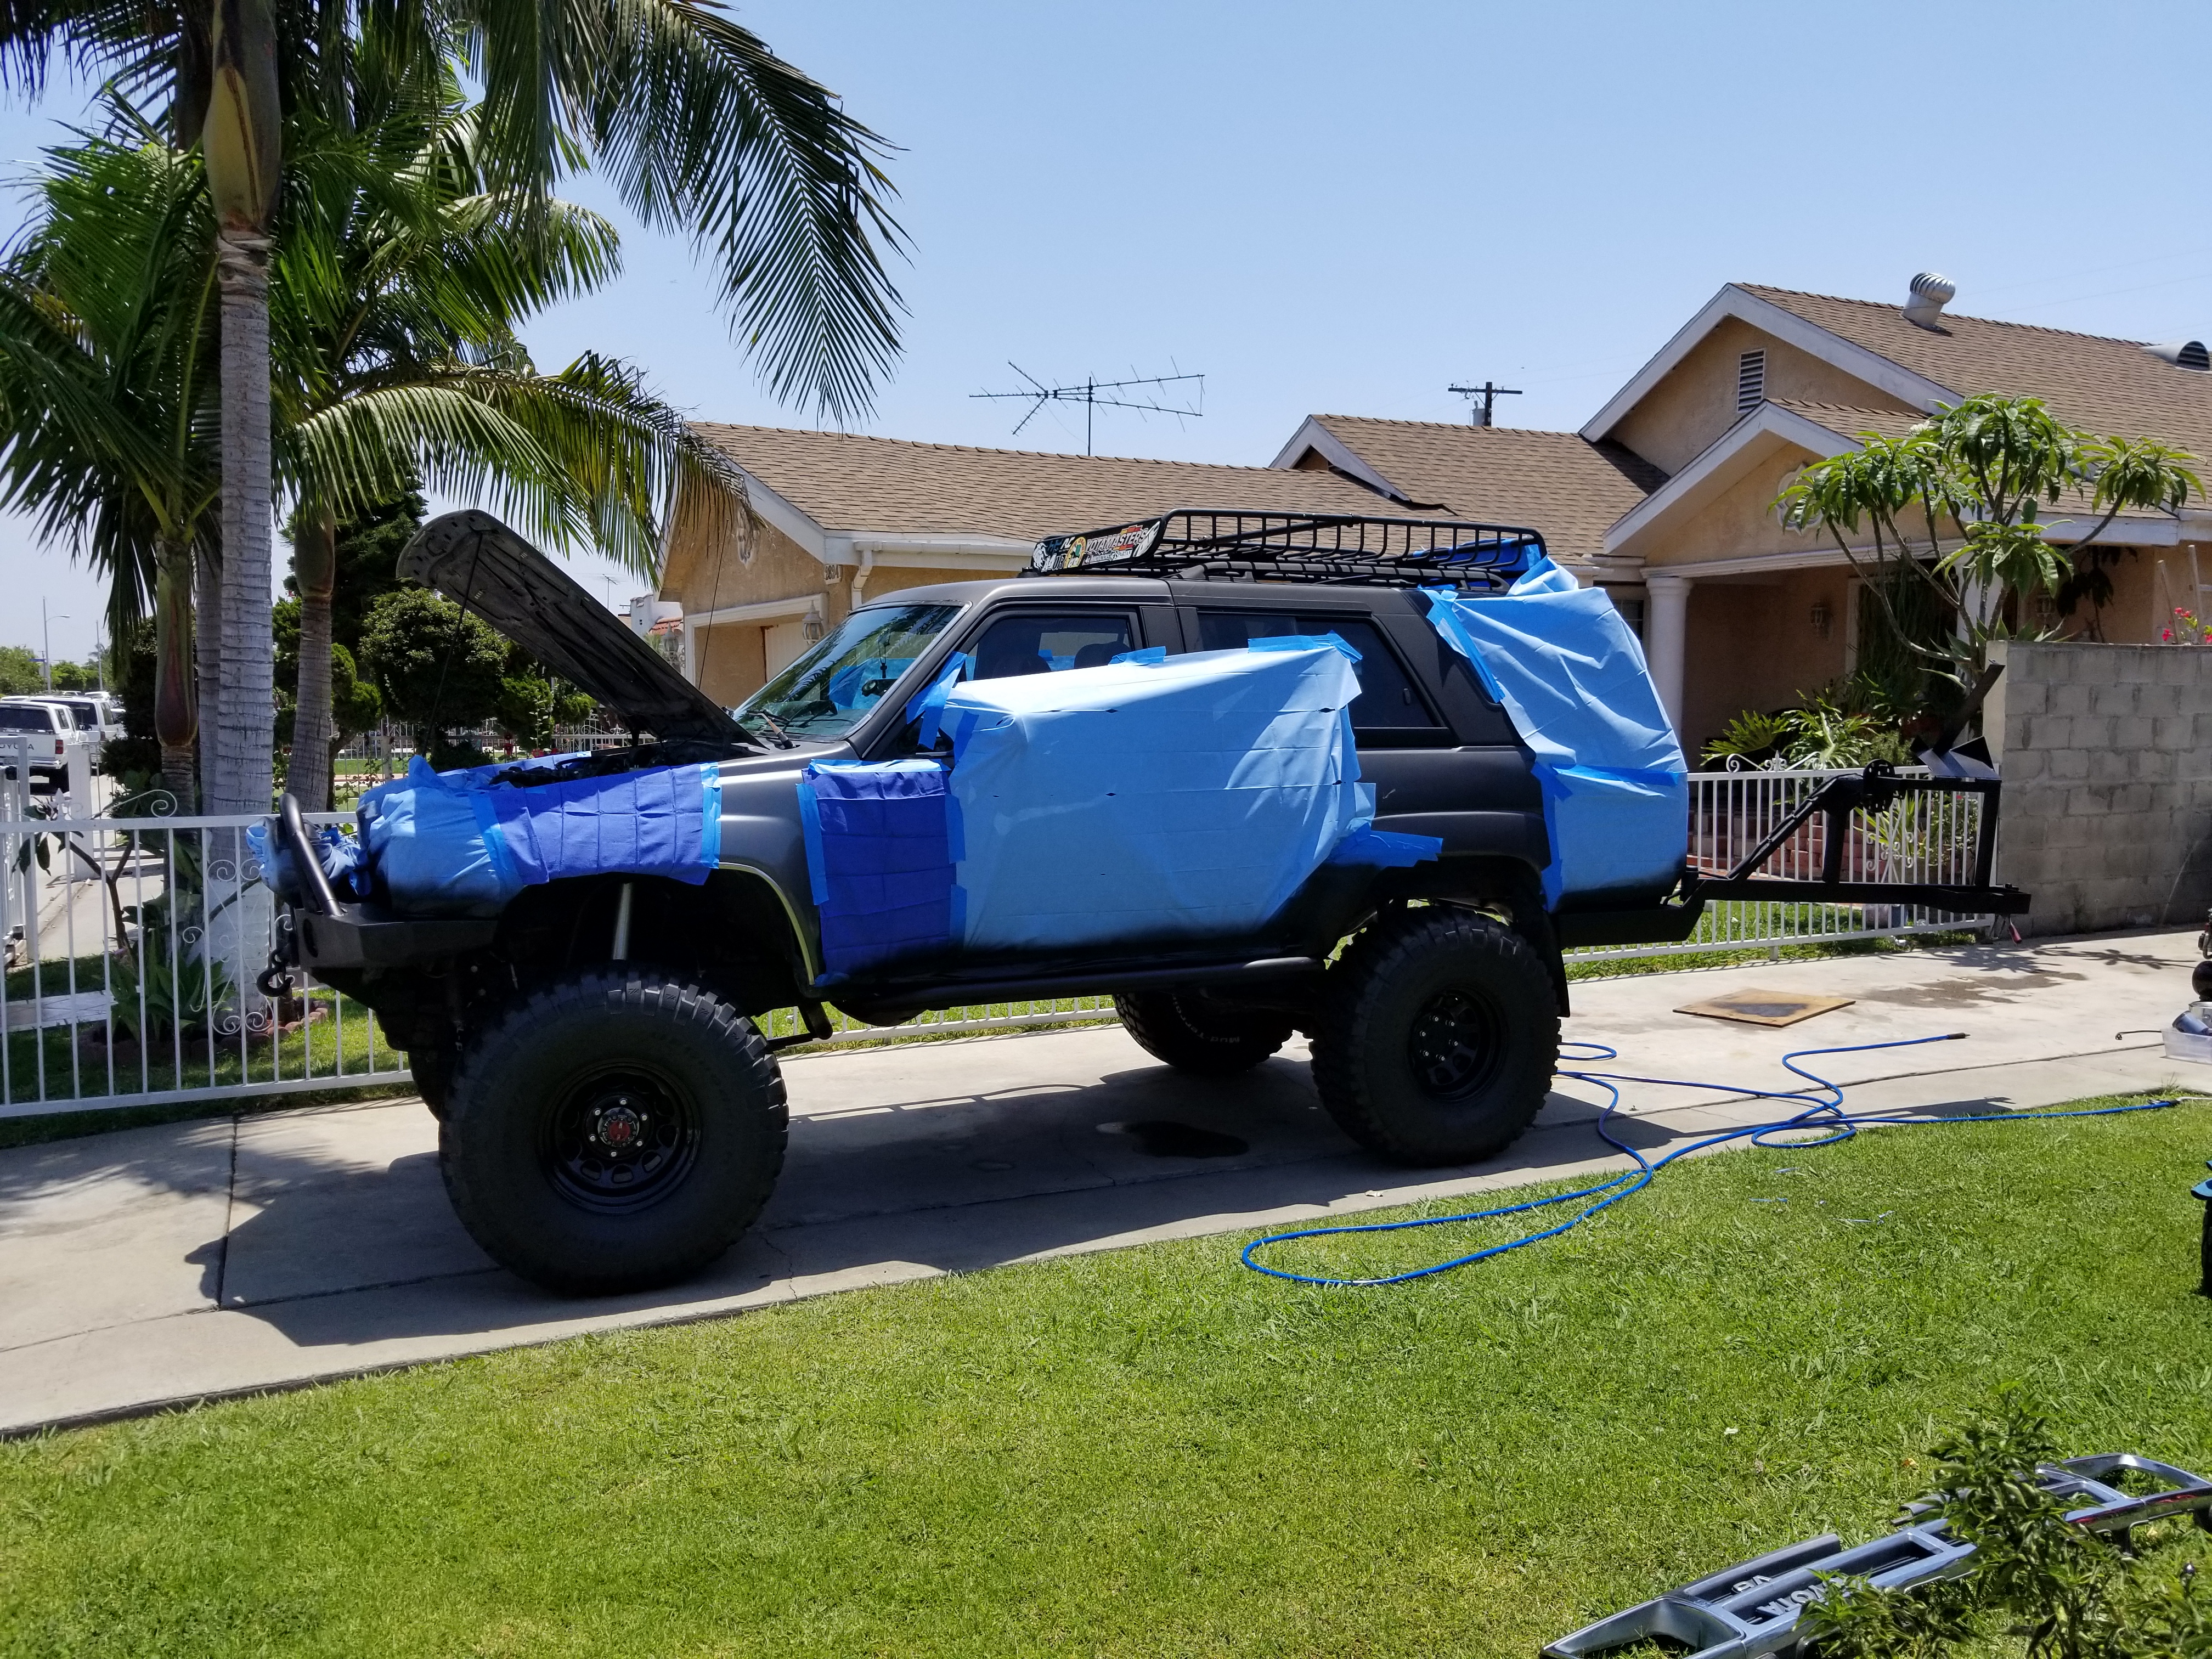
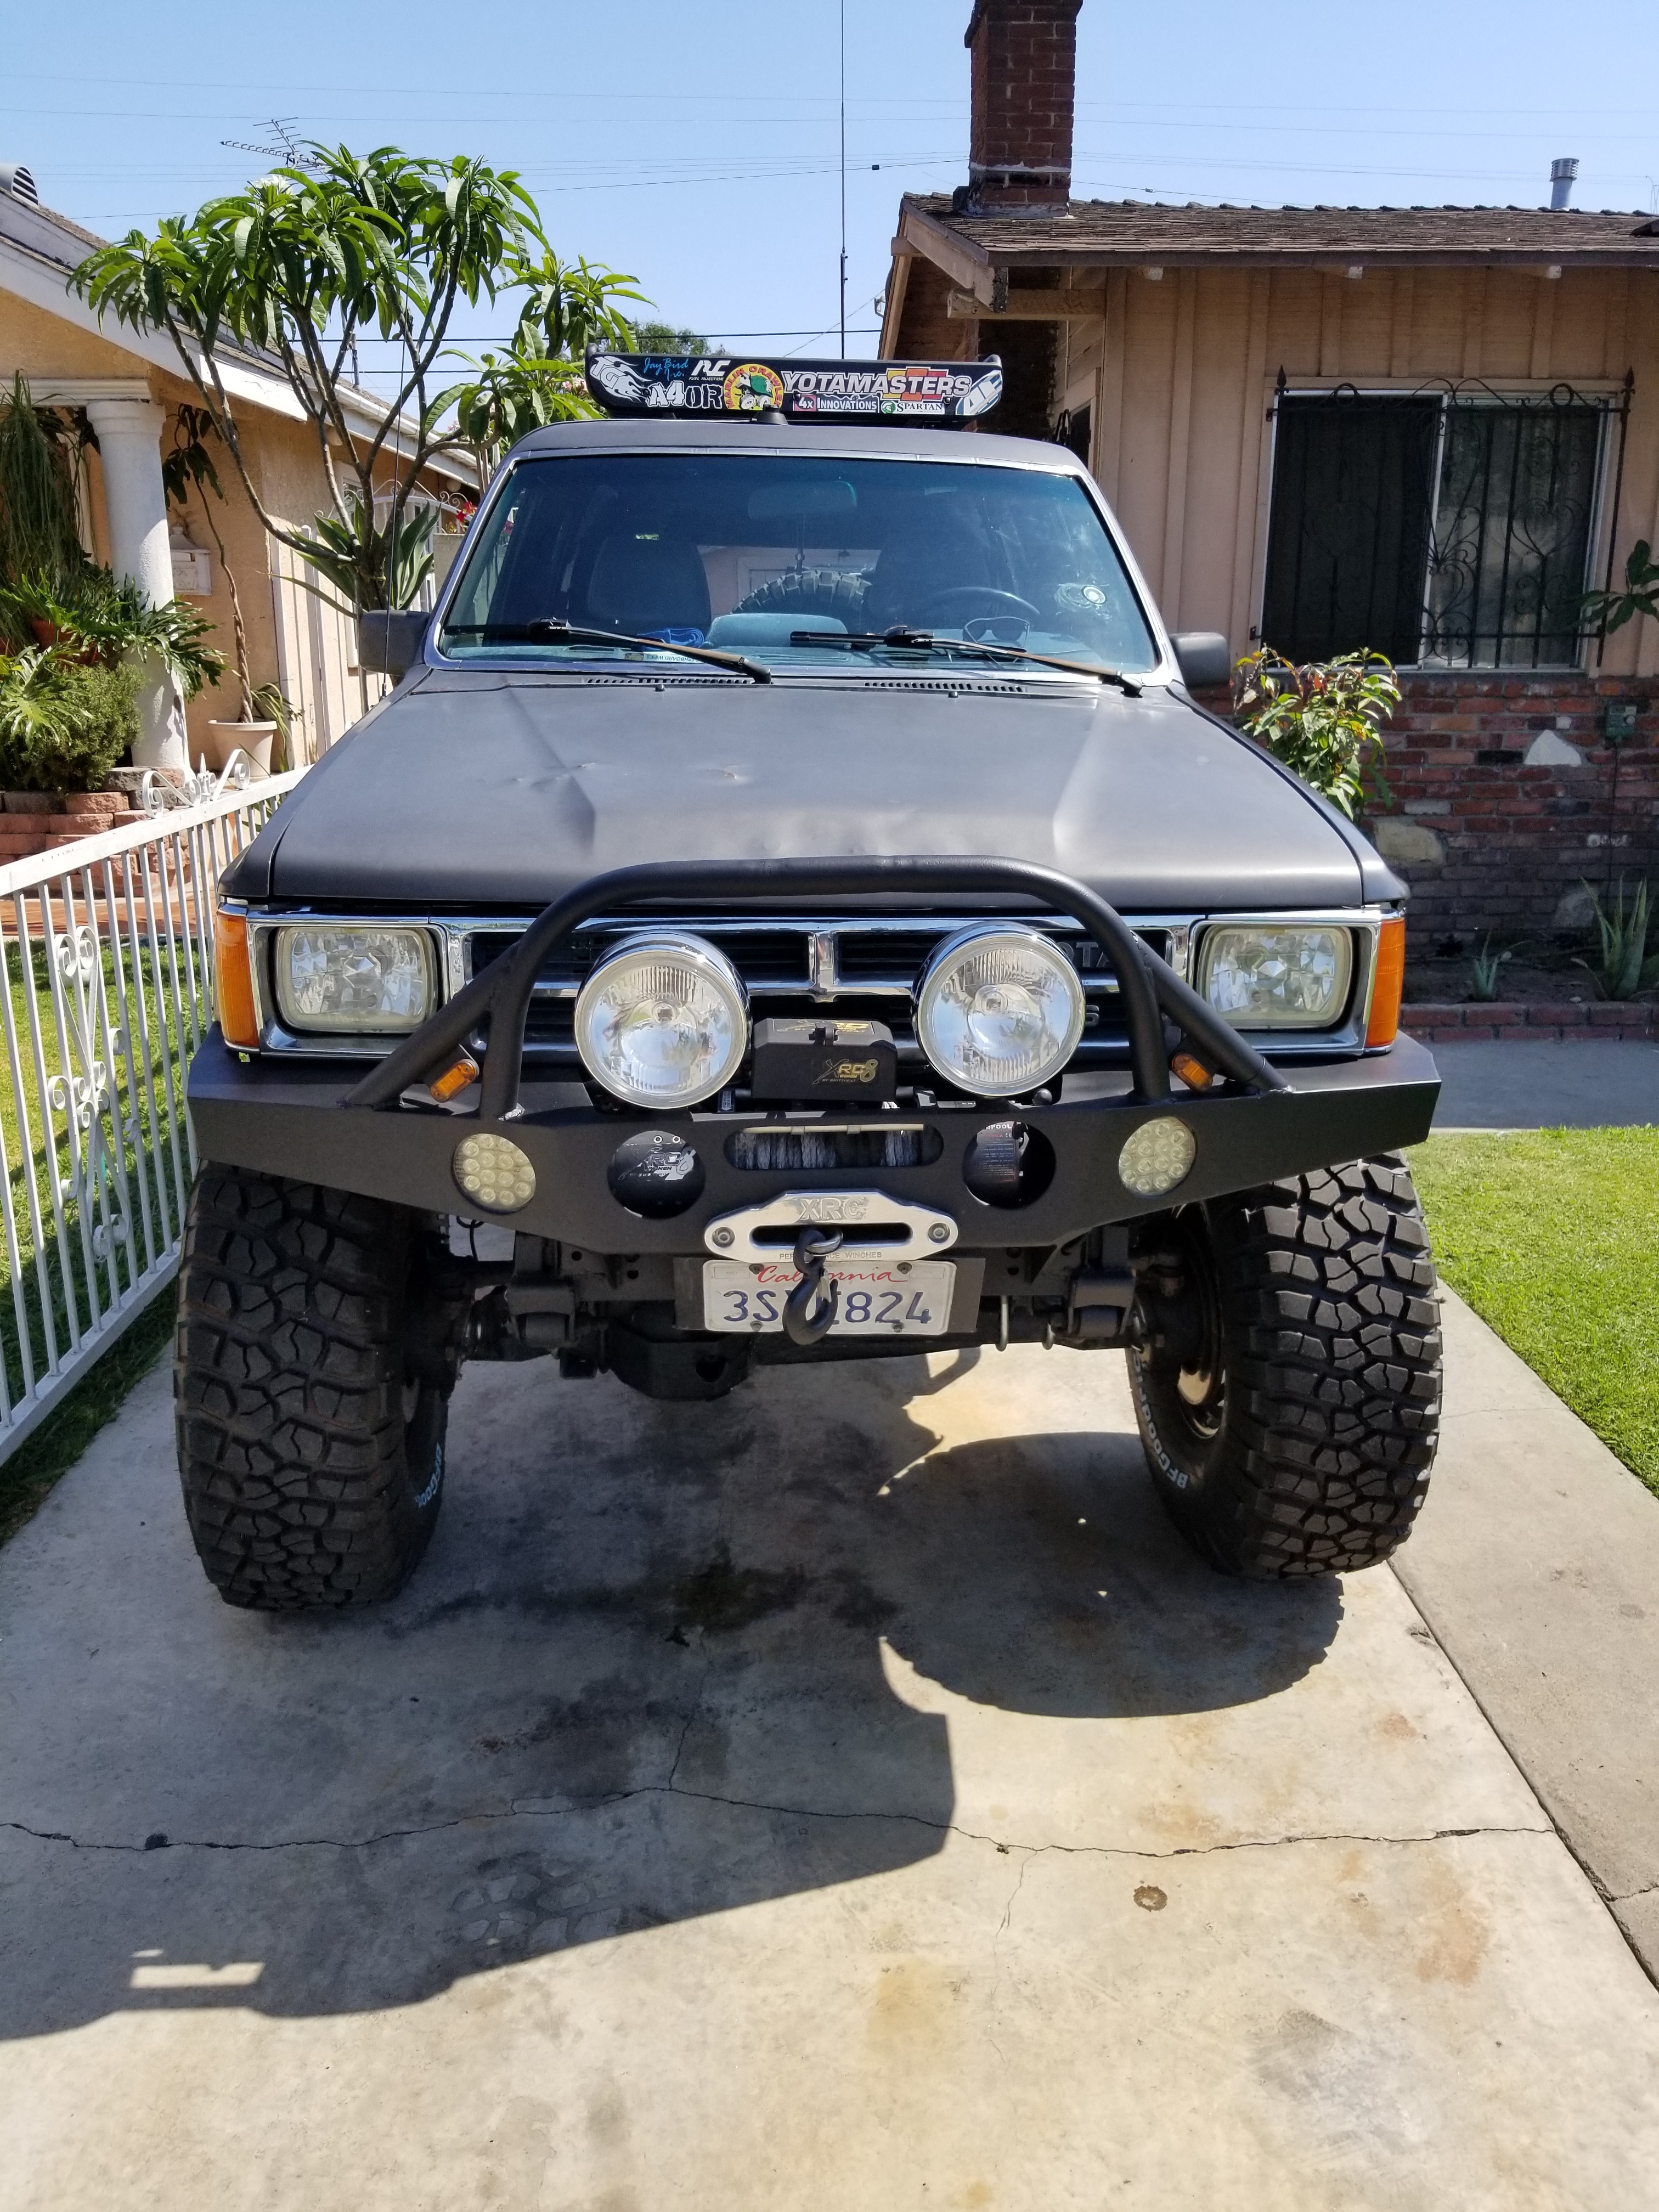
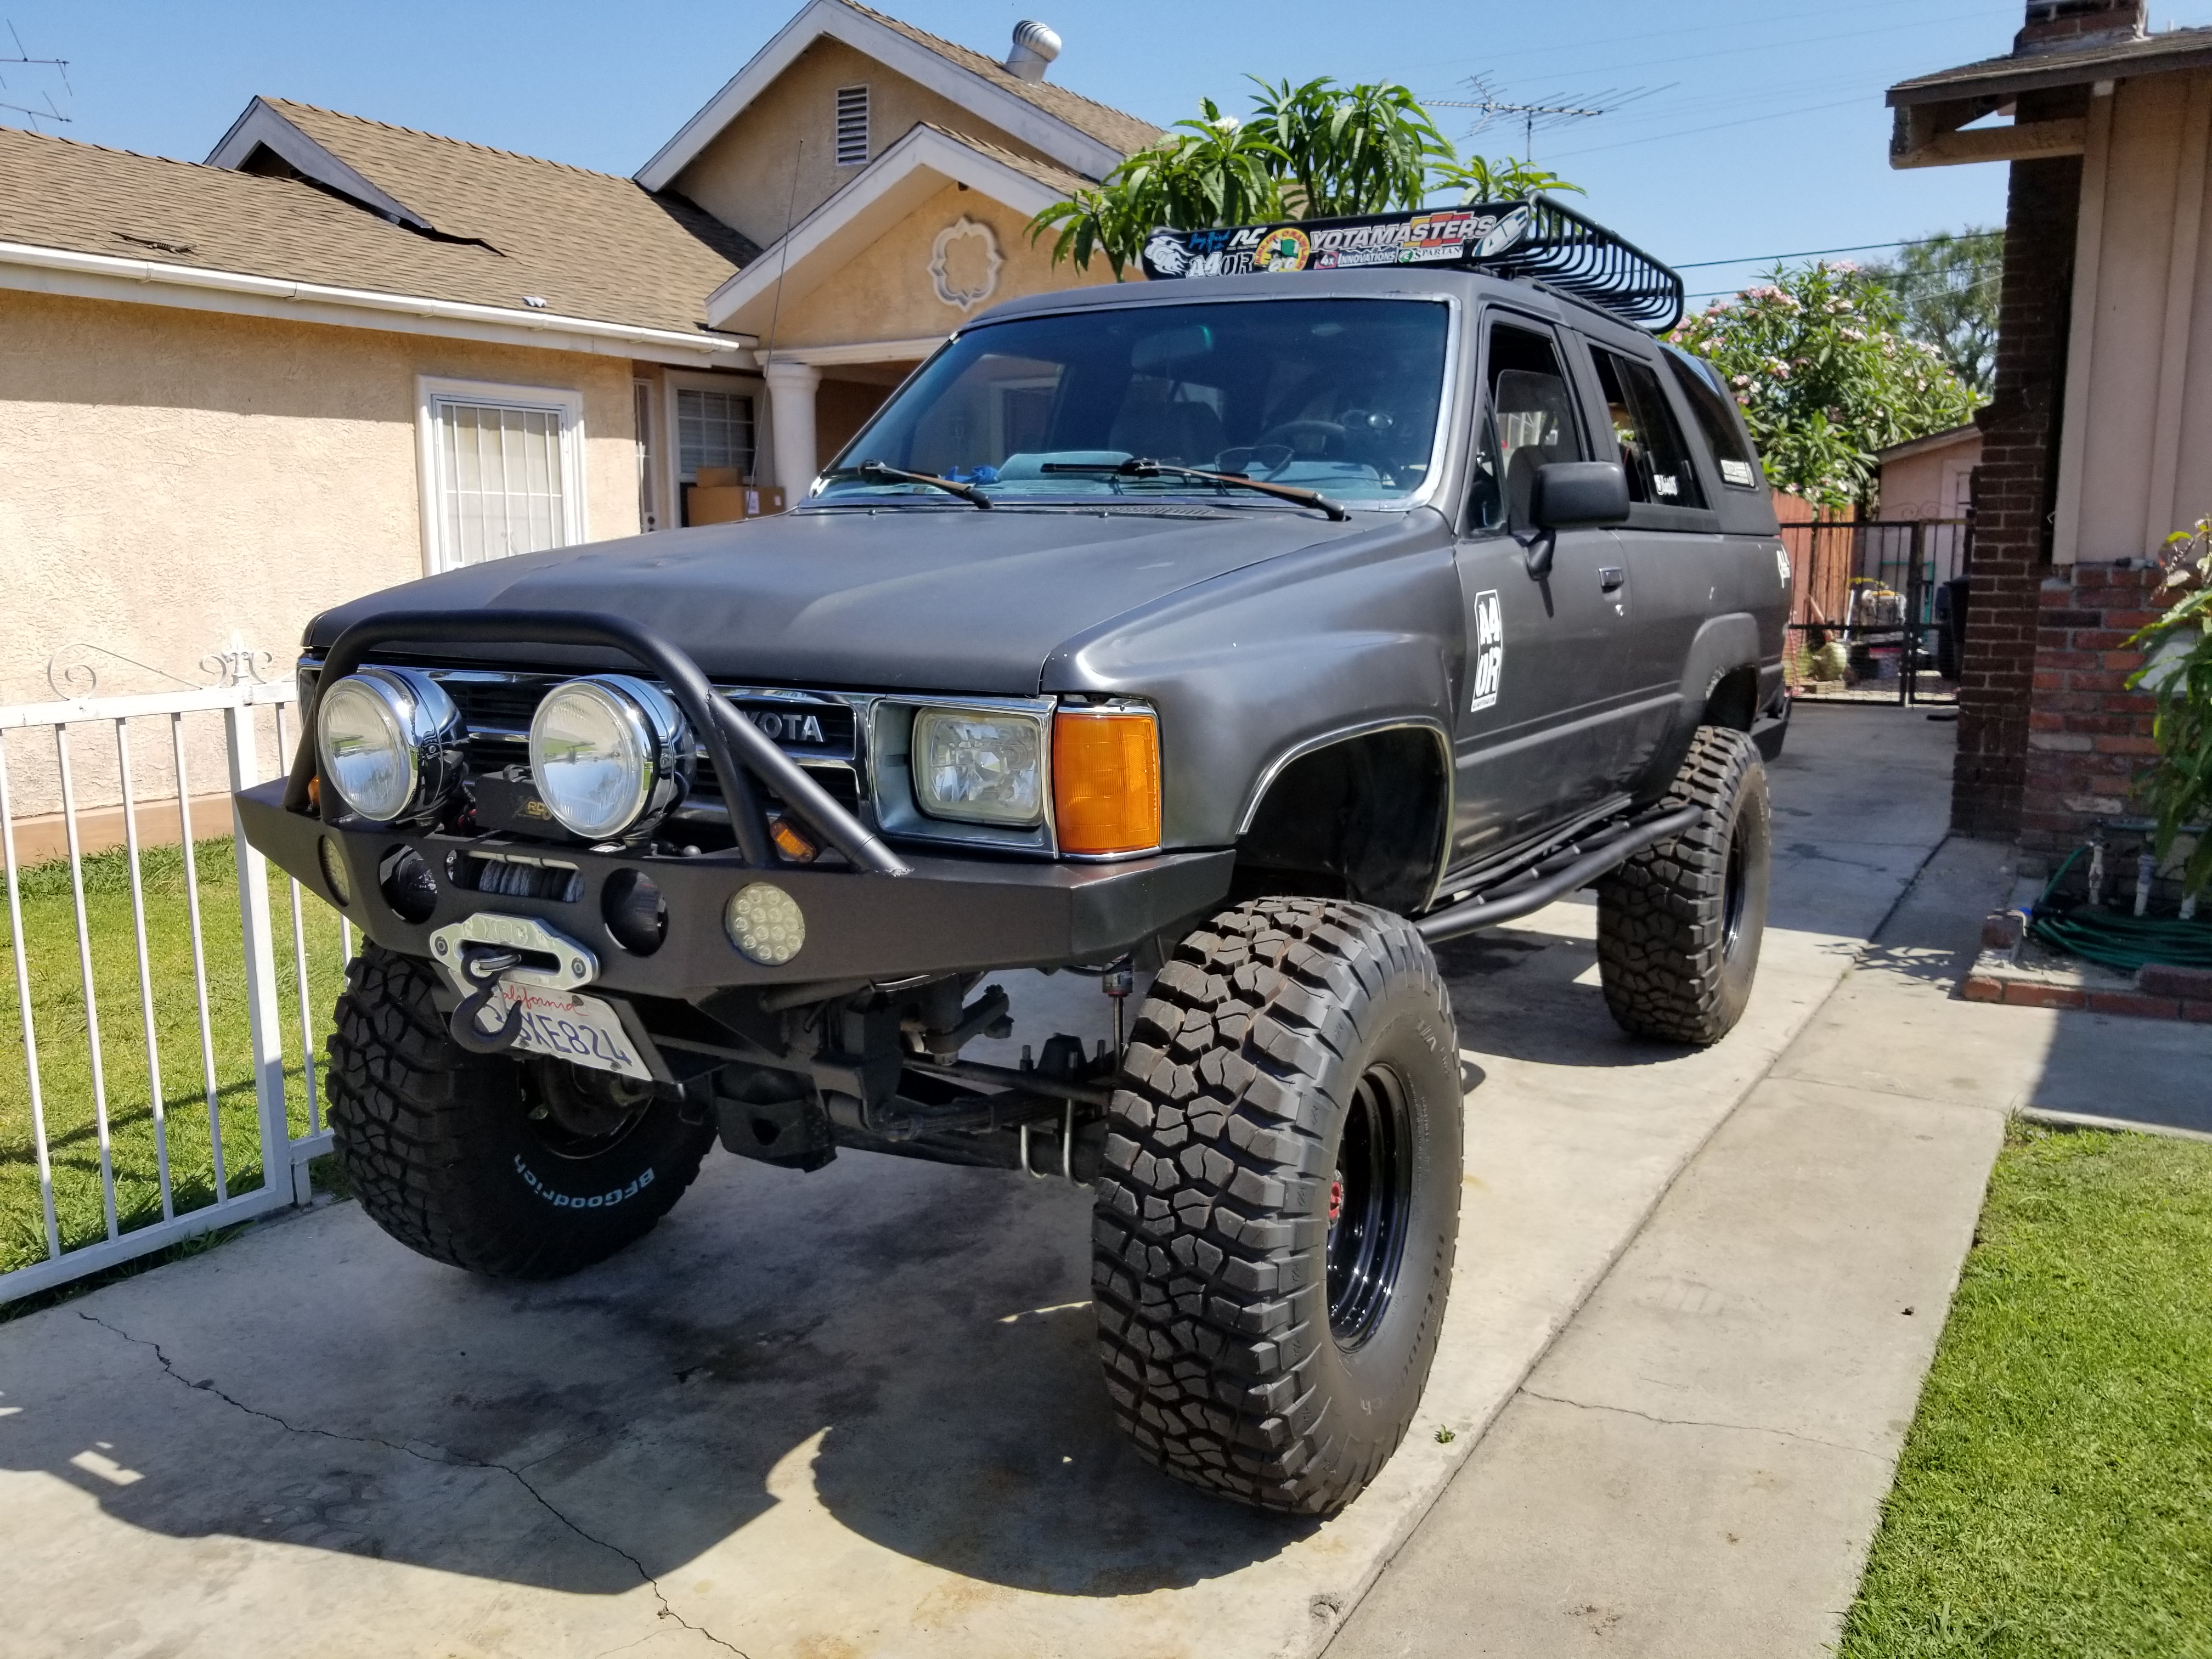
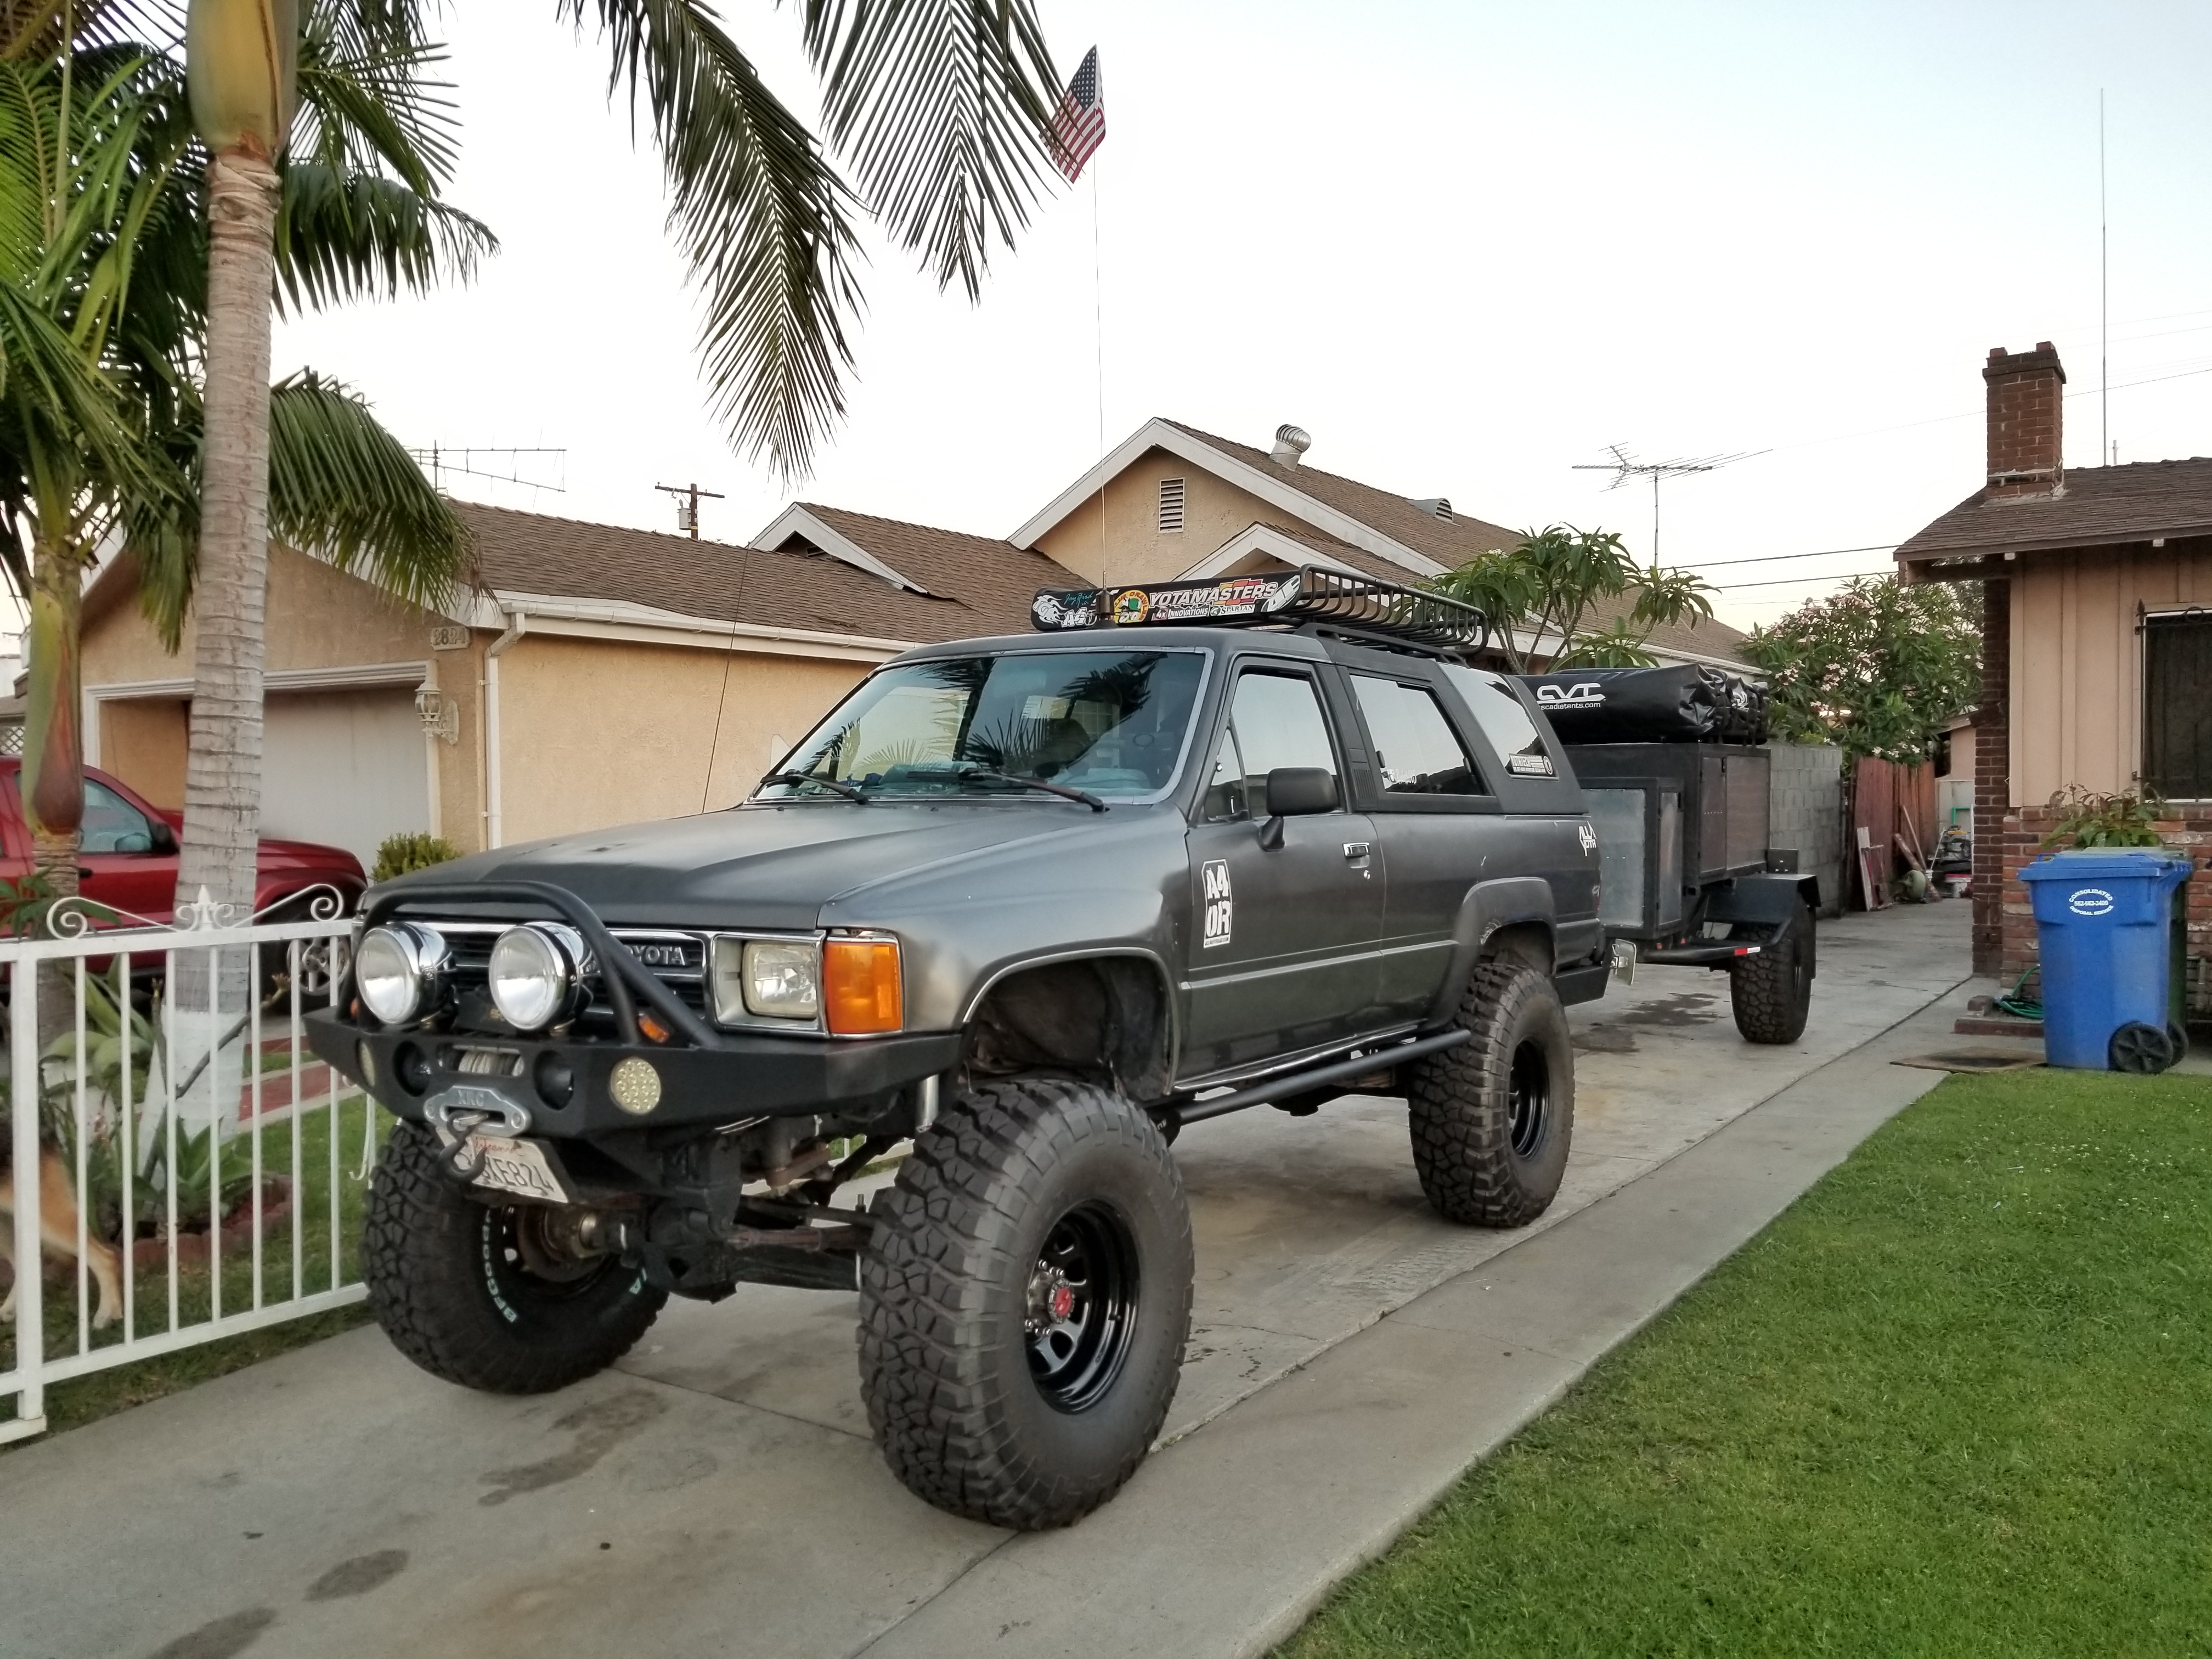
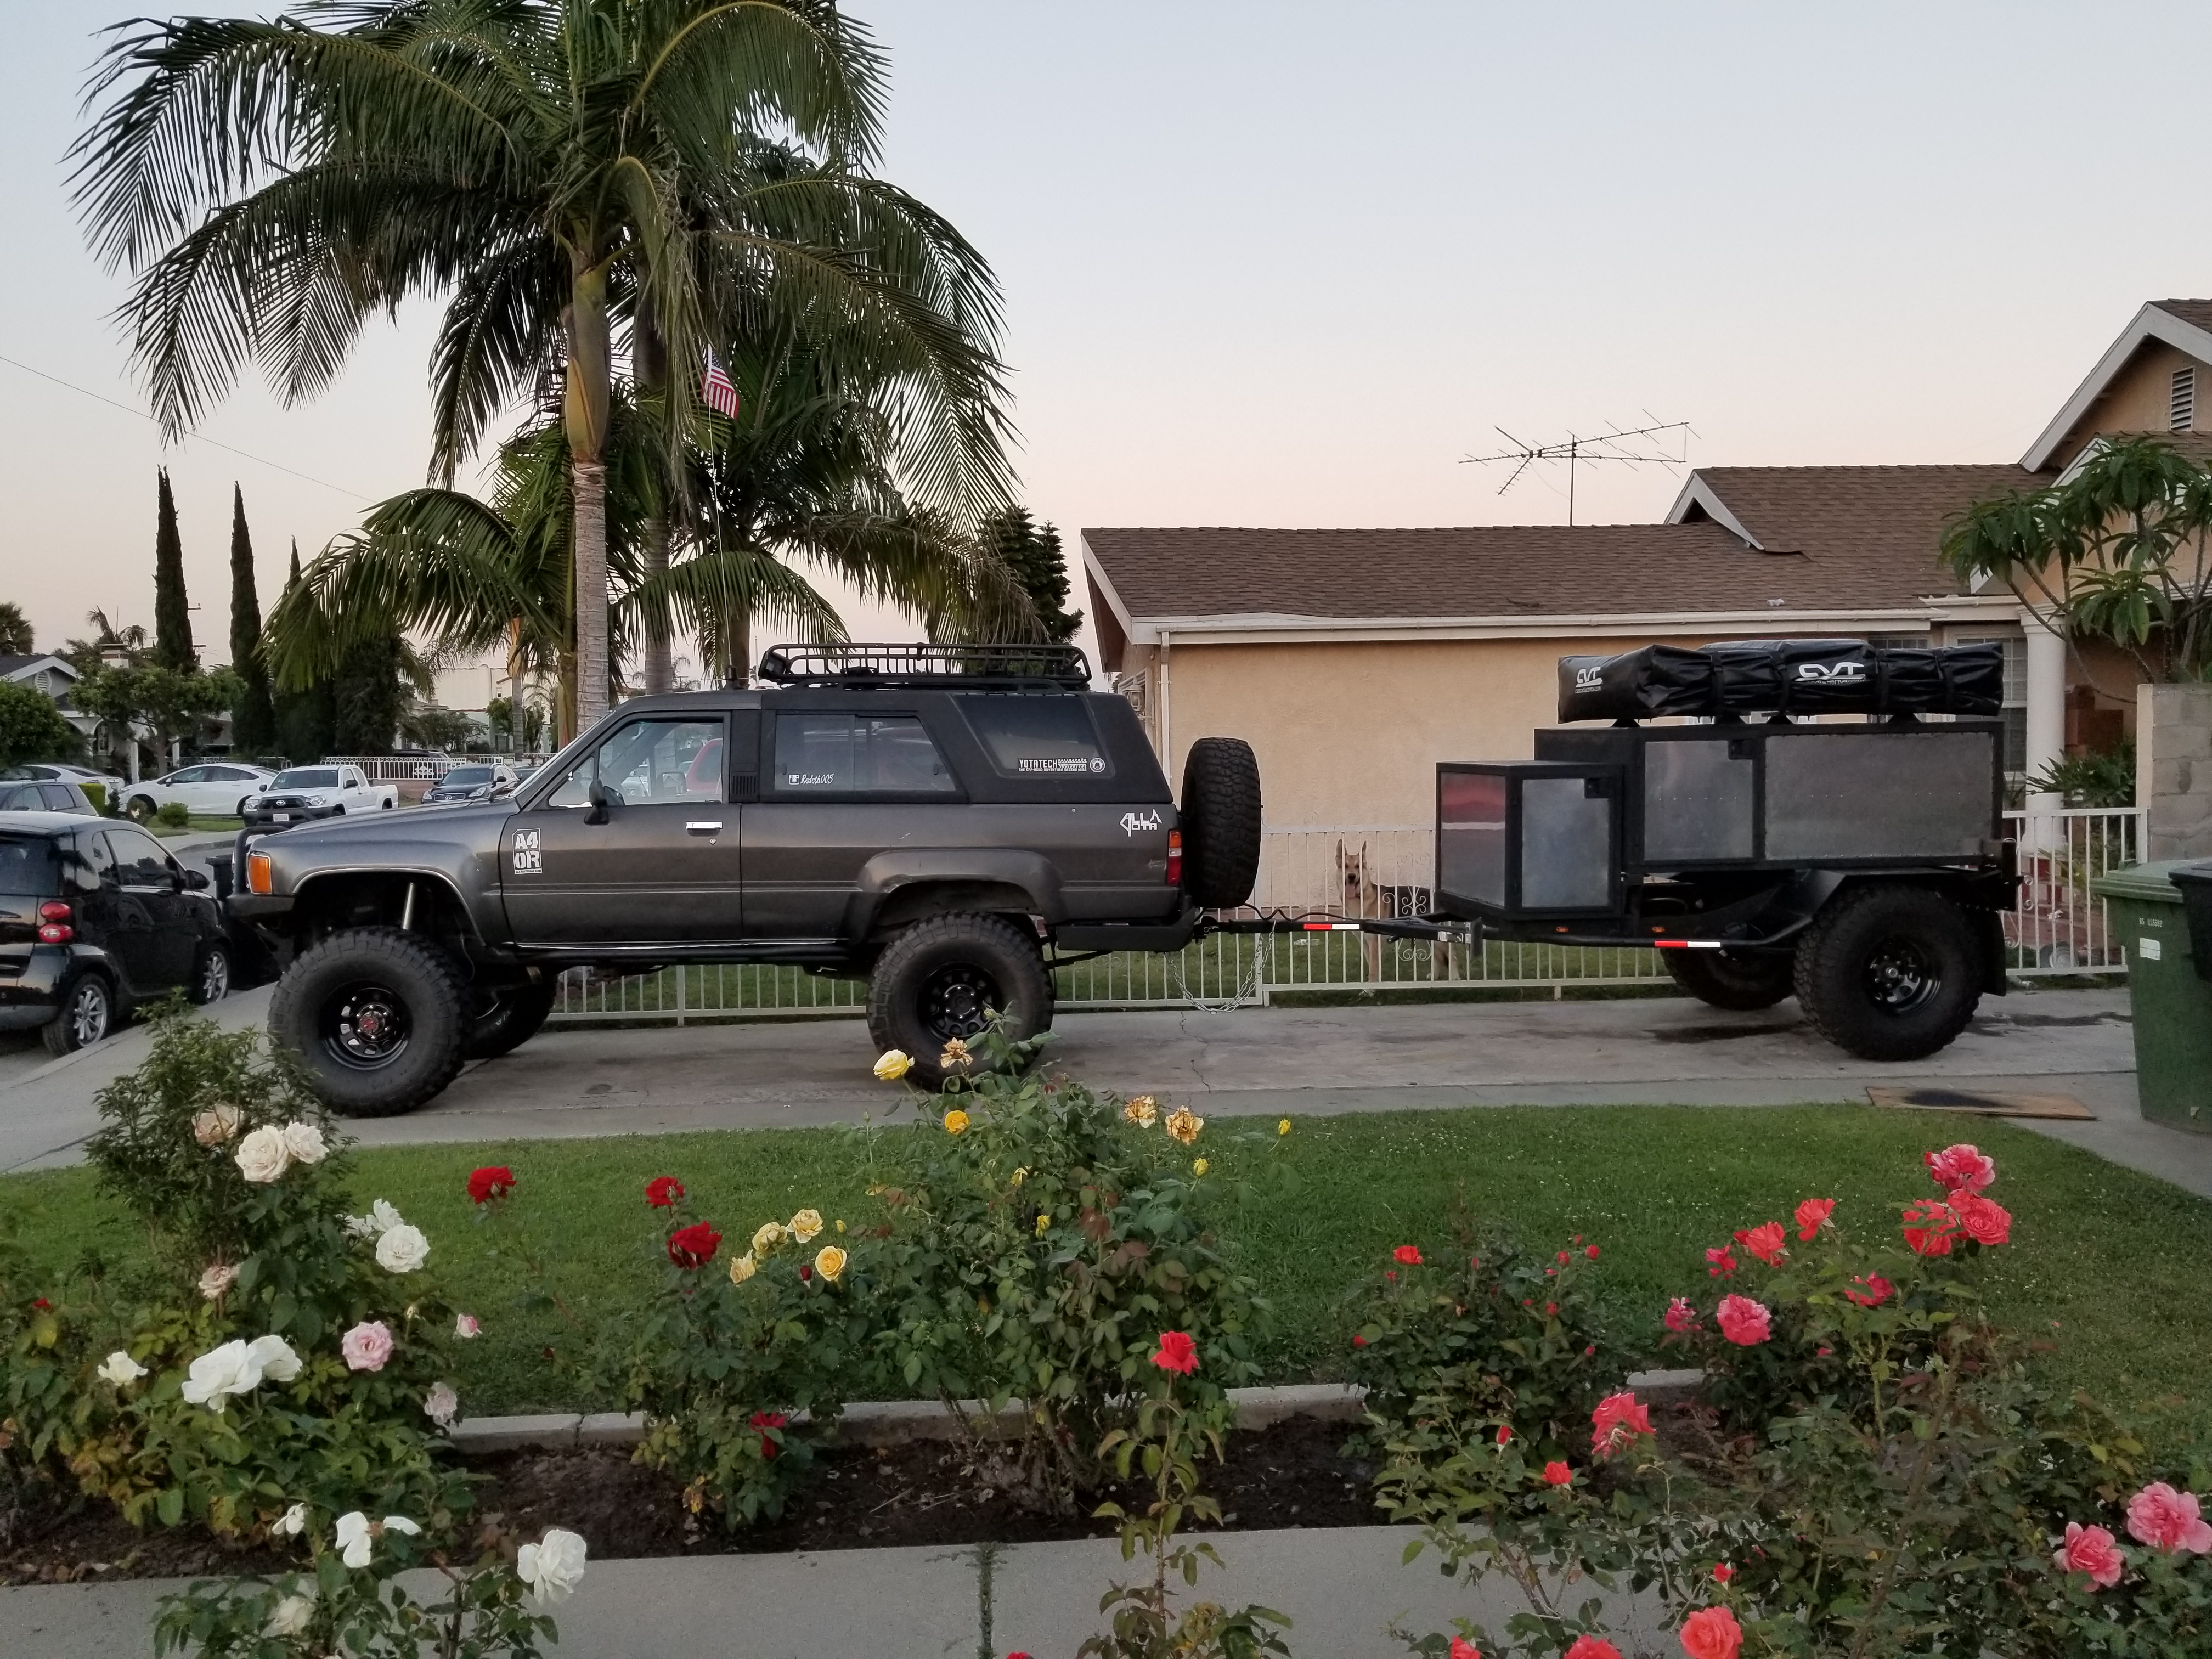
With a such a nice clean trailer that has a new clean coat of paint it was only fair that i gave my 4Runner some love. The bumpers and rock sliders were beginning to look grey from being so faded. Using some impervious surgical drapes as an overspray shield this thing came out looking sexy!


 Jun 28, 2017 | 09:07 PM
#143
Thread Starter
Registered User
Joined: Apr 2012
Posts: 2,817
Likes: 2
From: Los Angeles CA
My family and i all agreed to have a 3 day camping this past weekend. My girl and i would be going early friday morning with our 3 year old. And my Parents wih my 21 year old brother would be joining us later hat night around 8pm.
so here are pix of the trip...
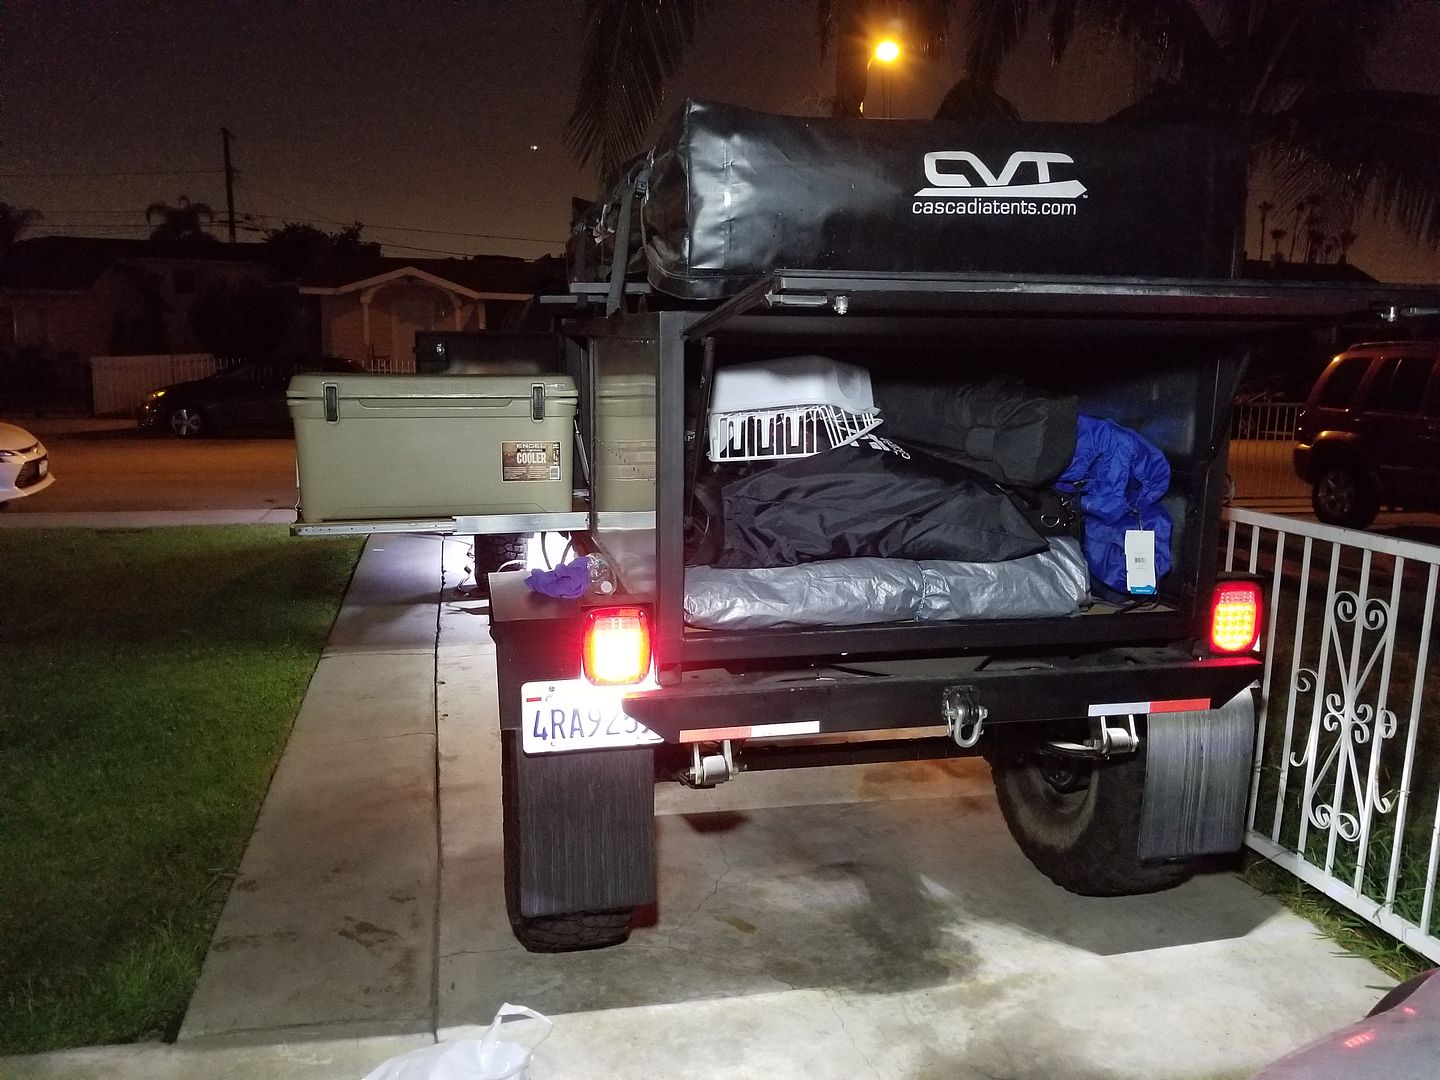
Mostly packed up with the items i need.
Rise n shine. All packed up and ready to head out at 6am friday morning.
Not too saggy
On our way to the lake. Not the safest thing to do while pulling a trailer but I just wanted to show how well the trailer pulls with my truck. The Tekonsha Prodigy P3 brake controller helped out so much! especially when having to make sudden stops. Gotta love electric trailer brakes!

So i dont know much about RV's and trailer but i didnt know we werent supposed to use this water at the dump stations to put into our water tanks. It isn't poo water but it is, however reclaimed water. We didnt use it for drinking water or cooking we basically only used it for showering but still i felt kind gross letting my family shower with that water. I eventually ran fresh water through the tank 2 times through to wash it out. But i still need to mix up some bleach and water to run through the system a couple of times. To clean up my water storage again.
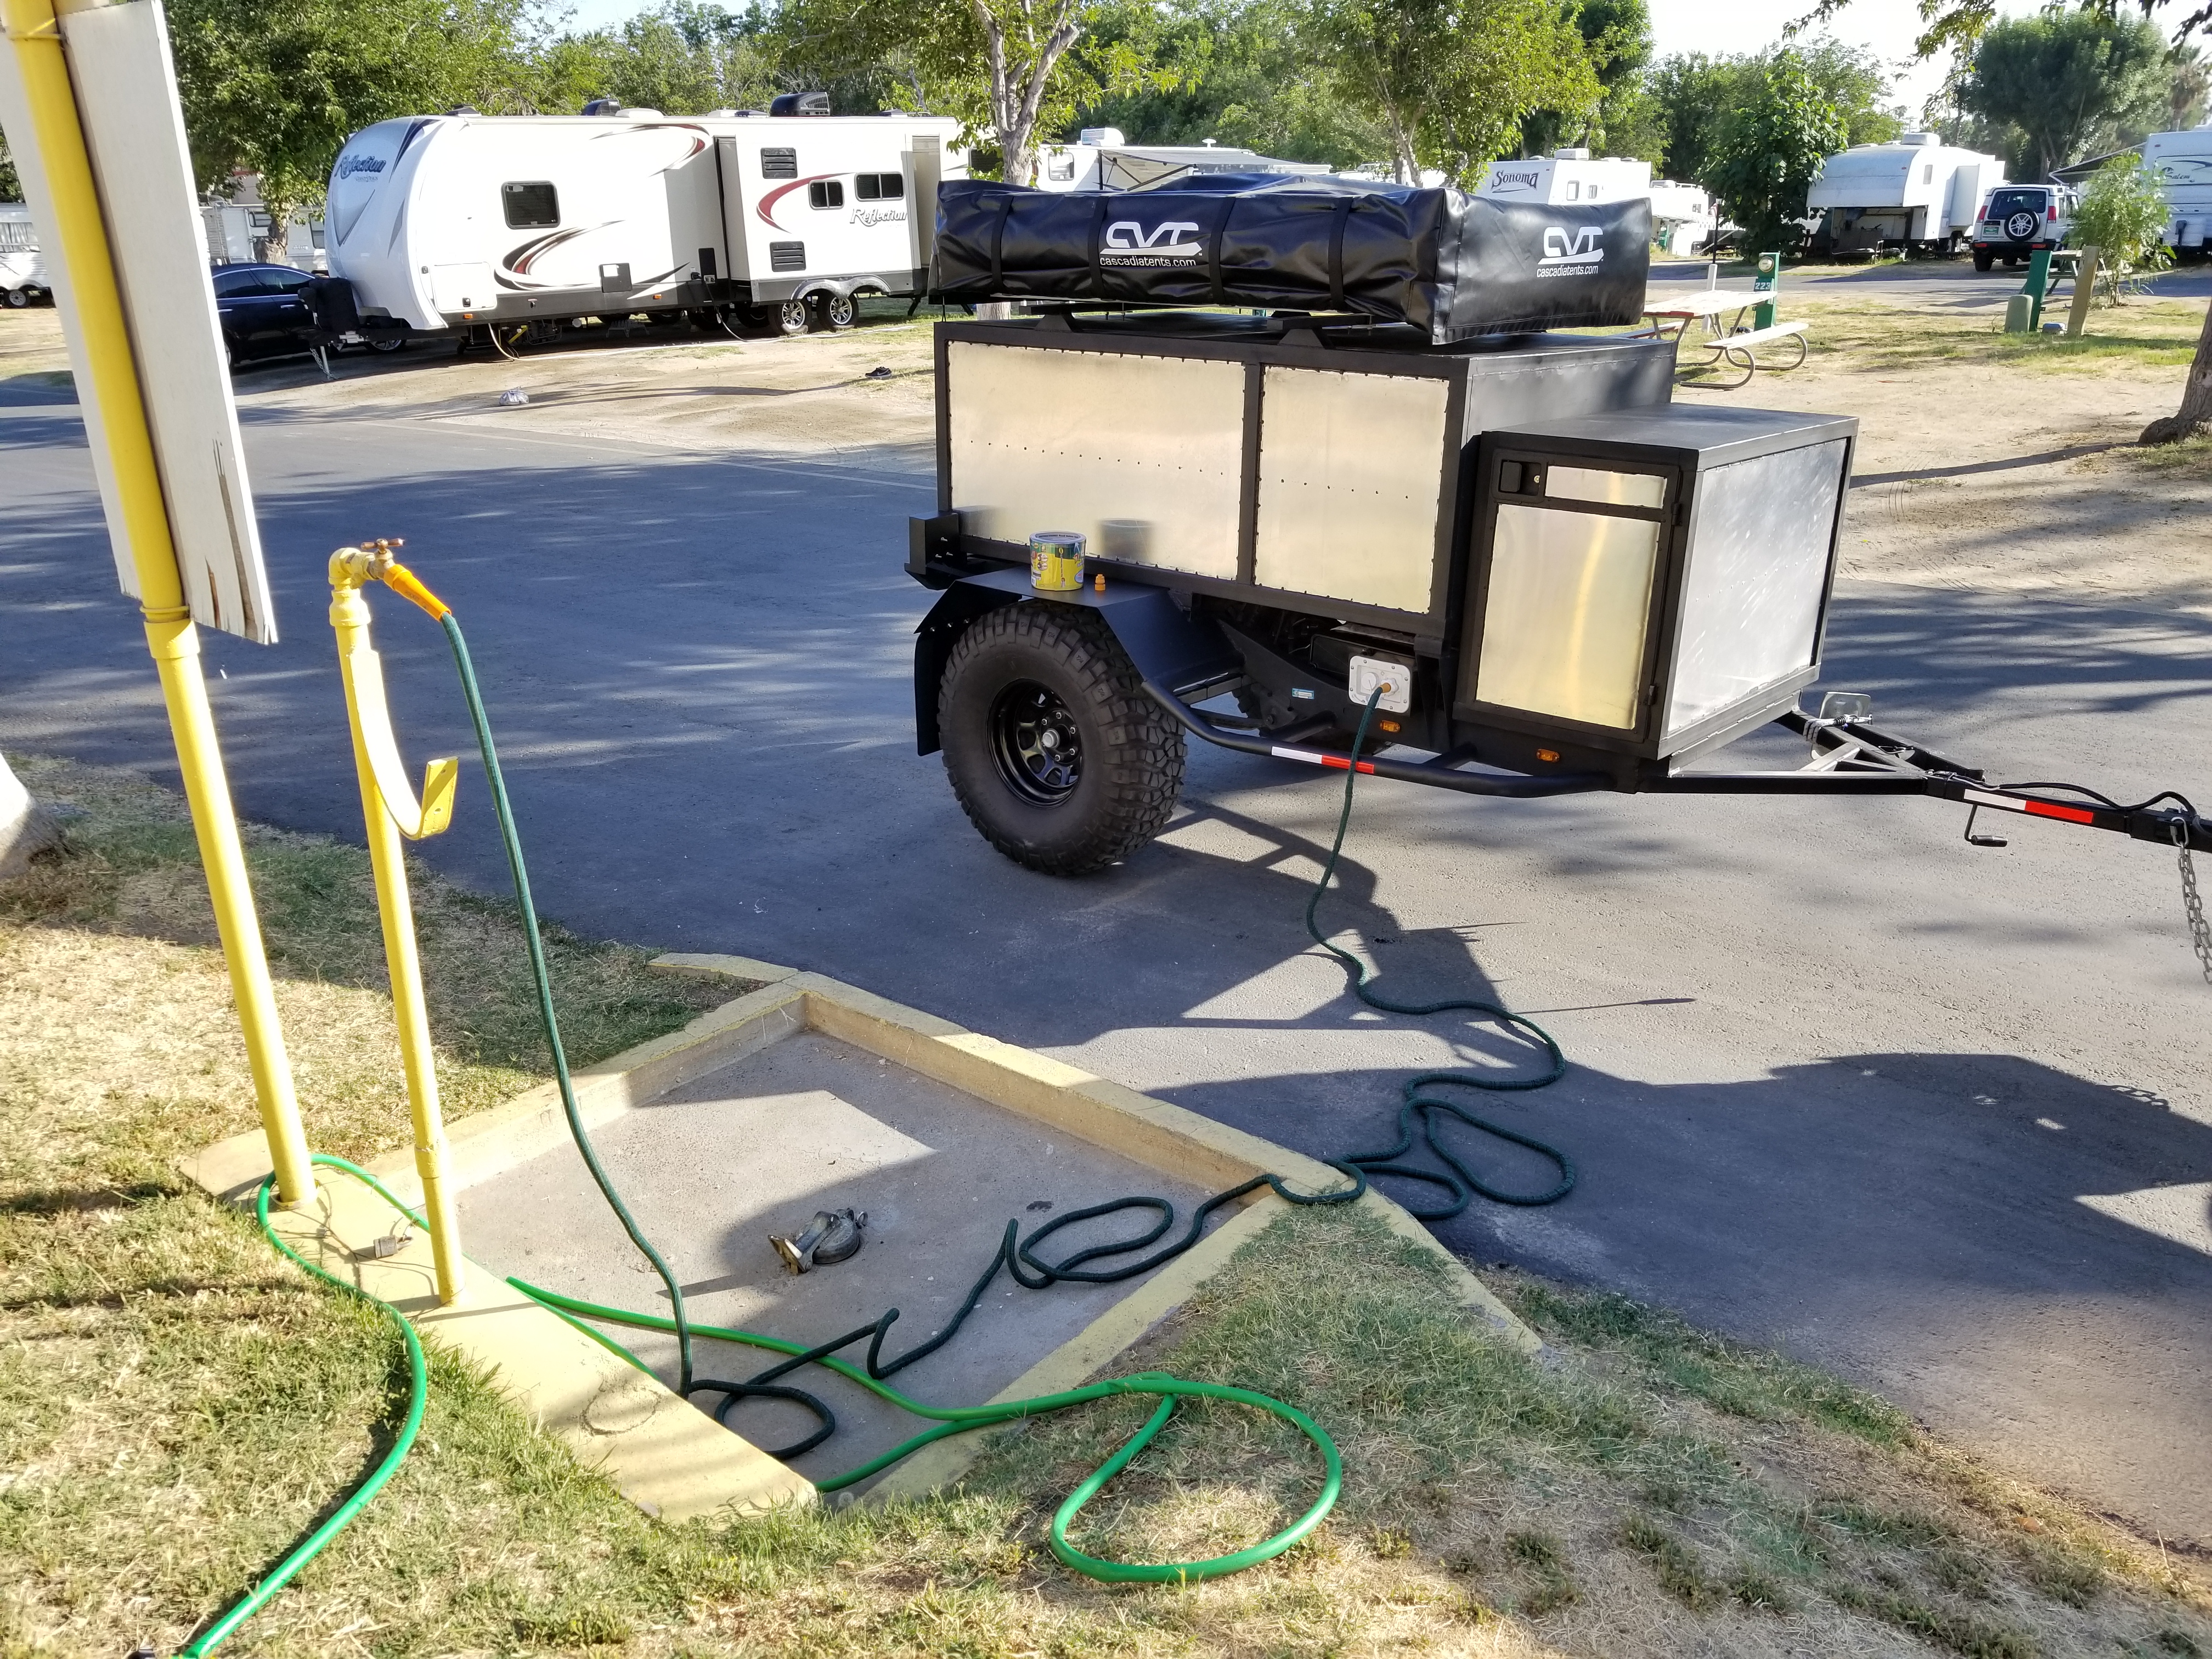
Close up of the water fill area on the passenger side of the trailer.
That is a 15 gallon Valtera water tank under there. I am actually thinking about adding another water tank. IT should be more then enough to shower my family of 3 and soon to be 4 but since i had my parents and brother join us this past weekend so 15 gallons was NOWHERE near enough. If i buy anoher 15 or 20 gallon tank i can run it on the rear side of the trailer and mount it higher then this tank here and just run one hose to the bottom tank so it will fill by gravity pulling the water to the lower tank. This is most likely what i plan to do ..

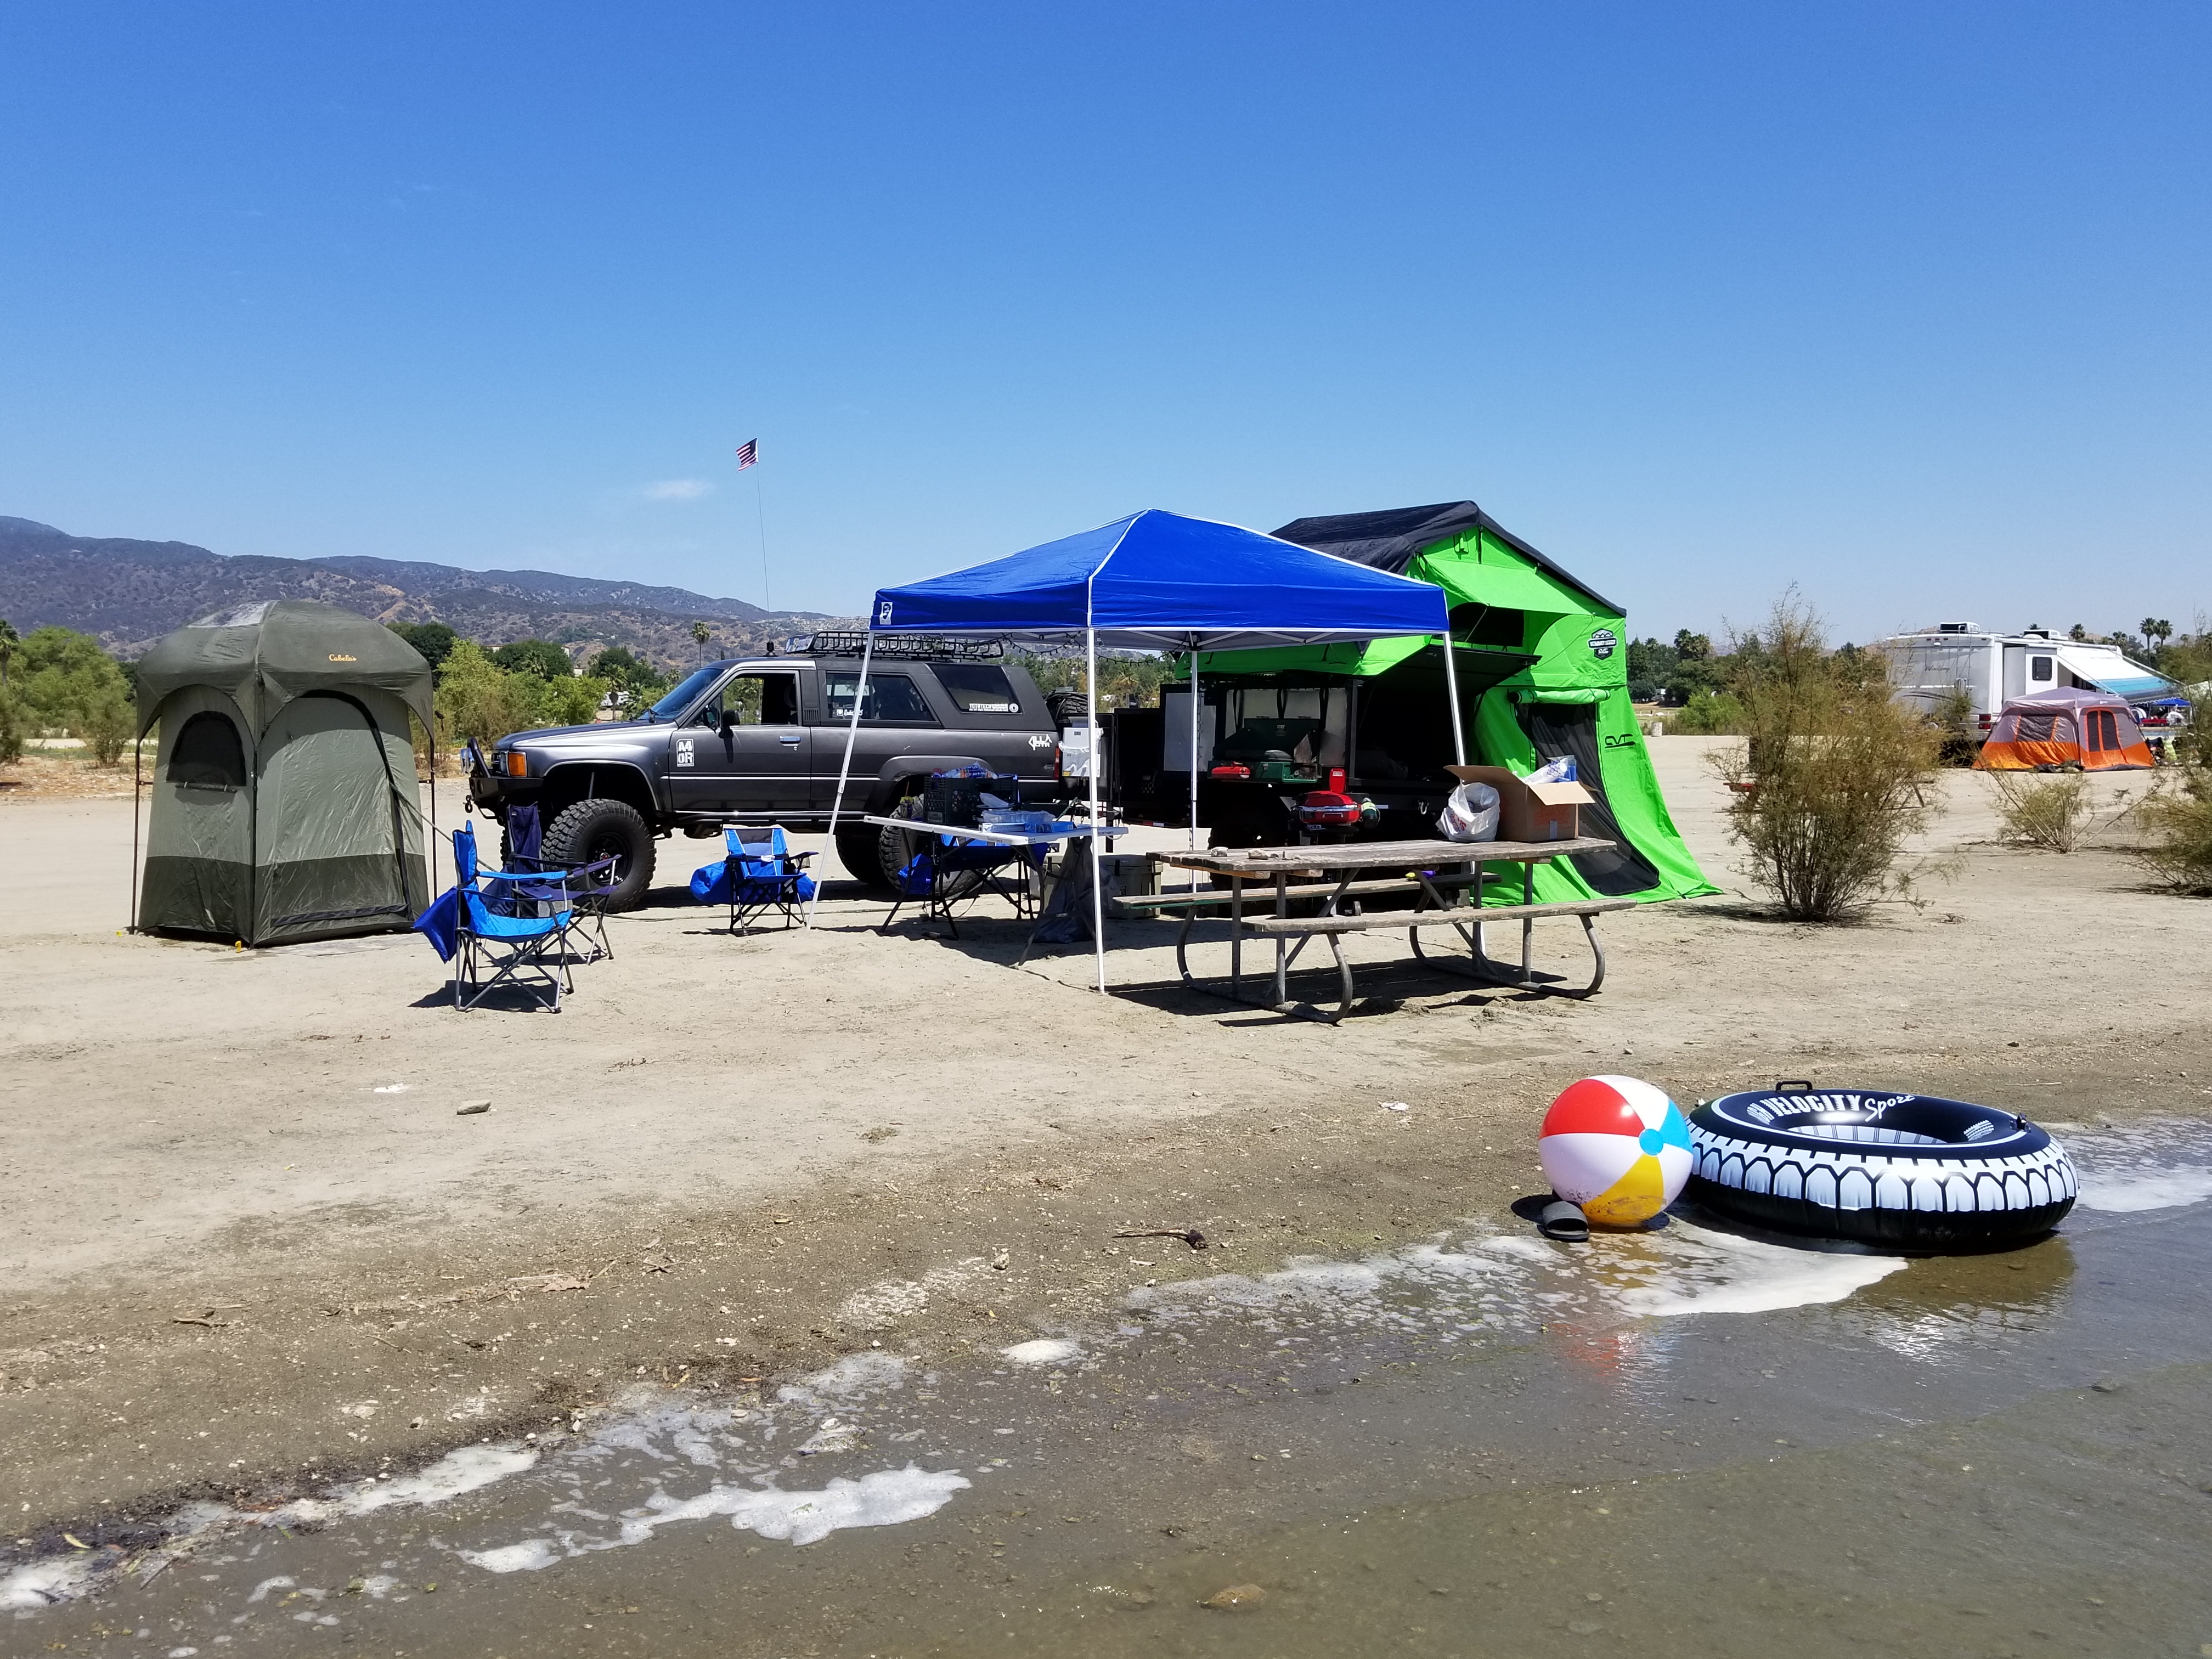
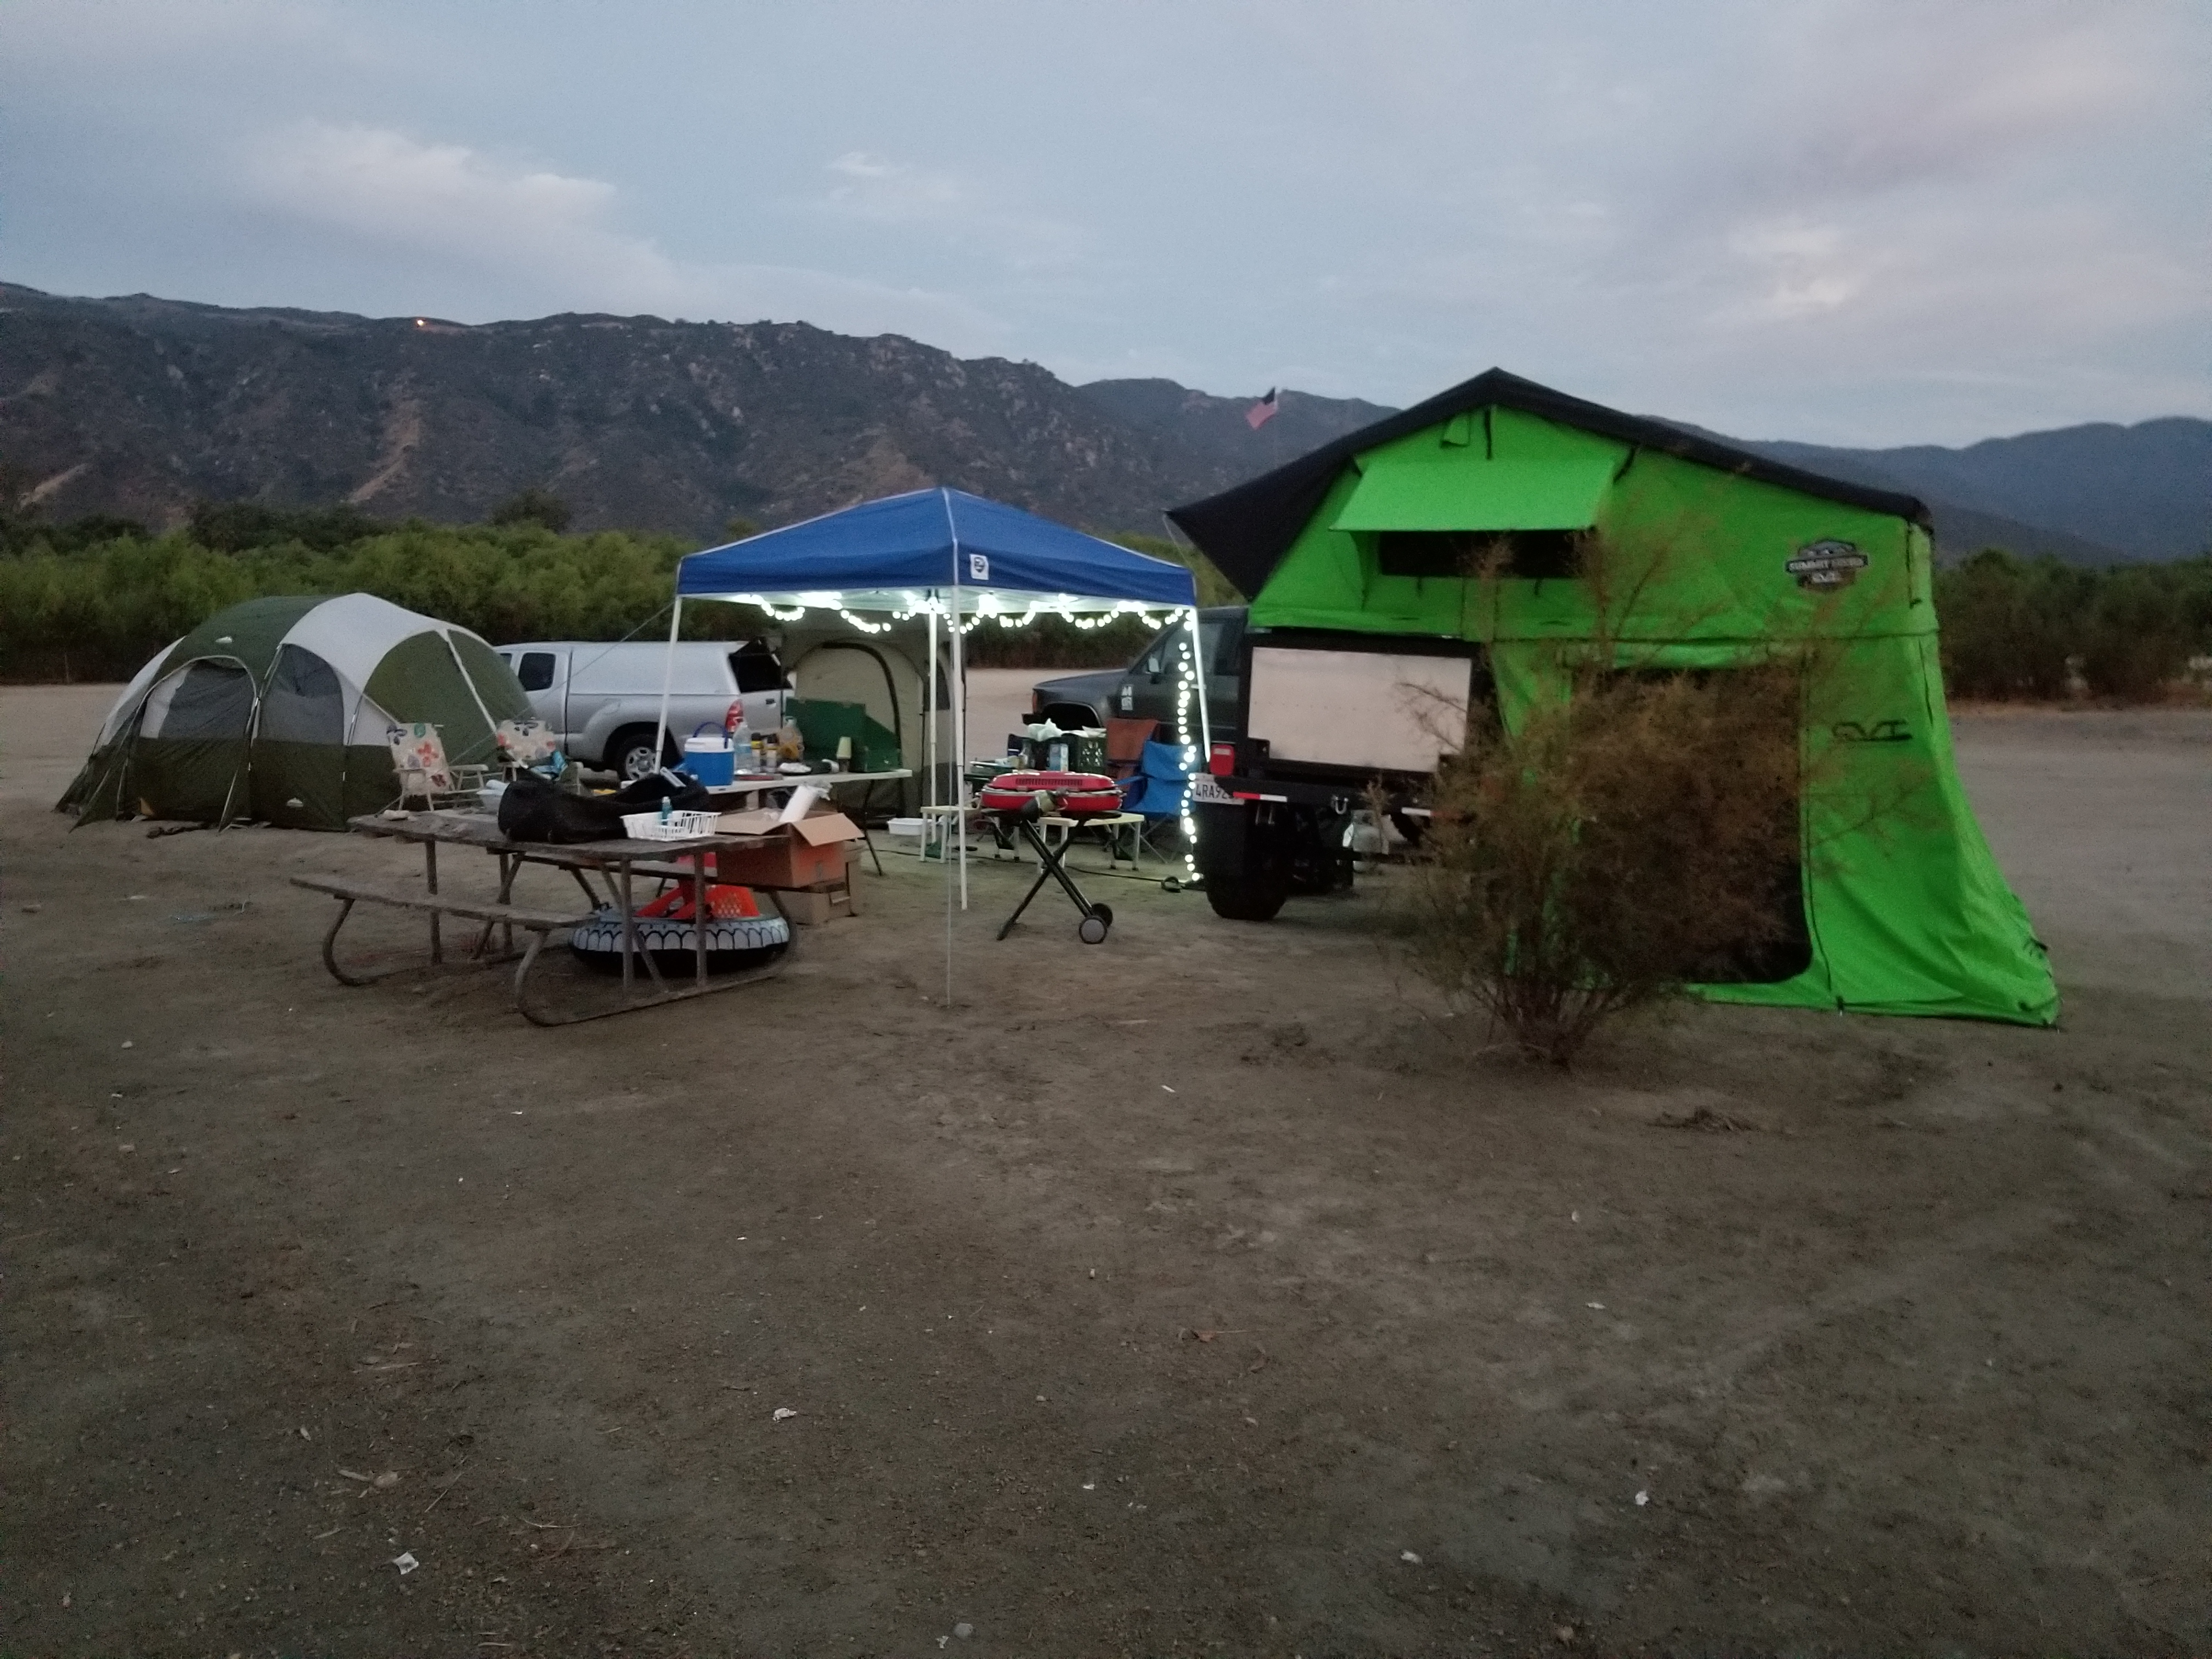
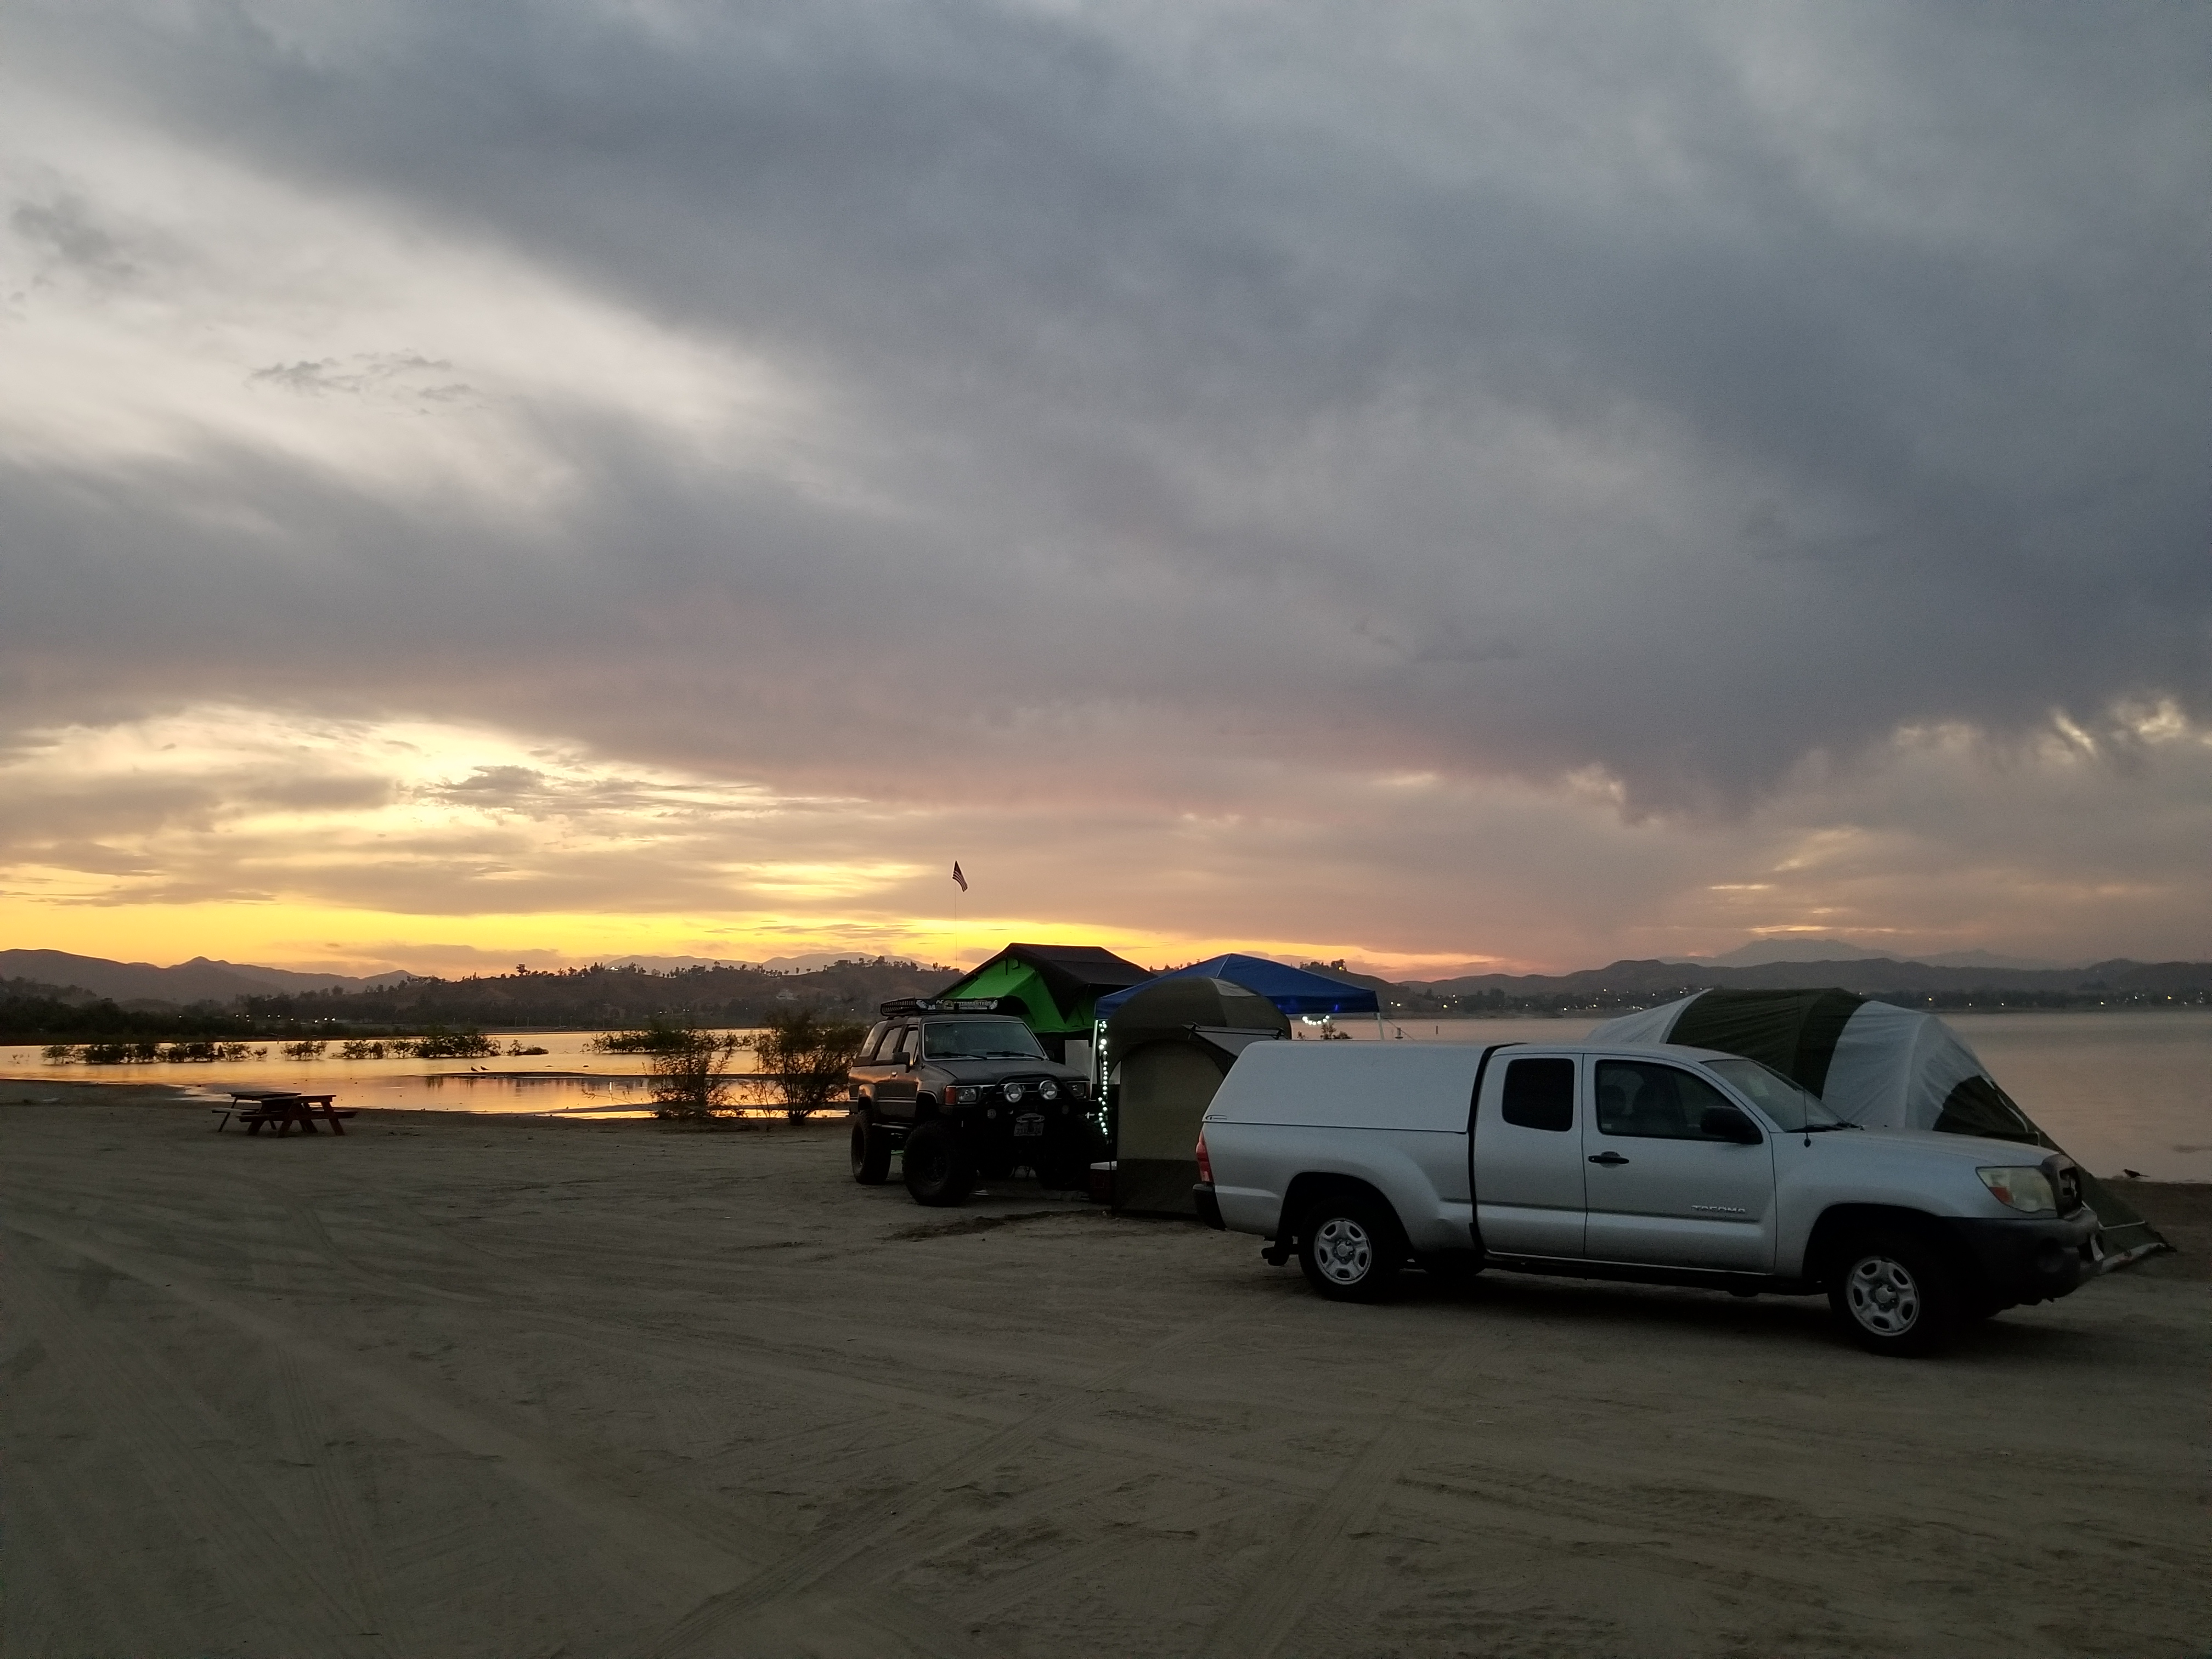
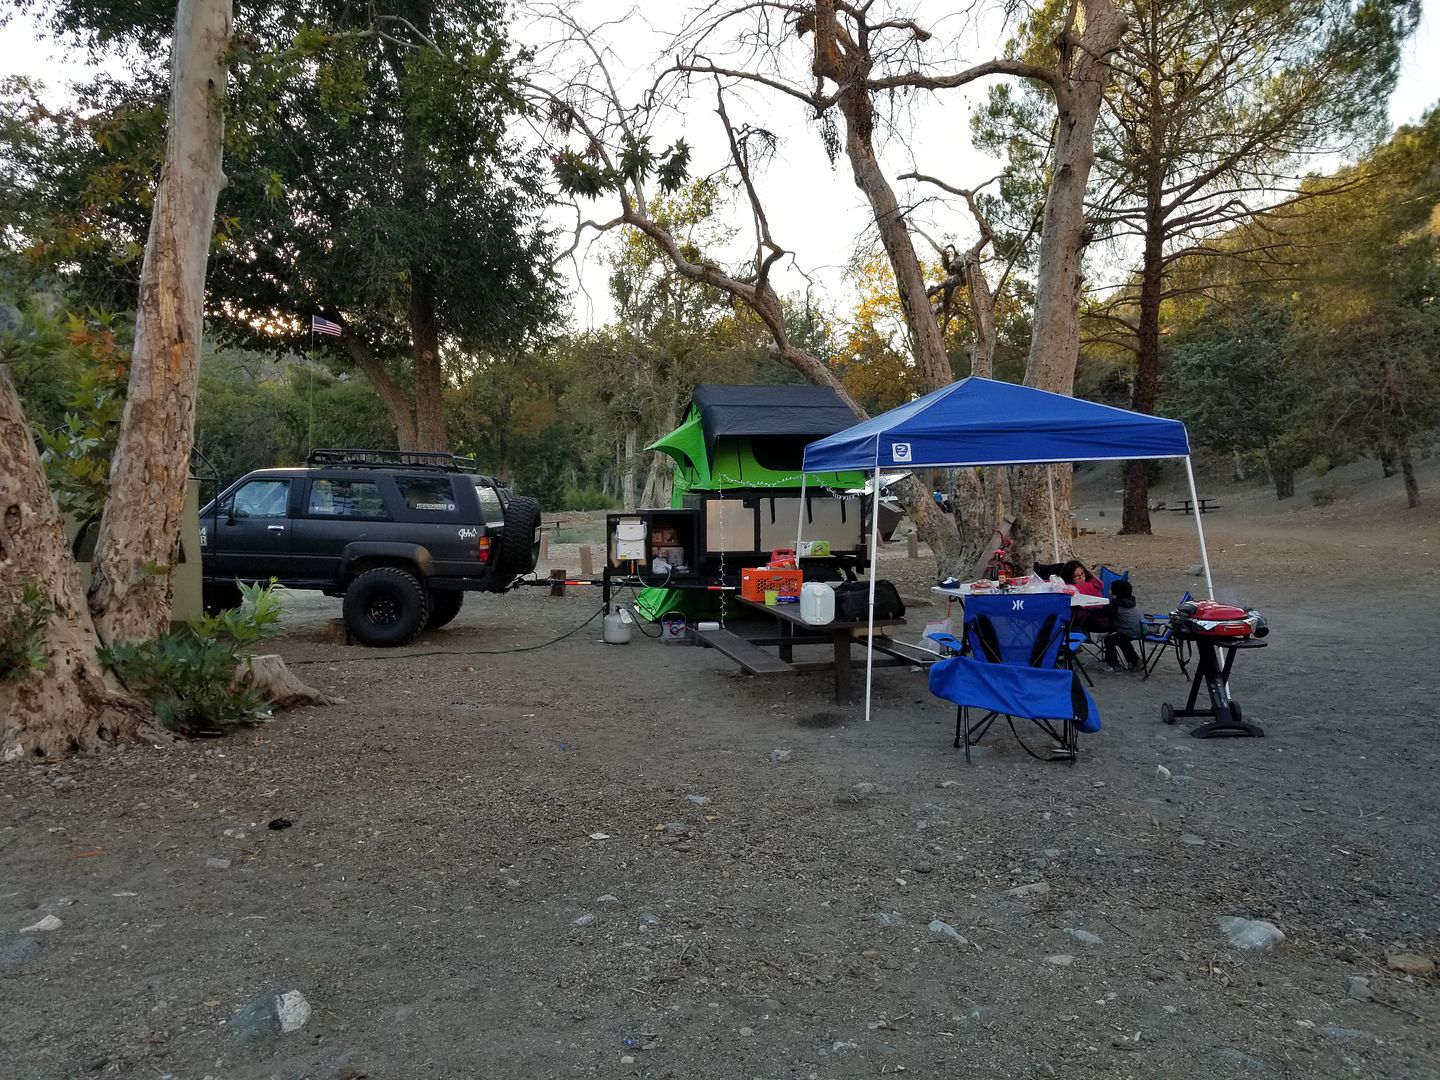
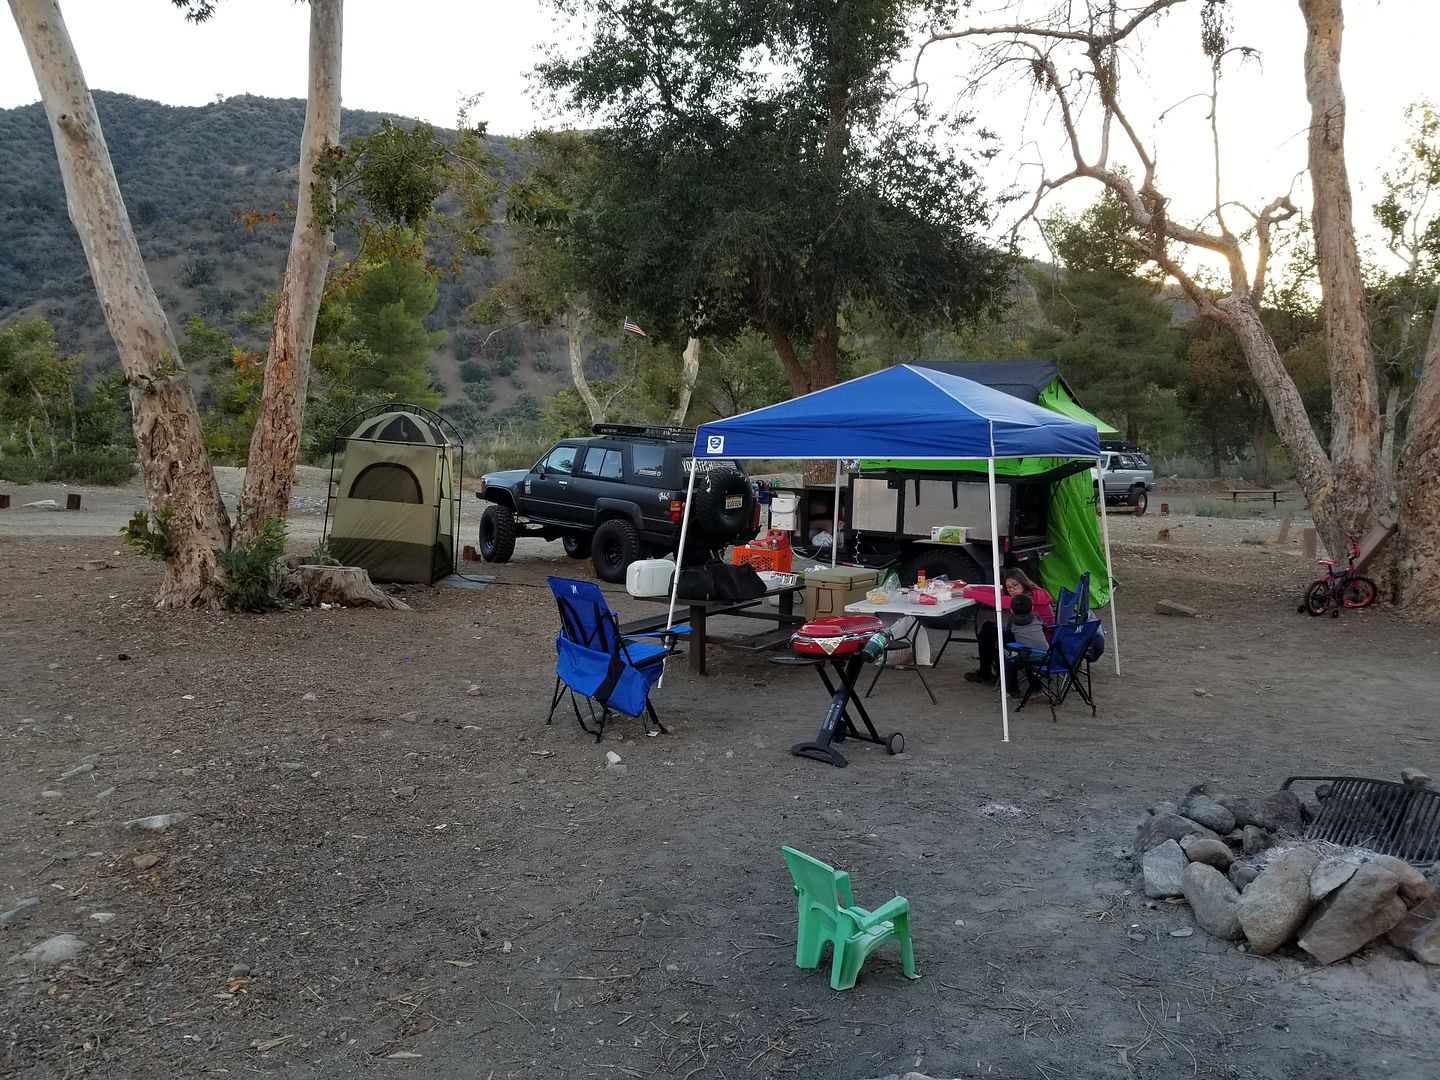
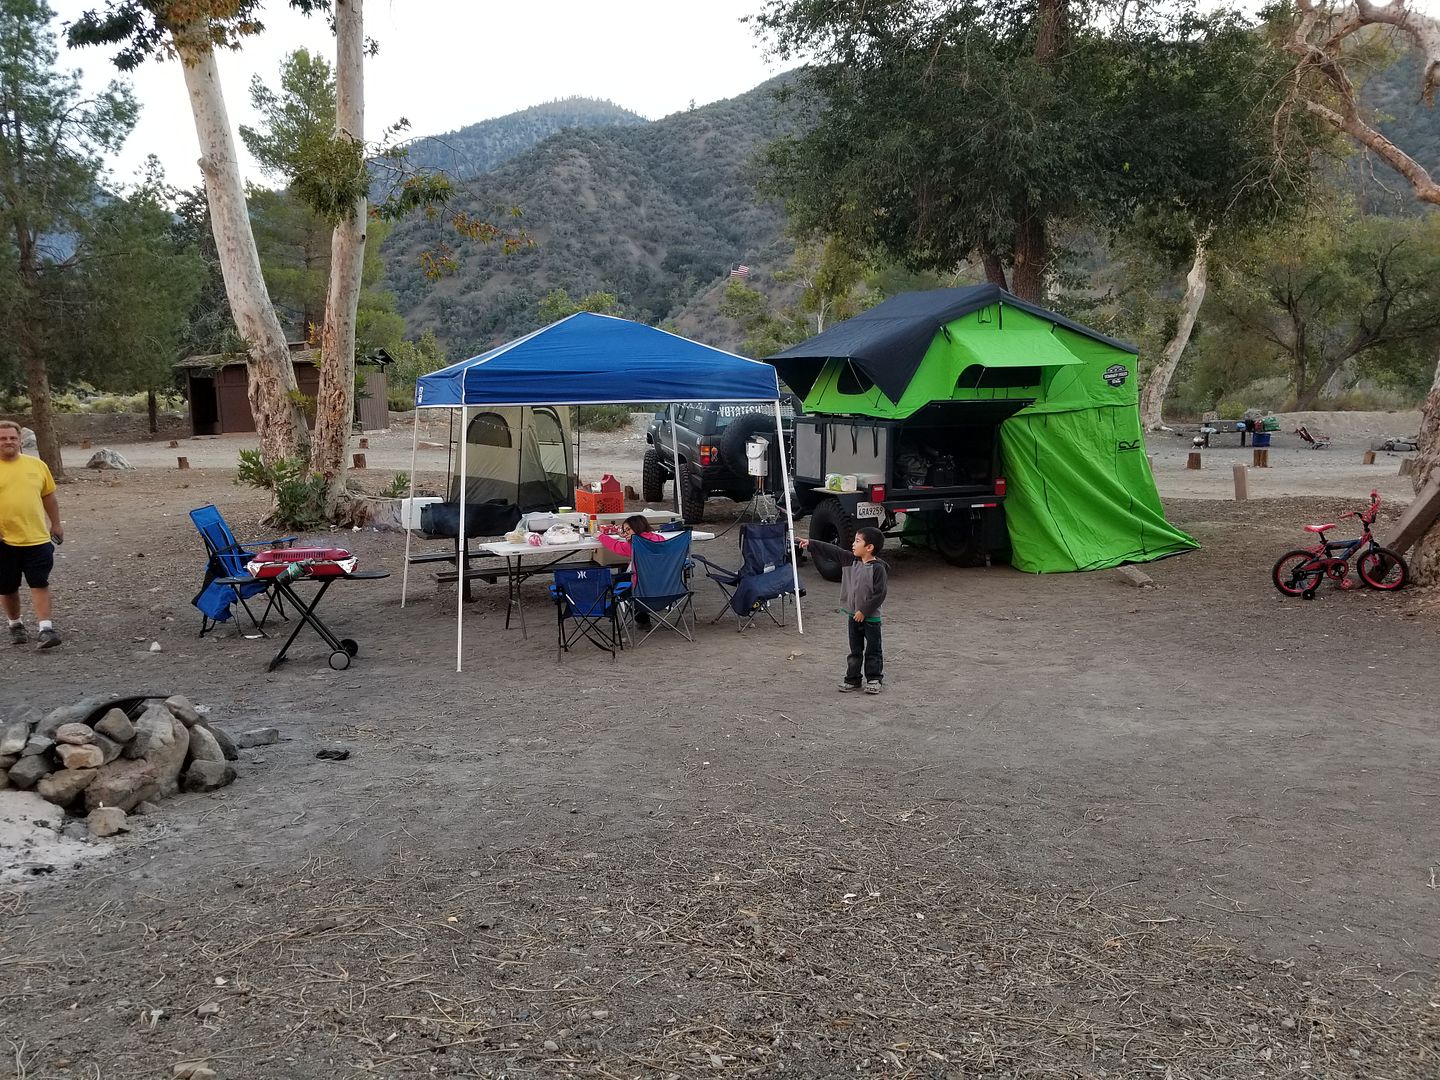
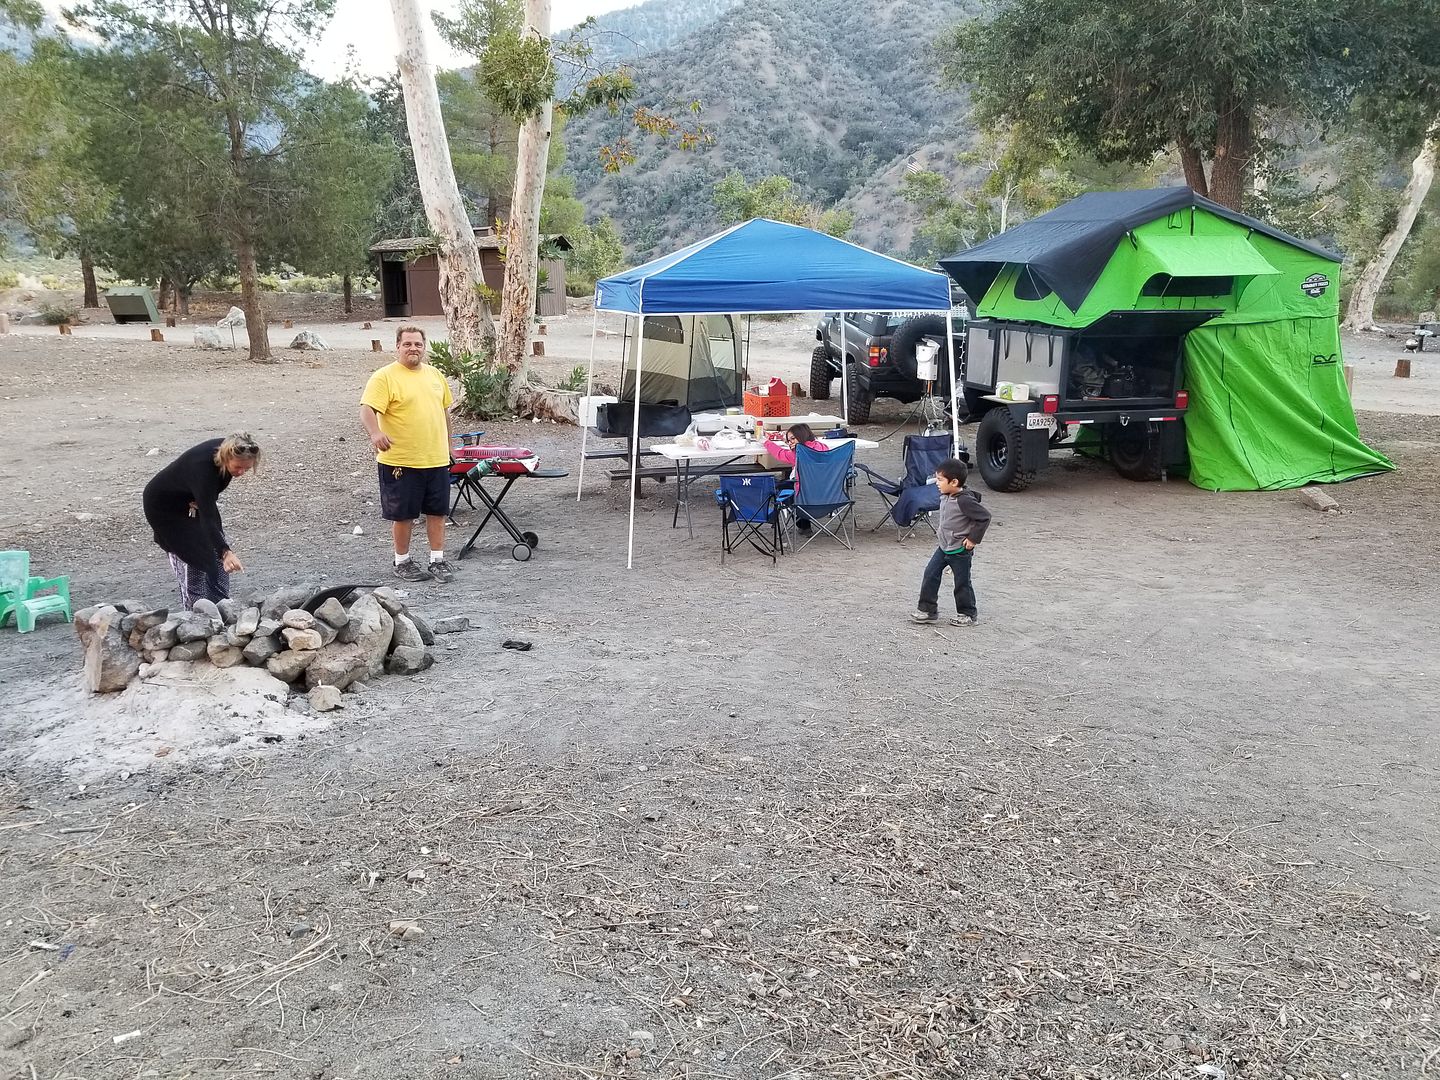
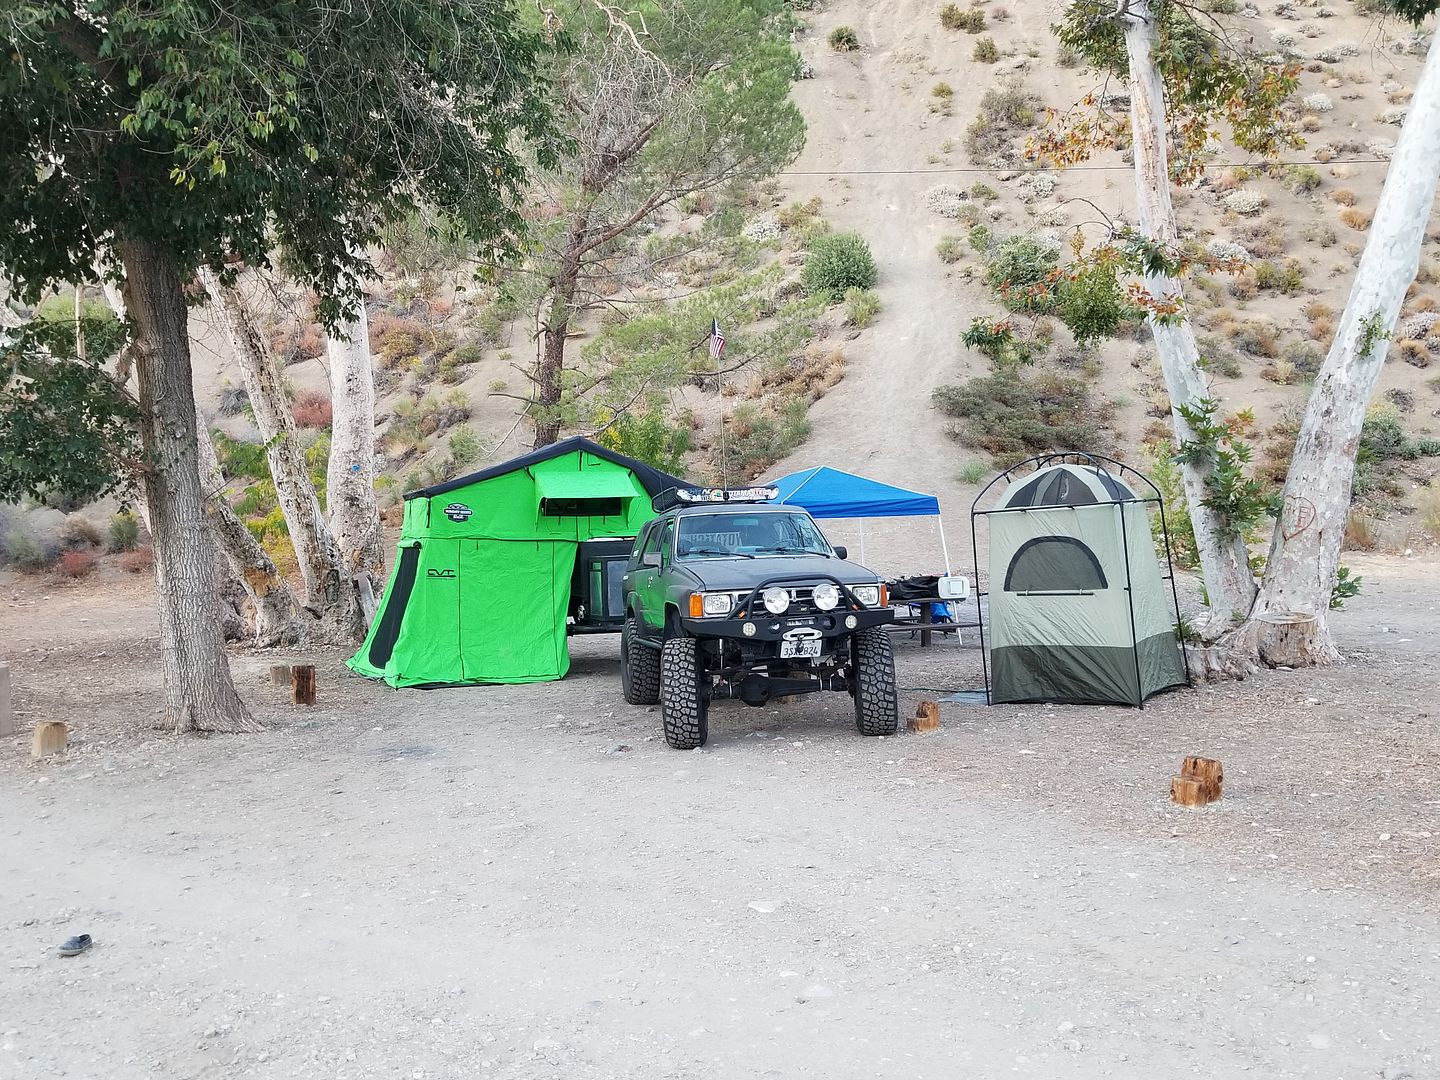
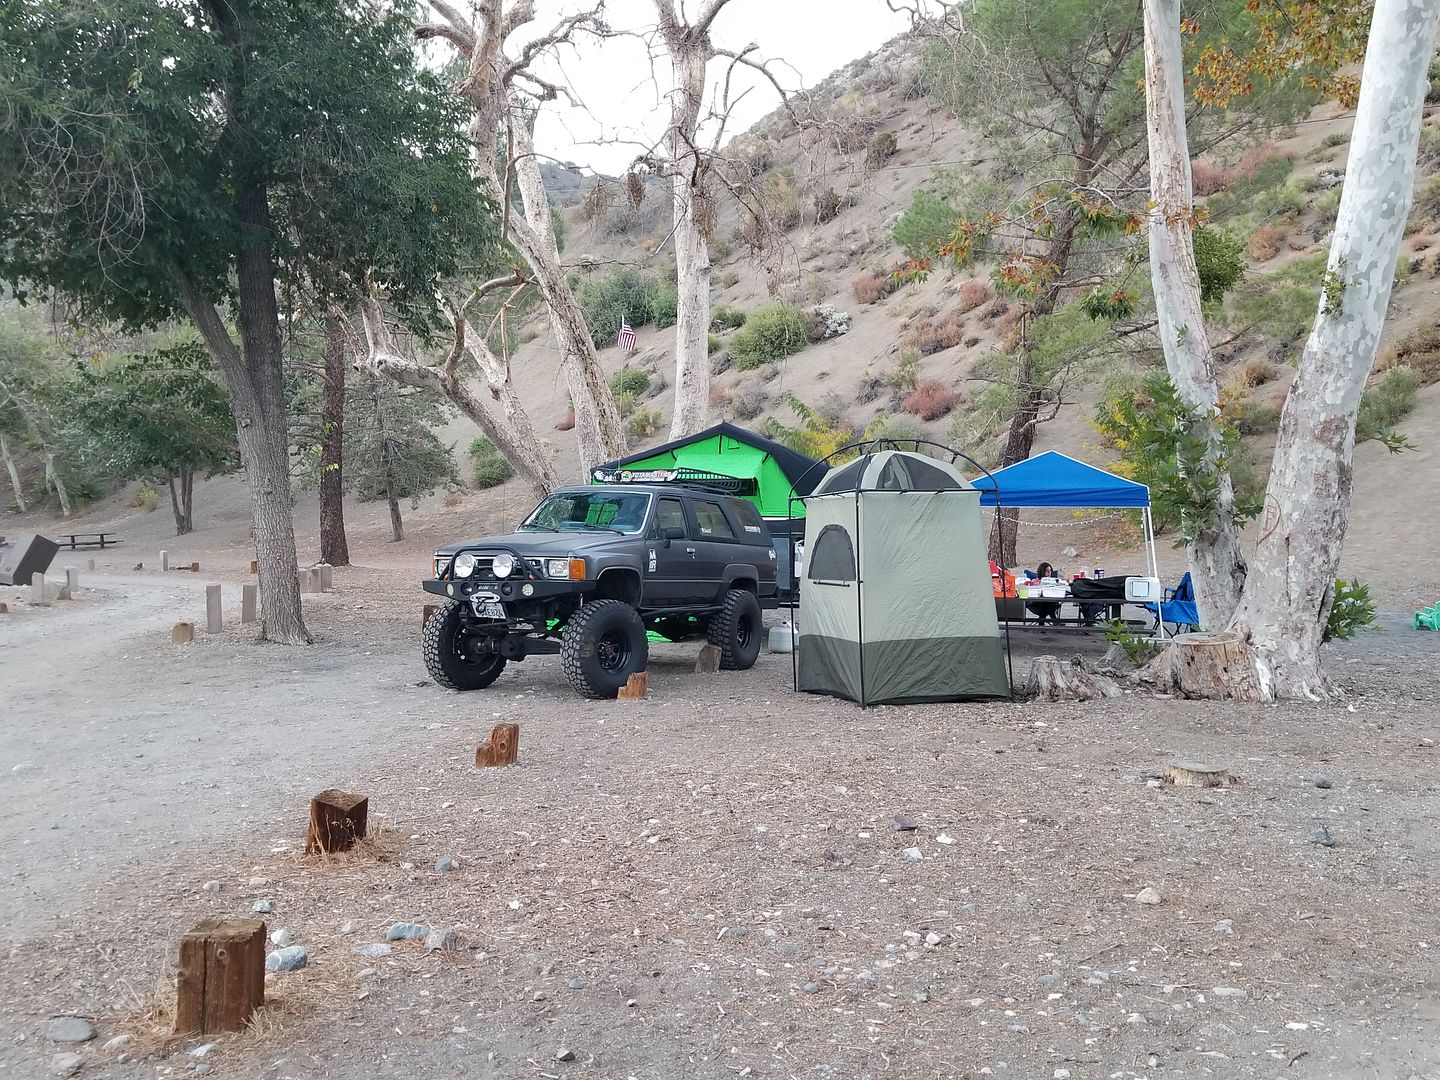
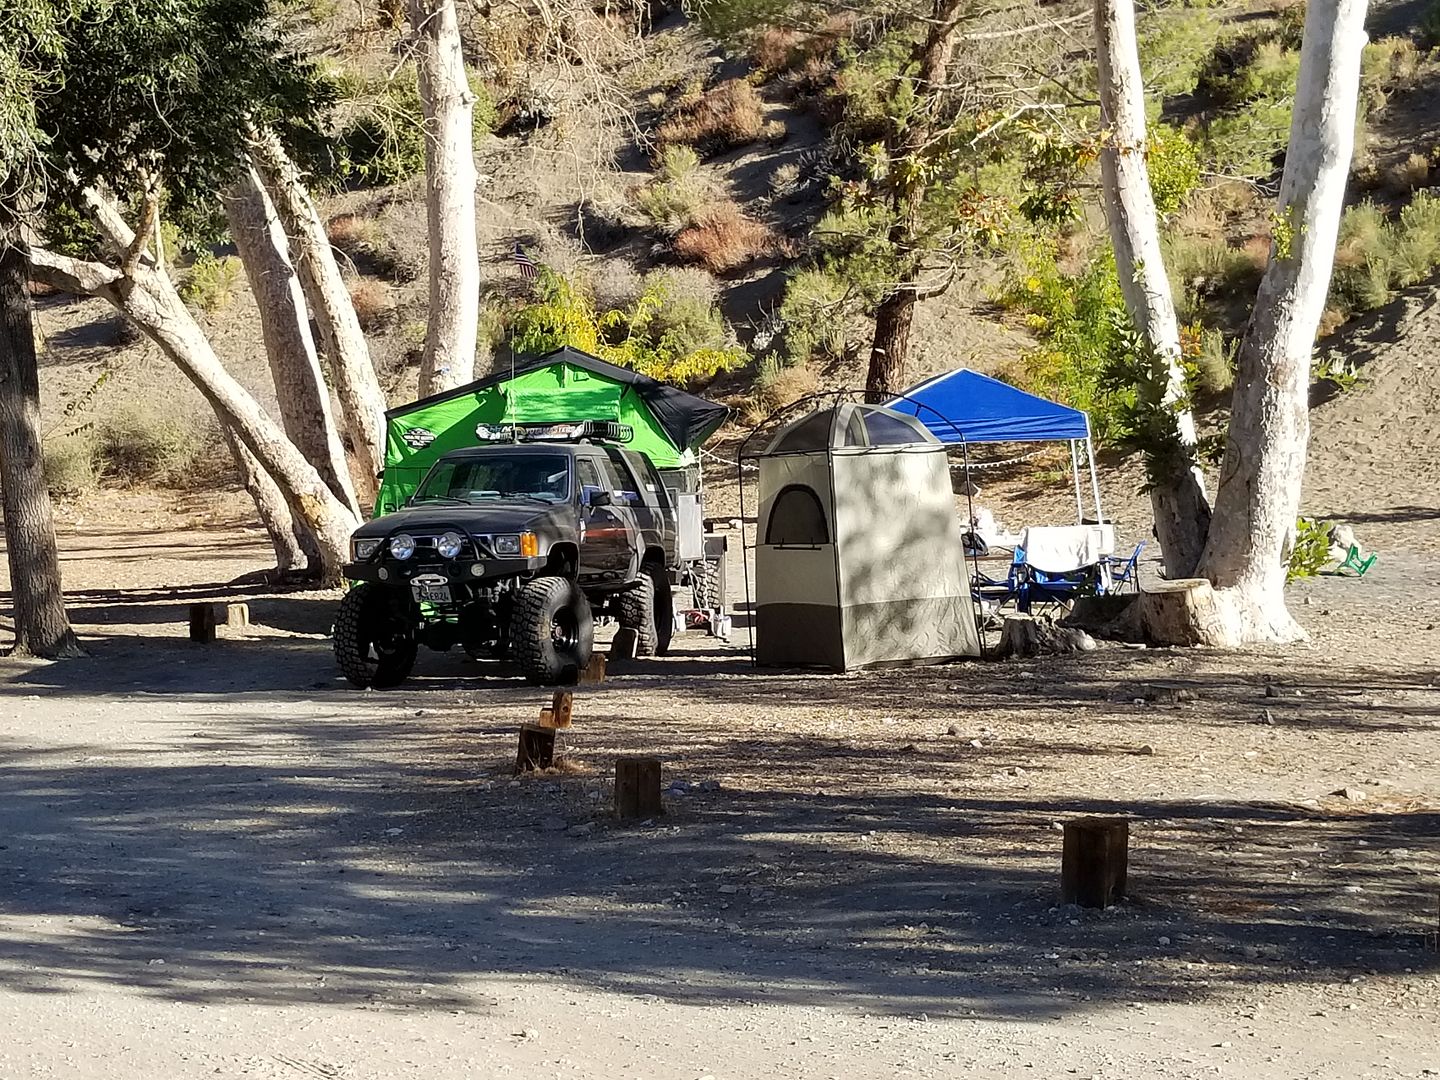
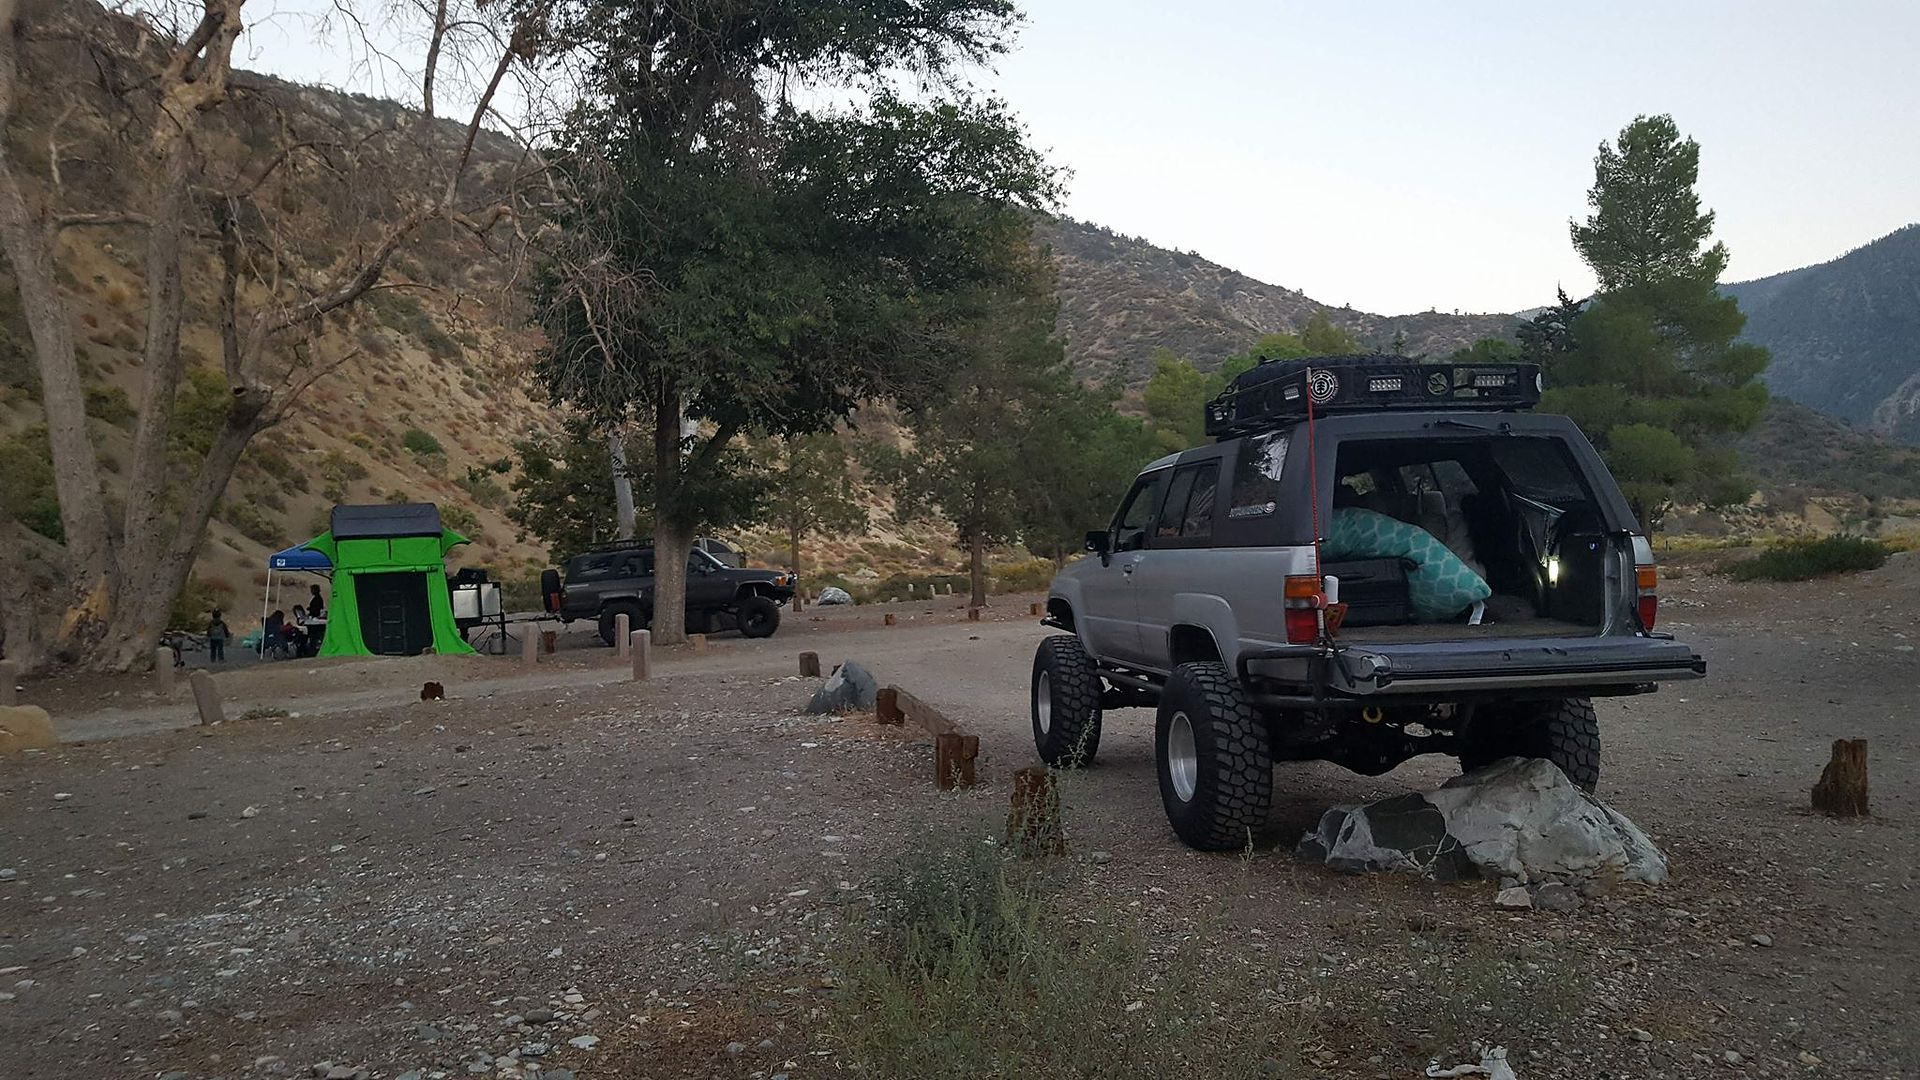
Perfect camp site on the lake front!
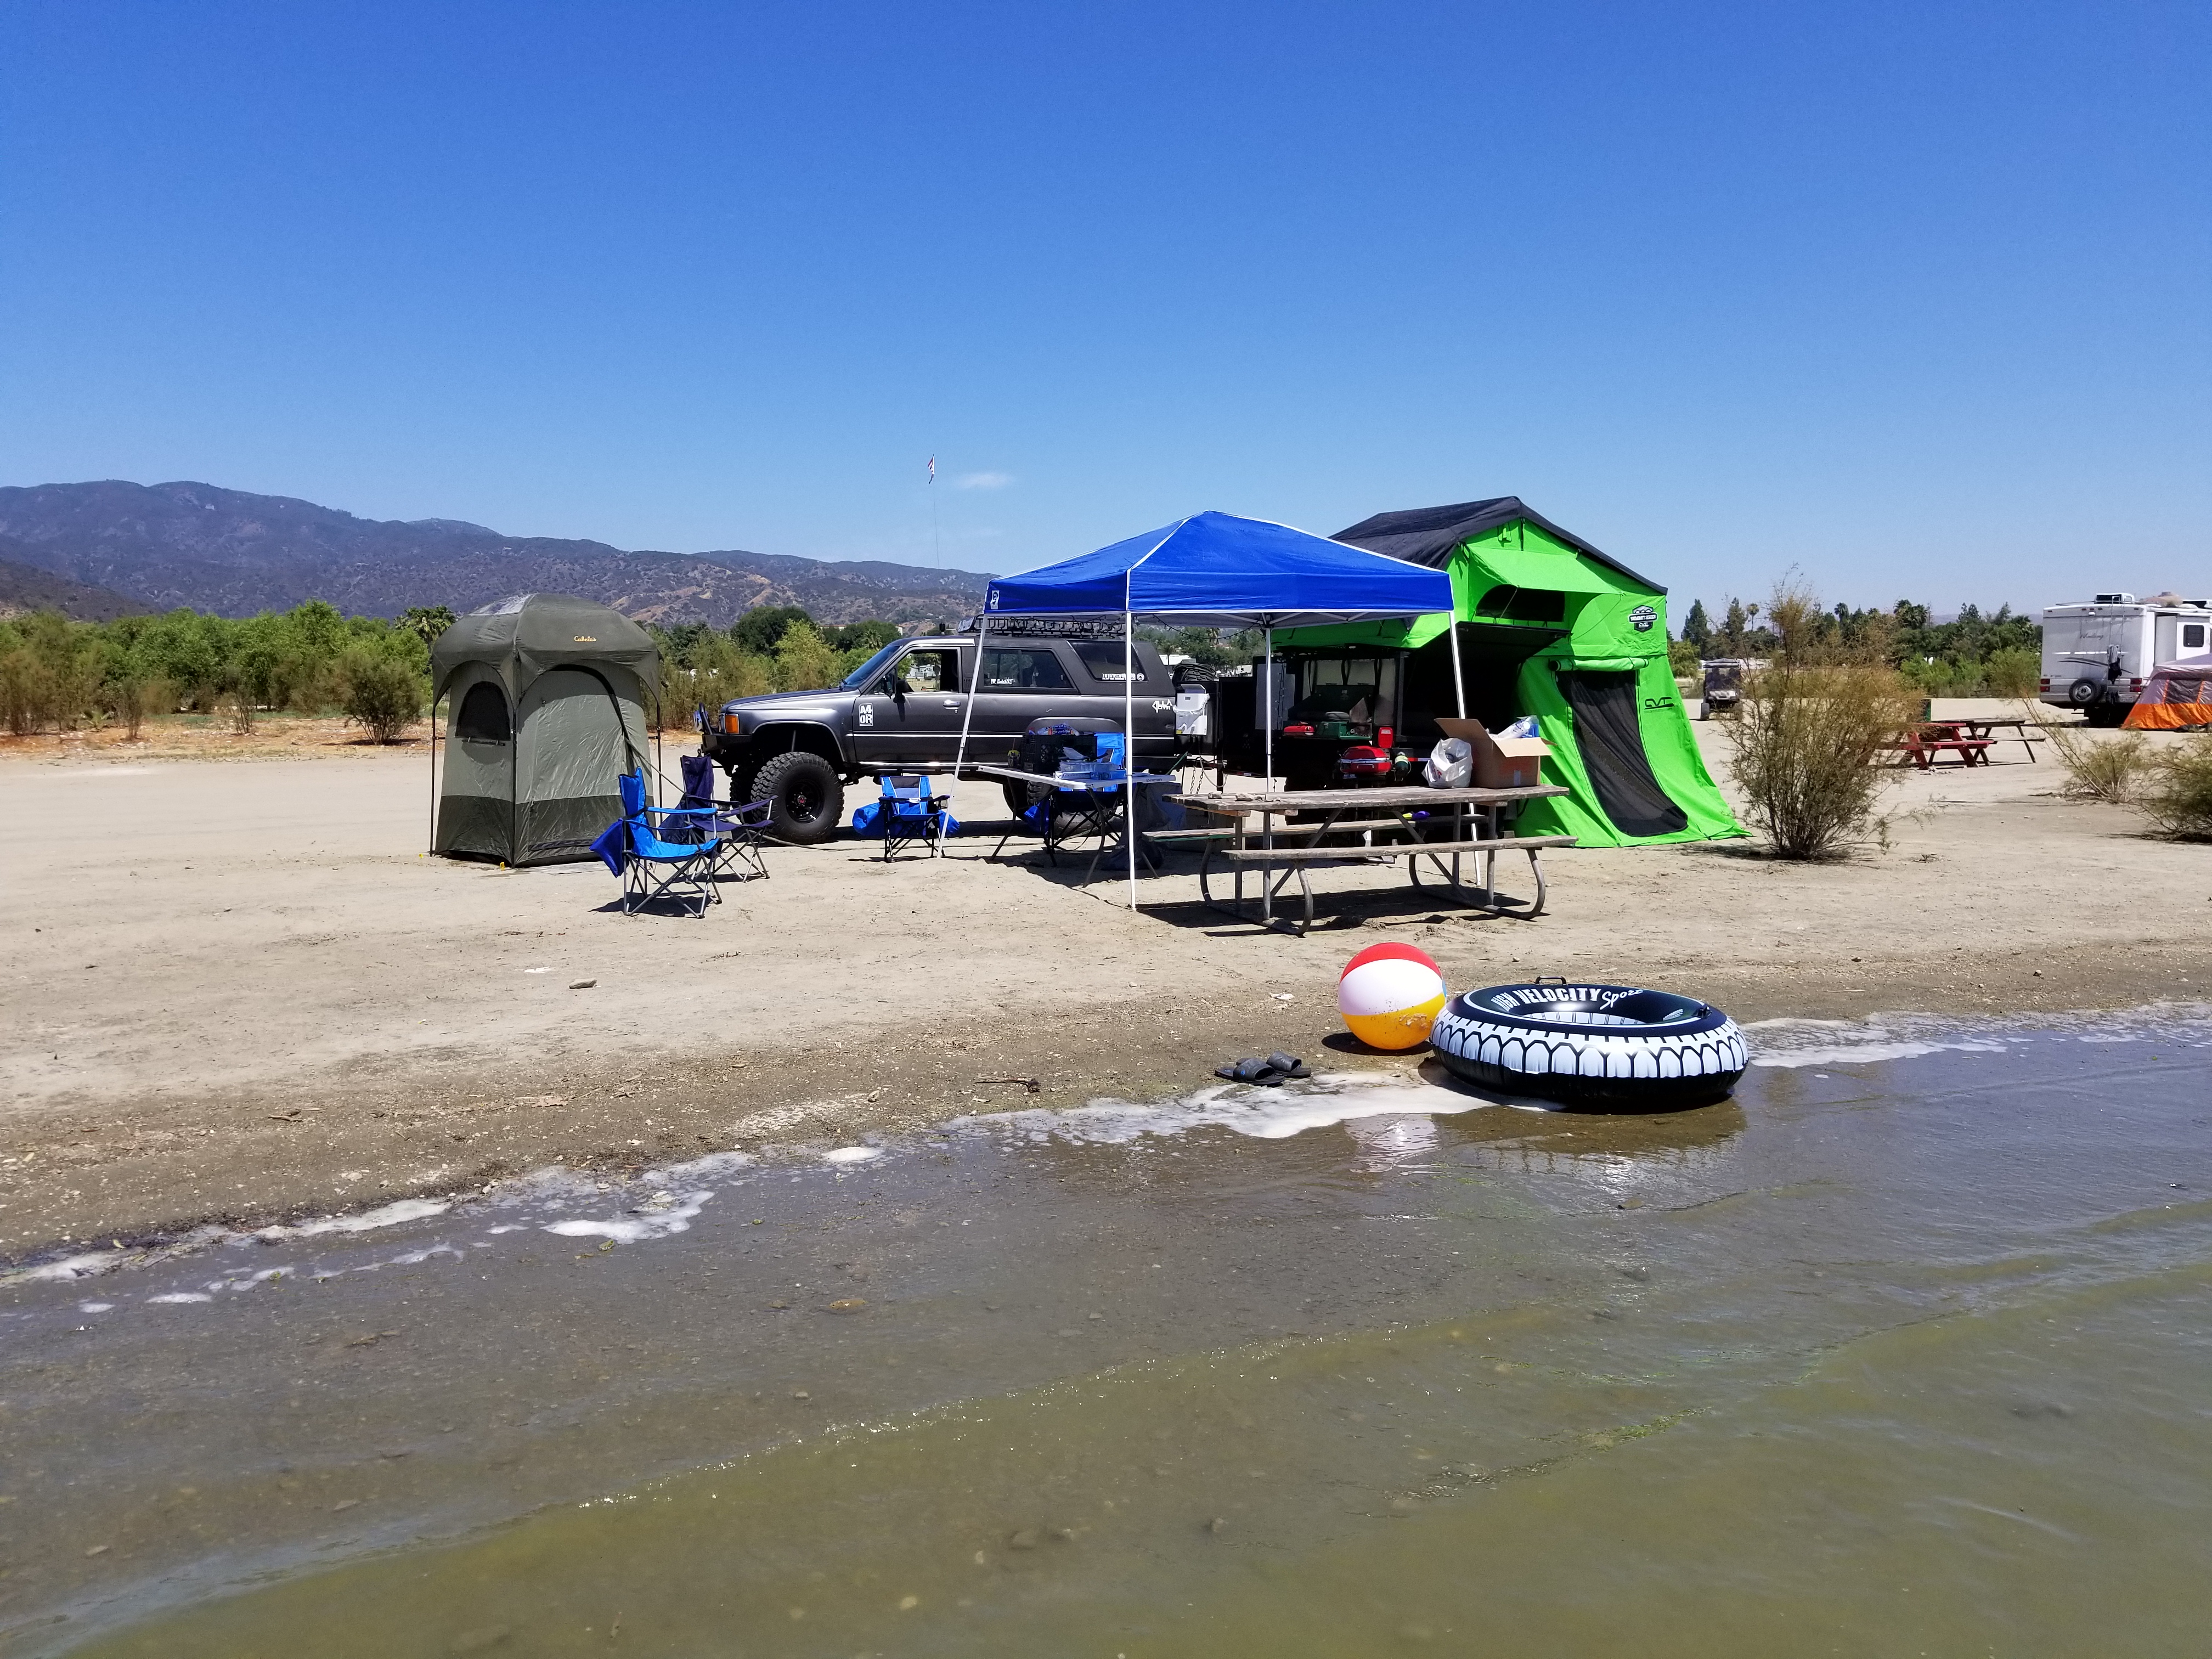
We were the only ones on the lake most of friday then people trickled in as the weekend approached. Luckily i had already reserved a pretty large space
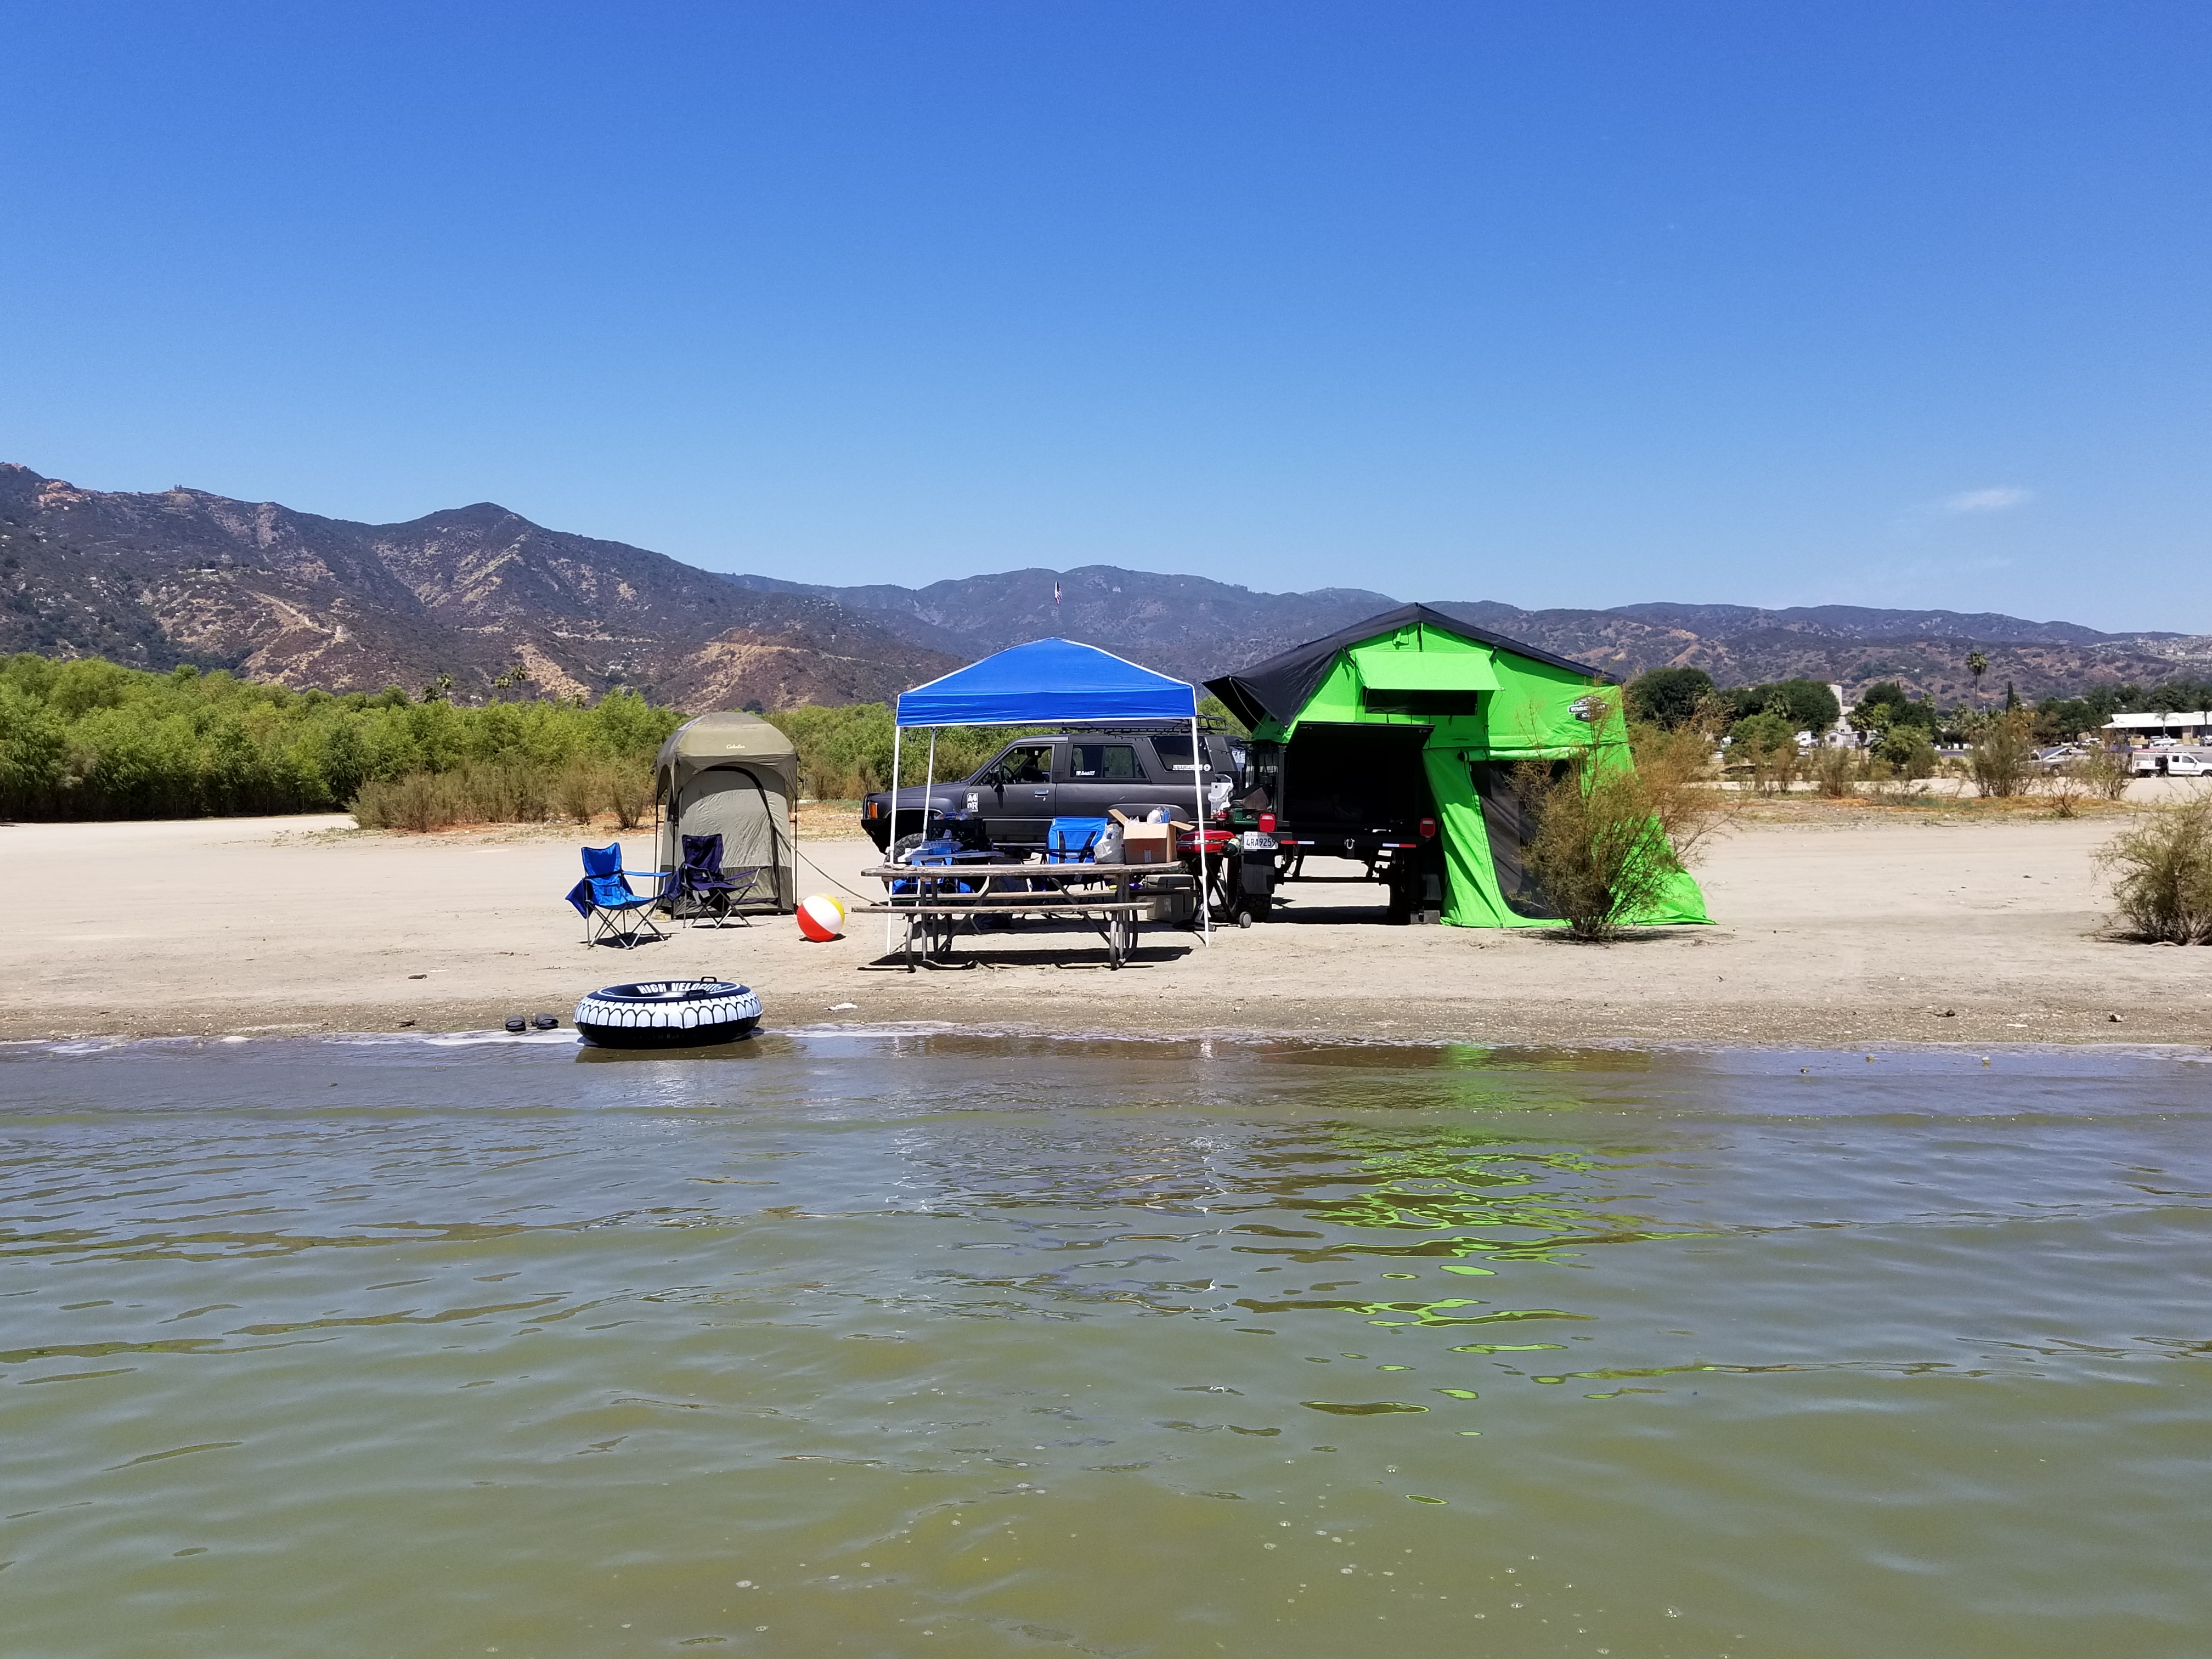
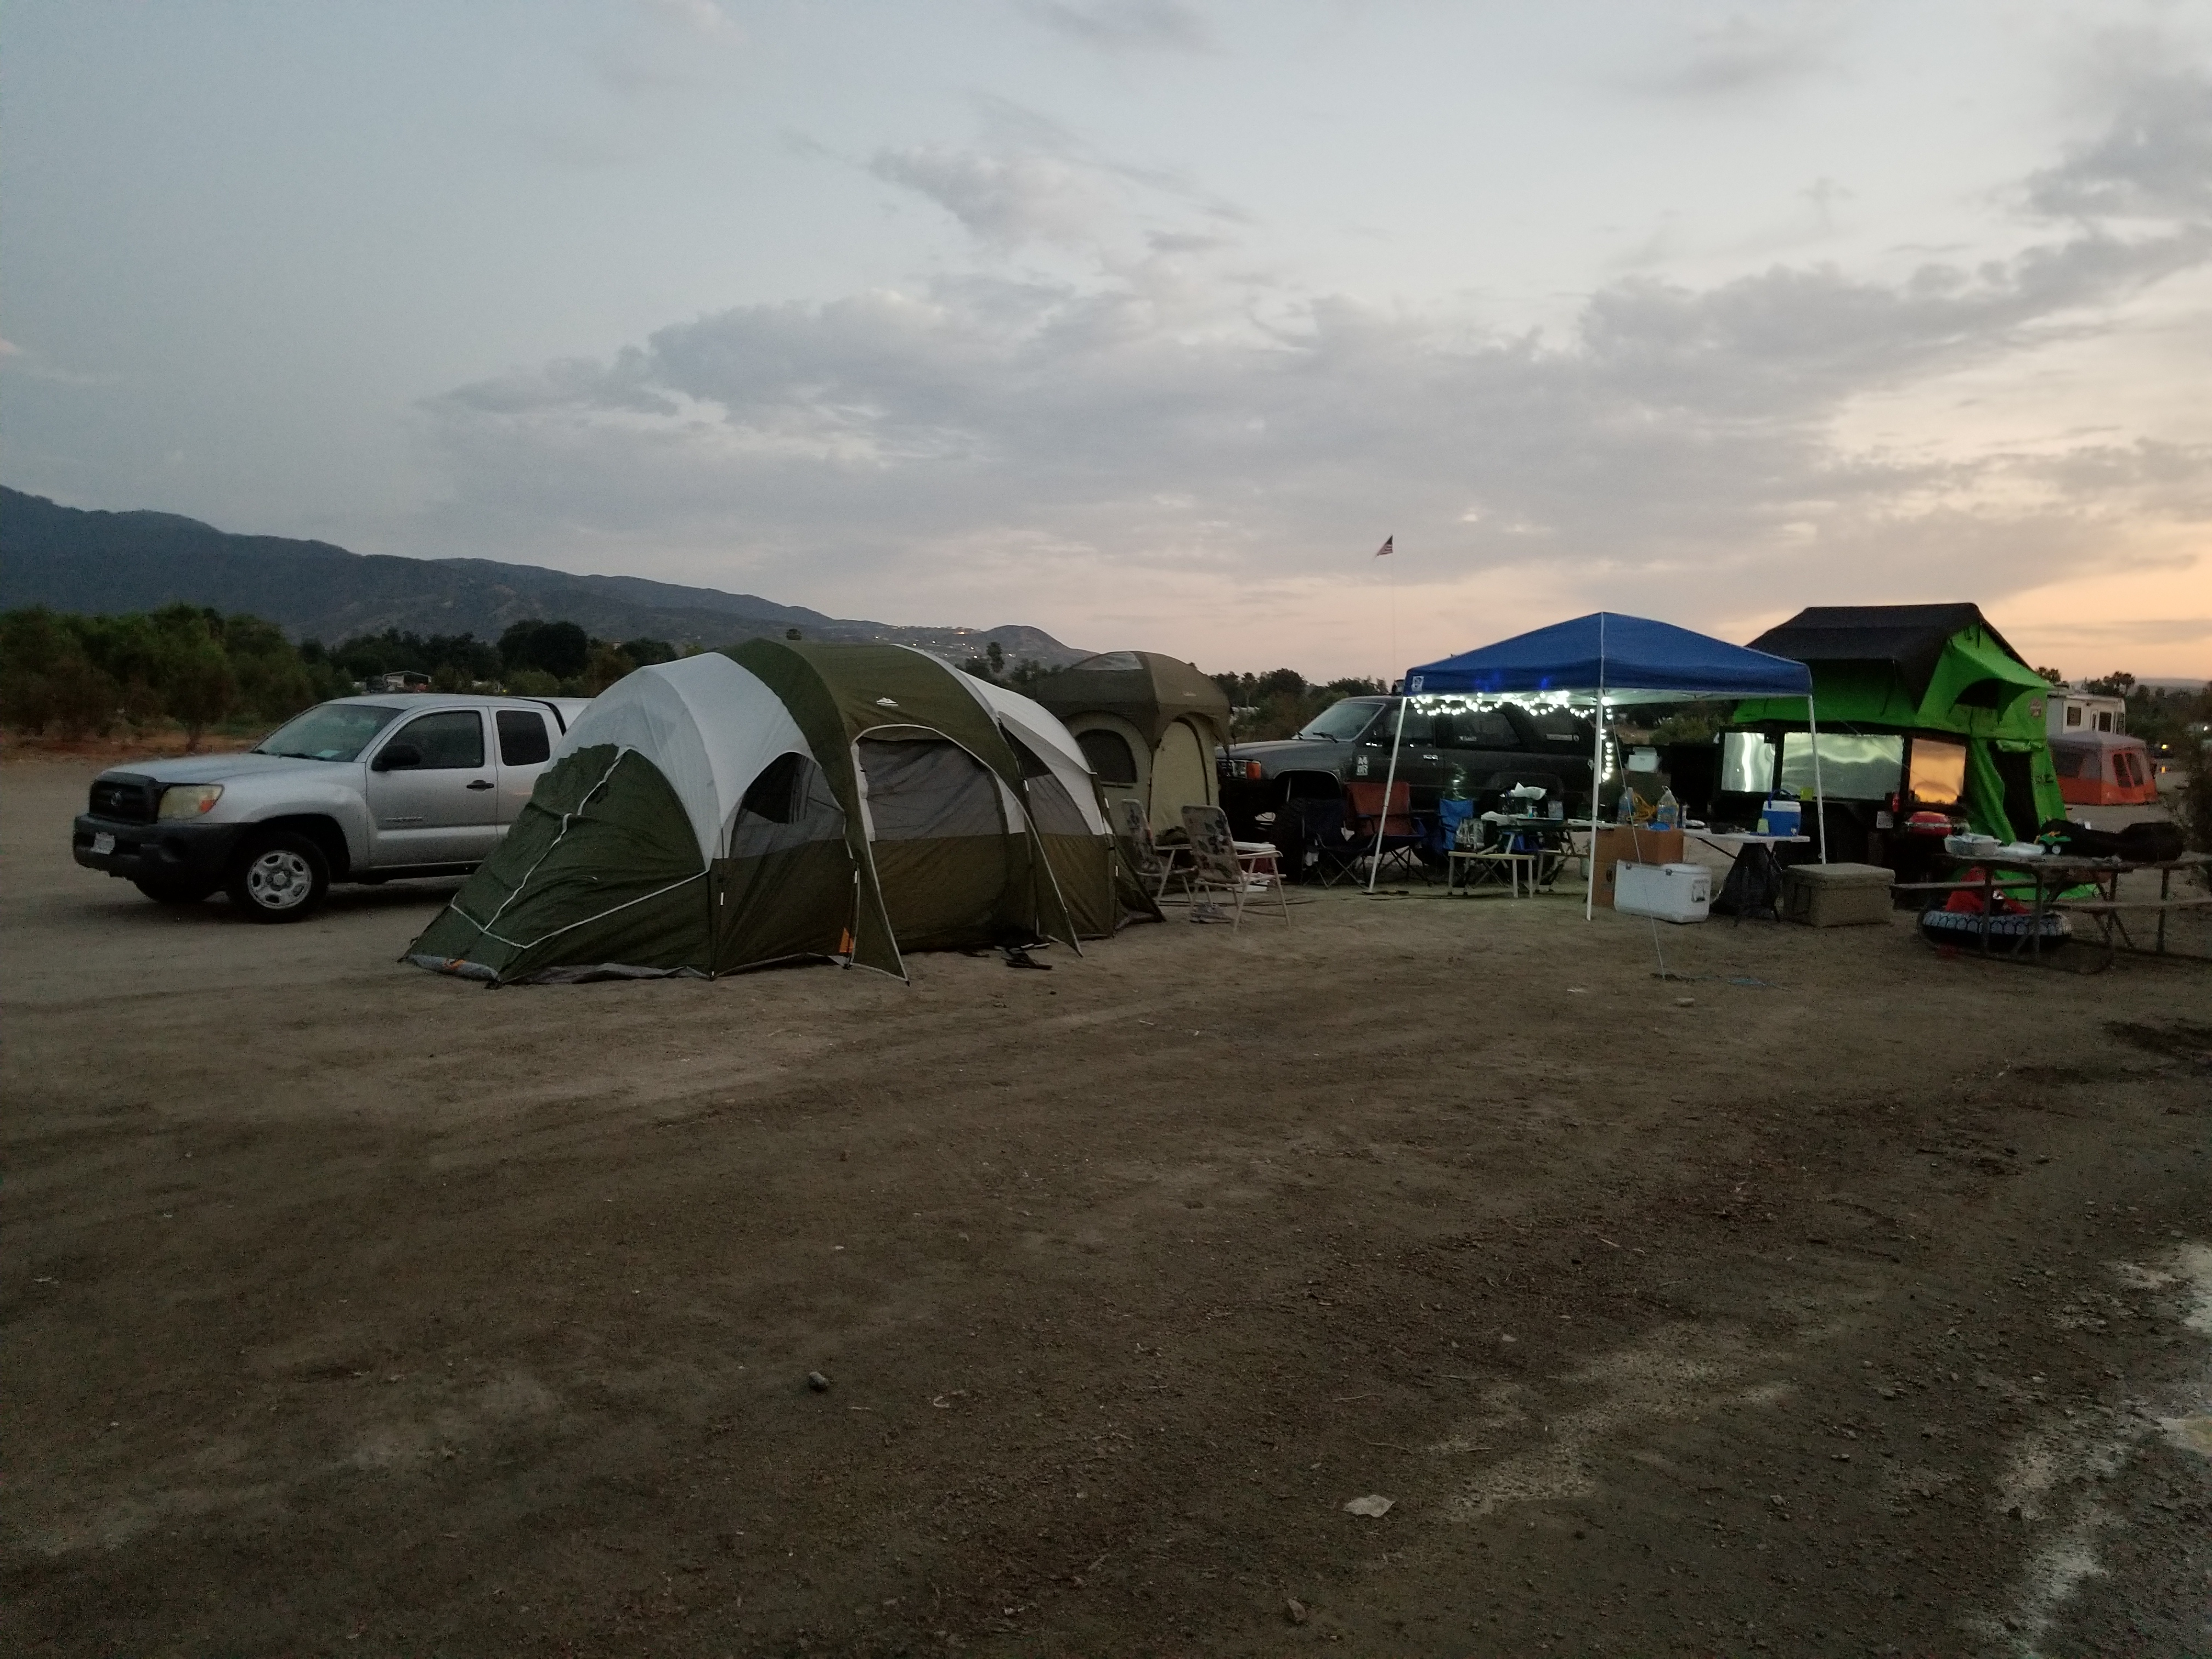
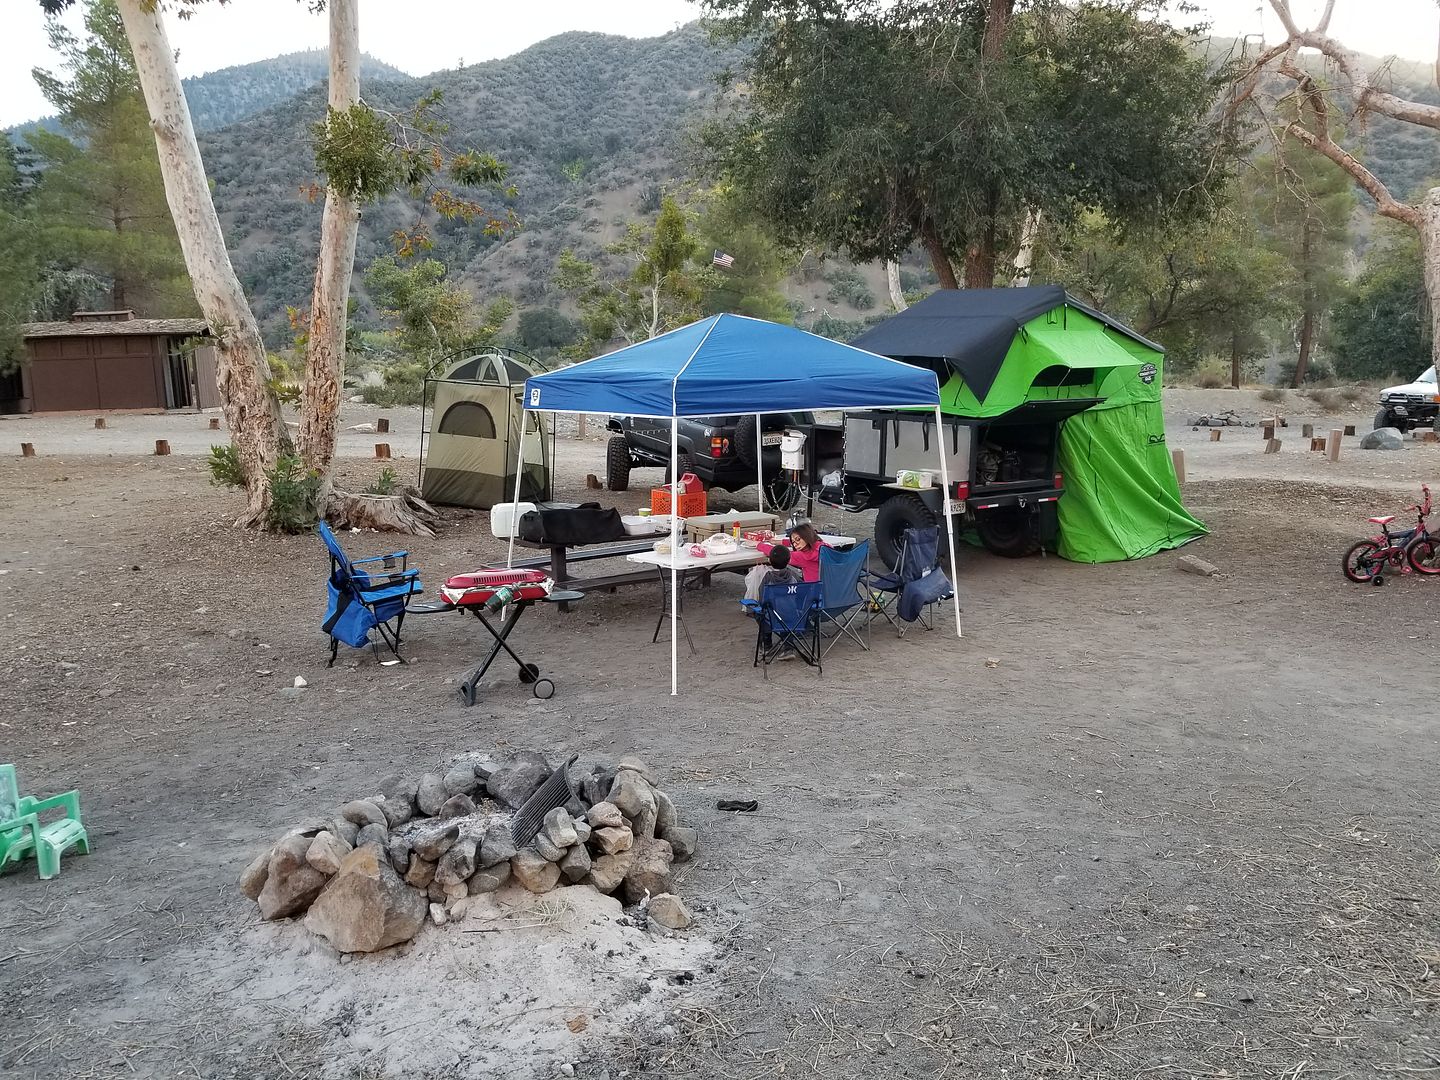
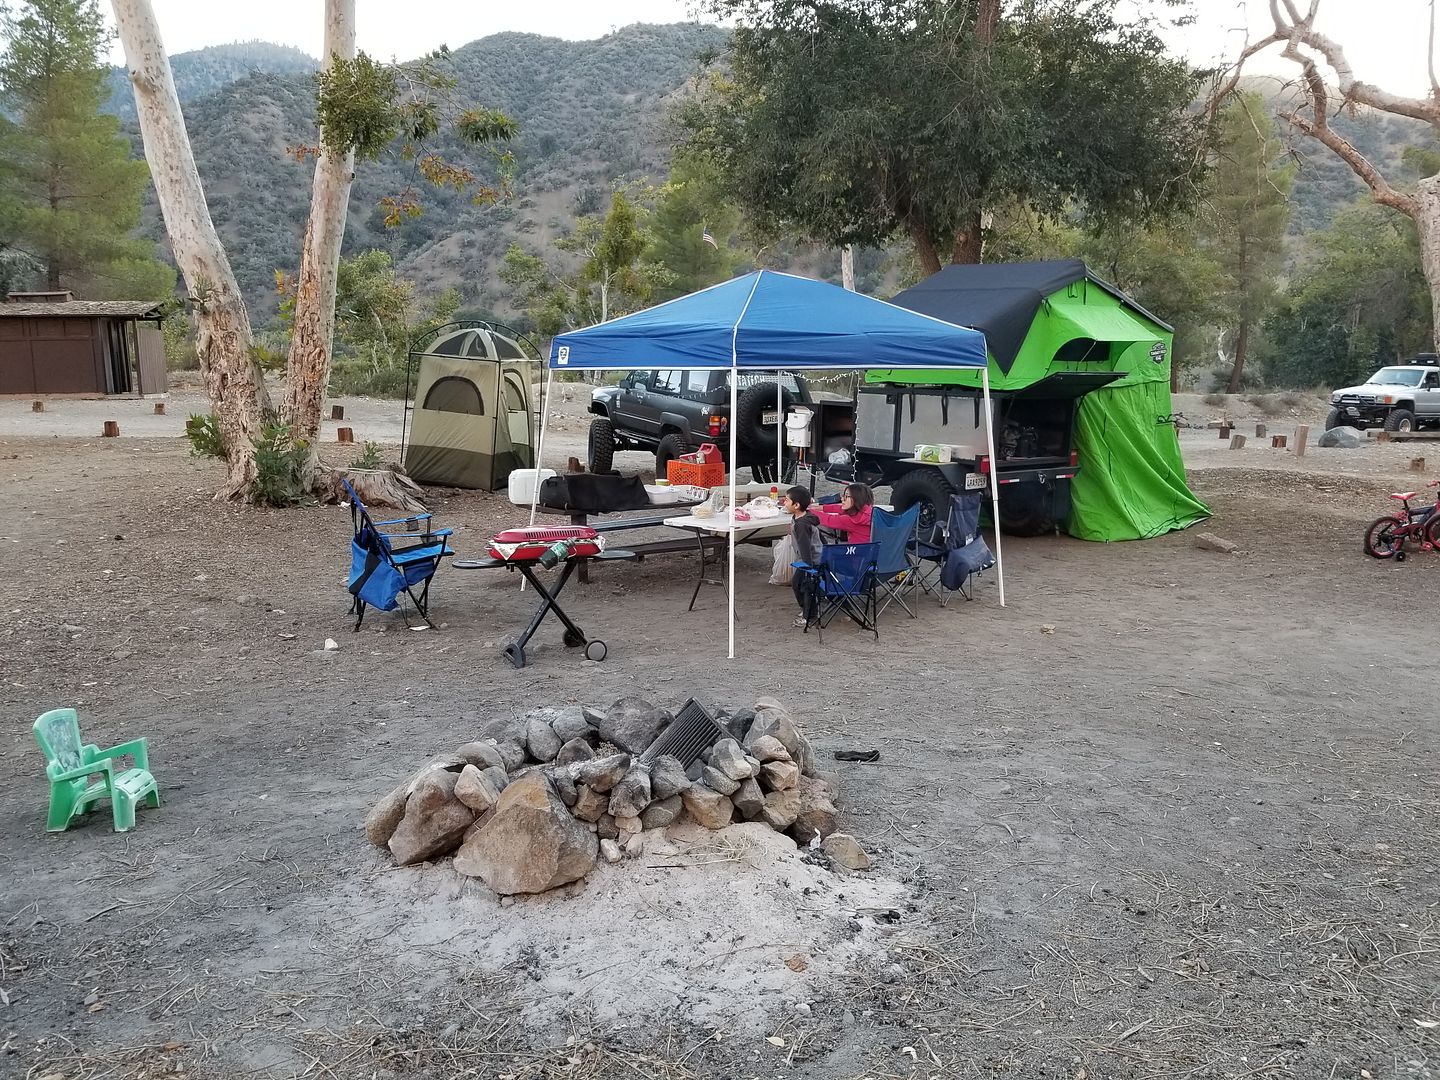
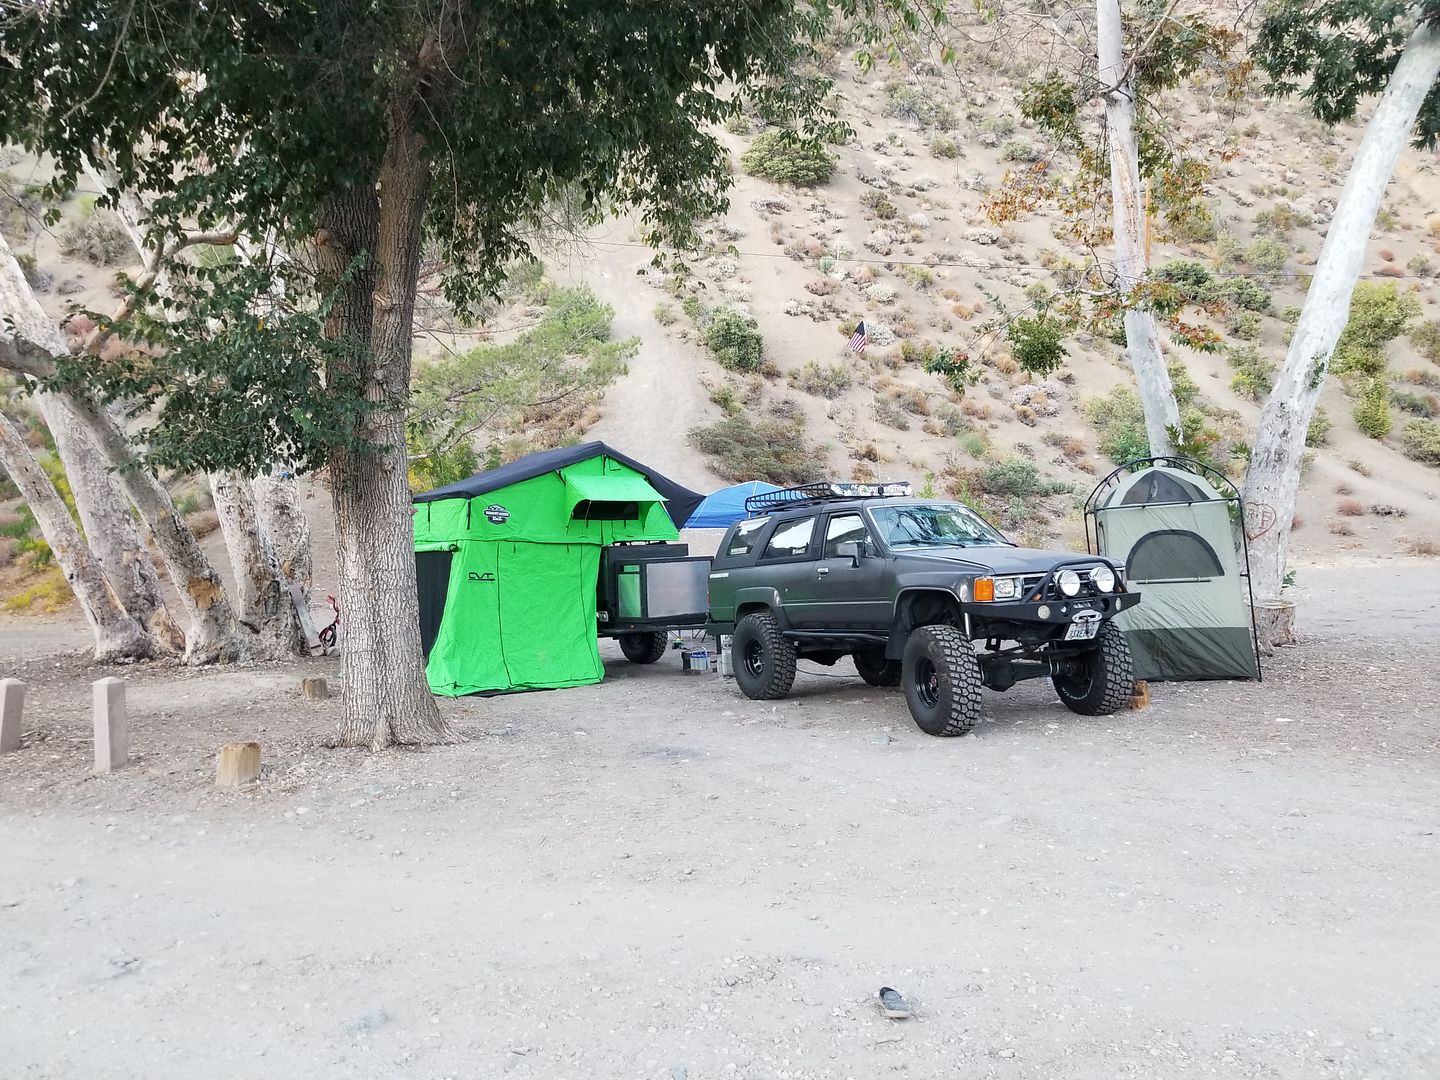
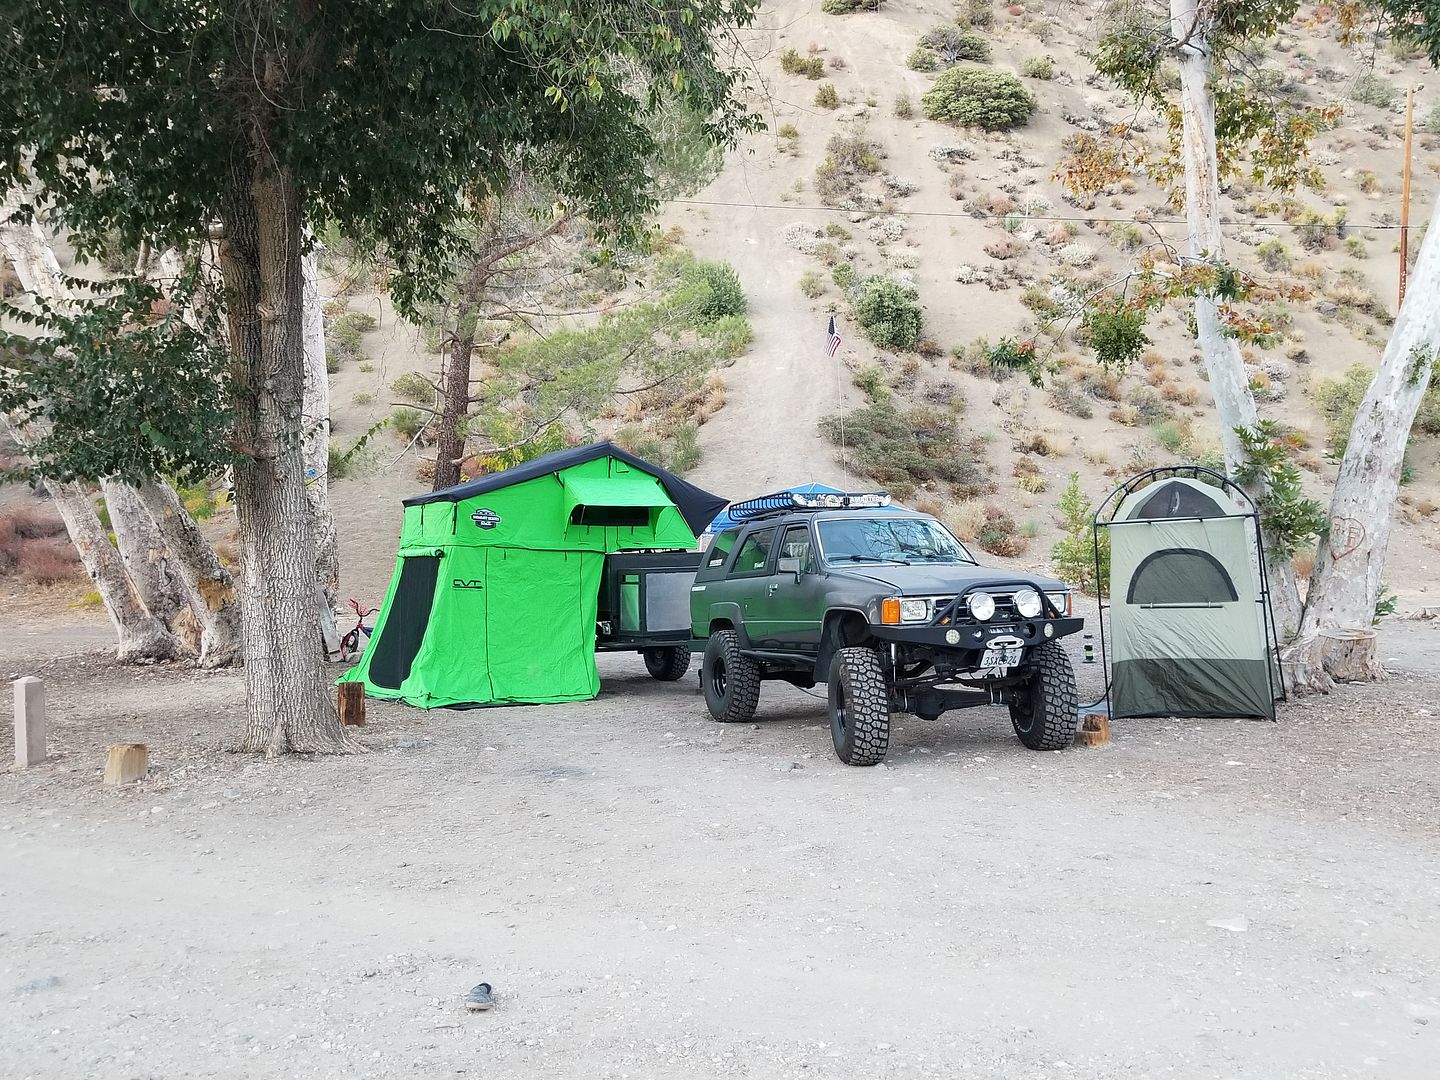
Good view of the CVT Summit series Mt Rainier tent. It is definitely an eye sore but it is definitely a good thing. You can spot my tent from super far away. and for people who don't know where my camp is at only have to look for one thing... "The bright green roof top tent" not to mention when we go swimming most people at all camp sites have similar colors. So this is easy to spot and easy for everyone to know when they are drifting off too far away from camp when having fun in the water.

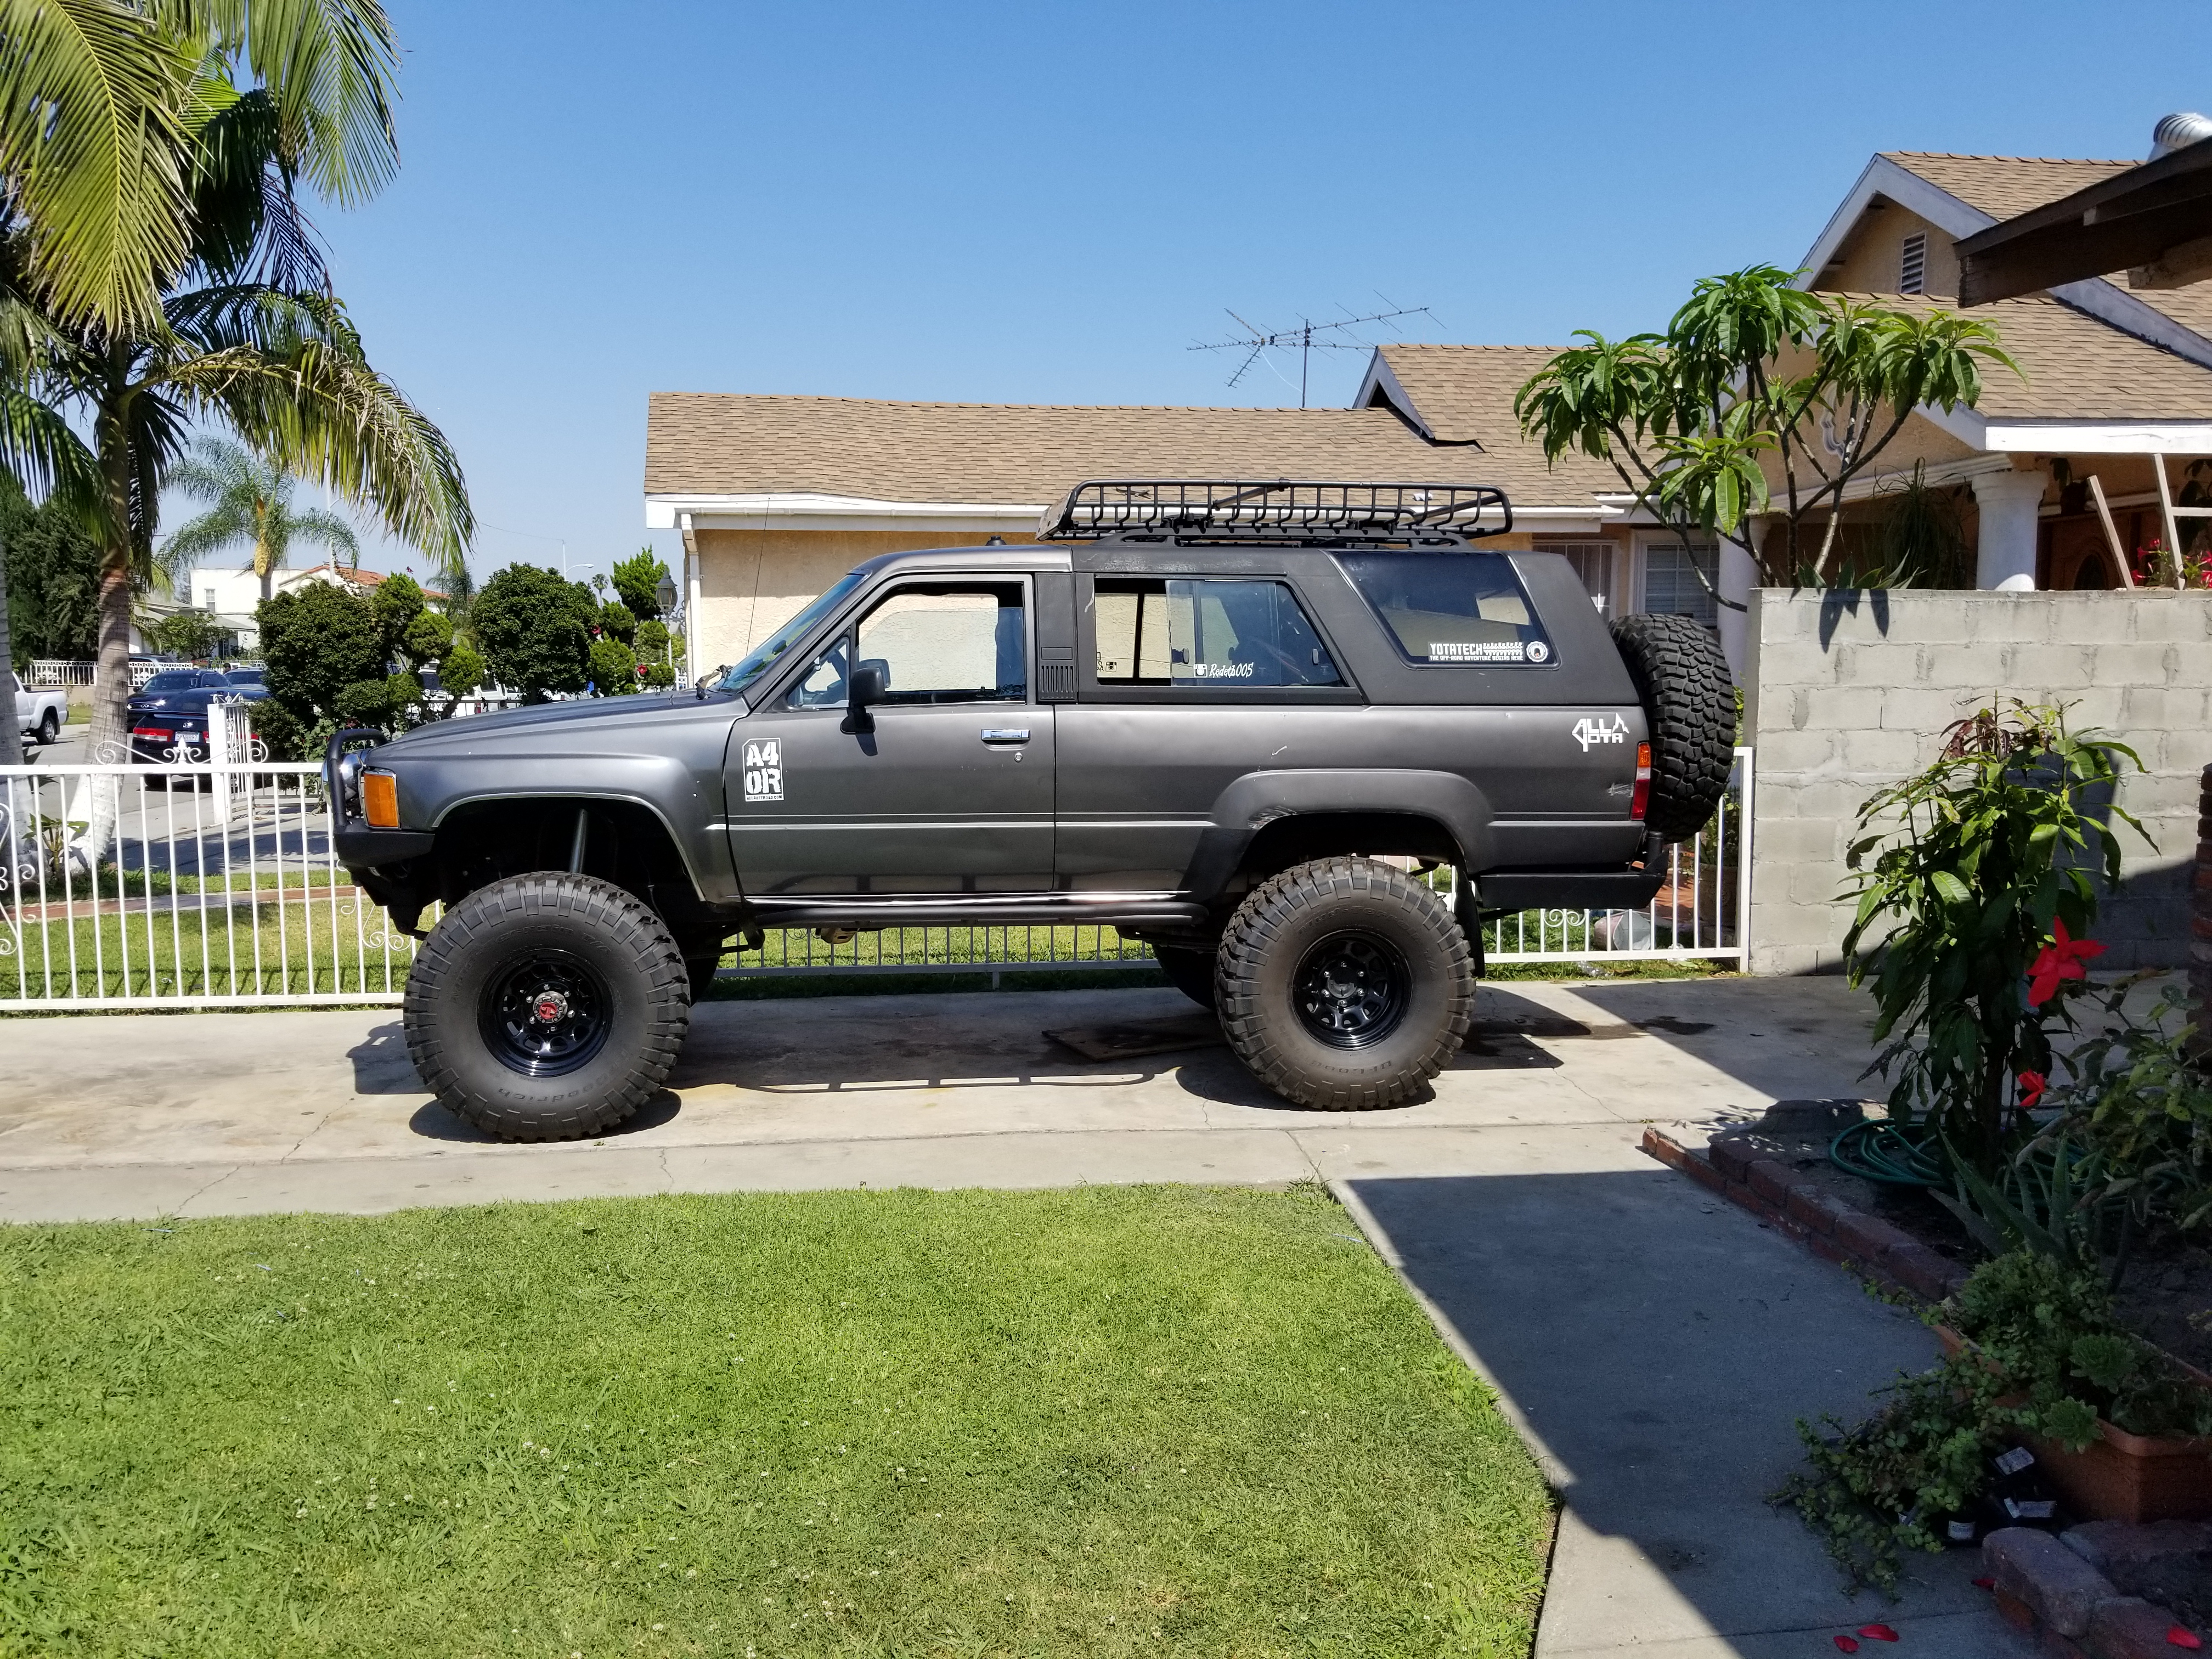
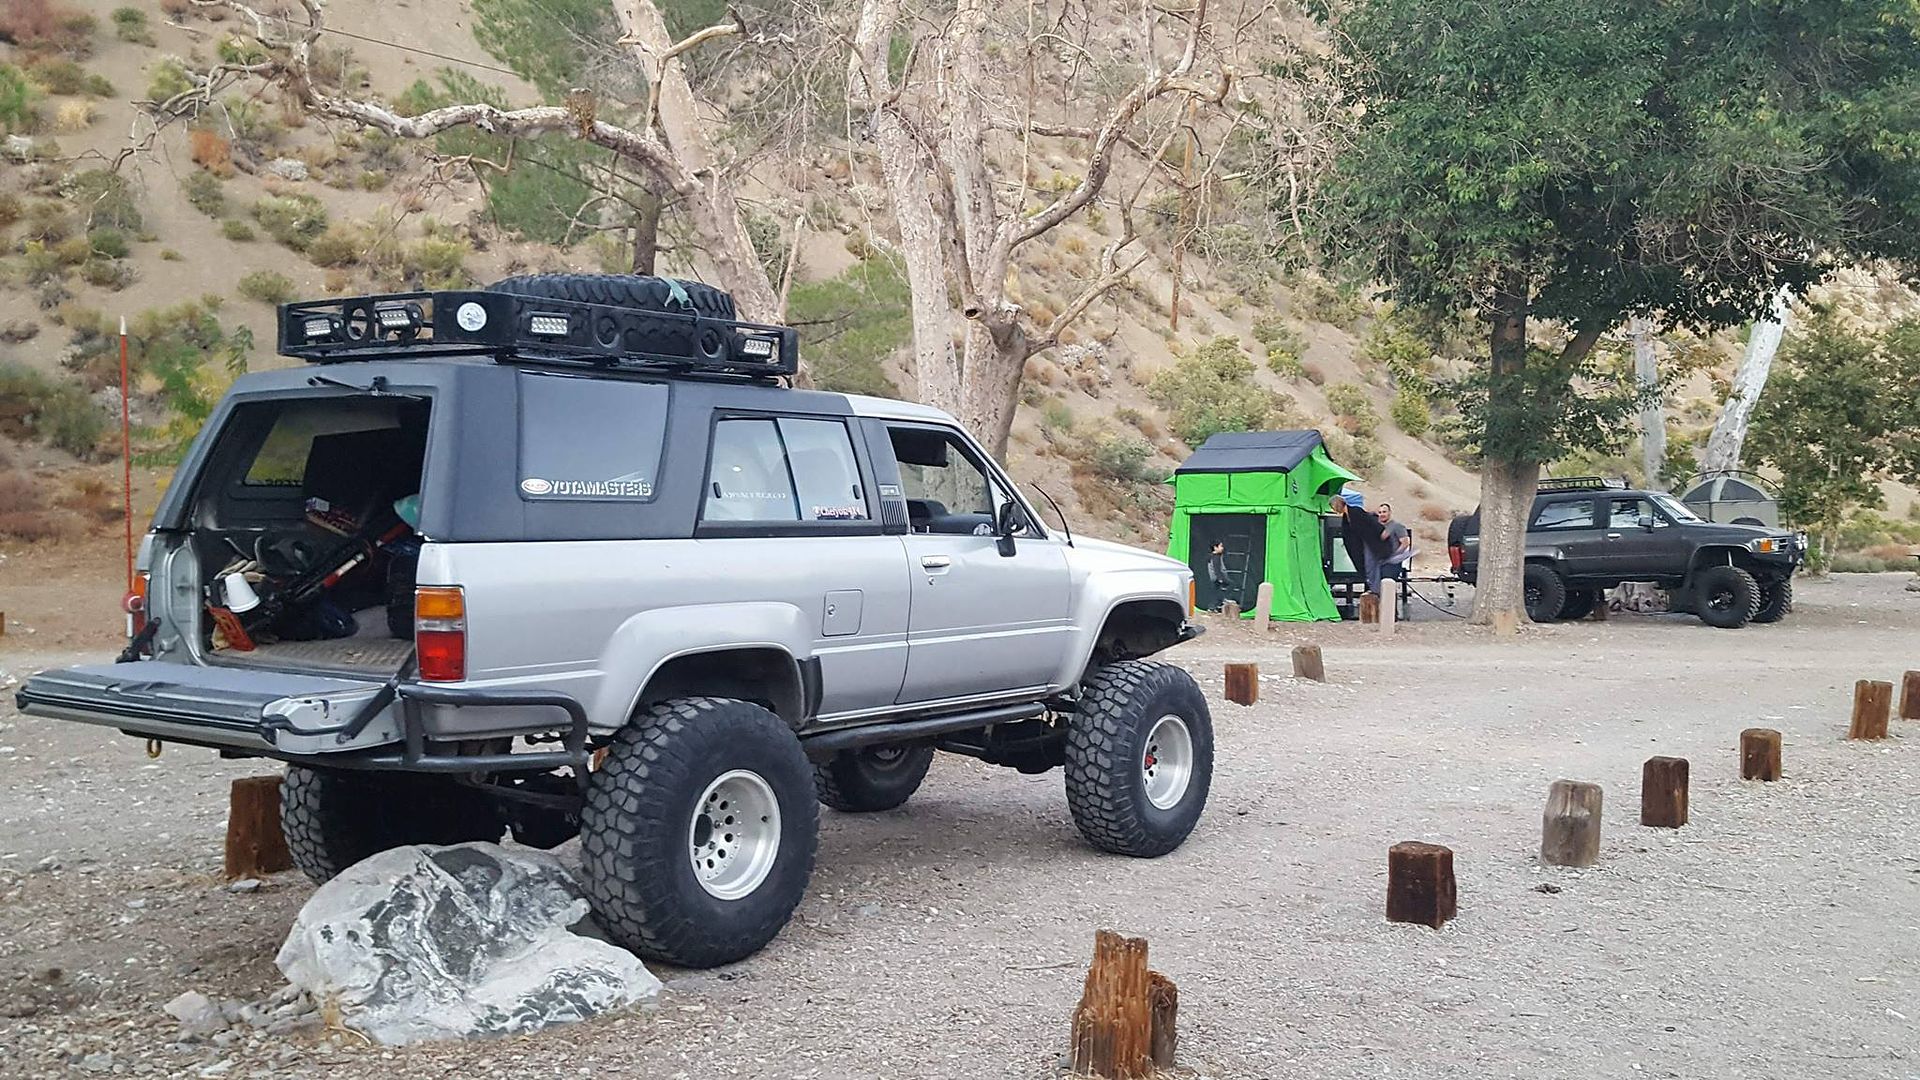
Gotta love a 1st gen 4Runner!
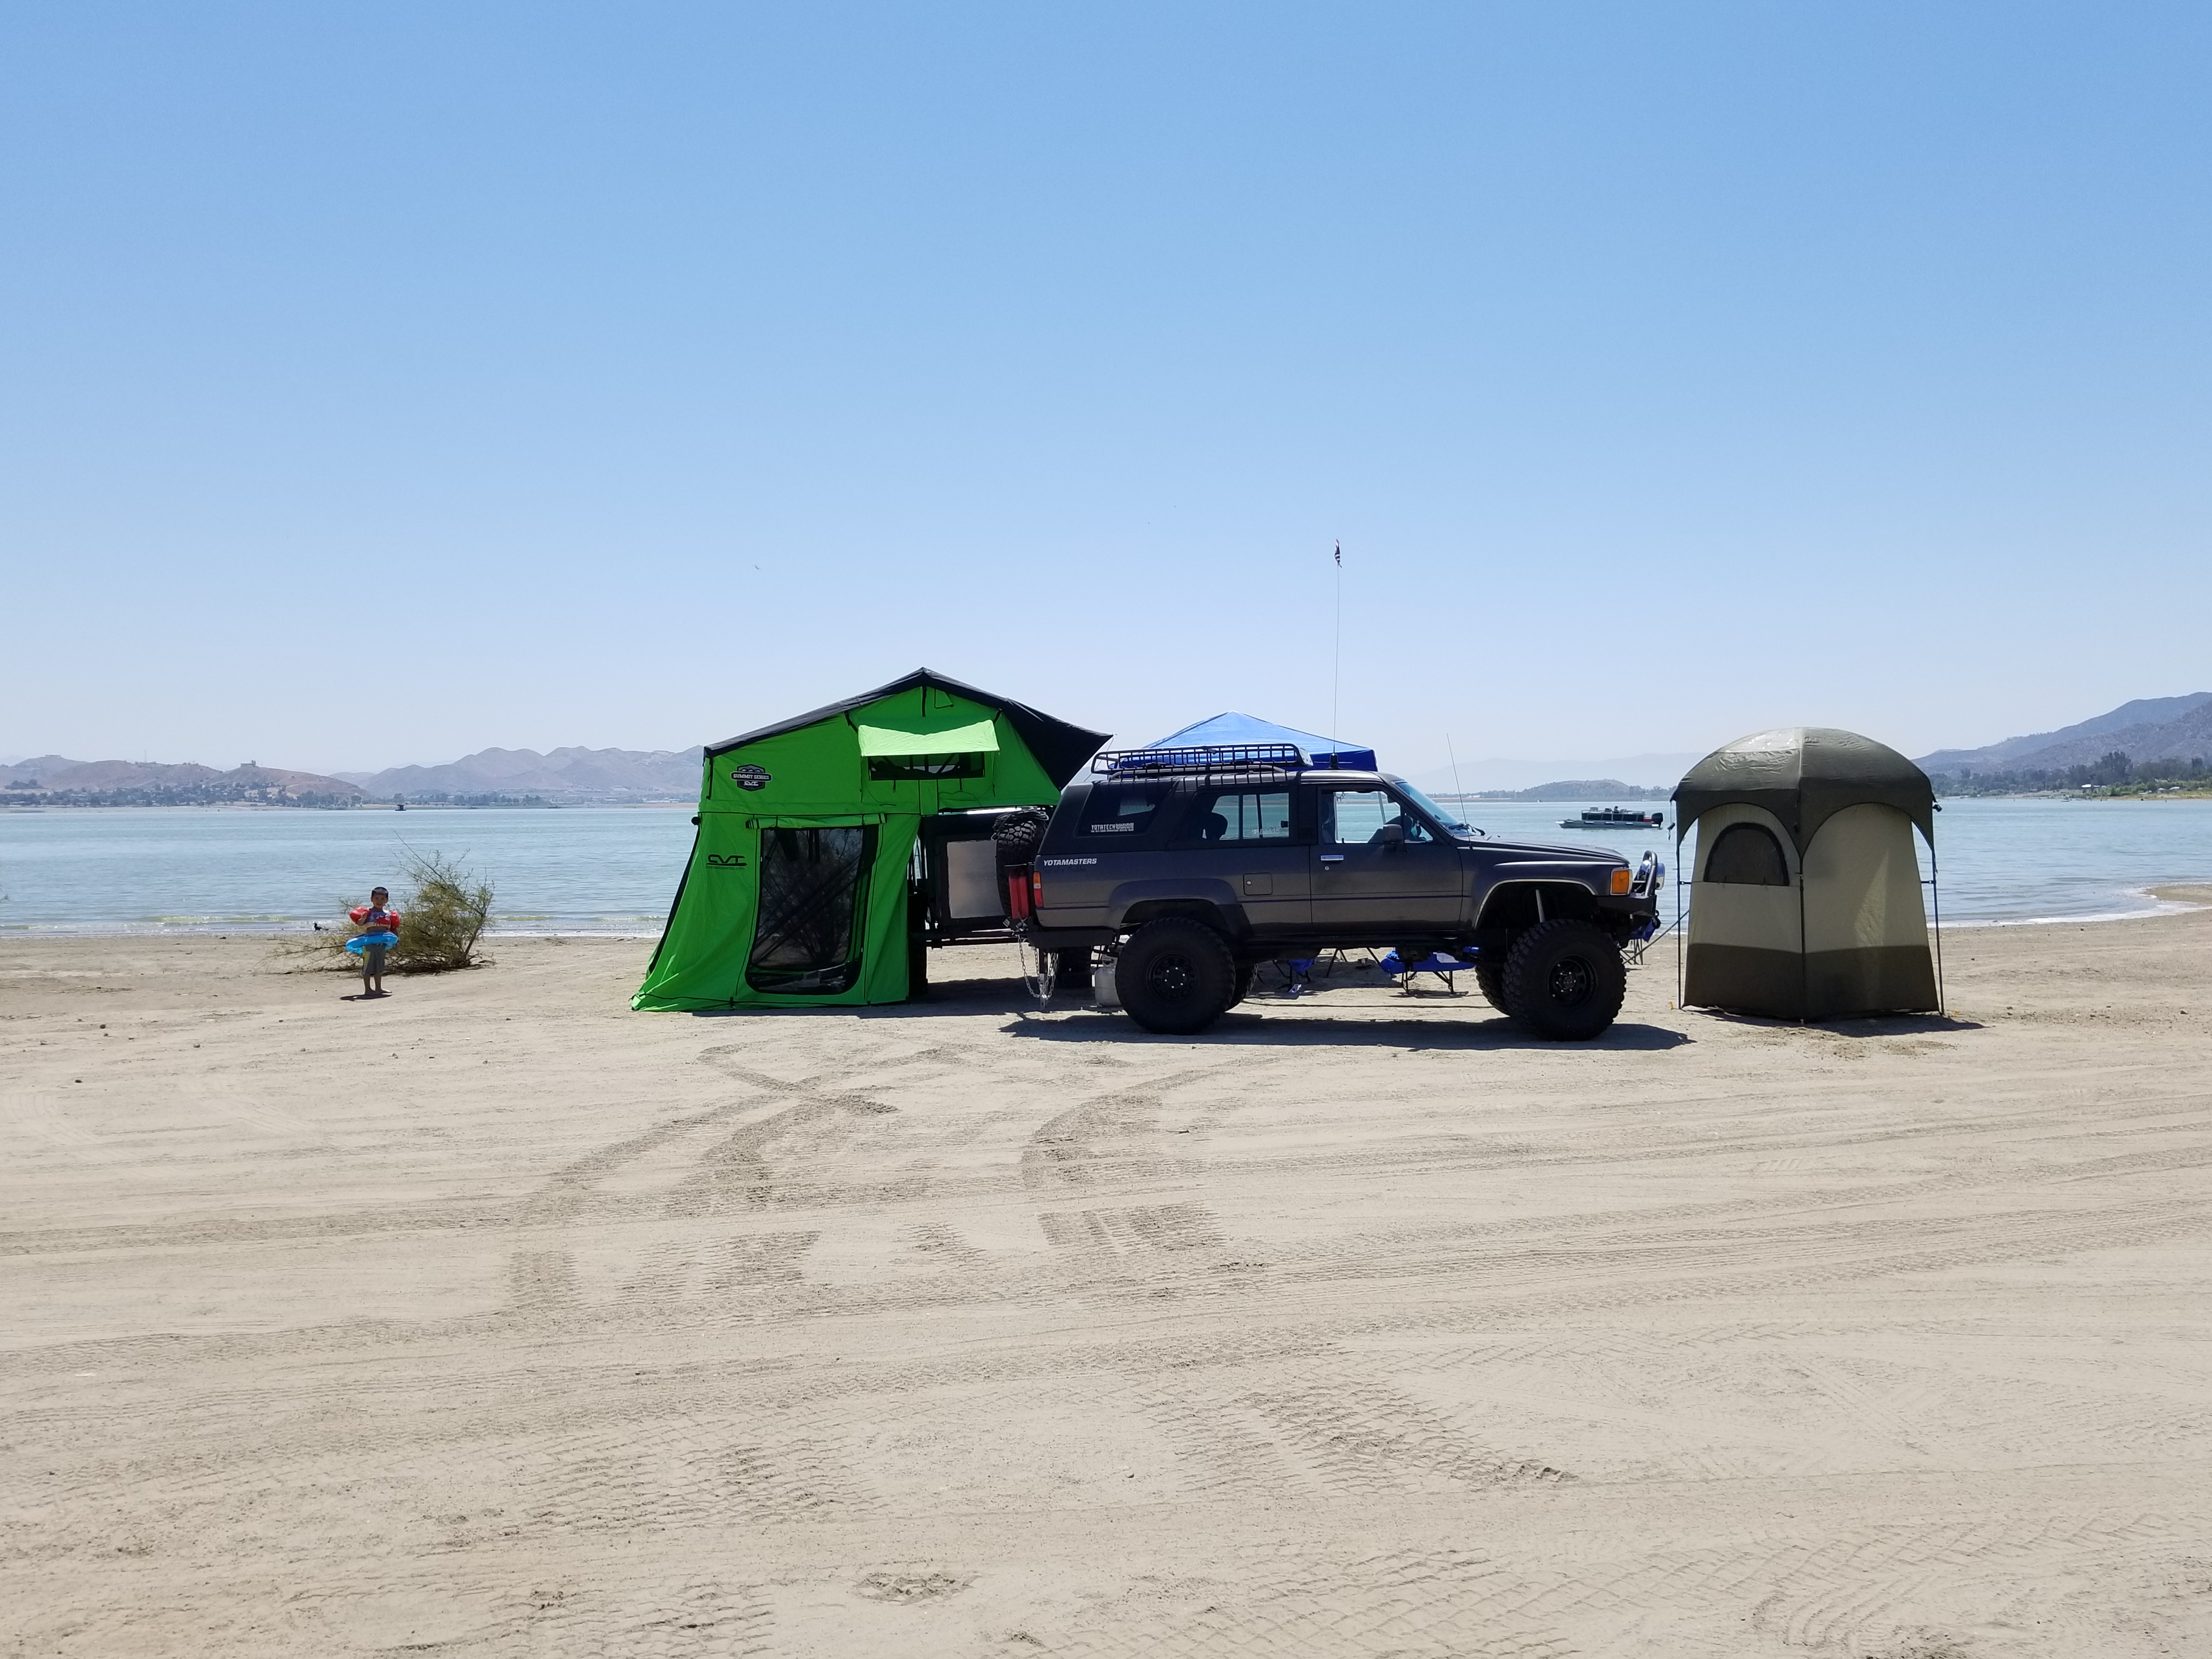
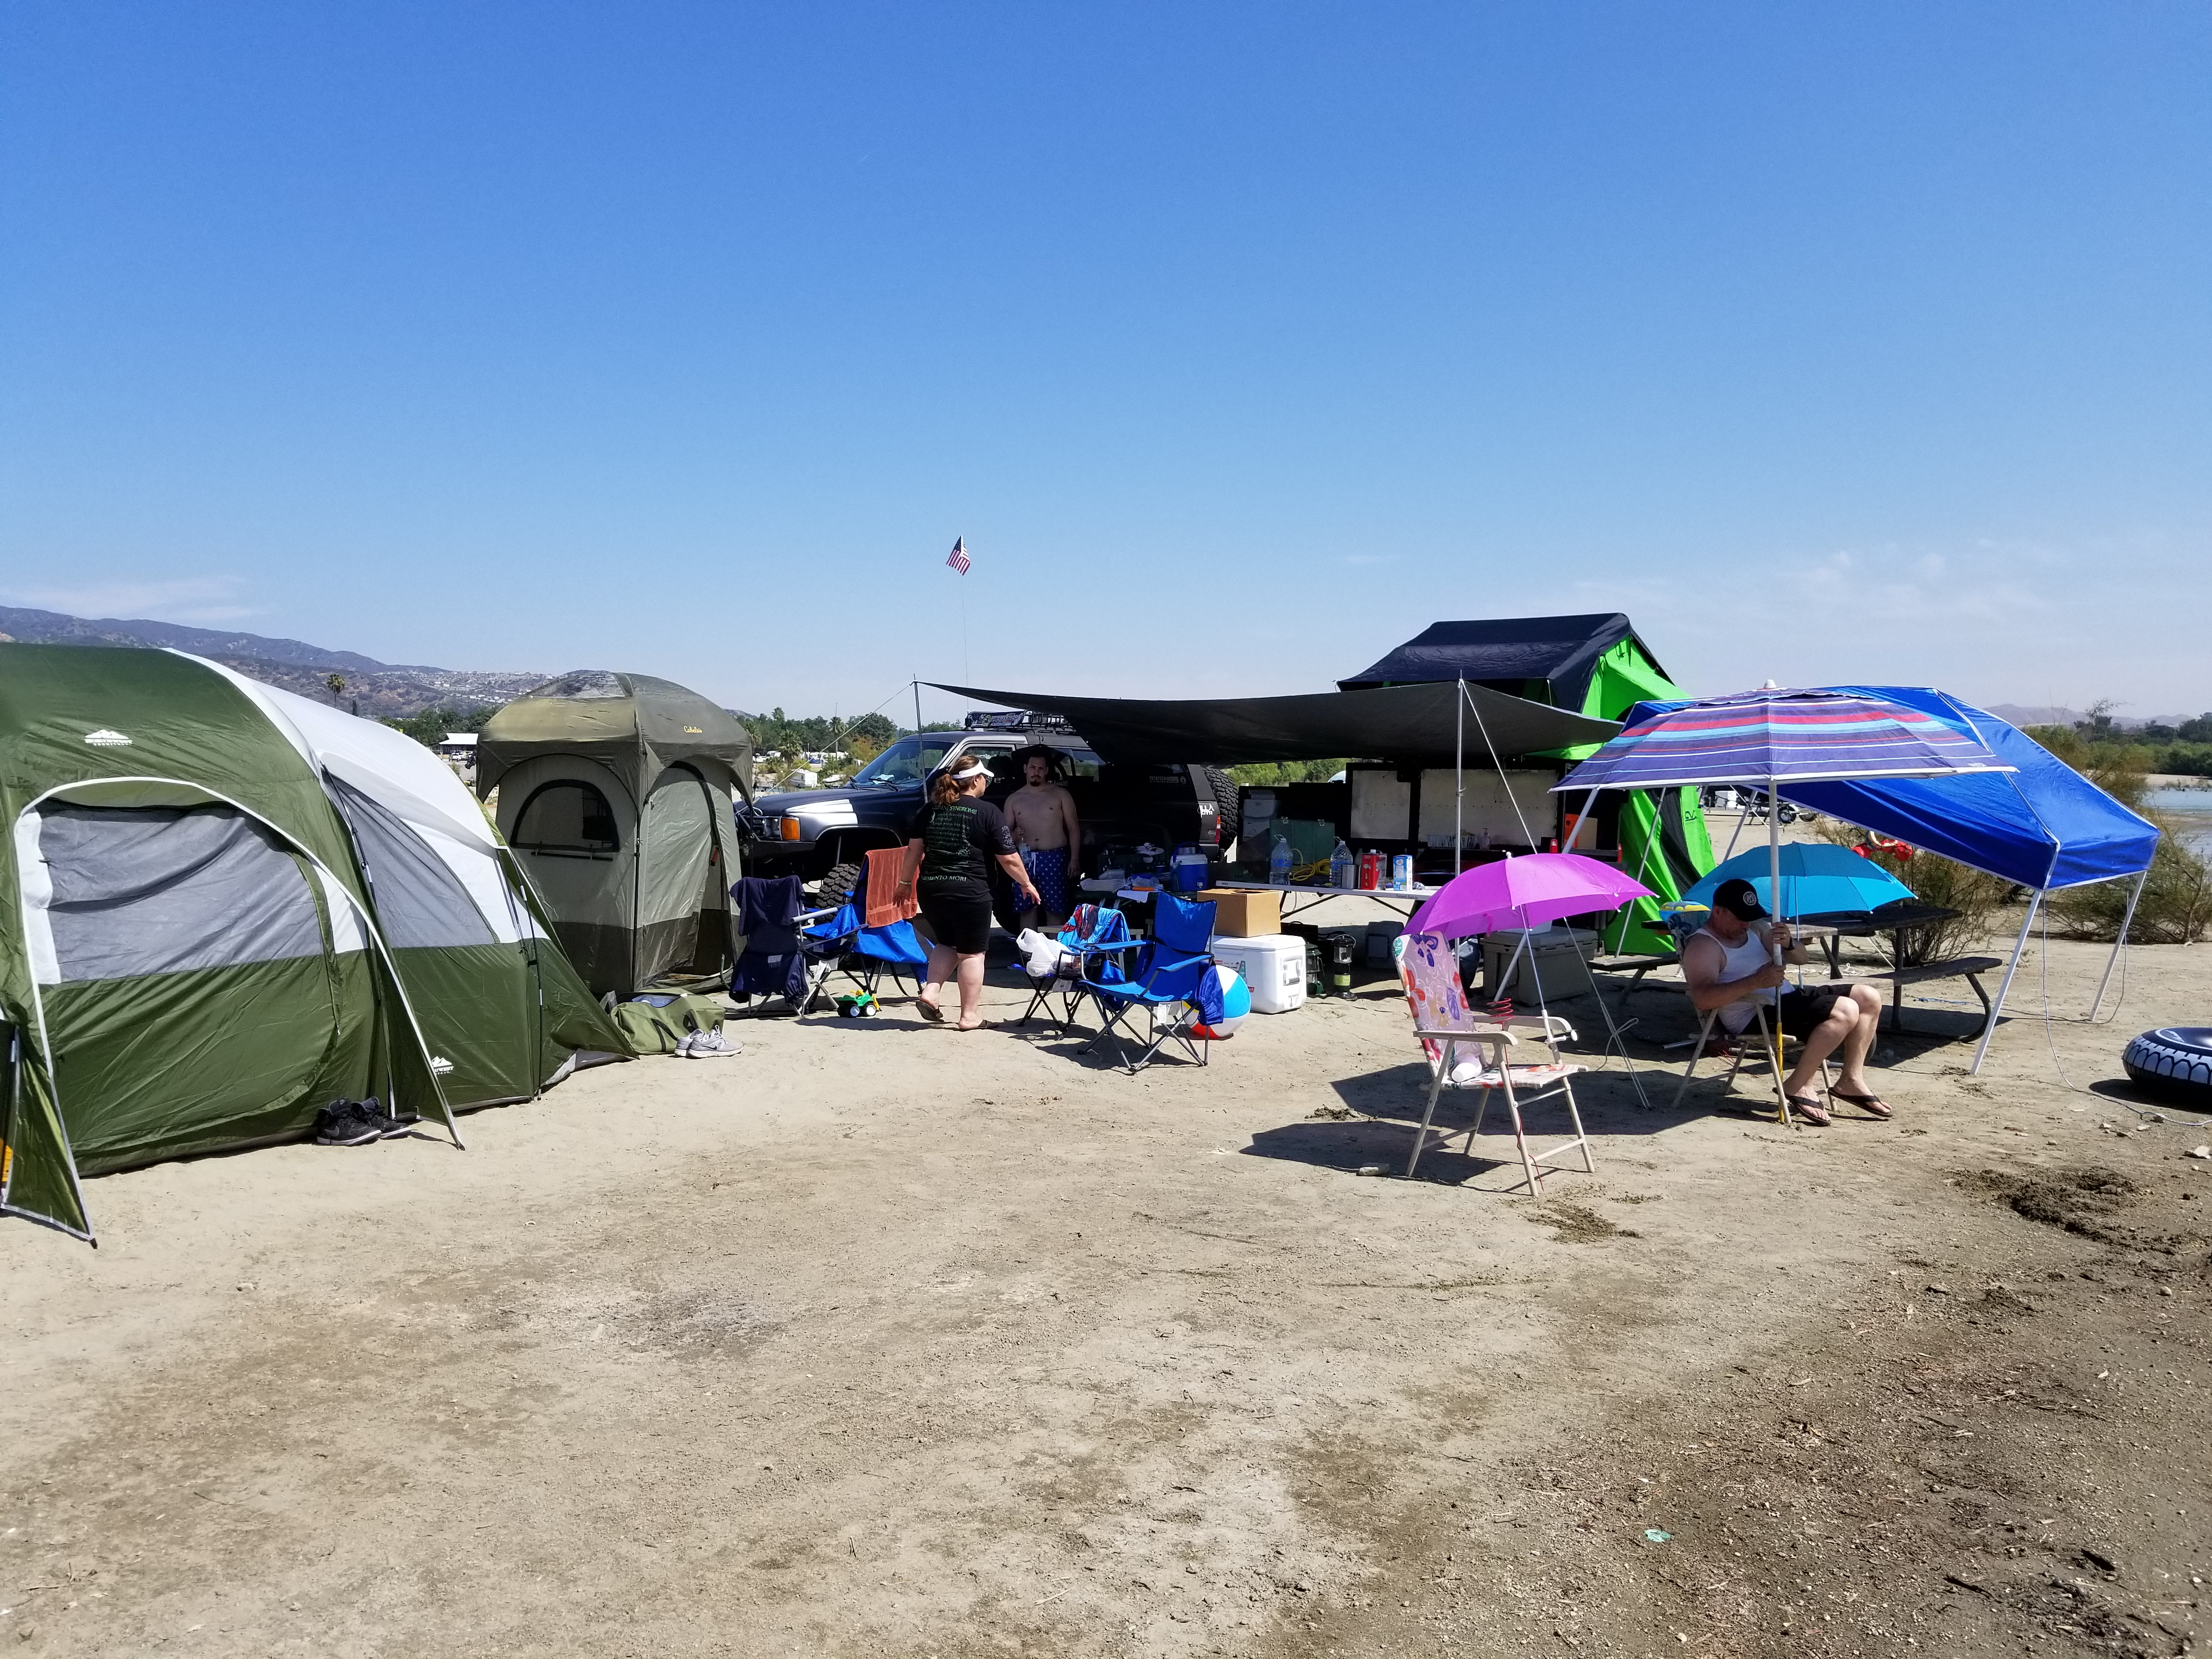
For each of the 3 days we stayed at this camp we had people rolling up asking me questions about my trailer, truck and especially my roof top tent and the shower tent set up. People really loved everything about the set up

With my portable 6ft table and the one provided to us we had more then enough surfaces to use.
My Parents eventually met up with us for the remainder of the weekend.
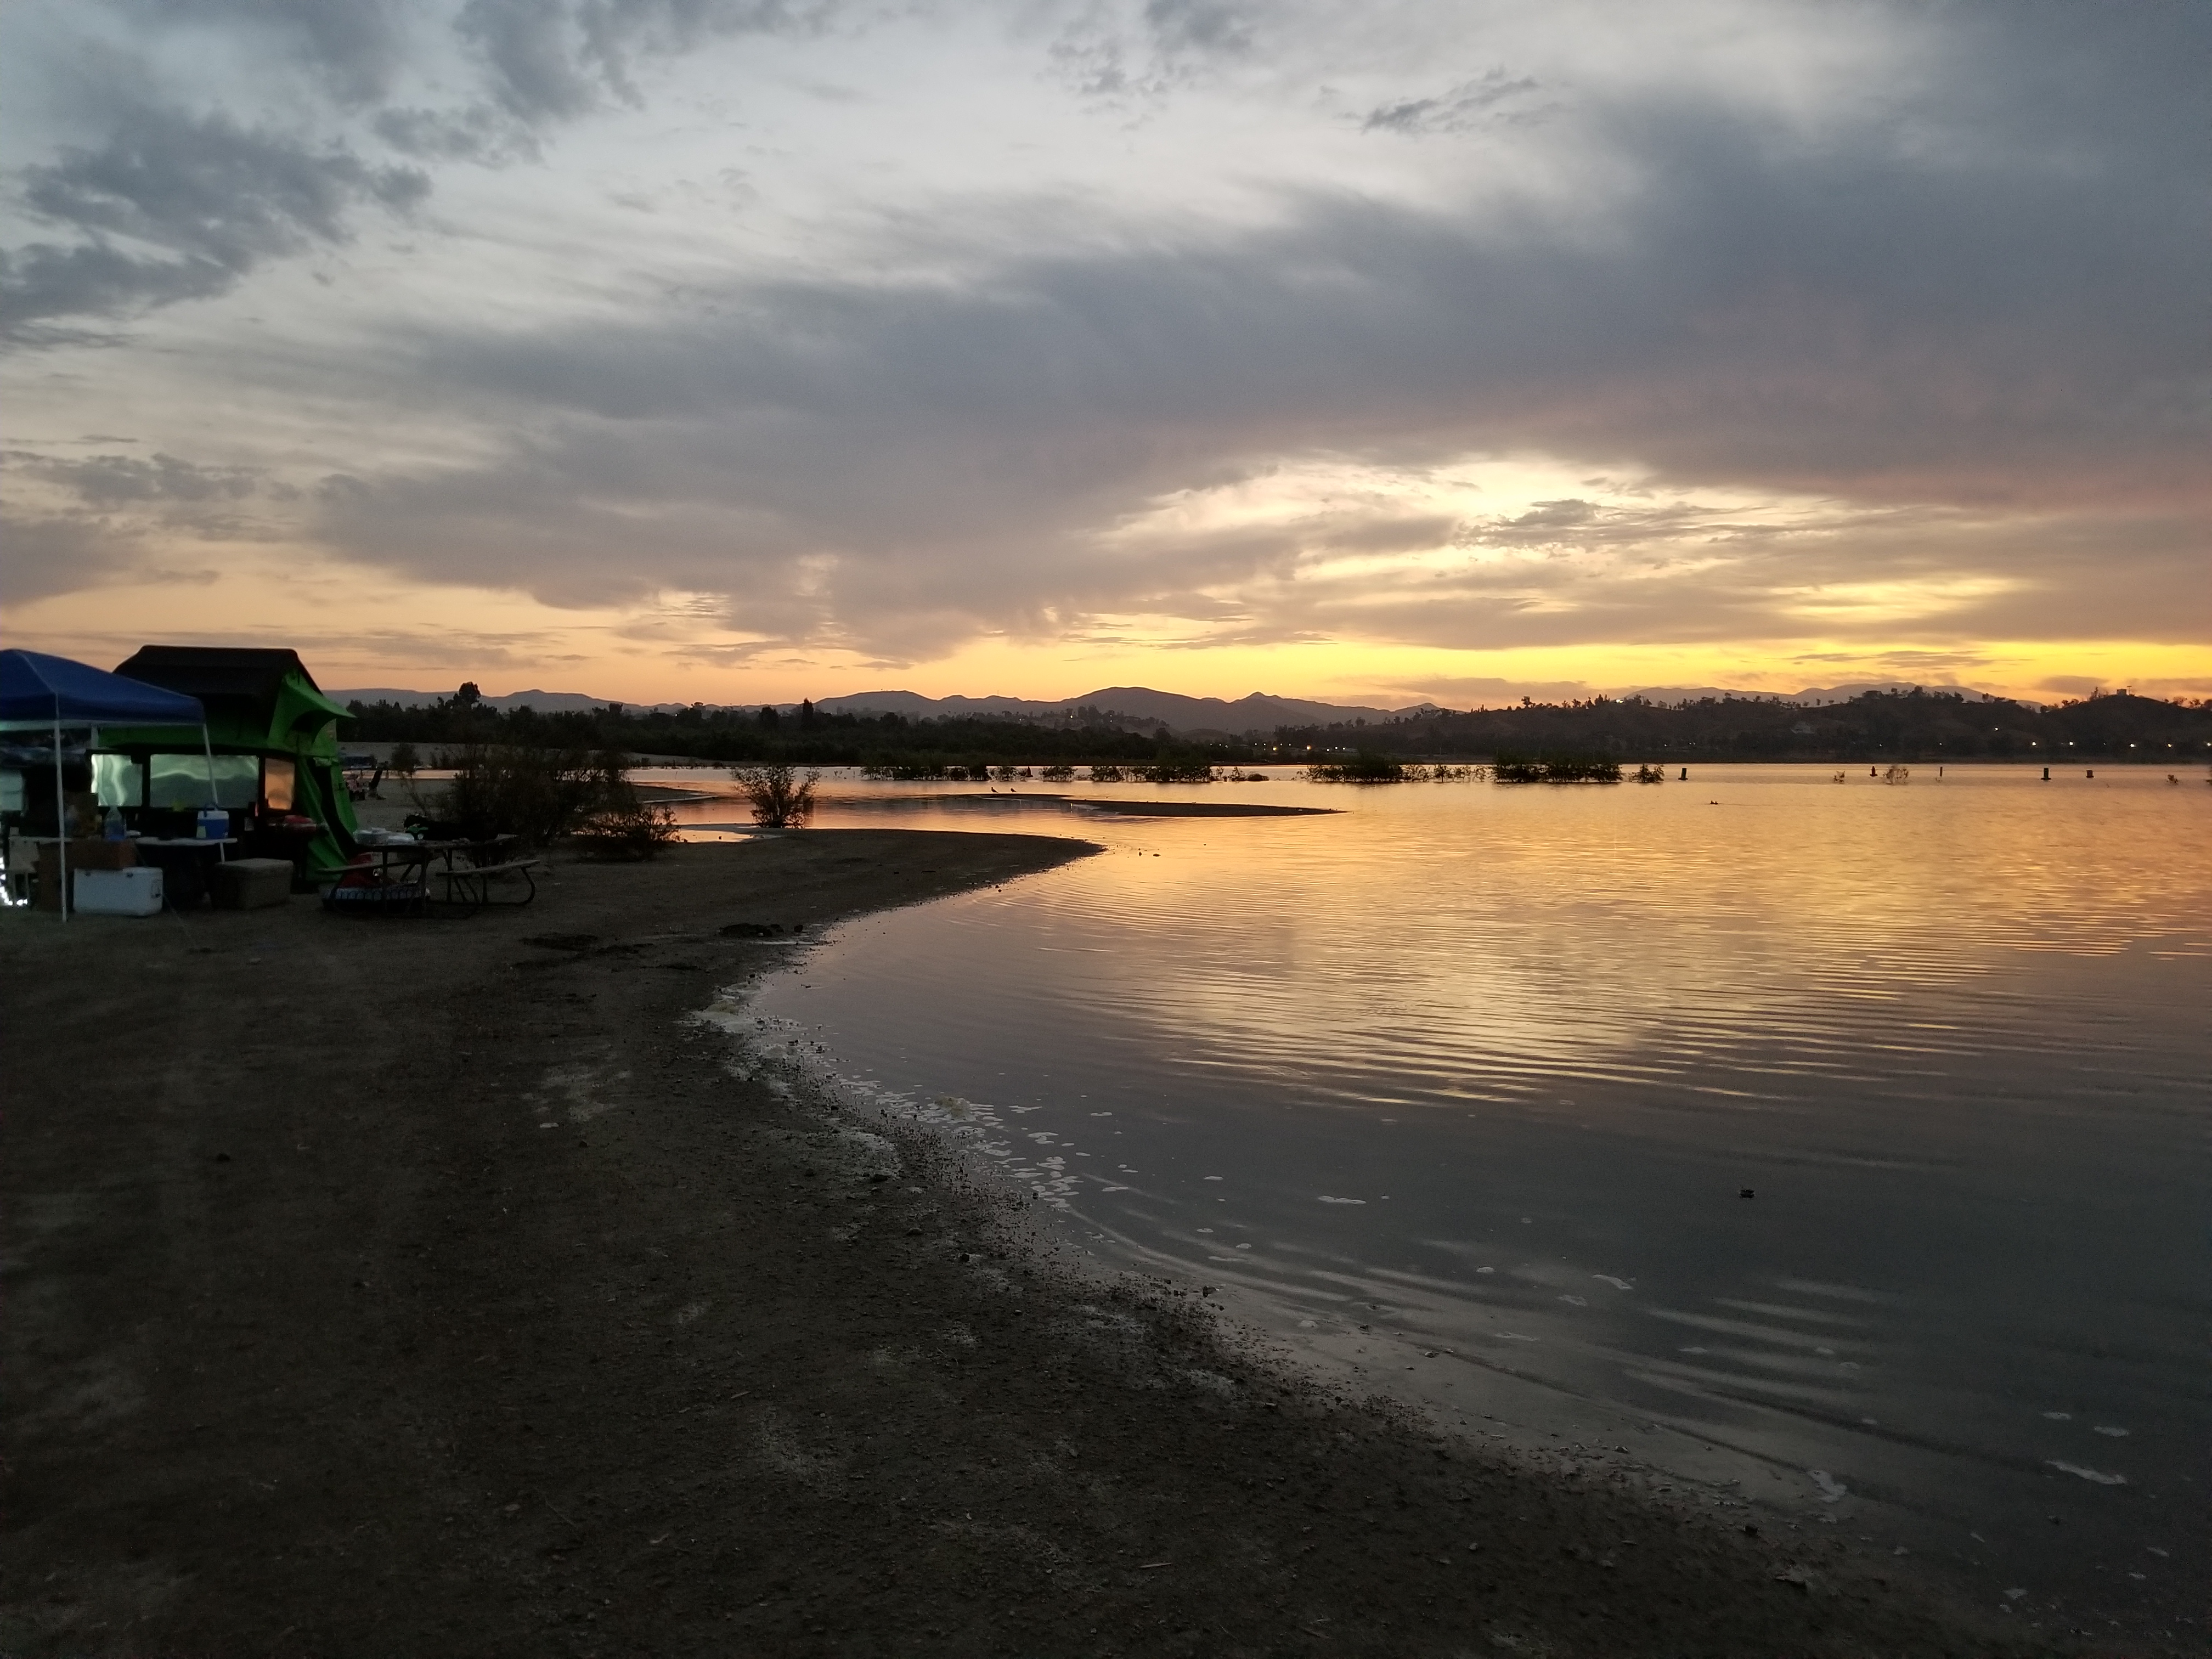
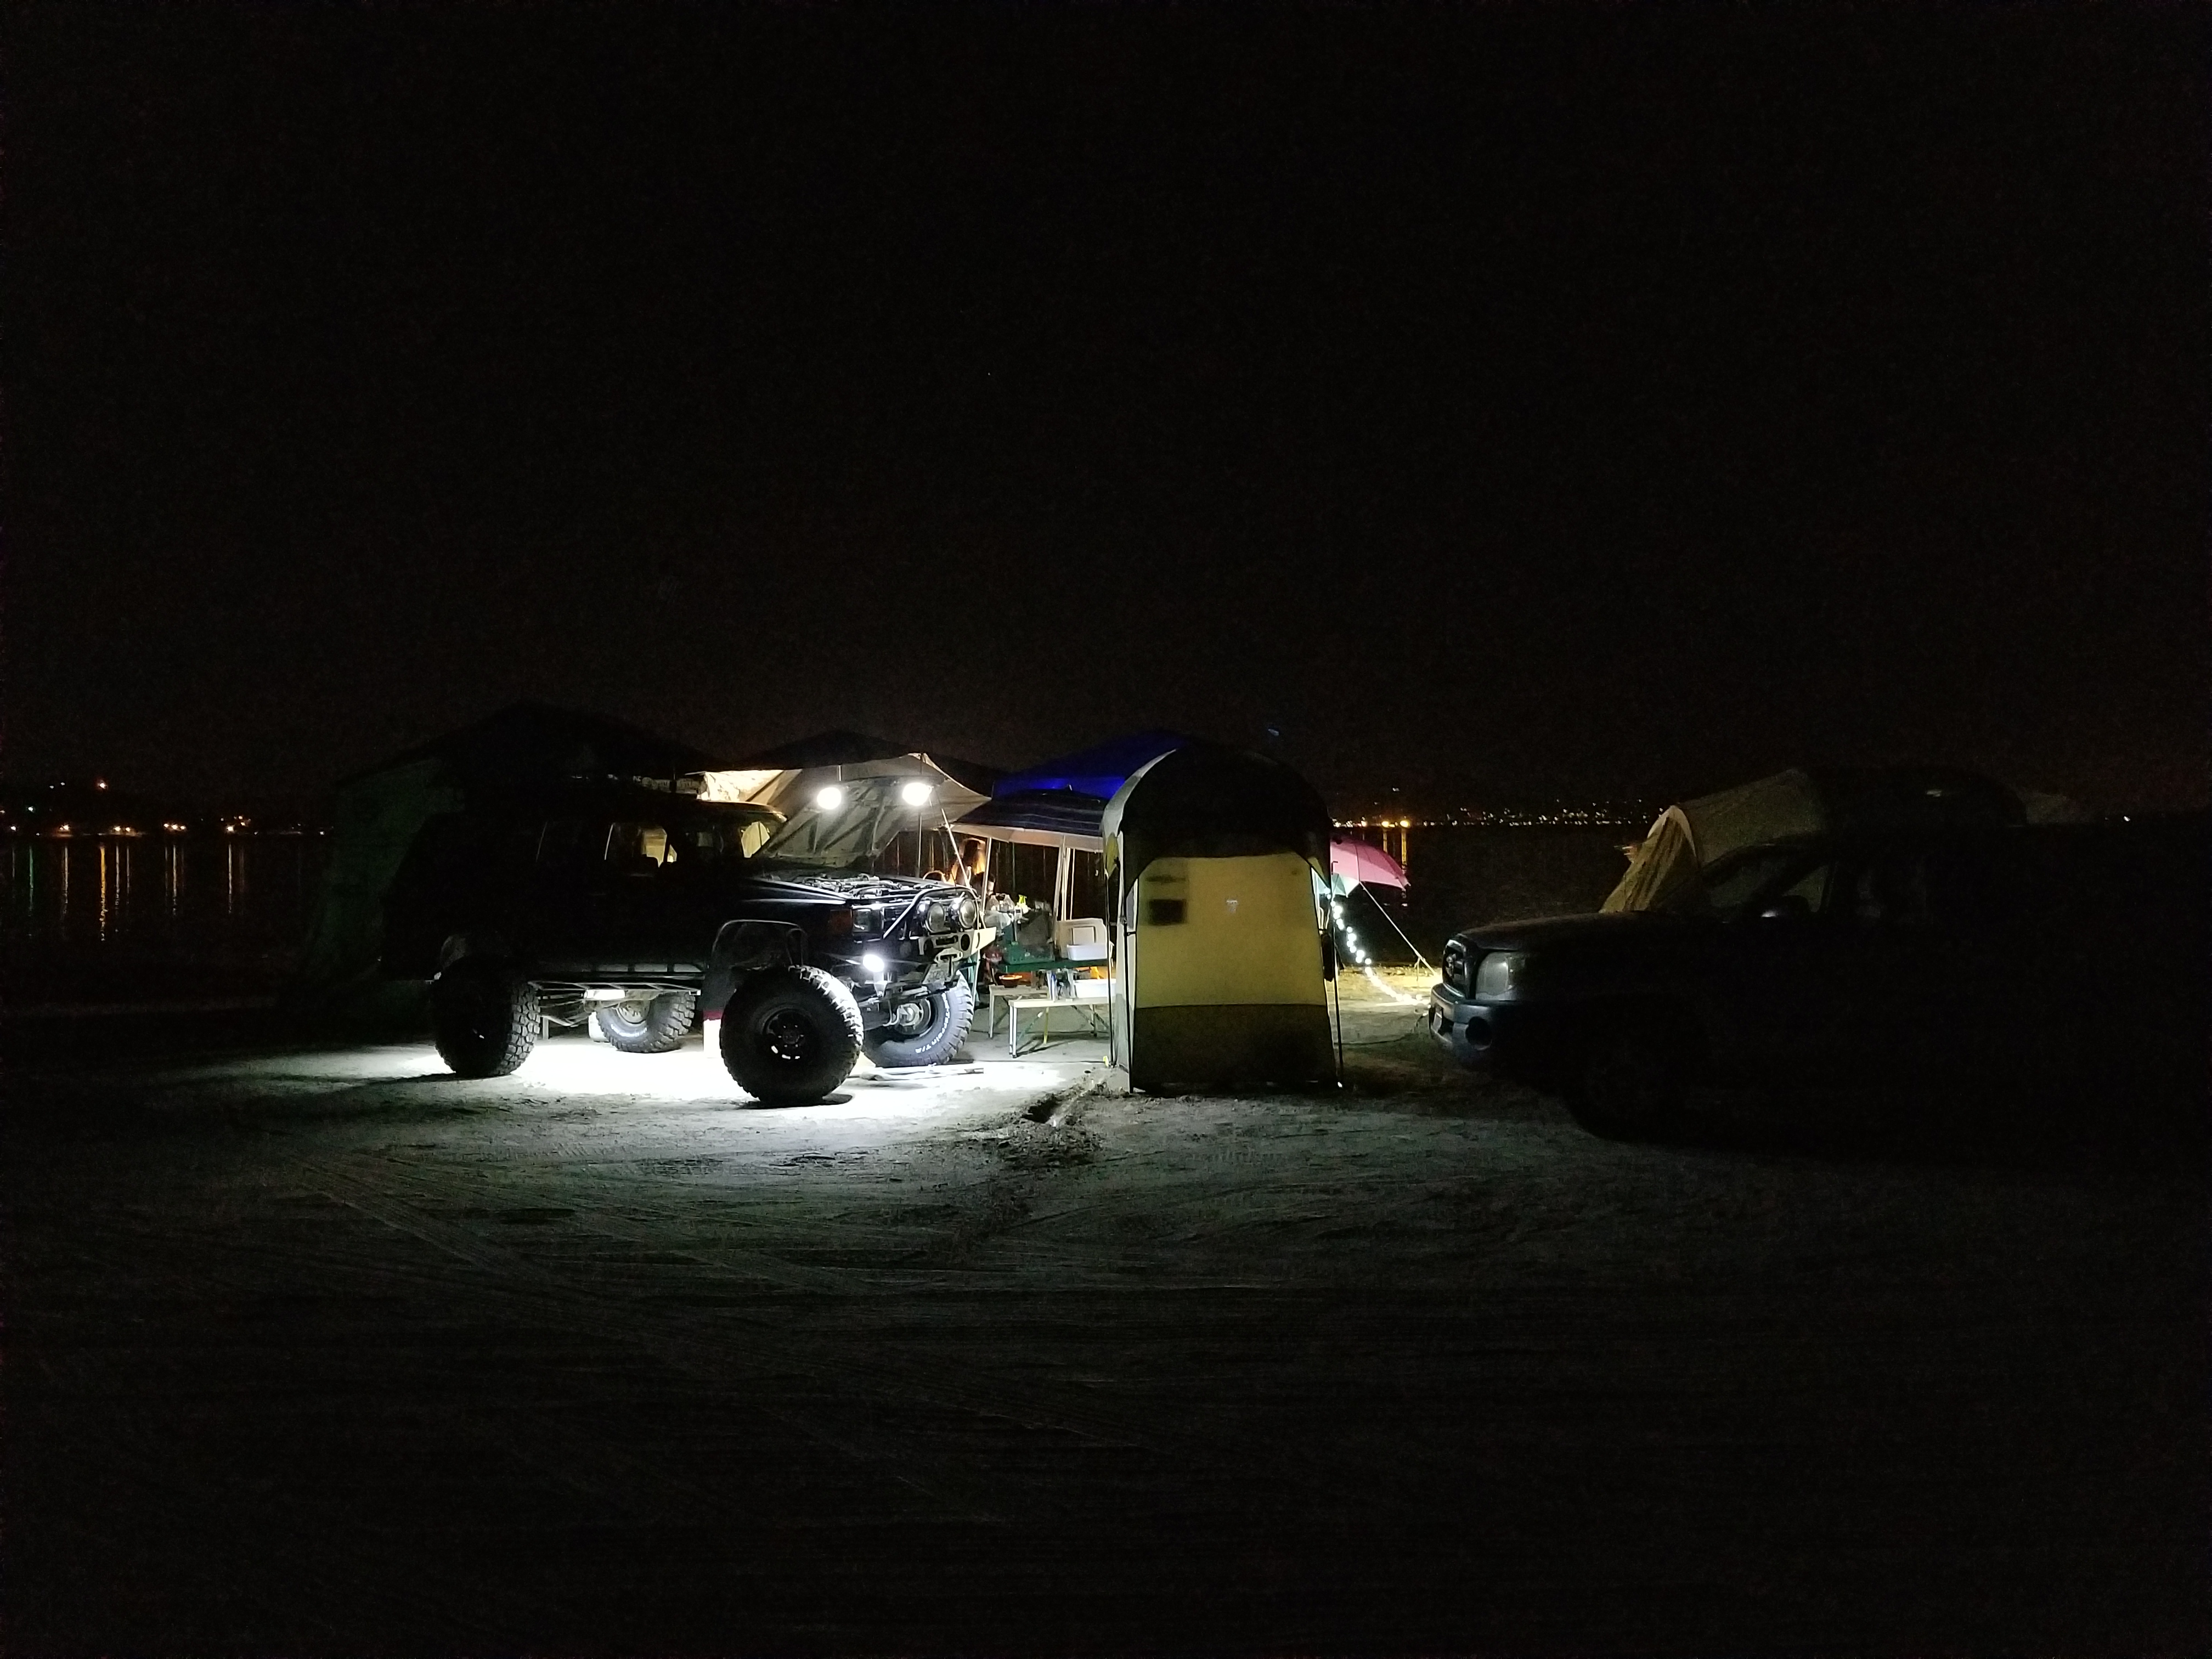
The view from my camp site at 5:30am in the morning


Gotta love having a battery bank on the trailer. Even if it isn't permanently mounted yet having the deep cycle batteries really helped out. We kept on the exterior LED's which are mounted on my canopy on all night. IT provided just enough light for us to get up to use the restroom in my shower tent without being too bright and keeping us up
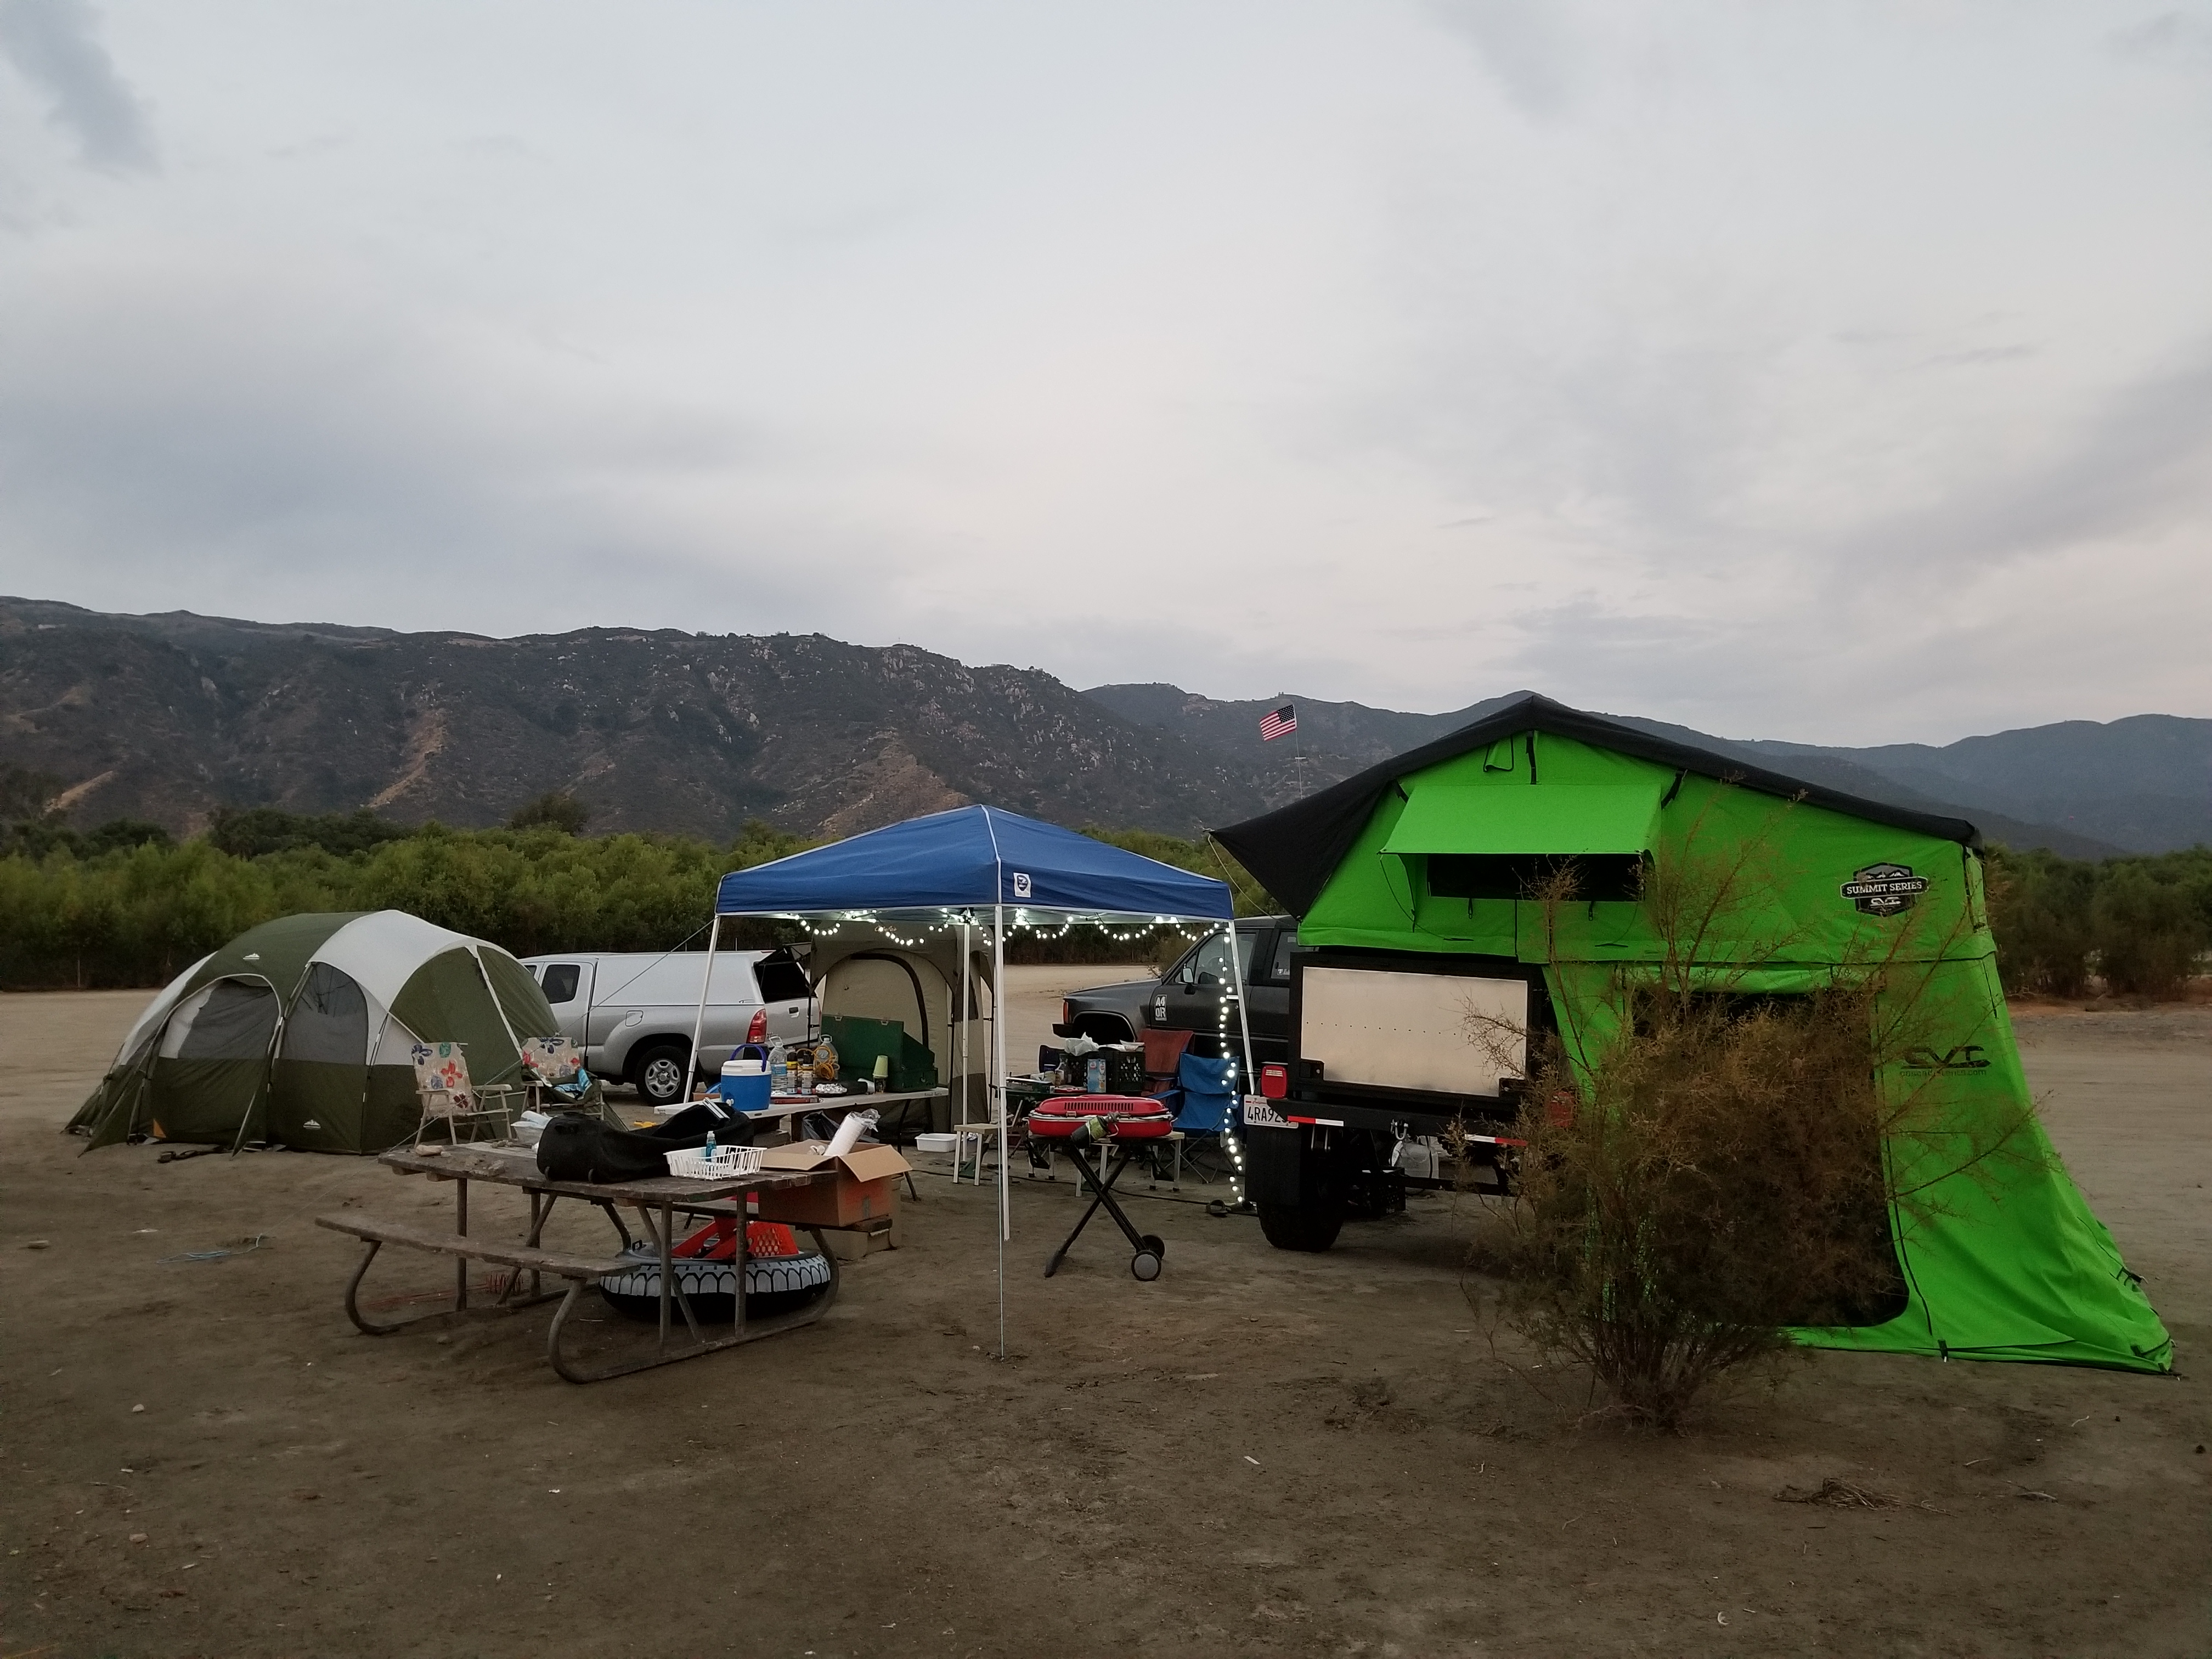
Since day one reached nearly 110�F during the first day i had my parents bring me my extra large tarp and telescoping poles with clothes line rope to our set up to give us more shade. Once set up it added at least 1.5 - 2 times more shade then the canopy provided. We used the trailer and my trucks roof rack/bumper as starting attachment points then used poles extend the tarp further. It worked like a charm and is so much cheaper then buying a tiny ARB pull out shade or fox wing because his one i believe is 20 by 15 feet. I actually want to buy the larger heavy duty harbor freight tarp for the next trip. But this one worked great!
so here are pix of the trip...
Mostly packed up with the items i need.


Rise n shine. All packed up and ready to head out at 6am friday morning.

Not too saggy

On our way to the lake. Not the safest thing to do while pulling a trailer but I just wanted to show how well the trailer pulls with my truck. The Tekonsha Prodigy P3 brake controller helped out so much! especially when having to make sudden stops. Gotta love electric trailer brakes!
So i dont know much about RV's and trailer but i didnt know we werent supposed to use this water at the dump stations to put into our water tanks. It isn't poo water but it is, however reclaimed water. We didnt use it for drinking water or cooking we basically only used it for showering but still i felt kind gross letting my family shower with that water. I eventually ran fresh water through the tank 2 times through to wash it out. But i still need to mix up some bleach and water to run through the system a couple of times. To clean up my water storage again.

Close up of the water fill area on the passenger side of the trailer.
That is a 15 gallon Valtera water tank under there. I am actually thinking about adding another water tank. IT should be more then enough to shower my family of 3 and soon to be 4 but since i had my parents and brother join us this past weekend so 15 gallons was NOWHERE near enough. If i buy anoher 15 or 20 gallon tank i can run it on the rear side of the trailer and mount it higher then this tank here and just run one hose to the bottom tank so it will fill by gravity pulling the water to the lower tank. This is most likely what i plan to do ..

Perfect camp site on the lake front!

We were the only ones on the lake most of friday then people trickled in as the weekend approached. Luckily i had already reserved a pretty large space

Good view of the CVT Summit series Mt Rainier tent. It is definitely an eye sore but it is definitely a good thing. You can spot my tent from super far away. and for people who don't know where my camp is at only have to look for one thing... "The bright green roof top tent" not to mention when we go swimming most people at all camp sites have similar colors. So this is easy to spot and easy for everyone to know when they are drifting off too far away from camp when having fun in the water.

Gotta love a 1st gen 4Runner!

For each of the 3 days we stayed at this camp we had people rolling up asking me questions about my trailer, truck and especially my roof top tent and the shower tent set up. People really loved everything about the set up

With my portable 6ft table and the one provided to us we had more then enough surfaces to use.

My Parents eventually met up with us for the remainder of the weekend.


The view from my camp site at 5:30am in the morning


Gotta love having a battery bank on the trailer. Even if it isn't permanently mounted yet having the deep cycle batteries really helped out. We kept on the exterior LED's which are mounted on my canopy on all night. IT provided just enough light for us to get up to use the restroom in my shower tent without being too bright and keeping us up


Since day one reached nearly 110�F during the first day i had my parents bring me my extra large tarp and telescoping poles with clothes line rope to our set up to give us more shade. Once set up it added at least 1.5 - 2 times more shade then the canopy provided. We used the trailer and my trucks roof rack/bumper as starting attachment points then used poles extend the tarp further. It worked like a charm and is so much cheaper then buying a tiny ARB pull out shade or fox wing because his one i believe is 20 by 15 feet. I actually want to buy the larger heavy duty harbor freight tarp for the next trip. But this one worked great!

Last edited by Redeth005; Jun 28, 2017 at 09:25 PM.
Jun 28, 2017 | 09:09 PM
#144
Thread Starter
Registered User
Joined: Apr 2012
Posts: 2,817
Likes: 2
From: Los Angeles CA
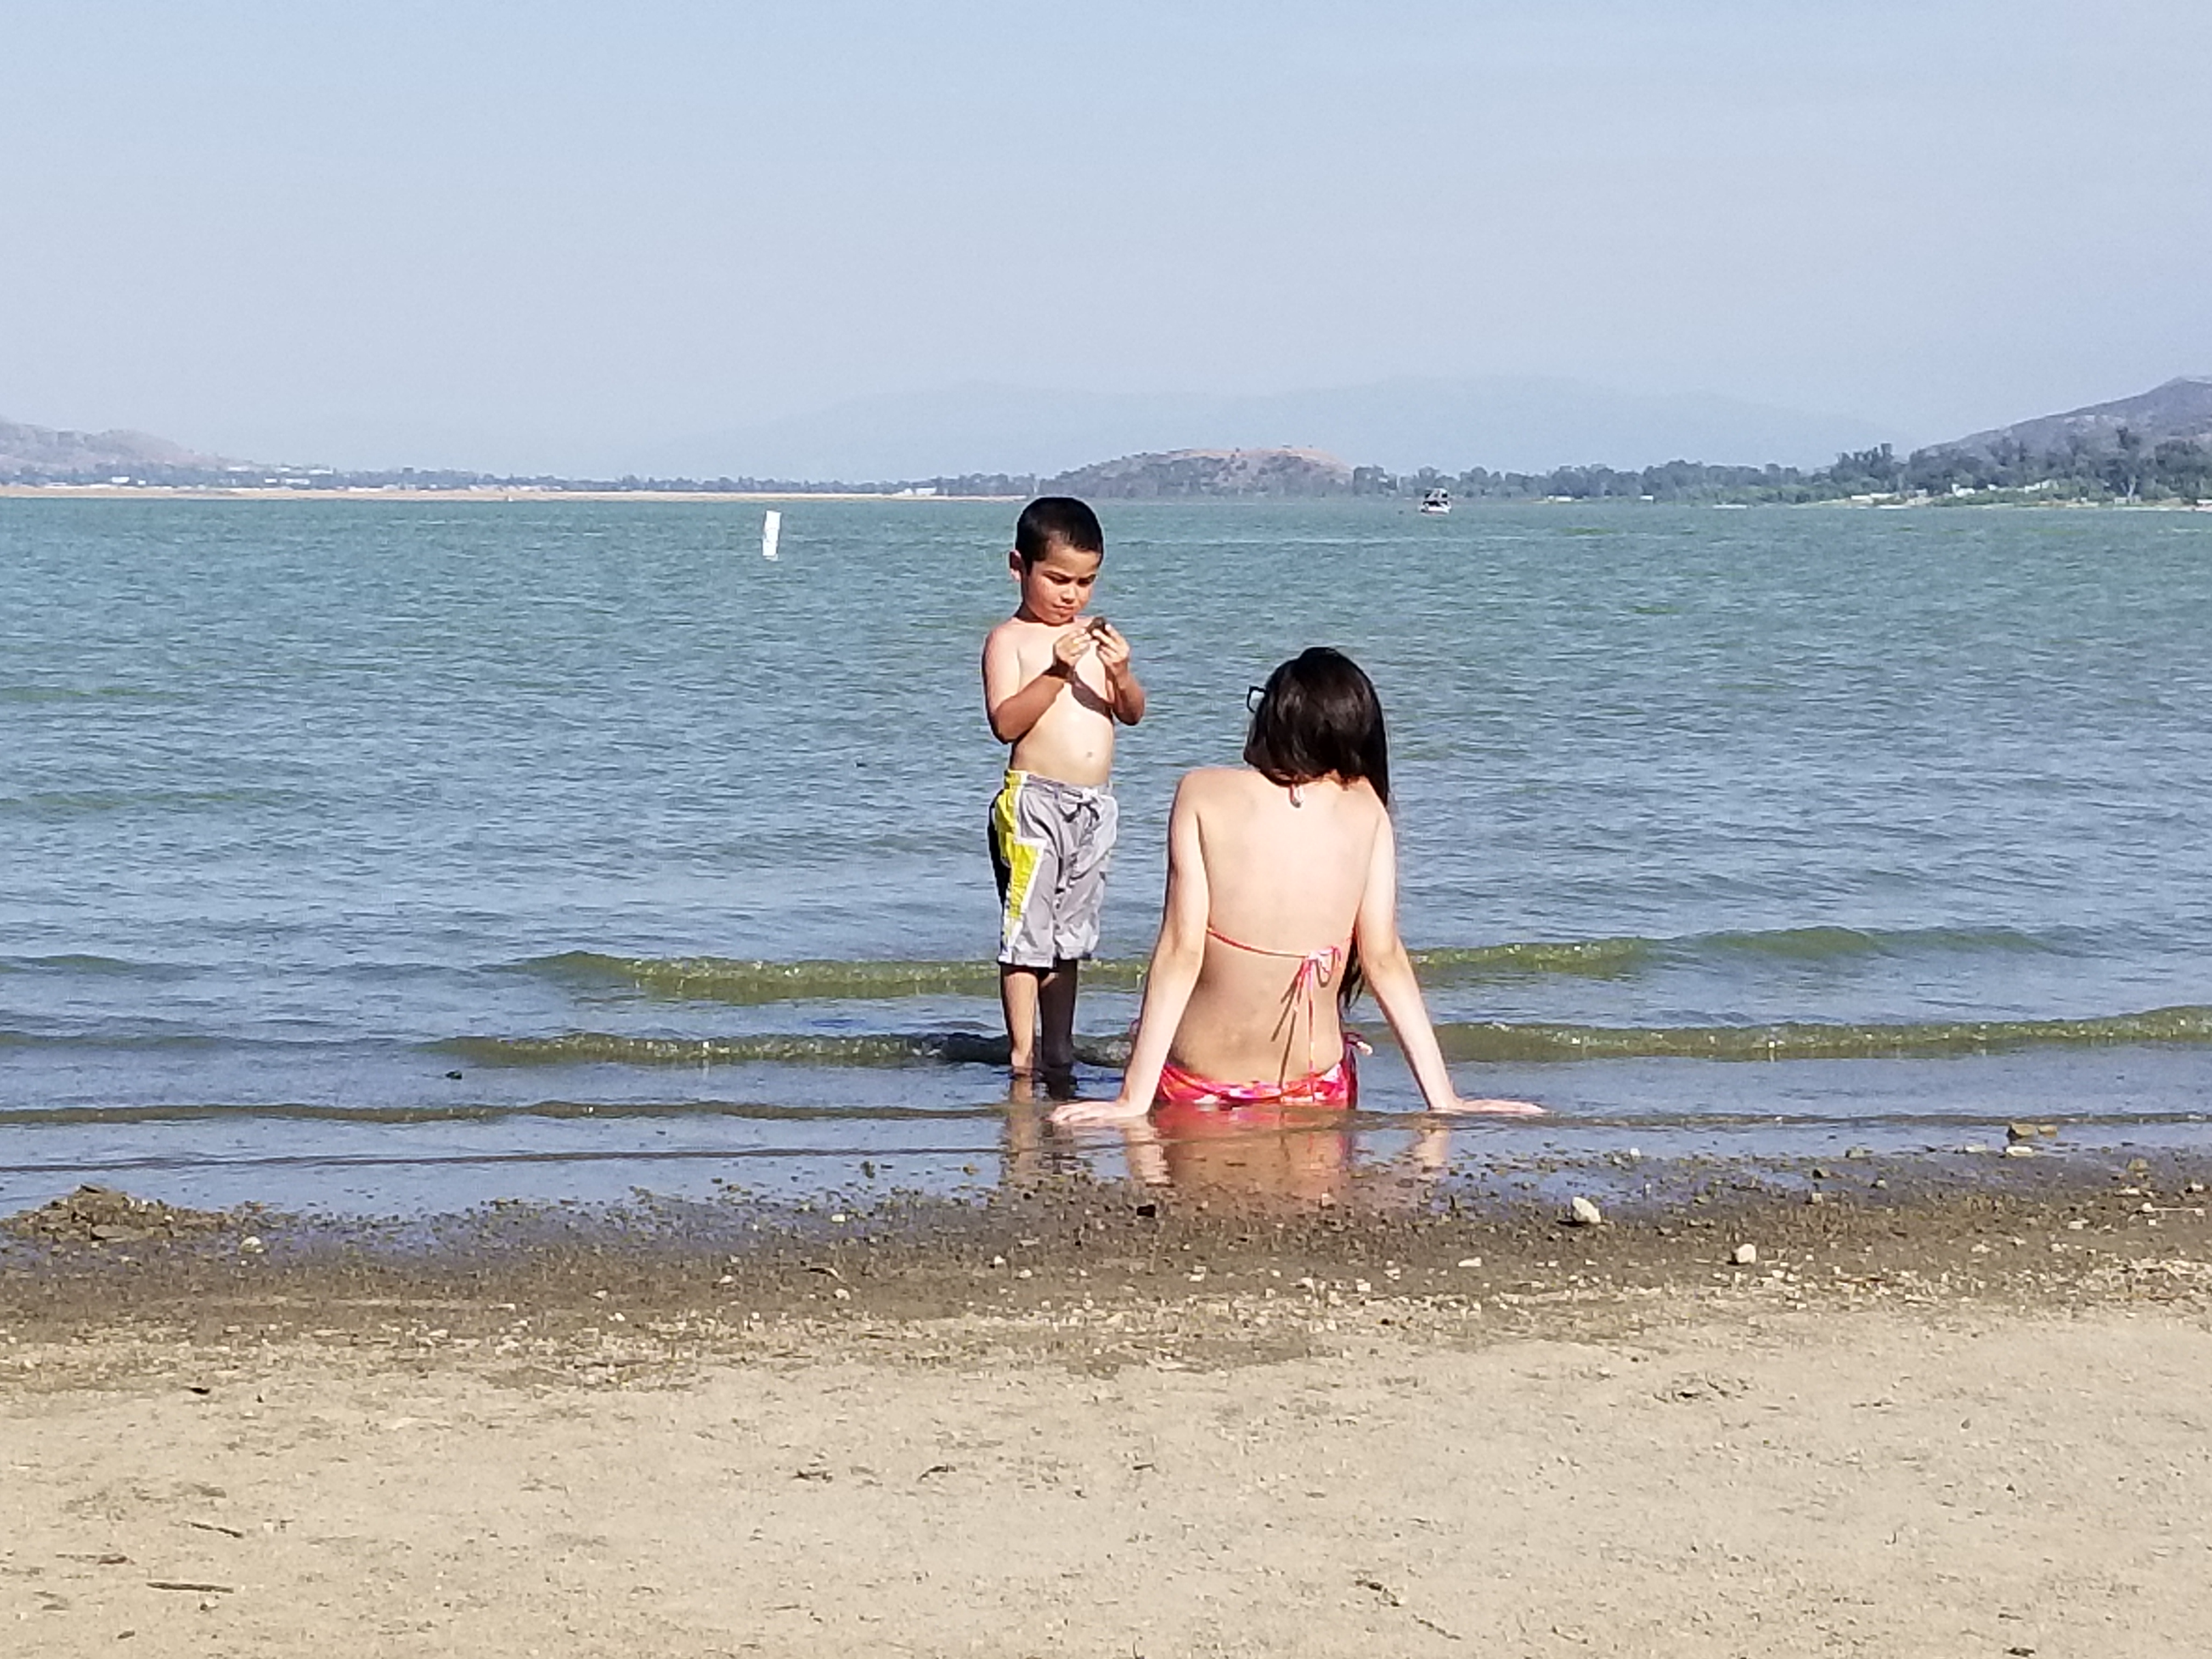
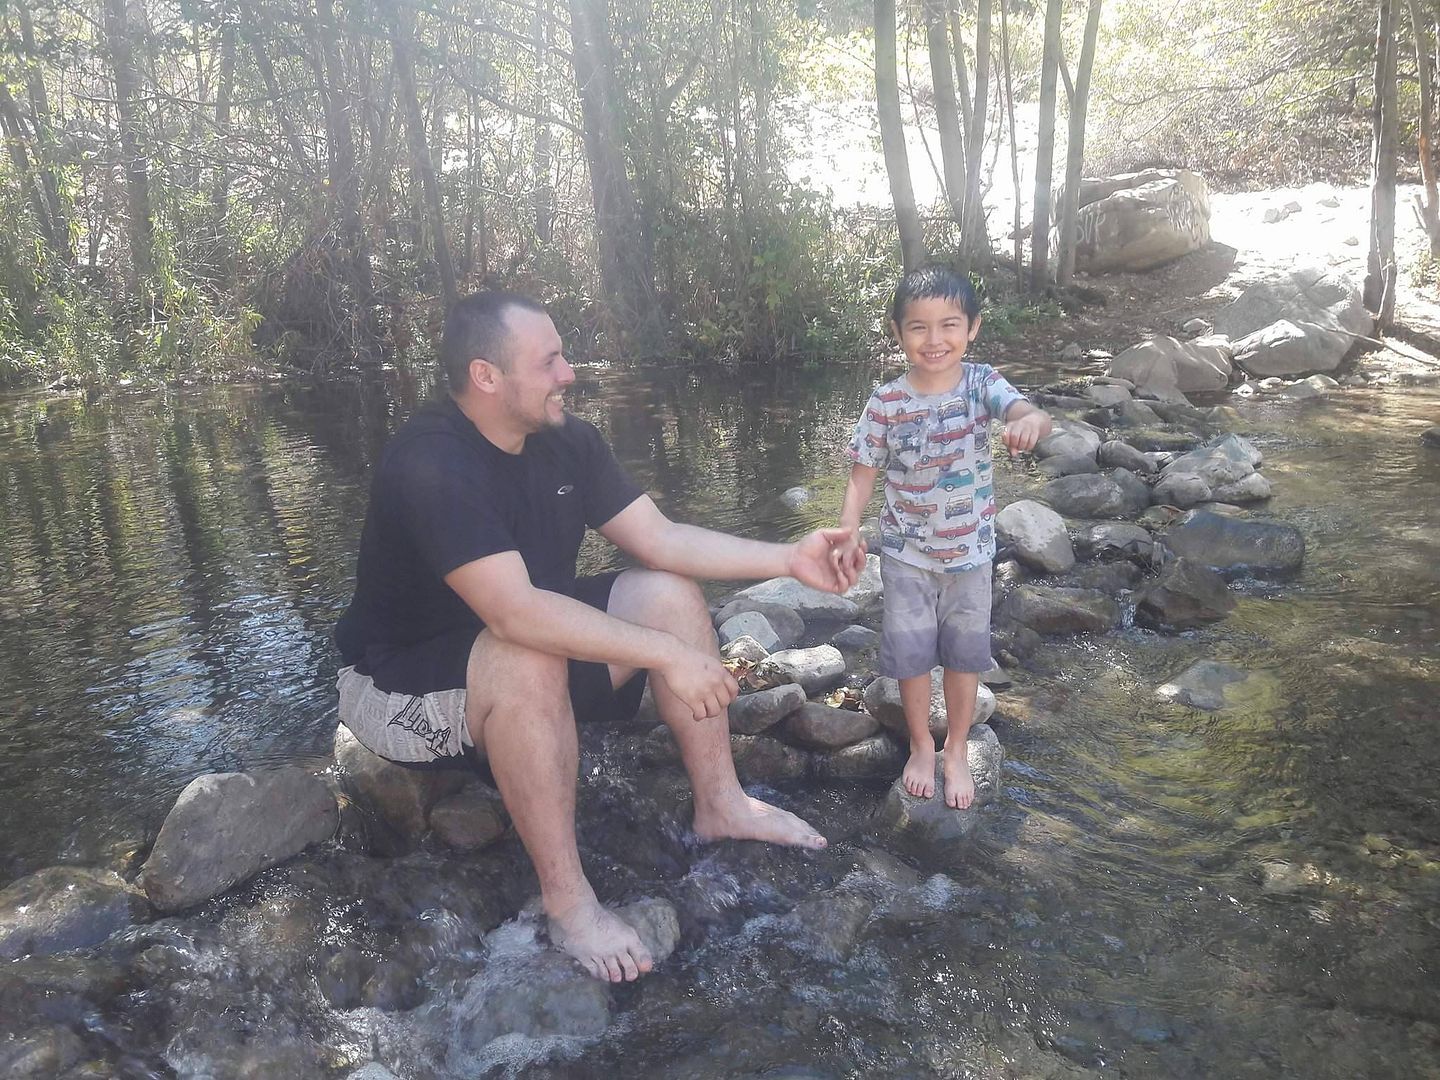
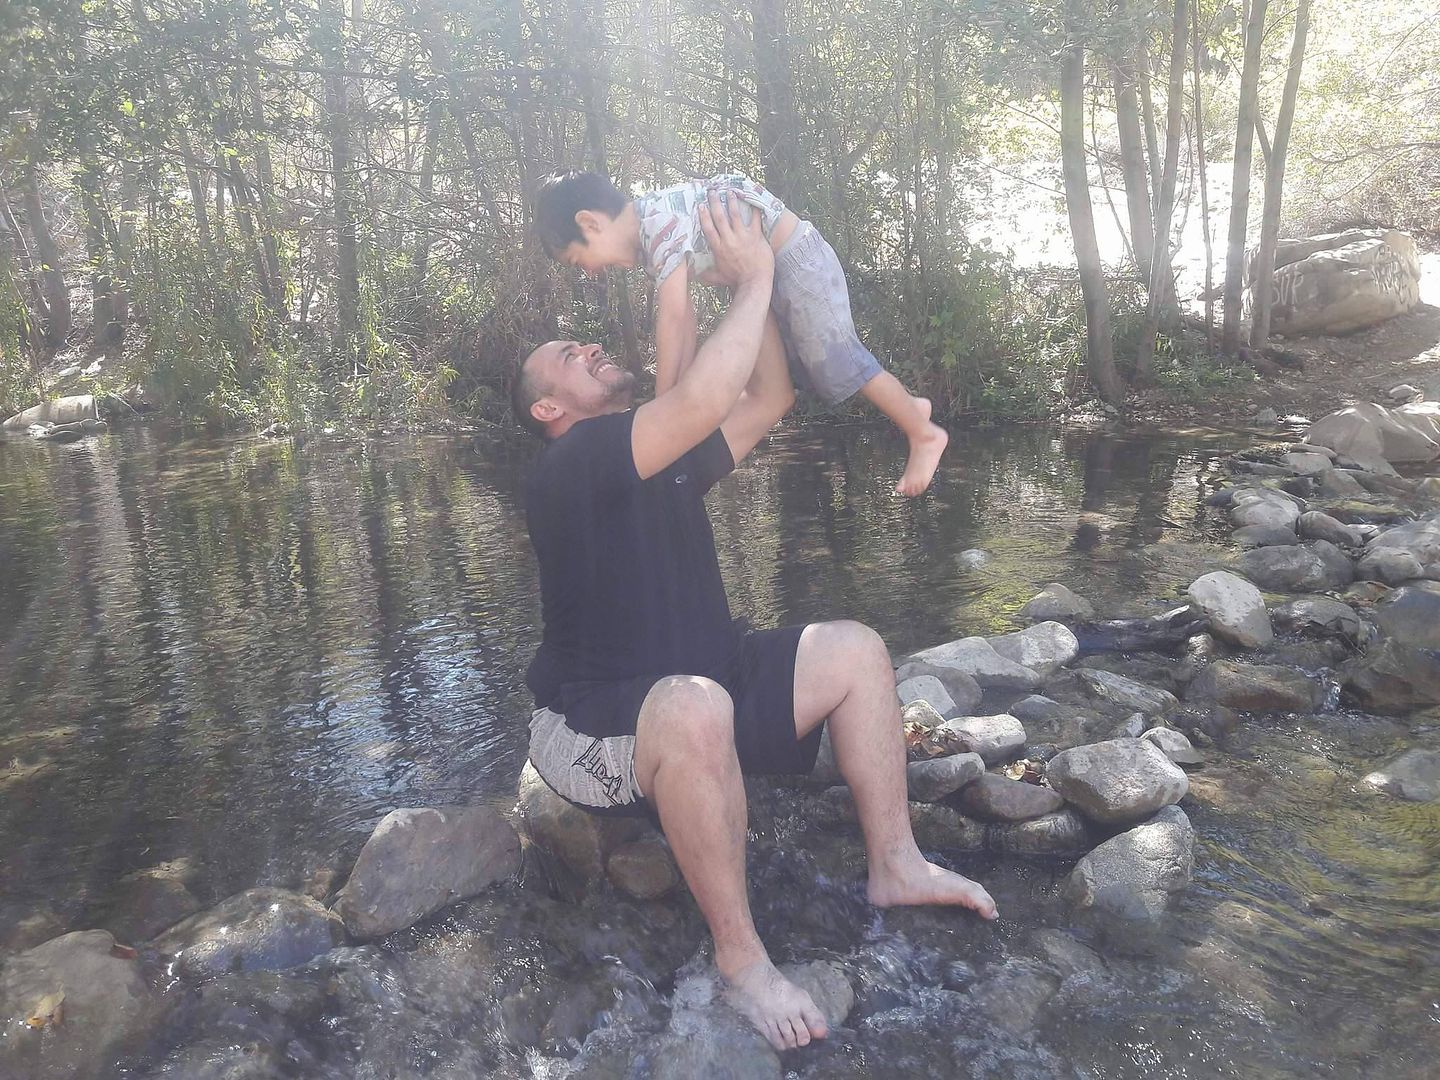
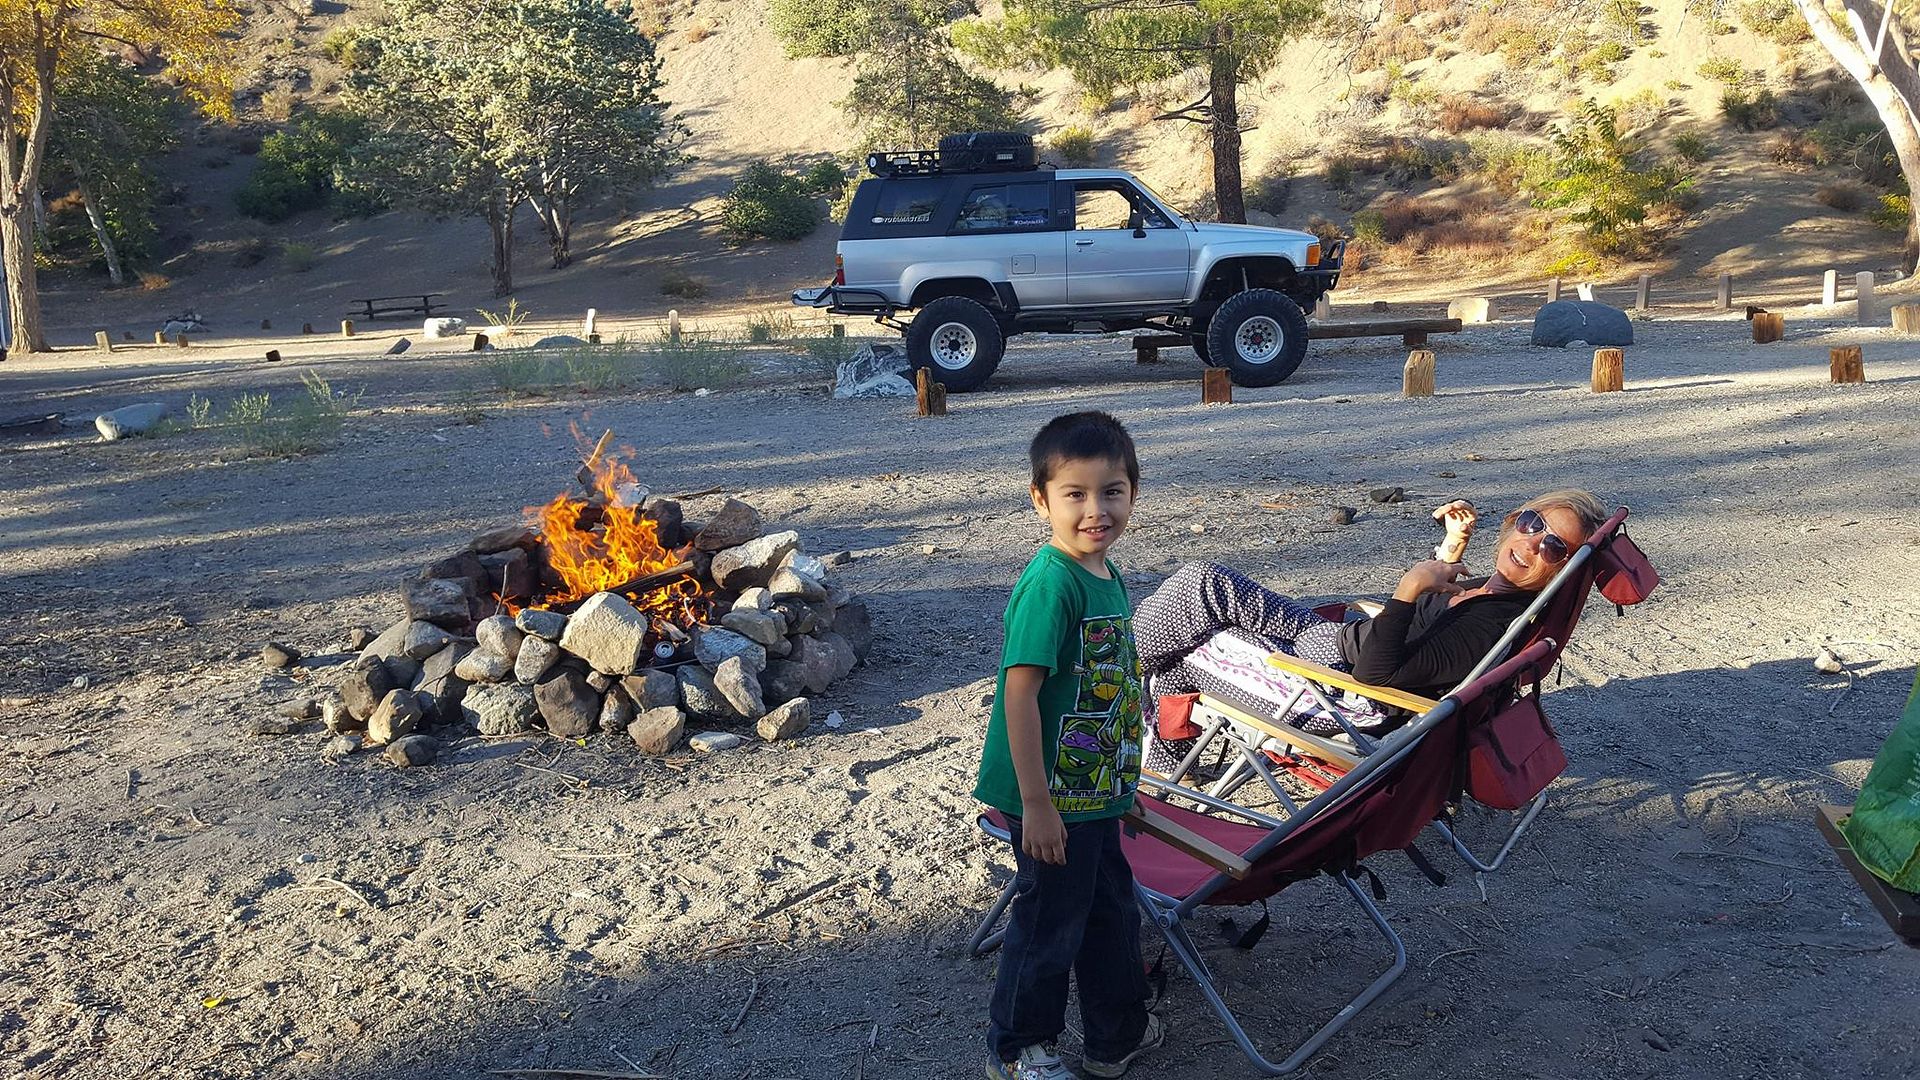
My two loves
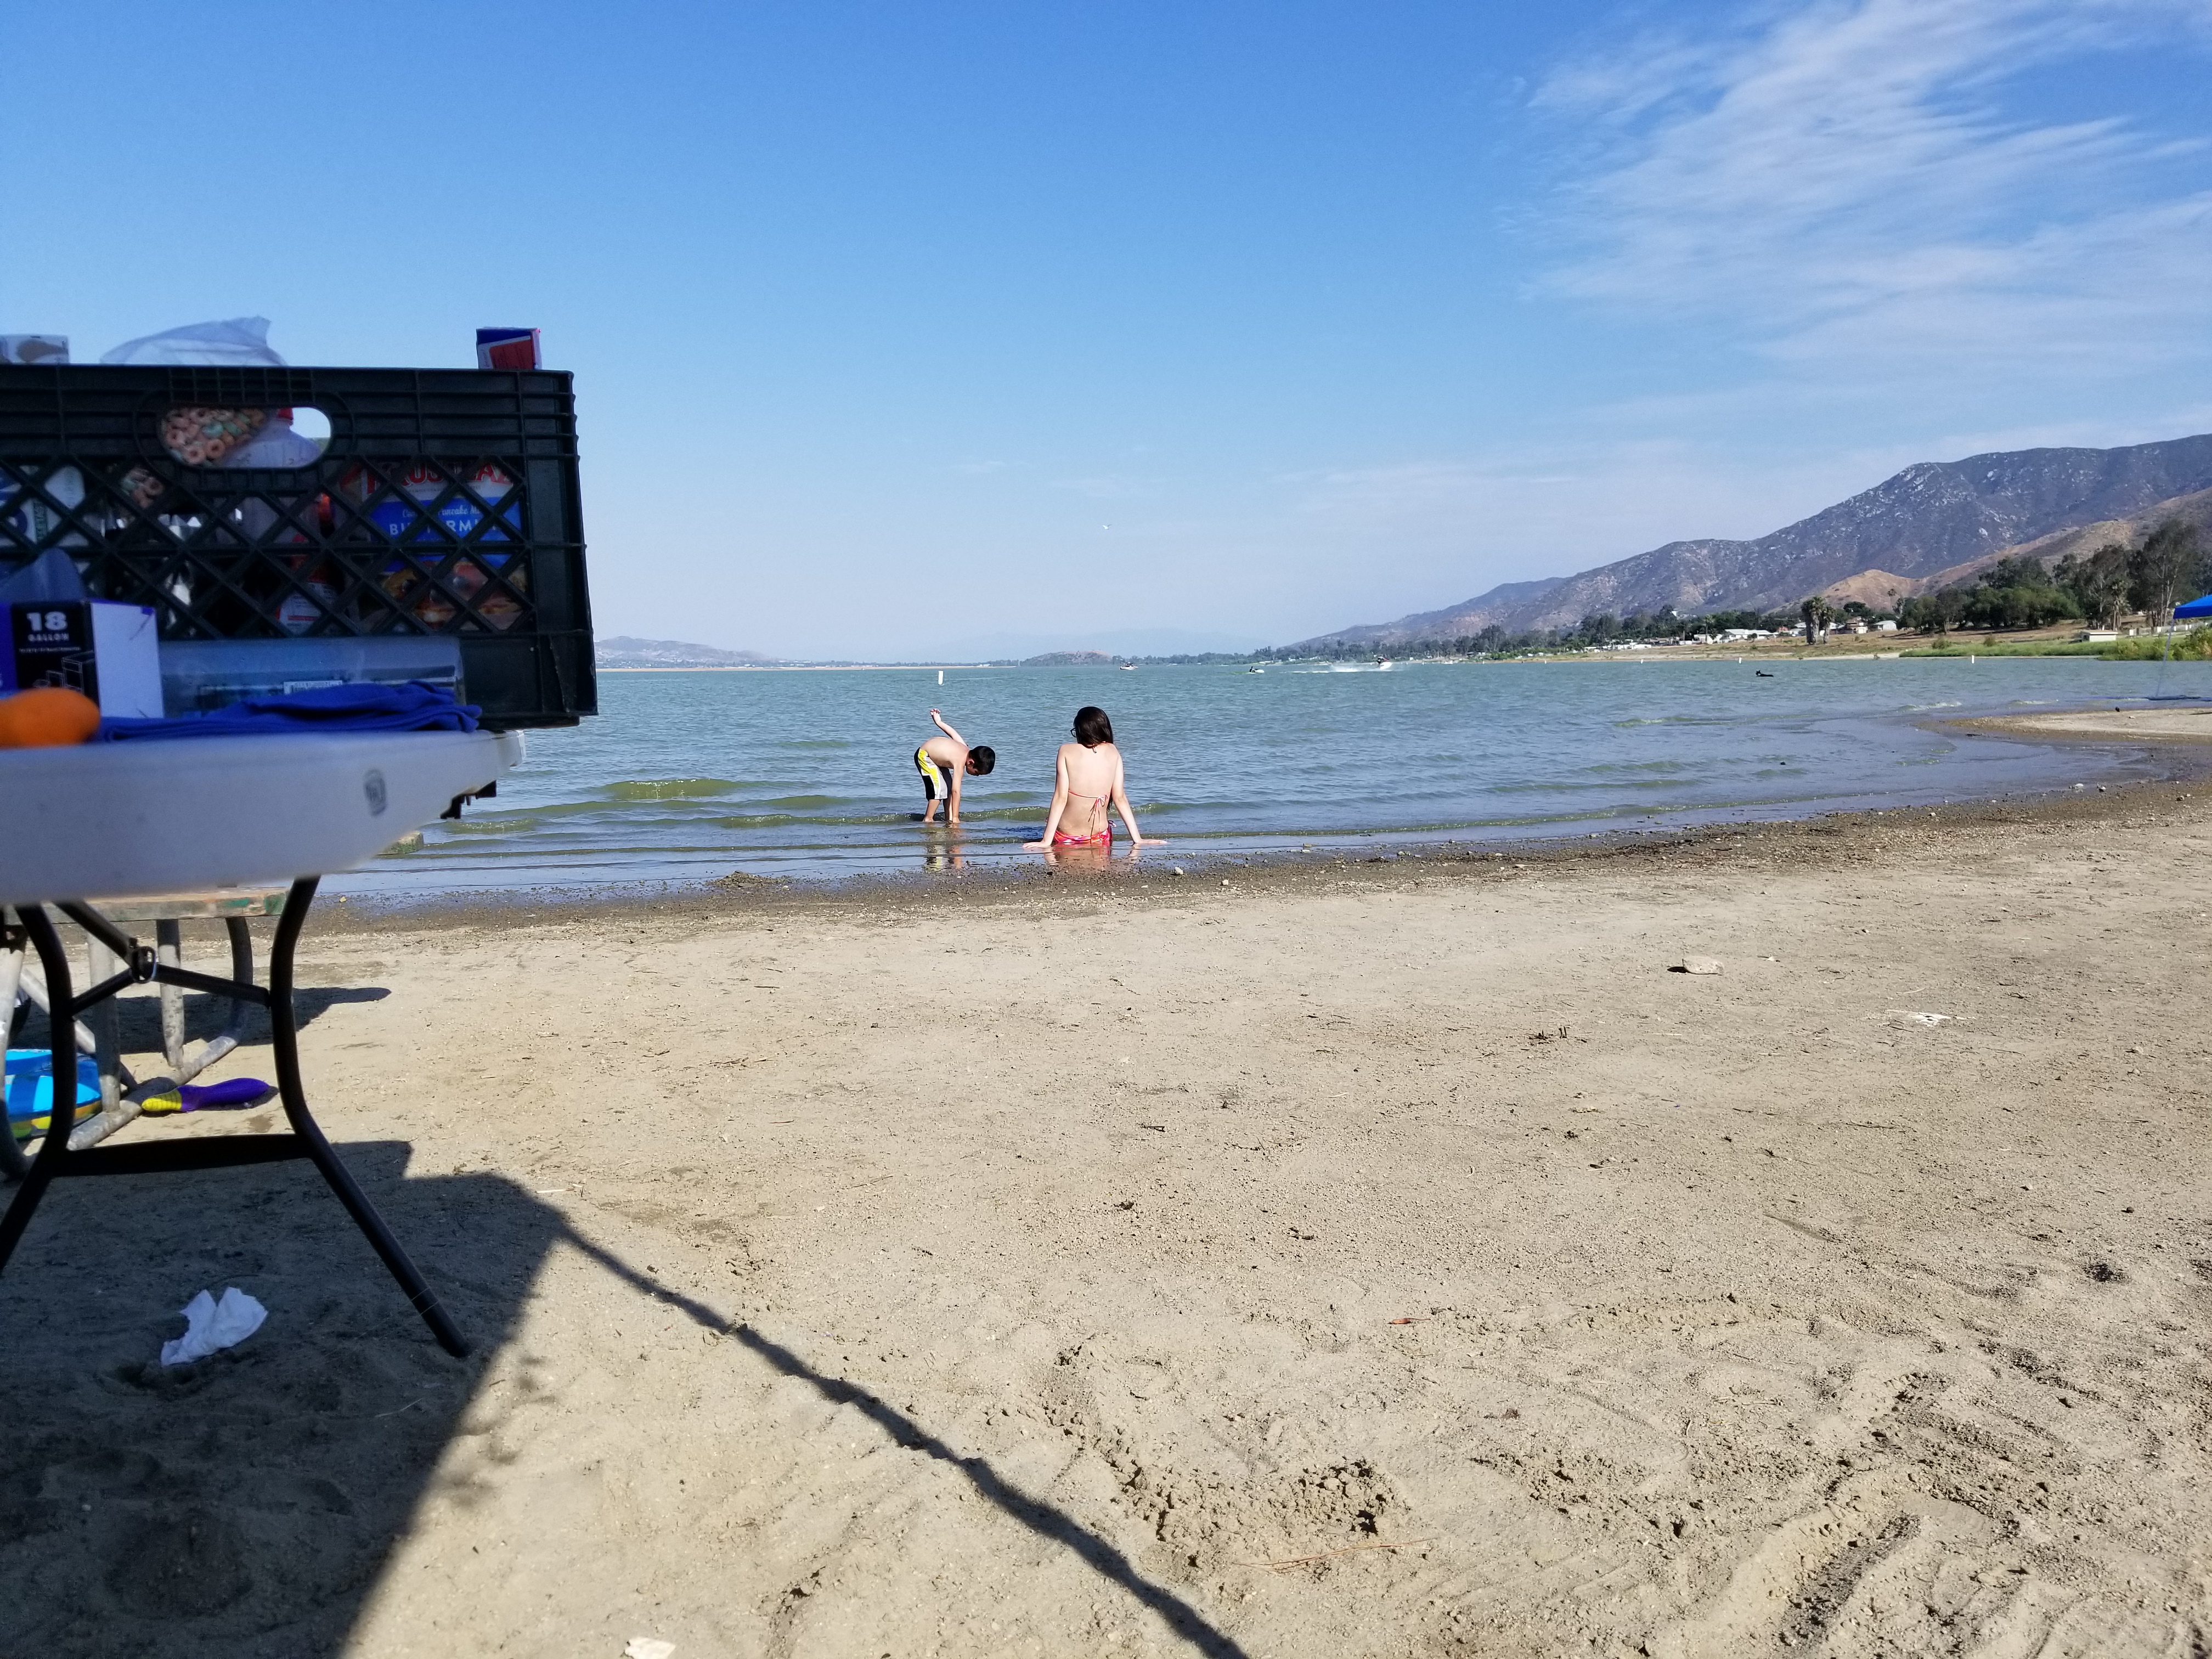
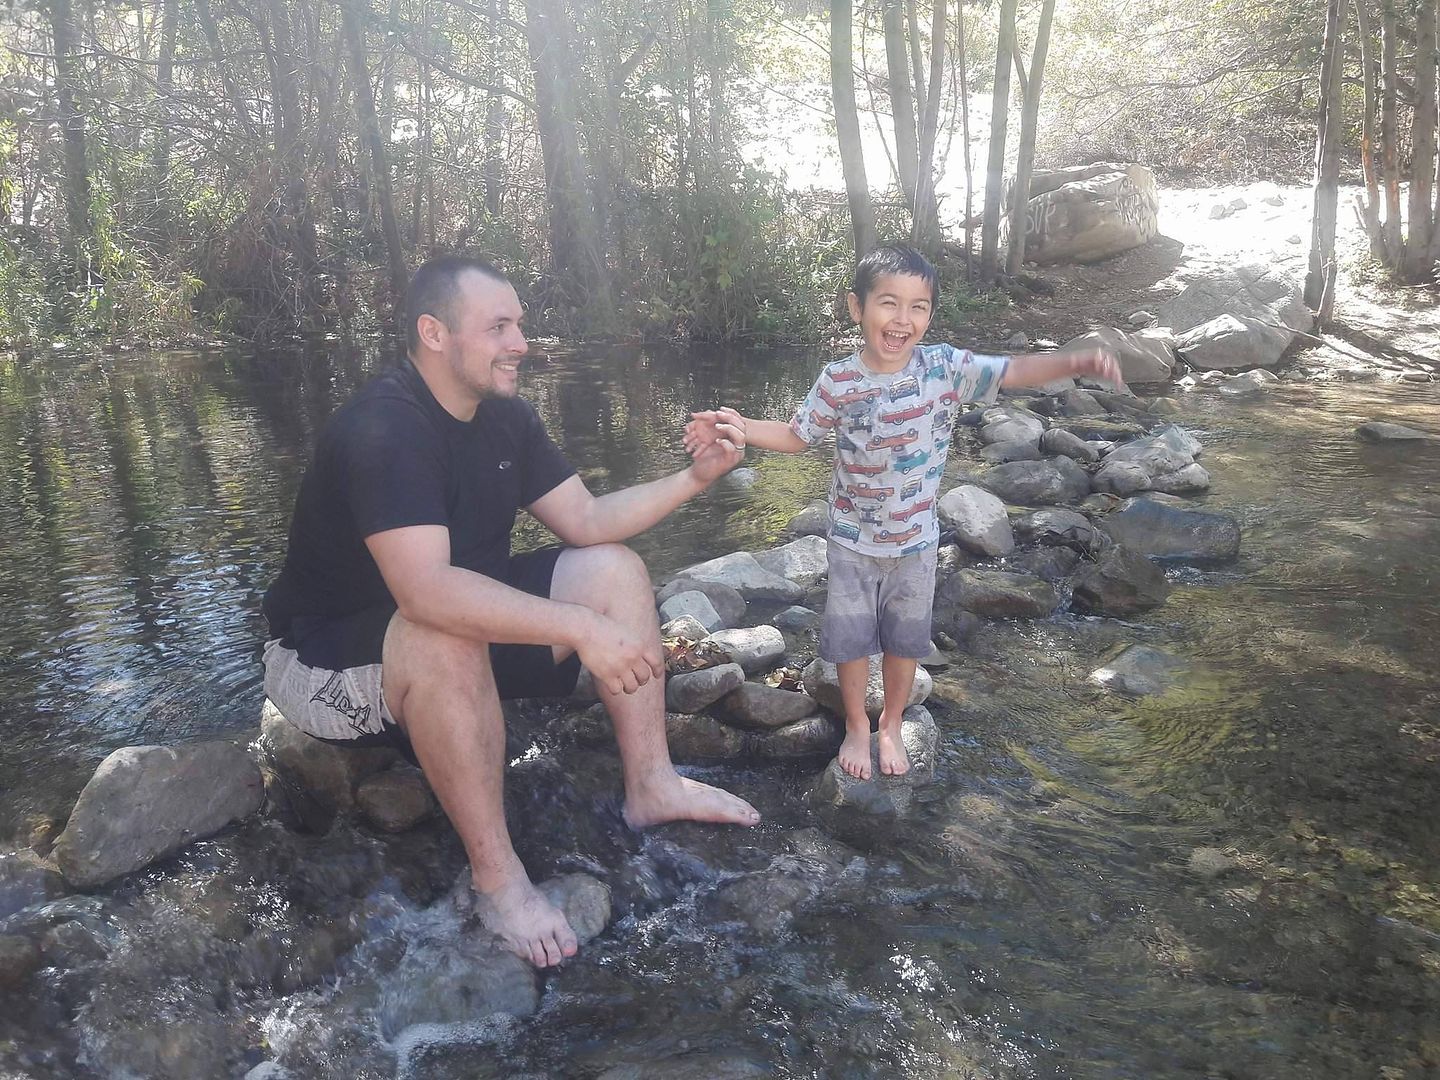
Little Isaac was having the funnest time finding all sizes and shapes of rocks.
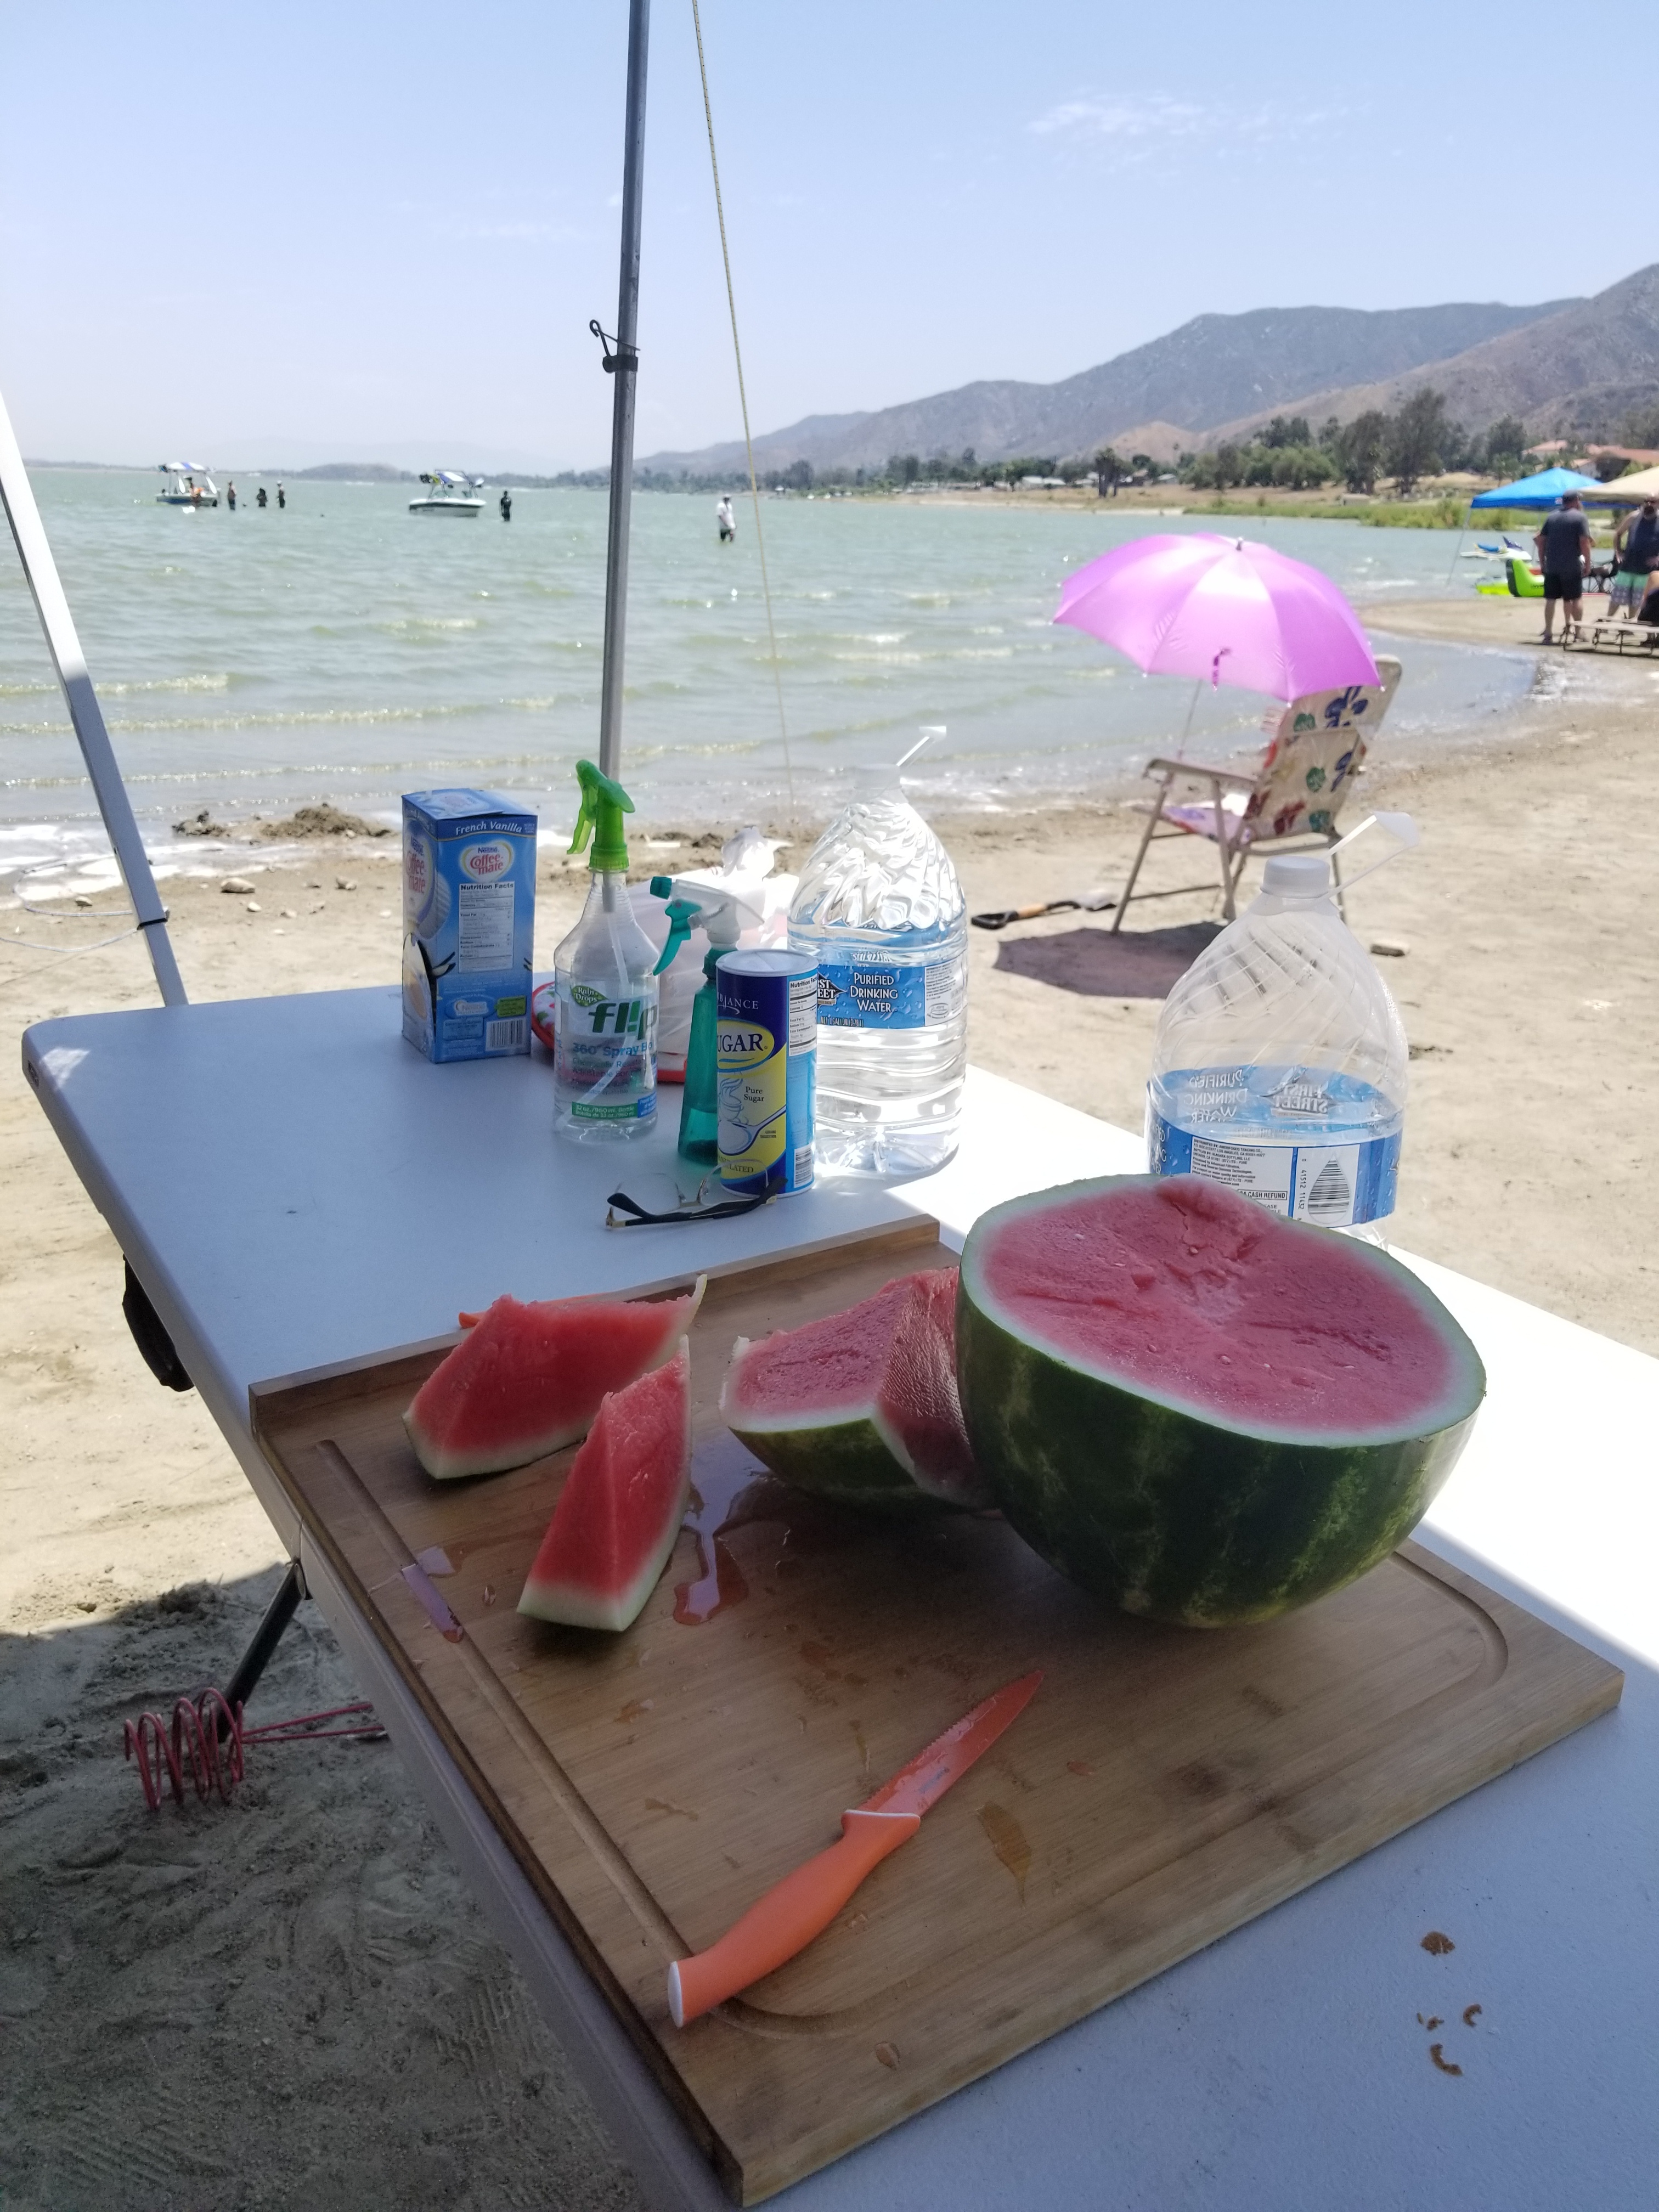
I don't think anything hit the spot more this past weekend then this delicious sweet watermelon. These full sized bamboo kitchen style chopping boards Really came in handy this weekend. I get down when it comes to cooking when we camp and one of my best buddies is a real professional private chef" so i added these with both of us in mind for some good prep surfaces.
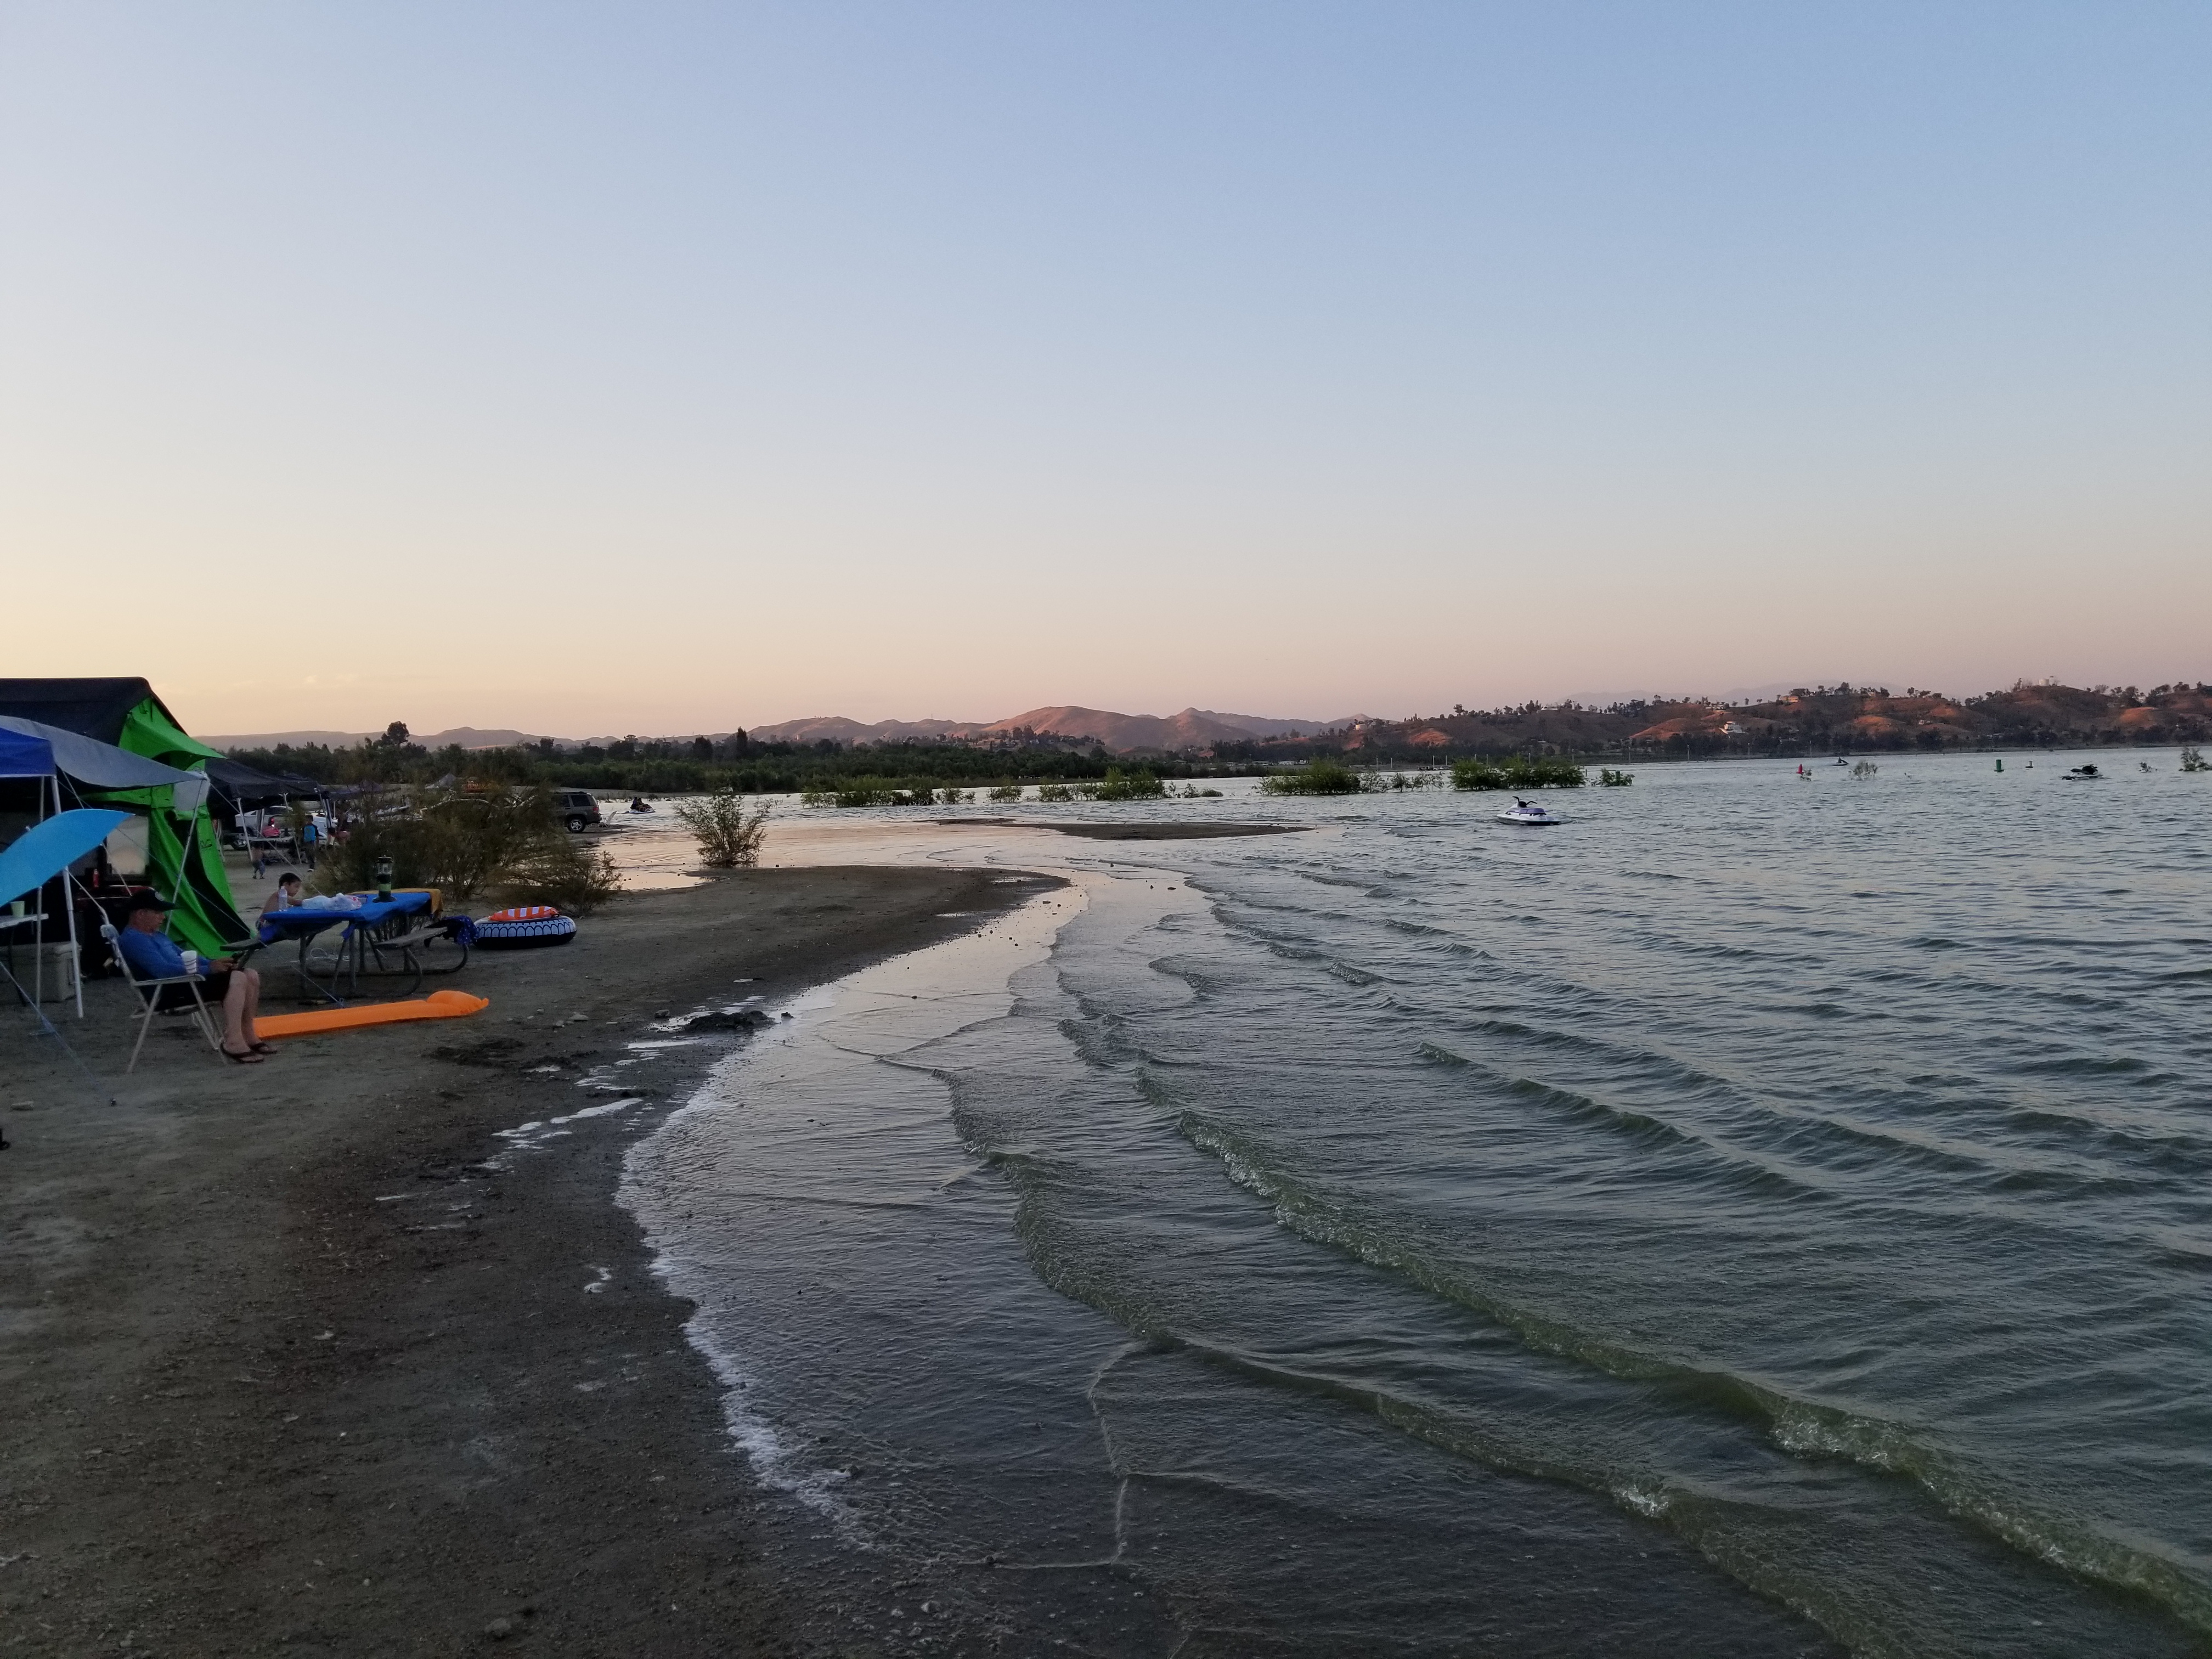
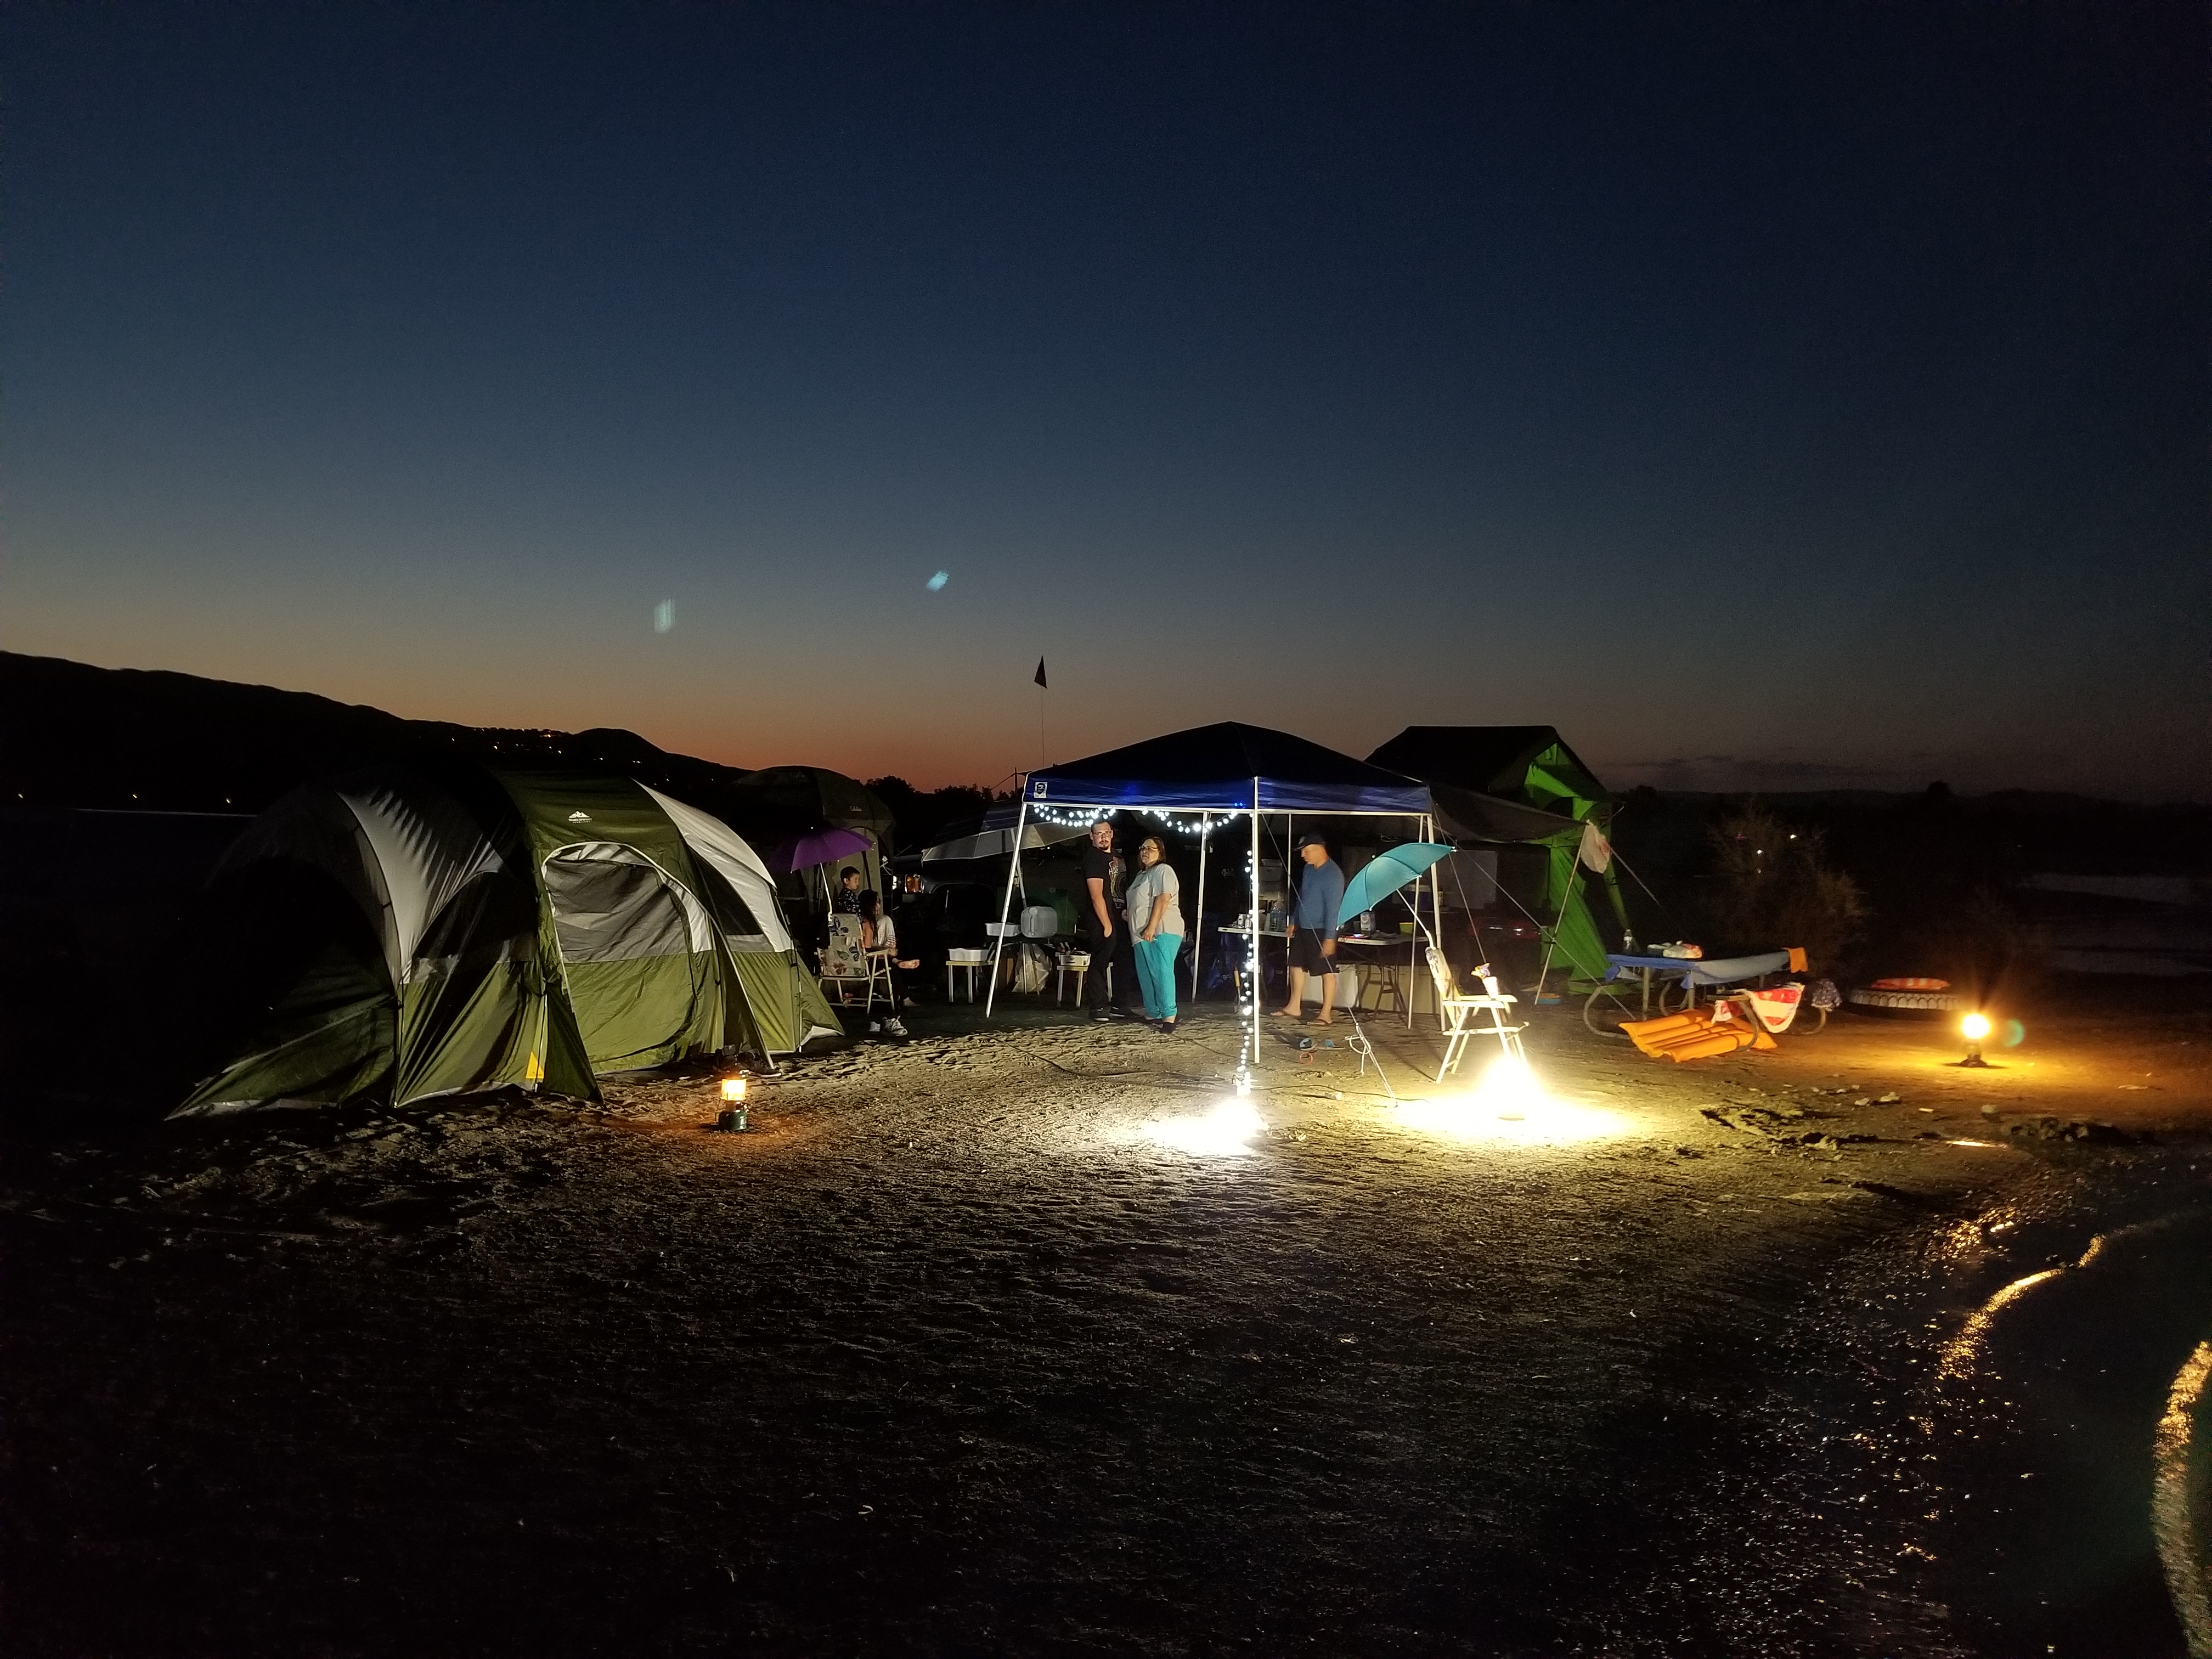
Sun is starting to go down and almost time to begin setting up the night time set up before mosquitoes come out to suck the blood out of everyone.

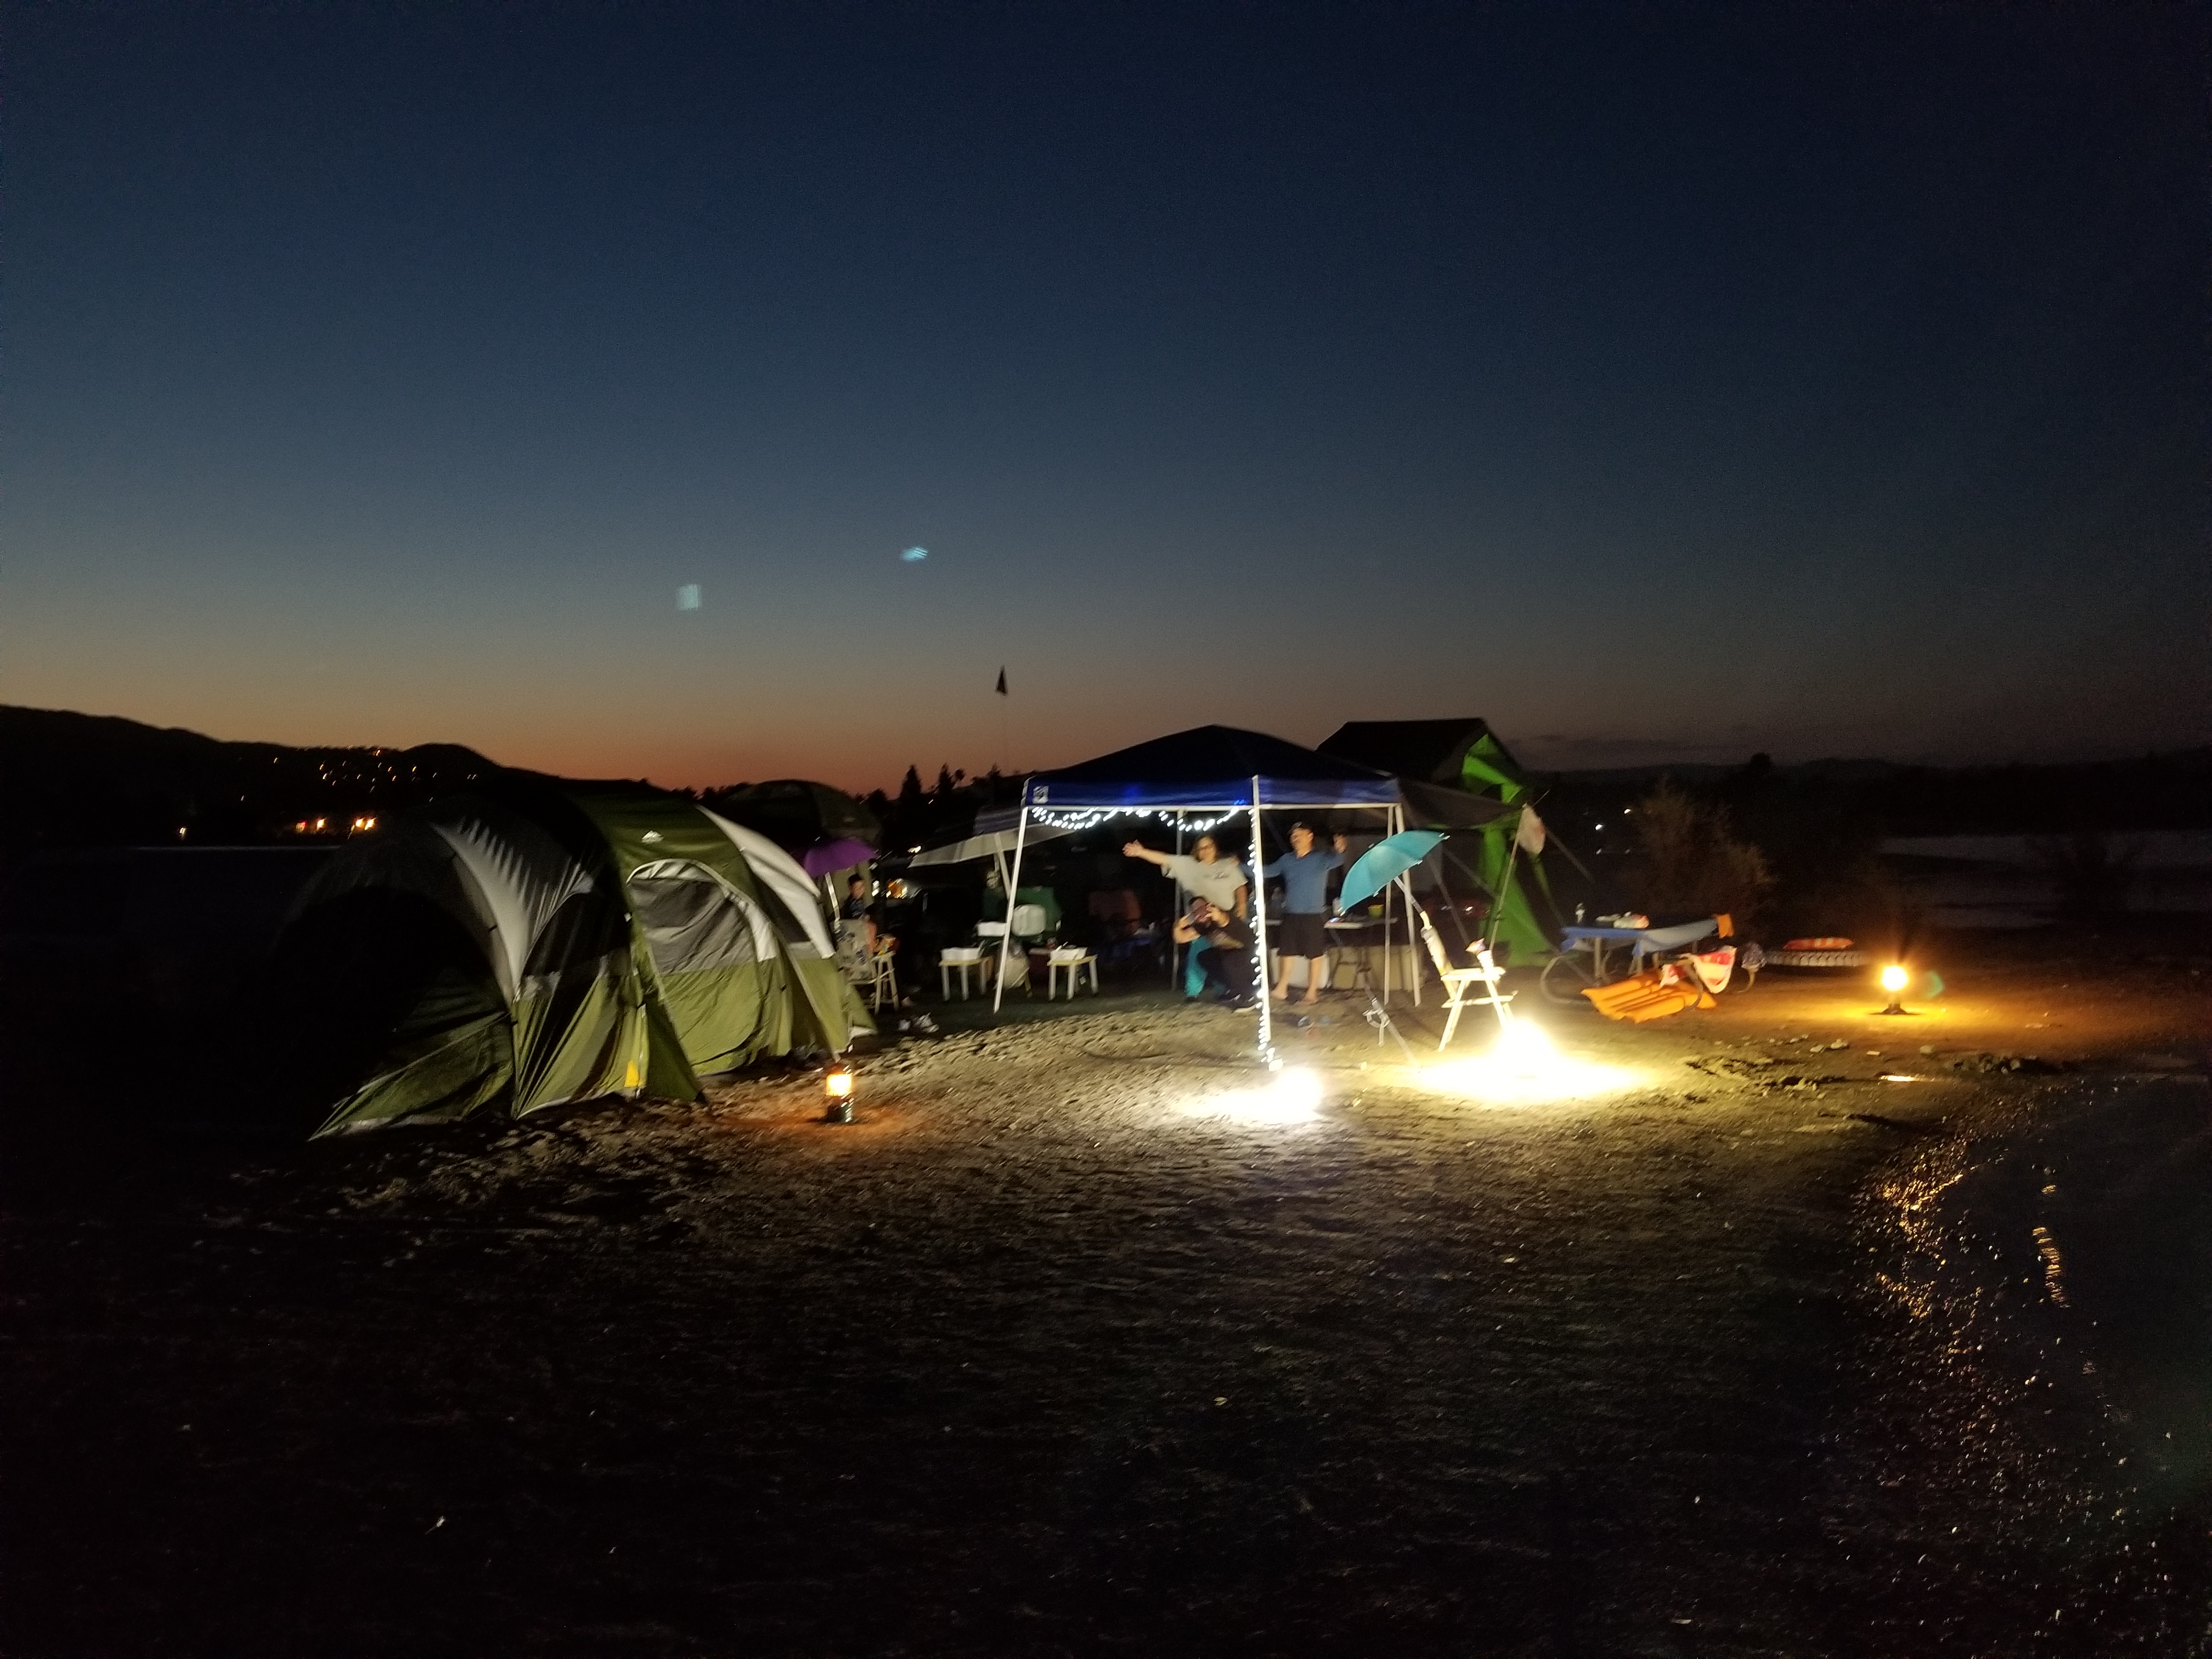
The first night the wind blew extremely hard. So hard it blew down a tent at a neighboring camp ground. and this canopy was blown right over my truck! We eventually used some clothes line rope to anchor it in place. ...and despite all the wind that blew so hard and destroyed a few camp set ups my CVT roof top tent help up great and barely moved at all when when the wind was at its worst! This CVT tent is definitely rigid enough to hold up against some nasty winds.
Out of all the camp sites on the camp ground ours definitely had the most light. I'm glad we had my dads super bright LED lights. Those were the ones that attracted the bulk of the mosquitos so I set those up as far away from the camp as possible. Although it didn't keep them all away I would say it kept about 90% of them away from us. Literally there had to have been over 500 mosquitos flying each of those 2 center nights and another ton of flies on the far right propane lantern.
My All4OffRoad rock lights lighting the under carriage of my truck helped out a ton when we had a temporary power outage with my trailers onboard deep cycle battery. Kept them on until I was able to get the battery charged up again with my truck.
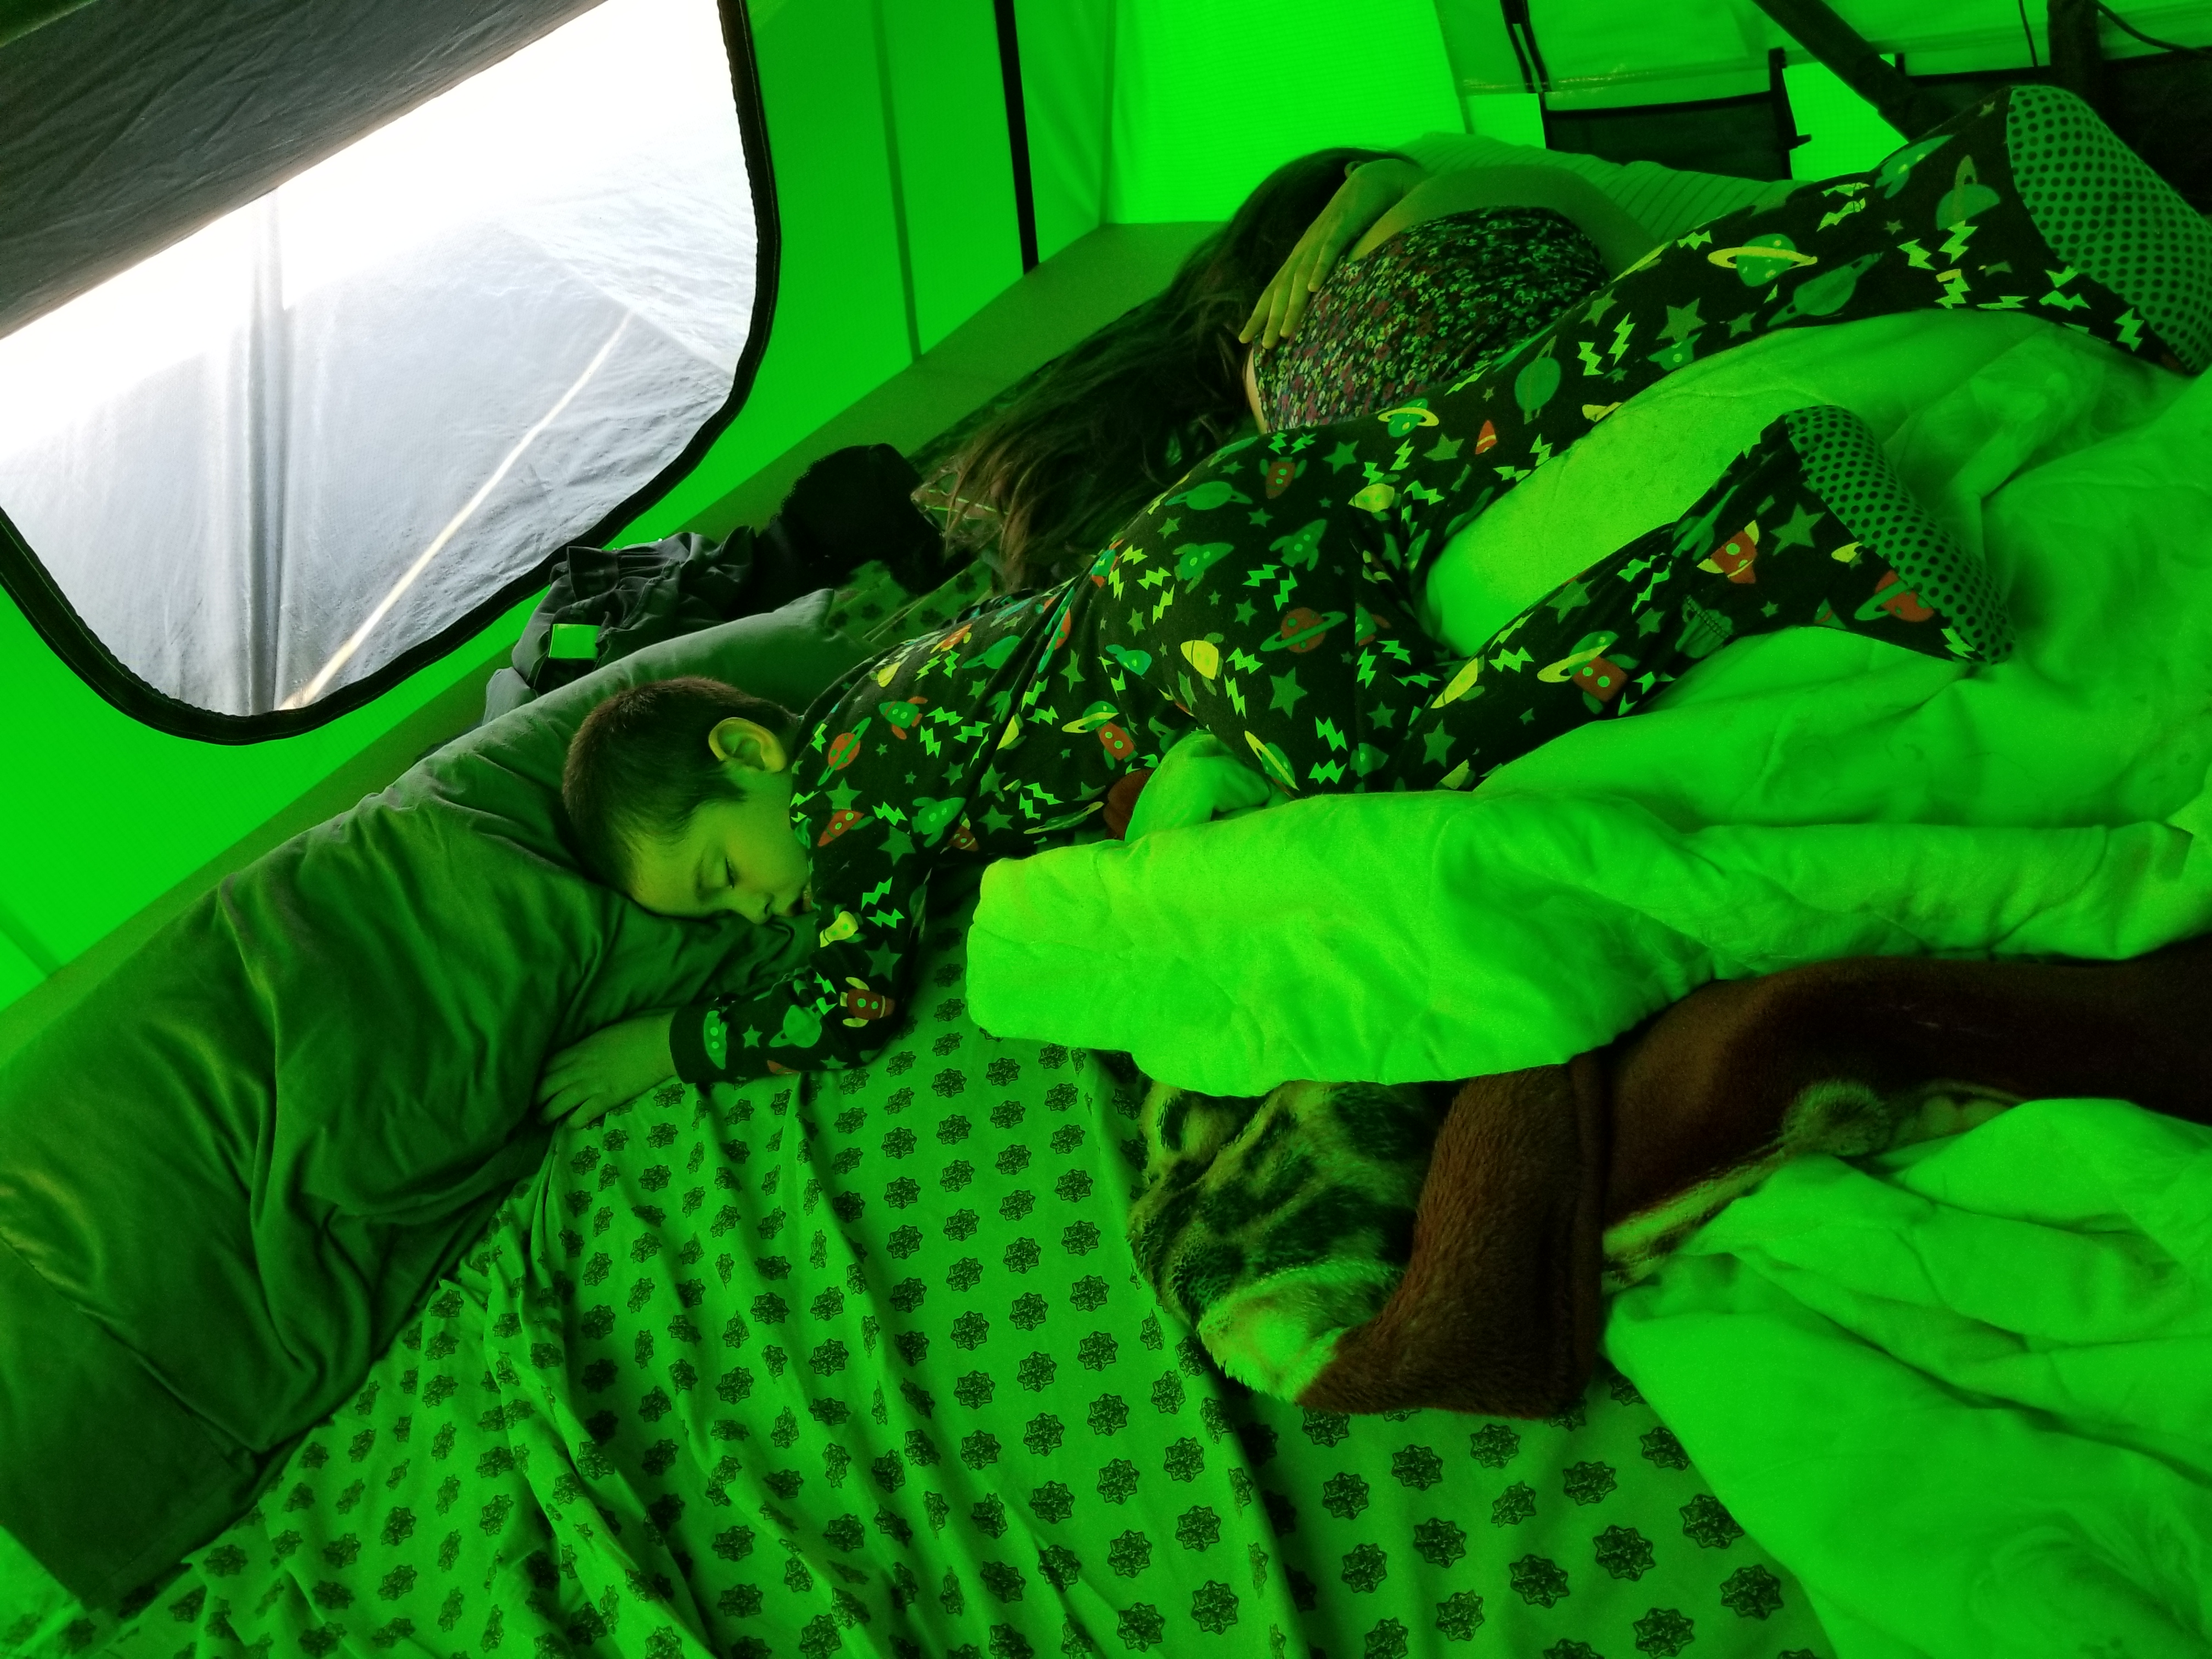
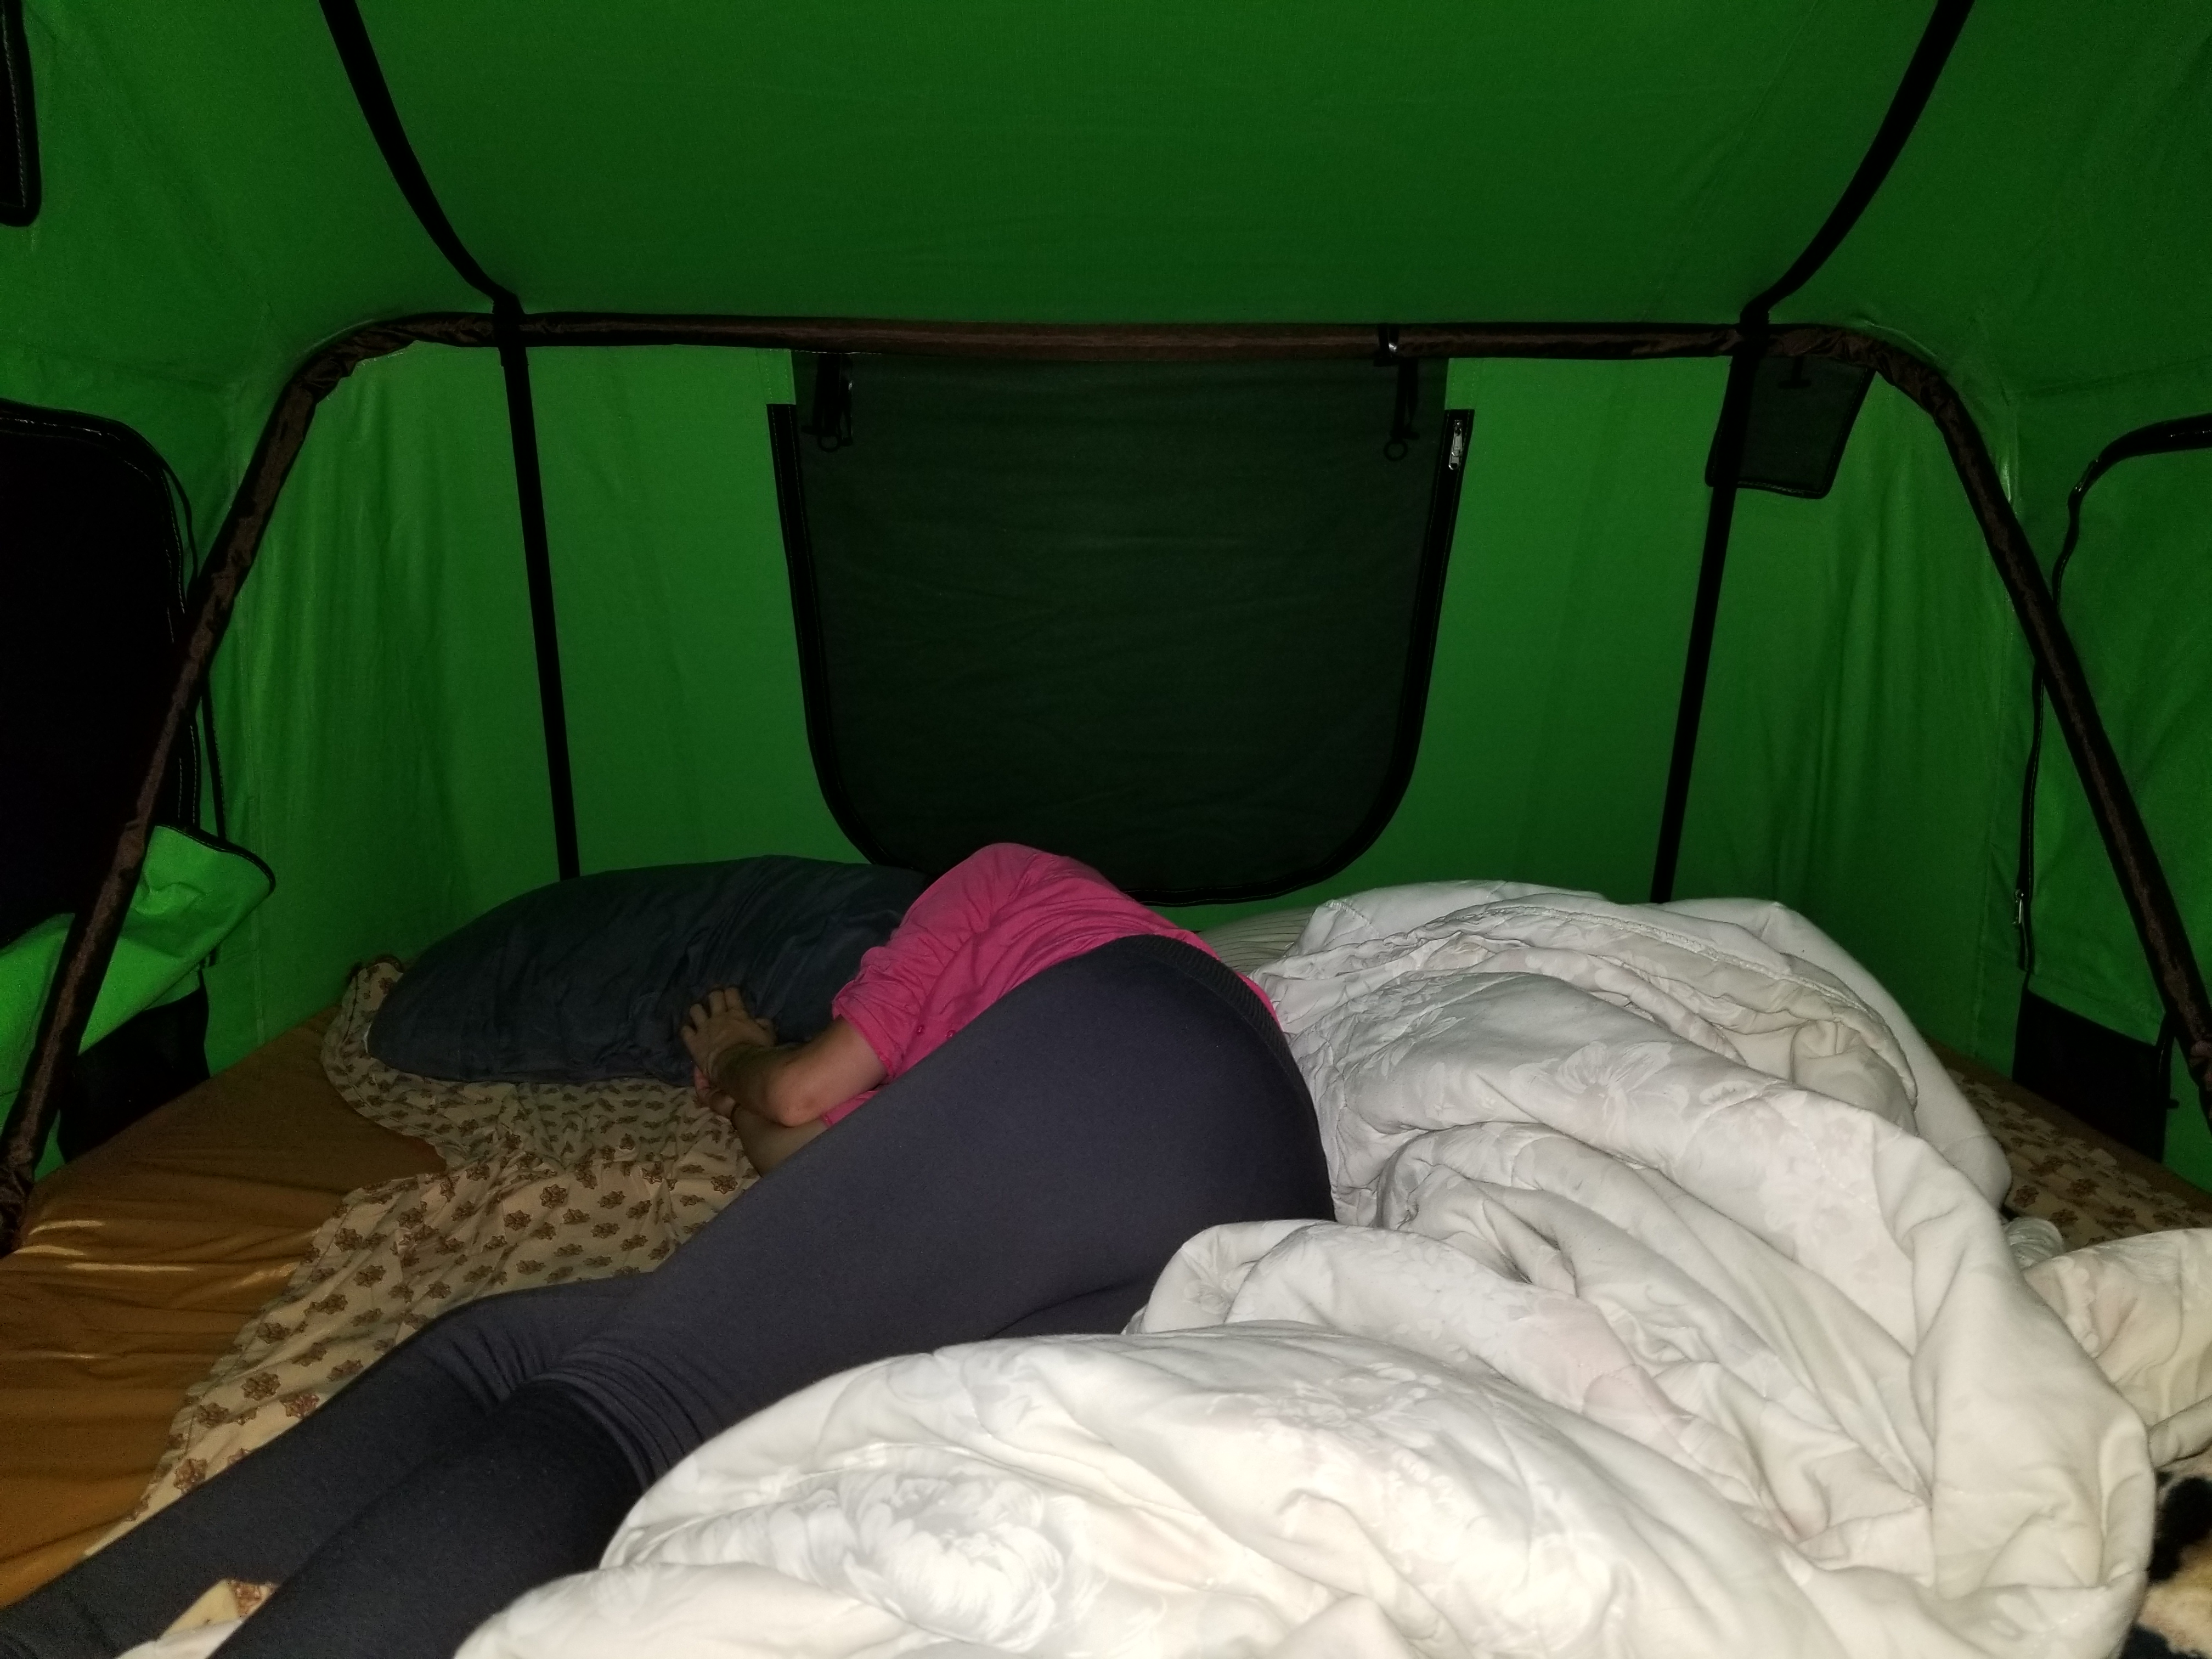
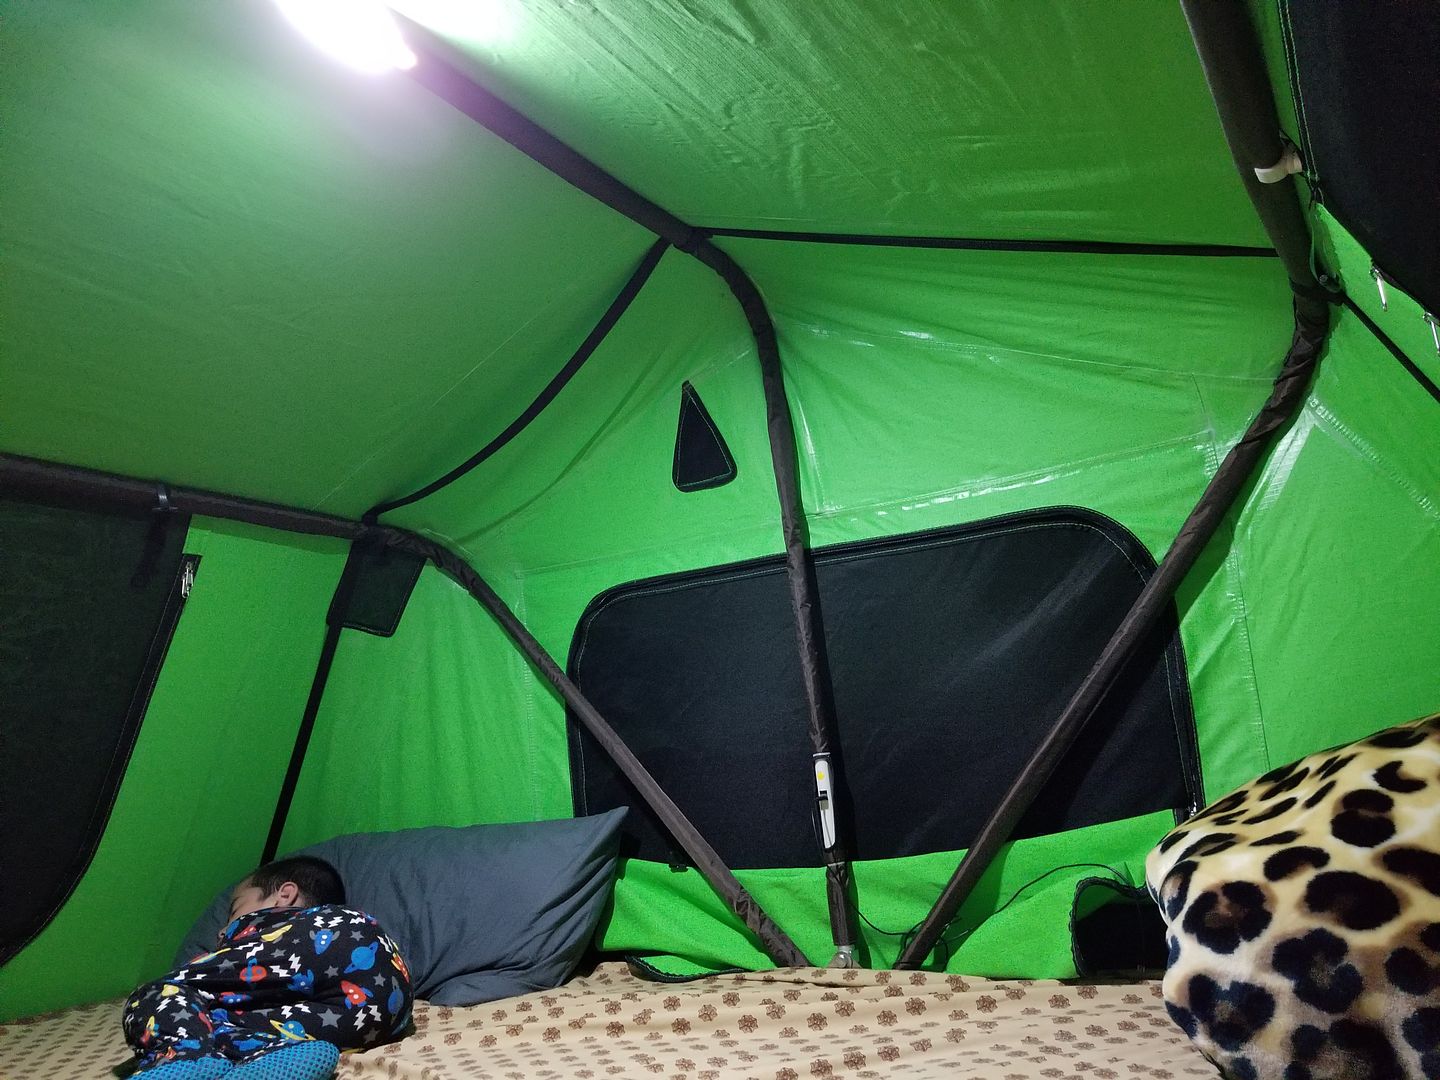
Here you can see how large the bed really is on this roof top tent. It fits all 3 of us comfortably look at little Isaac all comfy sleeping across on us lol
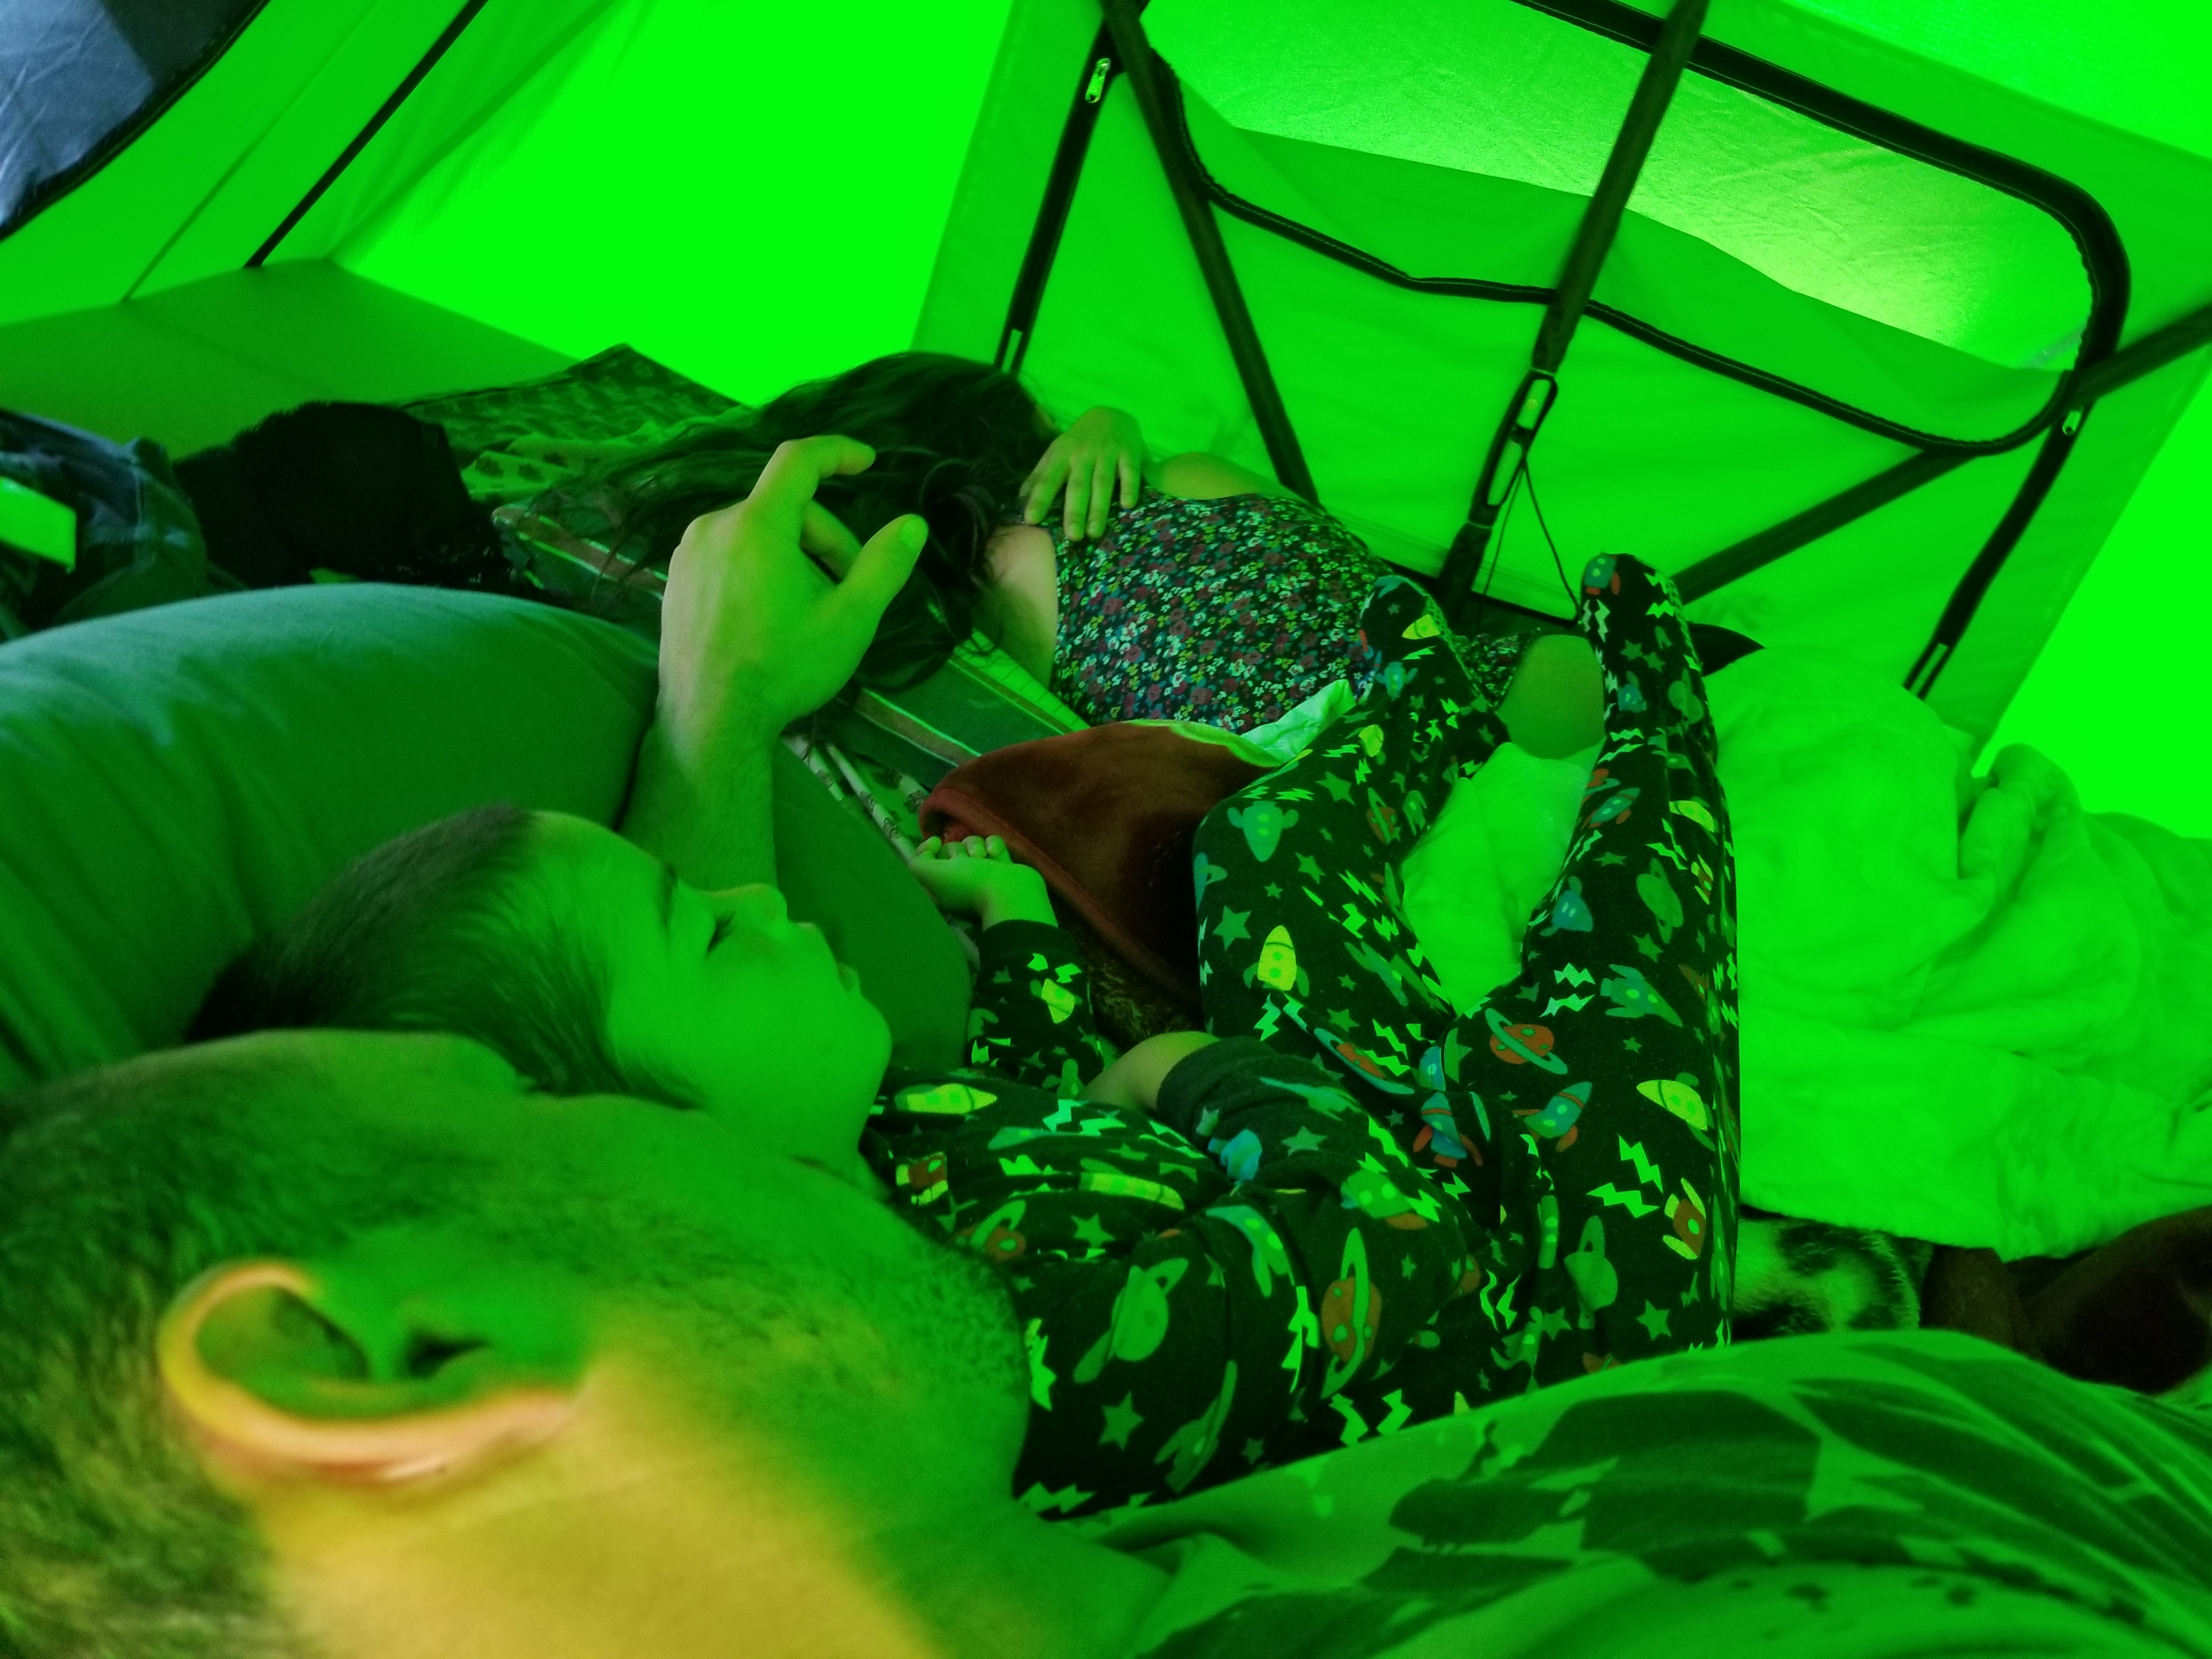
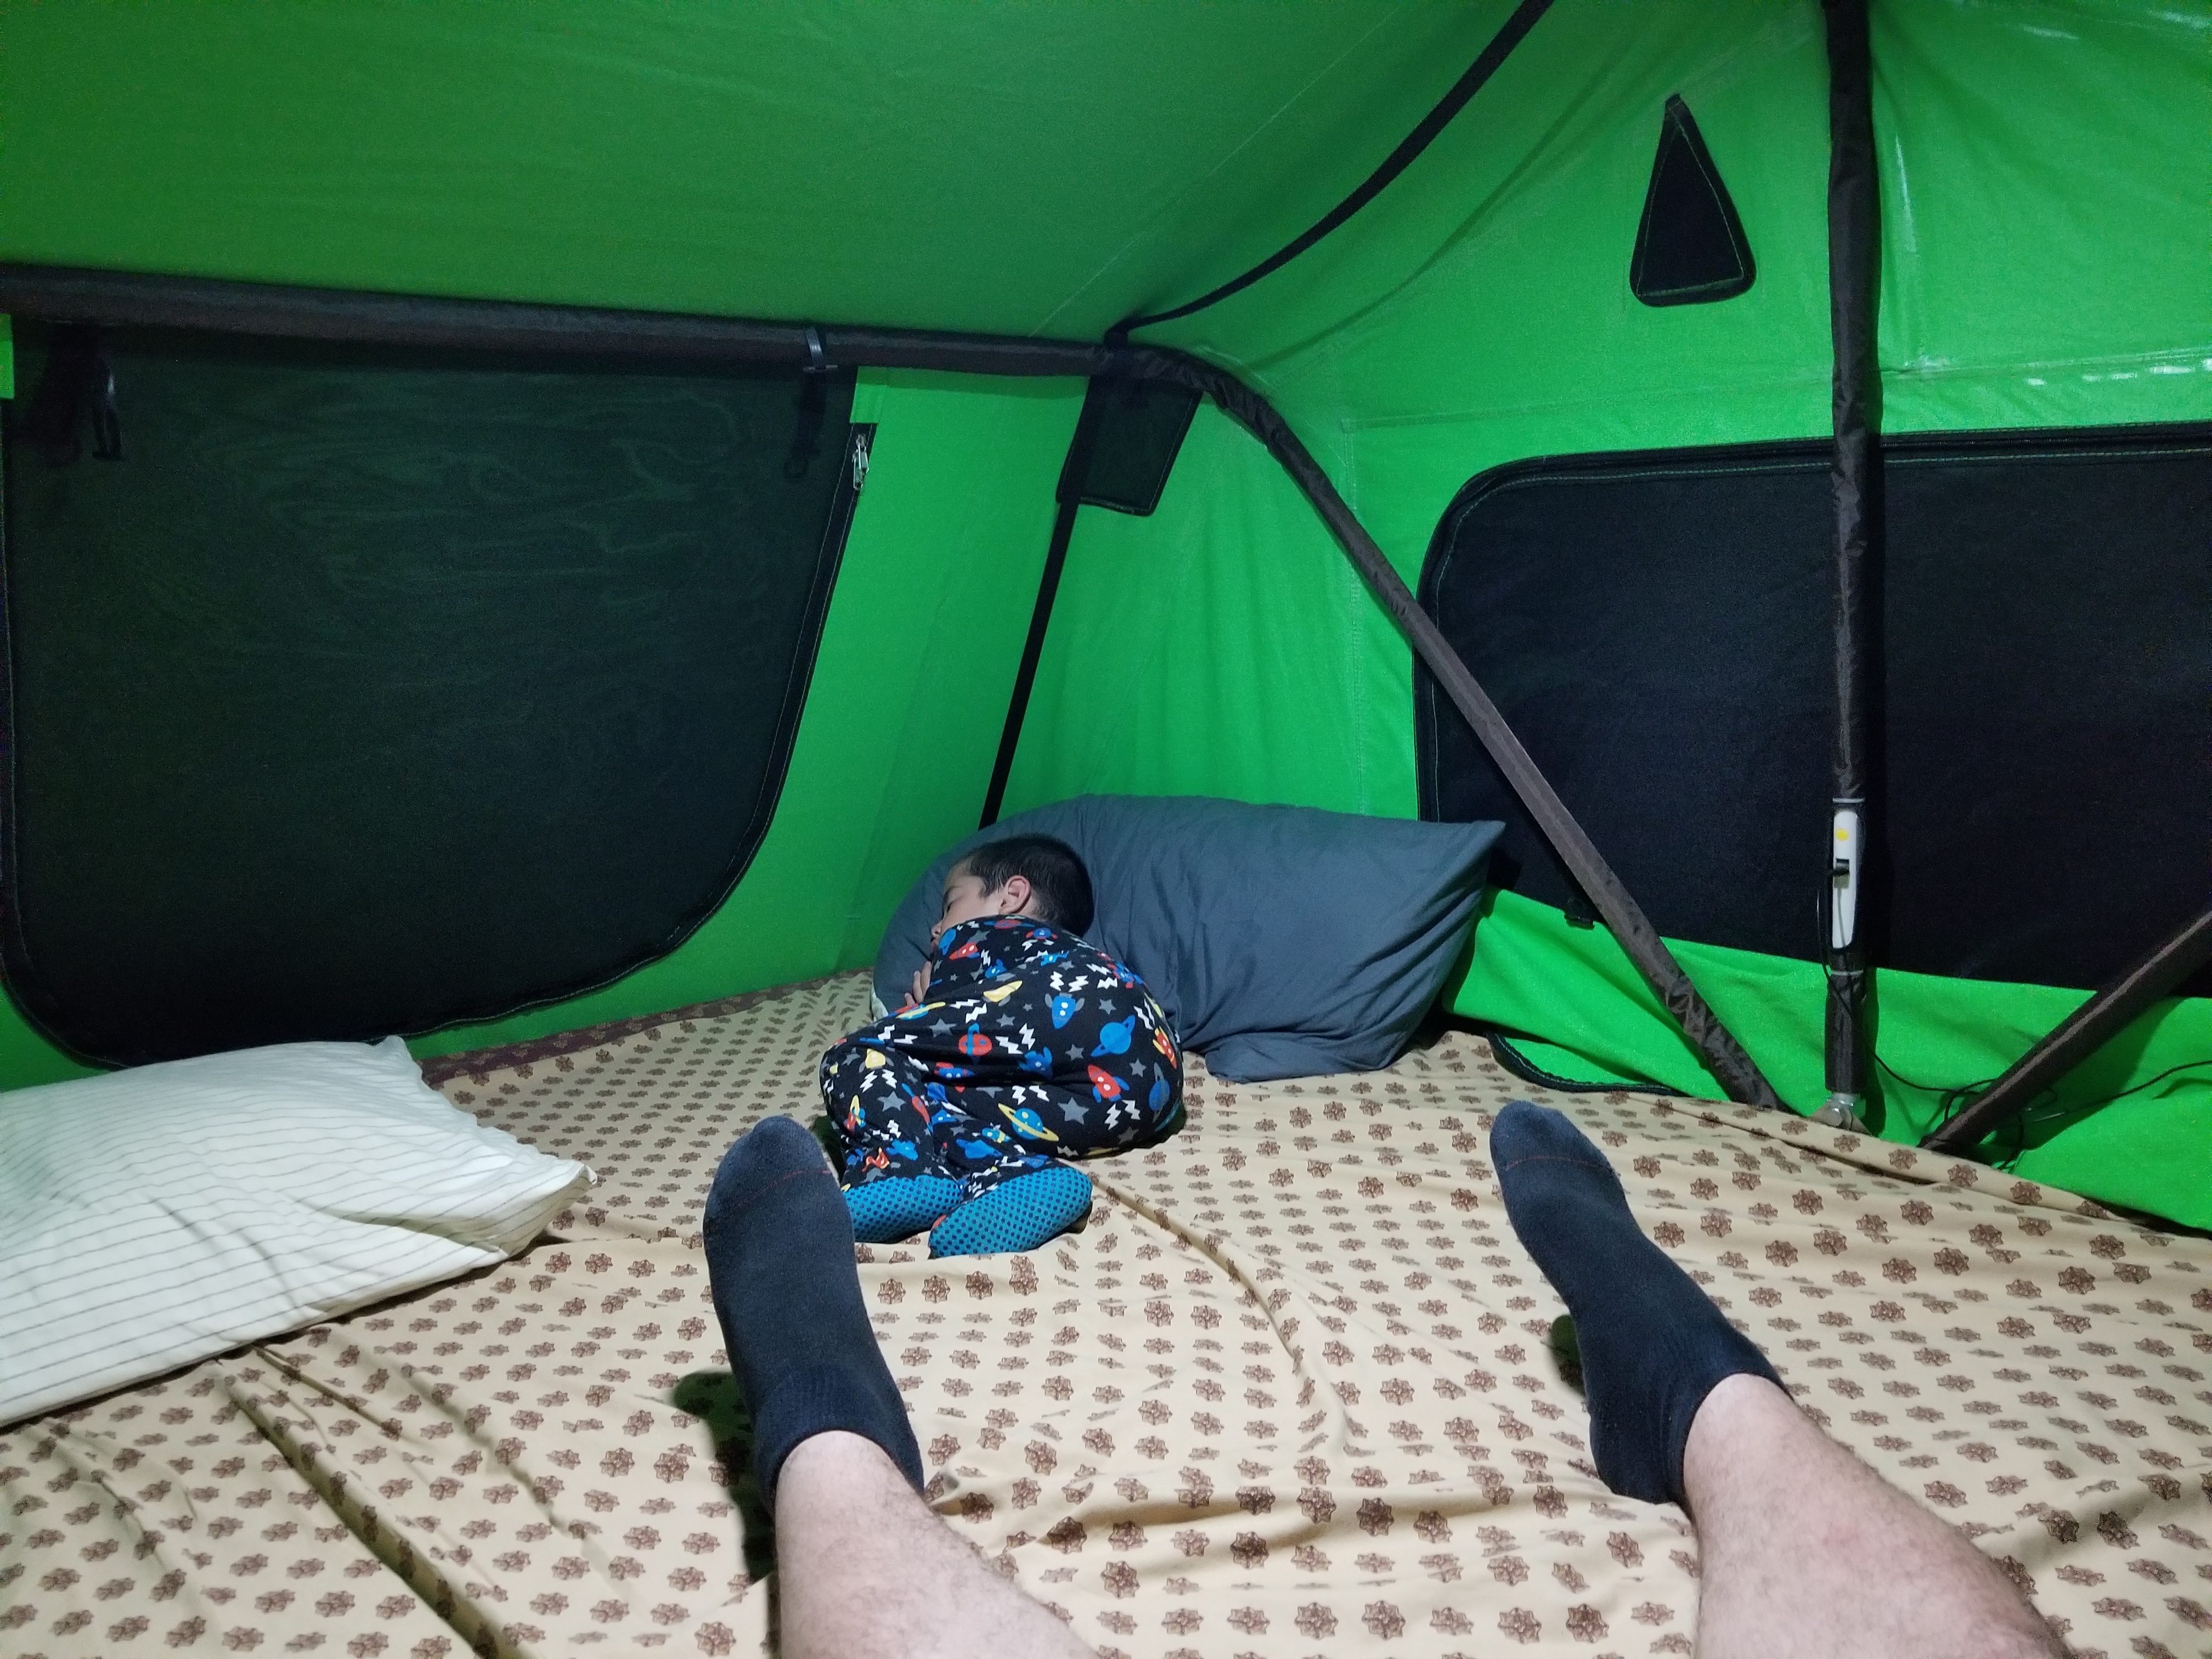
I love the fact that this tent has an on board LED and 2 USB charging ports. It worked great to charged our phones!

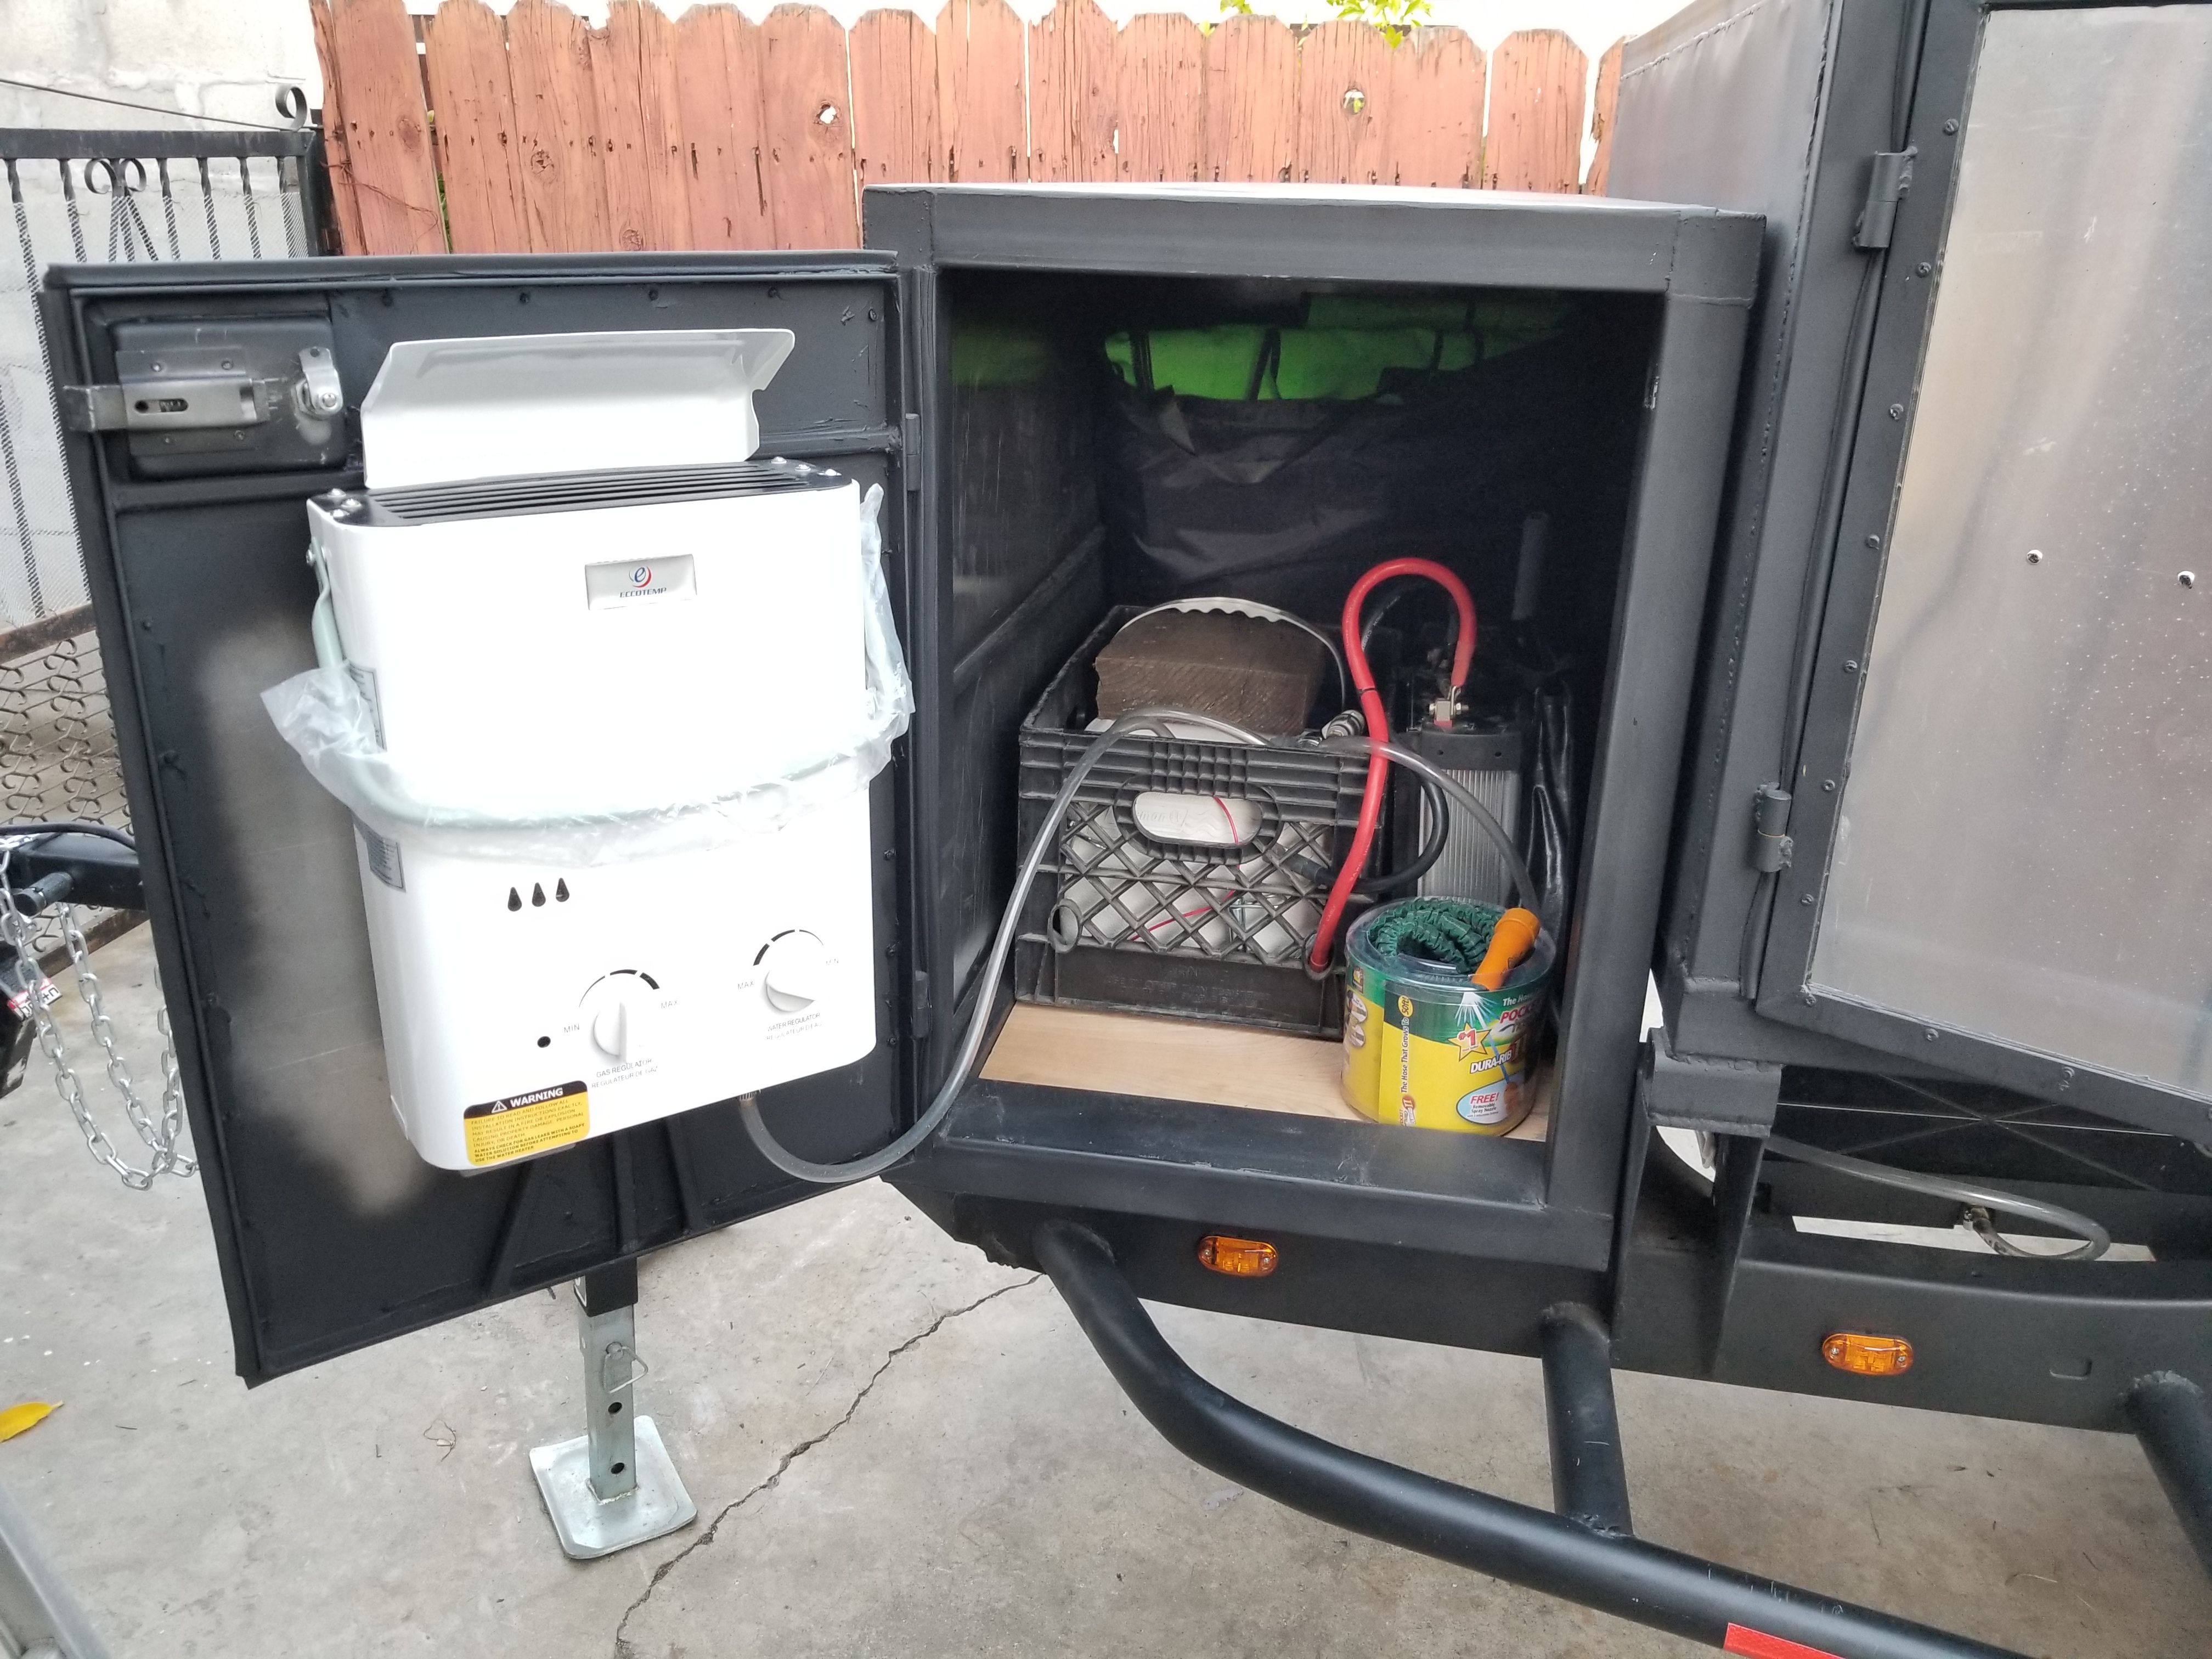
Here is a basically what i ran this weekend. As you saw in the other pix i have a Cabelas Shower tent which we use to shower and use as a port-a-potty. i dont use the hanging 5 gallon bag anymore. Instead i use this EccoTemp water heater for nice warm/hot showers. Happy wife happy Life. Plus nothing beats a warm shower especially when you are all dusty. This shower does not work unless you have water pressure. So i use this paired with a 1Gallon per minute water pump whcih works off of 12v power. For this trip i only took 1 of the two blue top optima deep cycle batteries that i recently bought. and to make use of battery power i have a 3000watt (6k watt peak) inverter that i have had for almost 2 years now to use with my 3 gallon compressor to air up tires when i go Rock Crawling. Its a bit overkill for this trailer but i don't want to buy another one since i already have this one lol i works. I may get a lower wattage one eventually. And last this eccotemp shower works with two D batteries not 12v power.

Little Isaac was having the funnest time finding all sizes and shapes of rocks.

I don't think anything hit the spot more this past weekend then this delicious sweet watermelon. These full sized bamboo kitchen style chopping boards Really came in handy this weekend. I get down when it comes to cooking when we camp and one of my best buddies is a real professional private chef" so i added these with both of us in mind for some good prep surfaces.

Sun is starting to go down and almost time to begin setting up the night time set up before mosquitoes come out to suck the blood out of everyone.

The first night the wind blew extremely hard. So hard it blew down a tent at a neighboring camp ground. and this canopy was blown right over my truck! We eventually used some clothes line rope to anchor it in place. ...and despite all the wind that blew so hard and destroyed a few camp set ups my CVT roof top tent help up great and barely moved at all when when the wind was at its worst! This CVT tent is definitely rigid enough to hold up against some nasty winds.

Out of all the camp sites on the camp ground ours definitely had the most light. I'm glad we had my dads super bright LED lights. Those were the ones that attracted the bulk of the mosquitos so I set those up as far away from the camp as possible. Although it didn't keep them all away I would say it kept about 90% of them away from us. Literally there had to have been over 500 mosquitos flying each of those 2 center nights and another ton of flies on the far right propane lantern.


My All4OffRoad rock lights lighting the under carriage of my truck helped out a ton when we had a temporary power outage with my trailers onboard deep cycle battery. Kept them on until I was able to get the battery charged up again with my truck.

Here you can see how large the bed really is on this roof top tent. It fits all 3 of us comfortably look at little Isaac all comfy sleeping across on us lol


I love the fact that this tent has an on board LED and 2 USB charging ports. It worked great to charged our phones!

Here is a basically what i ran this weekend. As you saw in the other pix i have a Cabelas Shower tent which we use to shower and use as a port-a-potty. i dont use the hanging 5 gallon bag anymore. Instead i use this EccoTemp water heater for nice warm/hot showers. Happy wife happy Life. Plus nothing beats a warm shower especially when you are all dusty. This shower does not work unless you have water pressure. So i use this paired with a 1Gallon per minute water pump whcih works off of 12v power. For this trip i only took 1 of the two blue top optima deep cycle batteries that i recently bought. and to make use of battery power i have a 3000watt (6k watt peak) inverter that i have had for almost 2 years now to use with my 3 gallon compressor to air up tires when i go Rock Crawling. Its a bit overkill for this trailer but i don't want to buy another one since i already have this one lol i works. I may get a lower wattage one eventually. And last this eccotemp shower works with two D batteries not 12v power.
 Sep 6, 2017 | 06:16 PM
#145
Thread Starter
Registered User
Joined: Apr 2012
Posts: 2,817
Likes: 2
From: Los Angeles CA
Here's the latest update. The heater is the next project to tackle on my list.
for the heater ducting I plan to route the ducting through the center joint where the RTT opens up. A the large hinged joint in the middle there is a small flap that when lifted up exposes a small space where the duct can easily fit into. If this hadn't worked i would have just planned to route the duct in through the annex. But the hinge portion for the RTT seems to be a great spot.
Here is where i'm talking about:


--------------------------------------------------------------------------------------------------------------------------------------------------------------------------------------------------------
As for how i plan to route the duct through the front compartment.... well that's still in the works. It is actually one thing i am currently brainstorming. I like the many ideas that this guy on youtube (use: Tinskipper) suggested on his video here:
If you look at the comments section you'll see where i asked him a few things and where he replied. But basically here is the links to the 2 hoses that he uses in his video. Together they fit within on another which makes it possible to have that telescoping effect for storage. each heater duct is 5ft. So that makes 10ft when extended and puts away neatly at 5ft. He uses a 55mm and a 60mm heater duct.
55mm Duct:
http://www.suremarineservice.com/W441-376.aspx
60mm Duct:
http://www.suremarineservice.com/398-497.aspx
Right now the only thing i still need to find is that exhaust fitting that he used for a pressed fit of that duct to the heater. He said he used a "2.5(outside diameter) x 2.25(inside diameter) exhaust fitting"
I Just got done buying the 2 hoses so i'll update you guys some more when everything comes in the mail.
---------------------------------------------------------------------------------------------------------------------------------------------------------------------------------------------------------
Here's a few other items i bought to contribute to that front compartment. (from one of my earlier posts)
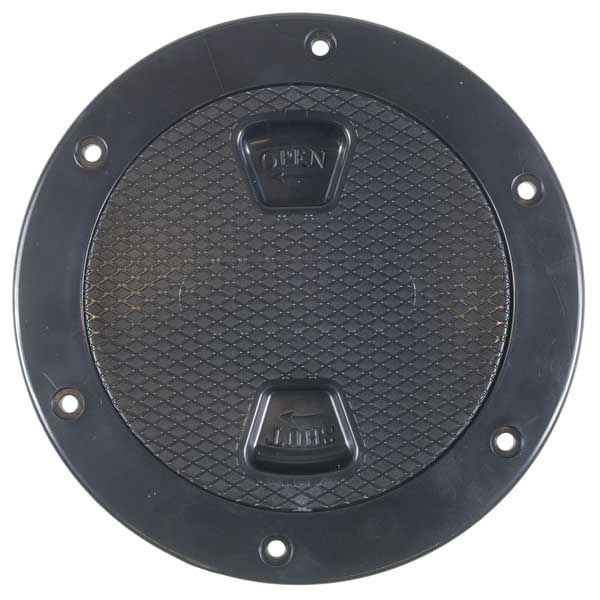
Hatch. This Hatch is basically meant for kayaks but i dont see why this cant work. It is a 4" waterproof hatch that twists on and off. I like it because since it is meant for kayaks the hatch is waterproof when closed. i can use this hatch to run the heater ducting from the inside of my front compartment through the front wall and up into my tent with about 1" around the duct once it is connected. Then when its time to pack up i just remove the ducting and close up this port. It only costs $13.99
https://www.westmarine.com/buy/west-marine--4-screw-in-deck-plate--11743010?cm_mmc=PS-_-Google-_-GSC%2520-%2520Product%2520Type-_-11743010&product_id=11743010&adpos=1o1&creative=10 8421552924&device=c&matchtype=&network=g&gclid=Cjw KEAjw387JBRDPtJePvOej8kASJADkV9TLjP6j-IVo2wnybo1GwA1bowMZp5X-nd3lrMEHNSgGABoCFHDw_wcB
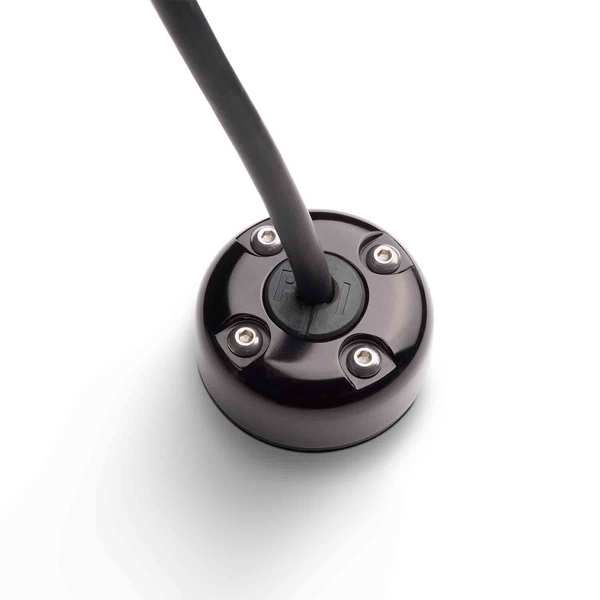
Now as for running power from my 7 pole into the front compartment where i plan to run the 12v batteries here is what i plan to use. These are Marine grade so they will have a water tight seal.
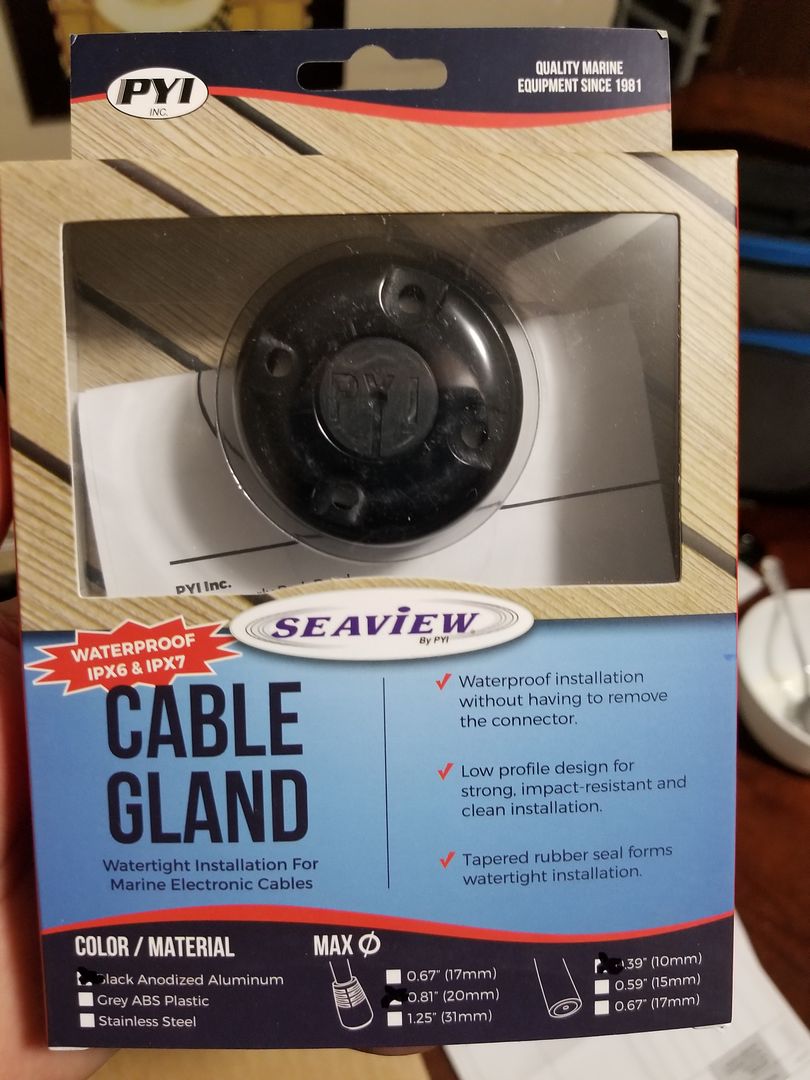
Now this one is aluminum so it was more pricey. but you can get plastic ones for WAY cheaper. this one in particular cost me $27.99 I bough 2 of these because i may need another one for the exterior LED lighting. We will see. But it will definitely be put to use.
https://www.westmarine.com/buy/pyi--cable-gland-cable-clam-deck-seal--17834342?cm_mmc=PS-_-Google-_-GSC%2520-%2520Product%2520Type-_-17834342&product_id=17834342&adpos=1o4&creative=10 8421552444&device=c&matchtype=&network=g&gclid=Cjw KEAjw387JBRDPtJePvOej8kASJADkV9TL_nBtII4sv0jayv1gA m5TxtIQEam1rcRNgewZaG_X7xoCQ5fw_wcB
Next i am going to have to find a safe way to pass the propane line into that front compartment to feed my Propex heater. This one has to be waterproof but still be able to pass through the solid aluminum wall. I need to research this one a bit more. I'm open to any ideas or suggestions if you all have any. I was thinking of possibly using something like the quick disconnect that "Tinskipper" from that youtube video used. But i do need to research that part a bit more.
for the heater ducting I plan to route the ducting through the center joint where the RTT opens up. A the large hinged joint in the middle there is a small flap that when lifted up exposes a small space where the duct can easily fit into. If this hadn't worked i would have just planned to route the duct in through the annex. But the hinge portion for the RTT seems to be a great spot.
Here is where i'm talking about:


--------------------------------------------------------------------------------------------------------------------------------------------------------------------------------------------------------
As for how i plan to route the duct through the front compartment.... well that's still in the works. It is actually one thing i am currently brainstorming. I like the many ideas that this guy on youtube (use: Tinskipper) suggested on his video here:
55mm Duct:
http://www.suremarineservice.com/W441-376.aspx
60mm Duct:
http://www.suremarineservice.com/398-497.aspx
Right now the only thing i still need to find is that exhaust fitting that he used for a pressed fit of that duct to the heater. He said he used a "2.5(outside diameter) x 2.25(inside diameter) exhaust fitting"
I Just got done buying the 2 hoses so i'll update you guys some more when everything comes in the mail.
---------------------------------------------------------------------------------------------------------------------------------------------------------------------------------------------------------
Here's a few other items i bought to contribute to that front compartment. (from one of my earlier posts)
Hatch. This Hatch is basically meant for kayaks but i dont see why this cant work. It is a 4" waterproof hatch that twists on and off. I like it because since it is meant for kayaks the hatch is waterproof when closed. i can use this hatch to run the heater ducting from the inside of my front compartment through the front wall and up into my tent with about 1" around the duct once it is connected. Then when its time to pack up i just remove the ducting and close up this port. It only costs $13.99

https://www.westmarine.com/buy/west-marine--4-screw-in-deck-plate--11743010?cm_mmc=PS-_-Google-_-GSC%2520-%2520Product%2520Type-_-11743010&product_id=11743010&adpos=1o1&creative=10 8421552924&device=c&matchtype=&network=g&gclid=Cjw KEAjw387JBRDPtJePvOej8kASJADkV9TLjP6j-IVo2wnybo1GwA1bowMZp5X-nd3lrMEHNSgGABoCFHDw_wcB
Now as for running power from my 7 pole into the front compartment where i plan to run the 12v batteries here is what i plan to use. These are Marine grade so they will have a water tight seal.
Now this one is aluminum so it was more pricey. but you can get plastic ones for WAY cheaper. this one in particular cost me $27.99 I bough 2 of these because i may need another one for the exterior LED lighting. We will see. But it will definitely be put to use.

https://www.westmarine.com/buy/pyi--cable-gland-cable-clam-deck-seal--17834342?cm_mmc=PS-_-Google-_-GSC%2520-%2520Product%2520Type-_-17834342&product_id=17834342&adpos=1o4&creative=10 8421552444&device=c&matchtype=&network=g&gclid=Cjw KEAjw387JBRDPtJePvOej8kASJADkV9TL_nBtII4sv0jayv1gA m5TxtIQEam1rcRNgewZaG_X7xoCQ5fw_wcB
Next i am going to have to find a safe way to pass the propane line into that front compartment to feed my Propex heater. This one has to be waterproof but still be able to pass through the solid aluminum wall. I need to research this one a bit more. I'm open to any ideas or suggestions if you all have any. I was thinking of possibly using something like the quick disconnect that "Tinskipper" from that youtube video used. But i do need to research that part a bit more.
Last edited by Redeth005; Sep 6, 2017 at 06:17 PM.
Sep 6, 2017 | 06:40 PM
#146
Thread Starter
Registered User
Joined: Apr 2012
Posts: 2,817
Likes: 2
From: Los Angeles CA
I Found the exhaust fitting that "Tinskipper" used in that youtube video. 2-1/4" ID x 2-1/2" OD. which is basically what he used.
It costs $3.27 This was the hardest piece to find! It seems like that size is discontinued or non existent in many other online vendors.
Here is the link:
http://www.ebay.com/itm/Nickson-Indu...FU80T9&vxp=mtr
Anyway just in case the link is ever broken in the future just look the Ebay vendor up he goes by "541variations" he has a 99.1% positive feedback rating.
Just thought i would share that. Now i wait anxiously for pars to arrive lol
 Sep 6, 2017 | 09:04 PM
#148
Thread Starter
Registered User
Joined: Apr 2012
Posts: 2,817
Likes: 2
From: Los Angeles CA
Mar 21, 2018 | 06:20 PM
#150
Thread Starter
Registered User
Joined: Apr 2012
Posts: 2,817
Likes: 2
From: Los Angeles CA
If you have Instagram i suggest you follow me on there "@Redeth005" I usually post updates to the truck and trailer on instagram long before i update these pages.
Mar 21, 2018 | 08:03 PM
#151
Thread Starter
Registered User
Joined: Apr 2012
Posts: 2,817
Likes: 2
From: Los Angeles CA
So those of you who follow the Instagram page know that i have neglected to update my online forum build threads. I have a lot to update you guys on so be patient.
Since the last trip to Lake Elsinore we have taken a trip up to Angels crest national forest for a fun weekend trip of just dry camping with Chefyota4x4 and his girlfriend. This was back in Sepember 29th to October 1, 2017.
Here are the pix for that trip:
All packed and ready to go
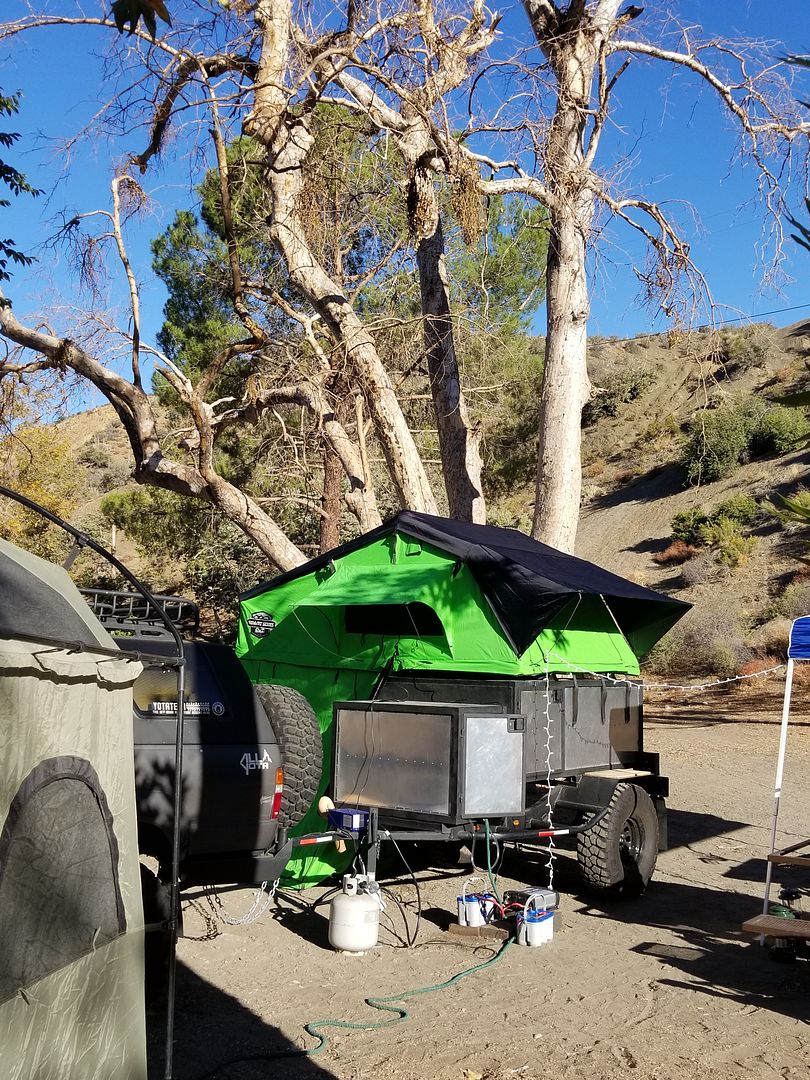
Pix of our campsite
We had a really great campsite. Literally in between a few trees. The other spots were in very open terrain some with maybe only 1 tree. This one was definitely the best.
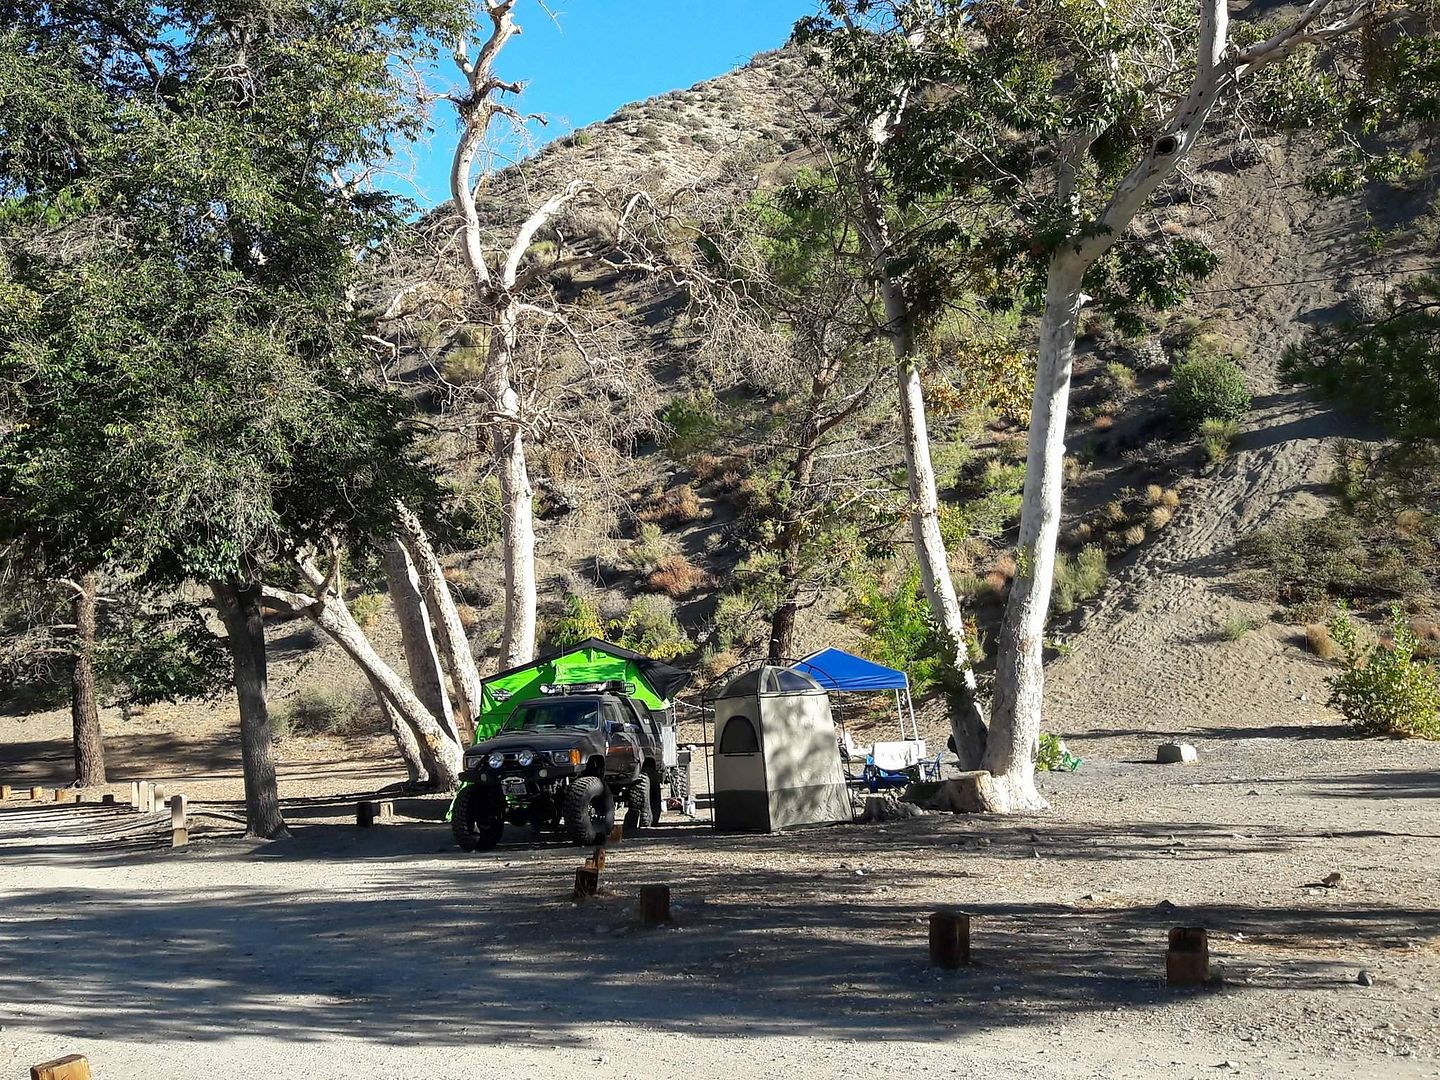
Mark (Chefyota4x4) and his lady arrived soon after we got there.
The pix of the tow rig with the trailer look great
---------------------------------------------------------------------------------------------------------------------------------------------------------------------------------------------------
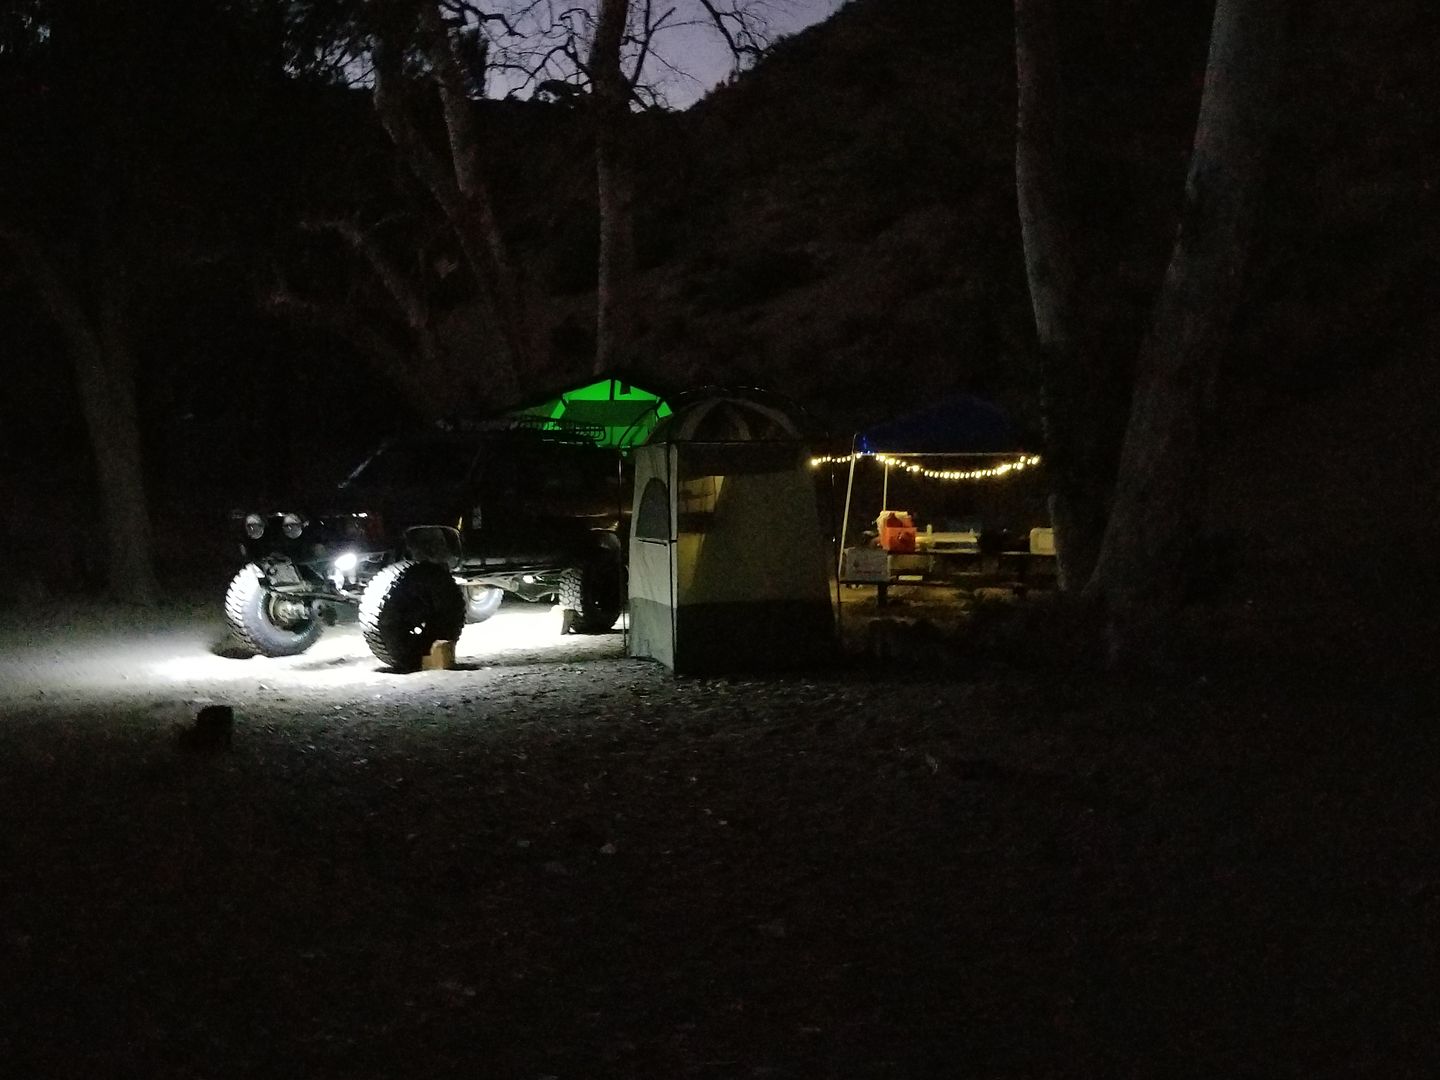
This is actually the first trip i ever used my Propex heater with the trailer. The weather in the middle of the night pummeled on Saturday night. Luckily the heater worked like a charm. Out of everything on this trailer i was looking forward to testing out this weekend my Propex HS2000 forced air heater was the main thing i was excited about. It turned our chilly cvt tent into a toasty sauna. lol i had to mess with the thermostat quite a bit to find a comfortable temperature. I'm happy it works as good as it did and it is extremely battery efficient; The battery voltage only went from about 12.76v to 12.36v after an entire night of running off of just one of my two batteries. That's hella good! My 2nd battery went from about 12.80v to 12.40v after running exterior LED christmas lighting and running the water pump for 3 showers. That's not bad either. Once i have the solar panel/charge controller rigged up with the 7pole trailer (+) battery charge wire connected my battery bank should be more than efficient to be a self sustained solar/battery storage bank.
Here you can see how i routed the heater duct into the CVT tent through the foldable joint where the tent opens and closes. Also that black thing with the dial is the thermostat. I need to buy some more ducting because this one is only a hot air duct for blowing air in to the tent. The Thermostat can not fully work properly unless i route a air return leading back to the heater unit so the thermostat knows it has reached the desired temperature.
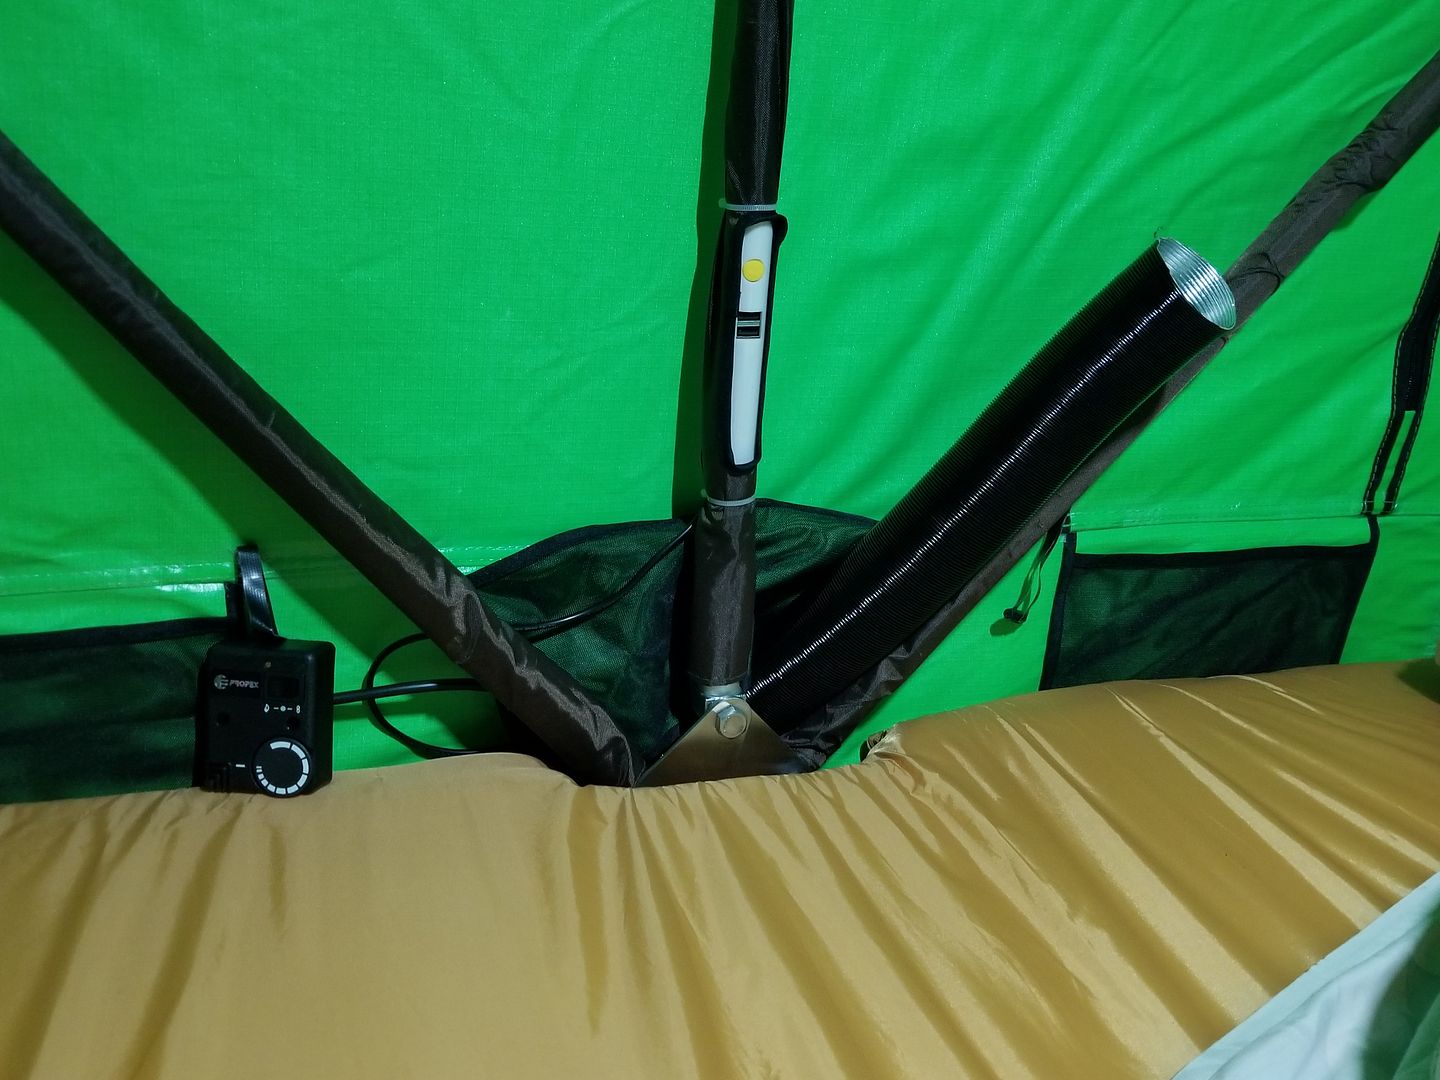
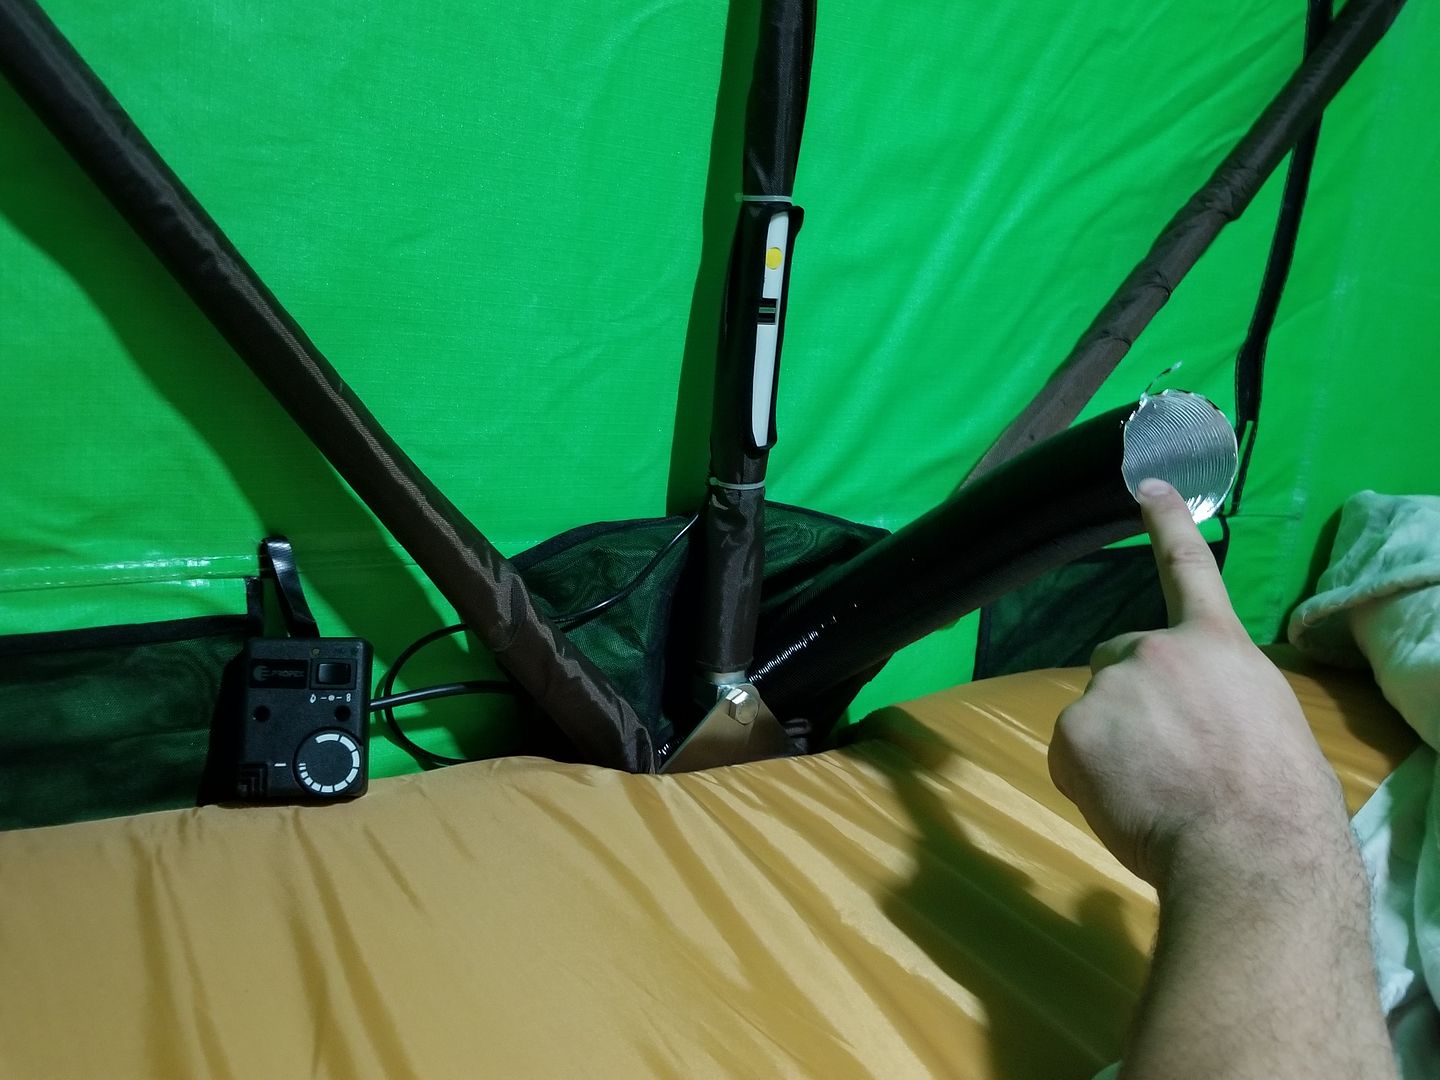
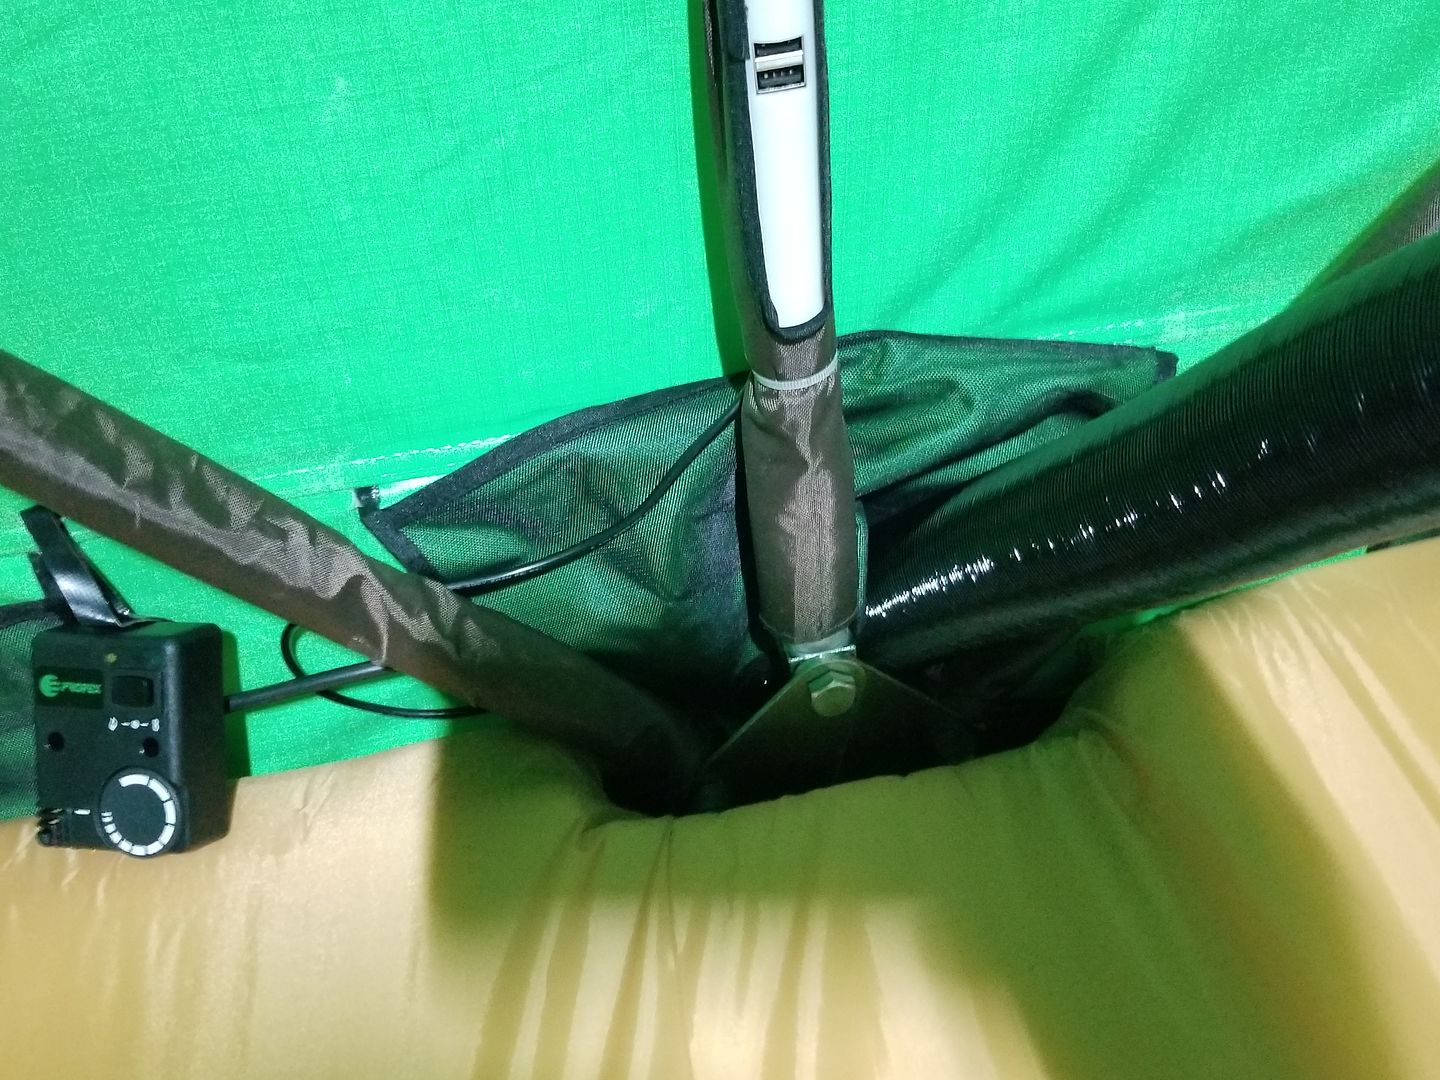
Here you can see that black duct routed into the tent from the bottom side of that window
.....Also as you you can see i desperately need to add a neat battery storage and keep it all enclosed within the trailer. For this trip i just rested the propex heater on top the the trailer tongue but that is a very expensive unit to have out in the open just like that. Same with the dual blue top optima batteries. each is about 250 a piece.
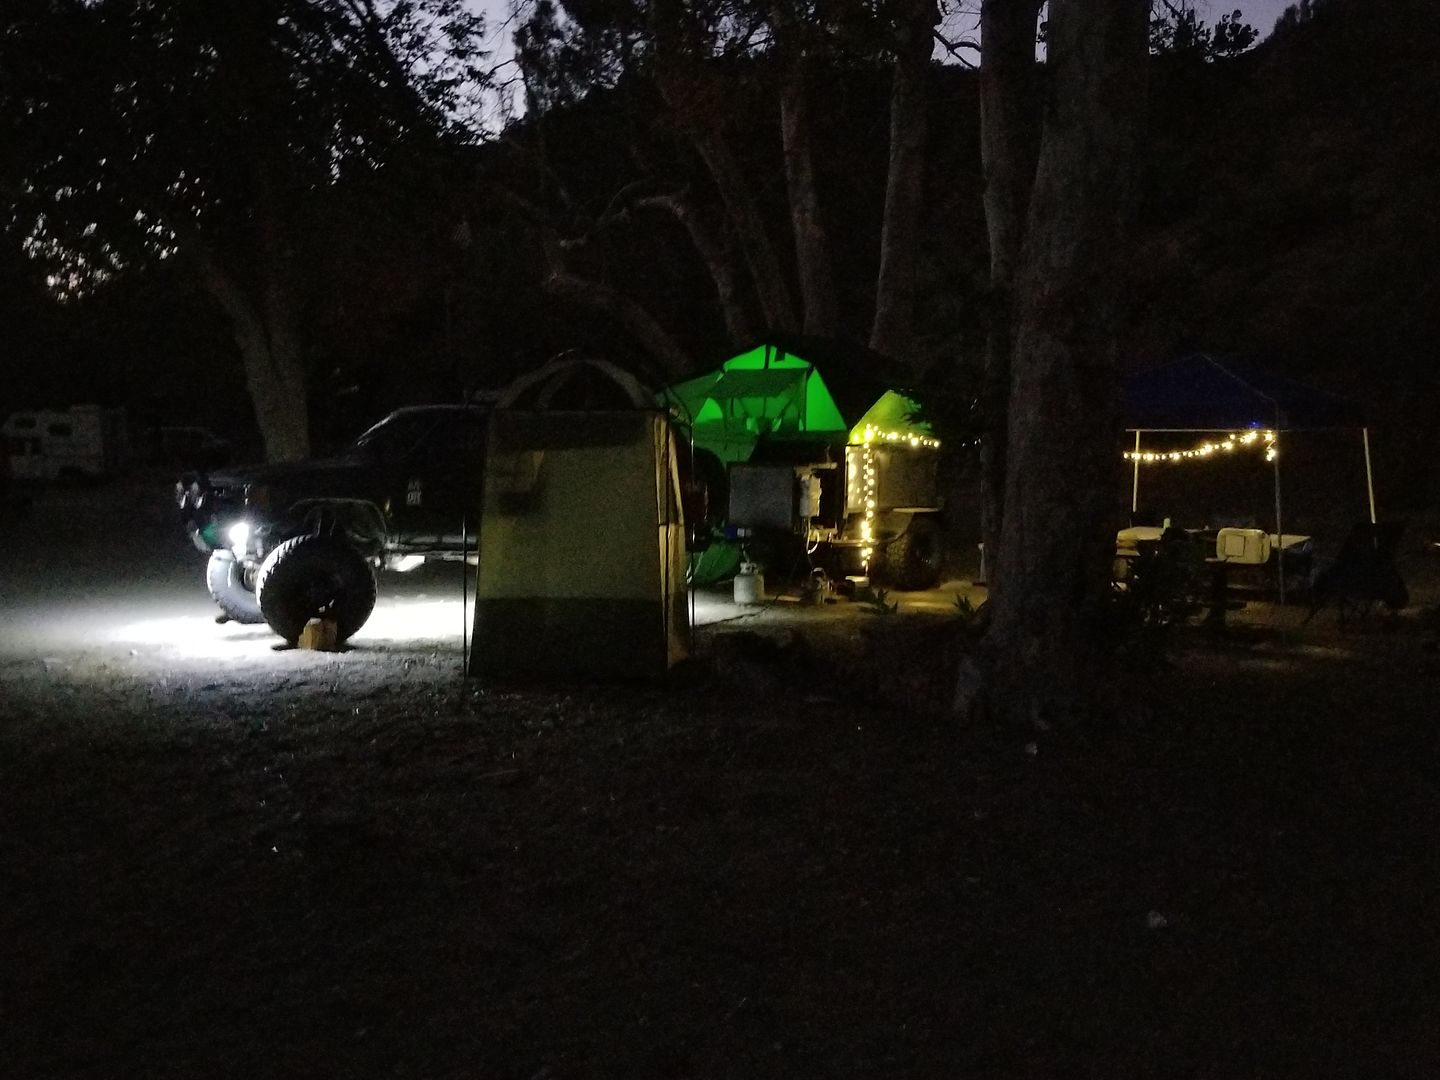
How 'bout them @all4offroad flex rock lights. I love how bright these 4 pairs are. I cant wait to install 4 more pairs to the exterior surrounding the trailer. You can clearly see how bright these lights are under the truck. I'm sure they will provide just enough light for the immediate campground surrounding my trailer. On a side note the interior LED light that comes inside of this Summit Series CVT tents is awesome. i love how it gets that green glow when you see it from the outside.
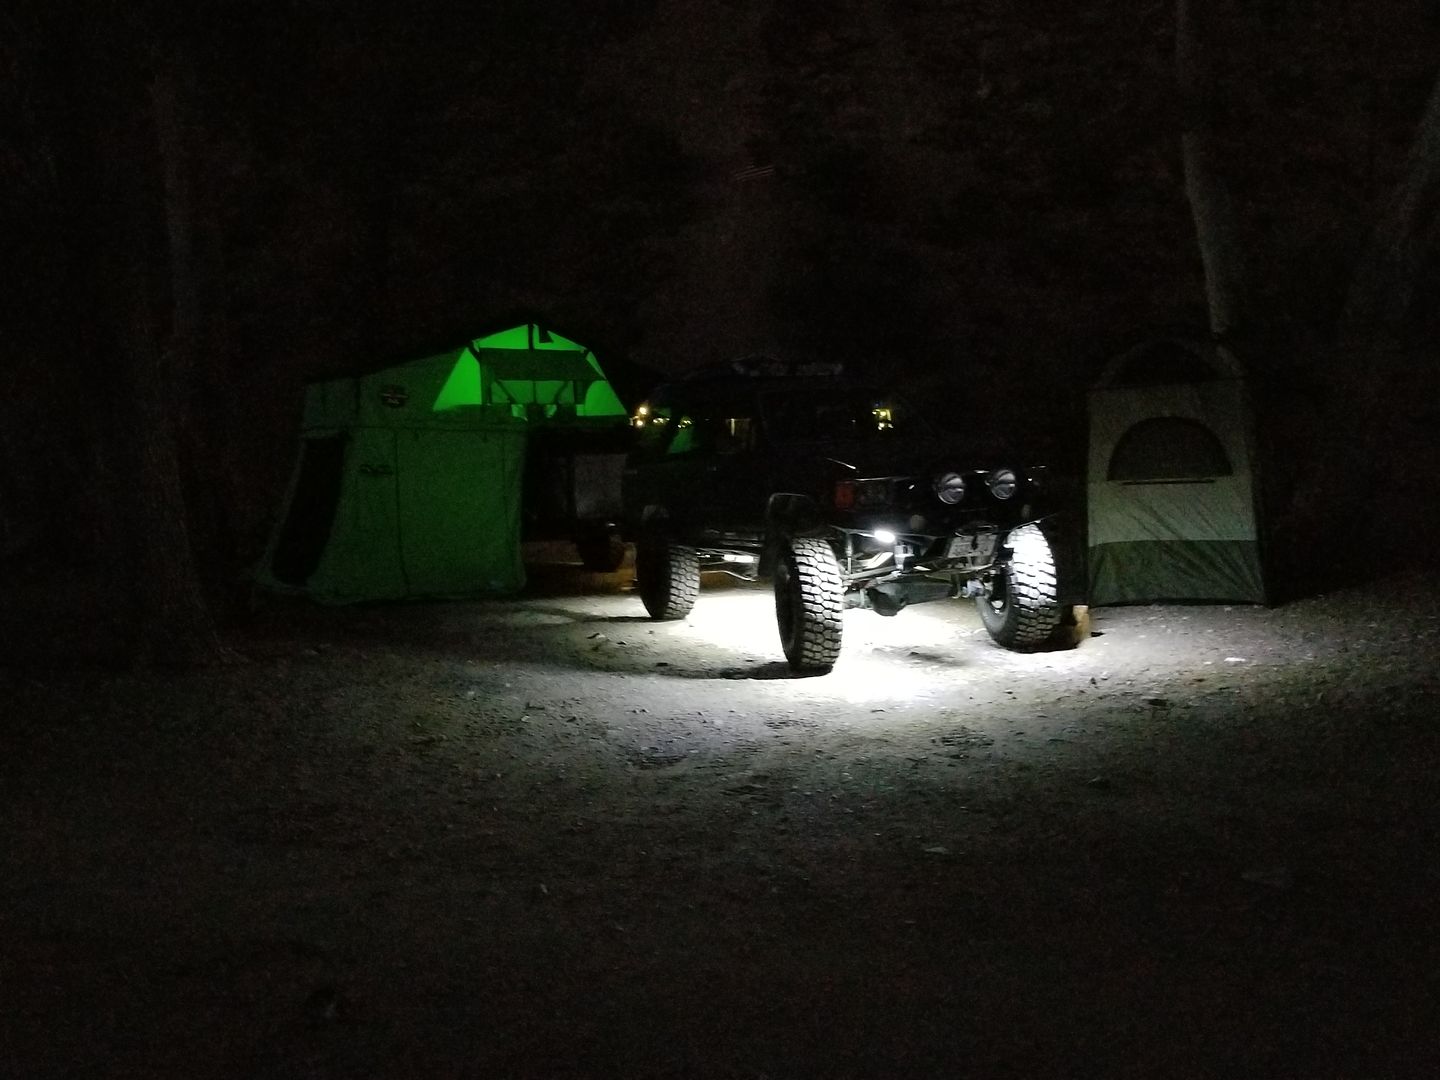
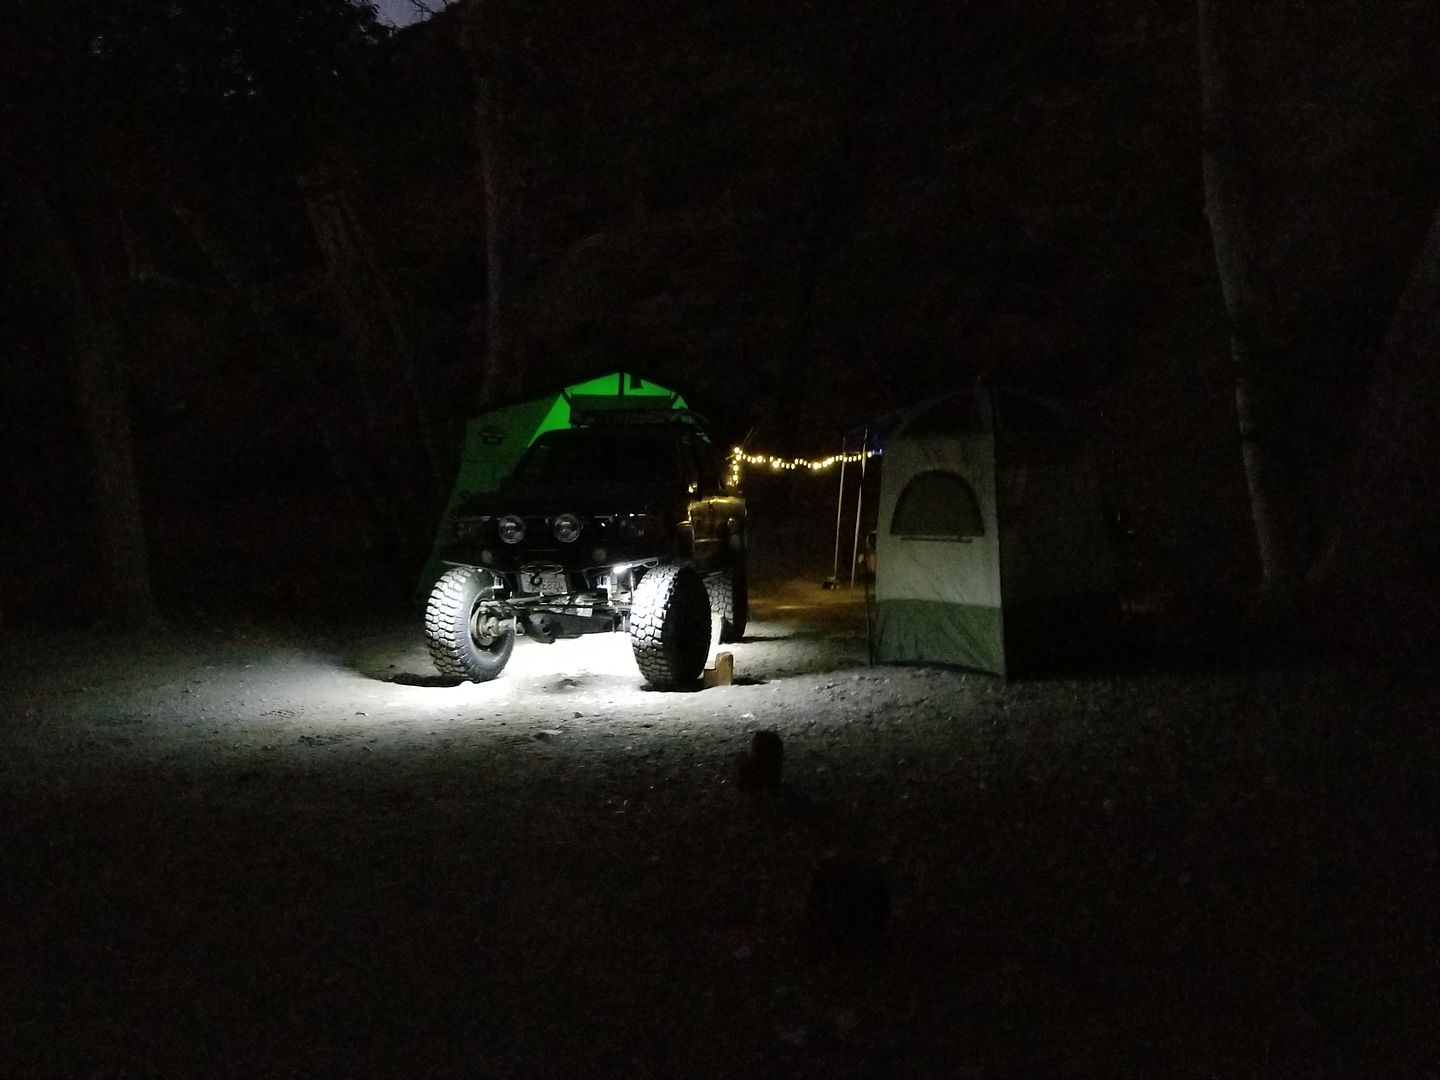
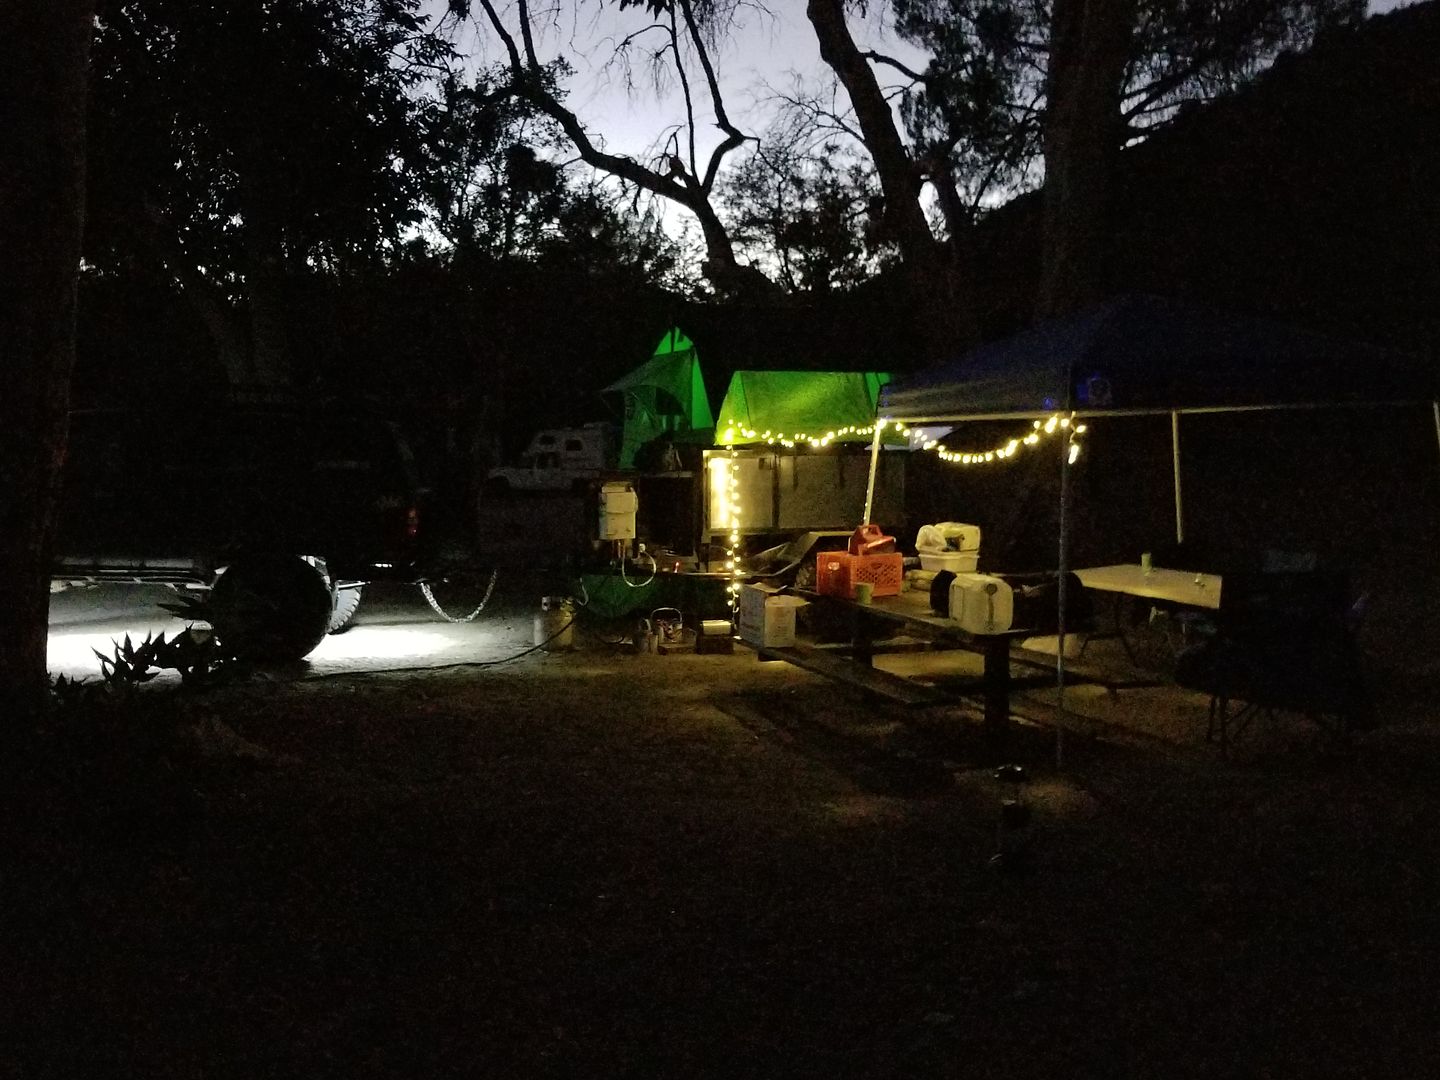
Either way if those All4OffRoad lights do not end up being enough light i always have these warm LED Christmas lights to use. And Since this trip i have bought another set of these same Christmas lights to add on to the camp lighting. By having a 2nd one i can daisy chain the lights to the portable shower/restroom for using it in the middle of the night
--------------------------------------------------------------------------------------------------------------------------------------------------------------------------------------------------
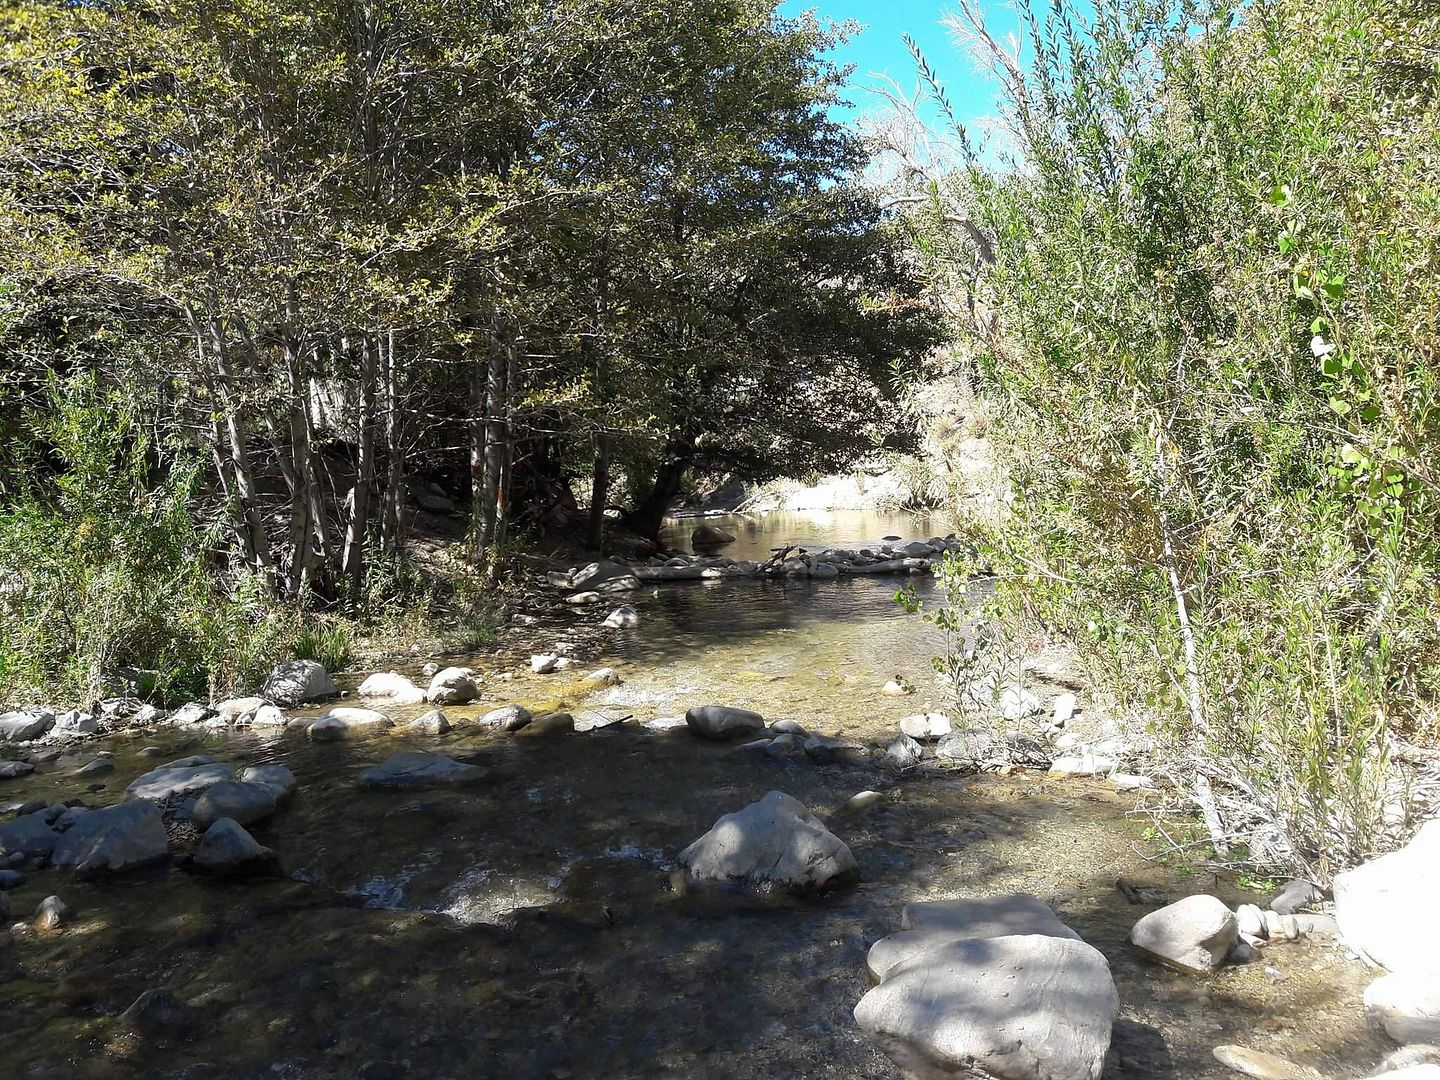
Playing in the ice cold creek


------------------------------------------------------------------------------------------------------------------------------------------------------------------------------------------------------------
Kicking it at Mark's camp spot
Since the last trip to Lake Elsinore we have taken a trip up to Angels crest national forest for a fun weekend trip of just dry camping with Chefyota4x4 and his girlfriend. This was back in Sepember 29th to October 1, 2017.
Here are the pix for that trip:
All packed and ready to go

Pix of our campsite
We had a really great campsite. Literally in between a few trees. The other spots were in very open terrain some with maybe only 1 tree. This one was definitely the best.


Mark (Chefyota4x4) and his lady arrived soon after we got there.


The pix of the tow rig with the trailer look great


---------------------------------------------------------------------------------------------------------------------------------------------------------------------------------------------------
This is actually the first trip i ever used my Propex heater with the trailer. The weather in the middle of the night pummeled on Saturday night. Luckily the heater worked like a charm. Out of everything on this trailer i was looking forward to testing out this weekend my Propex HS2000 forced air heater was the main thing i was excited about. It turned our chilly cvt tent into a toasty sauna. lol i had to mess with the thermostat quite a bit to find a comfortable temperature. I'm happy it works as good as it did and it is extremely battery efficient; The battery voltage only went from about 12.76v to 12.36v after an entire night of running off of just one of my two batteries. That's hella good! My 2nd battery went from about 12.80v to 12.40v after running exterior LED christmas lighting and running the water pump for 3 showers. That's not bad either. Once i have the solar panel/charge controller rigged up with the 7pole trailer (+) battery charge wire connected my battery bank should be more than efficient to be a self sustained solar/battery storage bank.
Here you can see how i routed the heater duct into the CVT tent through the foldable joint where the tent opens and closes. Also that black thing with the dial is the thermostat. I need to buy some more ducting because this one is only a hot air duct for blowing air in to the tent. The Thermostat can not fully work properly unless i route a air return leading back to the heater unit so the thermostat knows it has reached the desired temperature.


Here you can see that black duct routed into the tent from the bottom side of that window

.....Also as you you can see i desperately need to add a neat battery storage and keep it all enclosed within the trailer. For this trip i just rested the propex heater on top the the trailer tongue but that is a very expensive unit to have out in the open just like that. Same with the dual blue top optima batteries. each is about 250 a piece.
How 'bout them @all4offroad flex rock lights. I love how bright these 4 pairs are. I cant wait to install 4 more pairs to the exterior surrounding the trailer. You can clearly see how bright these lights are under the truck. I'm sure they will provide just enough light for the immediate campground surrounding my trailer. On a side note the interior LED light that comes inside of this Summit Series CVT tents is awesome. i love how it gets that green glow when you see it from the outside.


Either way if those All4OffRoad lights do not end up being enough light i always have these warm LED Christmas lights to use. And Since this trip i have bought another set of these same Christmas lights to add on to the camp lighting. By having a 2nd one i can daisy chain the lights to the portable shower/restroom for using it in the middle of the night


--------------------------------------------------------------------------------------------------------------------------------------------------------------------------------------------------
Playing in the ice cold creek


------------------------------------------------------------------------------------------------------------------------------------------------------------------------------------------------------------
Kicking it at Mark's camp spot


 Mar 21, 2018 | 08:56 PM
#152
Thread Starter
Registered User
Joined: Apr 2012
Posts: 2,817
Likes: 2
From: Los Angeles CA
Time for trailer updates!!!
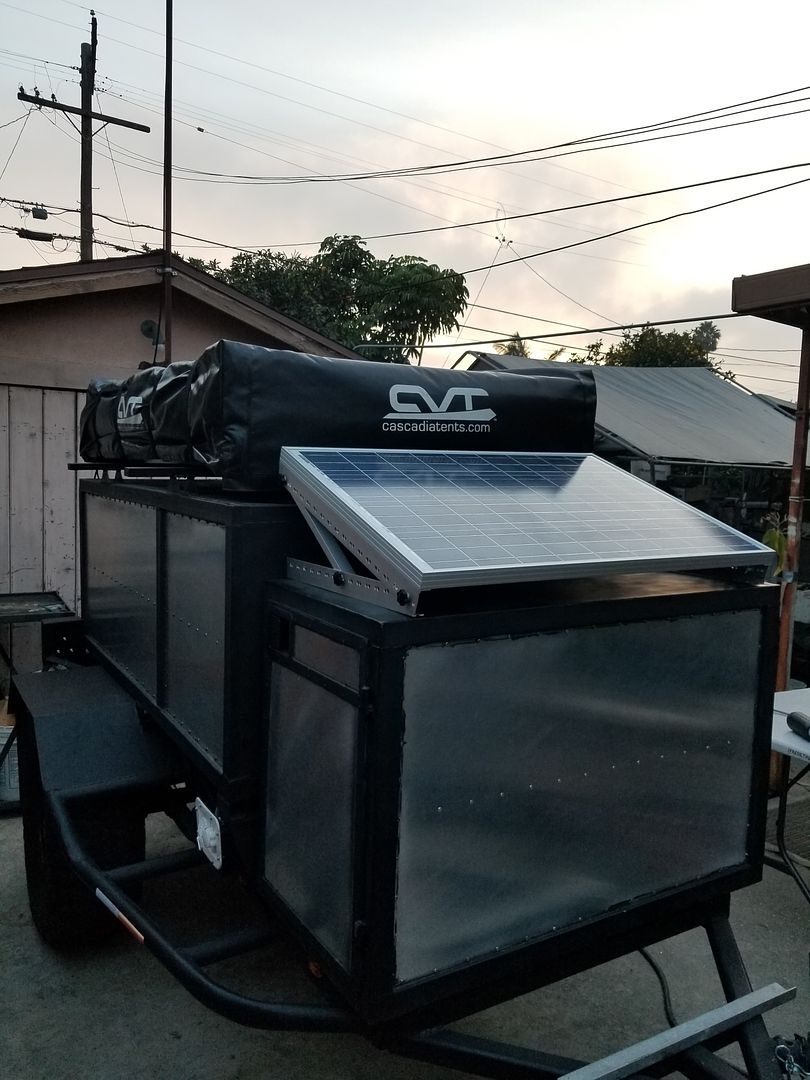
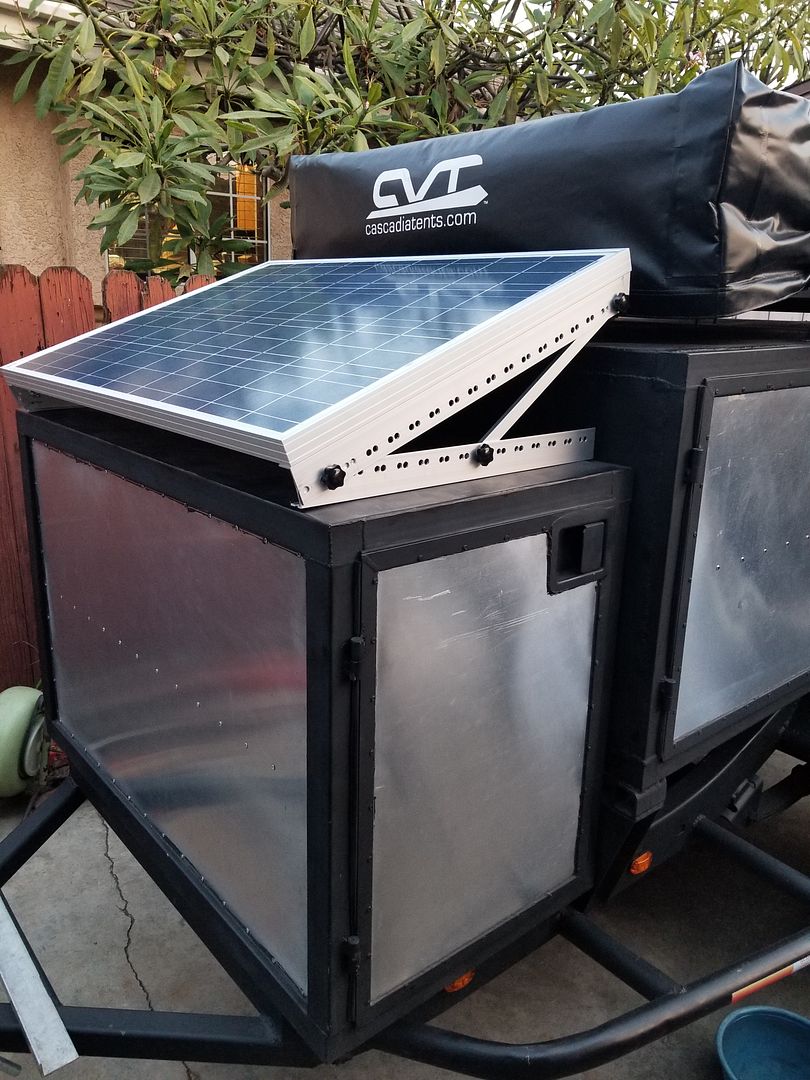
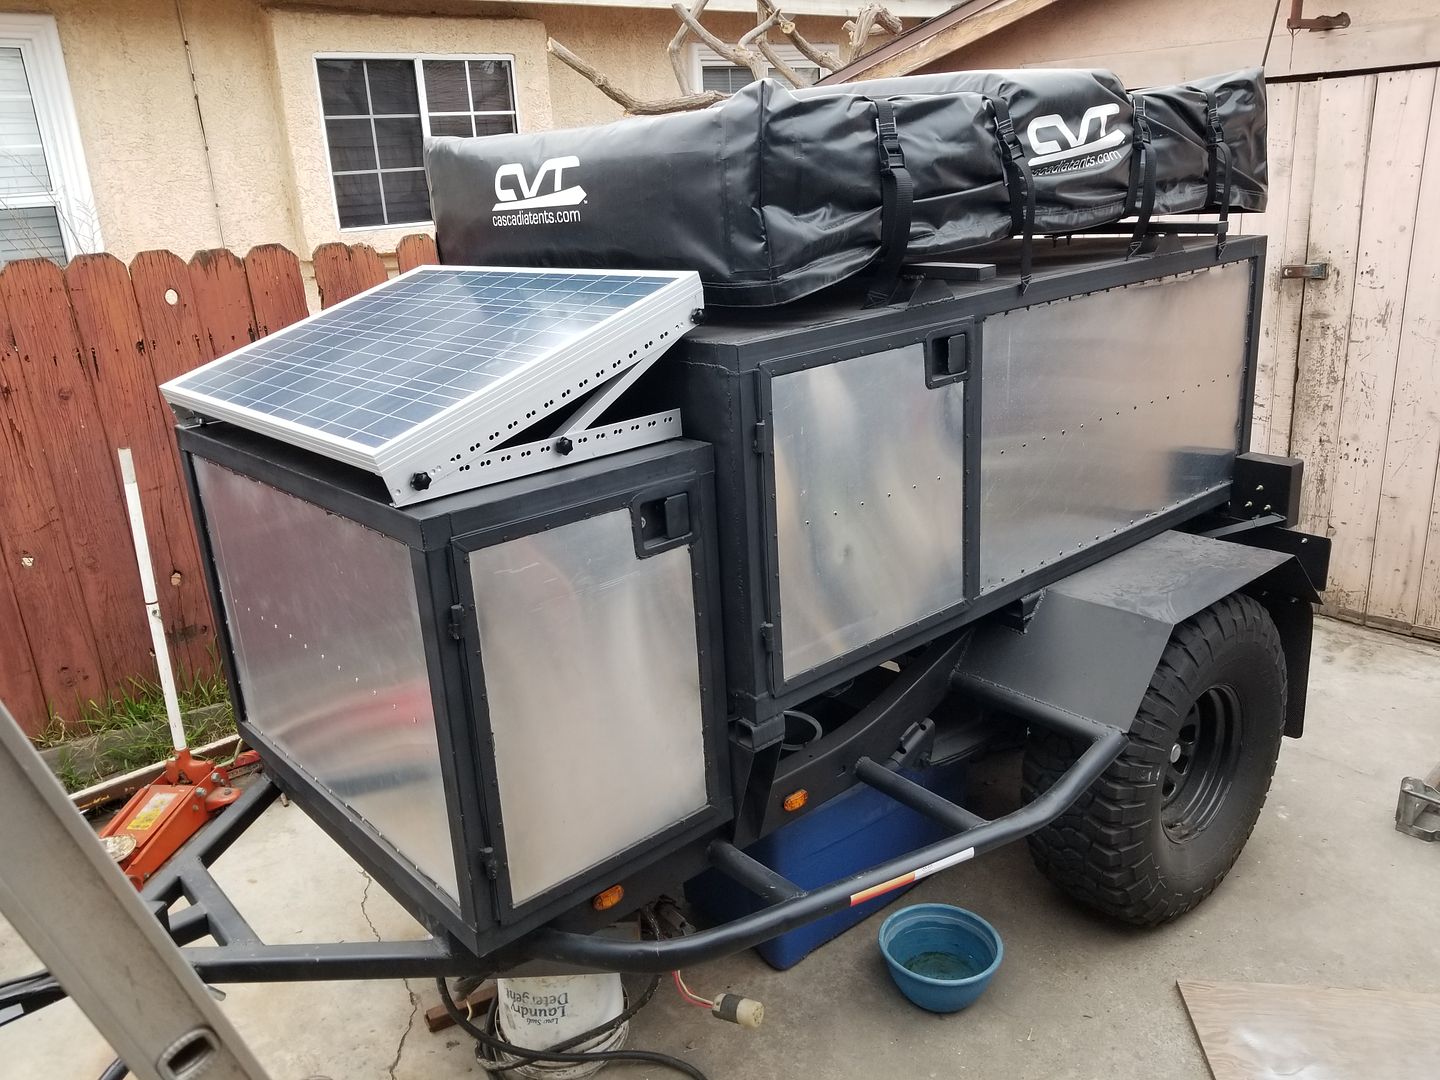
Well, lets get to it. For the solar panel mount I had to chop up the solar panel mount and add twice as many holes to each rail then what it came with for a larger variety of angles.
Here is the solar panel mount after all the adjustments had been made to it.
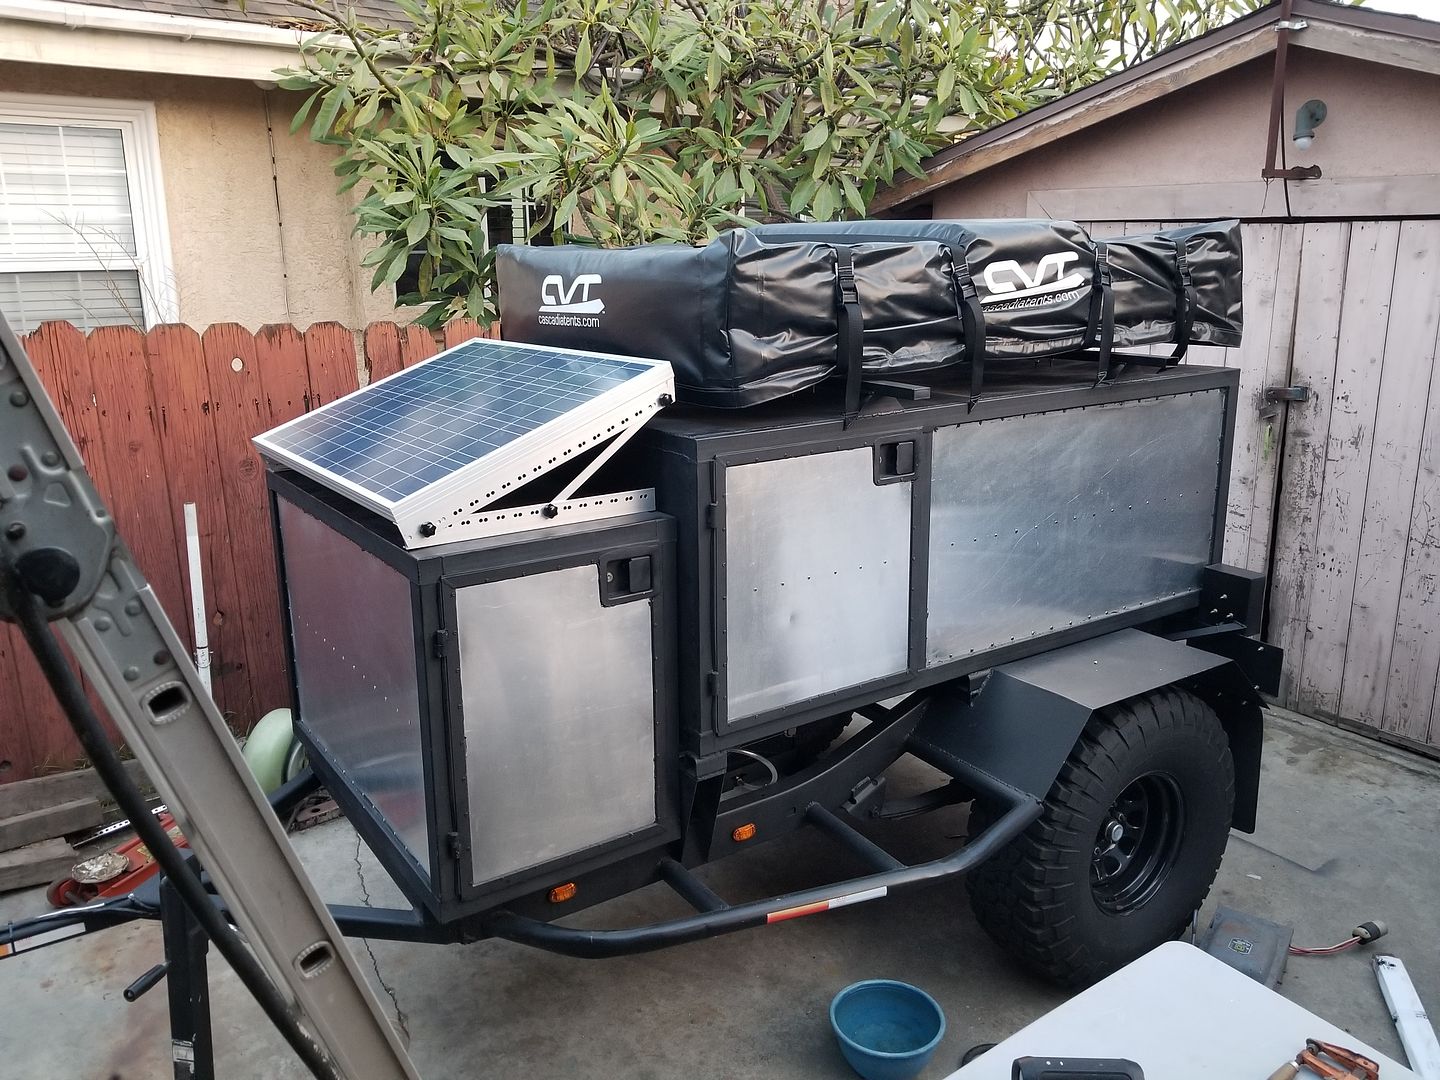
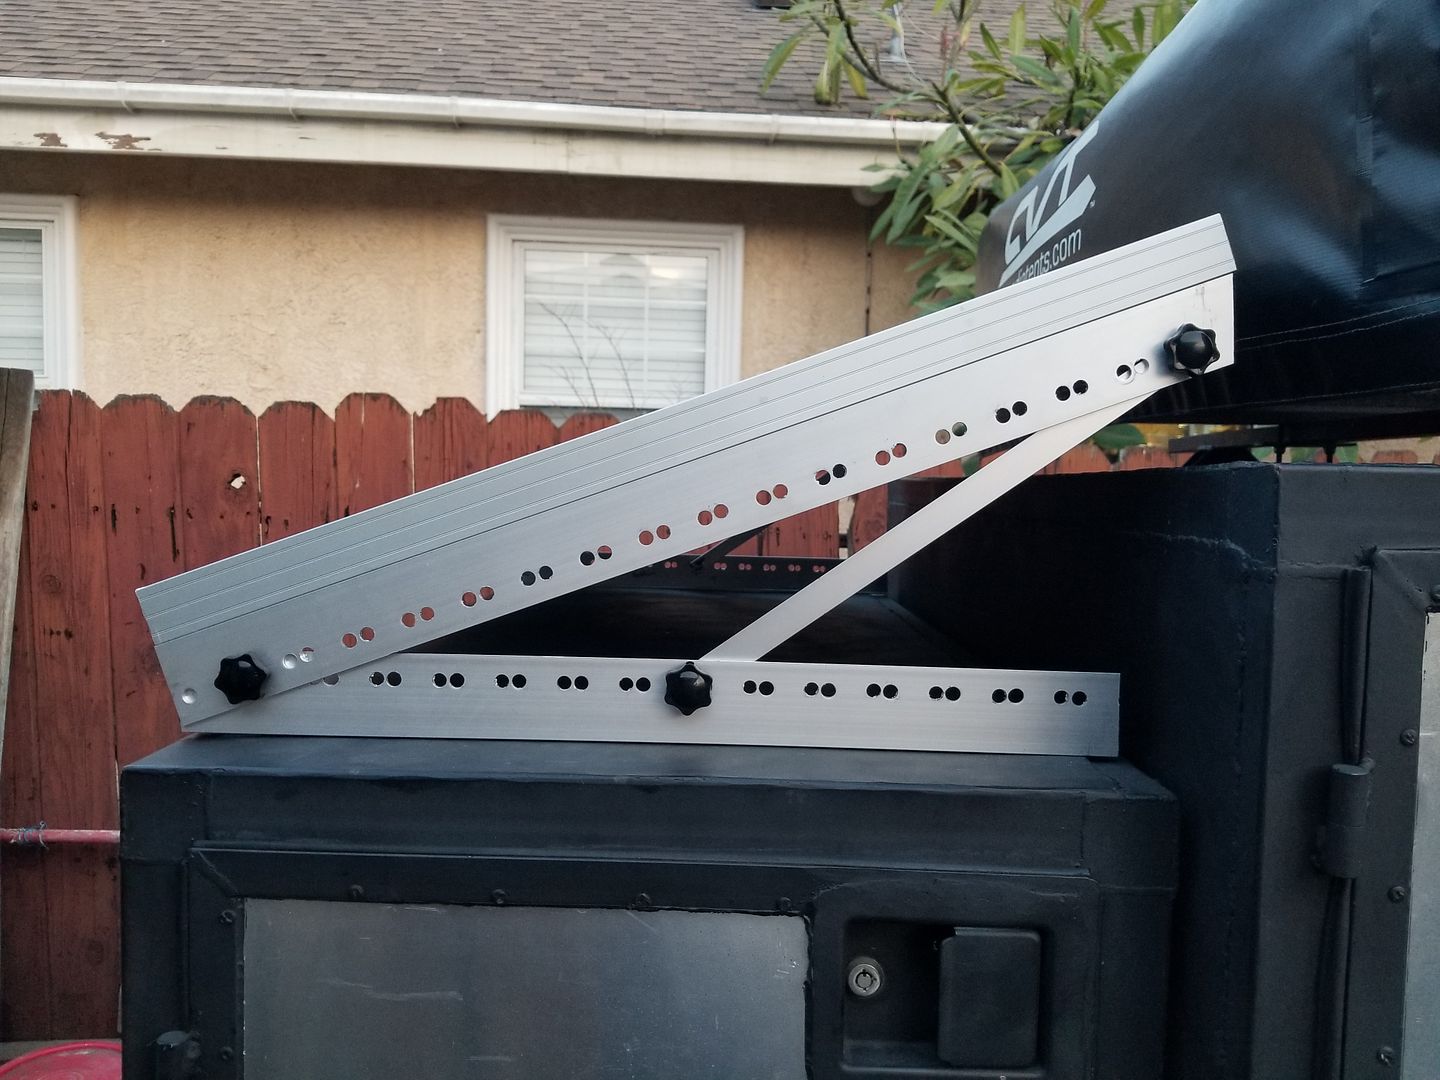
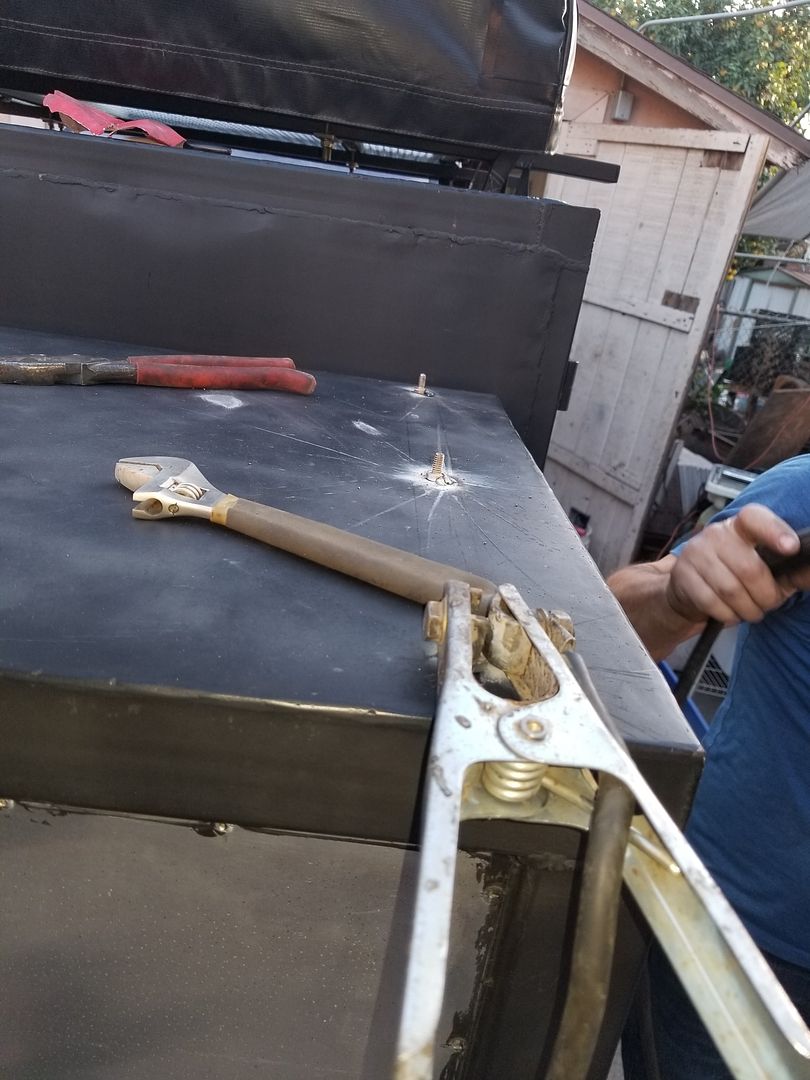
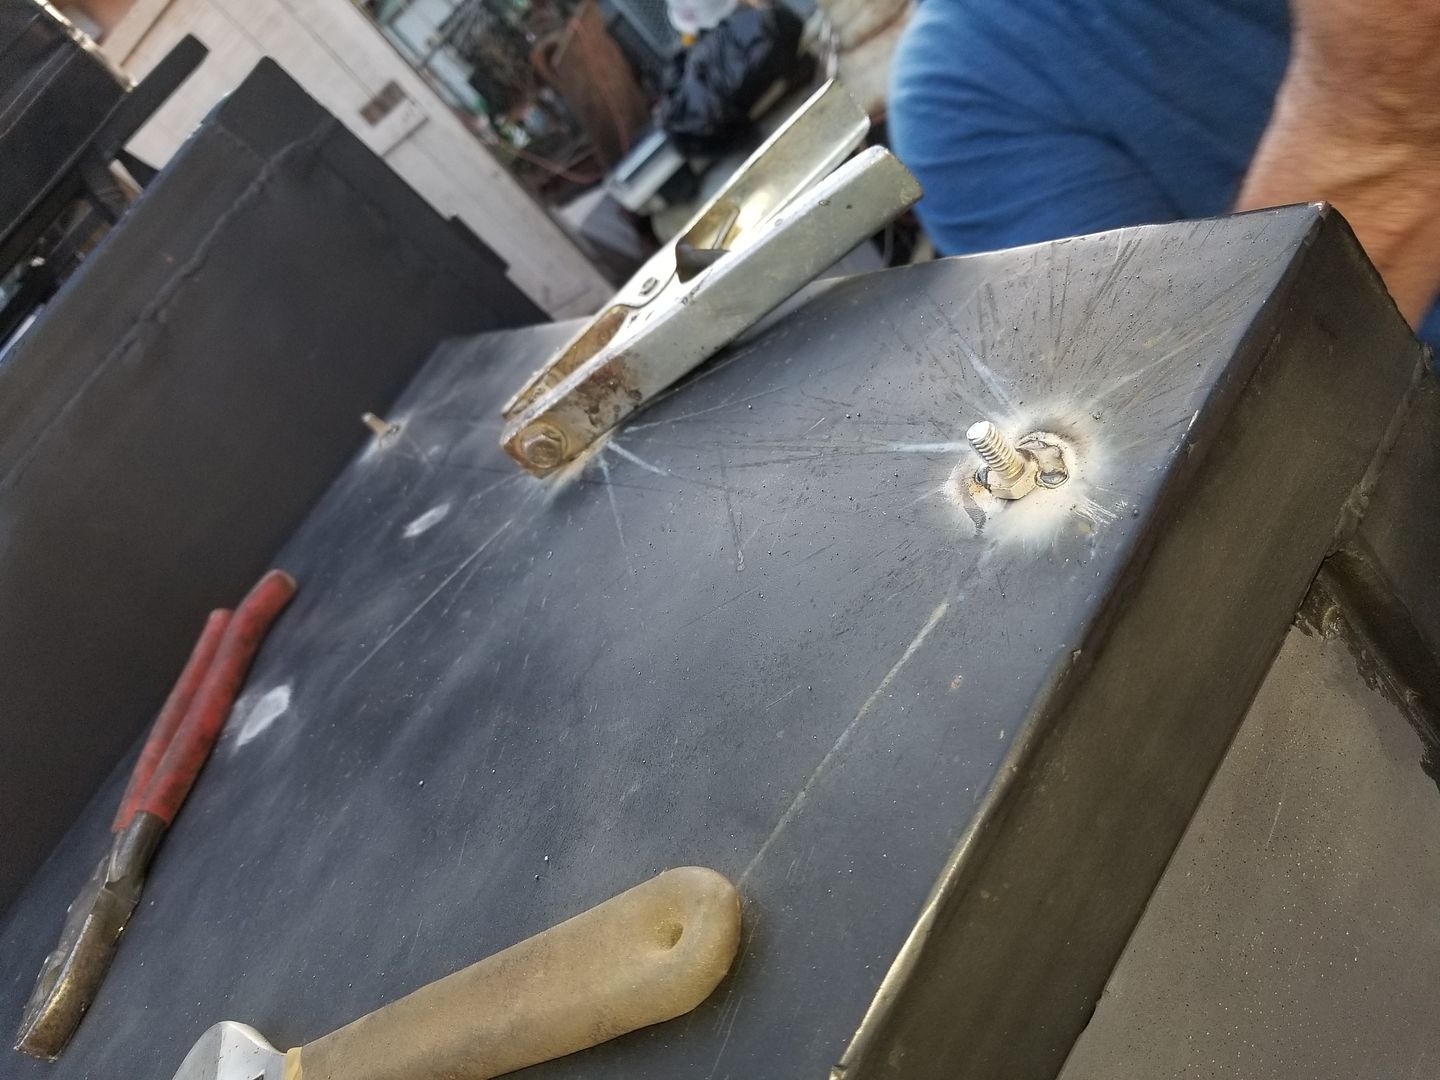
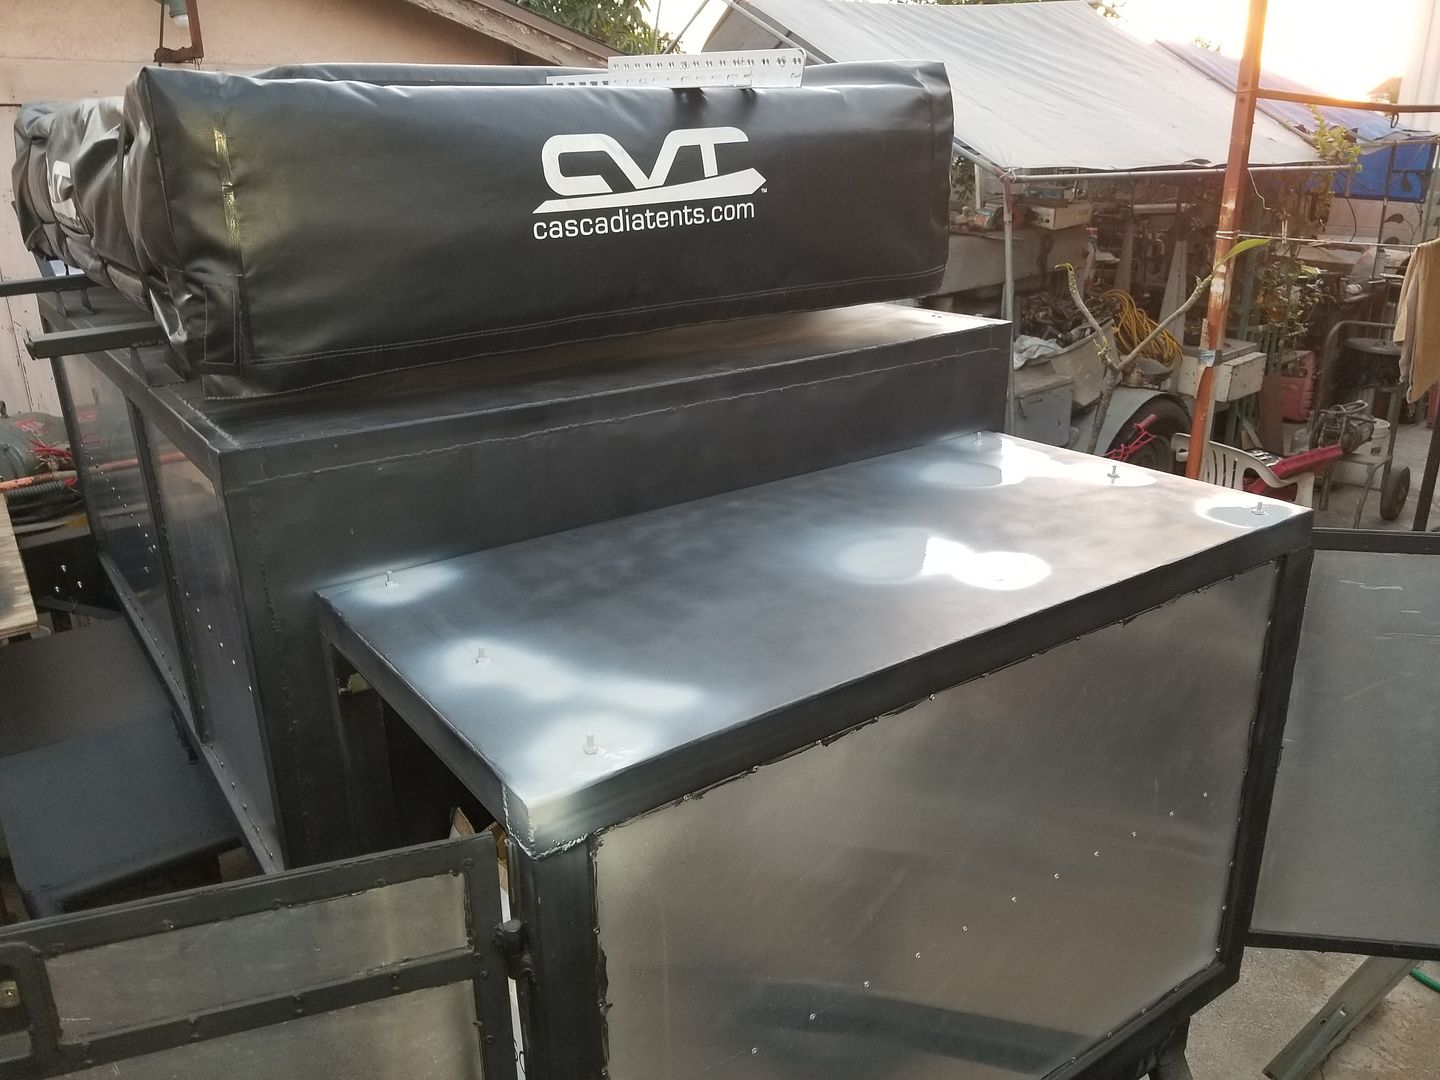
I welded 6 bolts to the top of the compartment. so i could mount the solar panel mount rails. Basically the same technique i used for the pull out slide for the ice chest in the rear compartment.
Primer
Nice heavy coat of flat black paint
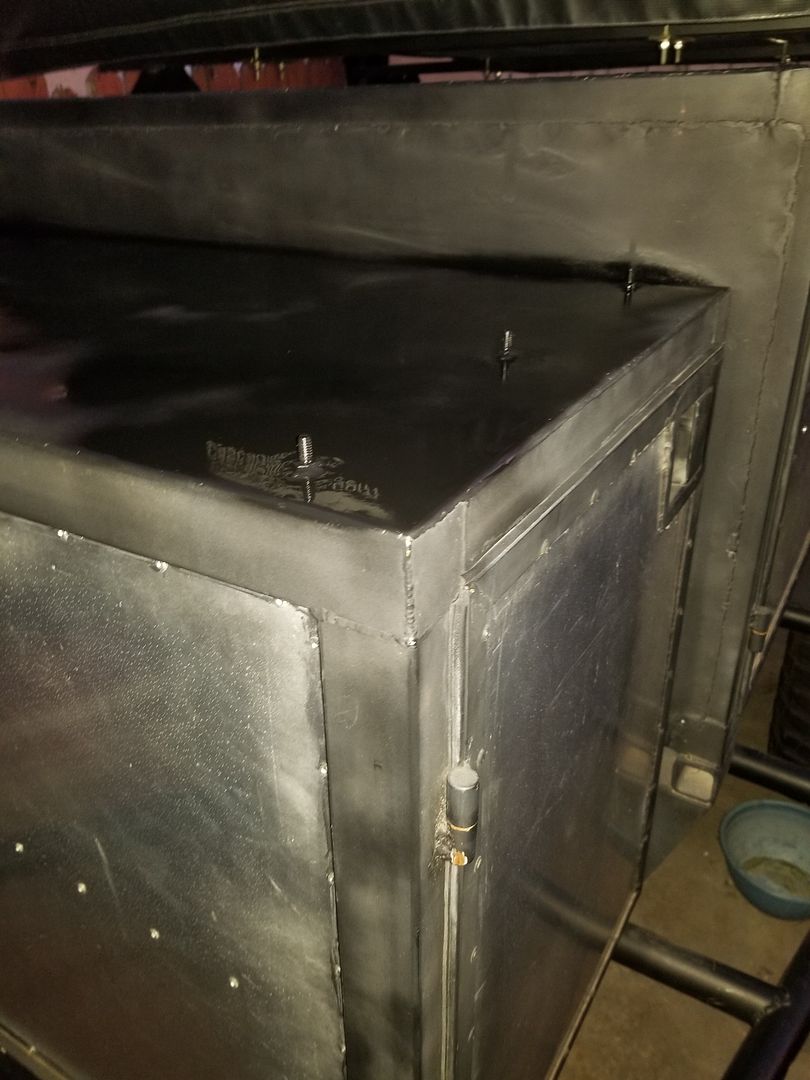
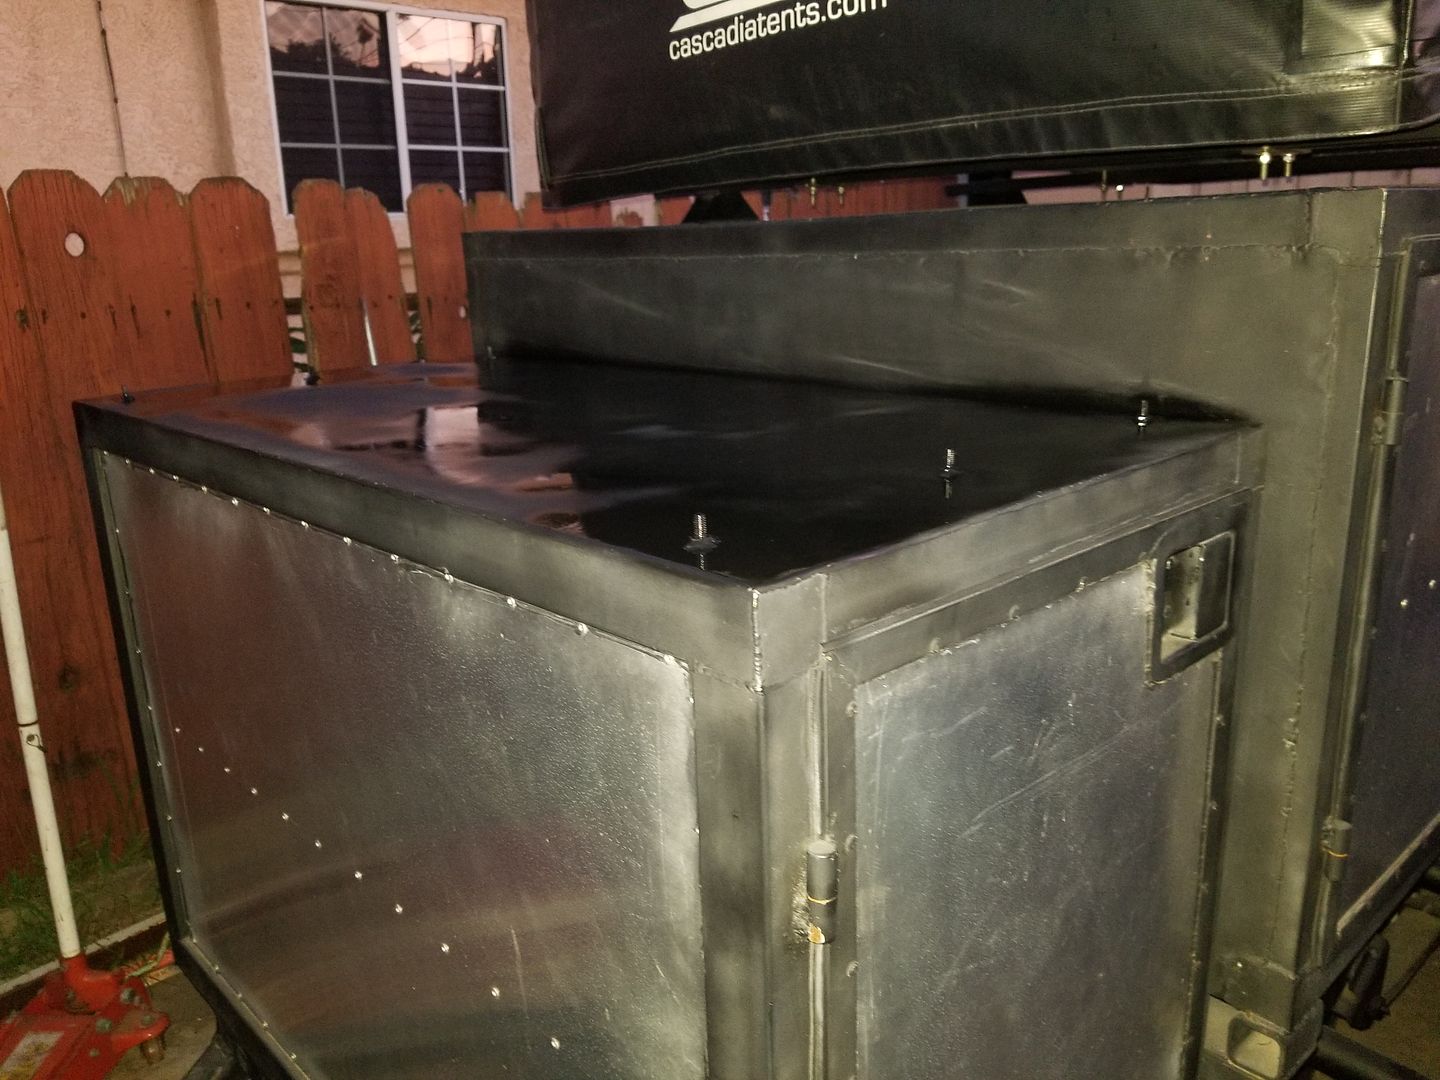
Here is how it looks when it's mounted.
Well, lets get to it. For the solar panel mount I had to chop up the solar panel mount and add twice as many holes to each rail then what it came with for a larger variety of angles.
Here is the solar panel mount after all the adjustments had been made to it.


I welded 6 bolts to the top of the compartment. so i could mount the solar panel mount rails. Basically the same technique i used for the pull out slide for the ice chest in the rear compartment.


Primer

Nice heavy coat of flat black paint


Here is how it looks when it's mounted.
 Mar 21, 2018 | 09:37 PM
#153
Thread Starter
Registered User
Joined: Apr 2012
Posts: 2,817
Likes: 2
From: Los Angeles CA
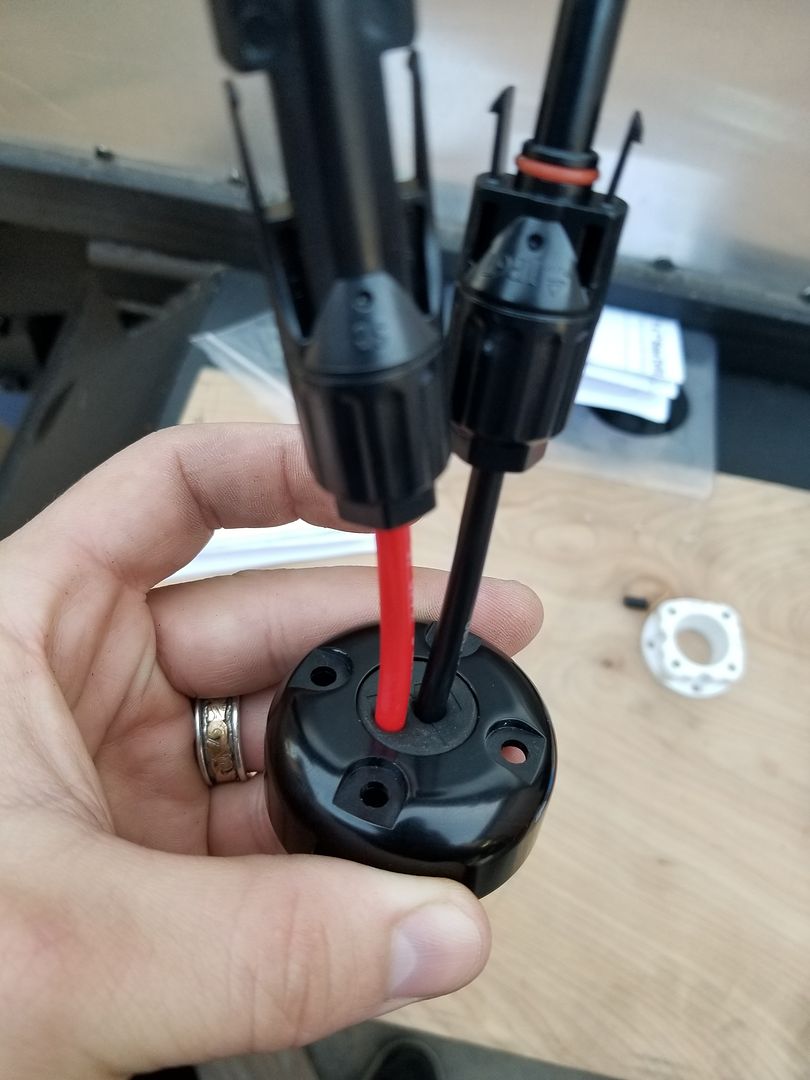
Now to install this waterproof cable gland to pass through the solar panel wires into the front cab to connect it to the future charge controller.
Directions say to drill a whole the diameter of the wire you plan to pass through. So that's what i did for these 2 wires.
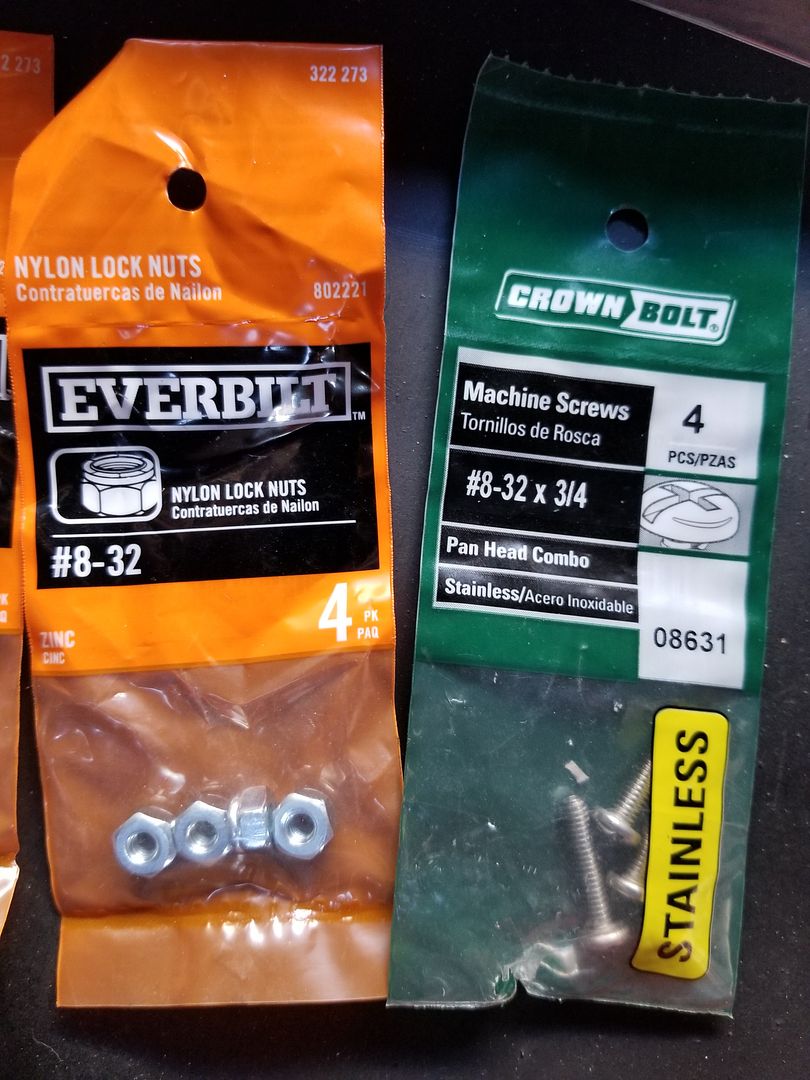
This cable gland comes with these sharp screws to secure it onto a boat. But we aren't using this application on a boat. I need to secure this to steel. So i bought these replacement bolts at home depot.
Same size #6 5/8ths inch long. Machine tapered screw heads, with nylon lock nuts and washers. Everything stainless steel since it is gonna be exposed to the outdoors.
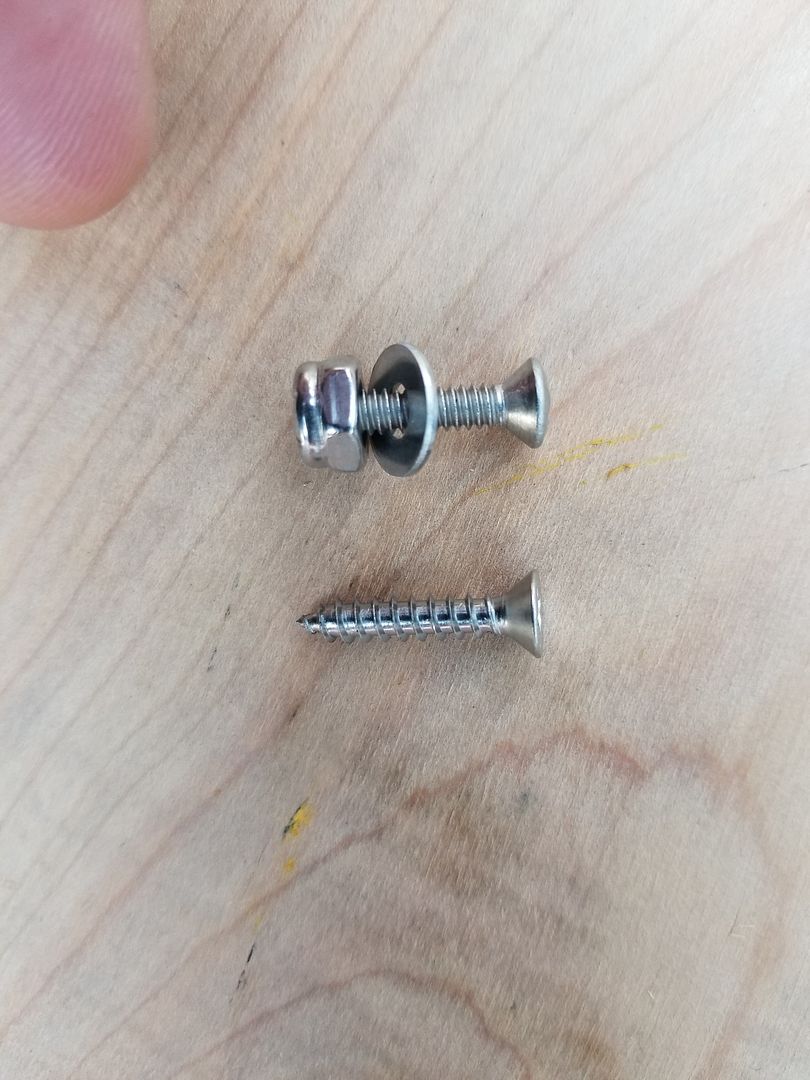
The ones it comes with vs the ones i bought

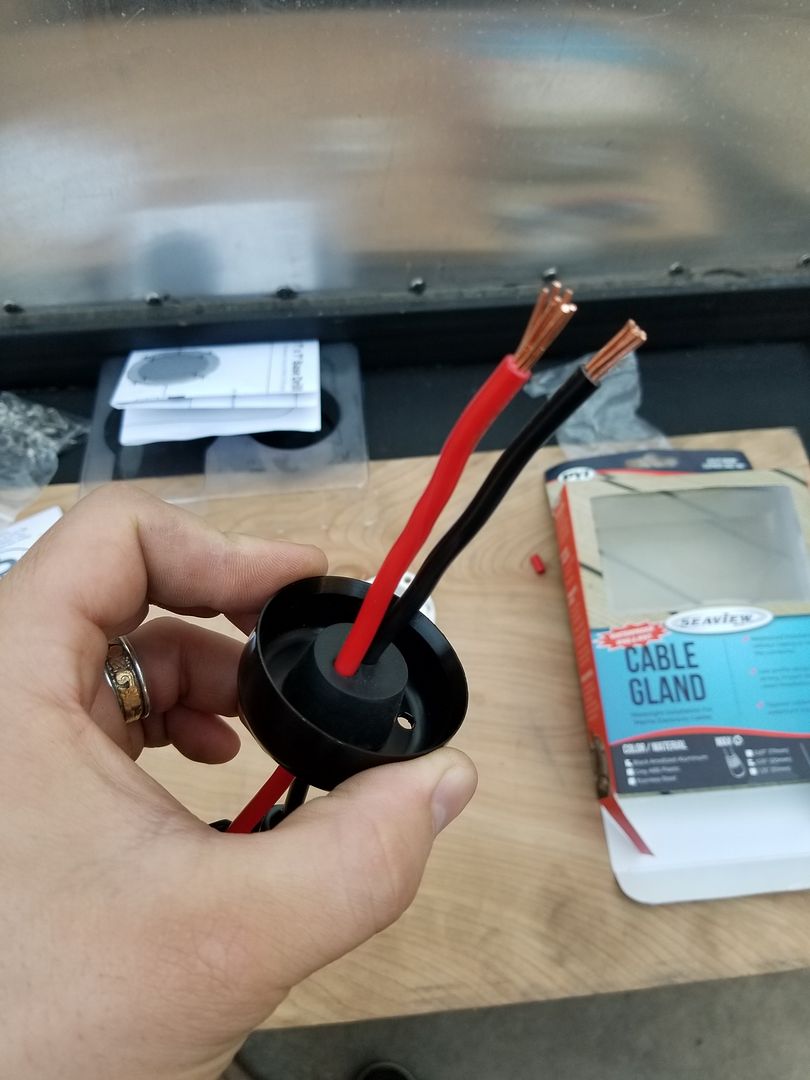
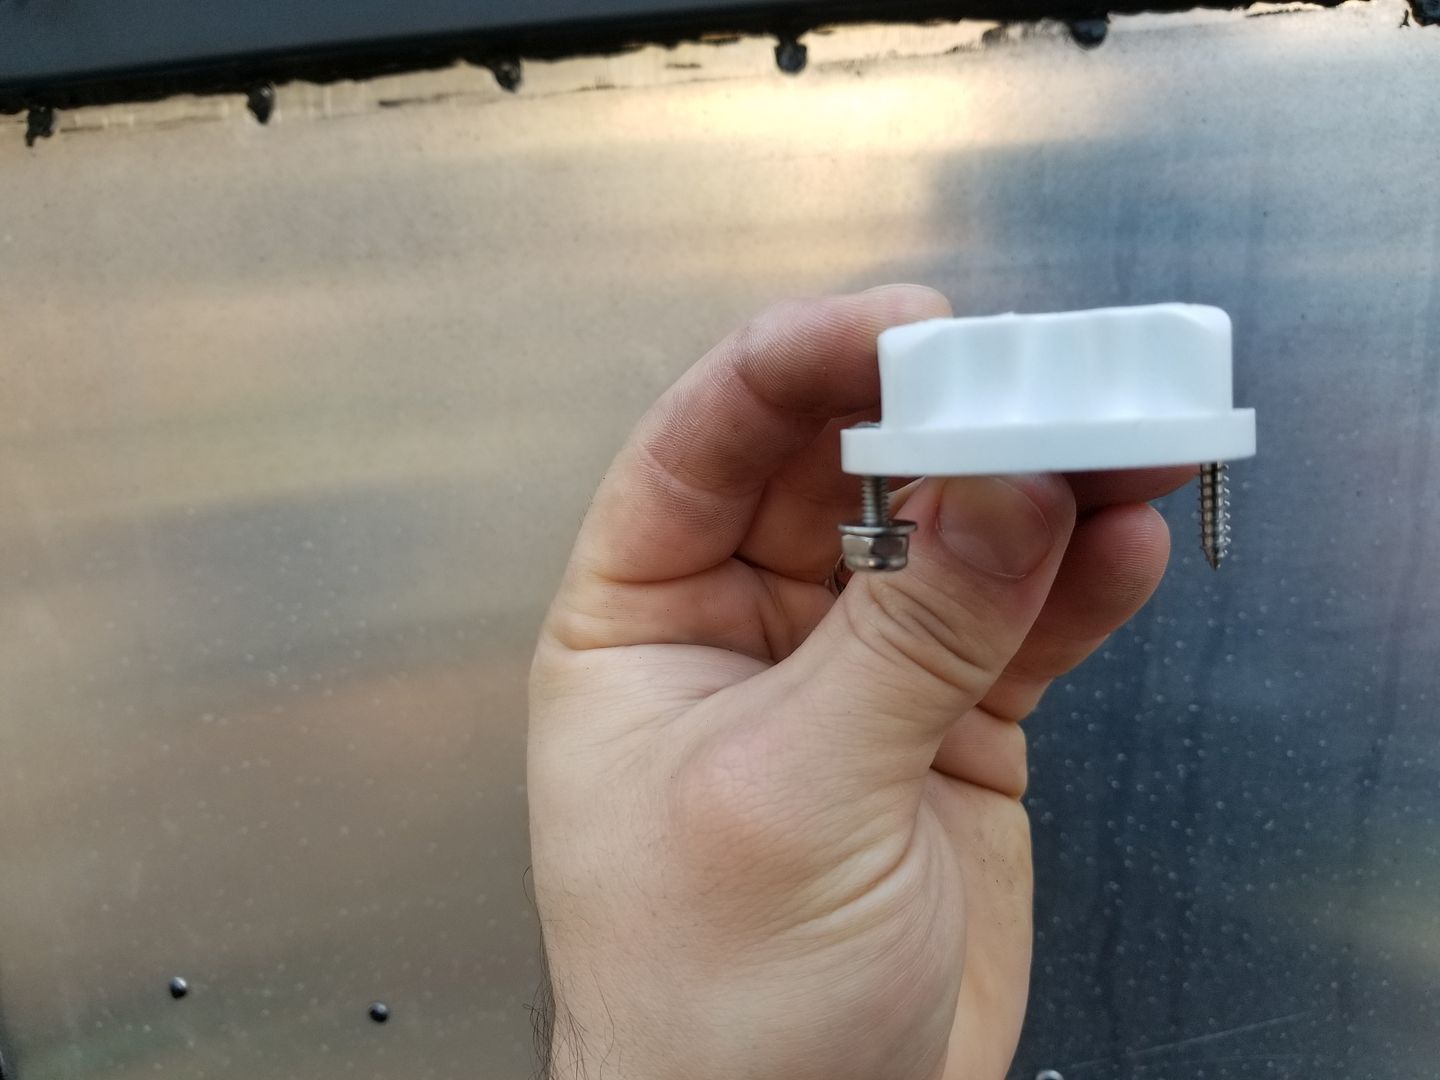
All mounted up. Used Silicone inside the holes that the wires pass through and on the inside surface of the tapered rubber plug. also on the rubber bushing that joins the cable gland to the steel roof.
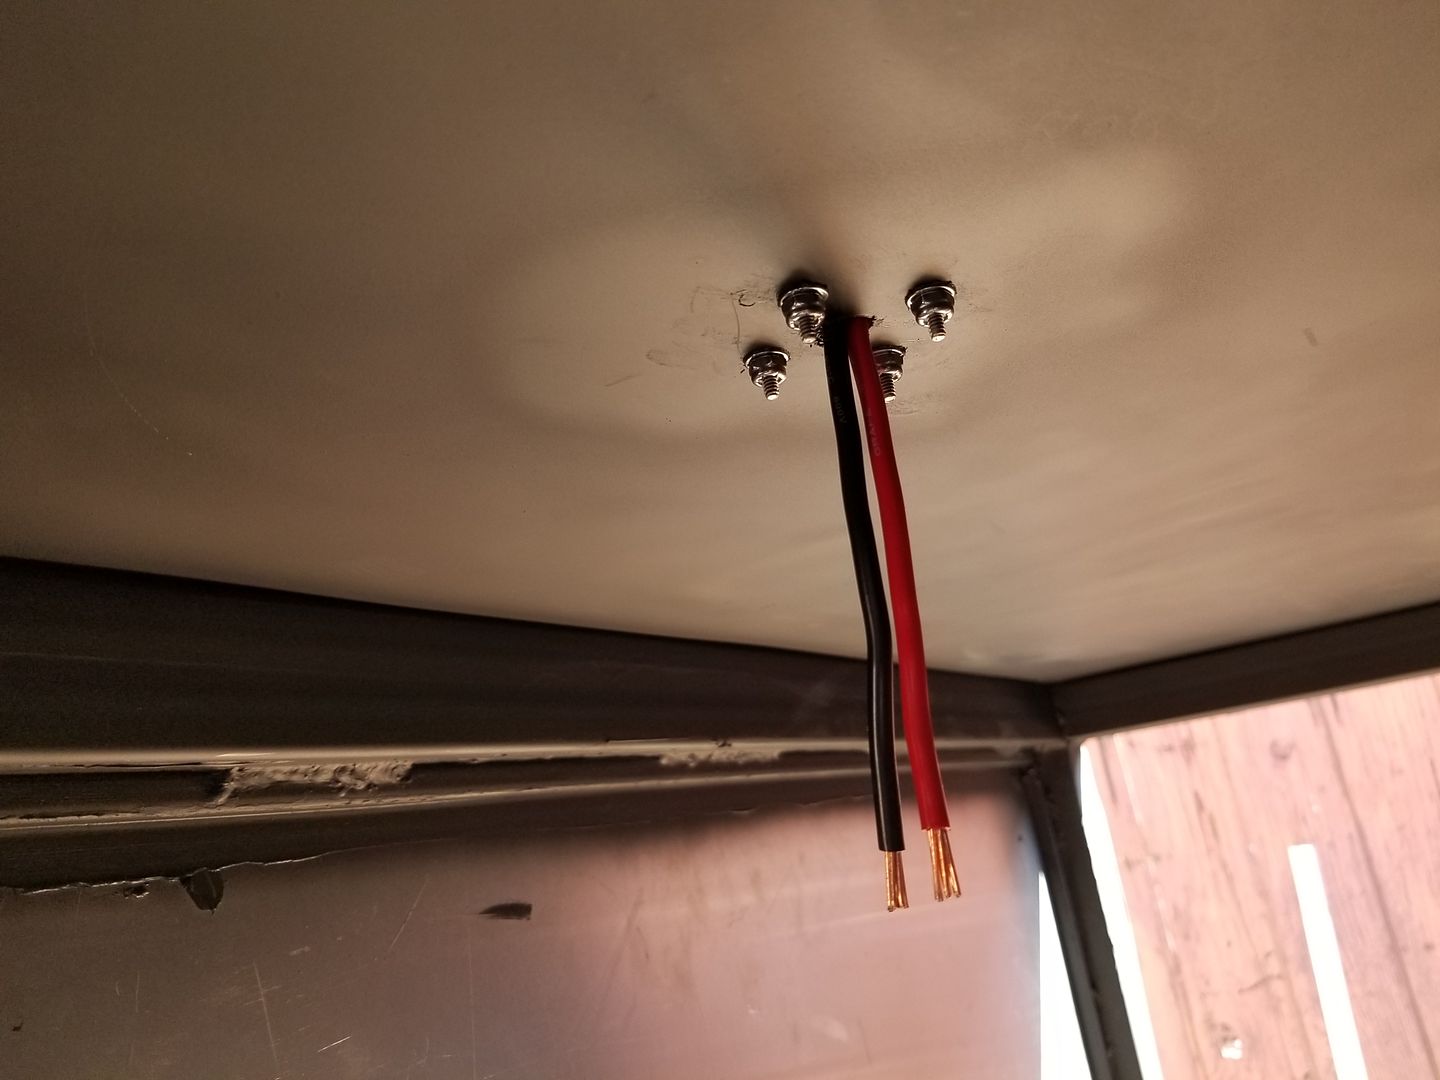
Here is how it looks on the inside of the cab
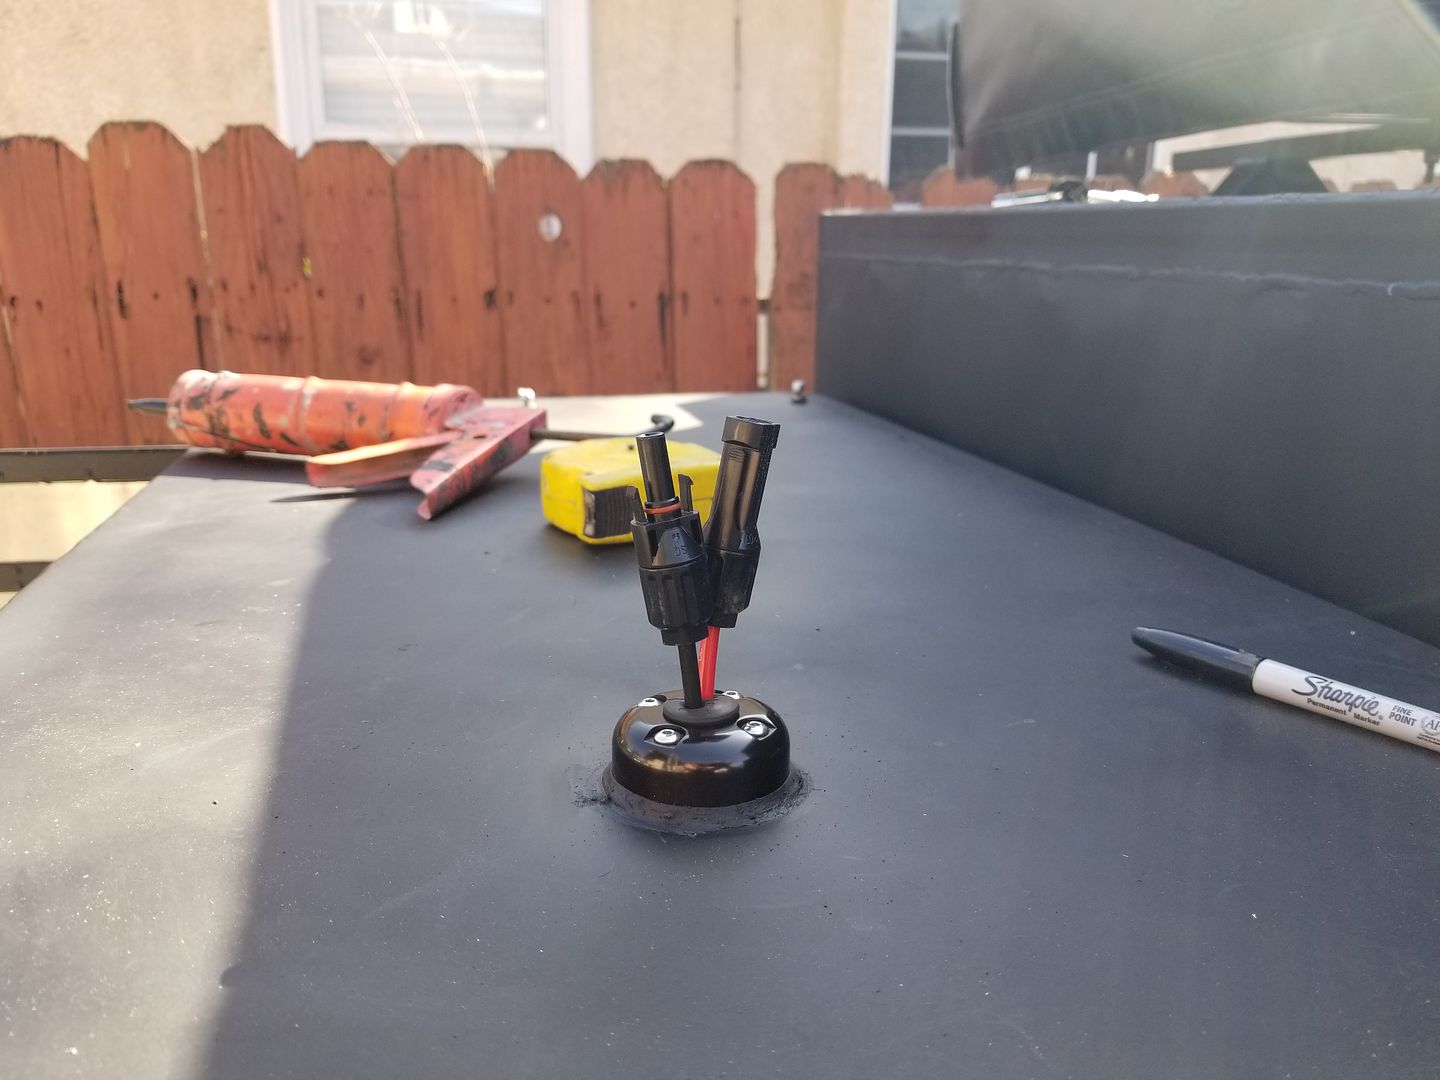
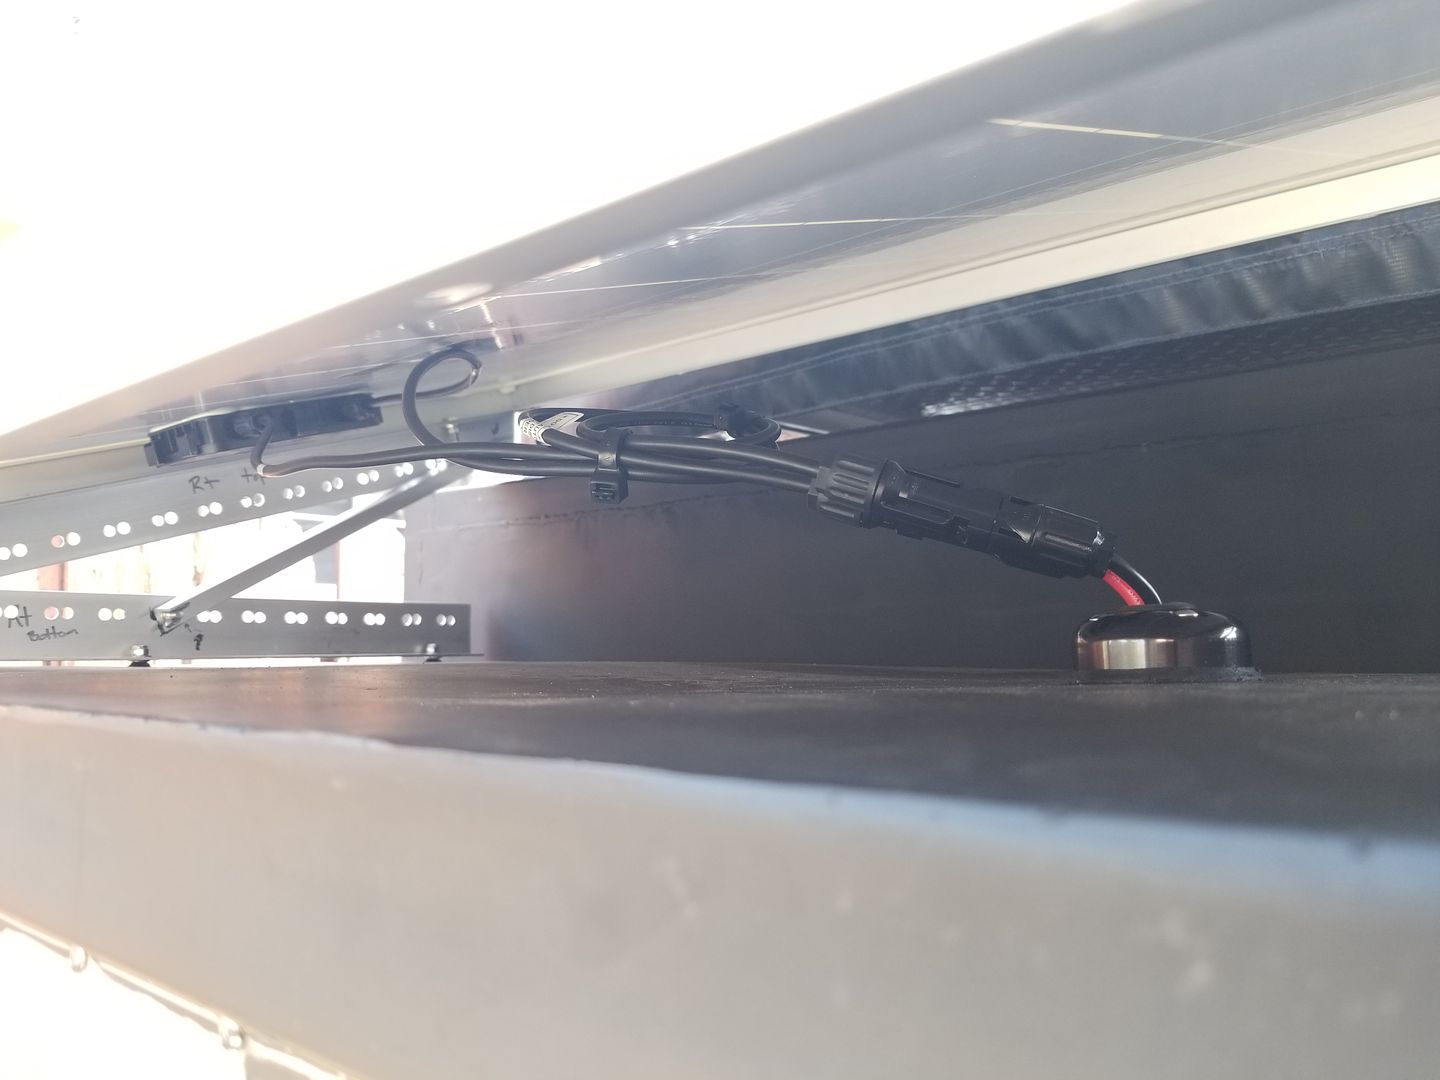
Solar panel mounted and hooked up

Directions say to drill a whole the diameter of the wire you plan to pass through. So that's what i did for these 2 wires.


This cable gland comes with these sharp screws to secure it onto a boat. But we aren't using this application on a boat. I need to secure this to steel. So i bought these replacement bolts at home depot.
Same size #6 5/8ths inch long. Machine tapered screw heads, with nylon lock nuts and washers. Everything stainless steel since it is gonna be exposed to the outdoors.


The ones it comes with vs the ones i bought

All mounted up. Used Silicone inside the holes that the wires pass through and on the inside surface of the tapered rubber plug. also on the rubber bushing that joins the cable gland to the steel roof.

Here is how it looks on the inside of the cab

Solar panel mounted and hooked up
 Mar 21, 2018 | 09:46 PM
#154
Thread Starter
Registered User
Joined: Apr 2012
Posts: 2,817
Likes: 2
From: Los Angeles CA
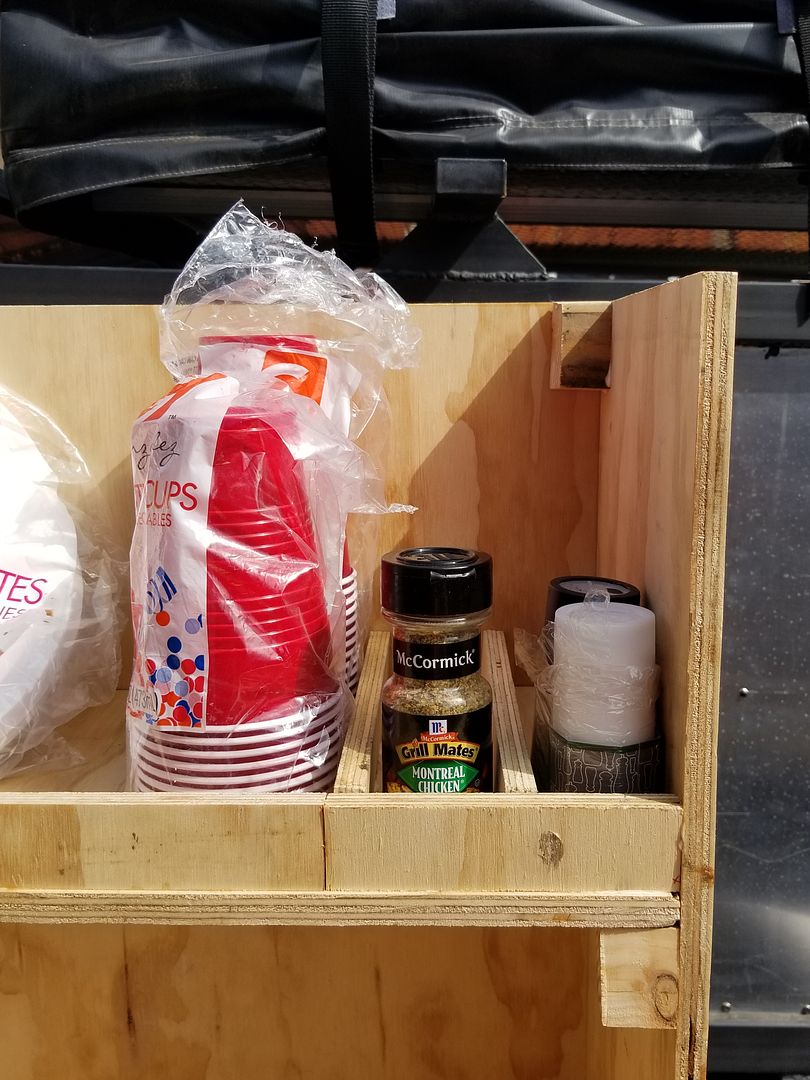
Finally got around to making the pantry/spice rack/utensils storage on the pull out drawer of my trailer. It doesn't look too bad considering it's my first woodworking project. It's solid and it will serve its purpose when we go camping. That's all i care. It is removable in case i wanna take it out but i doubt i'll ever need to do that. unless i gotta clean out the floor of the rear compartment.
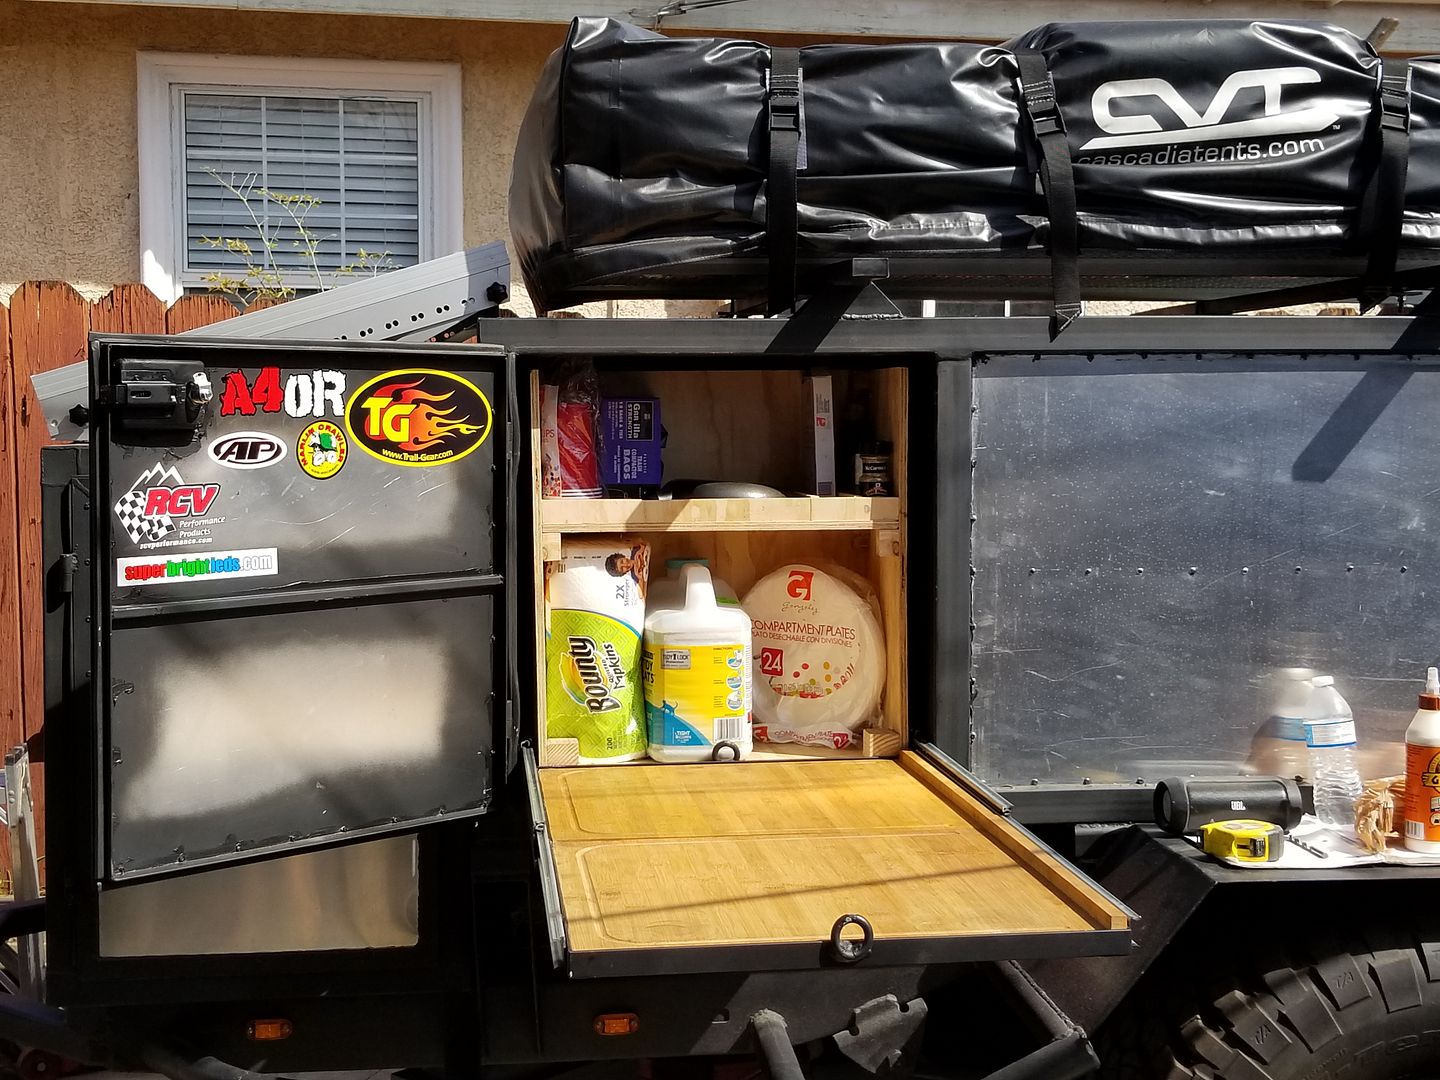
Gotta buy a few more pans and maybe 1 or 2 pots with lids. when i have that maybe ill add something to hold them upright without falling.
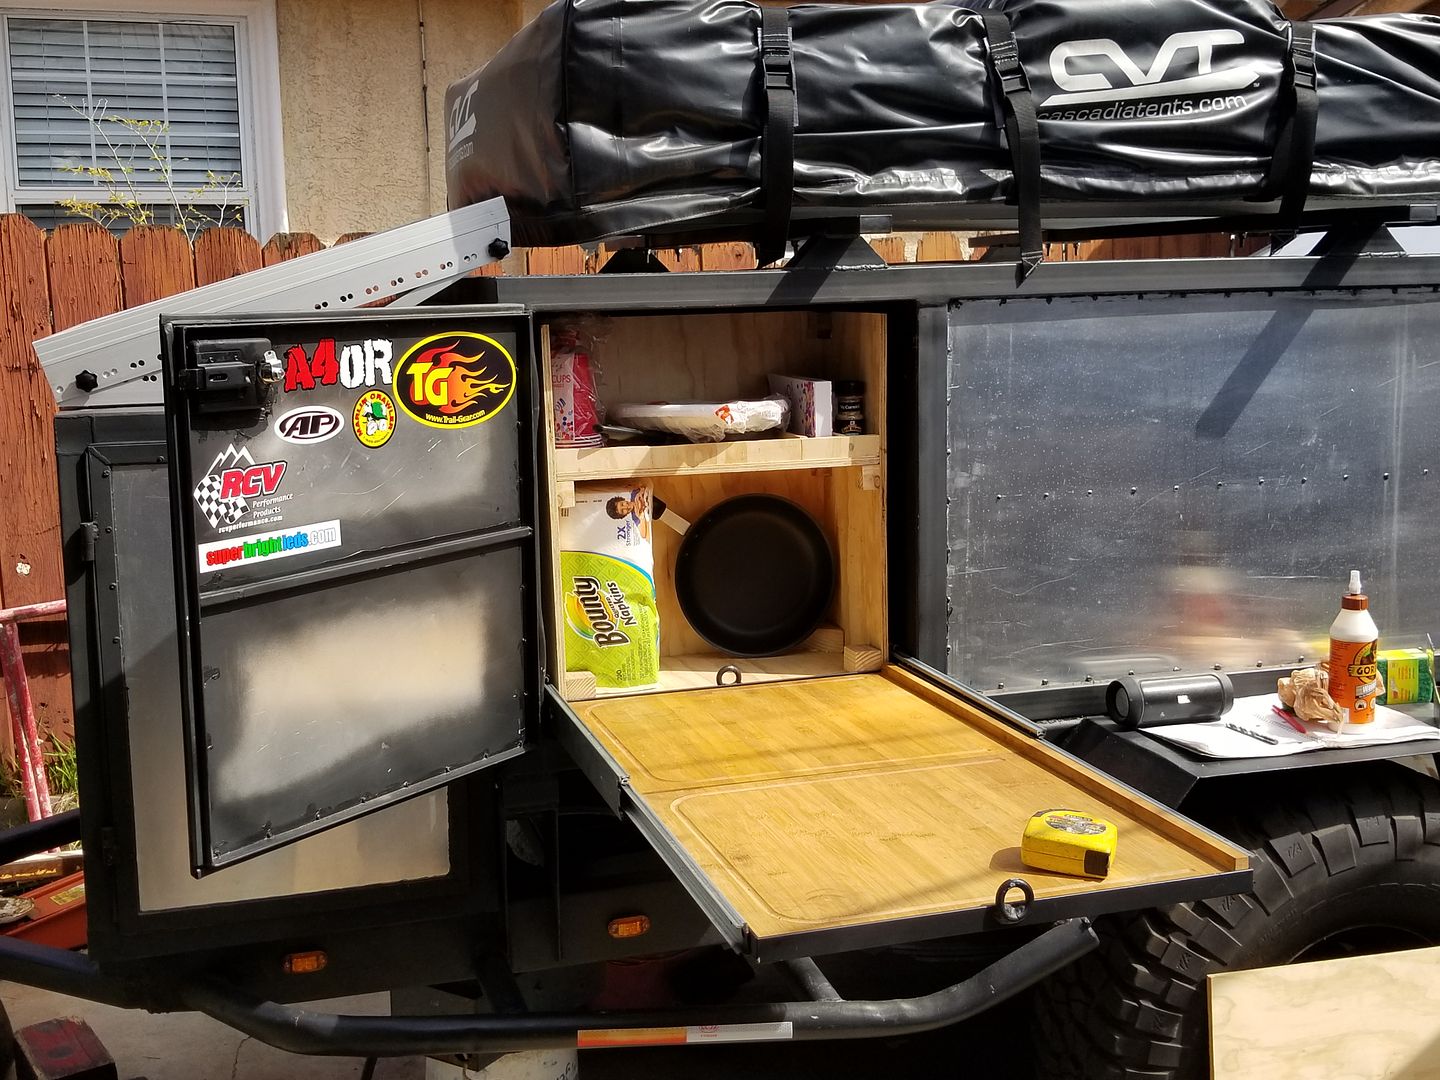
I gotta stock up on my spices now that i have a spot for them.

Gotta buy a few more pans and maybe 1 or 2 pots with lids. when i have that maybe ill add something to hold them upright without falling.

I gotta stock up on my spices now that i have a spot for them.
 Mar 21, 2018 | 10:27 PM
#155
Thread Starter
Registered User
Joined: Apr 2012
Posts: 2,817
Likes: 2
From: Los Angeles CA
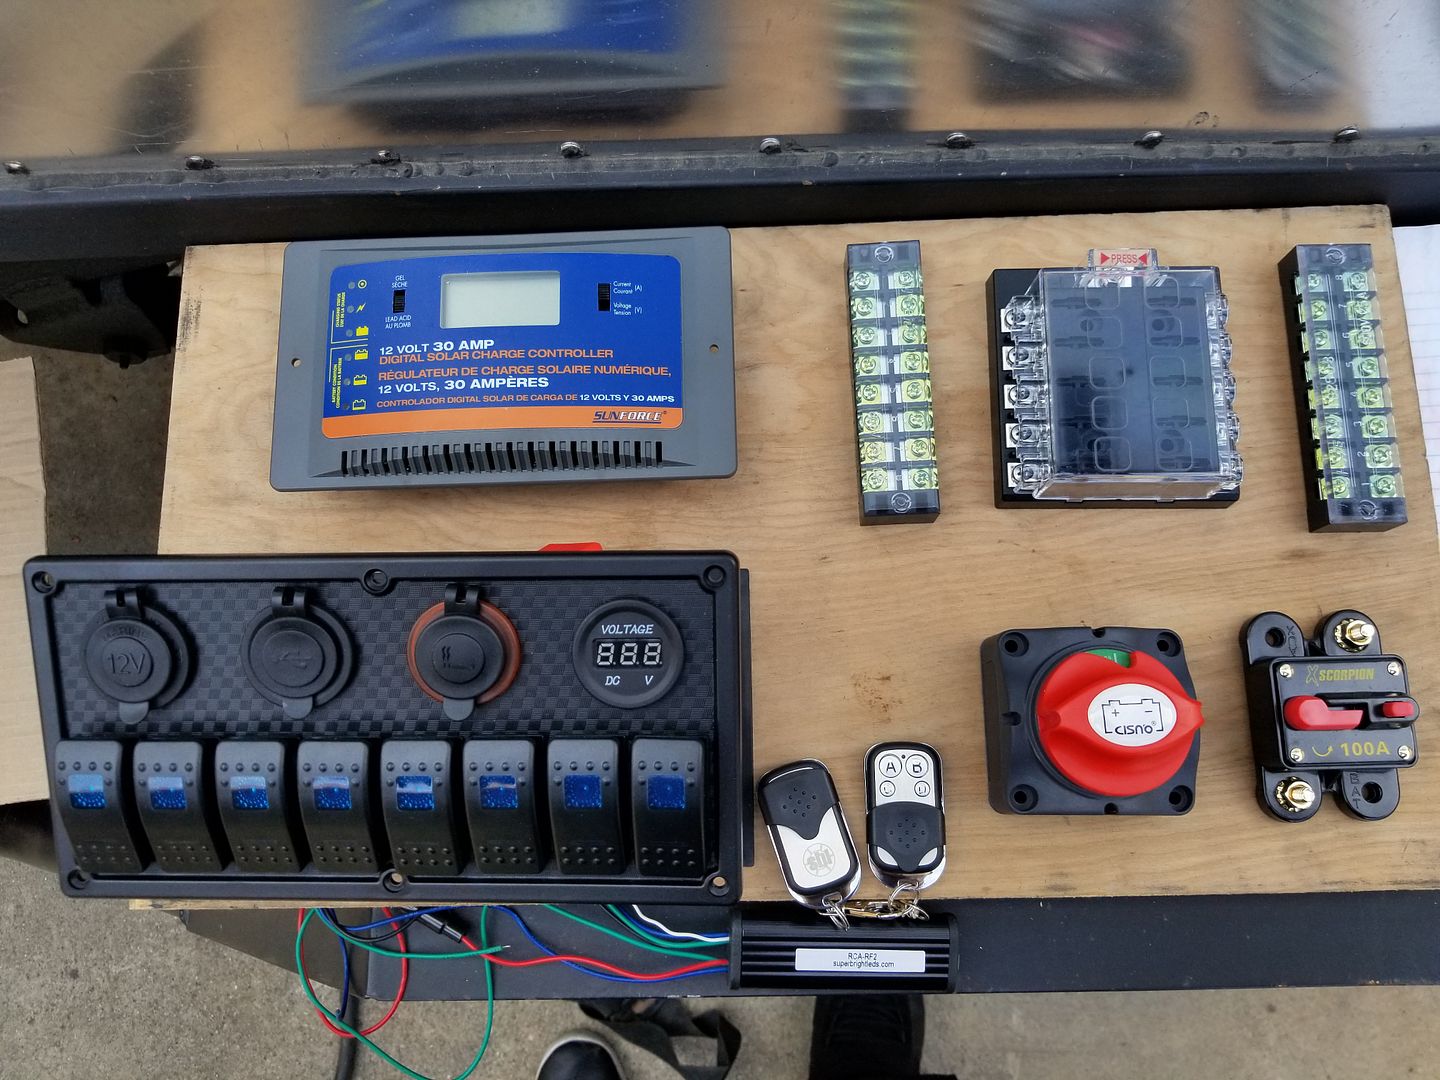
I got the last of my electrical parts shipped this weekend. Now it's time to figure out how to wire everything up. I gotta research what order to do this breaker, master on/off switch, and switch panel. I have 8 switches on there and I ordered 10 relays for each switch and ill have 2 left over.
I have my 100watt solar panel on the roof and wires for it are already routed into the cab. Also have a 12v wire coming from my 7 pole trailer harness as an AUX charging wire that i gotta figure out how to integrate into all of this.
Here is a list of items that I'd like to wire up to this switch panel.
1) 1GPM water pump
2) Propex HeatSource HS2000 forced air propane heater.
3) Driver side LEDs �3 (where the majority of my camp stuff sets up)
4) Passenger side LED �1
5) Rear LEDs �2
6) Front LED �1
7) Rock lights (Undercarriage lighting) �3
8 ) Free for something i may want to add for future use.
And on top of all that I have a wireless relay with two keychain Remotes by SuperBrightLEDs.com that I'd like to hook all of those exterior lights up to as well. So we can turn on & off the lights from the inside of our Rooftop tent incase we hear something in our campsite in the middle of the night. But that may be overkill right there.
By the way feel free to share videos or diagrams showing how to properly wire this stuff up. That'll help me out a ton. Thanks!
-----------------------------------------------------------------------------------------------------------------------------------------------------------------------
All the electrical stuff. Plus that wireless relay with 2 remotes at the center bottom of the pic.
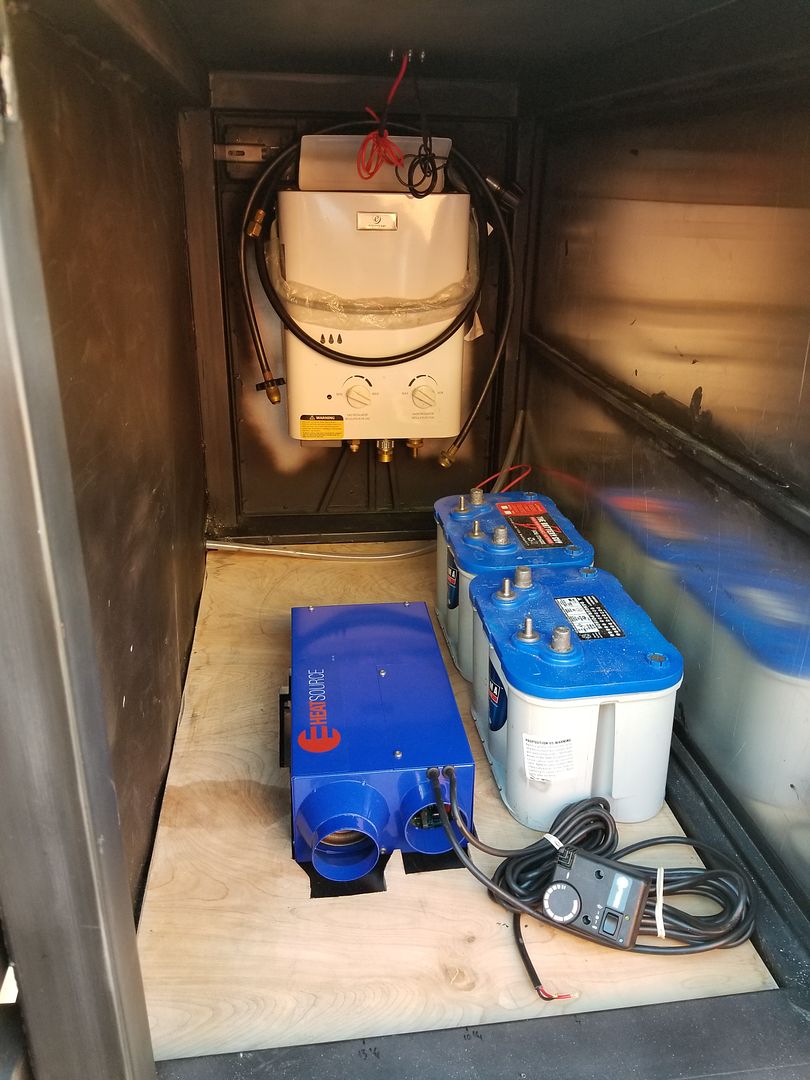
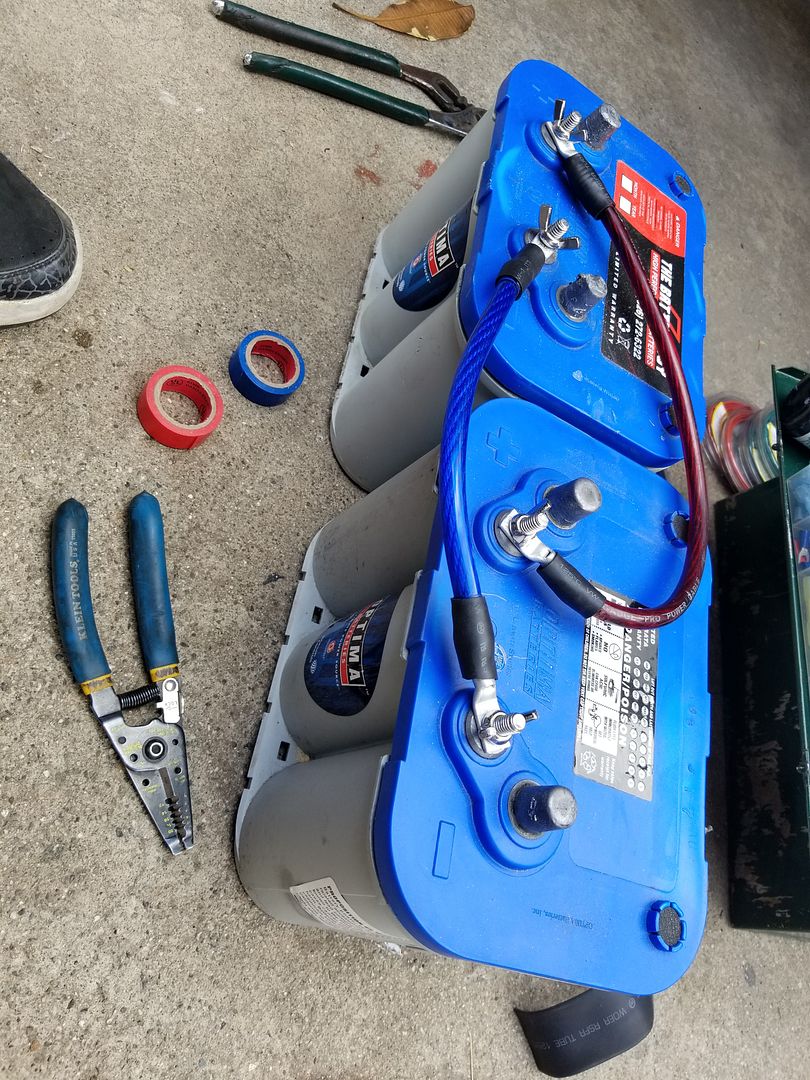
My battery bank
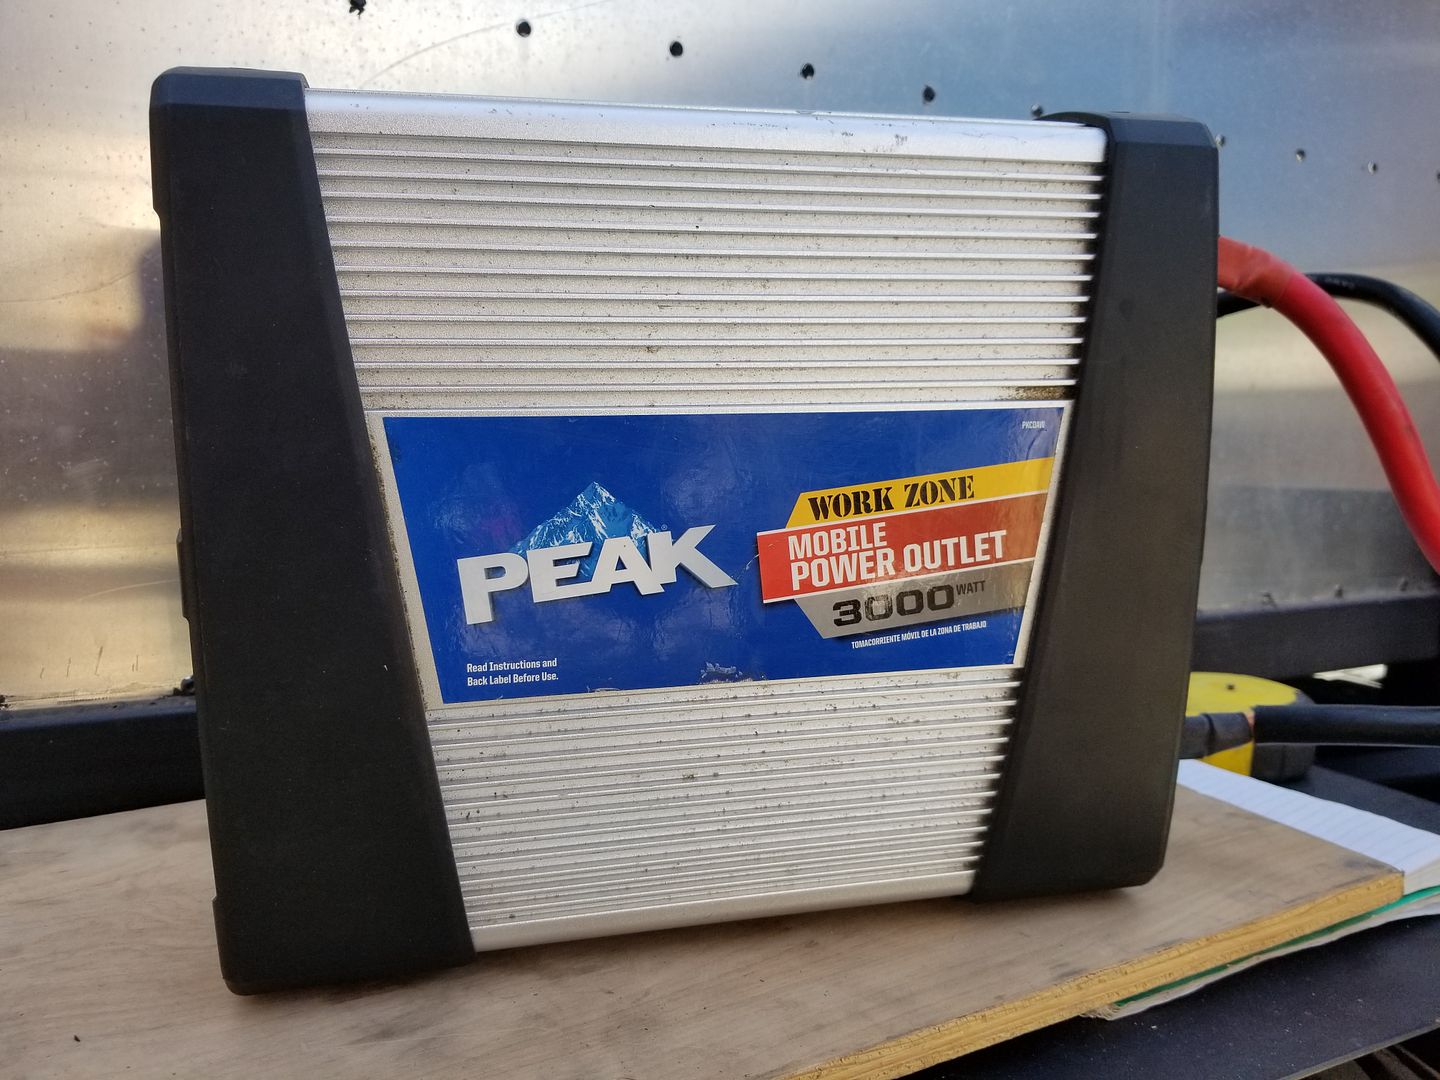
I've had this inverter for a few years now. I use it to run a small 3 gallon air compressor when i go offroad. I didnt wanna have to buy another one for the trailer so this is what i plan to use 3000 watt inverter. I believe it is 6000 peak watts. I may need to use a smaller inverter though. I have been told that the bigger the inverter the more power draw you have when you arent using it. Or something like you get less power draw for lets say charging a phone or using the outlet for a light when using a smaller inverter vs something huge like this one. We will see. I'm open to suggestions
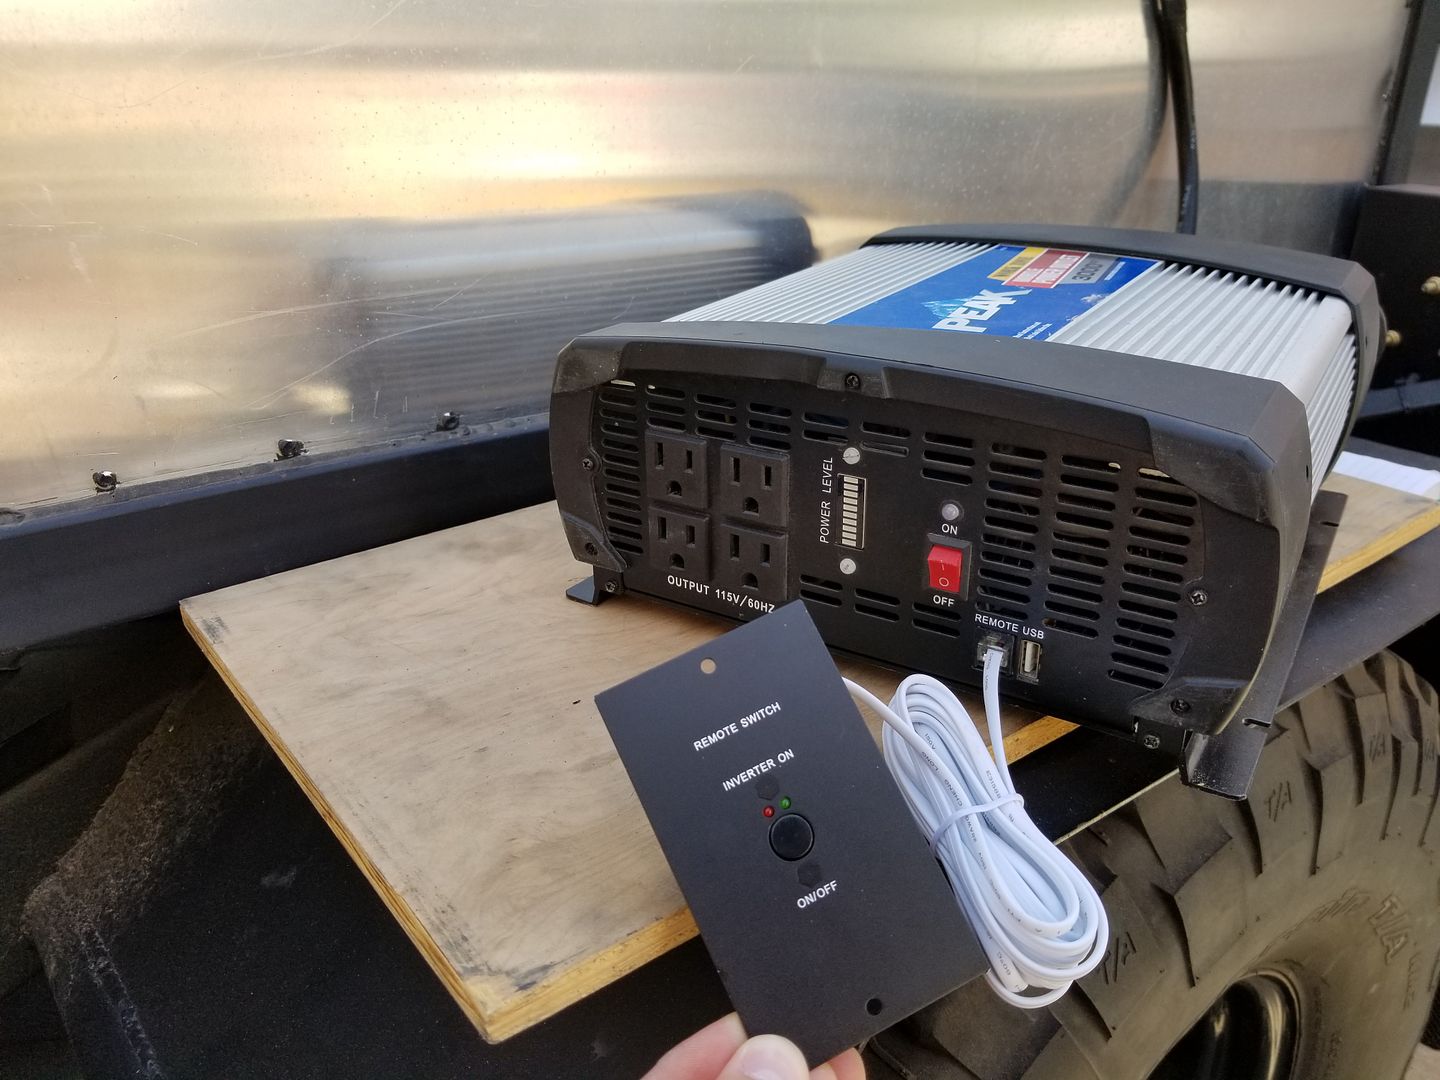
Cool thing about this one is that it has a remote on and off switch that can be mounted to my electrical panel too.

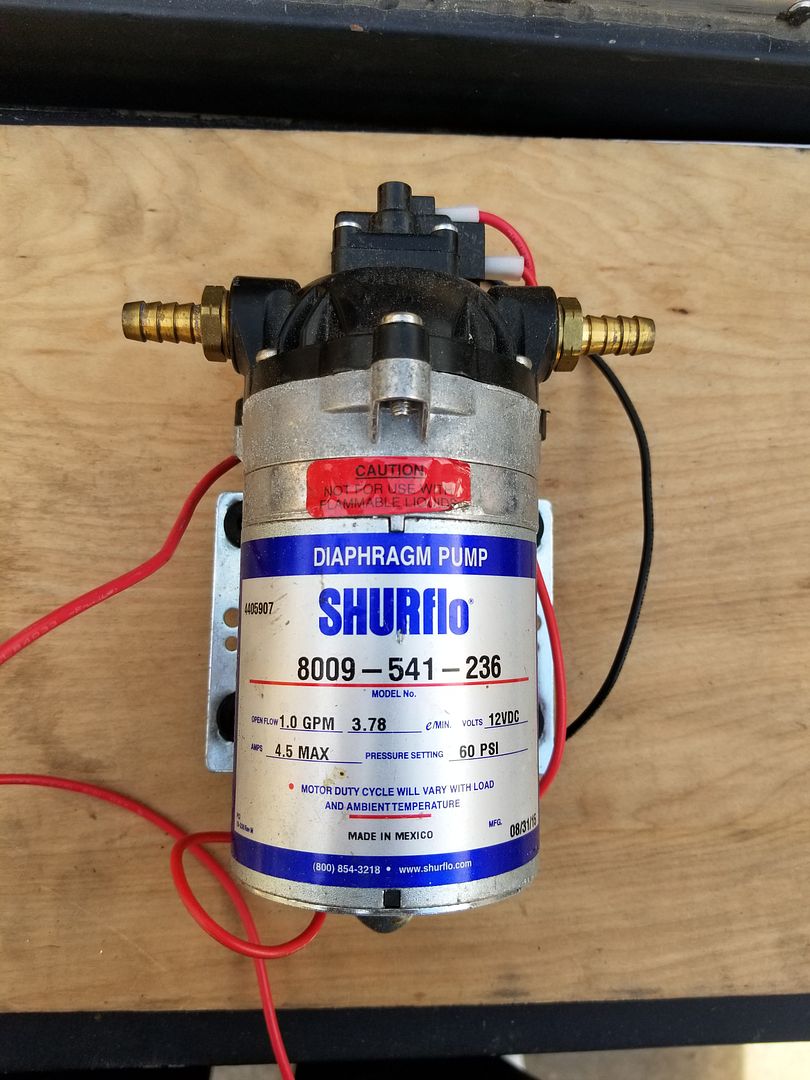
12v 1gpm water pump. Pumps at 60psi. Enough to have the correct water pressure to use with my EccoTemp water heater for my shower set up
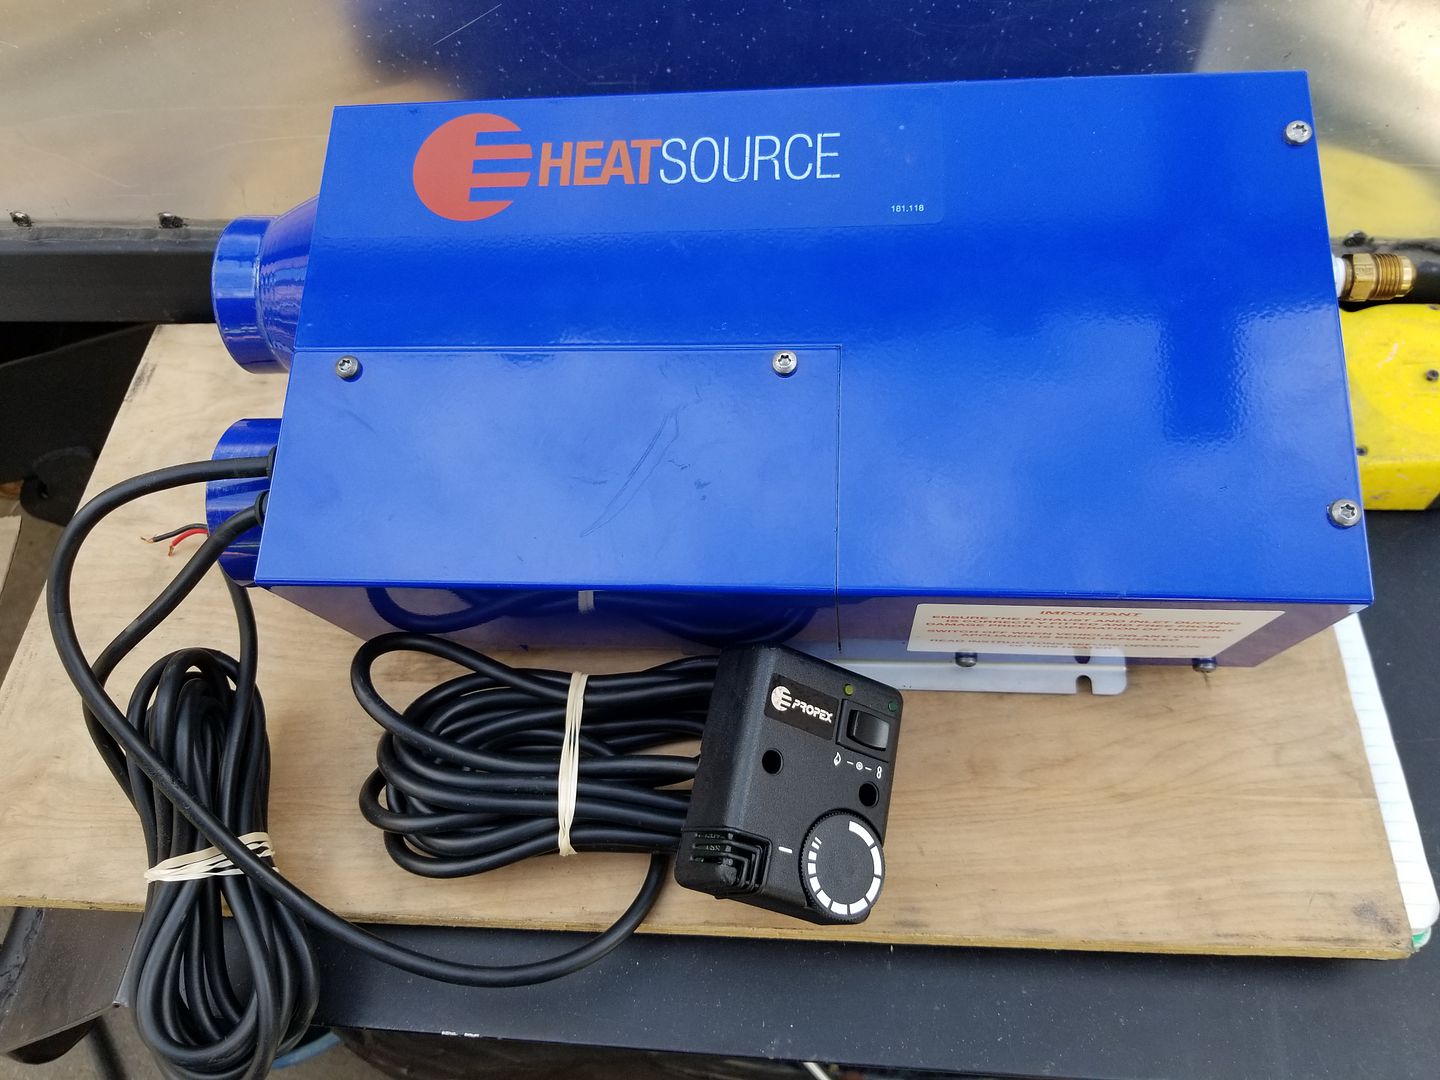
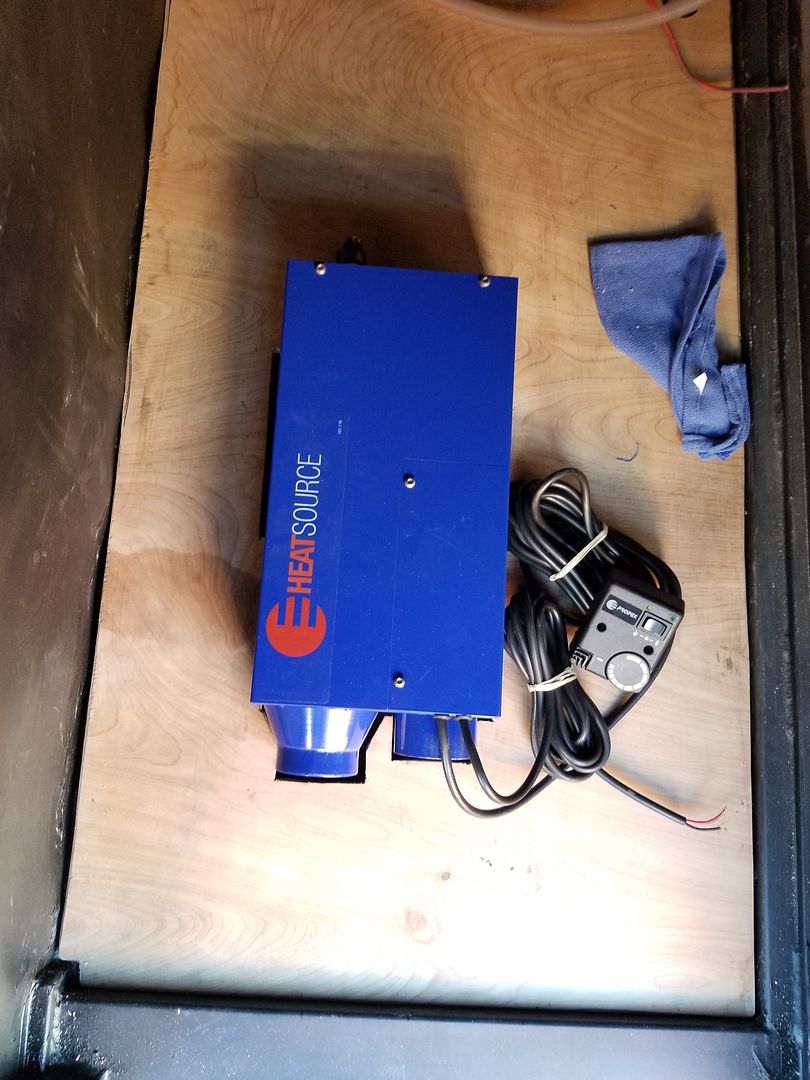
Propex Heatsource HS2000 force air propane heater. The black thing on the bottom is the thermostat.
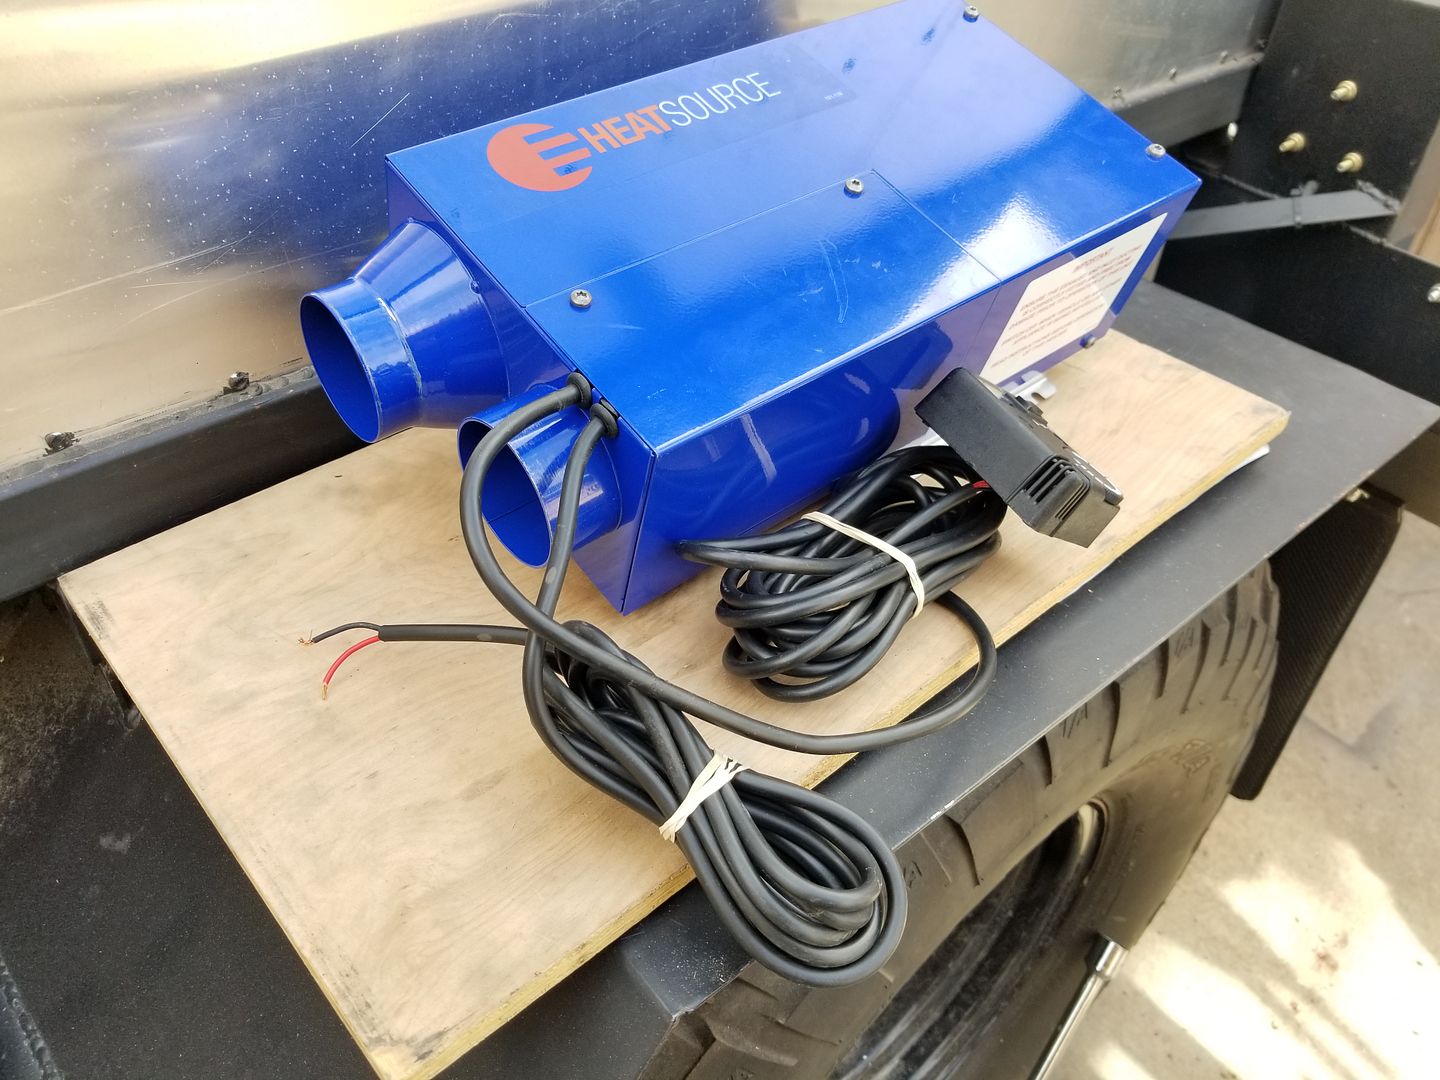
Hot air out and return.
All4OffRoad LED rock lights that I'll be using for lighting the undercarriage and around the entire trailer.
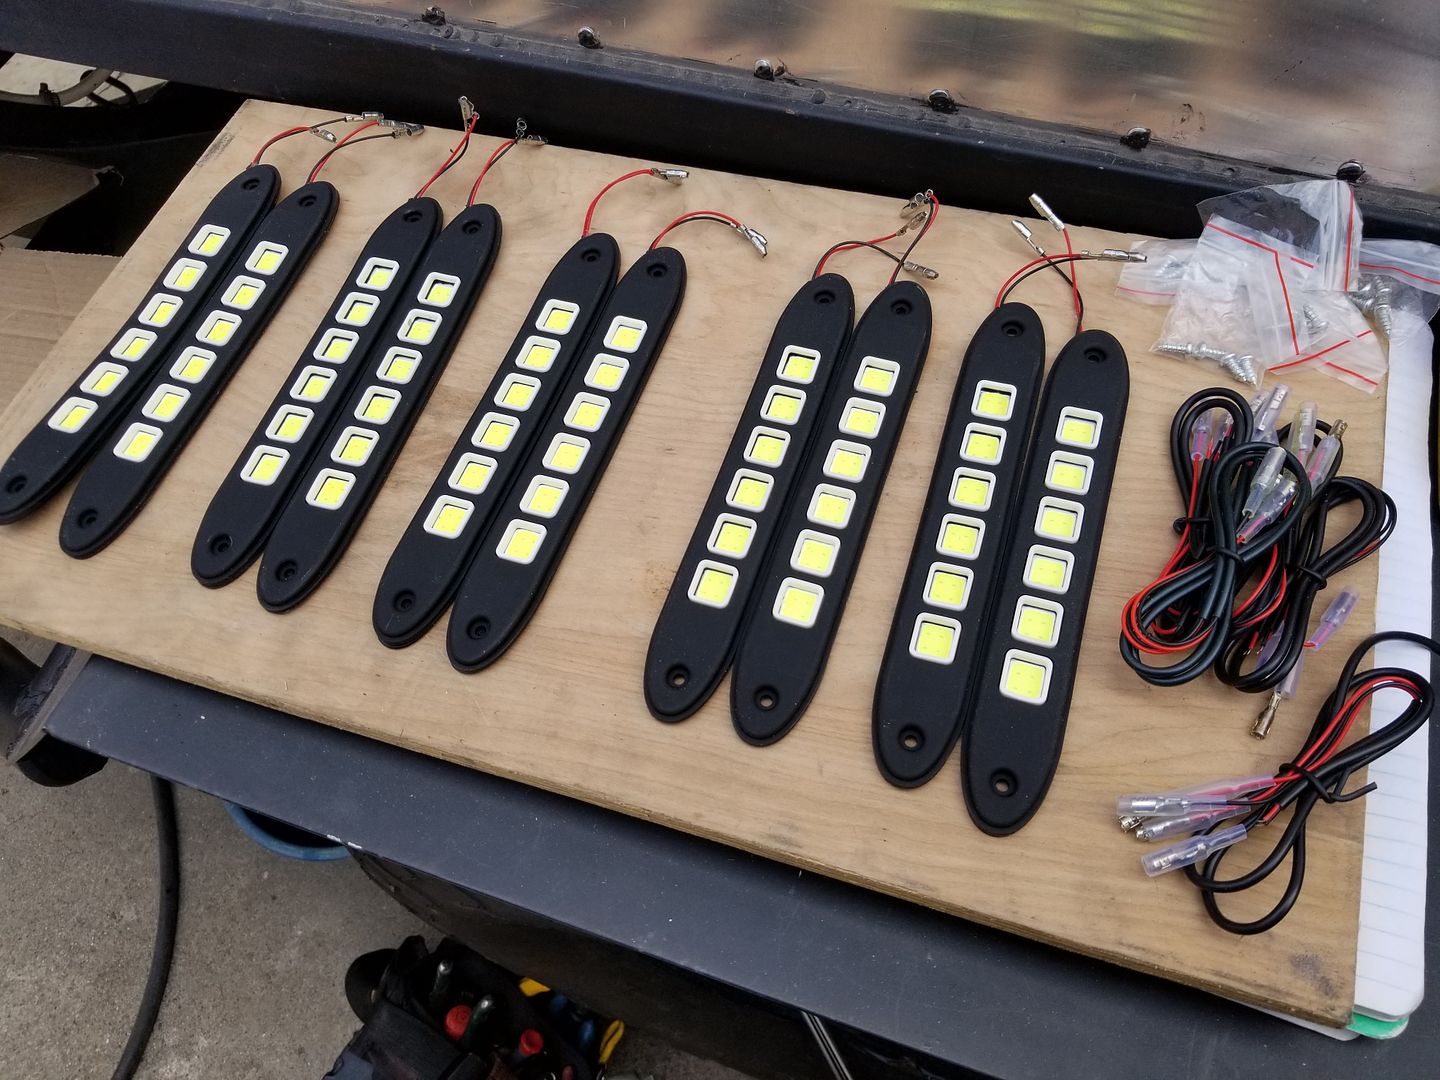
Just wanted to show how bright those LEDs are. I used those same lights underneath my truck. So this gives you an idea of how bright they are in the middle of the night

And i also need to figure out a way to incorporate this 12v aux wire coming off the 7 pole trailer harness.
So rather then buy the SUPER NICE Cable gland like i used for the solar panel wires. I went this much cheaper one from Home depot. Only this one is for electrical conduit but it works just fine. The rubber piece inside tightens on the cable as you screw the head and still creates a water tight seal. Only difference is that i used a 1/2" one instead of this 3/4". I passed the 12v wire in front the bottom side of the cab since thats where all the 7pole harness wires are at. then i siliconed around the cable gland underneath and on the inside portion to add on to the water tight seal. This baby only costed me about 2 bucks.
Here is a video of that gland taken apart.
and in prepping for all the interior electrical stuff i decided to add a couple of feet of wire to the solar panel wires tyo have it ready for when i hook everything up.
I have my 100watt solar panel on the roof and wires for it are already routed into the cab. Also have a 12v wire coming from my 7 pole trailer harness as an AUX charging wire that i gotta figure out how to integrate into all of this.
Here is a list of items that I'd like to wire up to this switch panel.
1) 1GPM water pump
2) Propex HeatSource HS2000 forced air propane heater.
3) Driver side LEDs �3 (where the majority of my camp stuff sets up)
4) Passenger side LED �1
5) Rear LEDs �2
6) Front LED �1
7) Rock lights (Undercarriage lighting) �3
8 ) Free for something i may want to add for future use.
And on top of all that I have a wireless relay with two keychain Remotes by SuperBrightLEDs.com that I'd like to hook all of those exterior lights up to as well. So we can turn on & off the lights from the inside of our Rooftop tent incase we hear something in our campsite in the middle of the night. But that may be overkill right there.
By the way feel free to share videos or diagrams showing how to properly wire this stuff up. That'll help me out a ton. Thanks!
-----------------------------------------------------------------------------------------------------------------------------------------------------------------------
All the electrical stuff. Plus that wireless relay with 2 remotes at the center bottom of the pic.

My battery bank

I've had this inverter for a few years now. I use it to run a small 3 gallon air compressor when i go offroad. I didnt wanna have to buy another one for the trailer so this is what i plan to use 3000 watt inverter. I believe it is 6000 peak watts. I may need to use a smaller inverter though. I have been told that the bigger the inverter the more power draw you have when you arent using it. Or something like you get less power draw for lets say charging a phone or using the outlet for a light when using a smaller inverter vs something huge like this one. We will see. I'm open to suggestions

Cool thing about this one is that it has a remote on and off switch that can be mounted to my electrical panel too.


12v 1gpm water pump. Pumps at 60psi. Enough to have the correct water pressure to use with my EccoTemp water heater for my shower set up

Propex Heatsource HS2000 force air propane heater. The black thing on the bottom is the thermostat.

Hot air out and return.

All4OffRoad LED rock lights that I'll be using for lighting the undercarriage and around the entire trailer.

Just wanted to show how bright those LEDs are. I used those same lights underneath my truck. So this gives you an idea of how bright they are in the middle of the night
And i also need to figure out a way to incorporate this 12v aux wire coming off the 7 pole trailer harness.

So rather then buy the SUPER NICE Cable gland like i used for the solar panel wires. I went this much cheaper one from Home depot. Only this one is for electrical conduit but it works just fine. The rubber piece inside tightens on the cable as you screw the head and still creates a water tight seal. Only difference is that i used a 1/2" one instead of this 3/4". I passed the 12v wire in front the bottom side of the cab since thats where all the 7pole harness wires are at. then i siliconed around the cable gland underneath and on the inside portion to add on to the water tight seal. This baby only costed me about 2 bucks.

Here is a video of that gland taken apart.
and in prepping for all the interior electrical stuff i decided to add a couple of feet of wire to the solar panel wires tyo have it ready for when i hook everything up.

Last edited by Redeth005; Mar 21, 2018 at 10:31 PM.
Mar 24, 2018 | 05:52 PM
#156
Thread Starter
Registered User
Joined: Apr 2012
Posts: 2,817
Likes: 2
From: Los Angeles CA
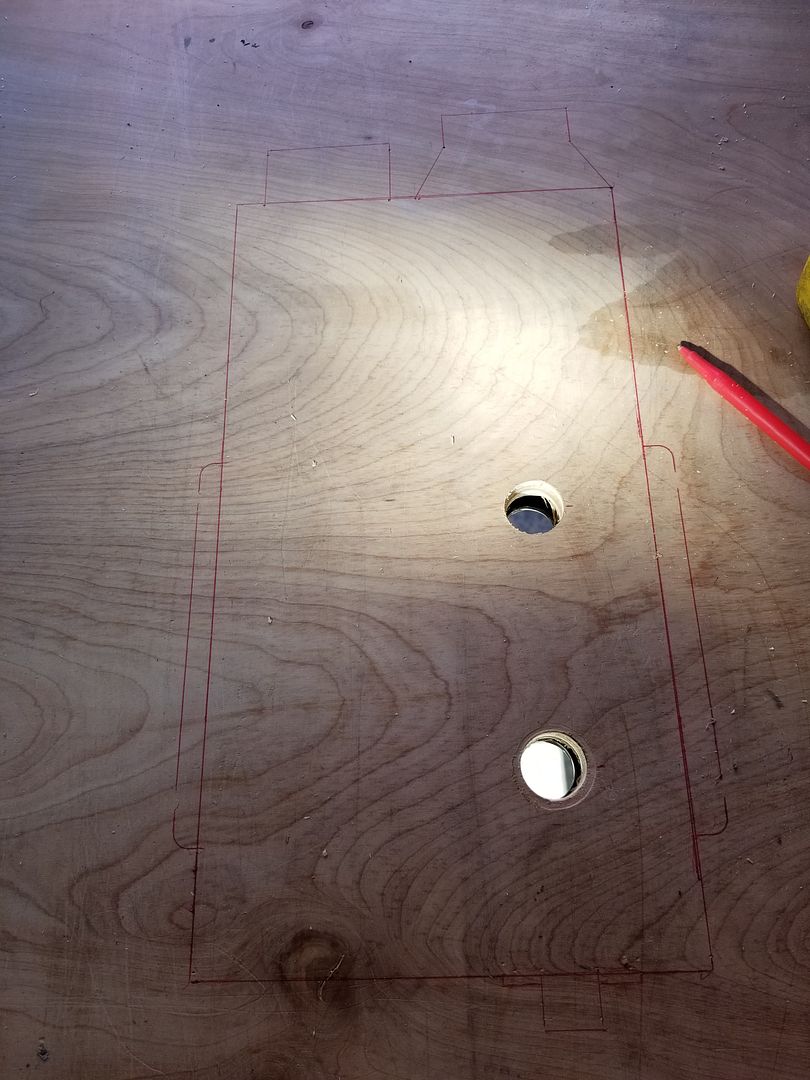
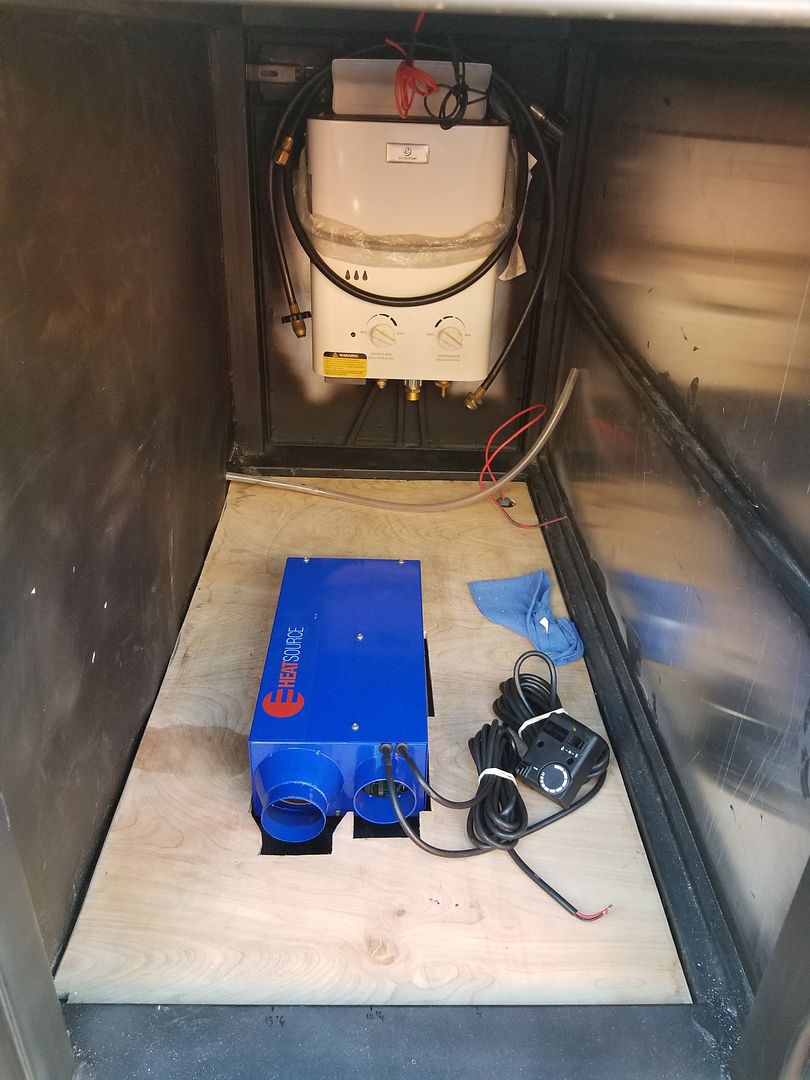
After what seems like 2 years I was finally able to get around to installing the Propex heater onto my trailer. I hard mounted it to the steel floor rather then onto the wood. Which called for machined screws and nylon lock washers to secure it into place. Here are all the pix i took.
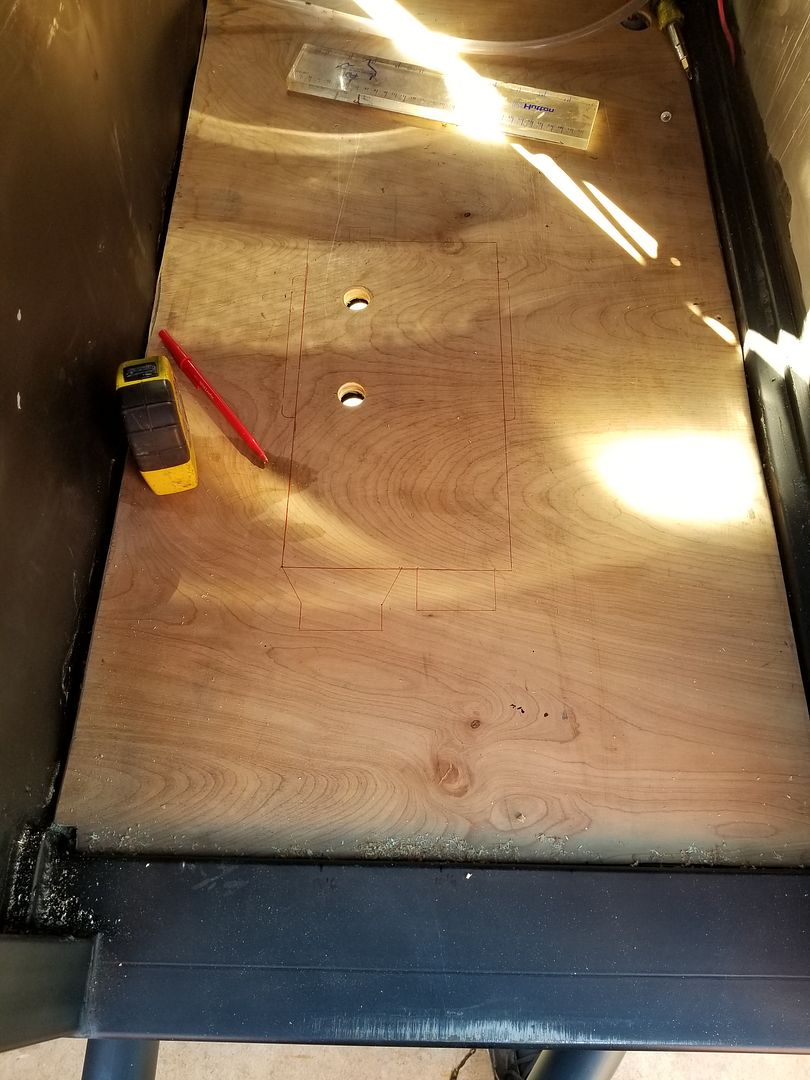
Gotta start with some measurements using the left side because the right side wasn't completely square.
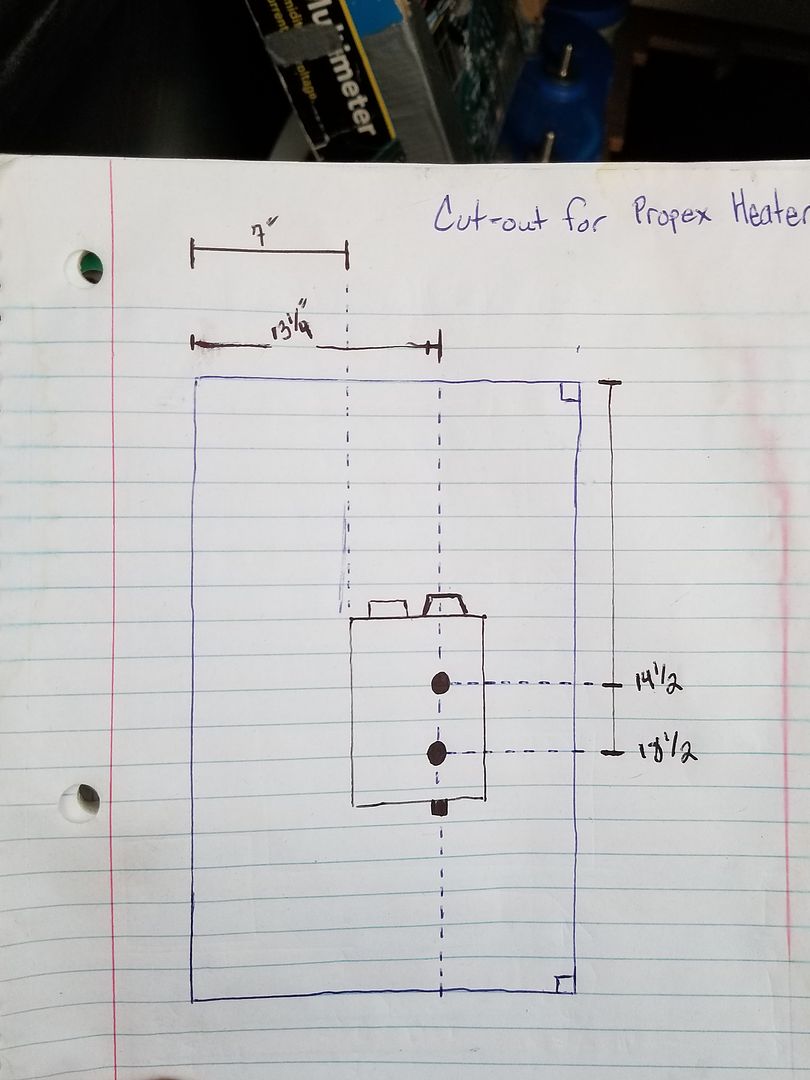
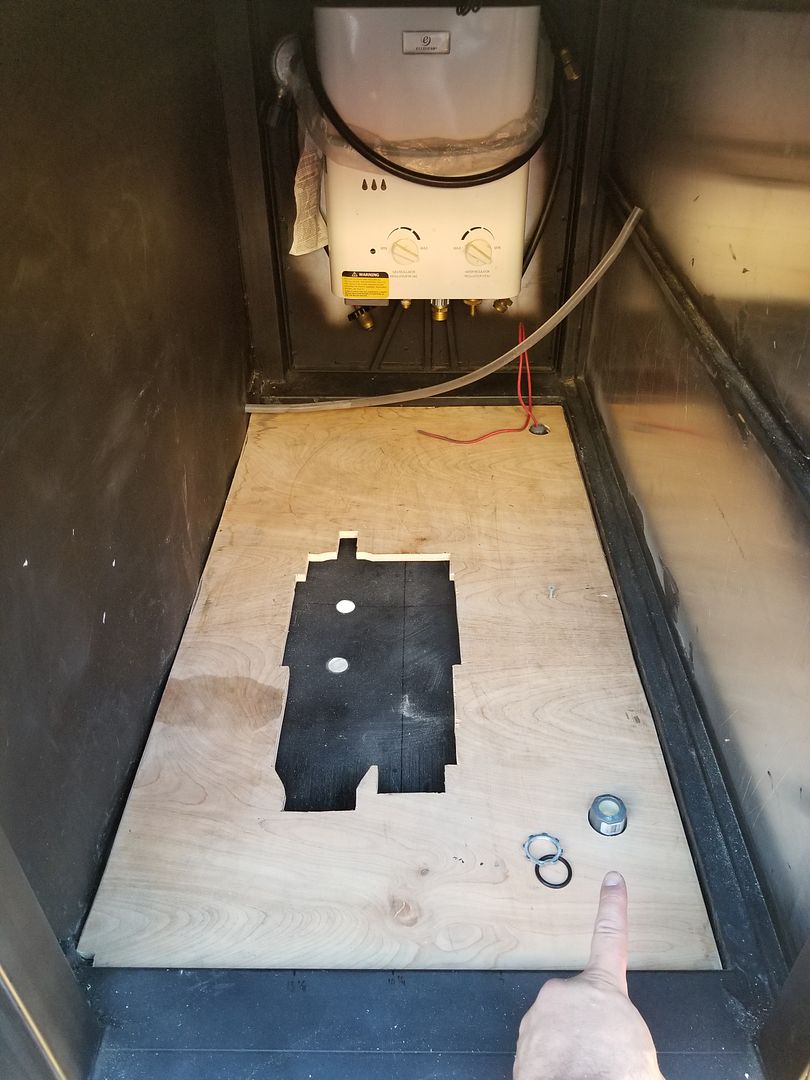
Drilled the holes completely through both the wood and the steel floor to make sure they mirror each other. Followed by making the cut out for the entire heater unit.
But cutting it this way i can remove the wood floor in case for some reason the front compartment springs up a leak. this way i can remove the future cabinet and the wood floor to clean it up.
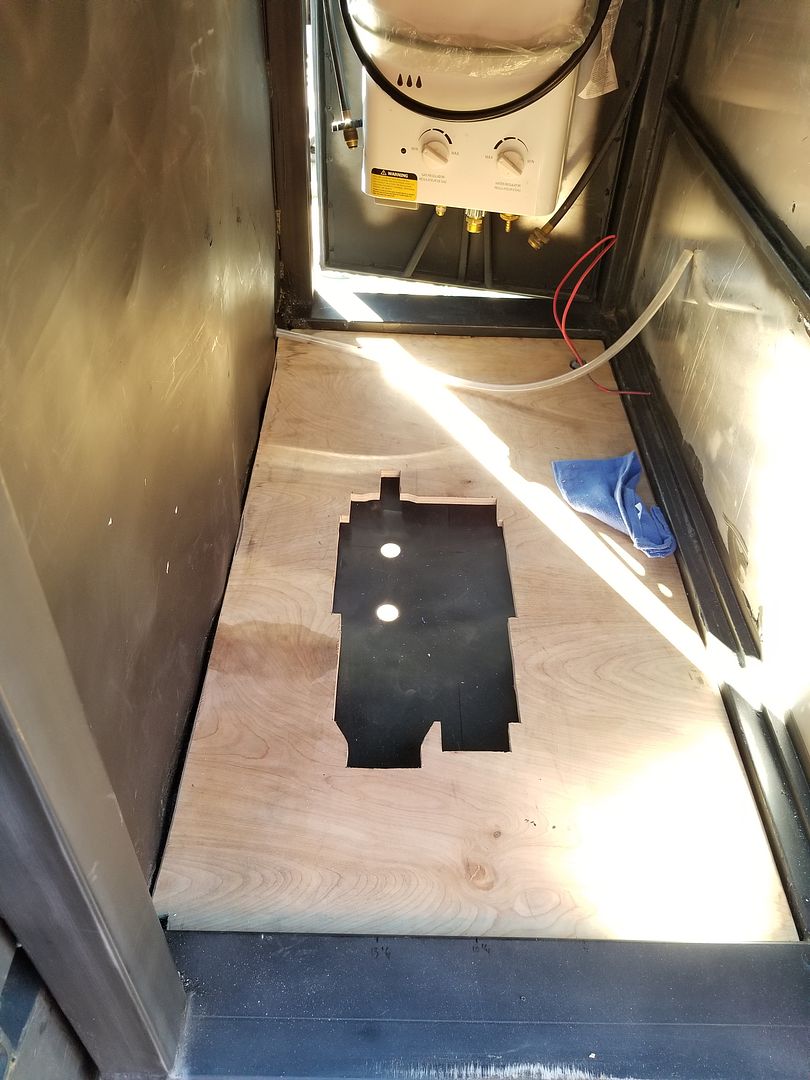
Perfect fit
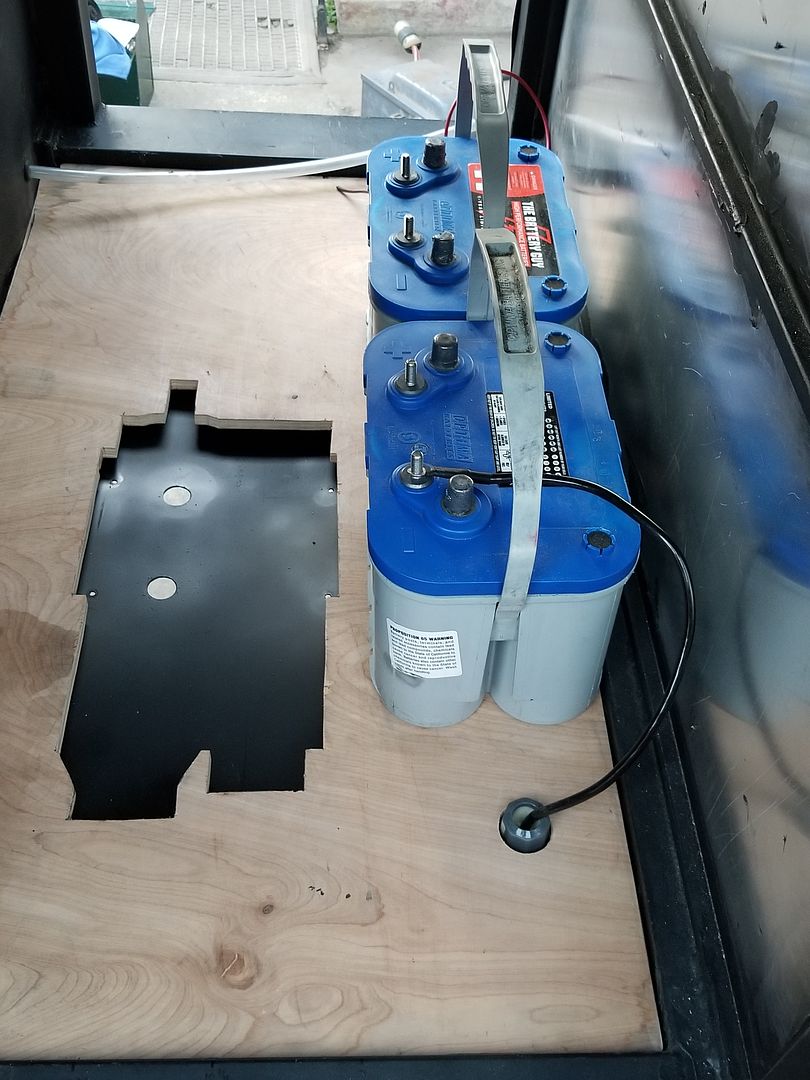
Both batteries will be mounted in this fashion to keep the weight even in the front.
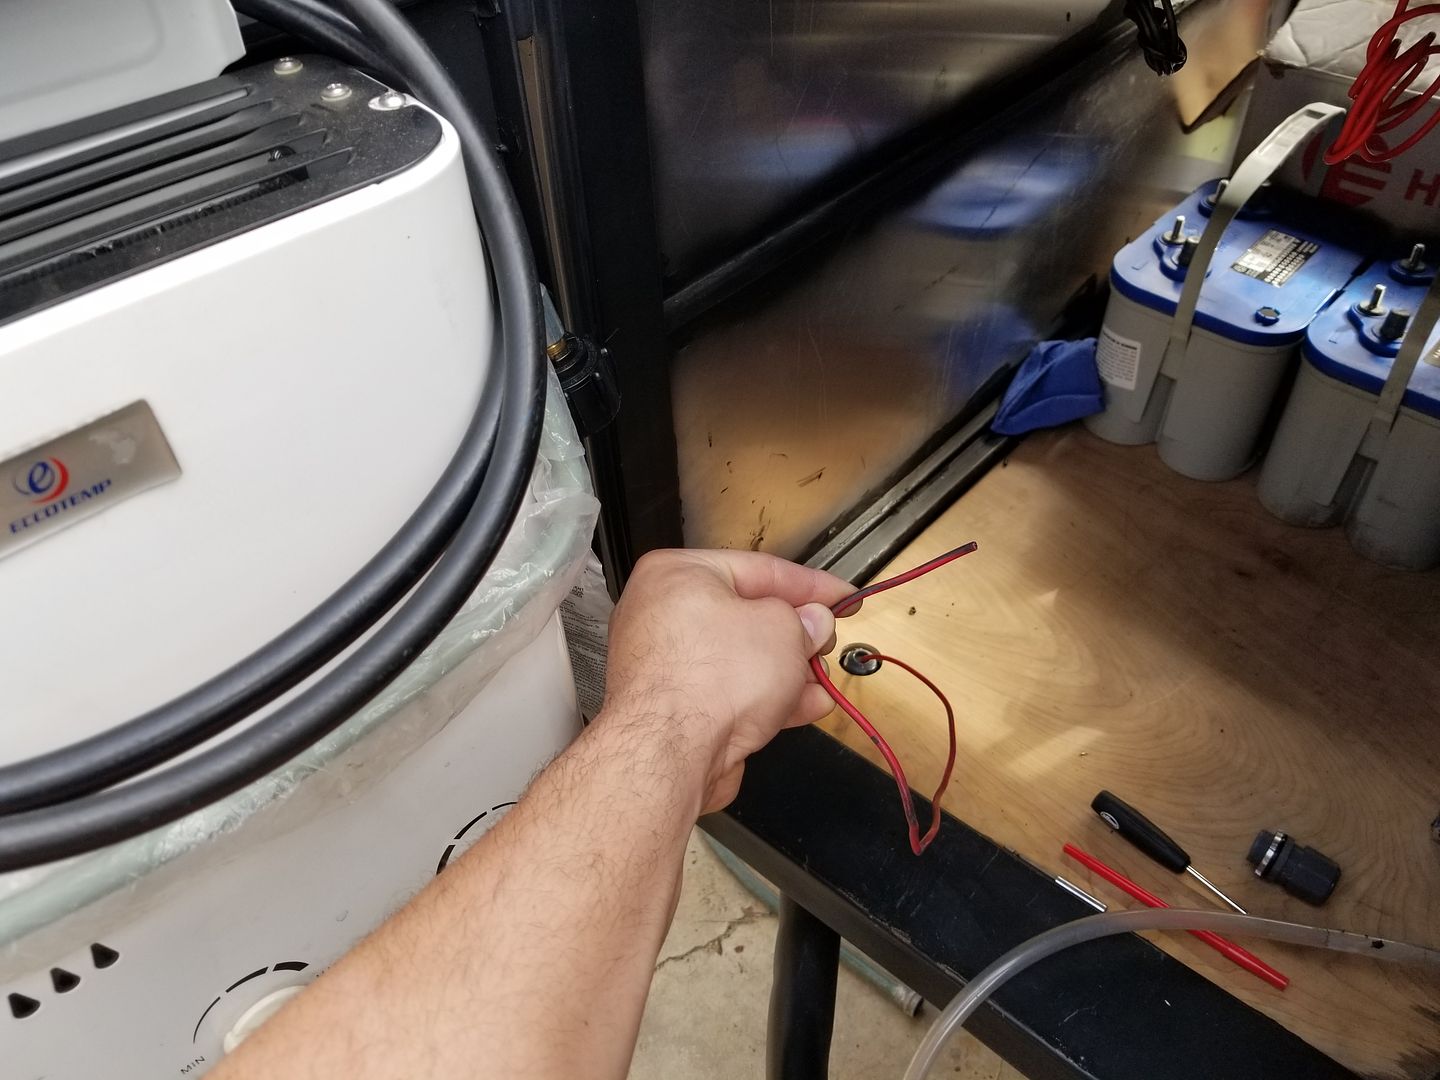
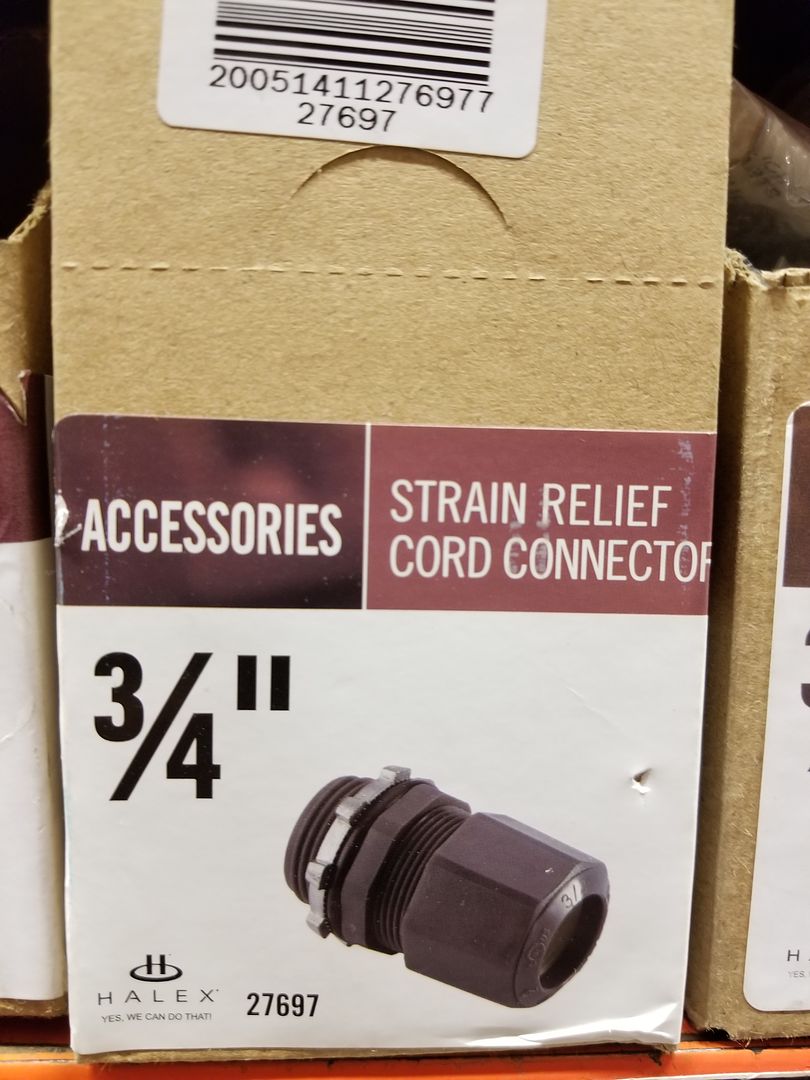
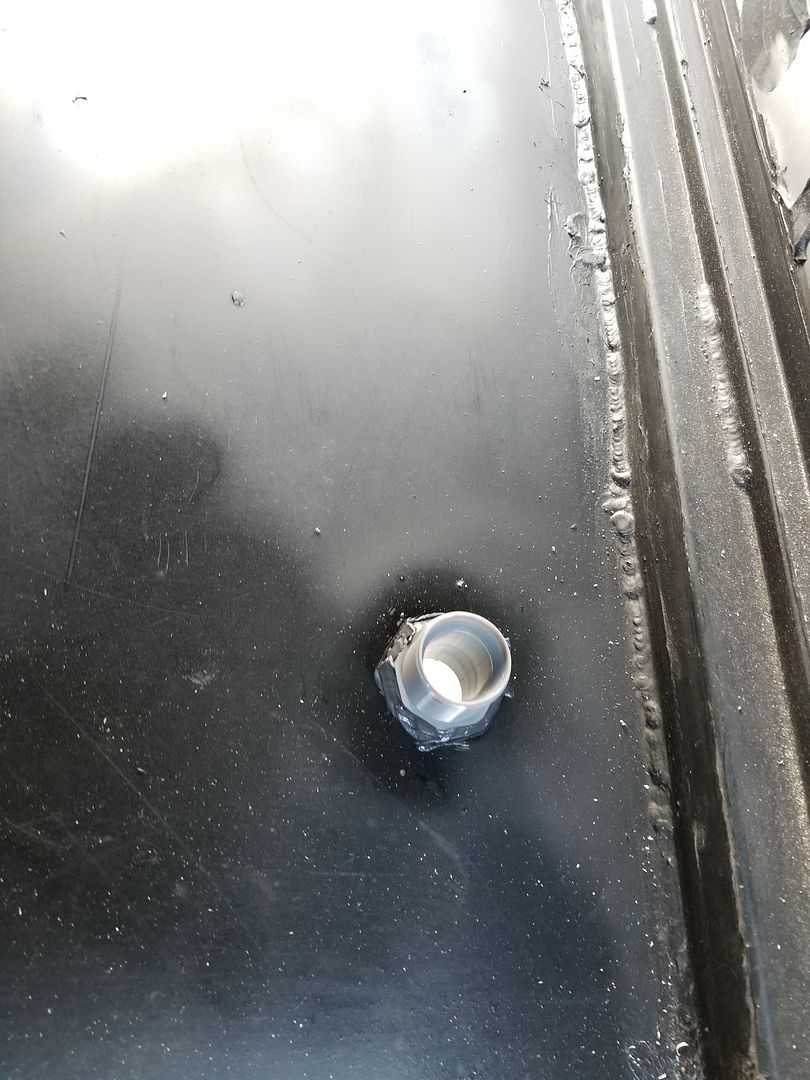
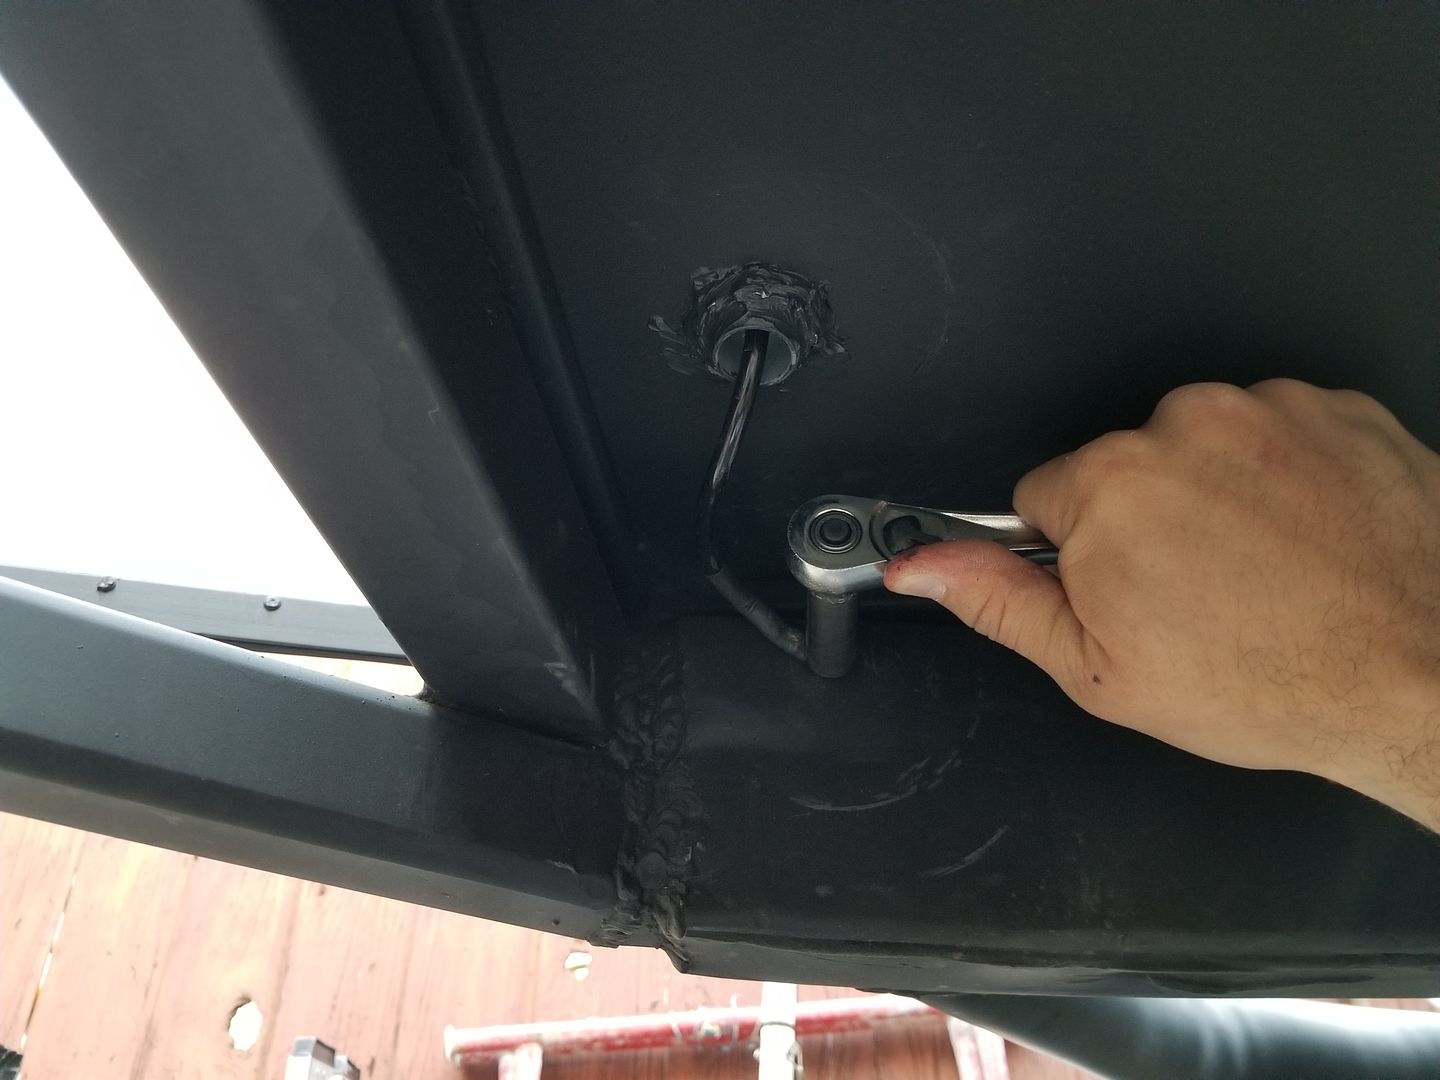
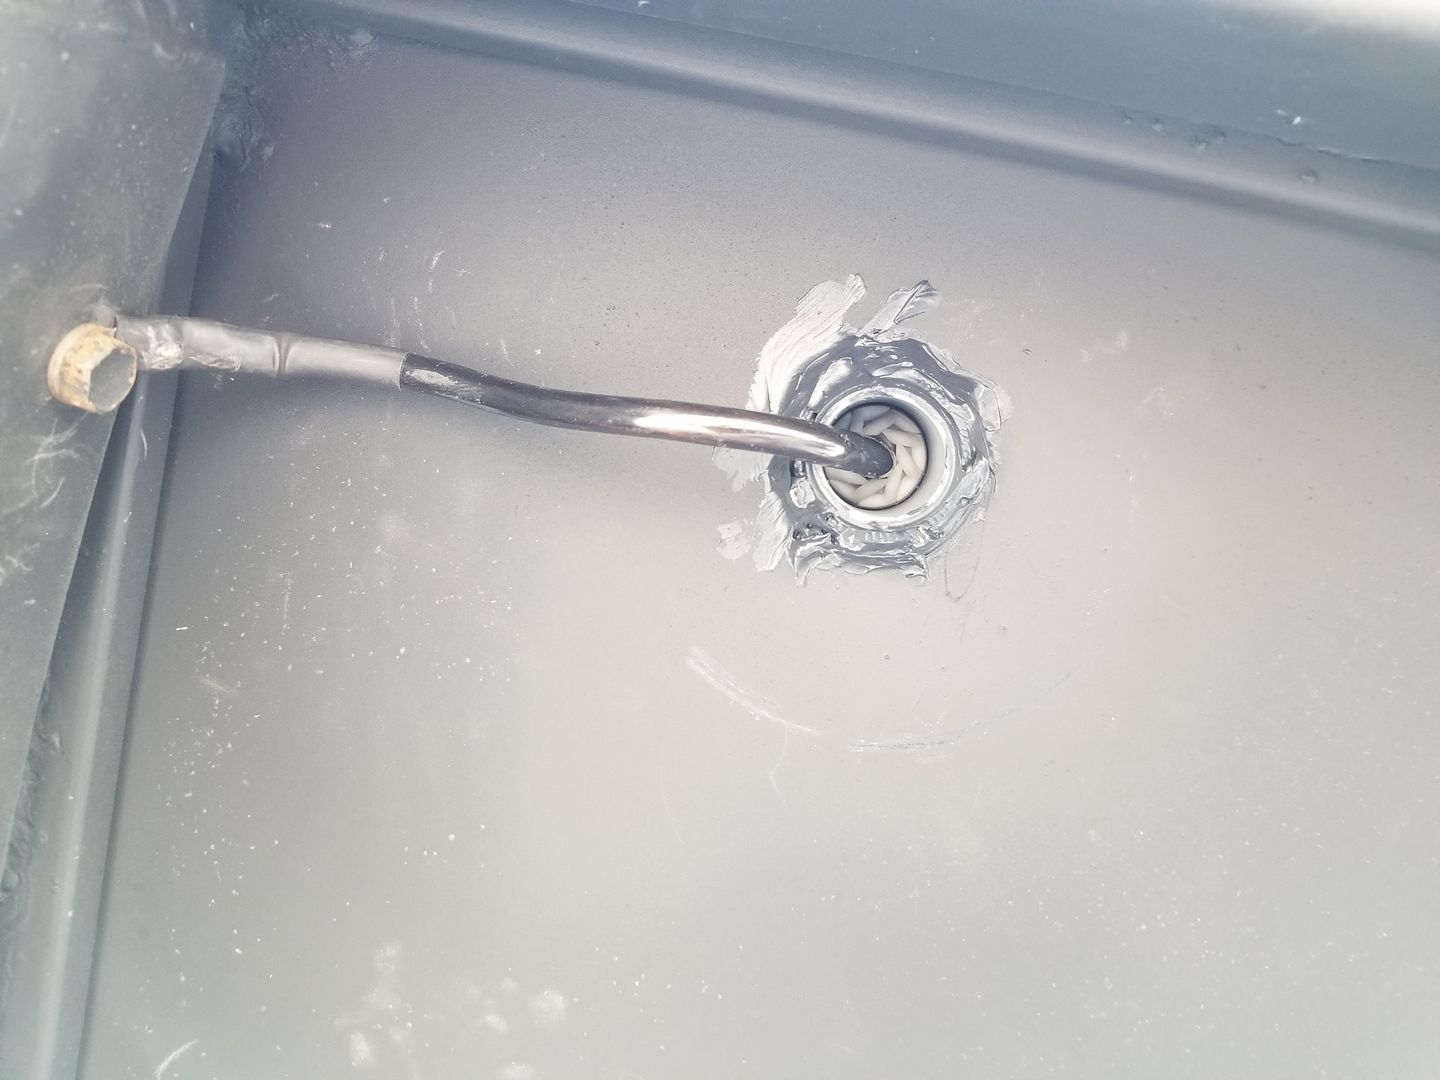
Then i went ahead and used a 3/4" strain relief cord connector on the opposite side that the 12v power inters the cab in. I went with a 3/4" so i could pass a decent size ground onto the actual chassis. And also because i plan to run more wire through that same port for rock lights (undercarriage lighting), and maybe run the rest of the exterior lighting through there too.
Once installed i silicone around to as more water proofing to the install on both the inside of the cab and onto the bottom.
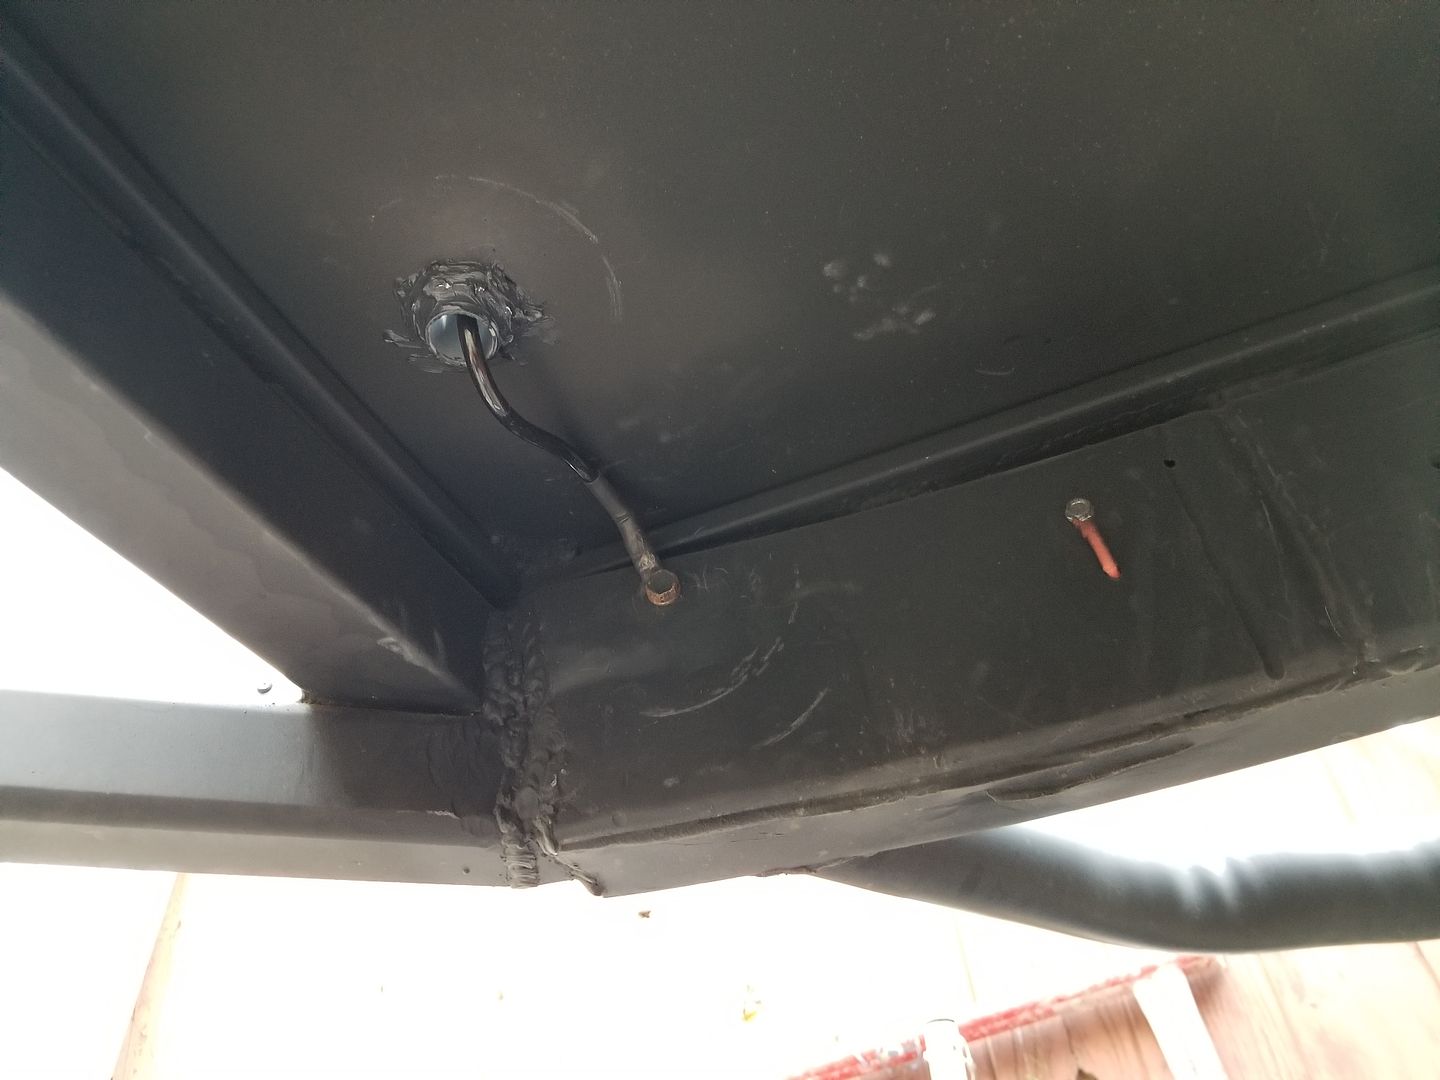
The good thing about choosing to use this 4Runner Chassis for the frame is that you have the stock bolt locations already tapped into the frame. Here is one of those spots conveniently located exactly where i needed it. This one is a 12mm bolt.
This is one thing that i really liked about these strain relief cord connectors. Here is how they dismantle. AThe piece after that grey plastic nut is a rubber piece that hugs the wires you pass through, The 3rd piece literally twists and tightens on to the cable and makes a water tight seal when it puts pressure on the rubber part. You can tighten or loosen the grip but twisting the grey plastic nut.
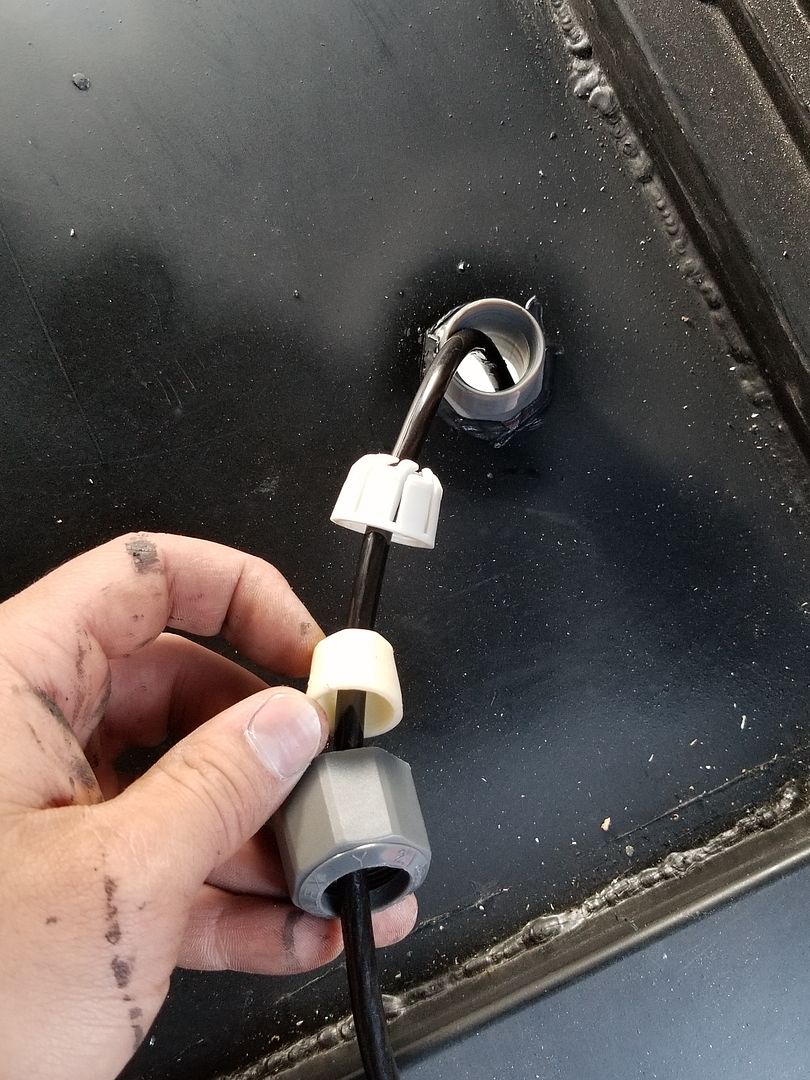
Here is a view of that connector once it is tightened on the ground cable. You can clearly see how it twists onto the cable to get a grip making it seal.
There it is. Ring terminal ready to install whenever i get the batteries mounted.
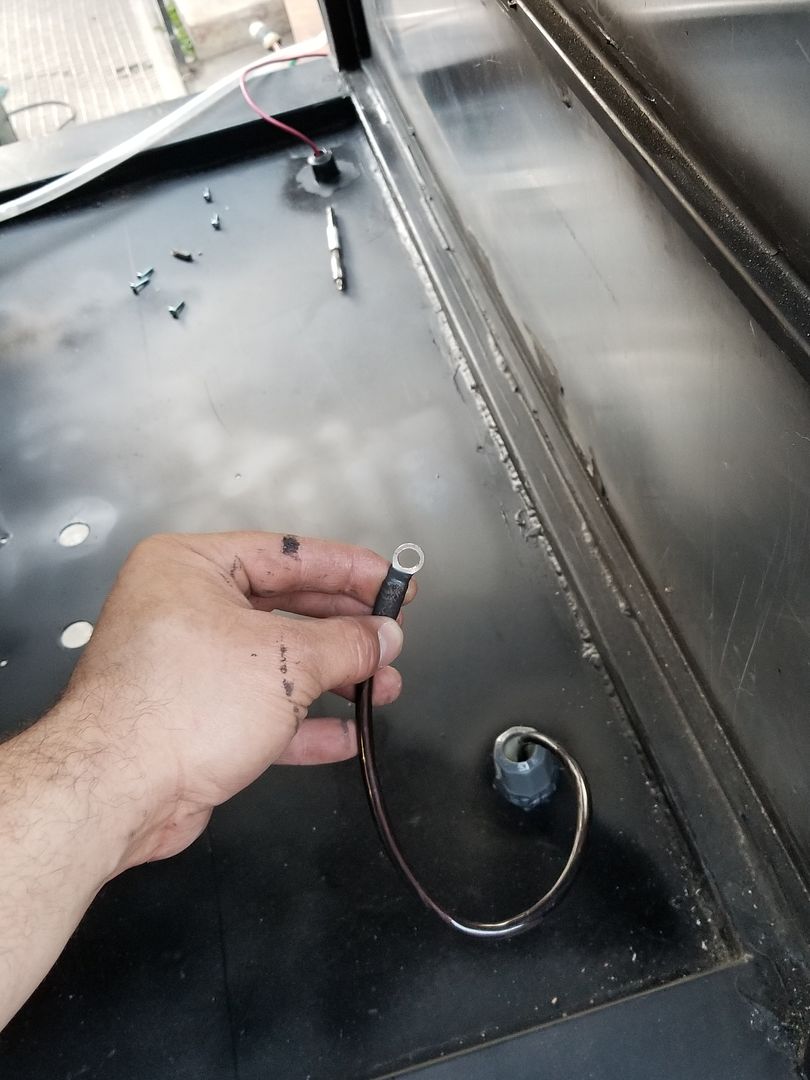
It'll look something like this.
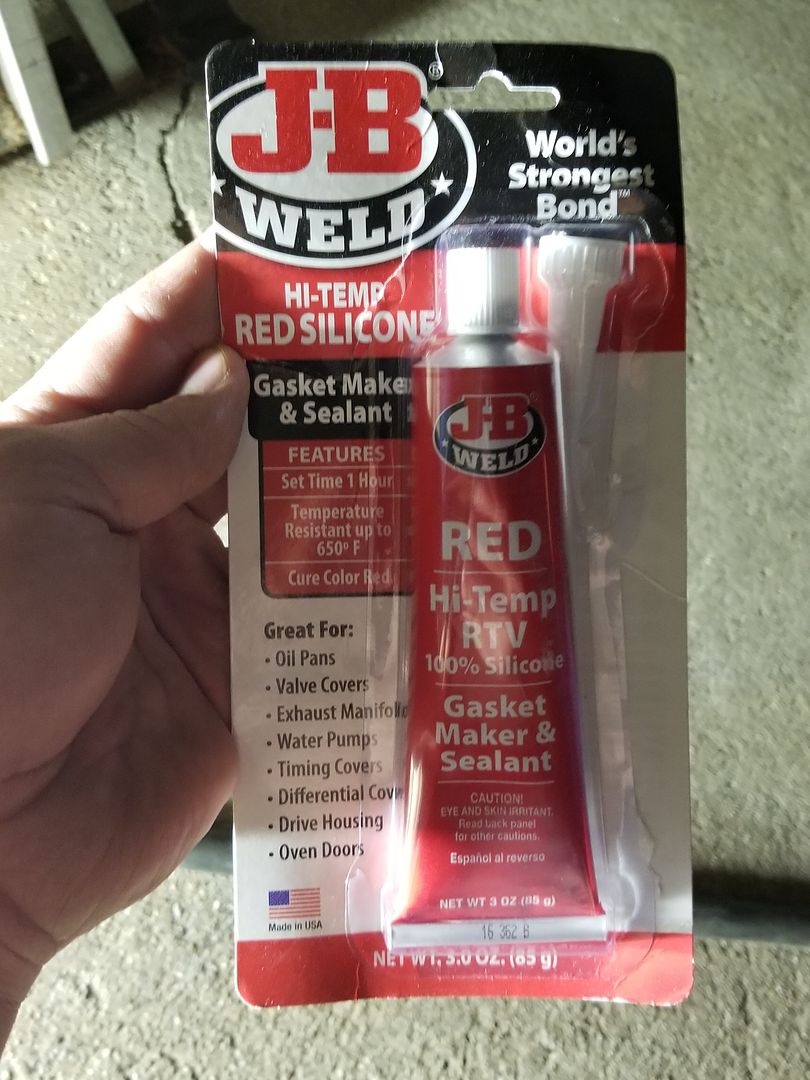
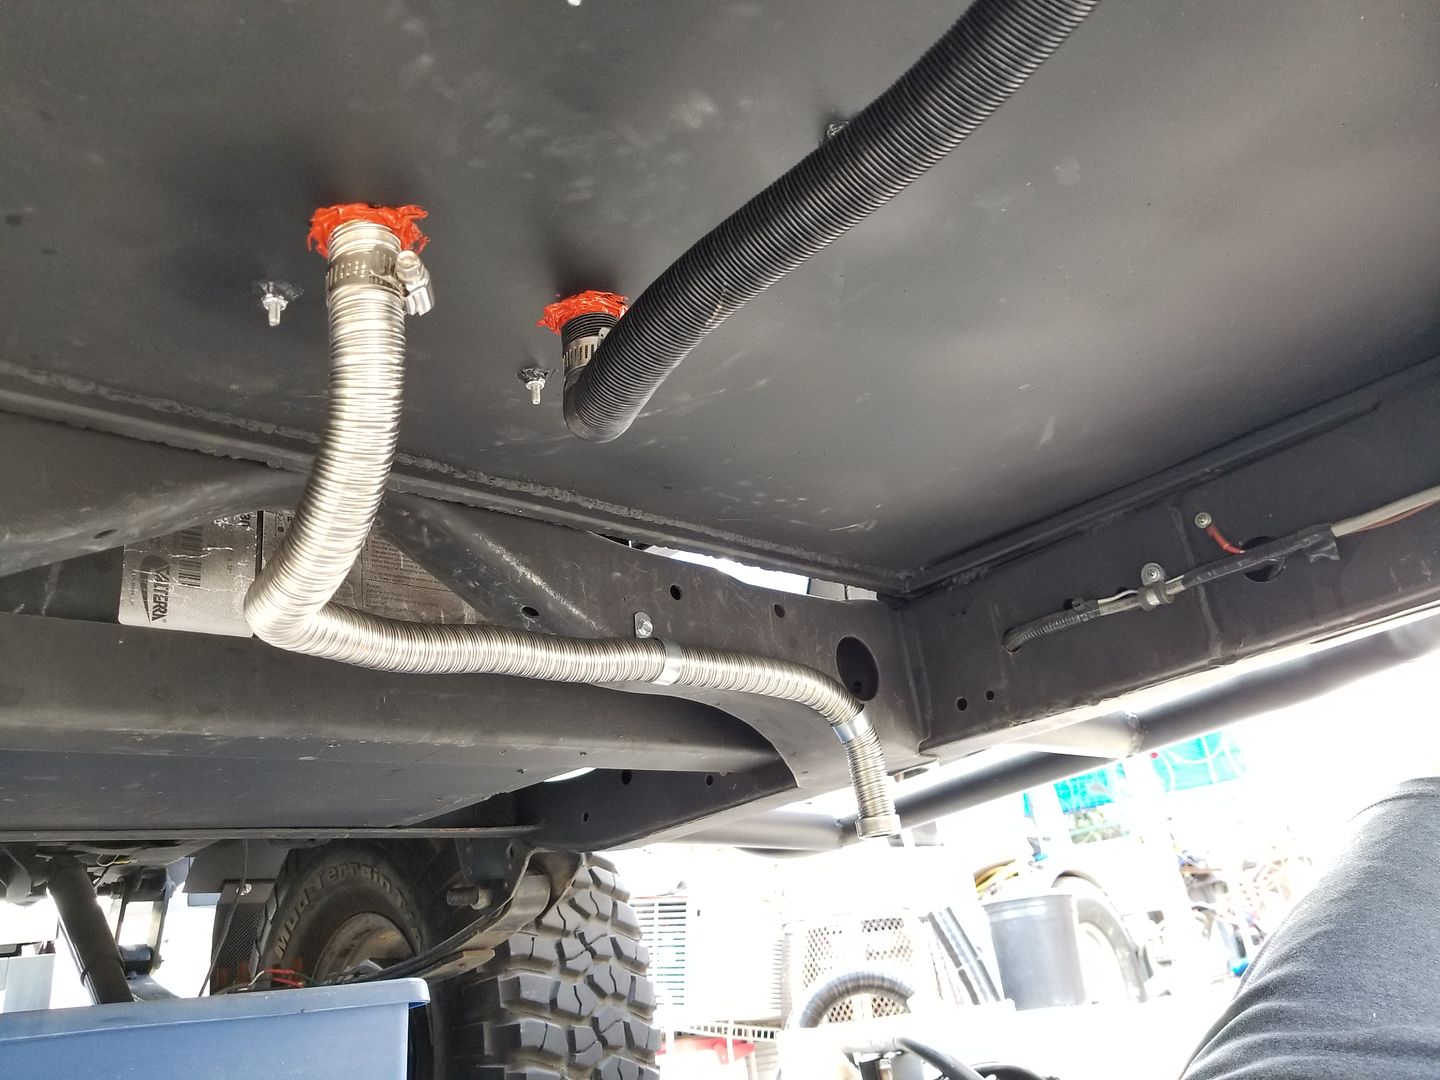
Next up i drilled the 4 holes to pass through the #8 machined screws on the floor. These will hold the heater in place. Also bought some High Temperature RTV sealant to place around the exhaust and air inlet hoses and also to waterproof from the outside. I also used regular silicone around the nylon washers.
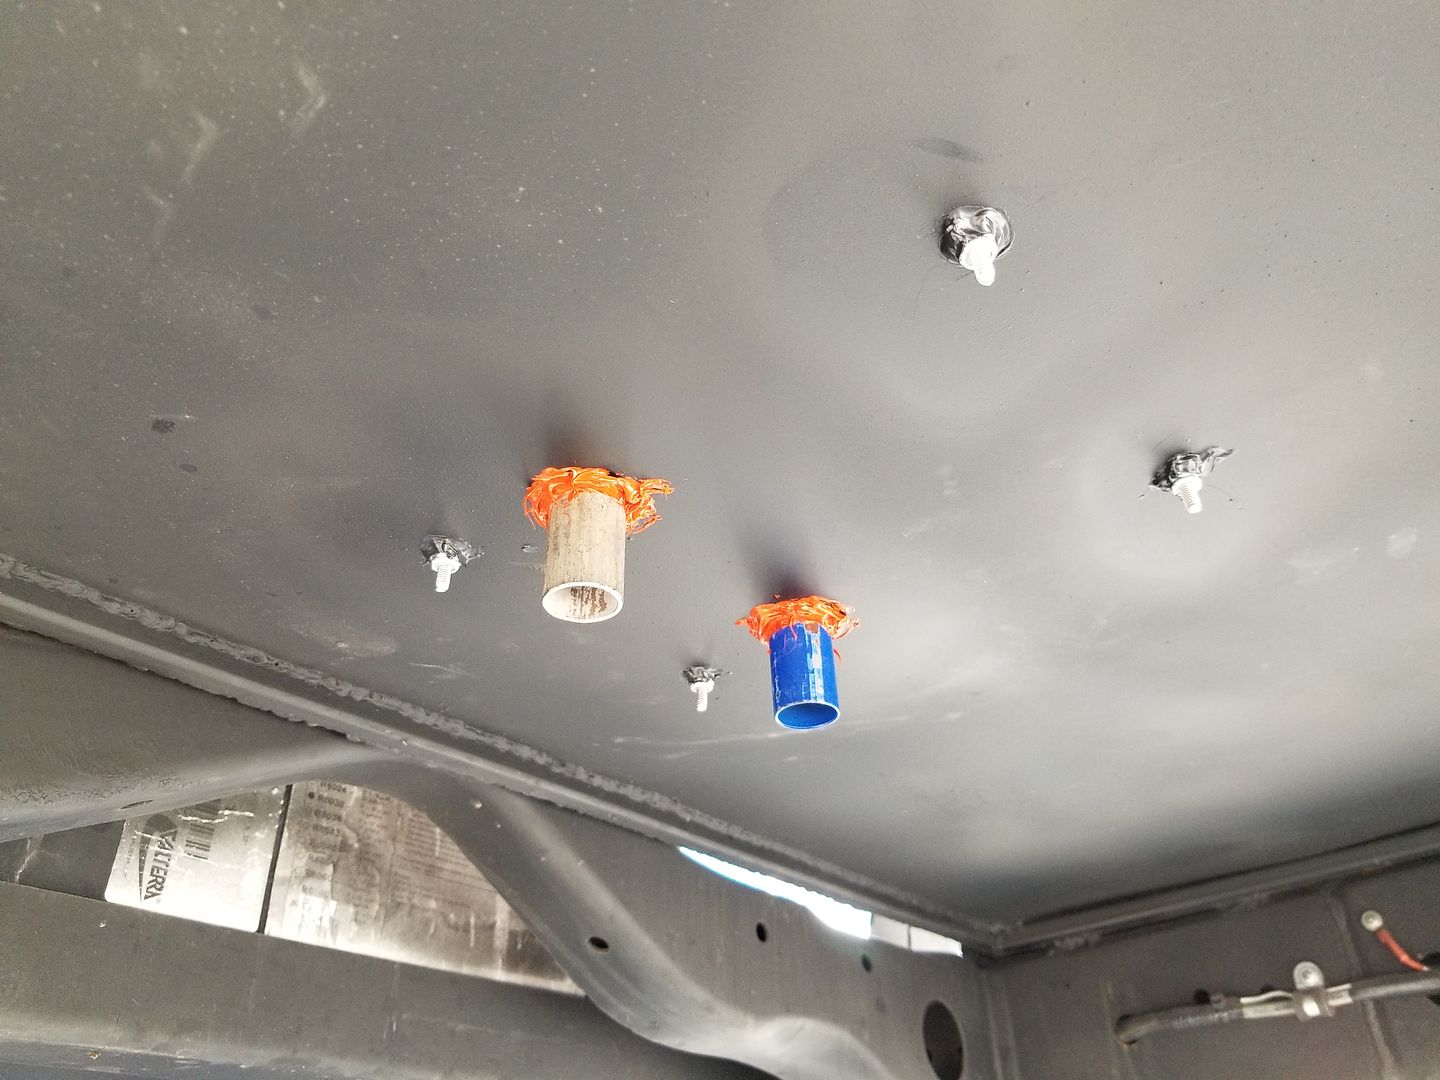
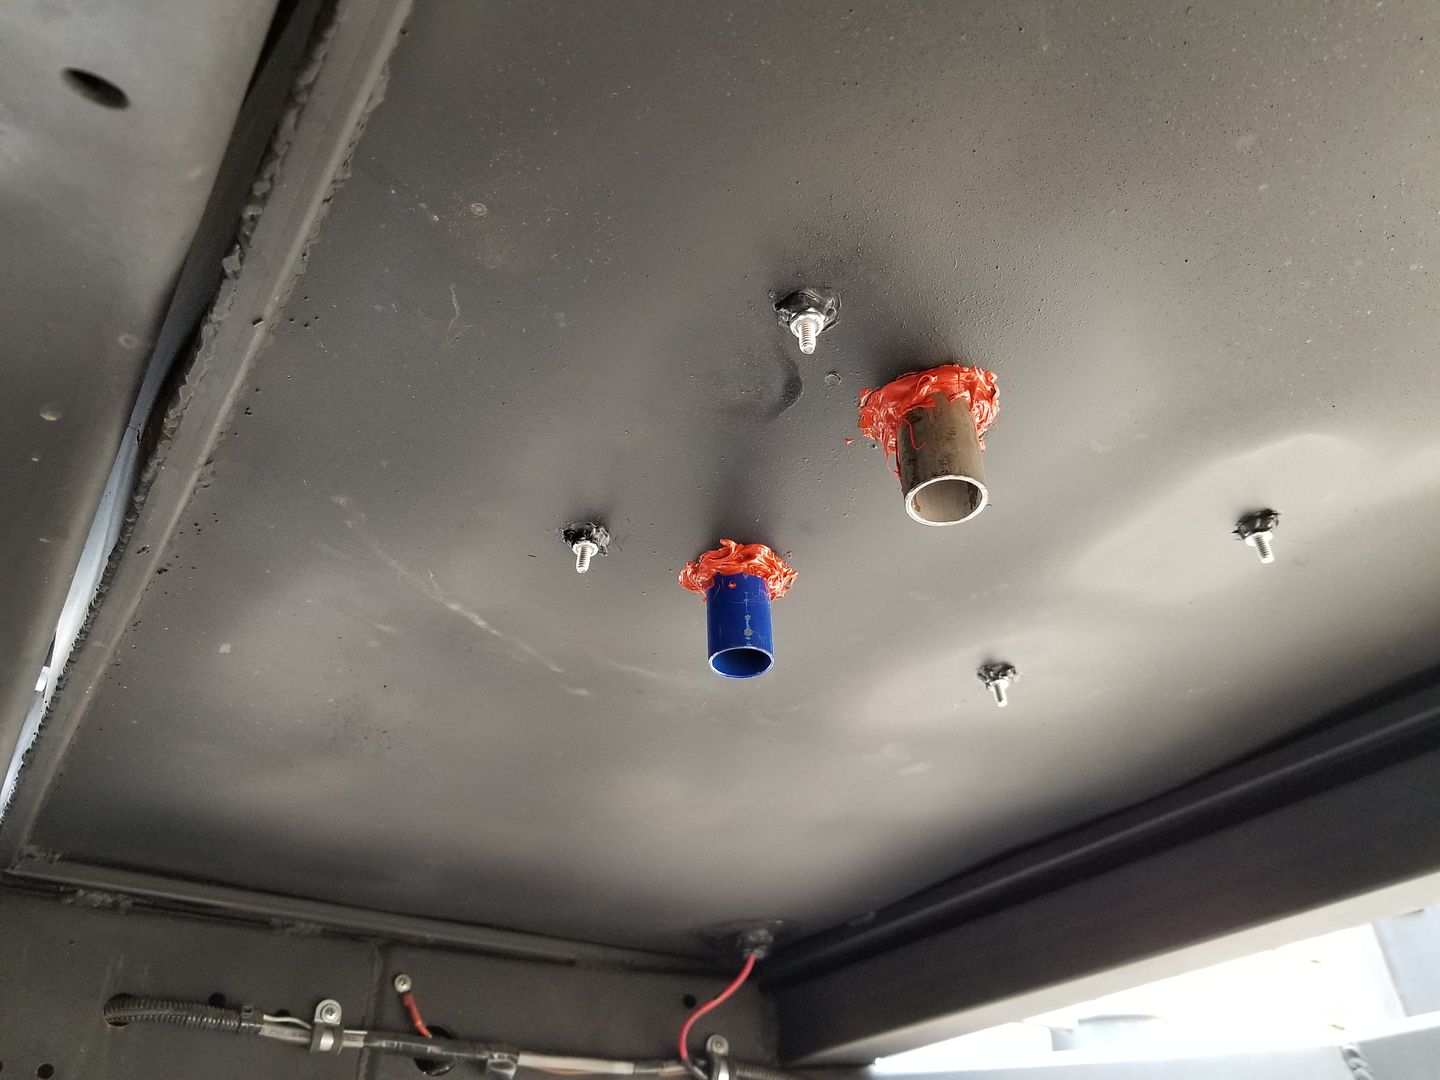
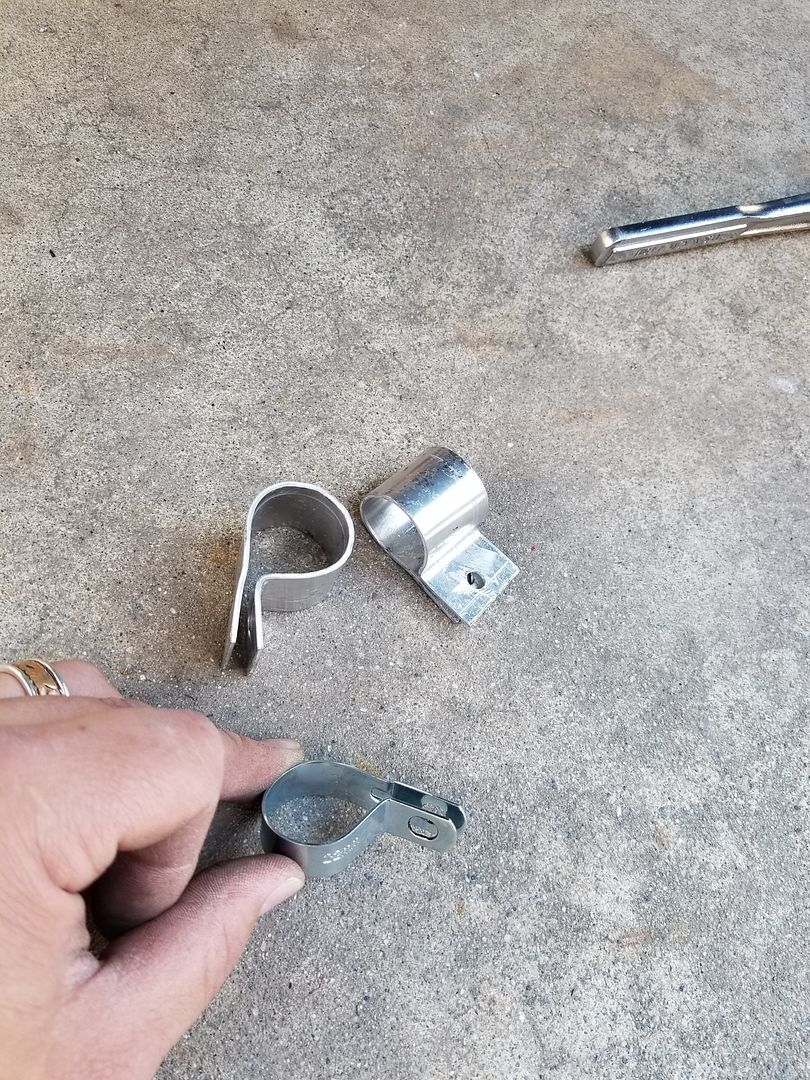
Once installed i would be able to put the exhaust and air inlet tubing and secure them in place. The kit only comes with 2 metal adel clamps. So rather then buy more at the hardware store i made some of my own using some aluminum scrap metal i had lying around. i actaully like mine better then the ones the kit came with. They are wider and i feel they hold the tube more secure.
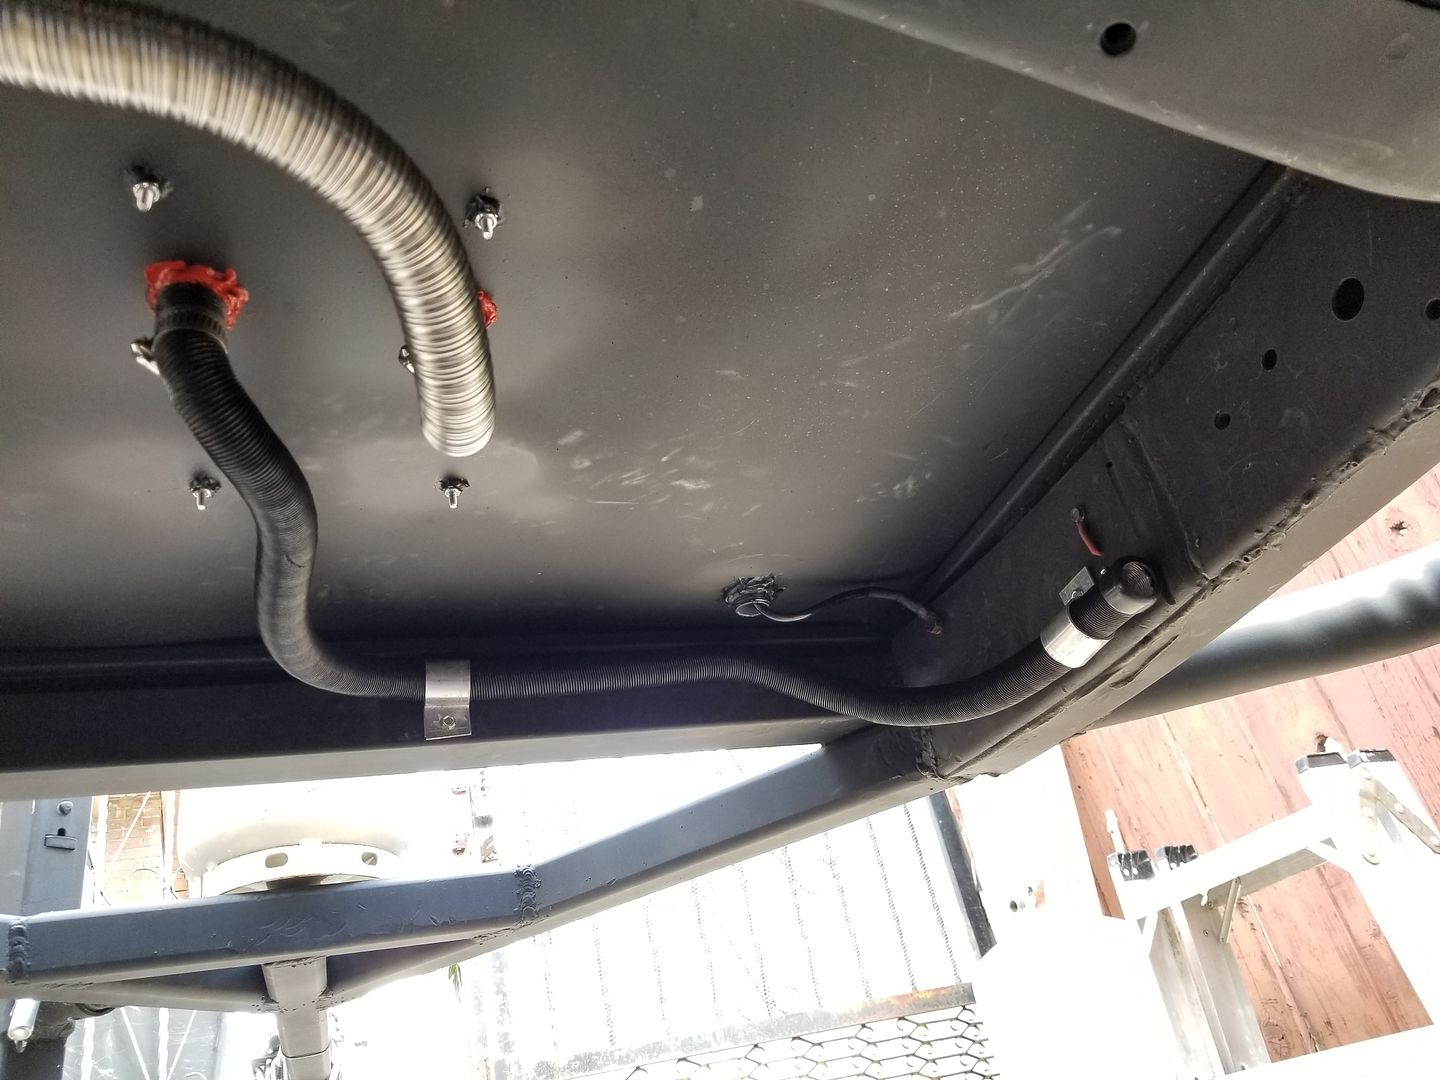
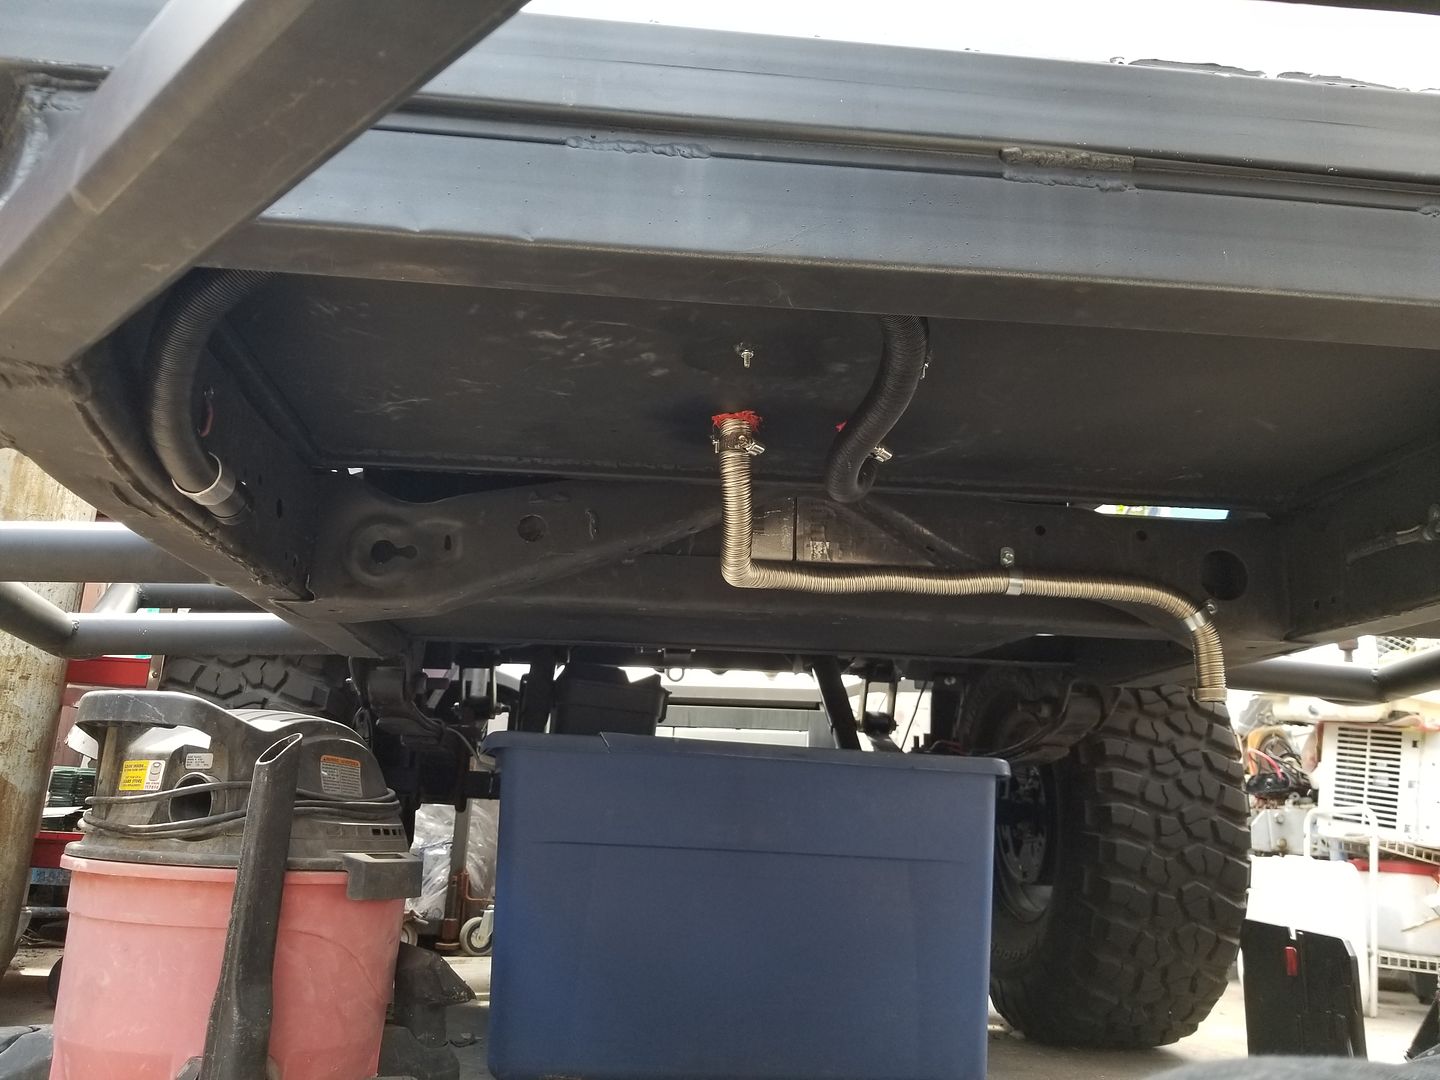
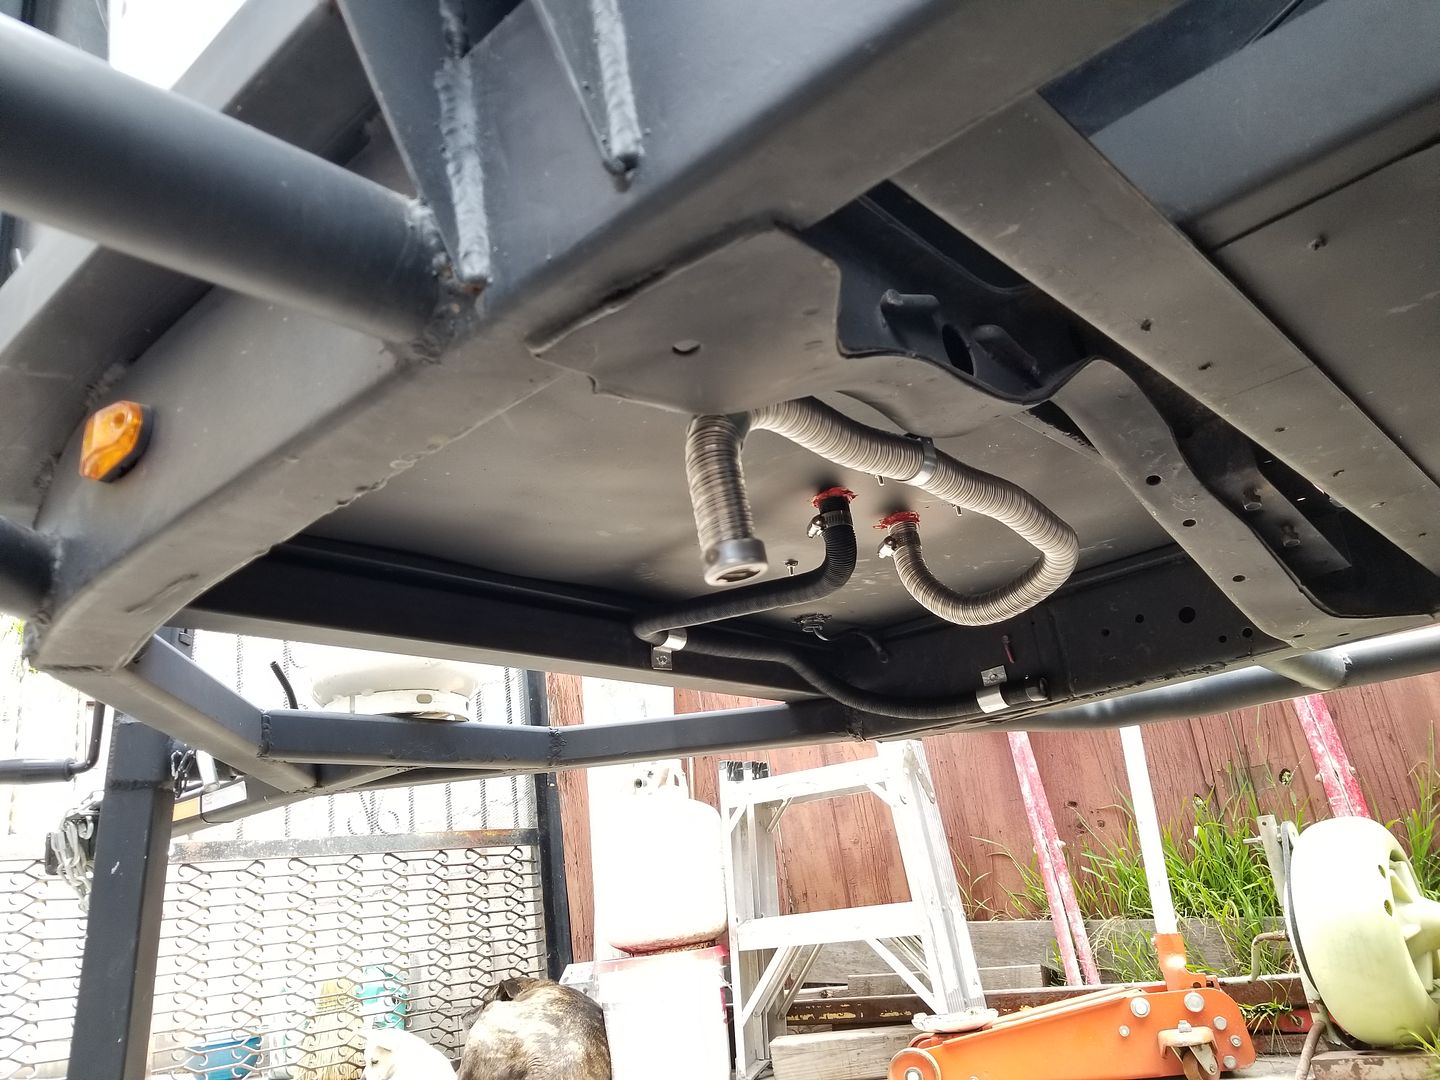
Tubing nicely routed. I ran the air inlet on the side that my CVT Tent annex is gonna be. And routed the exhaust on the opposite side. Just in case i have family sleeping in there. I dont want exhaust fumes getting into the tent. The stainless steel one is the exhaust. The black one is the air inlet.
All In all this install came out really clean. I'm very satisfied with how neat i did this.
Gotta start with some measurements using the left side because the right side wasn't completely square.

Drilled the holes completely through both the wood and the steel floor to make sure they mirror each other. Followed by making the cut out for the entire heater unit.


But cutting it this way i can remove the wood floor in case for some reason the front compartment springs up a leak. this way i can remove the future cabinet and the wood floor to clean it up.

Perfect fit


Both batteries will be mounted in this fashion to keep the weight even in the front.

Then i went ahead and used a 3/4" strain relief cord connector on the opposite side that the 12v power inters the cab in. I went with a 3/4" so i could pass a decent size ground onto the actual chassis. And also because i plan to run more wire through that same port for rock lights (undercarriage lighting), and maybe run the rest of the exterior lighting through there too.

Once installed i silicone around to as more water proofing to the install on both the inside of the cab and onto the bottom.

The good thing about choosing to use this 4Runner Chassis for the frame is that you have the stock bolt locations already tapped into the frame. Here is one of those spots conveniently located exactly where i needed it. This one is a 12mm bolt.


This is one thing that i really liked about these strain relief cord connectors. Here is how they dismantle. AThe piece after that grey plastic nut is a rubber piece that hugs the wires you pass through, The 3rd piece literally twists and tightens on to the cable and makes a water tight seal when it puts pressure on the rubber part. You can tighten or loosen the grip but twisting the grey plastic nut.

Here is a view of that connector once it is tightened on the ground cable. You can clearly see how it twists onto the cable to get a grip making it seal.

There it is. Ring terminal ready to install whenever i get the batteries mounted.

It'll look something like this.

Next up i drilled the 4 holes to pass through the #8 machined screws on the floor. These will hold the heater in place. Also bought some High Temperature RTV sealant to place around the exhaust and air inlet hoses and also to waterproof from the outside. I also used regular silicone around the nylon washers.


Once installed i would be able to put the exhaust and air inlet tubing and secure them in place. The kit only comes with 2 metal adel clamps. So rather then buy more at the hardware store i made some of my own using some aluminum scrap metal i had lying around. i actaully like mine better then the ones the kit came with. They are wider and i feel they hold the tube more secure.

Tubing nicely routed. I ran the air inlet on the side that my CVT Tent annex is gonna be. And routed the exhaust on the opposite side. Just in case i have family sleeping in there. I dont want exhaust fumes getting into the tent. The stainless steel one is the exhaust. The black one is the air inlet.


All In all this install came out really clean. I'm very satisfied with how neat i did this.
Mar 25, 2018 | 11:02 PM
#157
Thread Starter
Registered User
Joined: Apr 2012
Posts: 2,817
Likes: 2
From: Los Angeles CA
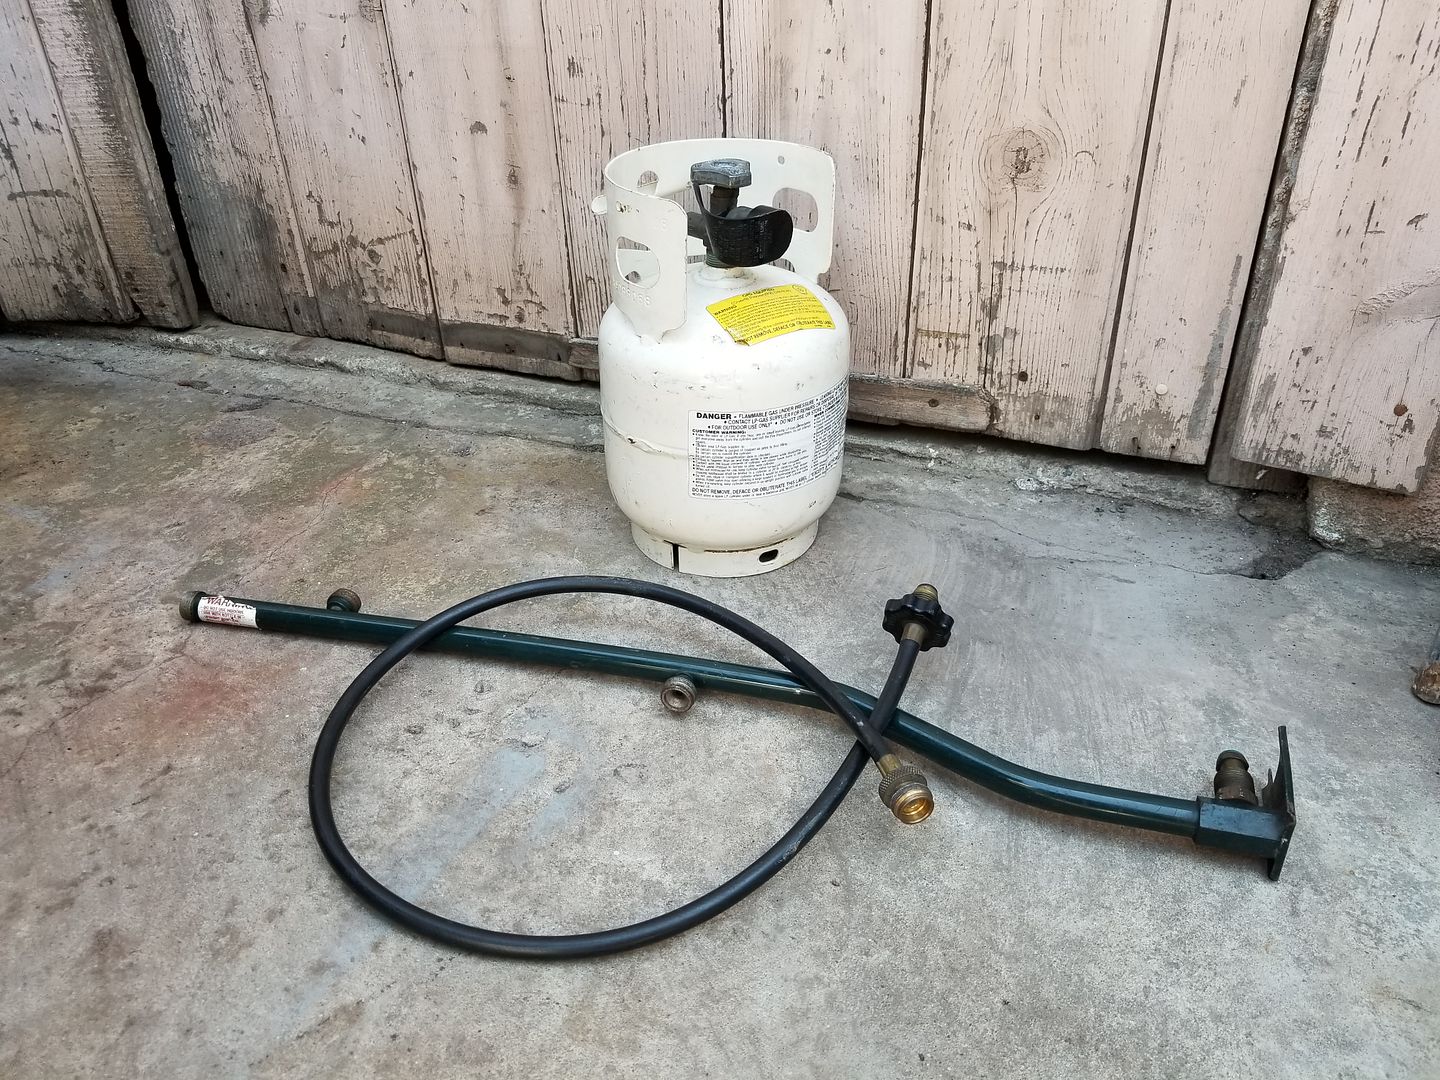
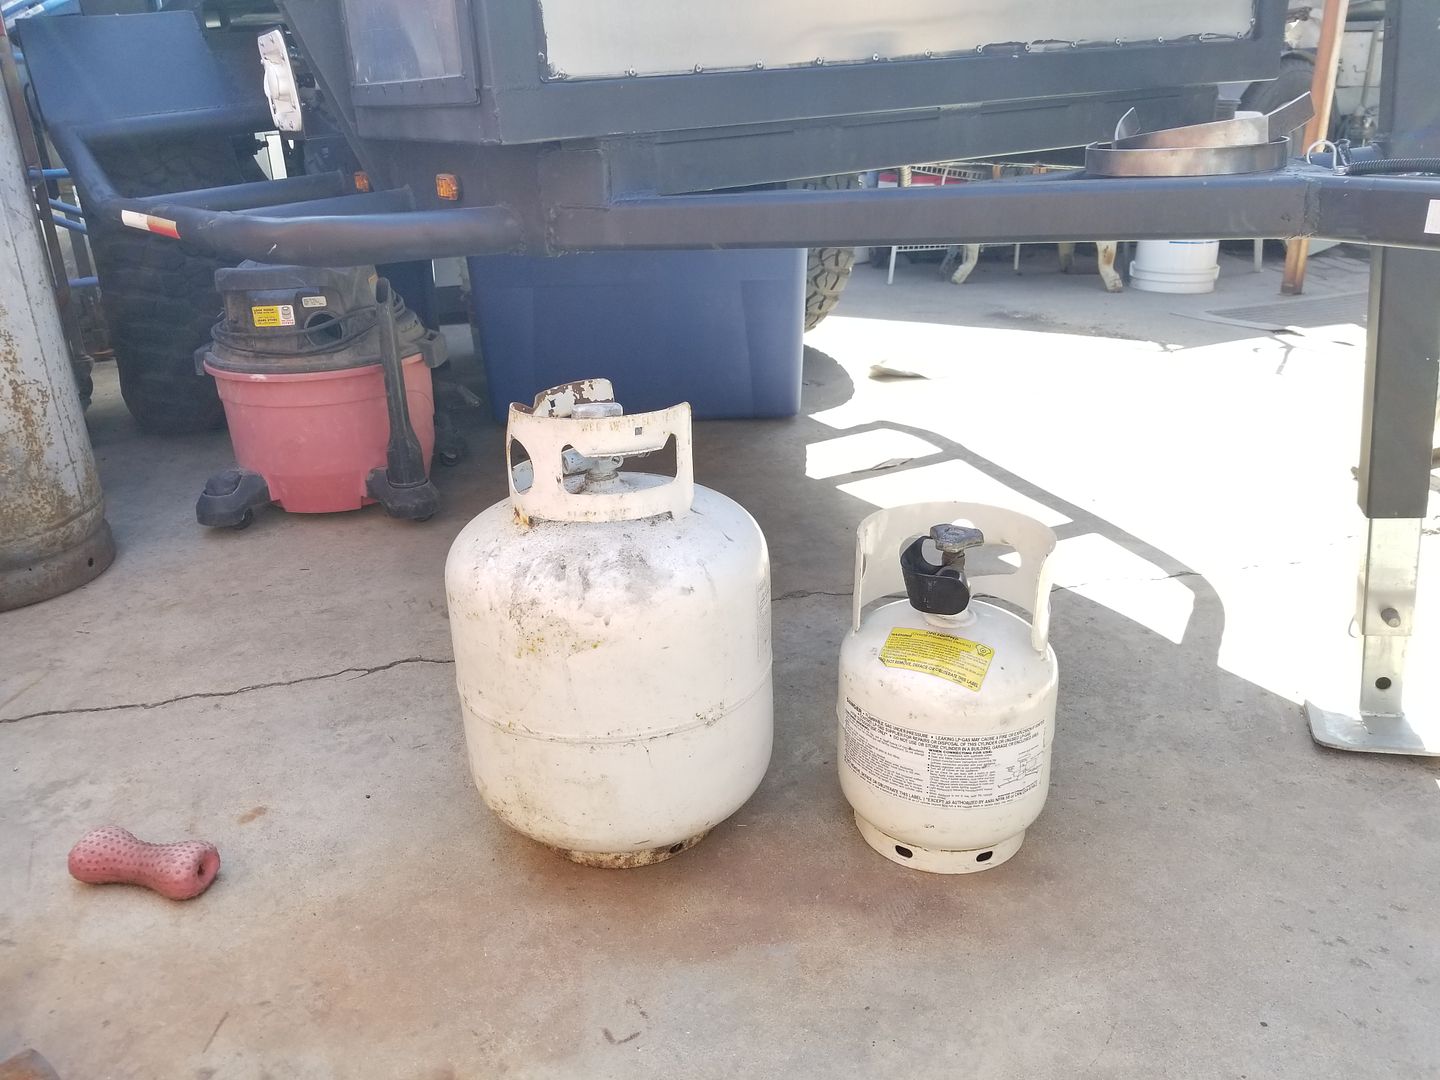
I finally got my hands on a 5lb propane tank. This old dude was selling his tank, coleman tree, and an adaptor for a grill to use a propane tank instead of the small disposables. All for 55 bucks! And the tank was about half full. Not a bad deal for $55. It all works too! I've really been wanting to get a tree like this so i could add my propane coleman lantern on top. And since i plan to run my Propex heater and my heated shower off this tank as well having 3 ports on this tree will work out great, i wish it had 4 so i could run my grill off of it too. but oh well. Maybe I'll either buy a splitter or just use a separate 5lb or continue to use disposable tanks for the grill.
Also today i got around to doing 2 things to the trailer. Nothing major but any work is better then no work done.
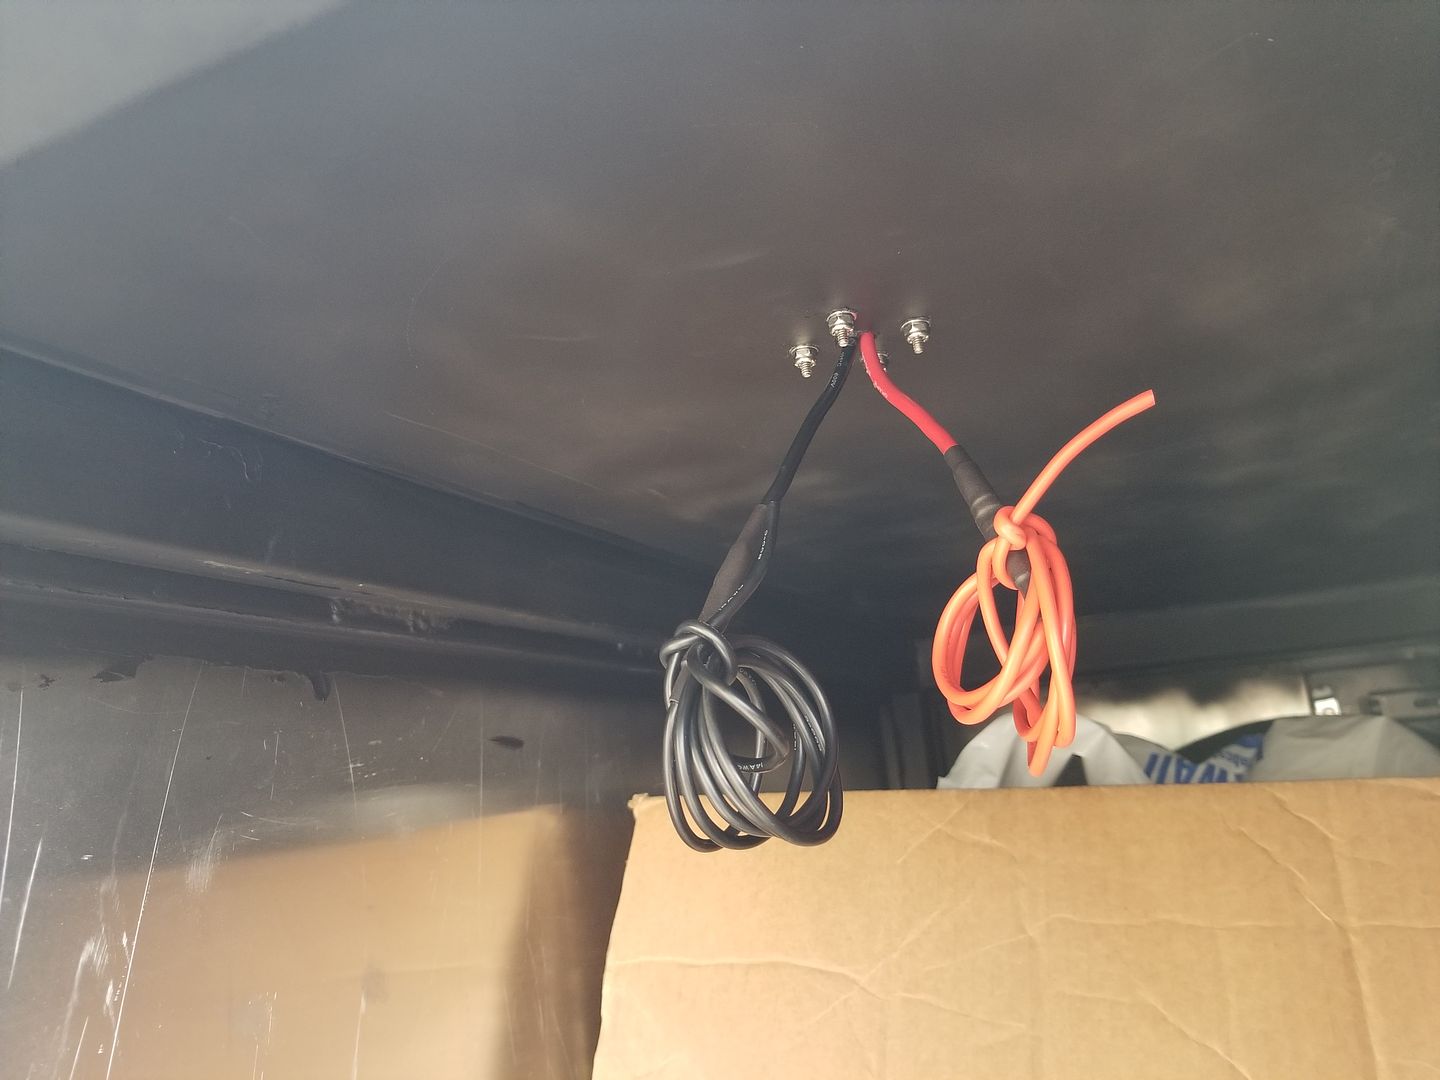
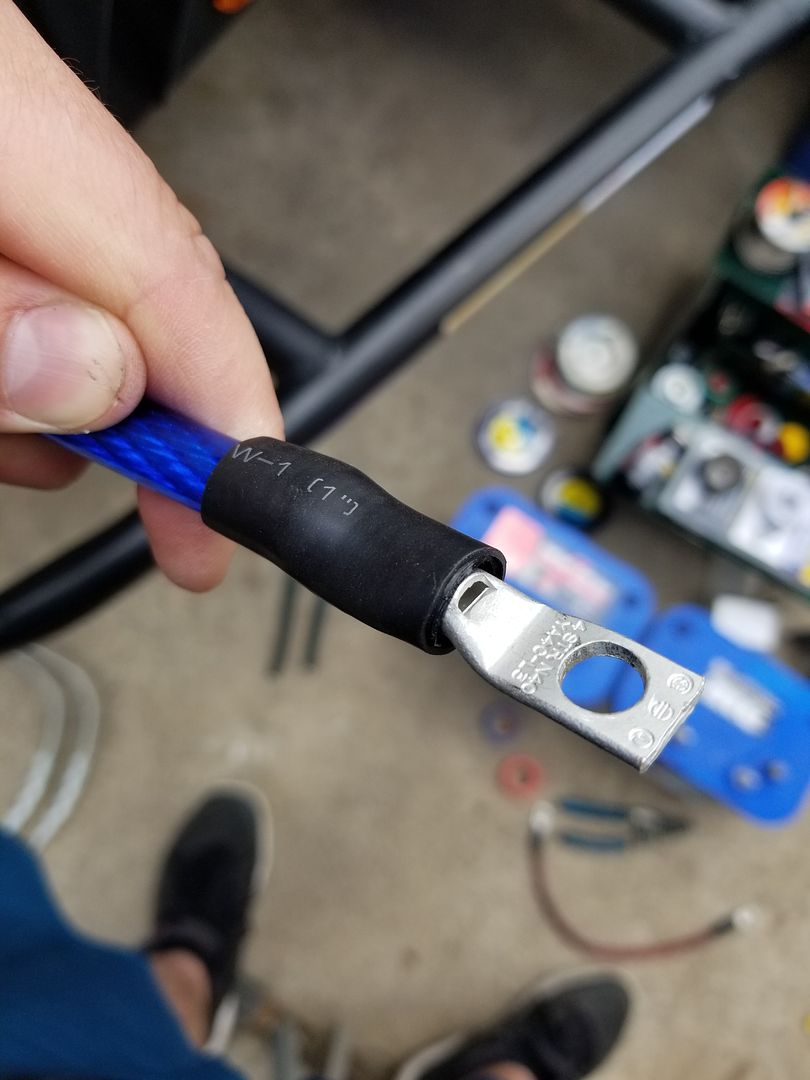
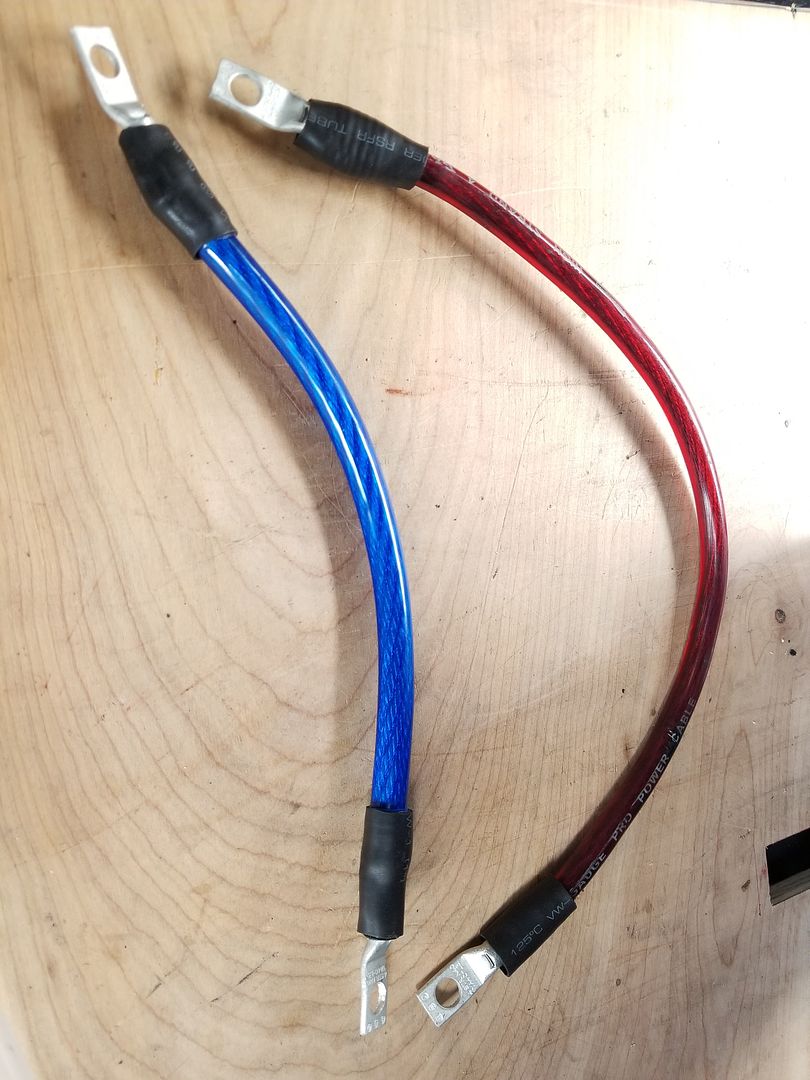
First I made the two (+) and (-) wires with ring terminals to run my 2 batteries parallel.
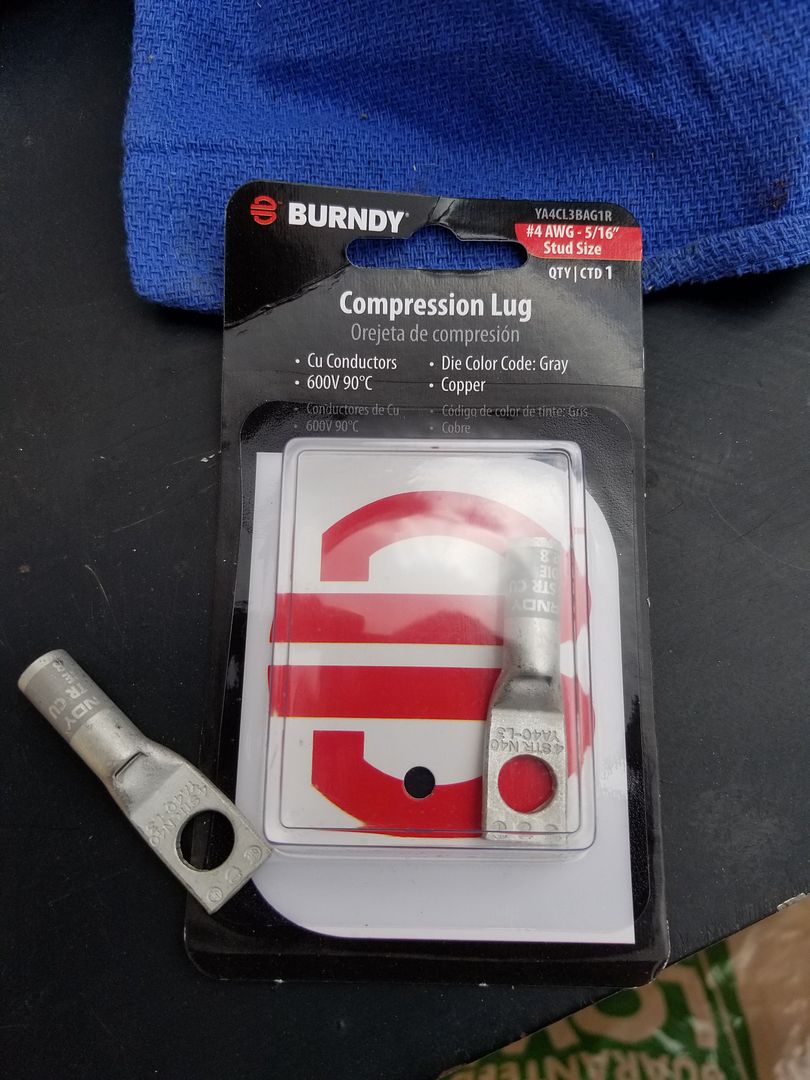
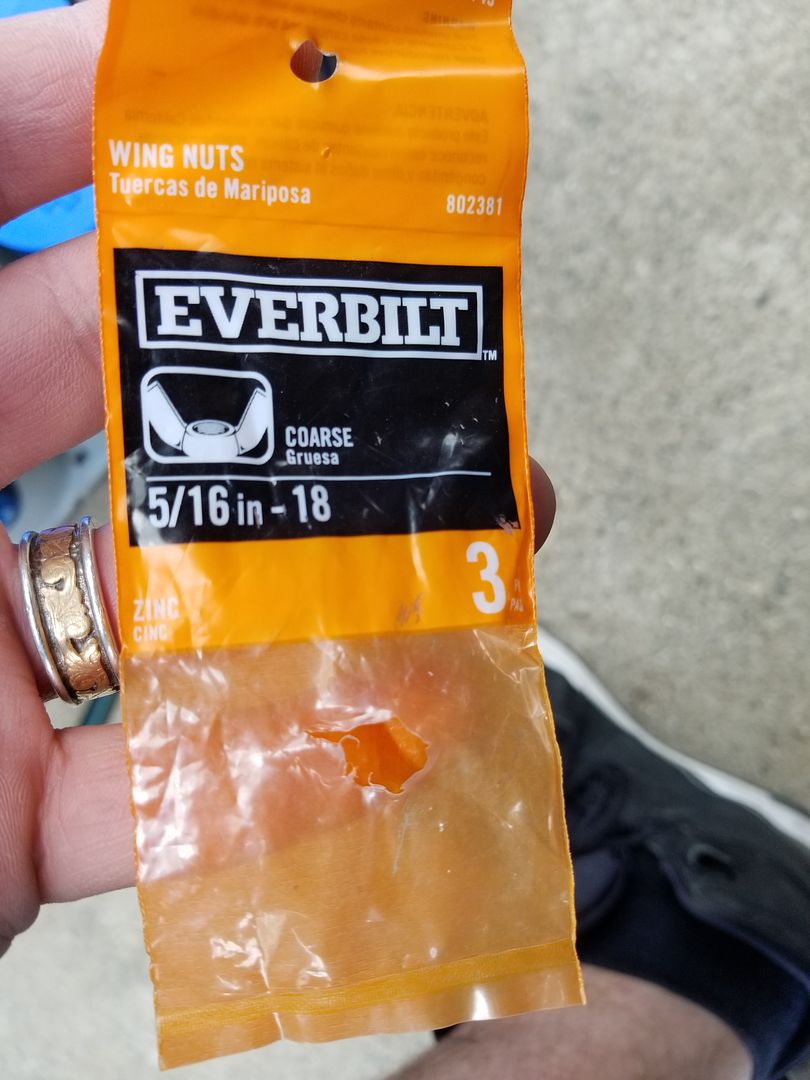
and incase youre wondering... This is the thread of those wing nuts that i used to secure the wire to the battery posts
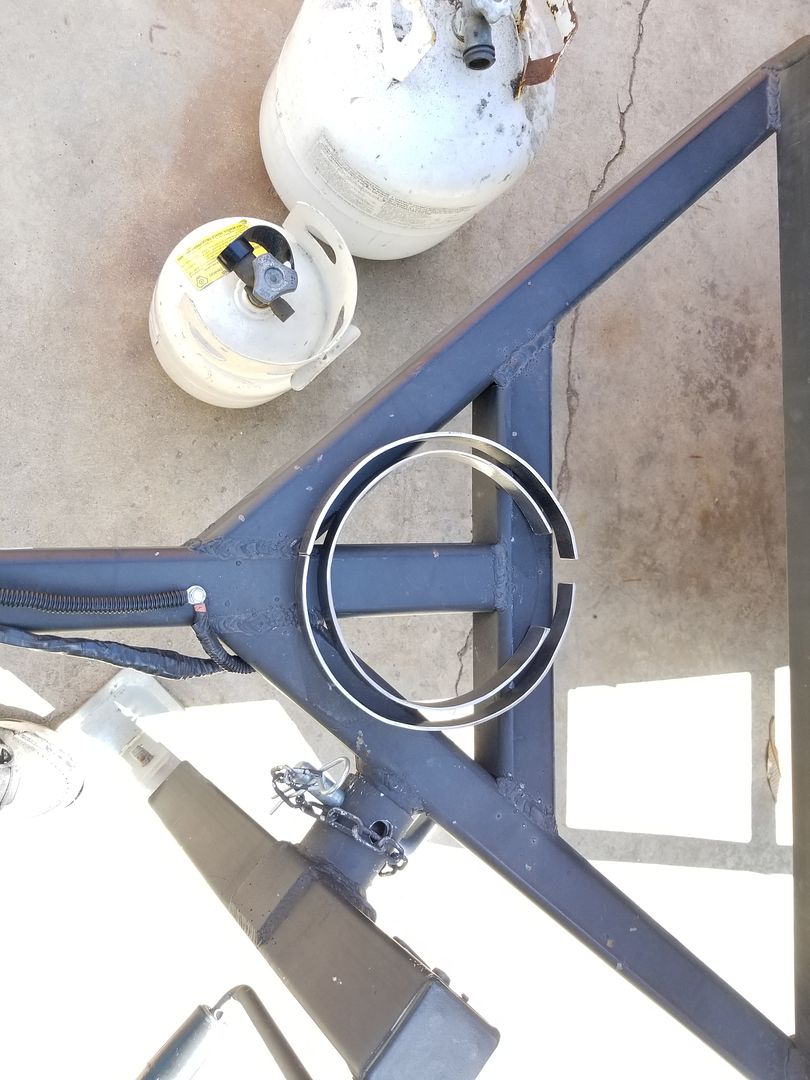
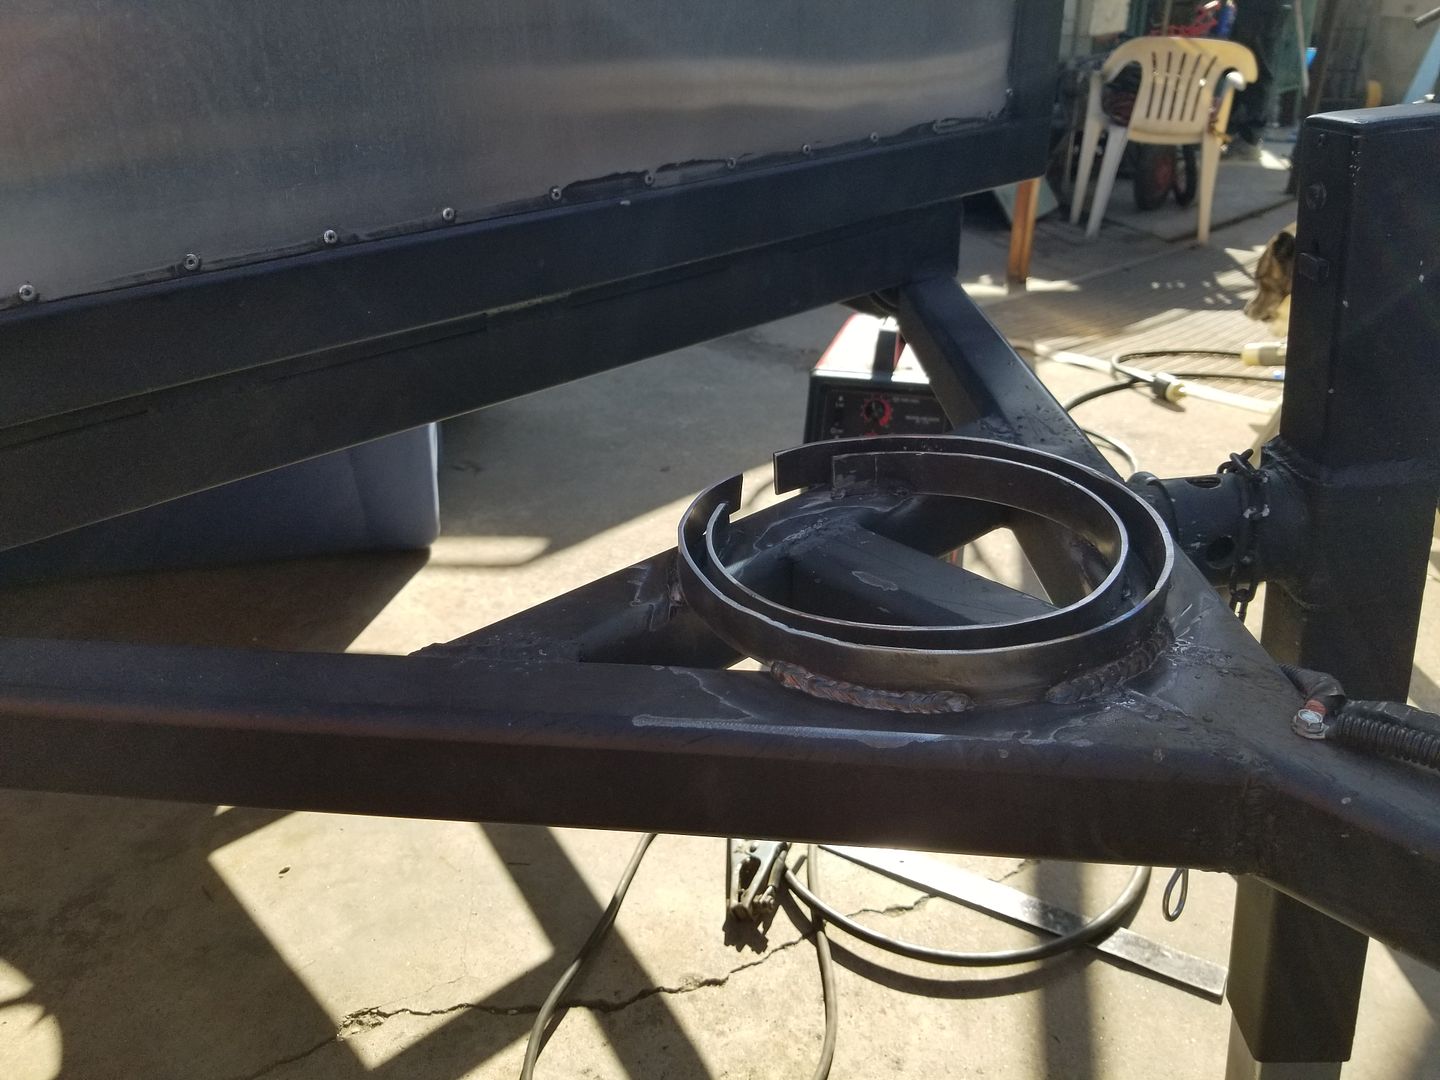
And i made some brackets to hold my 5lb and 20lb tanks on the tongue of my trailer. I can always use my small tank for a weekend trip. And if i decide i want to go on a week long trip or longer well i have the option of using a 20lb tank as well. Now i just need to figure out a way to secure the tanks in a locked position.
getting the position right
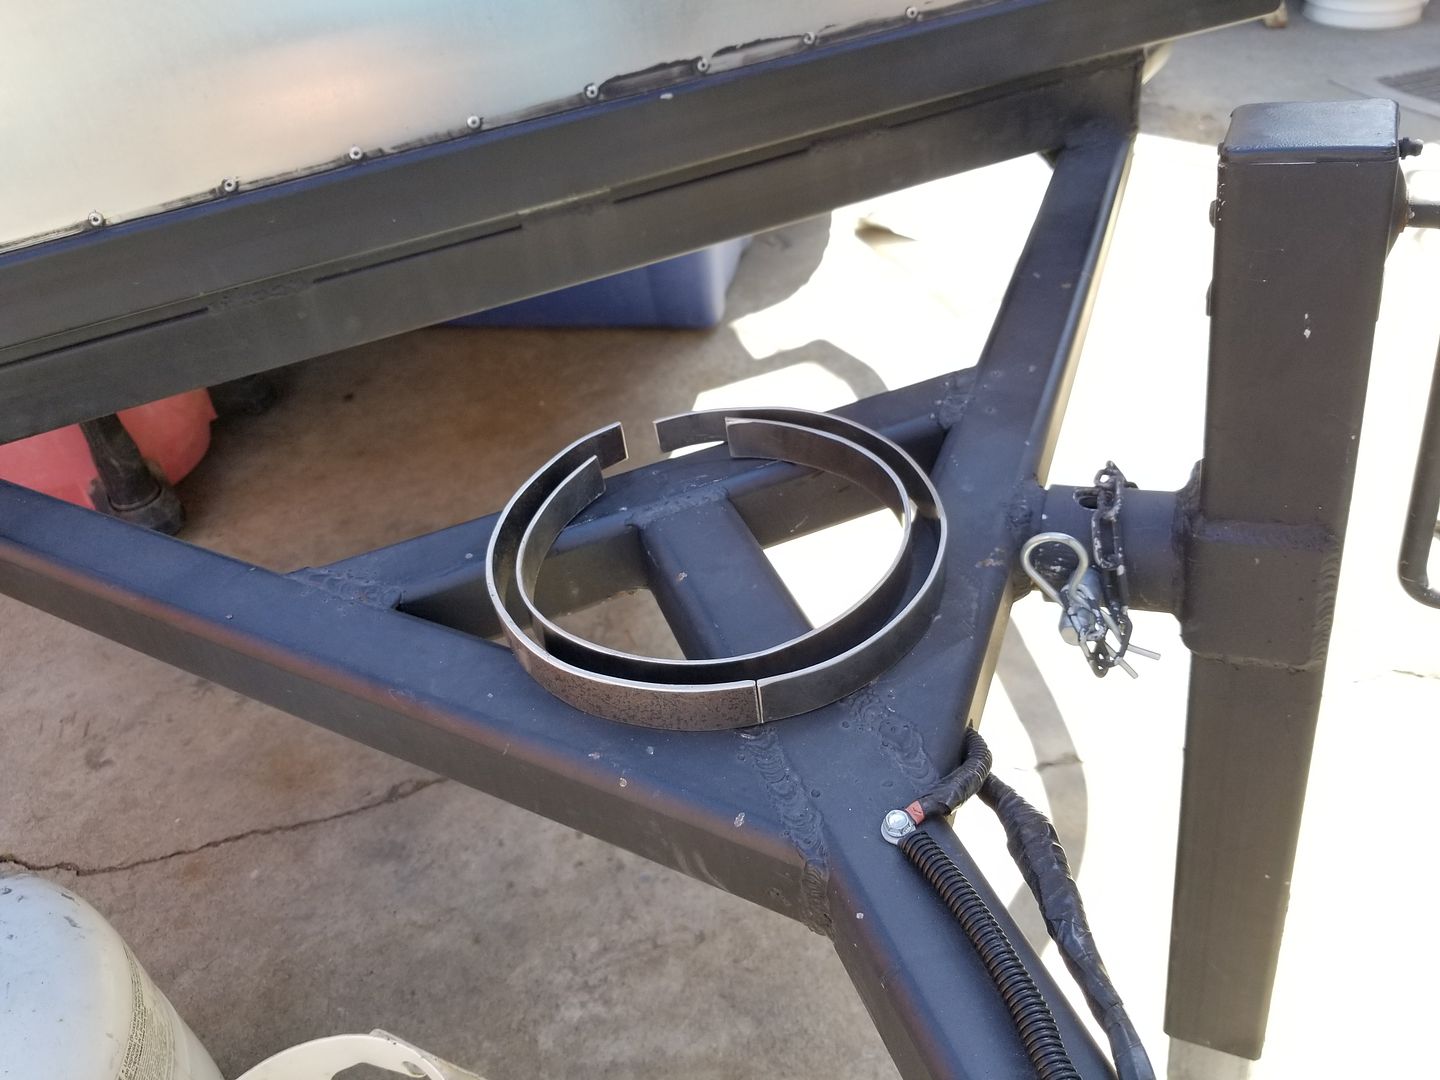
All welded into place
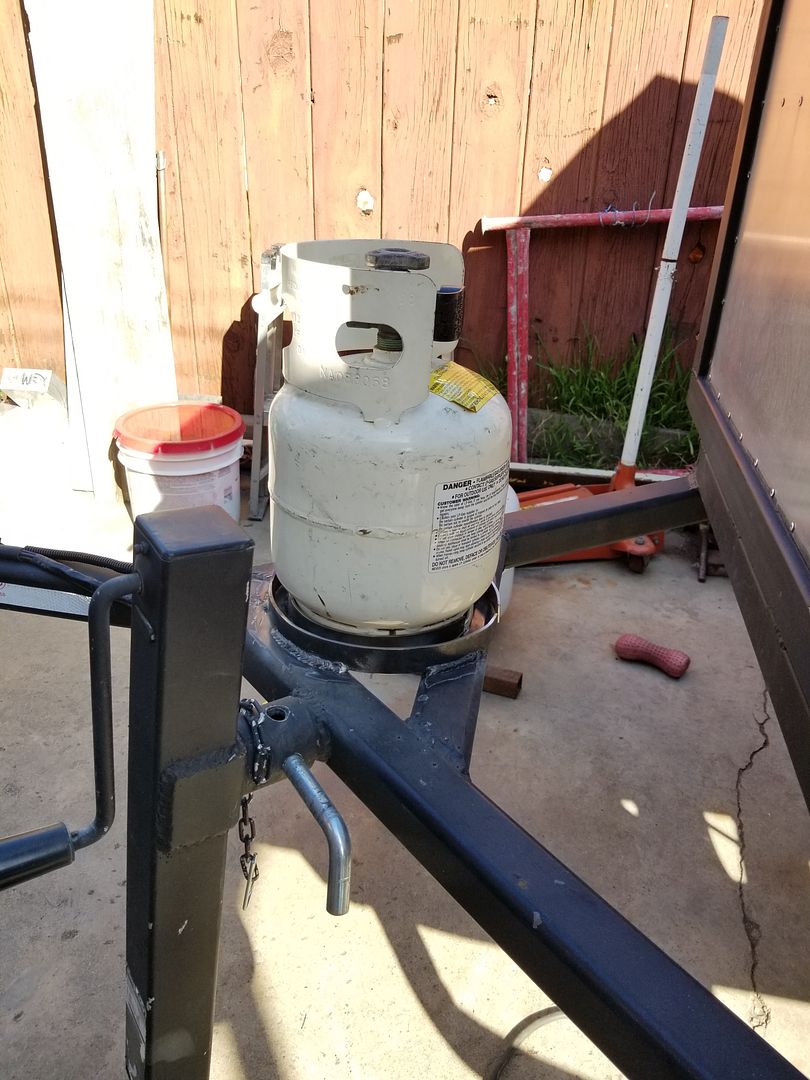
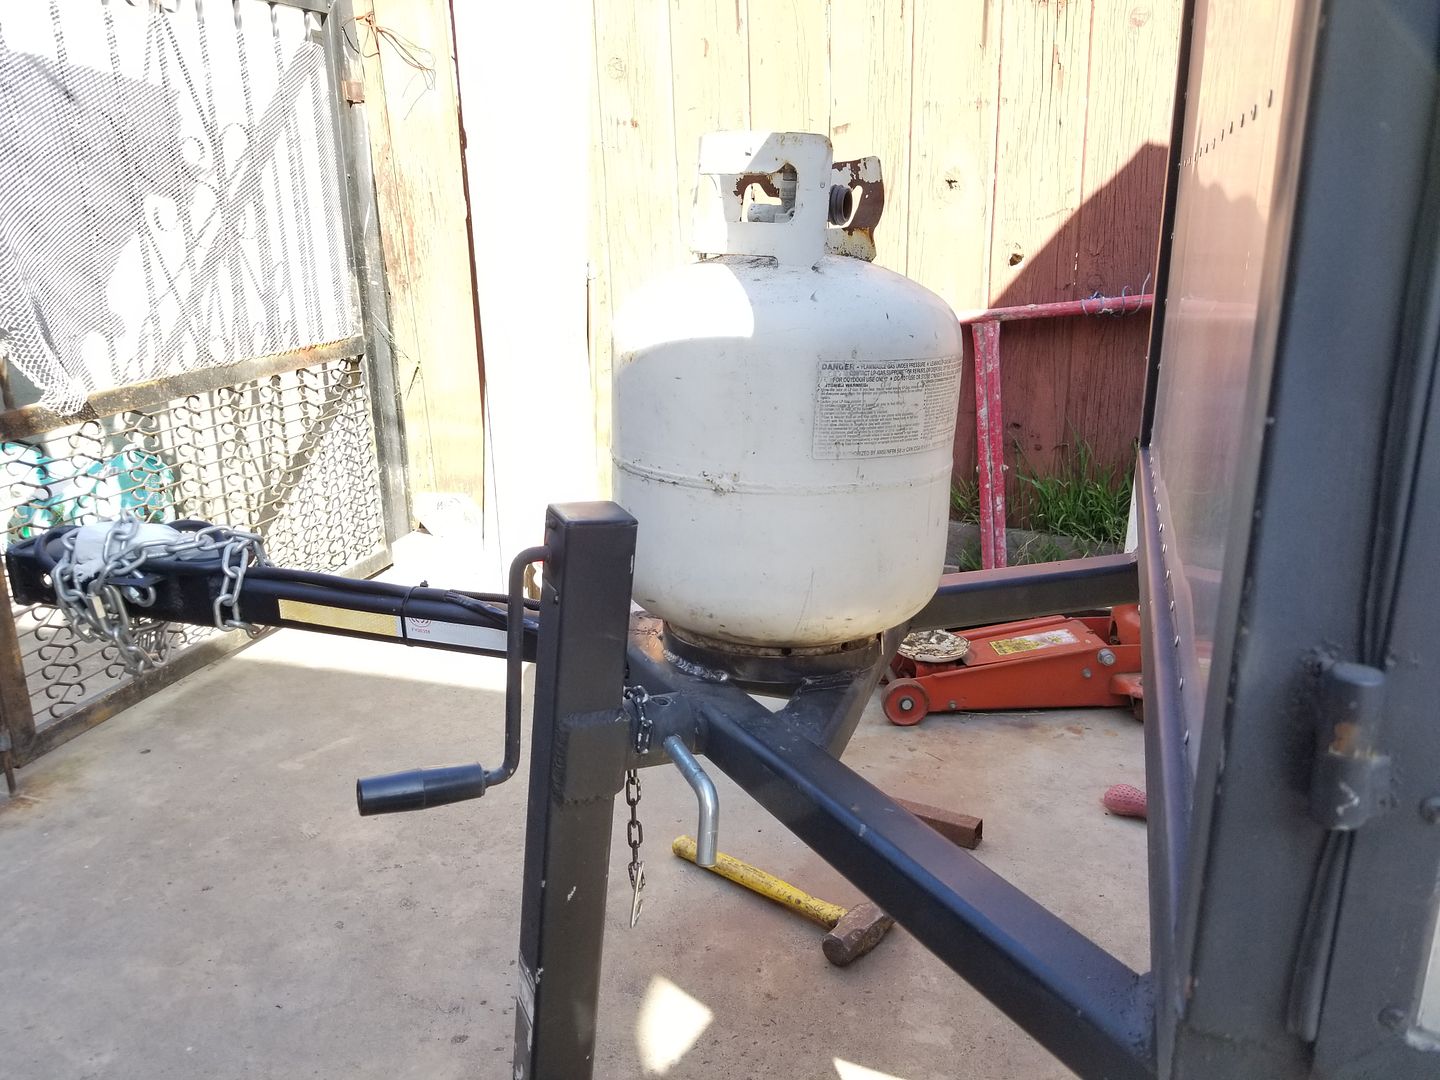
Final fitment before paint. I t was a bit tight on the large tank so i had to knock it open more to make it fit snug.
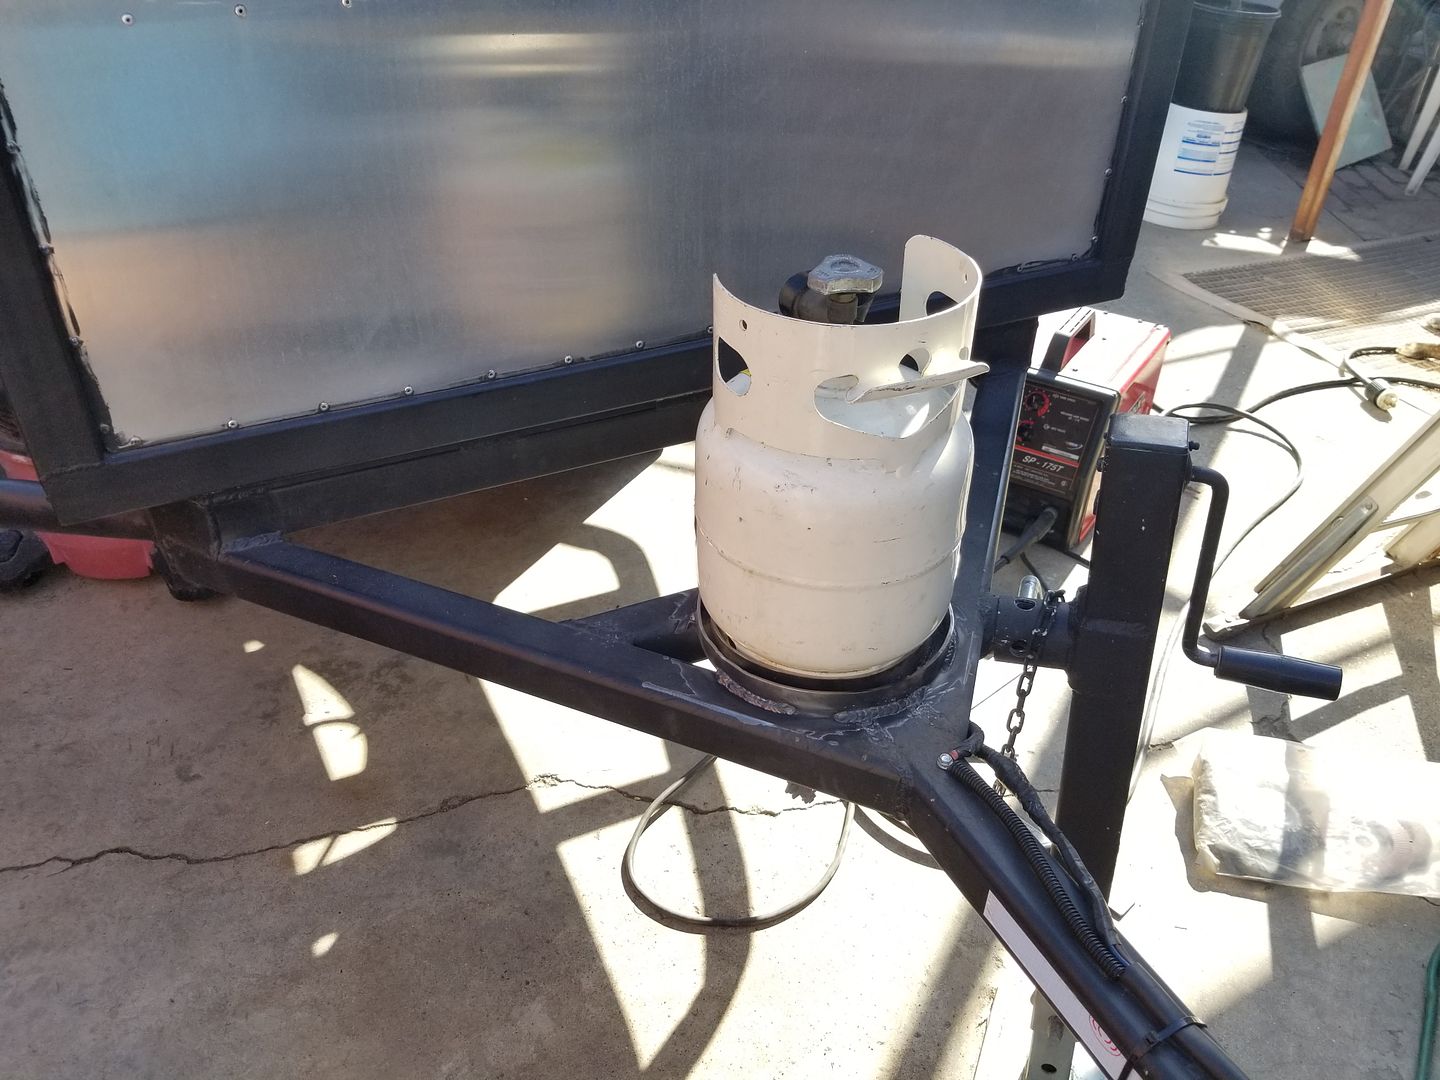
Now I'll have to make an adjustable mount of some sort. maybe something that slides forward and back to compensate for going with a larger or smaller tank. and adjustable in height as well. I'll have to go to the drawing board and see what i can fab up.


Also today i got around to doing 2 things to the trailer. Nothing major but any work is better then no work done.
First I made the two (+) and (-) wires with ring terminals to run my 2 batteries parallel.


and incase youre wondering... This is the thread of those wing nuts that i used to secure the wire to the battery posts

And i made some brackets to hold my 5lb and 20lb tanks on the tongue of my trailer. I can always use my small tank for a weekend trip. And if i decide i want to go on a week long trip or longer well i have the option of using a 20lb tank as well. Now i just need to figure out a way to secure the tanks in a locked position.

getting the position right


All welded into place

Final fitment before paint. I t was a bit tight on the large tank so i had to knock it open more to make it fit snug.


Now I'll have to make an adjustable mount of some sort. maybe something that slides forward and back to compensate for going with a larger or smaller tank. and adjustable in height as well. I'll have to go to the drawing board and see what i can fab up.

Last edited by Redeth005; Mar 25, 2018 at 11:06 PM.

 Mar 26, 2018 | 10:57 AM
#160
Thread Starter
Registered User
Joined: Apr 2012
Posts: 2,817
Likes: 2
From: Los Angeles CA
And when the time comes to build that cabinet i have a carpenter friend who volunteered to help me create it. So that's another reason i wanna get everything knocked out soon
I will most likely do that for the mean time until i can figure out a more secure way to keep it from getting stolen. I would really like to be able to leave camp without somebody stealing my tank.


