
bumper time
 Nov 19, 2010 | 09:25 PM
#1
Thread Starter
Registered User
Joined: Sep 2009
Posts: 263
Likes: 0
From: St George,Ut
bumper time
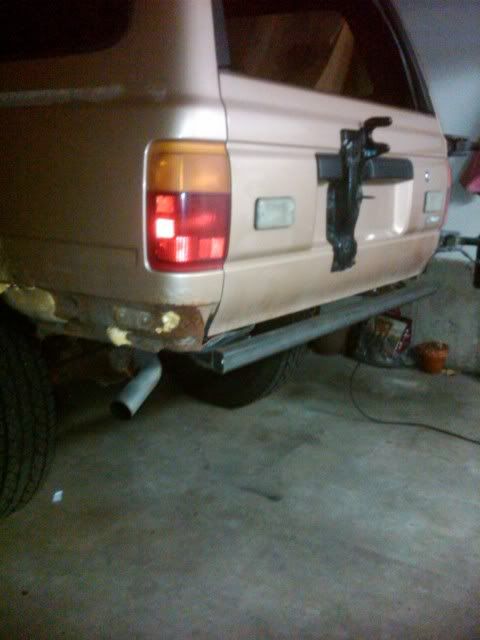
well after taking off my old bumper to fill in some rust holes with foam(to keep the exhaust out) i never put my bumper back on, for one it was rusted to france!
and two i hate chrome.
so i wanted something simple but functional. and i am broke.
so me and my friend ben got started about 6pm today and finished just after 9.
here are some pictures fer yah!
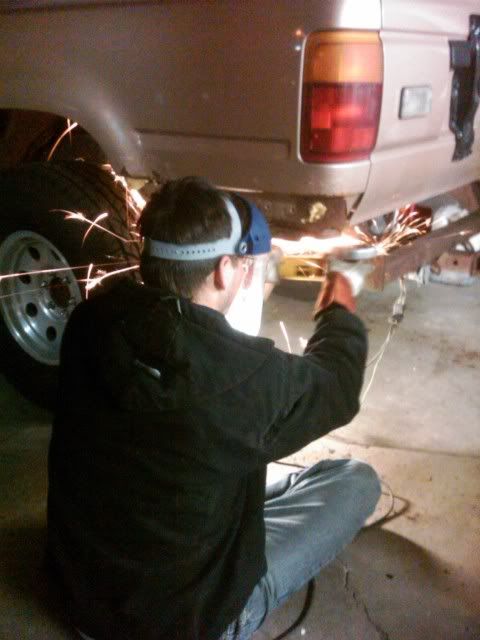
me cuttin off the old receiver hitch(using its mounting brackets for the bumper)
all cut off
built in light hook
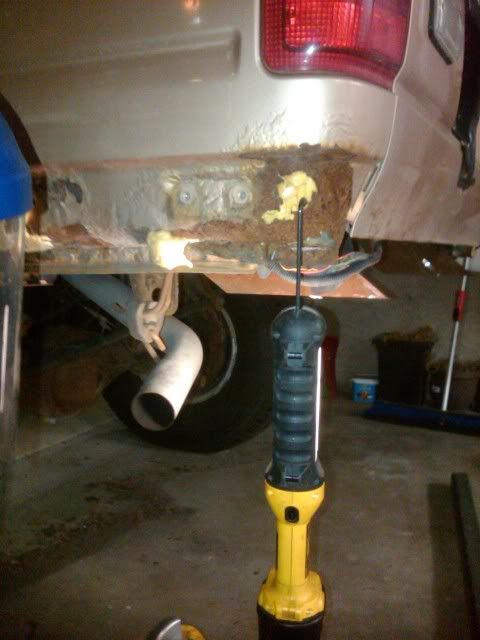
tacking mounting brackets
brackets to the frame

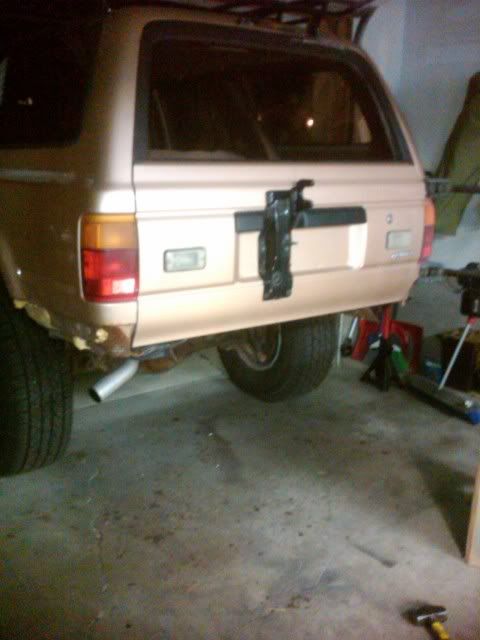
mock up stage
[IMG]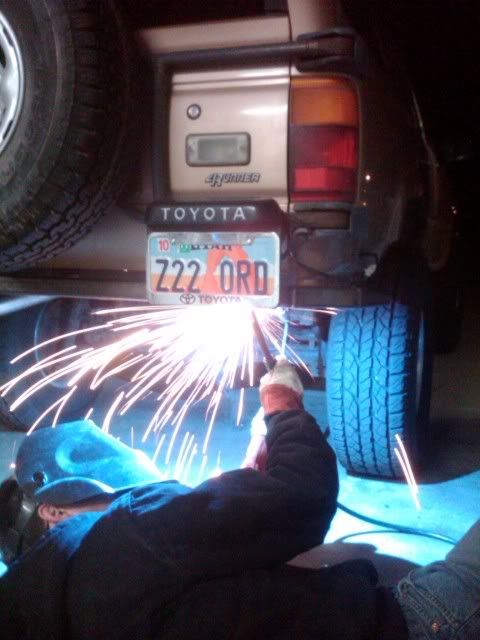 [/IMG]
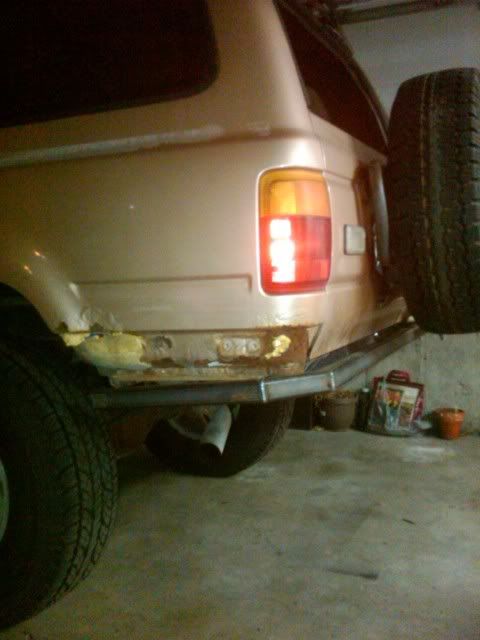
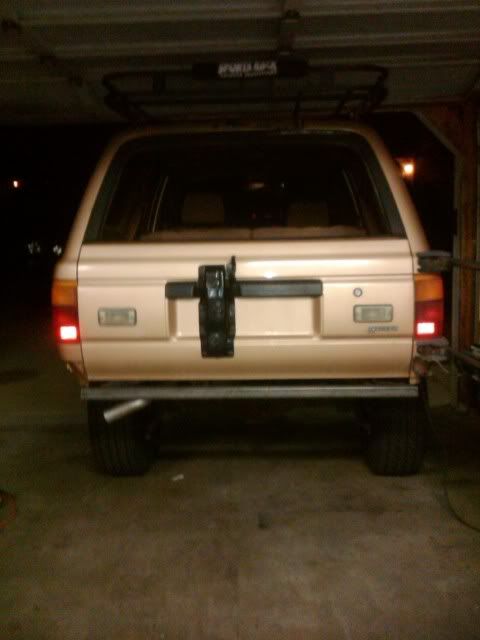
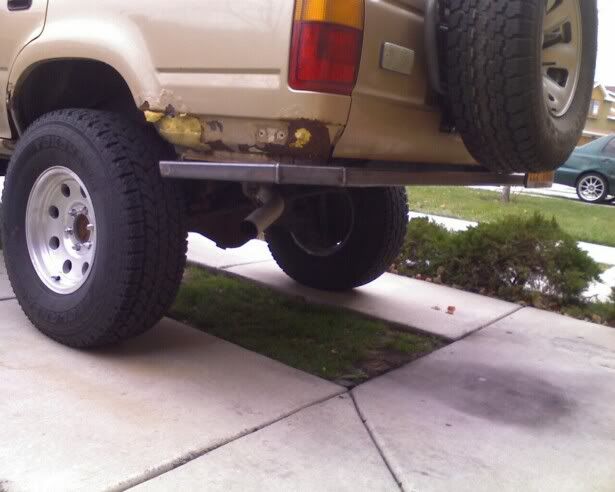
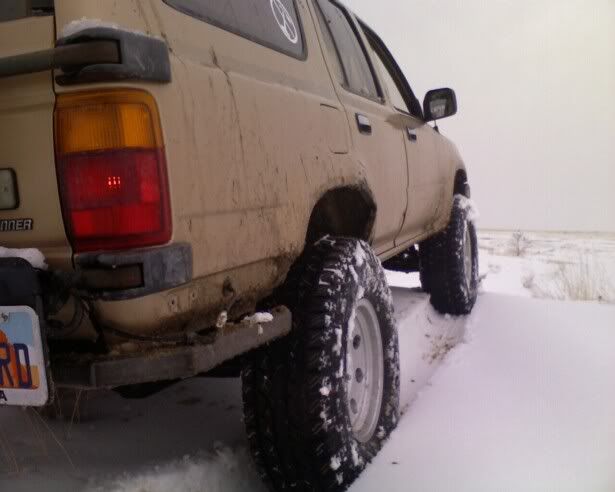
its not finished but its mounted and really sturdy !! i gained about 10" of clearance too!! there is still more to do but i like how it turned out.

i will take a day pic tomorrow.
and two i hate chrome.
so i wanted something simple but functional. and i am broke.
so me and my friend ben got started about 6pm today and finished just after 9.
here are some pictures fer yah!
me cuttin off the old receiver hitch(using its mounting brackets for the bumper)
all cut off
built in light hook
tacking mounting brackets
brackets to the frame
mock up stage
[IMG]
[/IMG]its not finished but its mounted and really sturdy !! i gained about 10" of clearance too!! there is still more to do but i like how it turned out.
i will take a day pic tomorrow.
Last edited by birdduck; Nov 20, 2010 at 08:41 AM.
Nov 21, 2010 | 06:26 PM
#2
Registered User
Joined: Jul 2010
Posts: 538
Likes: 6
From: Carson City
looks good man. Im in the process of doing the same thing. I have the smitty built tube bumper. I cut off the tube bumper and Im reusing the frame and hitch to do something similar. Good job keep us updated
Trending Topics
Dec 23, 2010 | 12:38 PM
#8
Thread Starter
Registered User
Joined: Sep 2009
Posts: 263
Likes: 0
From: St George,Ut
next time i go upsidedown i will worry about it.
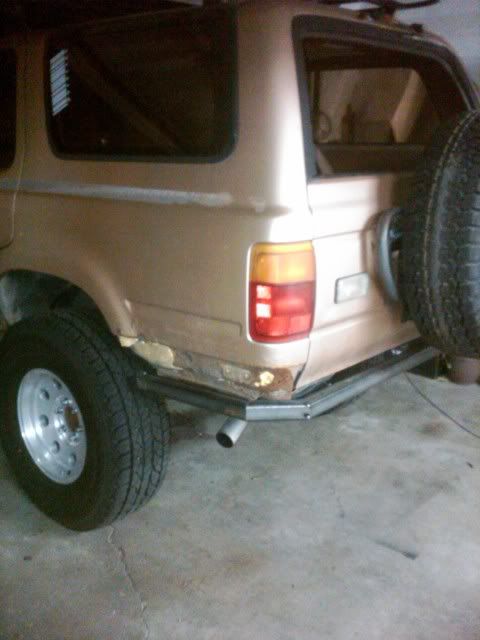
not built for rock crawling, built for increased clearance. its not finished, i plan on adding to the sides.
not built for rock crawling, built for increased clearance. its not finished, i plan on adding to the sides.
Last edited by birdduck; Dec 23, 2010 at 12:40 PM.
 Dec 23, 2010 | 01:48 PM
#11
Lets keep the drama in your pants guys. Birdduck don't take anyone's opinion personal. The criticism is ment to be contructive. Any more Gaff and i pull the plug on this.
Now resume the welding and grinding.
Now resume the welding and grinding.
Jan 10, 2011 | 08:07 PM
#13
Registered User
Joined: Nov 2007
Posts: 680
Likes: 0
From: Gilbert, Az.
Birdduck..
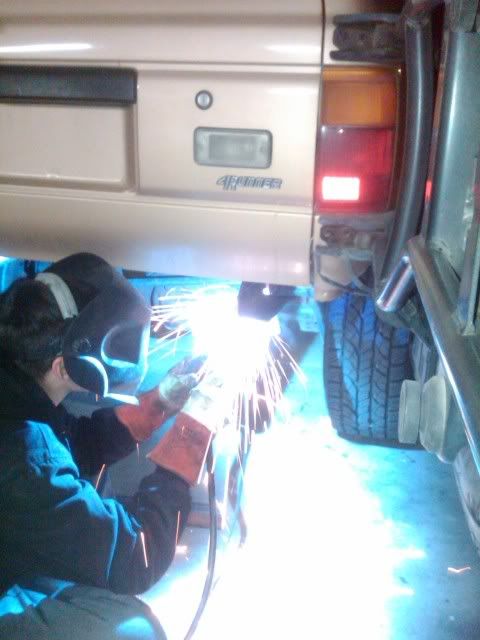
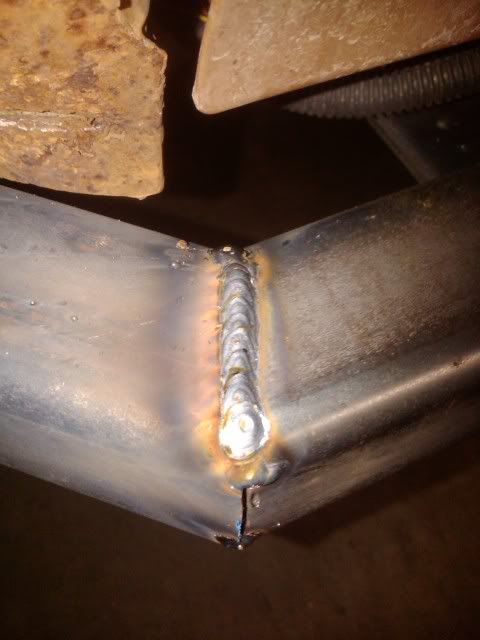
hey, it's all a work in progress...and I have to say, those are nice beads you're layin down? Looks like they might be mig but in some of the pictures it looks like you sparking an ARC. Anyhow, on the sides you really should join the frame to the side of the bumper...and again, it's all a work in progress...all of our 4Runners are. Keep it up.
-Ted
-Ted
Jan 11, 2011 | 07:52 PM
#14
Thread Starter
Registered User
Joined: Sep 2009
Posts: 263
Likes: 0
From: St George,Ut
the plan is to tie the ends to the frame, and add a second peace around the corners thats level and not slanted so its kinda like an ">" on the sides. is was solid metal wire on a mig..
there was some rusty spots that the grinder couldn't get to, so i just welded over them..
and our angles weren't perfect so there were some hefty gaps in some places.
there was some rusty spots that the grinder couldn't get to, so i just welded over them..
and our angles weren't perfect so there were some hefty gaps in some places.

Thread
Thread Starter
Forum
Replies
Last Post
RedRunner_87
95.5-2004 Tacomas & 96-2002 4Runners (Build-Up Section)
84
Jun 1, 2021 01:51 PM
WTB[WestCanada]: 1989 4runner stock front bumper and other items
lledwod
Items Wanted
1
Aug 30, 2016 01:03 PM
WTB[PacSoWest]: Looking for Smittybilt front bumper
shisha1999
Items Wanted
12
Mar 16, 2016 12:25 PM
Vargntucson
95.5-2004 Tacomas & 96-2002 4Runners
0
Jul 4, 2015 12:15 PM


