
88 4runner front plate bumper
 Sep 17, 2014 | 08:53 PM
#1
Thread Starter
Registered User
Joined: Sep 2014
Posts: 30
Likes: 0
From: Middletown, CA
88 4runner front plate bumper
First, I've been creeping around here for years and the info I have gotten out of this forum has helped me keep the old yota on the road. Finally decided to post something. Thanks to all who contribute to this.
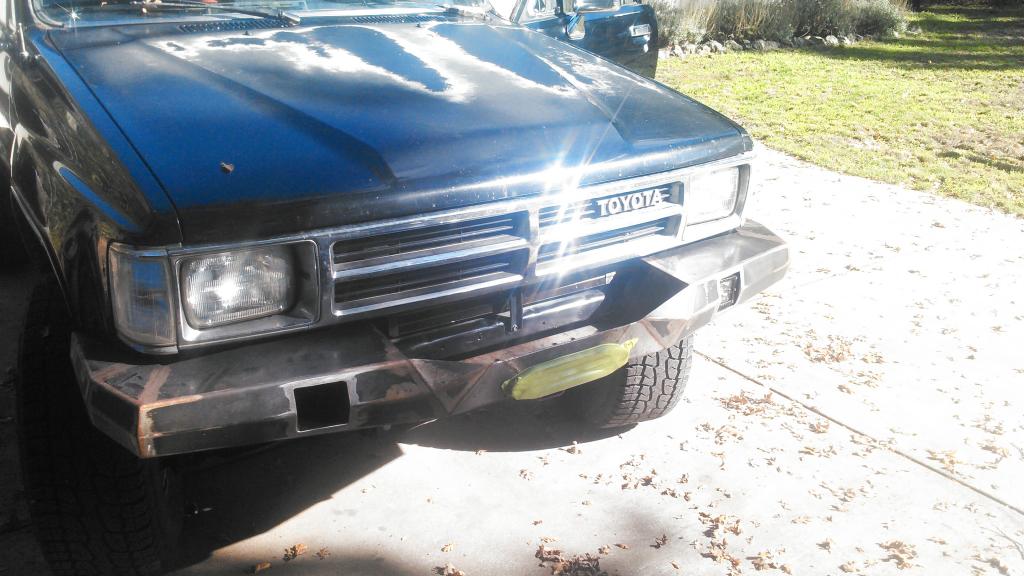
I traded some work with Eric at NorCal Motorsportz in Santa Rosa, CA for some fab time. I have to plug the guy, he mostly does sand and desert racing stuff and has built his own car from scratch. He is really good at working aluminum sheet for custom body panels. I want to armor up the old 4runner starting with the front bumper.
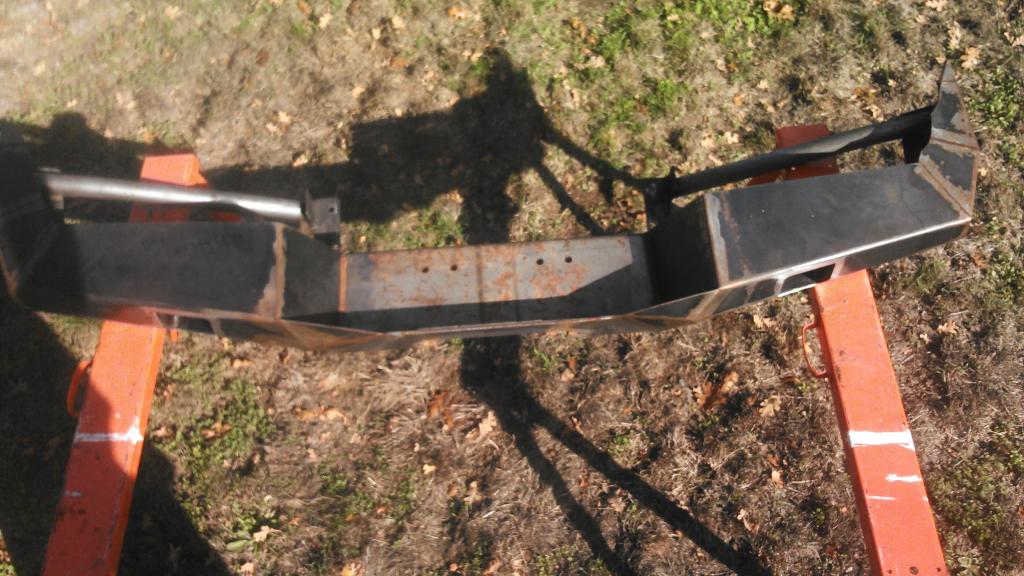
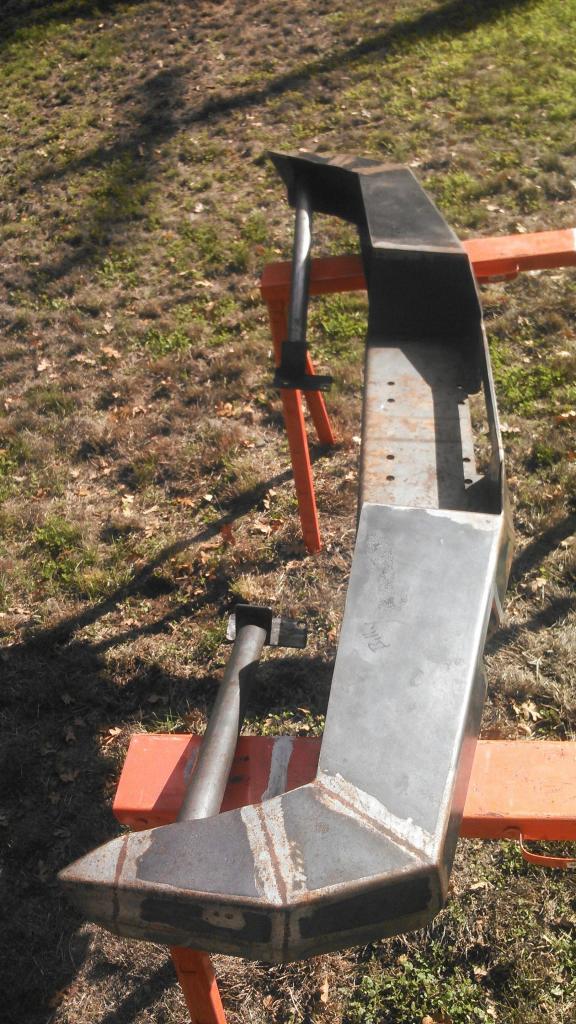
Got a trail gear like winch plate from PMC swap meet, boxed the front frame like crazy with some flat and angle iron bent, cut, and welded some 1/8" plate to it, add some tube to the frame from the corners and here is what we came up with and he built so far.
Attachment 99696
A couple days ago I was driving my normal commute and I hit a deer at 30mph, no time to hit the brakes. I struck it with the drivers corner of the bumper. Didn't even damage the bumper or front end at all. Got away with a few dents on the drivers door.
Left to do; 2 ridgid duallys are going to be cut into the front, make bolt on plate under the reciever to allow access to winch mounting bolts and slightly deter theft of winch with the use of allen button screws or something, build new skid plate with tube and plate. powder coat it all.
should get the lights cut in by next week.
I traded some work with Eric at NorCal Motorsportz in Santa Rosa, CA for some fab time. I have to plug the guy, he mostly does sand and desert racing stuff and has built his own car from scratch. He is really good at working aluminum sheet for custom body panels. I want to armor up the old 4runner starting with the front bumper.
Got a trail gear like winch plate from PMC swap meet, boxed the front frame like crazy with some flat and angle iron bent, cut, and welded some 1/8" plate to it, add some tube to the frame from the corners and here is what we came up with and he built so far.
Attachment 99696
A couple days ago I was driving my normal commute and I hit a deer at 30mph, no time to hit the brakes. I struck it with the drivers corner of the bumper. Didn't even damage the bumper or front end at all. Got away with a few dents on the drivers door.
Left to do; 2 ridgid duallys are going to be cut into the front, make bolt on plate under the reciever to allow access to winch mounting bolts and slightly deter theft of winch with the use of allen button screws or something, build new skid plate with tube and plate. powder coat it all.
should get the lights cut in by next week.
 Sep 18, 2014 | 11:36 AM
#6
Registered User


Joined: Oct 2009
Posts: 4,832
Likes: 332
From: Northfield, Vermont
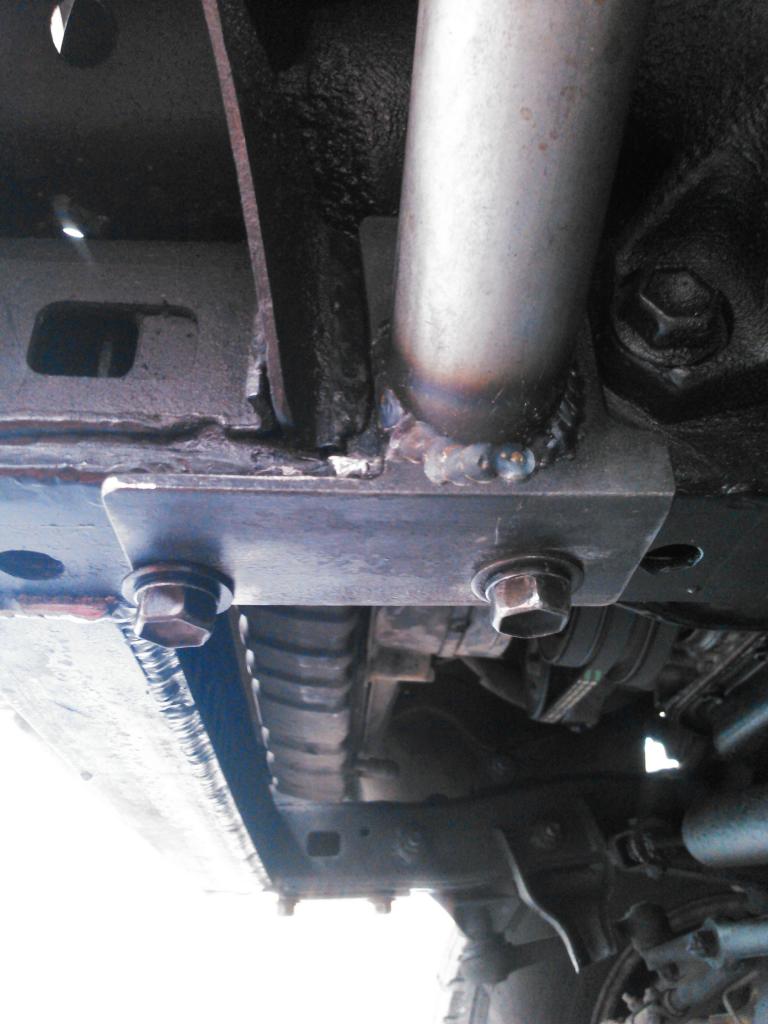
That worked! What the total weight of that? Are the side support bars welded to the frame? Did you plate the front of the frame? Would be a good idea if you plan on doing any hard winching.
Looks great though!
Looks great though!
Sep 18, 2014 | 05:46 PM
#7
Thread Starter
Registered User
Joined: Sep 2014
Posts: 30
Likes: 0
From: Middletown, CA
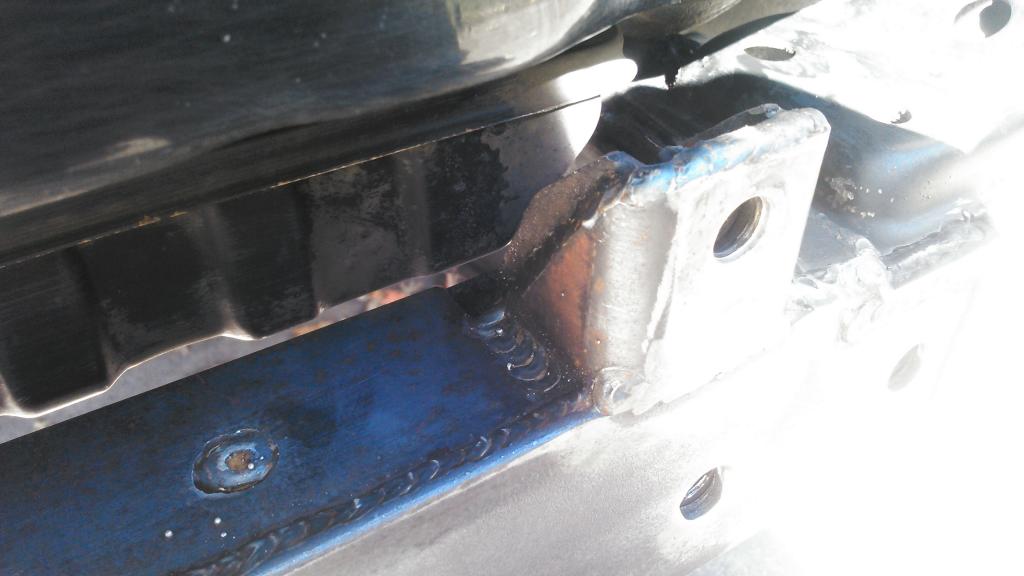
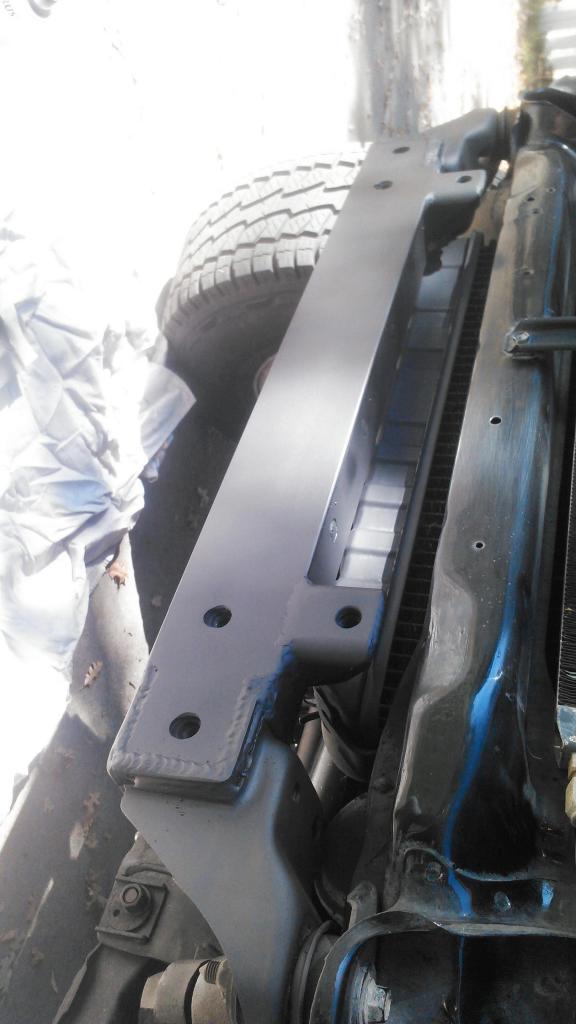
Thanks, I'm really happy with how it looks so far. I'm not sure of the weight but its not too bad. Other than the winch plate and support tubes it's just 1/8" steel. The bends seem to make it really strong. The tubes bolt to where the tow hooks used to by way of some angle iron welded to the tubes. The frame is reinforced on the bottom front and top. Way stronger than the kit you can buy.


Trending Topics
Nov 6, 2014 | 06:14 PM
#9
Thread Starter
Registered User
Joined: Sep 2014
Posts: 30
Likes: 0
From: Middletown, CA
Sure thing, but I wont be able to until next week. The bumper is sitting on the floor of the guys shop waiting to get some duallys recessed in the front right now. He's been busy so no real progress lately. No biggie, I'm patient.
Nov 12, 2014 | 07:48 PM
#11
Thread Starter
Registered User
Joined: Sep 2014
Posts: 30
Likes: 0
From: Middletown, CA
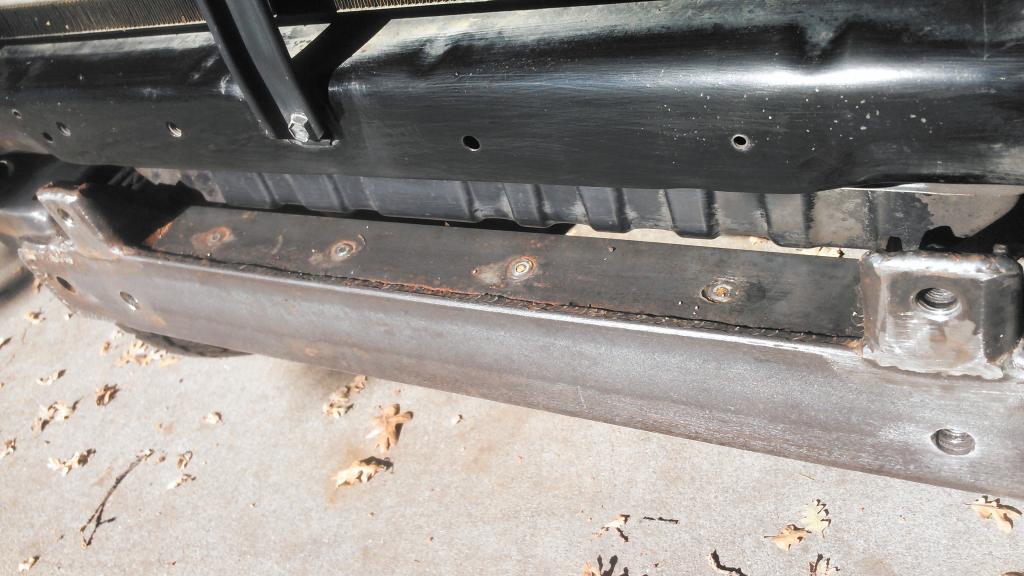
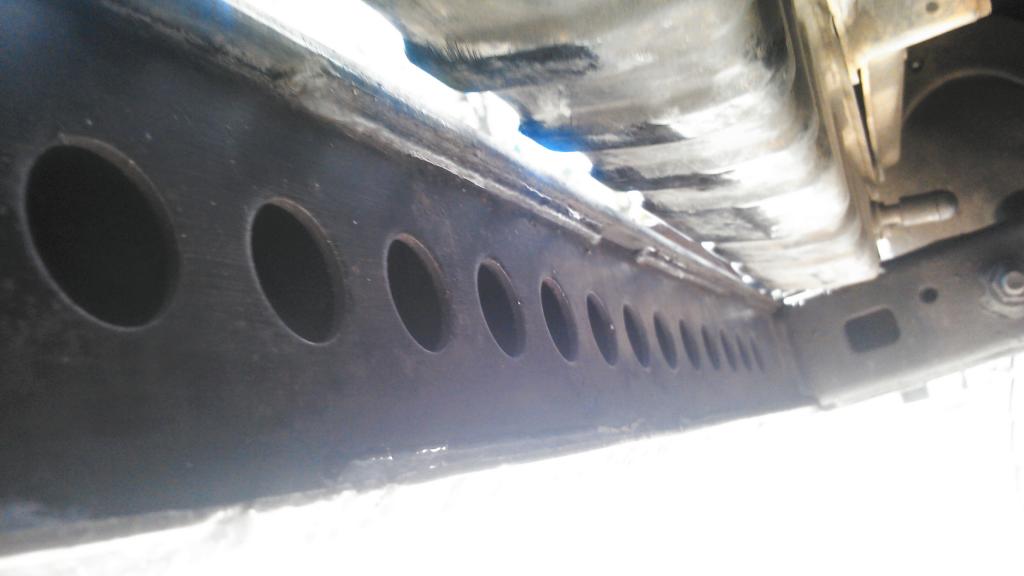
Thanks. Got word today that the lights are cut in. Can't wait to see it. Decided I'm going to spray it instead of powder coating. I'll see it friday and post more pics. Might paint it this weekend. Here are some more pics of the frame bracing and a shot with some sexy black paint on it.


Last edited by sparkymonkey; Nov 12, 2014 at 07:52 PM.
Nov 12, 2014 | 10:58 PM
#12
Registered User


Joined: Mar 2012
Posts: 7,130
Likes: 683
Nice! I like the low-profile styling. I like the idea of 1/8-inch plate myself. Not as sturdy as the conventional 3/16" but:
1) Would protect the radiator and engine better than stock, YET
2) Have some give so it would absorb some impact to minimize damage to frame. I'd rather sacrifice the bumper than have a bent frame.
1) Would protect the radiator and engine better than stock, YET
2) Have some give so it would absorb some impact to minimize damage to frame. I'd rather sacrifice the bumper than have a bent frame.
Nov 14, 2014 | 08:12 PM
#13
Thread Starter
Registered User
Joined: Sep 2014
Posts: 30
Likes: 0
From: Middletown, CA
Bumper is back home ready to be cleaned up and painted. Will post pics tomorrow. I'm going to mount my front license plate to the skid plate on the front of the bumper with a notch in the license plate to fit around the receiver. It will also be angled downward. I wonder if any cops would have a problem with that. Doesn't matter, anywhere else would look stupid as hell.
Last edited by sparkymonkey; Nov 14, 2014 at 08:13 PM.
Nov 15, 2014 | 07:34 PM
#14
Thread Starter
Registered User
Joined: Sep 2014
Posts: 30
Likes: 0
From: Middletown, CA
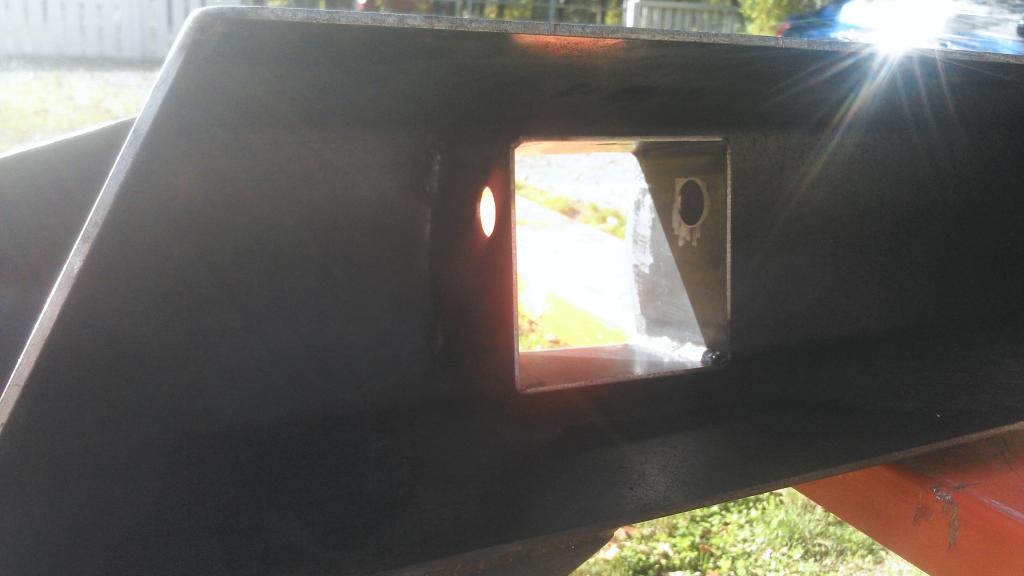
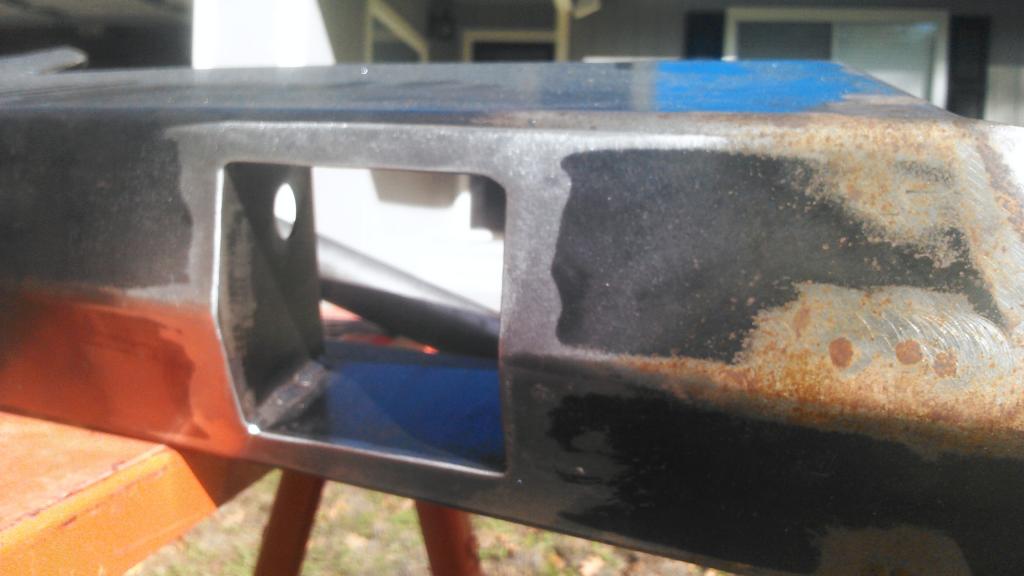
Hooray for progress. Been a busy day, installed a new drop down access ladder into my attic today. Busted that out real quick so I could take this.
Take it off by myself and clean it up.
Some light pocket pics.
Paint
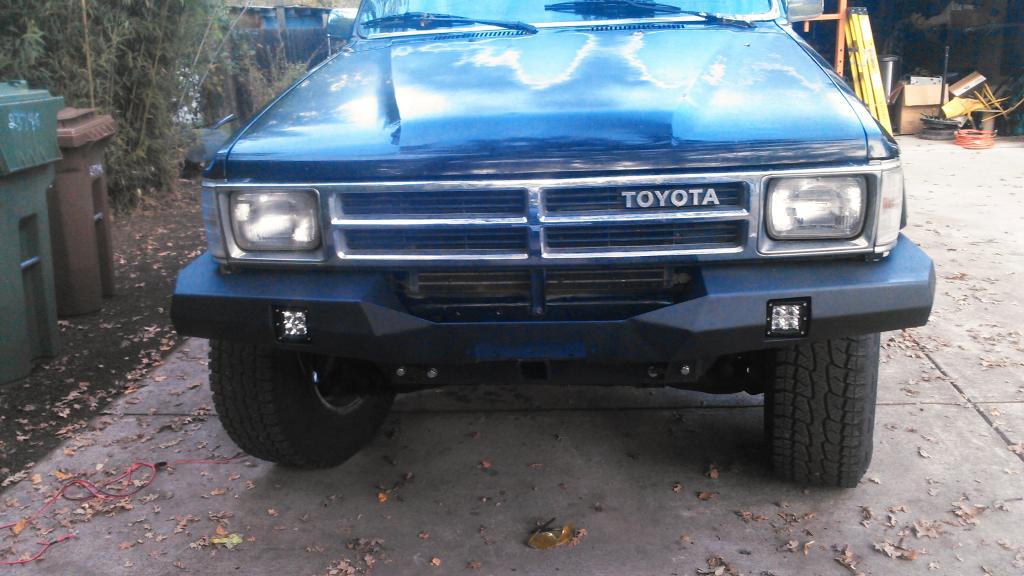
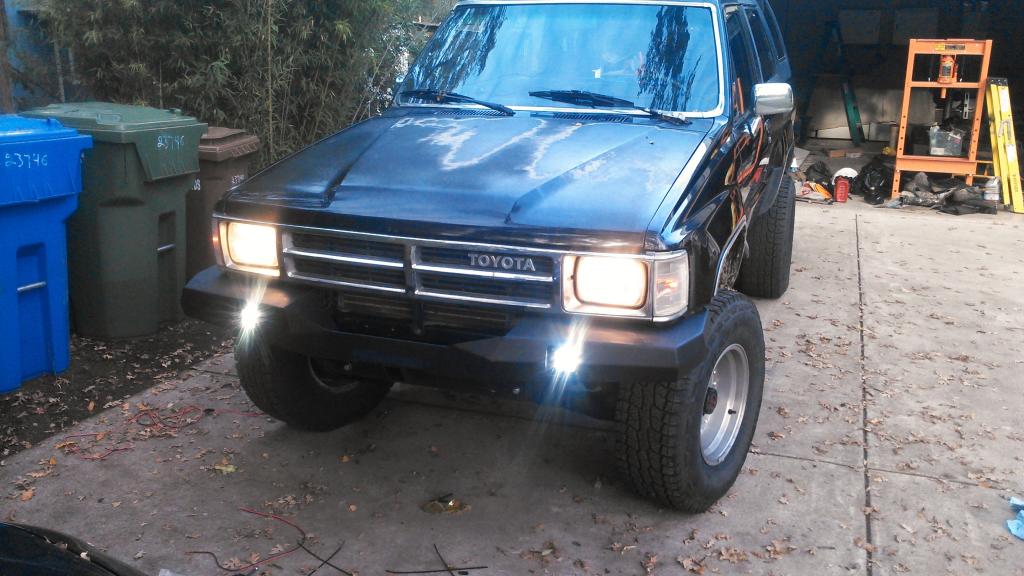
Let there be light!

Take it off by myself and clean it up.


Some light pocket pics.


Paint

Let there be light!
 Nov 17, 2014 | 07:11 PM
#18
Thread Starter
Registered User
Joined: Sep 2014
Posts: 30
Likes: 0
From: Middletown, CA
Thanks guys, I'm really happy with it. I think it will serve its purpose. It's not a full on rock crawling bumper although would probably work fairly well. I just wanted something a little lighter and could still mow down some zombies.
R4R, already done, turn signals are integrated with the corner lamps. Got dual filament bulbs and sockets. Orange ones cause of the clear corner lamps I got a long time ago cause I think it looks cool. Had to ream the stock socket out carefully but crudely with a unibit and hold the socket in with zip ties. It's kinda ghetto but clever. Also spliced to turn signal and corner lamp connectors onto bulb socket to keep factory harness less molested.
btw, I've read a bit of your build thread. The electrical knowledge you have documented in just the first few pages is impressive and very clearly written. I think I want to remove that load on the ignition switch for the starter relay coil. Did you seriously measure that out a 12 amps? Seems like a lot for a relay coil. Then again I wire buildings not cars, so I wouldn't know whats a lot.
I've still got a cover plate to put on the bumper to get done and I'll cut up my license plate to mount to that so a few more pics are coming. Feel free to ask any questions.


