
Sheared 2 of 3 thermo housing bolts
 Jun 12, 2010 | 07:38 PM
#1
Thread Starter
Registered User
Joined: Oct 2009
Posts: 19
Likes: 0
From: Nevada/SLC
Sheared 2 of 3 thermo housing bolts
I decided to undertake the old radiator/transmission cooler/timing belt/pump/thermo replacement. As I was very carefully working my way out, I sheared 2/3 thermo housing bolts. I have my ideas on how to handle this, but thought to check if anyone has made this mistake and found a good way to navigate.
Thanks!
Thanks!
 Jun 14, 2010 | 08:06 AM
#5
Registered User
Joined: Feb 2007
Posts: 1,262
Likes: 4
From: New Jersey and Sao Paulo
I sheared one going back on. Torque was 13 or 14 ft-lbs and stud sheared off when wrench was at like 12. There was enough left I could get it out with Vice-grips once I pulled the housing back off. I took my wrench downtown and had it checked. It was fine. I think those studs are just a bit too soft after 10 years in the block.
Jun 14, 2010 | 06:18 PM
#6
Thread Starter
Registered User
Joined: Oct 2009
Posts: 19
Likes: 0
From: Nevada/SLC
A Lucky Shake!
So a little update:
Saturday, after I broke the studs, I tried wrenching them with a vise-grip. When that didn't work, I quit for the day. I started looking at heli-coil, drill-out and tap, etc. I decided before I went through all that trouble, I would get a new pair of channel locks and try it again. Soaked the boys in PB for about 20 minutes, and they turned right out! I am usually not lucky, so today was great! I ordered replacement studs and nuts for $6 total.
I followed incorrect torque specs from the Haynes manual even though I had my FSM all ready to rock. Lesson learned.
Also, thought I'd share my run-in with the R cam pulley. 2 stitches.
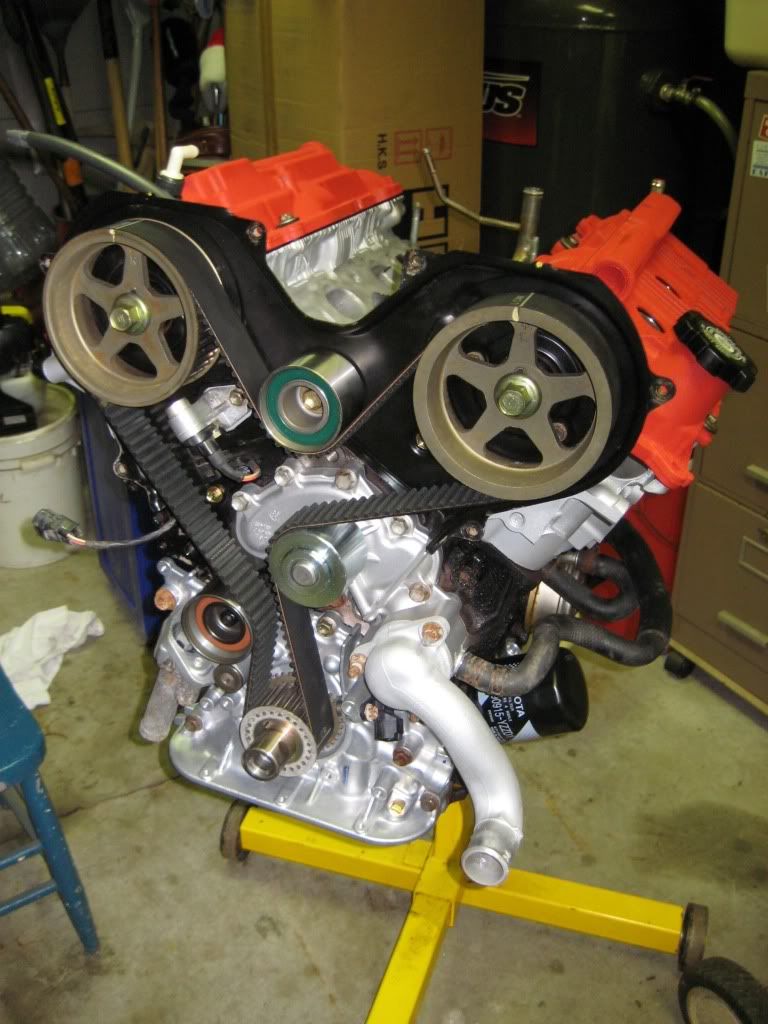
Speaking of the R pulley, when I opened the cover, the marks on the left pulley/belt/block were all lined up. The right however were not. The belt and block marks were in line, but the pulley mark was off. When I install the new belt, All marks should be perfectly in line, regardless of position of the old belt, correct? The timing was not off before the change--purred like a kitten in fact.
Great looking motor, Greg
Qyota, if you need the tensioner compressor and crank pulley holder, PM me and we can work out an arrangement
Thanks![IMG]file:///F:/DCIM/100KC360/100_0712.JPG[/IMG]
Saturday, after I broke the studs, I tried wrenching them with a vise-grip. When that didn't work, I quit for the day. I started looking at heli-coil, drill-out and tap, etc. I decided before I went through all that trouble, I would get a new pair of channel locks and try it again. Soaked the boys in PB for about 20 minutes, and they turned right out! I am usually not lucky, so today was great! I ordered replacement studs and nuts for $6 total.
I followed incorrect torque specs from the Haynes manual even though I had my FSM all ready to rock. Lesson learned.
Also, thought I'd share my run-in with the R cam pulley. 2 stitches.
Speaking of the R pulley, when I opened the cover, the marks on the left pulley/belt/block were all lined up. The right however were not. The belt and block marks were in line, but the pulley mark was off. When I install the new belt, All marks should be perfectly in line, regardless of position of the old belt, correct? The timing was not off before the change--purred like a kitten in fact.
Great looking motor, Greg
Qyota, if you need the tensioner compressor and crank pulley holder, PM me and we can work out an arrangement
Thanks![IMG]file:///F:/DCIM/100KC360/100_0712.JPG[/IMG]
Last edited by ft_surgn; Jun 14, 2010 at 06:21 PM. Reason: compliment
Jun 15, 2010 | 06:02 AM
#7
Registered User
Joined: Nov 2009
Posts: 127
Likes: 0
Thanks surgeon, but I'm just doing the t-stat and CTS, not the timing belt. Fortunately, that stuff was changed before I bought the truck.
So, it looks like even though you sheared the studs, there was plenty of stud left to get a vise grips on...right?
So, it looks like even though you sheared the studs, there was plenty of stud left to get a vise grips on...right?
Trending Topics
Jun 15, 2010 | 06:10 AM
#8

Registered User
Joined: Jul 2004
Posts: 1,231
Likes: 1
From: Toronto
So a little update:
Saturday, after I broke the studs, I tried wrenching them with a vise-grip. When that didn't work, I quit for the day. I started looking at heli-coil, drill-out and tap, etc. I decided before I went through all that trouble, I would get a new pair of channel locks and try it again. Soaked the boys in PB for about 20 minutes, and they turned right out! I am usually not lucky, so today was great! I ordered replacement studs and nuts for $6 total.
I followed incorrect torque specs from the Haynes manual even though I had my FSM all ready to rock. Lesson learned.
Also, thought I'd share my run-in with the R cam pulley. 2 stitches.
Speaking of the R pulley, when I opened the cover, the marks on the left pulley/belt/block were all lined up. The right however were not. The belt and block marks were in line, but the pulley mark was off. When I install the new belt, All marks should be perfectly in line, regardless of position of the old belt, correct? The timing was not off before the change--purred like a kitten in fact.
Great looking motor, Greg
Qyota, if you need the tensioner compressor and crank pulley holder, PM me and we can work out an arrangement
Thanks![IMG]file:///F:/DCIM/100KC360/100_0712.JPG[/IMG]
When you line up the new belt the marks should all line up (2 cams and the crankshaft). Once you turn it over a revolution they wont line up any more. It's perfectly OK.

Thread
Thread Starter
Forum
Replies
Last Post
DiZ86
Pre 84 Trucks
12
Dec 27, 2015 09:33 PM
TransAmBandit
86-95 Trucks & 4Runners
6
Jul 28, 2015 11:30 PM


