
I've got the blues
 Jun 1, 2003 | 03:55 AM
#101
Registered User
Joined: May 2002
Posts: 402
Likes: 0
From: LA, CA
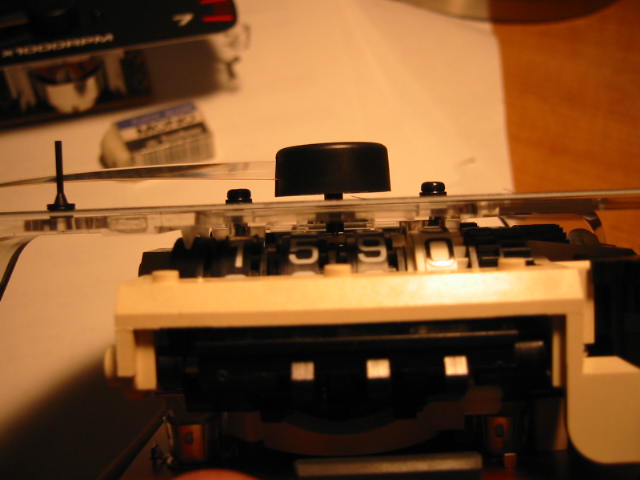
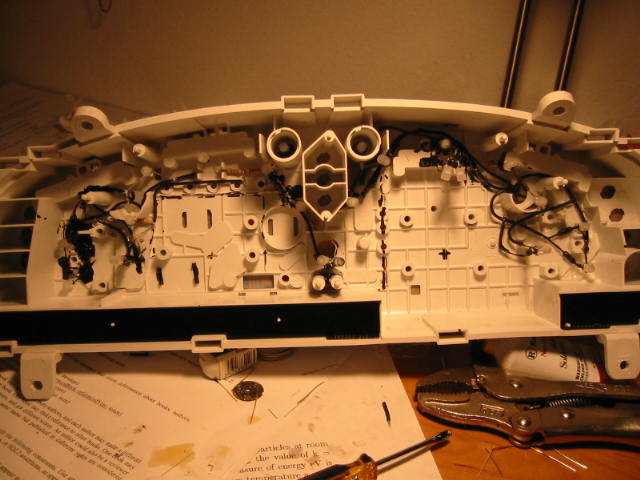
I was planning on shoving a LED behind the faces to light the needles, but it's not possible on the speedo. The spring on this dial is buried inside all the gadgetry
Last edited by DuB; Jun 1, 2003 at 04:01 AM.
Jun 1, 2003 | 04:04 AM
#102
Registered User
Joined: May 2002
Posts: 402
Likes: 0
From: LA, CA
ok, gauges...
-Follow Bob's directions for removing the guages.
-Remove the plastic face by unclipping the 7 clips.
-7 more clips hold in the black part.
-remove 3 screws from the back of each dial, except the speedo, which has 4.
-Do your soldering thang.
-lightly sandpaper the back of each needle to remove the yellow
-on the gas and temp dials, I pointed a blue LED from the side, pointing at the needle. For the speedo, I have two blue LEDs in the center to light up the Odo and trip meter.
-Solder a LED into each turn signal, and remove the green cover over each.
-I didn't have any plastic that would work well as replacements, so I took the lighting gel that Bill used, cut out #98, Medium Grey to give me the darkness, and #101 Light Frost on top of the grey to give me the texture I needed to match the factory texture on the dials. I just glued them to the black piece with some rubber cement.
-I painted the back of the tach and speedo needles with white paint in hopes of them lighting up a little and it worked very slightly...
-Reassemble
Problems and things I wouldn't do next time:
-The needles didn't light very well
-I wouldn't recommend lighting w/ LEDs. The lighting is uneven (around 75-95 mph and the opposite spot on the tach) because of the plastic on the back, even with 20 LEDs :eek: AND it also took me about 8 hours...
Just go for reverse indiglo gauges... :pat:
Here's a picture of the complete job. Yeah, I know it's ugly
Jun 1, 2003 | 04:45 AM
#105
Registered User
Joined: May 2002
Posts: 402
Likes: 0
From: LA, CA
Actually, the lighting is ok. Just make sure you use all one color. I used white and blue, but I forgot that the bottom left and bottom right of the center two dials are lit by the blue LED pointing sideways... I guess I'm going to have to open it back up one of these days and put some blue film over everything...
Jun 1, 2003 | 05:50 AM
#106
Thread Starter
Registered User
Joined: May 2002
Posts: 302
Likes: 0
From: Langley AFB, VA
Holy Moly! You went all out on that cluster didn't you! After seeing that I'm kinda glad I went the indiglo route on those. I'm still debating on how to make the needles light up better, thinking about putting some red 194 bulbs back there, since I have indiglos they would just light up the needles and odometer.
Good Job!
By the way you're not done, I'm sure you'll find other spots to stick those extra LED's you have. (ie. my center console storage now has a blue ligght inside when you open it up ).
).
Good Job!
By the way you're not done, I'm sure you'll find other spots to stick those extra LED's you have. (ie. my center console storage now has a blue ligght inside when you open it up
).
Jun 1, 2003 | 06:37 AM
#107
Registered User
Joined: May 2002
Posts: 402
Likes: 0
From: LA, CA
Yeah, I was hoping to get red LEDs from somewhere, but I didn't want to spend $15 on ebay to buy 25 leds only to use like 2 of them. I think I might go the indiglo route if the procarparts thingy that Bob is setting up goes through. Right now it looks like I'm all patriotic or something because the gauges are red, white, and blue :pat:
Oh, another tip for anyone who wants to try this: use a hot glue gun. I didn't have one, so I had to either epoxy, or tape LEDs into place. That's what made it take so long.
Well, after those 8 hours, I'm done for a while I might stick a white or blue one over the heater controls in the back. I don't think it's bright enough for the glovebox, so I left the stock bulb in there.
Oh, another tip for anyone who wants to try this: use a hot glue gun. I didn't have one, so I had to either epoxy, or tape LEDs into place. That's what made it take so long.
Well, after those 8 hours, I'm done for a while
I might stick a white or blue one over the heater controls in the back. I don't think it's bright enough for the glovebox, so I left the stock bulb in there.
Last edited by DuB; Jun 1, 2003 at 06:41 AM.
Jun 18, 2003 | 10:18 PM
#108

Registered User
Joined: May 2002
Posts: 10,036
Likes: 5
From: Los Angeles
Guys,
After my triumphant find of the wedding ring, I decided to celebrate with a good game of Rogue Spear (yeah, I still play it) and surf the 'net.
I'm interested in building an MP3 setup w/ touchscreen, but along the way I found this thread:
http://www.sounddomain.com/member_pa...=216257&page=6
Some guy did some amazing work w/ fiberglass and installing his mp3 system in his Camry. He even did what Wild Bill and Dub did w/ the blue lights. A very detailed write up and good sources for bulbs/LEDs in his write up too.
Bob
Jun 20, 2003 | 01:24 AM
#109
Registered User
Joined: May 2002
Posts: 402
Likes: 0
From: LA, CA
That's a pretty cool Camry. I like what he did with his headunit. Those LEDs remind me of the ones in Nokia phones. Man, changing those lights are a big headache. That's where I got all my practice soldering from. Actually, that and soldering in modchips into playstations To play imported and backup copies of games, of course 
edit: I forgot to tell you guys doing the conversion... I was thinking about ways to make the clock blue when I realized that the clock in my roommate's integra is the same as ours display-wise, just in blue. So, I'm going to buy an old clock off ebay and see if I can graft the display in. I'll let you know how it goes.
To play imported and backup copies of games, of course edit: I forgot to tell you guys doing the conversion... I was thinking about ways to make the clock blue when I realized that the clock in my roommate's integra is the same as ours display-wise, just in blue. So, I'm going to buy an old clock off ebay and see if I can graft the display in. I'll let you know how it goes.
Last edited by DuB; Jun 20, 2003 at 04:13 AM.
Jun 20, 2003 | 04:23 AM
#110
Registered User
Joined: May 2002
Posts: 402
Likes: 0
From: LA, CA
I finally put the A/C button label on. Well, since there were so many of you who wanted the transparency from Bill, I can mail one of you the transparency he sent me. I scanned in the A/C button and redrew it in adobe photoshop. I printed the label 10 times across the top, too. I'll send a CD with the file as well. I was going to make a bunch of pairs and send them out to whoever wanted one, but I never scanned in the Back Window switch because I ended up wet sanding the green off and it worked really well. So, I'll just send the A/C switch to someone, and then they can forward it to the next person Maybe if someone scans in the back window switch, they can add it to the CD.
So who wants it?
Maybe if someone scans in the back window switch, they can add it to the CD.So who wants it?
Jun 20, 2003 | 06:08 AM
#111
Contributing Member
Joined: Jan 2003
Posts: 5,377
Likes: 0
From: Houston, TX
Originally posted by DuB
I finally put the A/C button label on. Well, since there were so many of you who wanted the transparency from Bill, I can mail one of you the transparency he sent me. I scanned in the A/C button and redrew it in adobe photoshop. I printed the label 10 times across the top, too. I'll send a CD with the file as well. I was going to make a bunch of pairs and send them out to whoever wanted one, but I never scanned in the Back Window switch because I ended up wet sanding the green off and it worked really well. So, I'll just send the A/C switch to someone, and then they can forward it to the next person Maybe if someone scans in the back window switch, they can add it to the CD.
So who wants it?
I finally put the A/C button label on. Well, since there were so many of you who wanted the transparency from Bill, I can mail one of you the transparency he sent me. I scanned in the A/C button and redrew it in adobe photoshop. I printed the label 10 times across the top, too. I'll send a CD with the file as well. I was going to make a bunch of pairs and send them out to whoever wanted one, but I never scanned in the Back Window switch because I ended up wet sanding the green off and it worked really well. So, I'll just send the A/C switch to someone, and then they can forward it to the next person
Maybe if someone scans in the back window switch, they can add it to the CD.So who wants it?
 Jun 21, 2003 | 03:31 AM
#112
Registered User
Joined: May 2002
Posts: 402
Likes: 0
From: LA, CA
Oh, yeah, I can. The file's tiny. I was just going to include a CD with the transparency, too. If you want the image, just PM me with your email address. I'll upload it here, too, but you might need to do some resizing w/ photoshop.
width: 830 pixels -- 0.692"
height: 520 pixels -- 0.433"
resolution: 1200 dpi
*edit* the photoshop file has everything in separate layers so it takes a little more room. It's 487K uncompressed, and 247K zipped so I couldn't upload it here. You can PM me if you still want that file.
width: 830 pixels -- 0.692"
height: 520 pixels -- 0.433"
resolution: 1200 dpi
*edit* the photoshop file has everything in separate layers so it takes a little more room. It's 487K uncompressed, and 247K zipped so I couldn't upload it here. You can PM me if you still want that file.
Last edited by DuB; Jun 21, 2003 at 03:34 AM.
Jun 21, 2003 | 03:44 AM
#113
Registered User
Joined: May 2003
Posts: 380
Likes: 0
From: San Diego, CA
I never got the theater light gels that you suggested wild bill. I don't remember whether it's been discussed or not yet, but what about the digital odometers? Is there any way to change the color on that?
Jul 21, 2003 | 03:19 PM
#116

Registered User
Joined: Jul 2003
Posts: 46
Likes: 0
Help in indiglo
WOW!
Great work everyone~!
Over time, I'm hoping to change all my LEDs to blue too..
First the gauges.
Got mine from ProcarParts
Now, did most of you guys tap into the normal headlight power in order to have them power on only when headlights are on? HOw did you know which wire to use, anyone have a picture?
Thanks!
Jul 21, 2003 | 11:56 PM
#118
Registered User
Joined: May 2002
Posts: 402
Likes: 0
From: LA, CA
the gauges can be run off the illumination wire from the headunit. That's where I'd tap in from.
As for the LEDs, I think that if you sand the lenses flat, it'll have the same diffusing effect.
If anyone wants frosted white LEDs, lemme know. I have about 75 of them that I never opened cause I don't need them. I'll sell them for a little under what I got them for.
As for the stupid green clock... I never bothered to open the clock until AFTER I bought an accord clock off ebay. Well, I go to dissect both clocks, and it ends up they're both a bluish white color when they're stripped naked. Same bluish white, in fact. The Yota's green and the Honda's blue come from the lenses they put over them. SO, I just trimmed the Yota's plastic lens a little, slipped in a clear piece, slapped on some smoked and blue color filters from lighting gel pack, and put it back in.
Jul 26, 2003 | 10:39 PM
#120
Registered User
Joined: Jul 2003
Posts: 46
Likes: 0
Hey Dub Have you ever made any of those little LED light bulb socket things like they did on
http://www.99accord.com/HowToGuides/...LEDHowToEX.asp
Or are you basically killing each of the bulb holders to fit the LEDs in?
THanks
http://www.99accord.com/HowToGuides/...LEDHowToEX.asp
Or are you basically killing each of the bulb holders to fit the LEDs in?
THanks


