Custom front lightbars?
 Jan 4, 2010 | 12:25 AM
#1
Thread Starter
Registered User
iTrader: (1)
Joined: Oct 2009
Posts: 276
Likes: 0
From: Seattle / Bozeman, MT
Custom front lightbars?
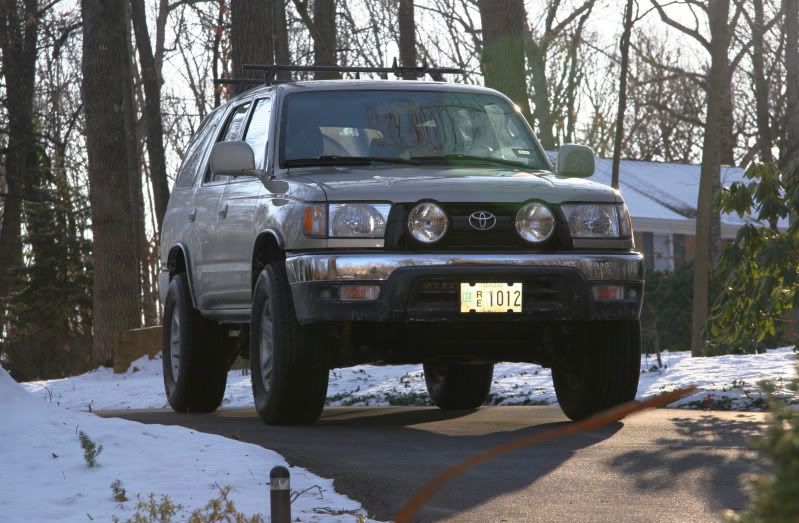
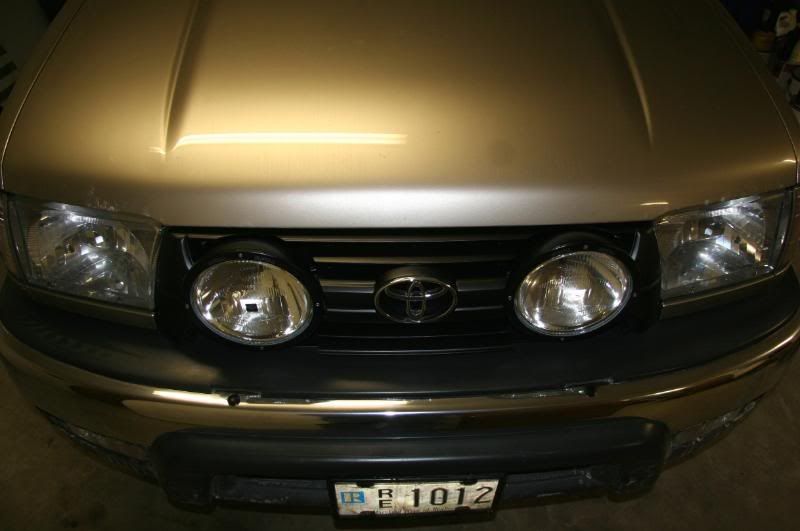
On my last 99 4runner, it had the chrome looking 'fat' front bumper that I had mounted 4 hella 500's on simply by drilling through the top plastic cover and through the bumper itself.
But on the new rig, the sport bumper is all painted and I'm a bit hesitant to drill through the painted metal. I constantly move the lights taking the covers on and off, and vibrations in general, worry me that they will buff the paint and possibly cause more rust.
All the lightbars I've found online cost about 200 plus and I'm looking for cheaper ideas. Anyone have any good design examples? Right now I'm thinking about welding up some plate metal from one of the metal cross bars in a gusseted L bracket design, drilling two or three holes in each (to make it removable for whatever reason necessary) and then running a second wide U bracket through a gap in the factory grill to the L's. I hope that is a clear description.
Jan 4, 2010 | 02:19 AM
#2
Registered User
Joined: Nov 2005
Posts: 548
Likes: 0
From: Toronto, ON
On my '01 Limited front bumper is plastic while the rear is still, at least they were till this Christmas, as now front is ARB and rear waits for CBI.
Meanwhile, you can mount the lights on front bumper as you did on your chrome one. If you still want a light bar, then just get yourself 1" DOM tube, bend it and you have a nice light bar you can mount in pre-runner style.
Meanwhile, you can mount the lights on front bumper as you did on your chrome one. If you still want a light bar, then just get yourself 1" DOM tube, bend it and you have a nice light bar you can mount in pre-runner style.
Jan 4, 2010 | 02:31 AM
#3
Registered User
Joined: Oct 2007
Posts: 208
Likes: 0
From: CHESTER COUNTY , PA ; by way of KOBLENZ , GERMANY
I took a piece of 2"x2" angle iron painted it black then i mounted it to the lisence plate bracket to blend in . and added a pair of cheap assed light from pep boys. but i will be adding some 6" off road lights.
Jan 7, 2010 | 07:57 AM
#4

Registered User
Joined: Feb 2007
Posts: 319
Likes: 0
From: Santa Monica, Ca
http://www.defianttruckproducts.com/...oyota/38/0.php
This guy is just about done with his bars - email him. Ive got 2 on order. Solid mounting - no vibration. 3 or 4 light mounts - whatever you prefer.
This guy is just about done with his bars - email him. Ive got 2 on order. Solid mounting - no vibration. 3 or 4 light mounts - whatever you prefer.
Jan 7, 2010 | 08:20 AM
#5

Registered User
Joined: Nov 2008
Posts: 28
Likes: 0
http://www.defianttruckproducts.com/...oyota/38/0.php
This guy is just about done with his bars - email him. Ive got 2 on order. Solid mounting - no vibration. 3 or 4 light mounts - whatever you prefer.
This guy is just about done with his bars - email him. Ive got 2 on order. Solid mounting - no vibration. 3 or 4 light mounts - whatever you prefer.
I had emailed Paul at Defiant about one for my '02 and he said that he has the template done for the fat lip bumpers and is just making sure that it fits right and there are no problems before he starts selling them. He told me they would be ready for sale by Feb. You can also chose from a short light bar or a longer one.
Jan 7, 2010 | 10:07 AM
#6
Thread Starter
Registered User
iTrader: (1)
Joined: Oct 2009
Posts: 276
Likes: 0
From: Seattle / Bozeman, MT
I've seen those online before but was just a bit hesitant about the 240 dollar price tag (I think that is what it was from memory, correct me if wrong. I just figured for that amount I'm already a good way toward an aftermarket bumper. Are they going to be coming through the bumper/grill for the fat lip bumpers? I just don't want it to hinder the approach angle.
Jan 7, 2010 | 10:33 AM
#7
Registered User
Joined: Mar 2009
Posts: 75
Likes: 0
From: Orange County, CA
Paul is excellent to deal with, and my bar is solid!! mounts using the two tow hook bolts + he thru drilled a bolt thru the end of the frame rail.
I have a post already with some pictures on here...
I have a post already with some pictures on here...
Trending Topics
Jan 7, 2010 | 11:25 AM
#8
Contributing Member
Joined: Jul 2003
Posts: 9,076
Likes: 1
From: Orlando, FL
On my last 99 4runner, it had the chrome looking 'fat' front bumper that I had mounted 4 hella 500's on simply by drilling through the top plastic cover and through the bumper itself.
But on the new rig, the sport bumper is all painted and I'm a bit hesitant to drill through the painted metal. I constantly move the lights taking the covers on and off, and vibrations in general, worry me that they will buff the paint and possibly cause more rust.
All the lightbars I've found online cost about 200 plus and I'm looking for cheaper ideas. Anyone have any good design examples? Right now I'm thinking about welding up some plate metal from one of the metal cross bars in a gusseted L bracket design, drilling two or three holes in each (to make it removable for whatever reason necessary) and then running a second wide U bracket through a gap in the factory grill to the L's. I hope that is a clear description.
But on the new rig, the sport bumper is all painted and I'm a bit hesitant to drill through the painted metal. I constantly move the lights taking the covers on and off, and vibrations in general, worry me that they will buff the paint and possibly cause more rust.
All the lightbars I've found online cost about 200 plus and I'm looking for cheaper ideas. Anyone have any good design examples? Right now I'm thinking about welding up some plate metal from one of the metal cross bars in a gusseted L bracket design, drilling two or three holes in each (to make it removable for whatever reason necessary) and then running a second wide U bracket through a gap in the factory grill to the L's. I hope that is a clear description.
Will also cut down on rattling too.
Fink
 Jan 8, 2010 | 08:20 PM
#9

Contributing Member
Joined: Jan 2004
Posts: 1,757
Likes: 46
From: Ellicott City, MD
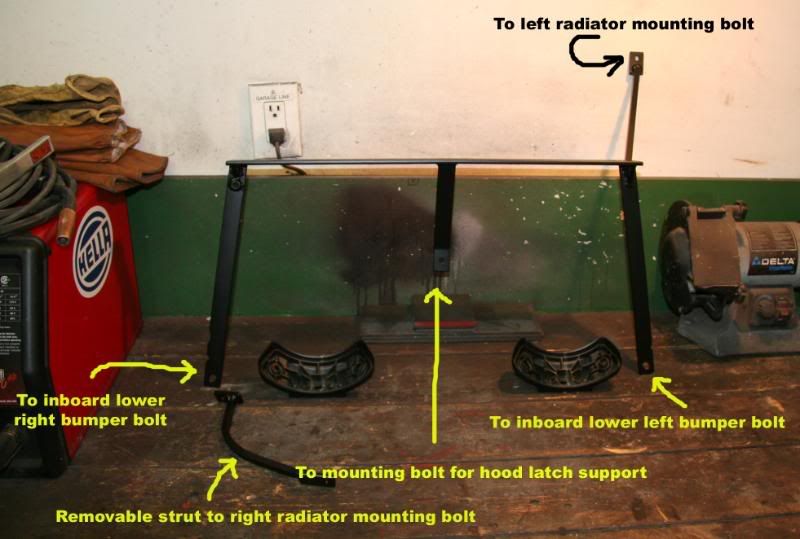
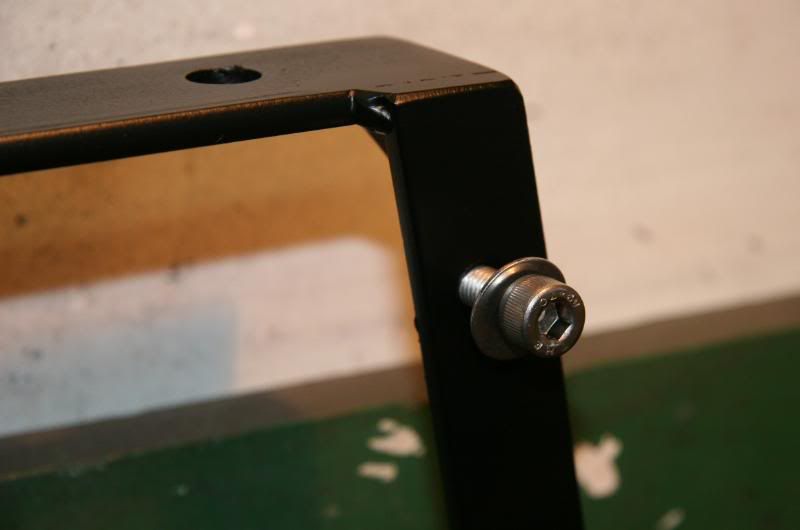
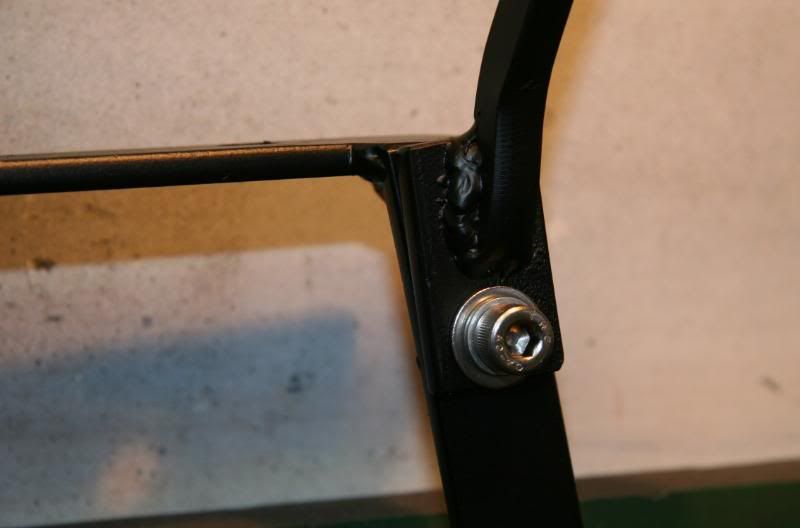
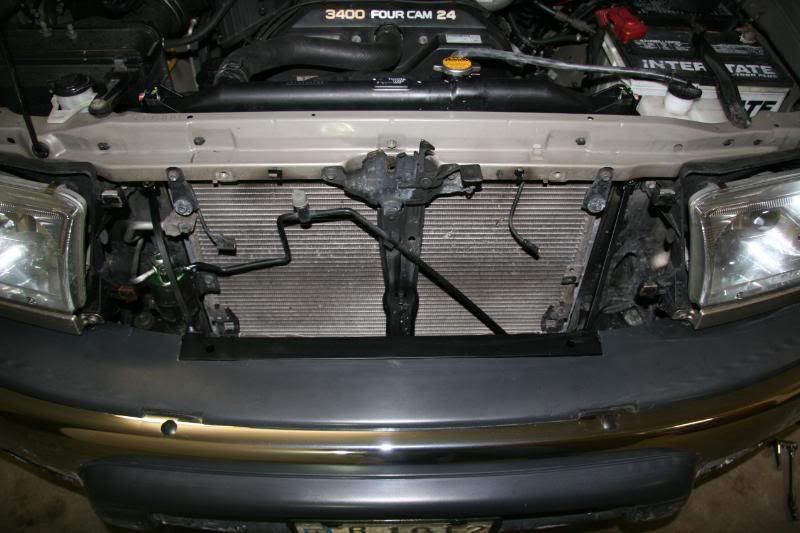
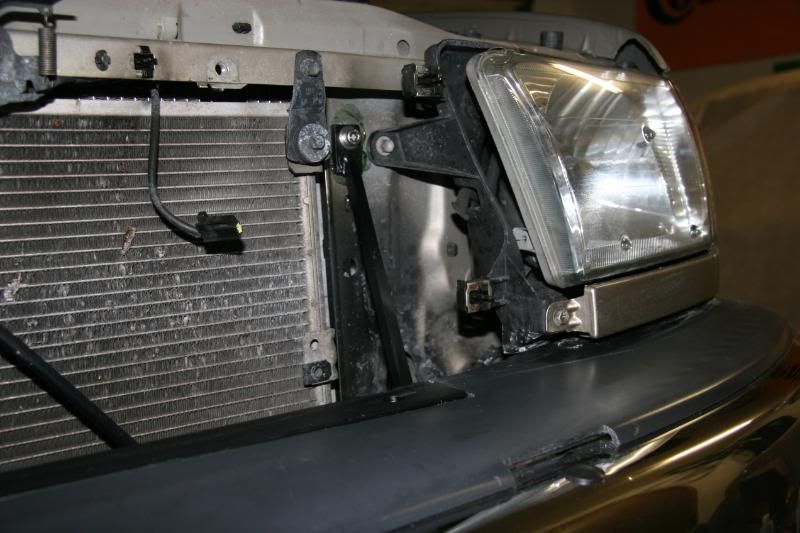
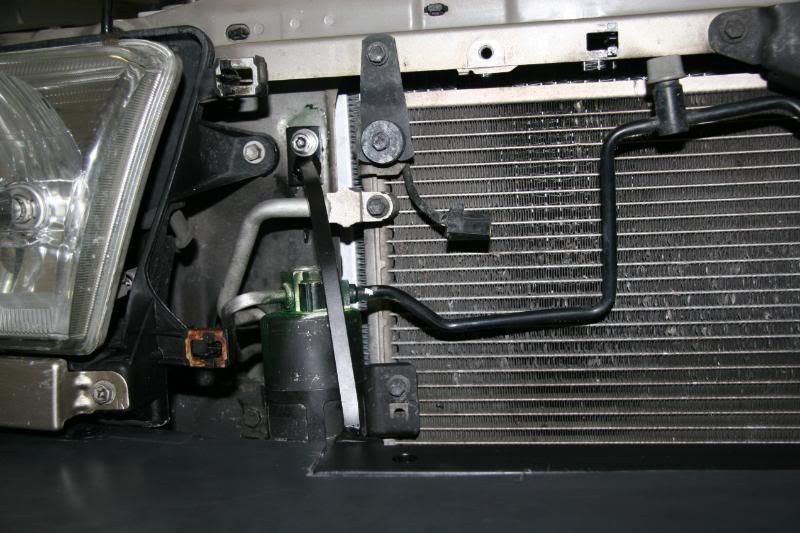
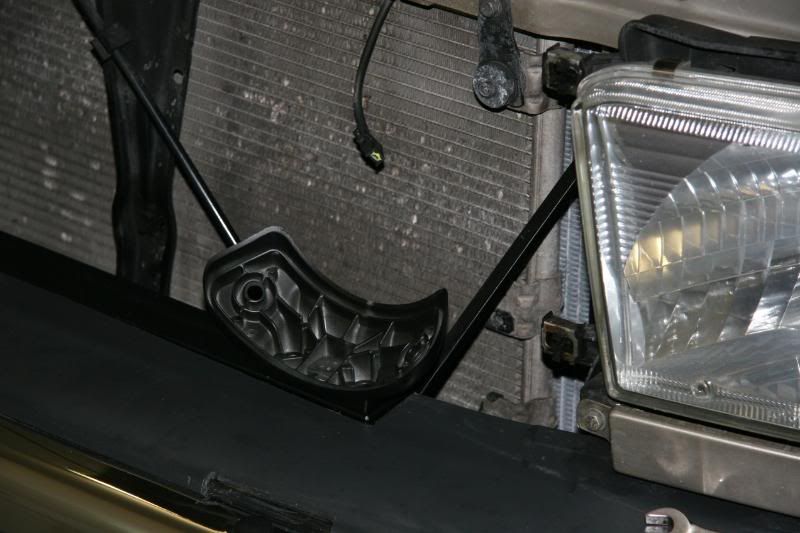
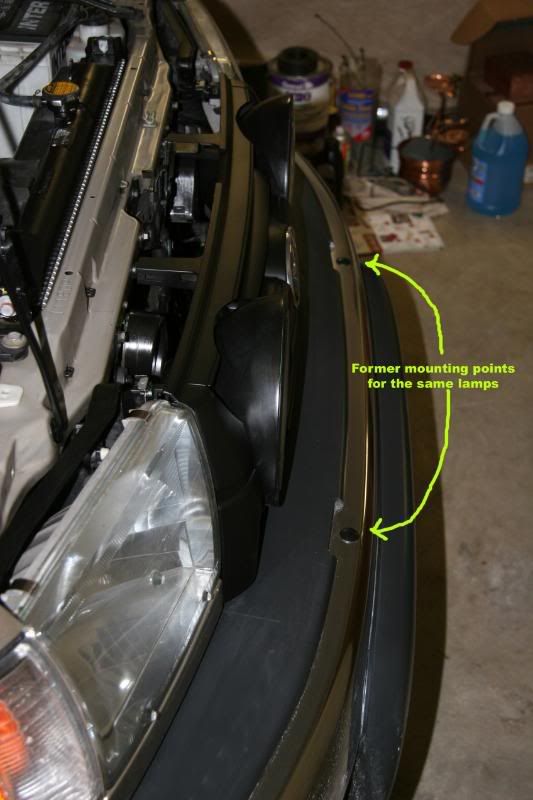
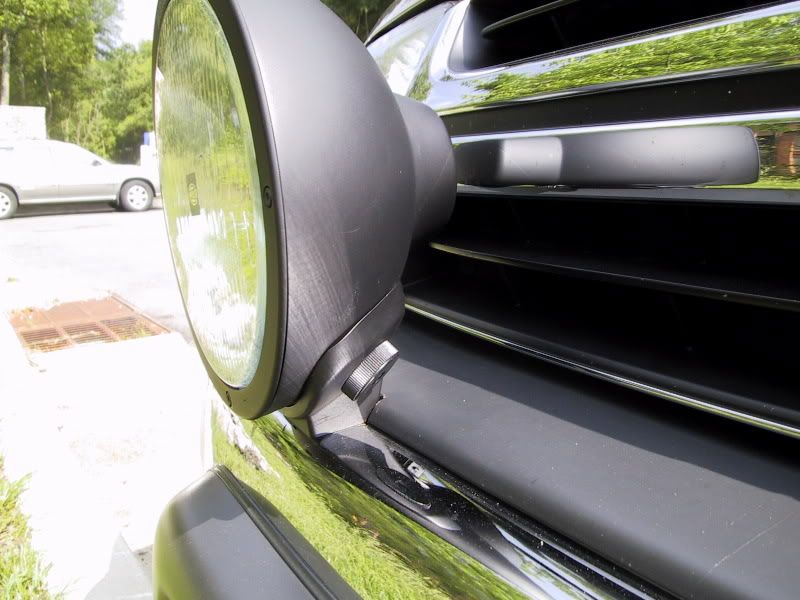
Timely thread.... I've spent part of the last two days fabricating a steel mount for my two Hella 4000 lamps. I first purchased the lamps in '02 and mounted them to the top of the front bumper. Since our bumpers are made of pre-rusted tin, I ended up having some 1/4" thick support bars bent that I connected from frame bolts to the lamp bracket bolts. A few years later, I removed the lights for no good reason. 
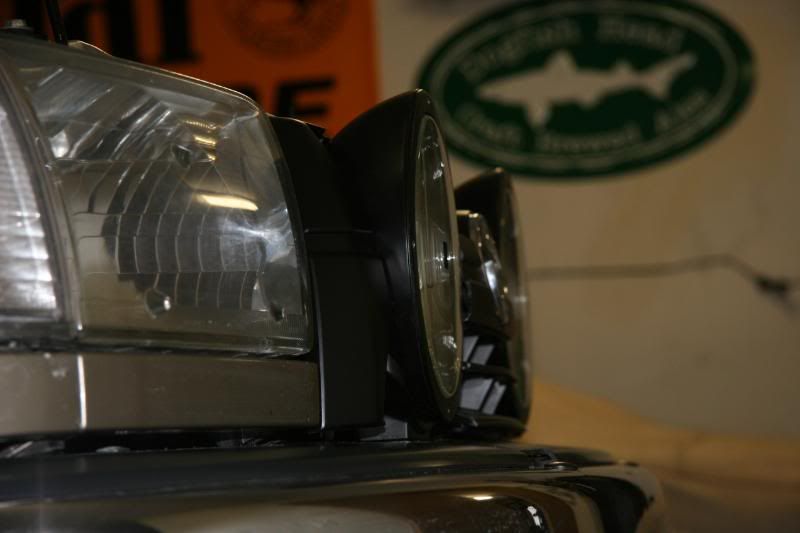
So recently I decided to dust them off and put them back into use. Armed with decent welding skills, metal cutting equipment, etc., I constructed a stout setup that sits under the grill, and behind the bumper. Everything is 1/4" steel and attaches at 5 points.
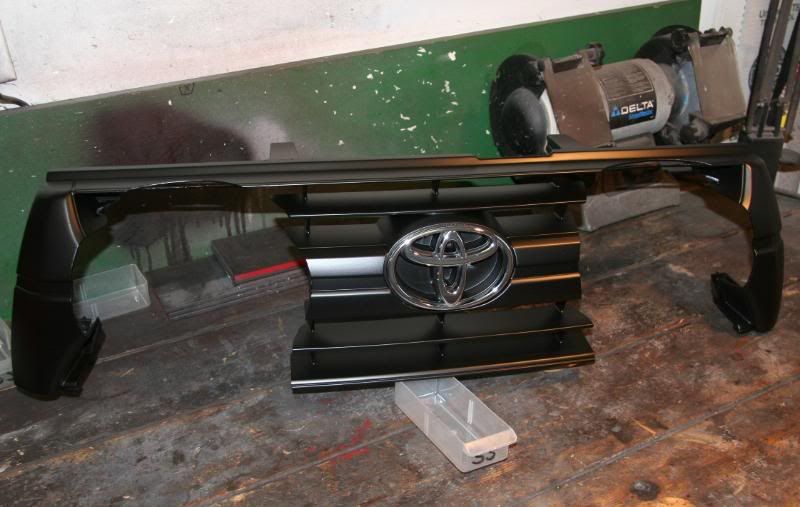
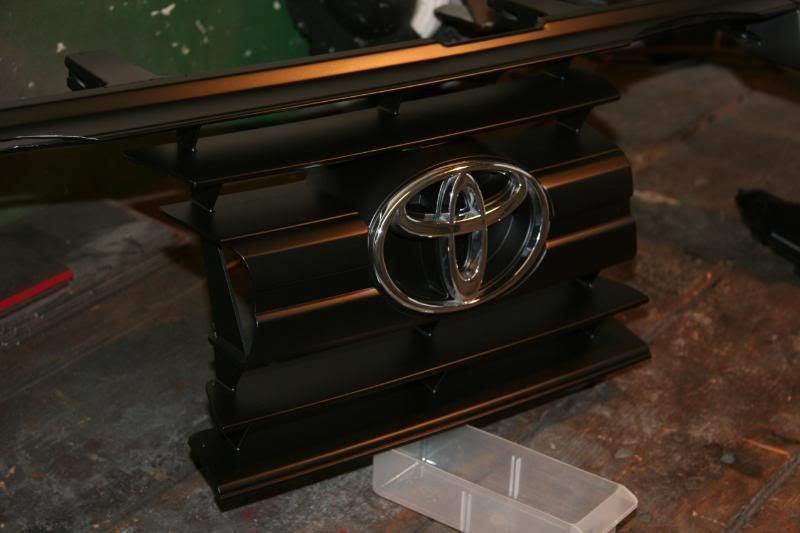
The caveat is that I will cut away a large portion of my beat-up grill to allow the lights to nestle closer to the radiator. I never liked how the lights jutted forward with my initial solution.
At 187,700 miles, I'm comfortable modifying the grille.
I'll take some pics and post here.
Andreas
So recently I decided to dust them off and put them back into use. Armed with decent welding skills, metal cutting equipment, etc., I constructed a stout setup that sits under the grill, and behind the bumper. Everything is 1/4" steel and attaches at 5 points.
The caveat is that I will cut away a large portion of my beat-up grill to allow the lights to nestle closer to the radiator. I never liked how the lights jutted forward with my initial solution.
At 187,700 miles, I'm comfortable modifying the grille.
I'll take some pics and post here.
Andreas
Jan 9, 2010 | 10:14 AM
#12
Contributing Member
Joined: Jan 2004
Posts: 1,757
Likes: 46
From: Ellicott City, MD

I may not get to the wiring today (just re-routing the same harness as before), but I'll certainly have both lamps bolted on and ready for some coming out pics.
Andreas
Jan 10, 2010 | 05:19 AM
#13
Contributing Member
Joined: Jan 2004
Posts: 1,757
Likes: 46
From: Ellicott City, MD
I'll have pics up later today.
Andreas
Jan 10, 2010 | 09:48 AM
#16
Contributing Member
Joined: Jan 2004
Posts: 1,757
Likes: 46
From: Ellicott City, MD
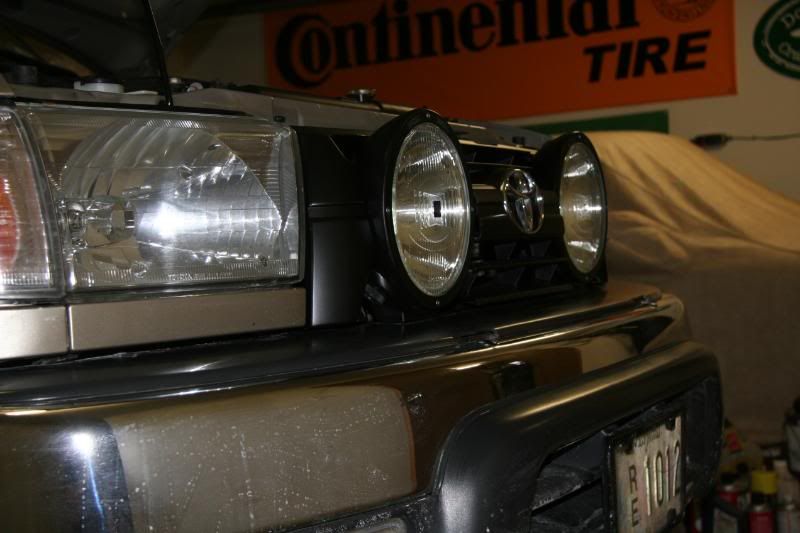
All done - for now. I'll re-install my original harness sometime this week and be able to once again enjoy 200W of proper light.
The pictures below should explain what I came up with. After using these lamps for 2 or 3 years, I just decided to remove them. The original mounting never appealed to me. So they've sat in a box for nearly 4 years.
I have a new gray plastic top trim piece for the bumper, so I had no issue making my old one a bit lighter. My new solution does not rely on the flimsy bumper for support - rather, it attaches to the frame in 5 places. I did some initial placement tacking in place on the truck and all finish welding in my shop. Before painting (Dupli-Color self-etching primer & Dupli-Color High Temp low-gloss black), I cleaned the structure in my bead blasting cabinet. I'm very happy with the solution and look forward to using these again. They're too damn expensive to sit in a box.....
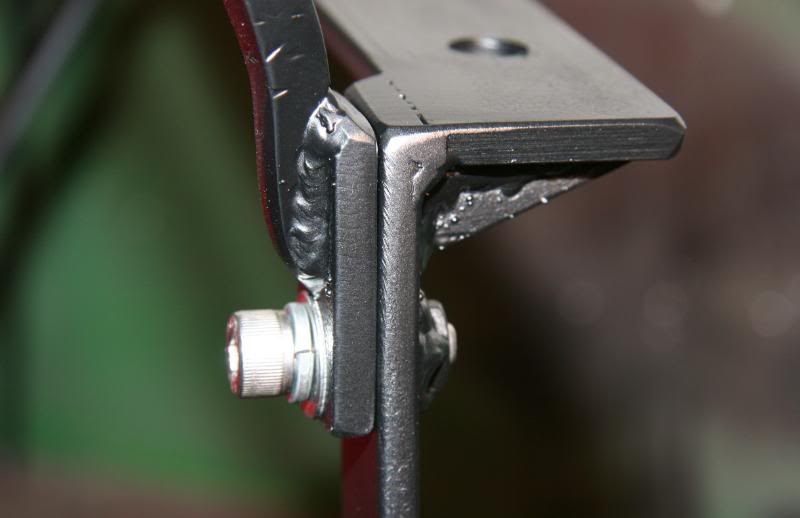
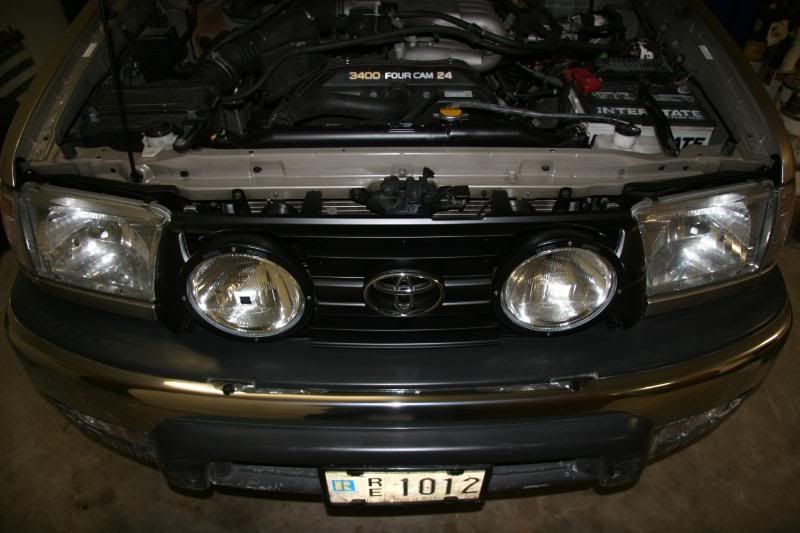
And this is how it looked 4 years ago:
Andreas
The pictures below should explain what I came up with. After using these lamps for 2 or 3 years, I just decided to remove them. The original mounting never appealed to me. So they've sat in a box for nearly 4 years.
I have a new gray plastic top trim piece for the bumper, so I had no issue making my old one a bit lighter. My new solution does not rely on the flimsy bumper for support - rather, it attaches to the frame in 5 places. I did some initial placement tacking in place on the truck and all finish welding in my shop. Before painting (Dupli-Color self-etching primer & Dupli-Color High Temp low-gloss black), I cleaned the structure in my bead blasting cabinet. I'm very happy with the solution and look forward to using these again. They're too damn expensive to sit in a box.....
And this is how it looked 4 years ago:
Andreas
Last edited by aowRS; Jan 10, 2010 at 09:50 AM.
Jan 10, 2010 | 02:38 PM
#19

Banned
Joined: Jul 2009
Posts: 118
Likes: 0
From: mississippi
http://stores.ebay.com/Hunter-Truck-...9?_nkw=4runner
these bull bars would be good for just a light bar. as cheap as $99
its where i got mine from. no lights on it yet though

these bull bars would be good for just a light bar. as cheap as $99
its where i got mine from. no lights on it yet though