When you click on links to various merchants on this site and make a purchase, this can result in this site earning a commission. Affiliate programs and affiliations include, but are not limited to, the eBay Partner Network.
Man. This was exactly what I was looking for. I am going to have to put one of these in and I have never really messed with trailer brakes before besides air brakes.
Wow, what a way to make an intro here at YT! Great write up and detailed pics
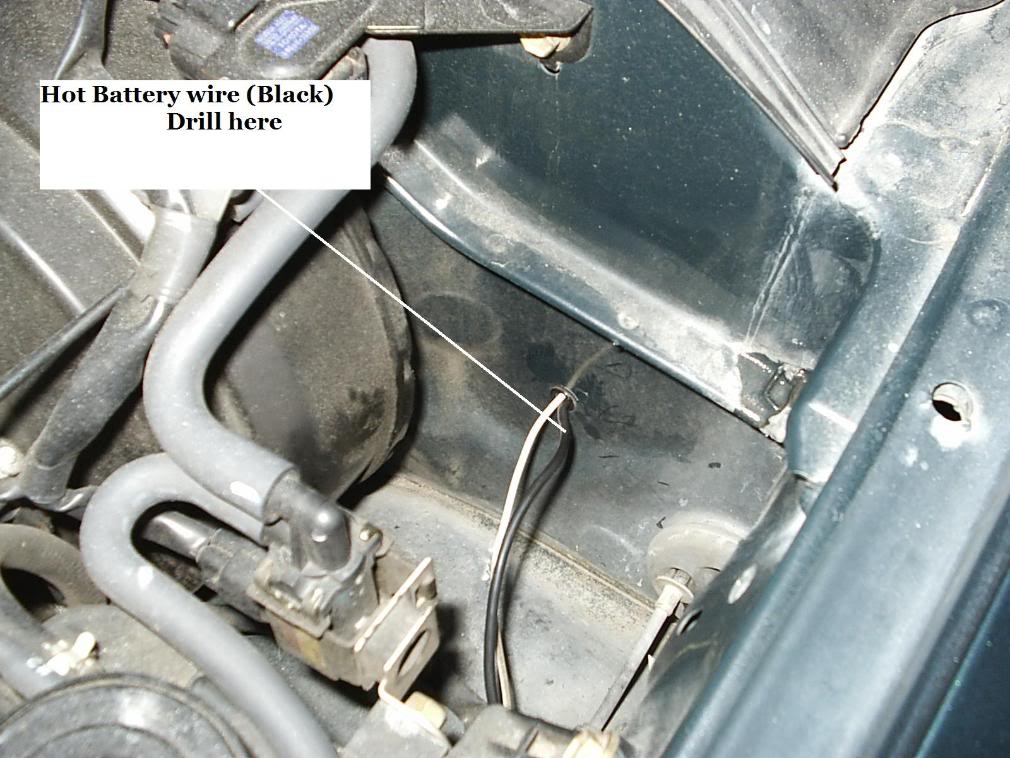
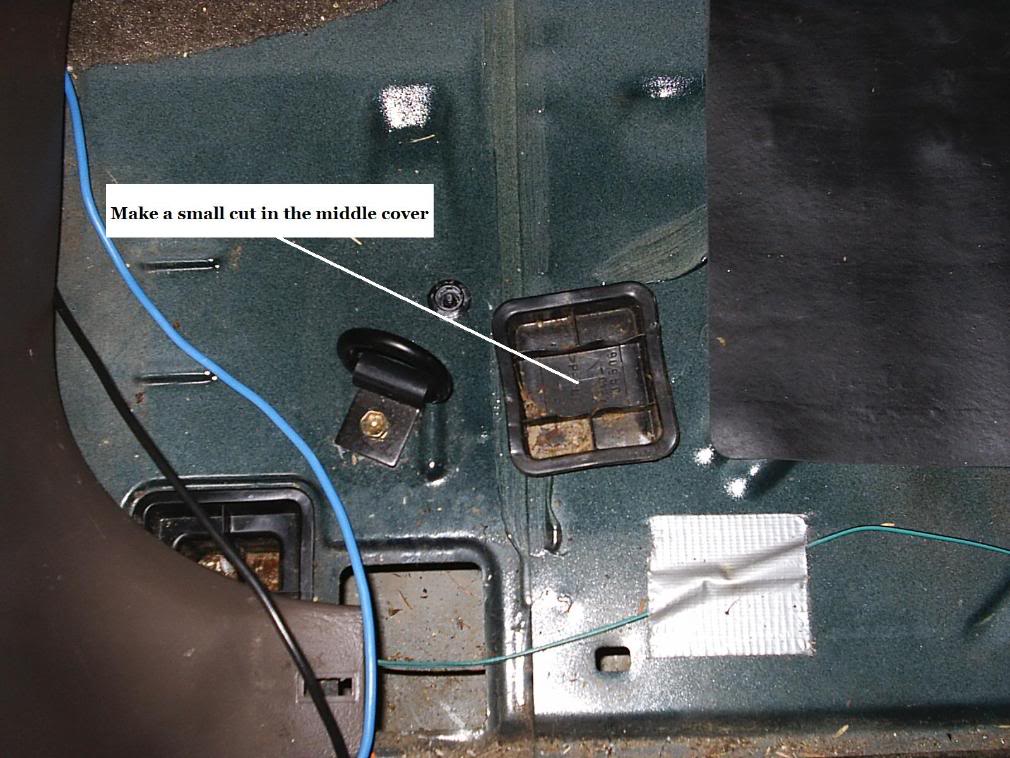
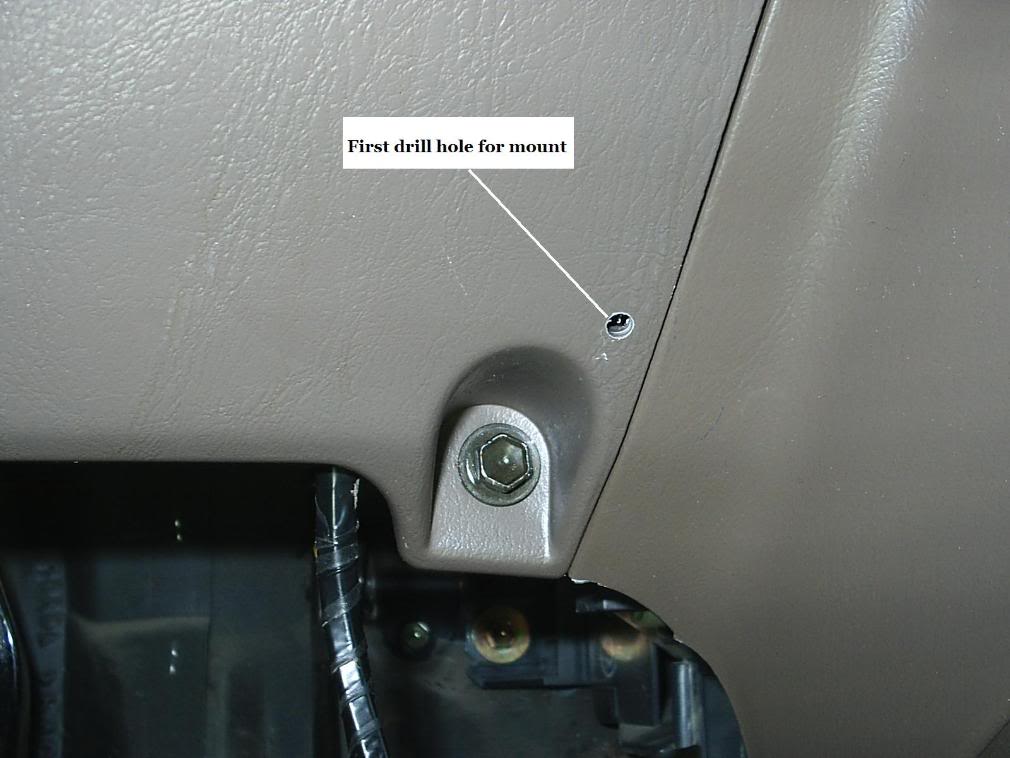
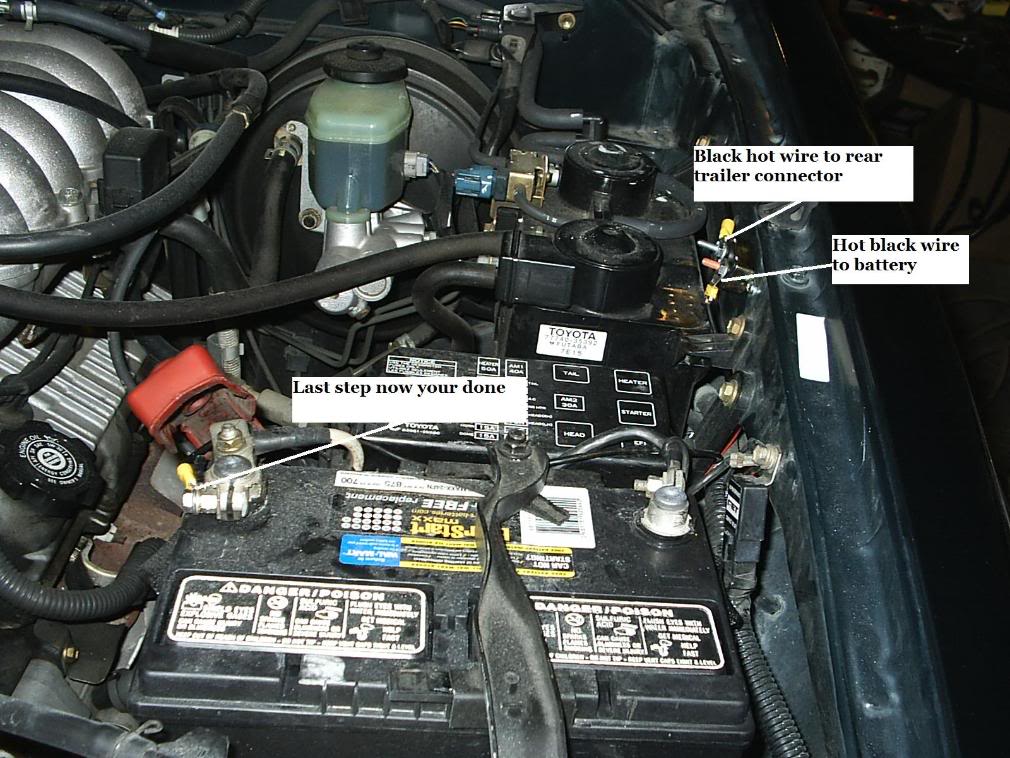
Let me just add this - Be sure to seal up that hole in the firewall really good. I ran some wires like that too in my 4Runner and thought I had it sealed properly until I discovered water was leaking into the cab thru that hole when it rained. I'm sure you sealed it properly, just wanted to make sure others knew to do so.
Again, nice work
Last edited by Rock Slide; Jan 4, 2008 at 10:15 AM.
Napa
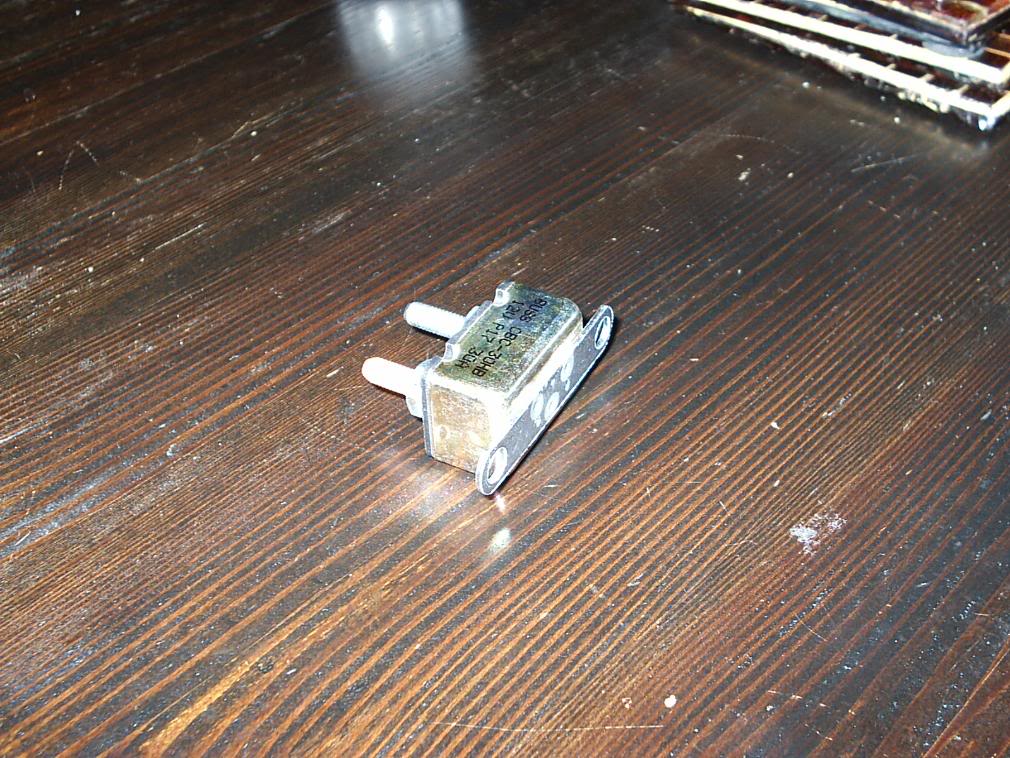
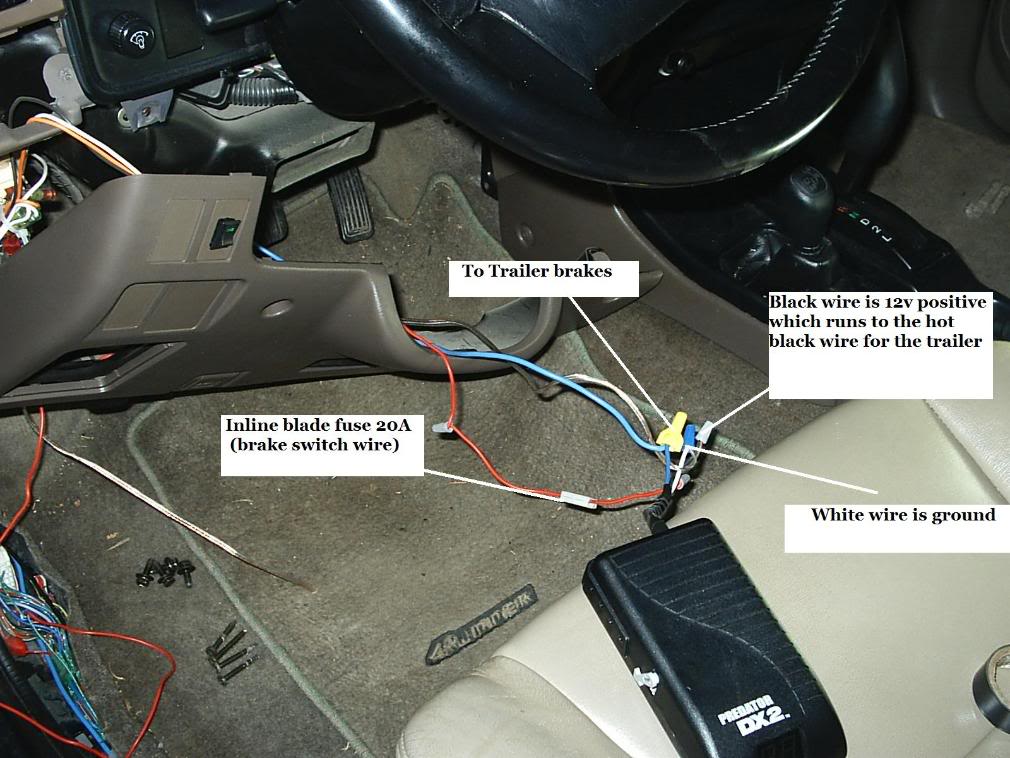
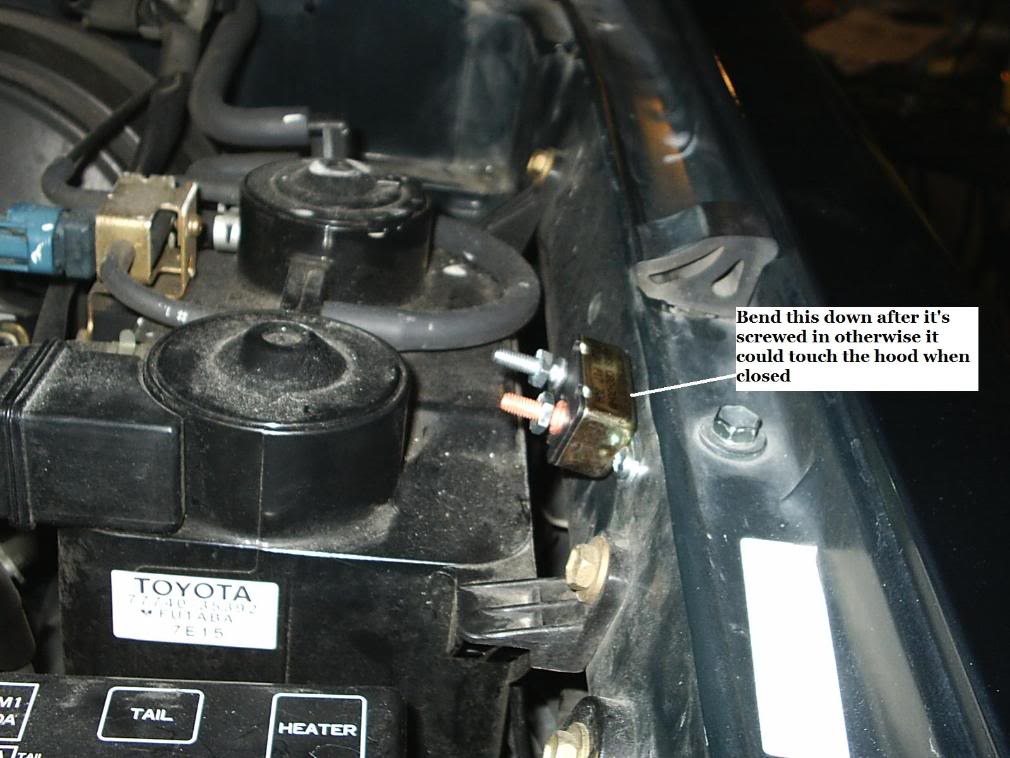
30 Amp Circuit Breaker Fuse $8.00
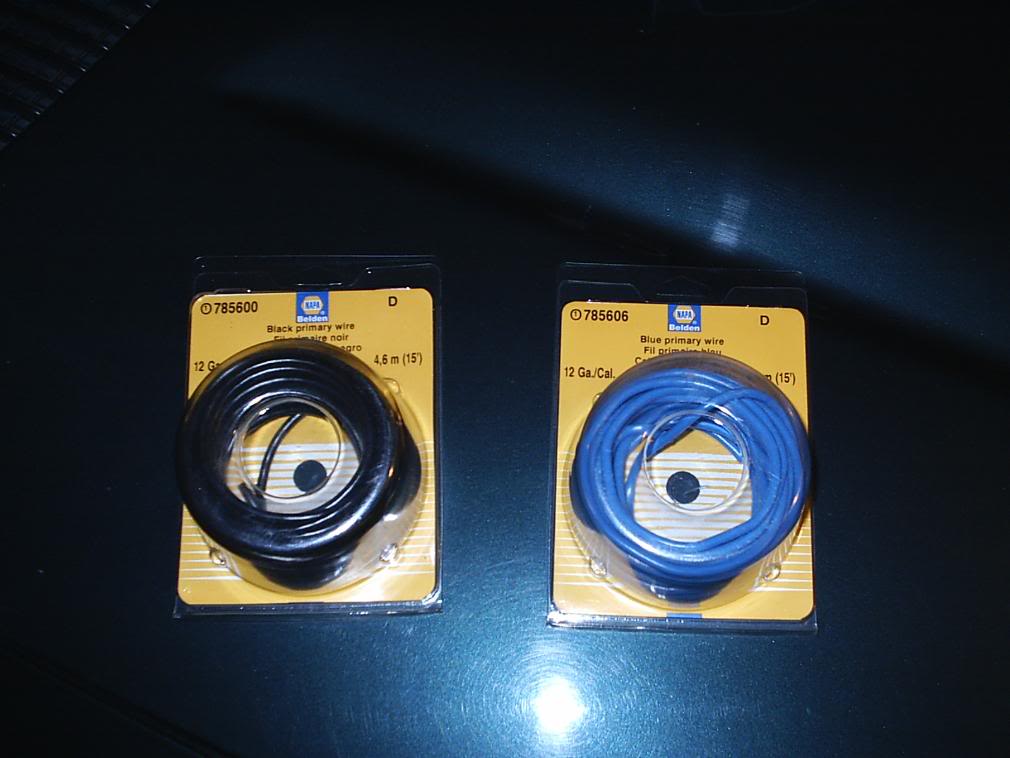
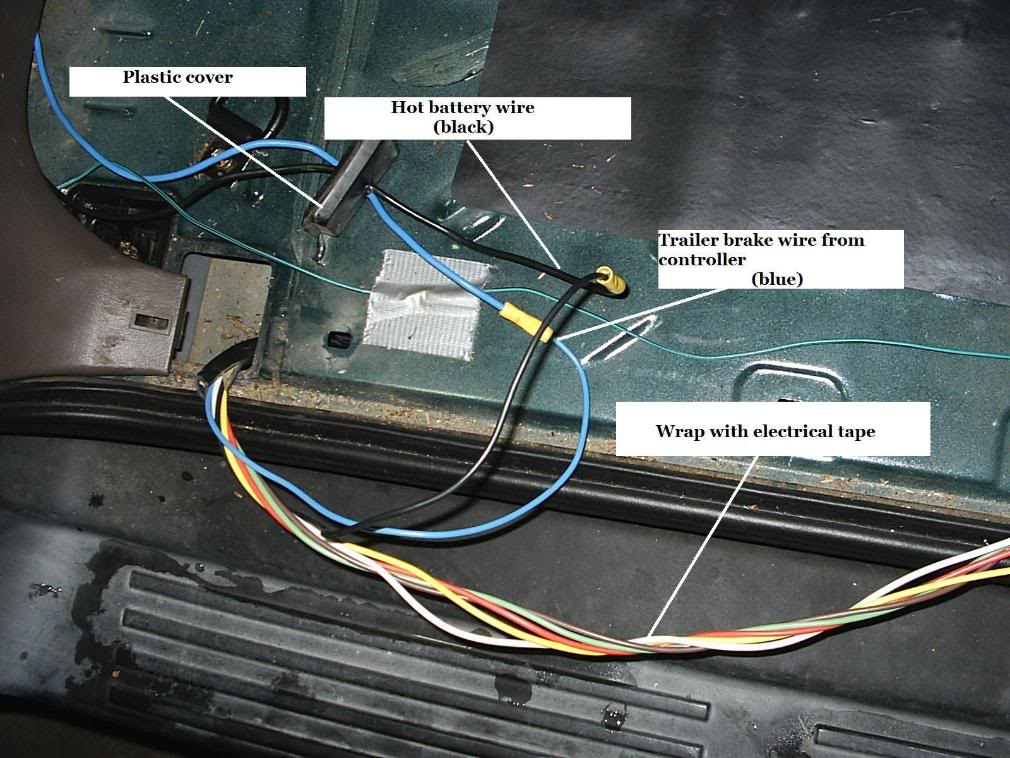
15' 12g Black Primary Wire $6.00
15' 12g Blue Primary Wire $6.00
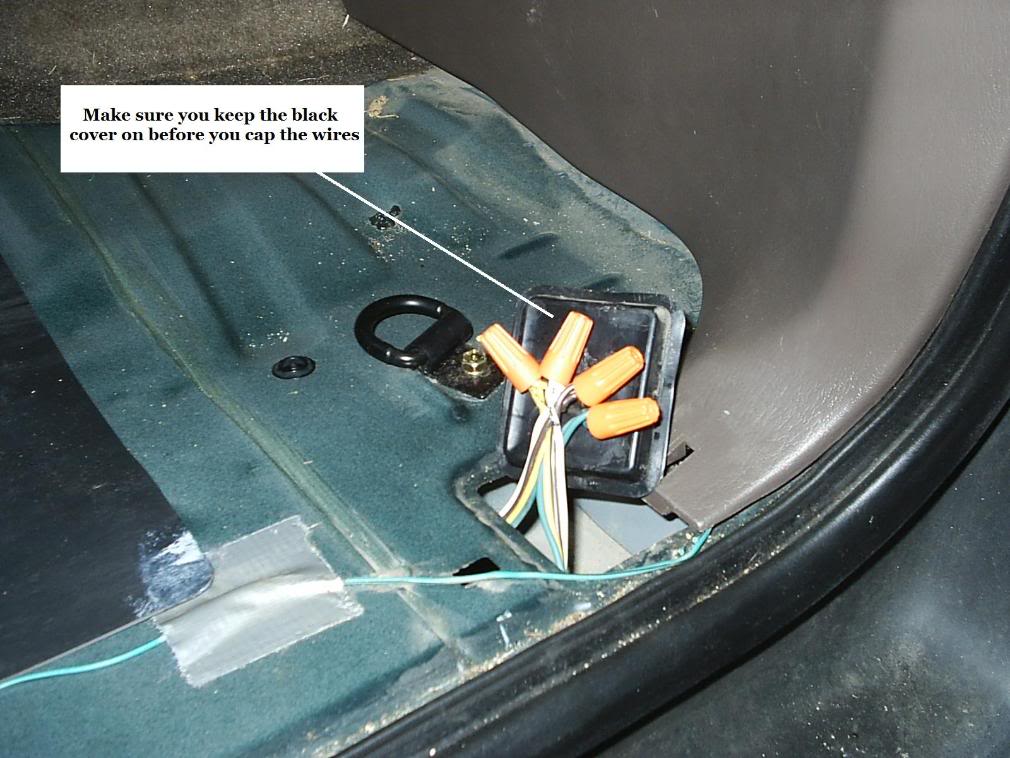
12pc pack of Crimp Caps $3.00
Misc ring terminals $2.50
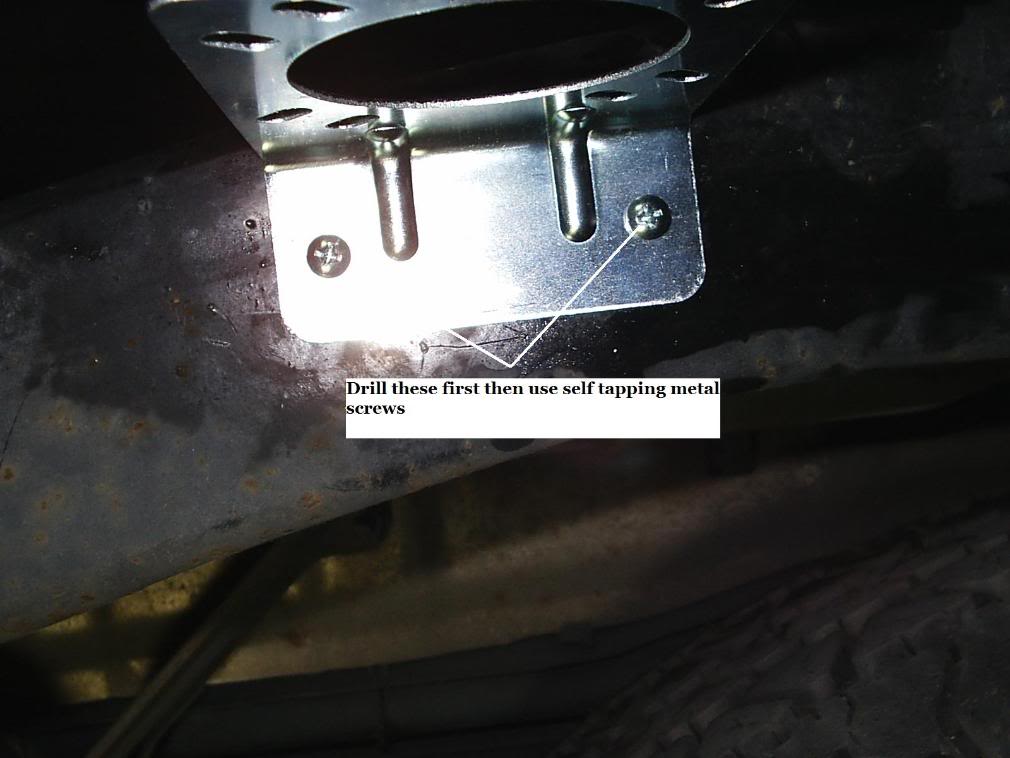
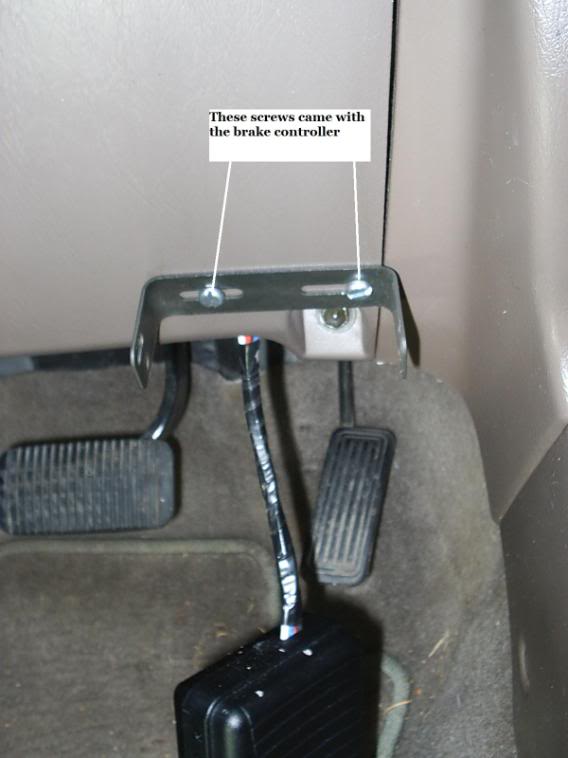
4 Self-tapping (Stainless or plated)screws $1.50
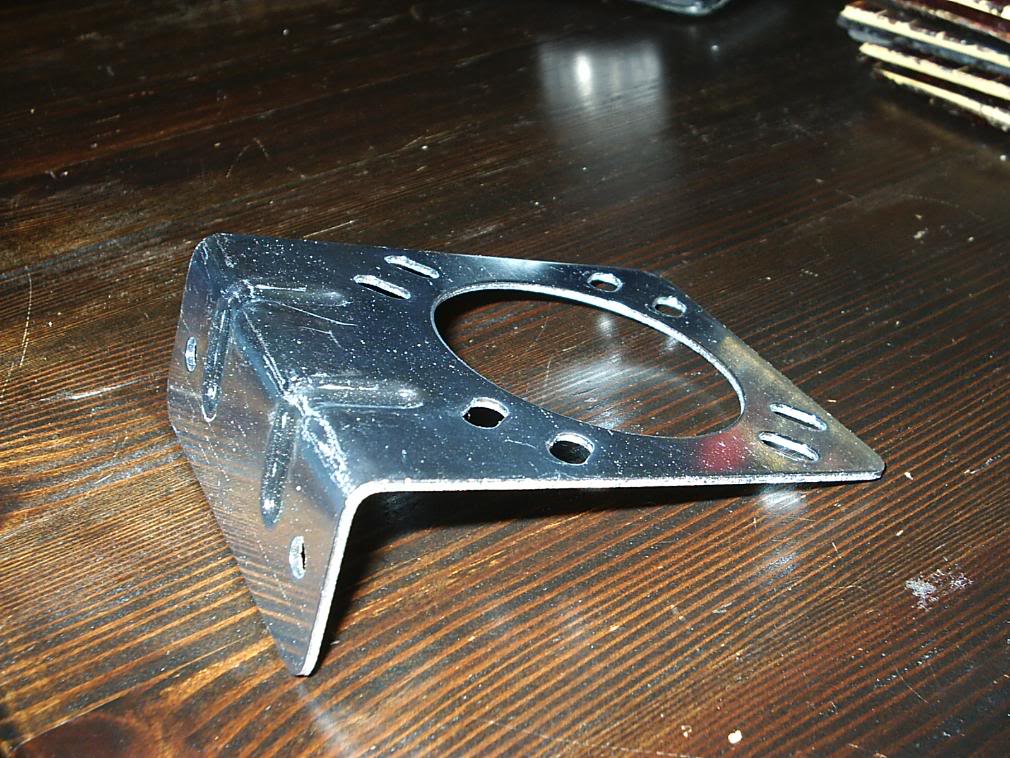
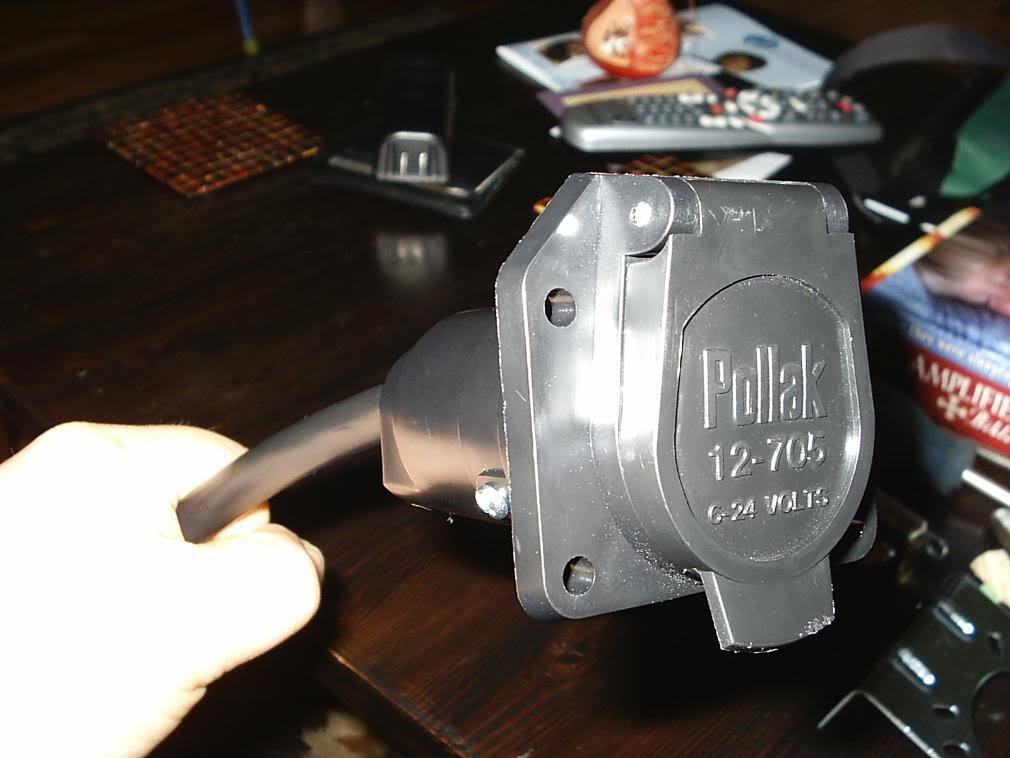
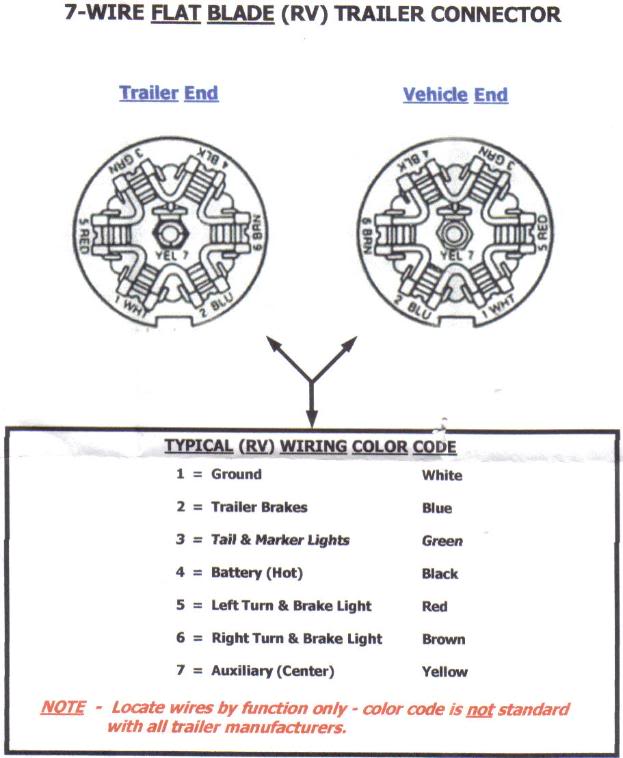
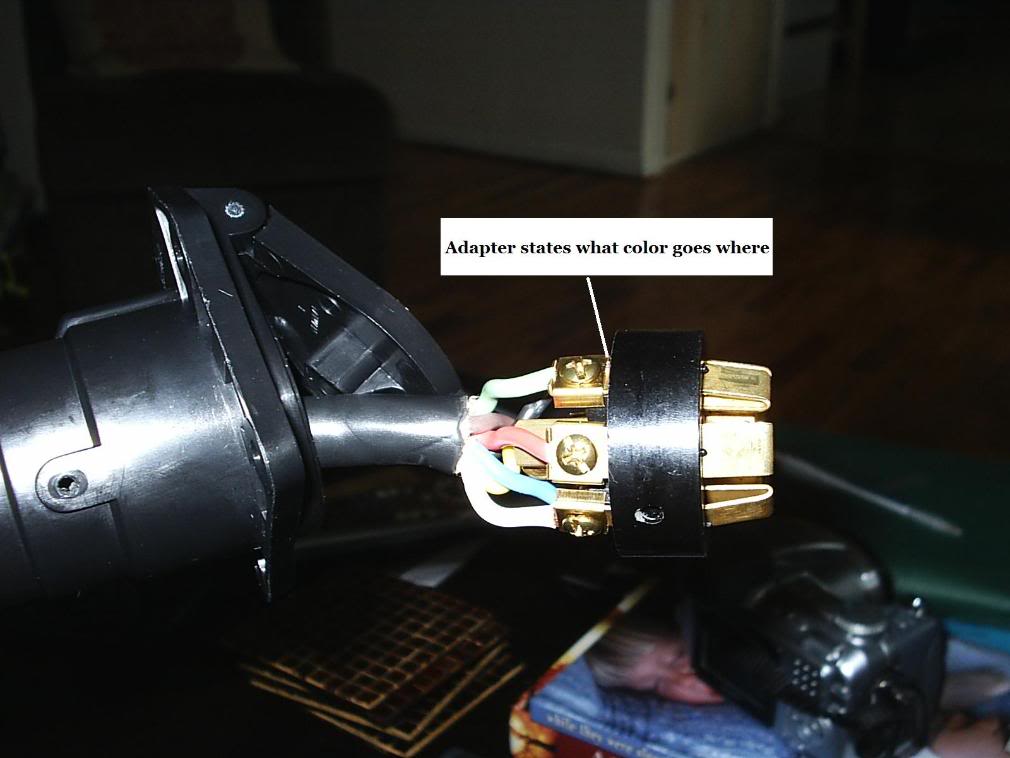
Pollack Trailer 7 pin connector with bracket $15.00
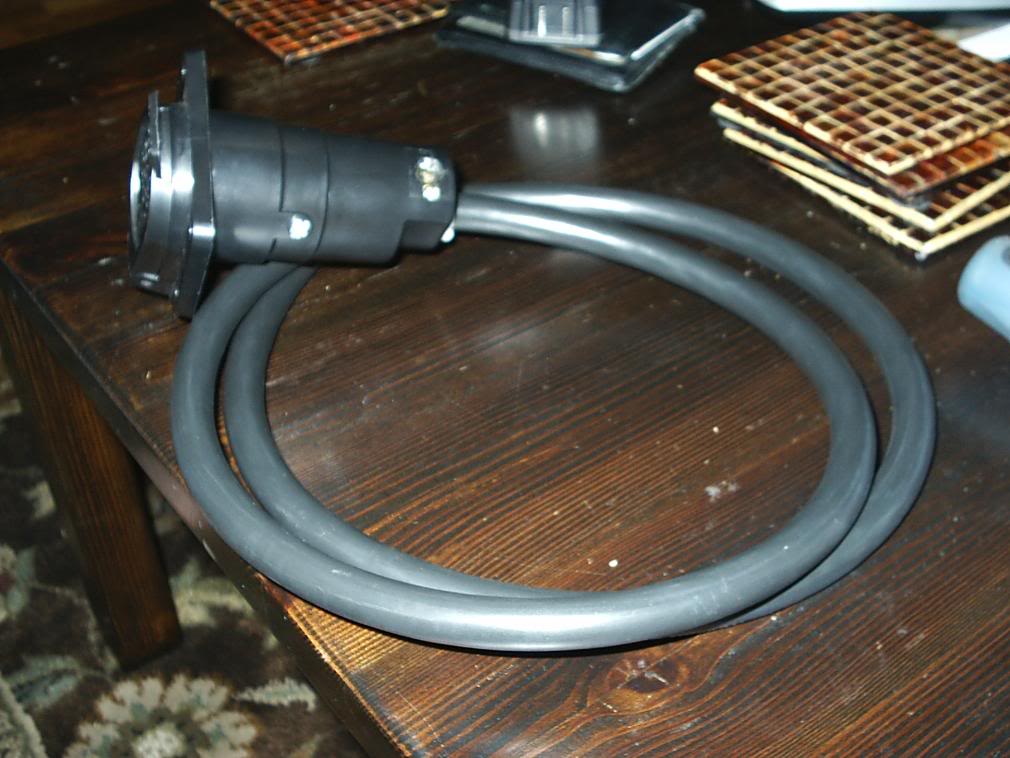
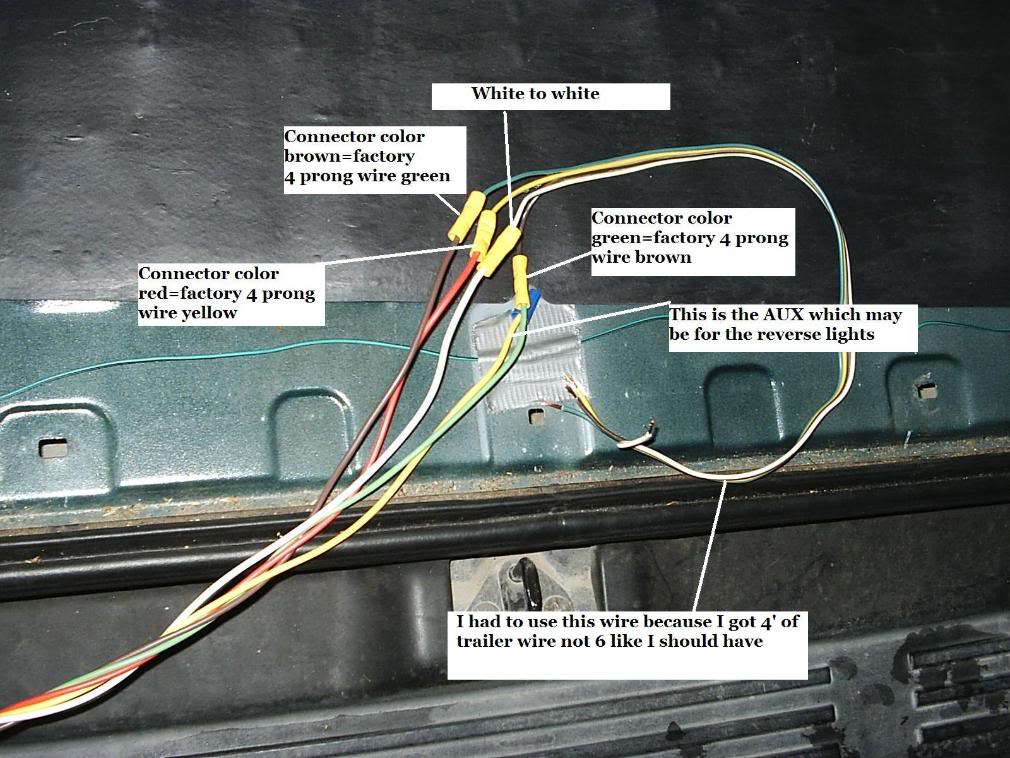
6' of 14ga 7-strand trailer wire $10.00
4 red wire nuts $2.00
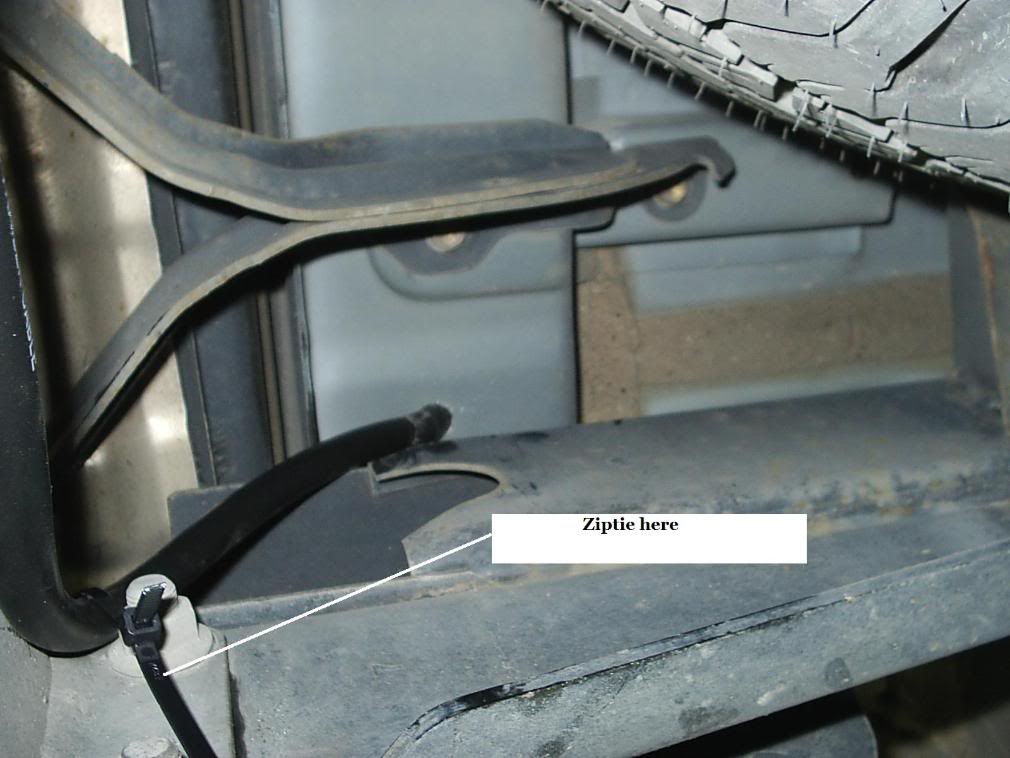
4 zip ties $.50
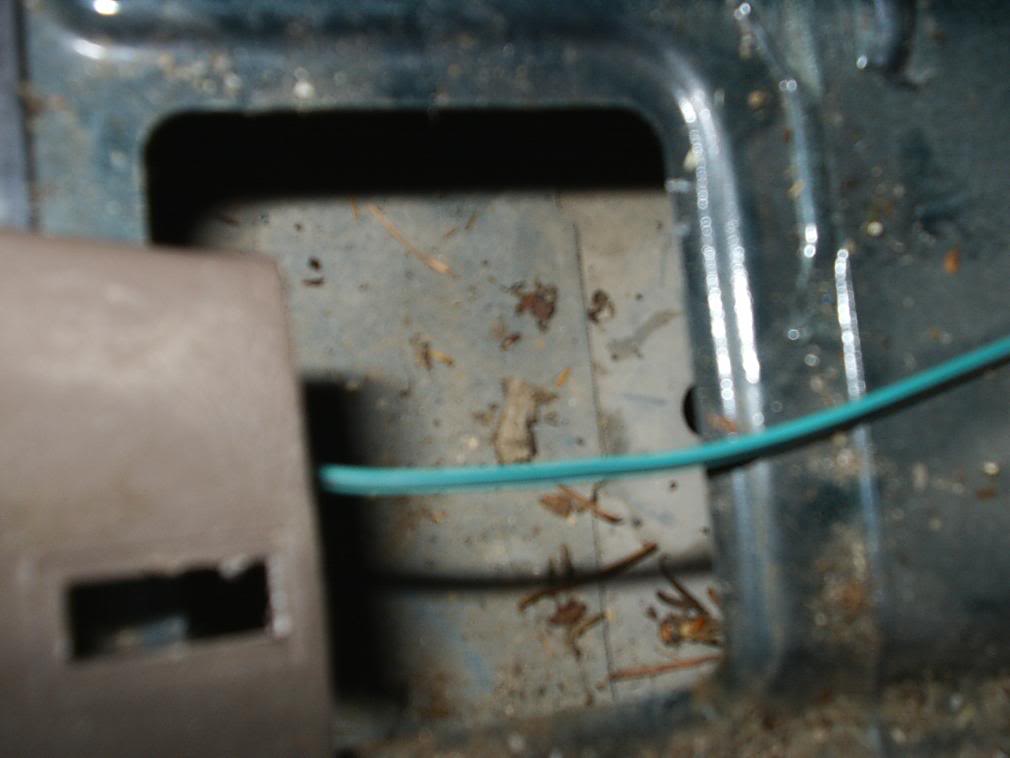
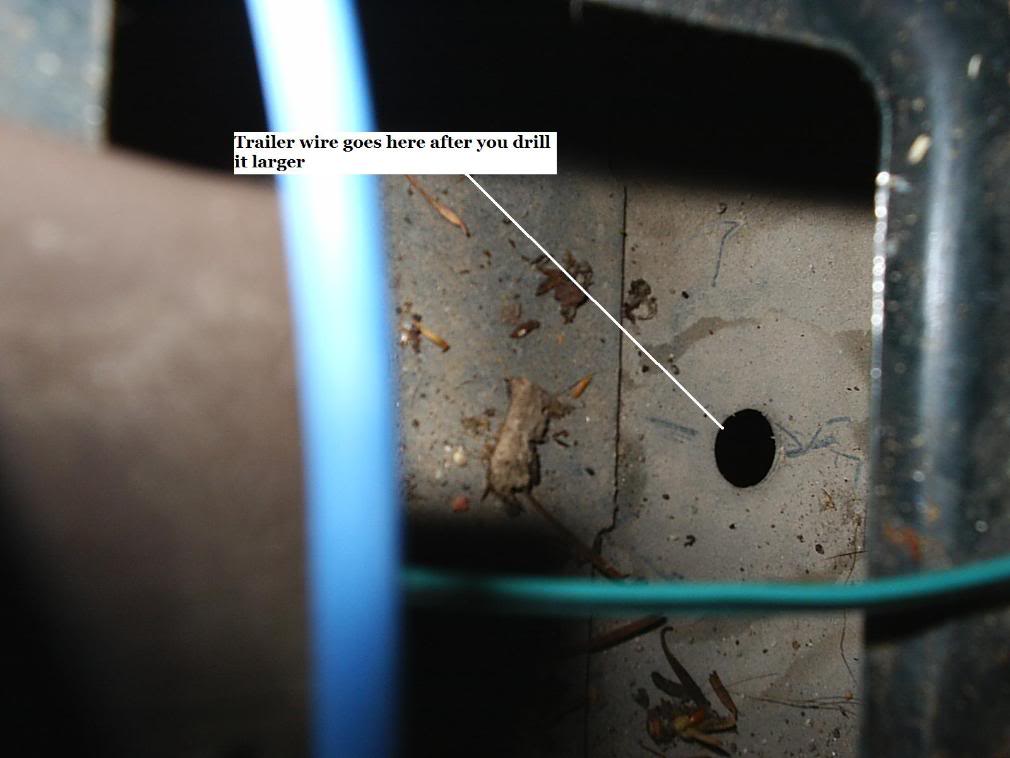
Also you don't want the wires to chafe around the hole that was drilled. Maybe find a rubber grommet, snip it and pull the wires through and place in hole. That almost sounds a little nasty.
Would like to thank you for this thread - it helped me alot.
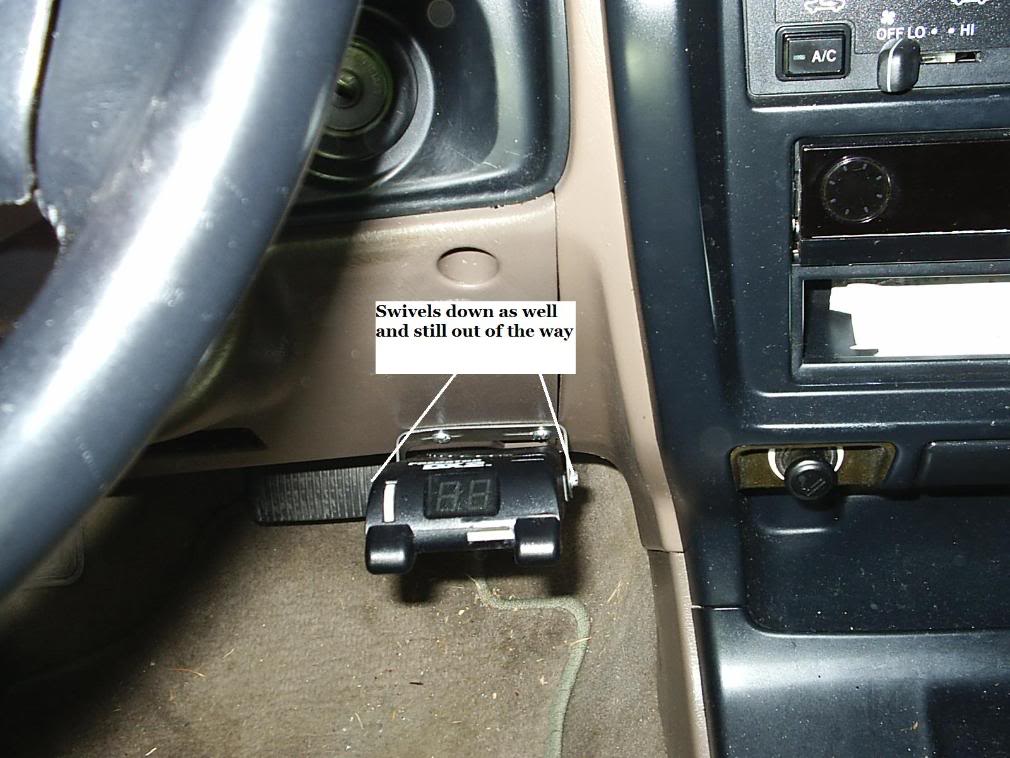
I installed my brake controller (Tekonsha Primus IQ) above the fuse panel. I couldn't get an angle I was happy with on the other side of the steering wheel. I only had to cut a little bit of plastic out with a Dremel and cutting disk. Super easy. On the left side worked out even better. I can see and reach it easily while driving. Obviously, if you have switches above the fuse panel, like an e-locker, this won't work. I was going to mount it in the fuse panel area, but the door arm got in the way.
I'd suggest using 10AWG for the black wire, tho. Just for peace of mind. After looking around at controller installs, seems like this is best practice.
Wire wasn't as hard to find and splice into as I thought. I used a crimp-splicer thingy. Made things super easy.
Last edited by One Sick Puppy; Jan 8, 2017 at 11:28 AM.
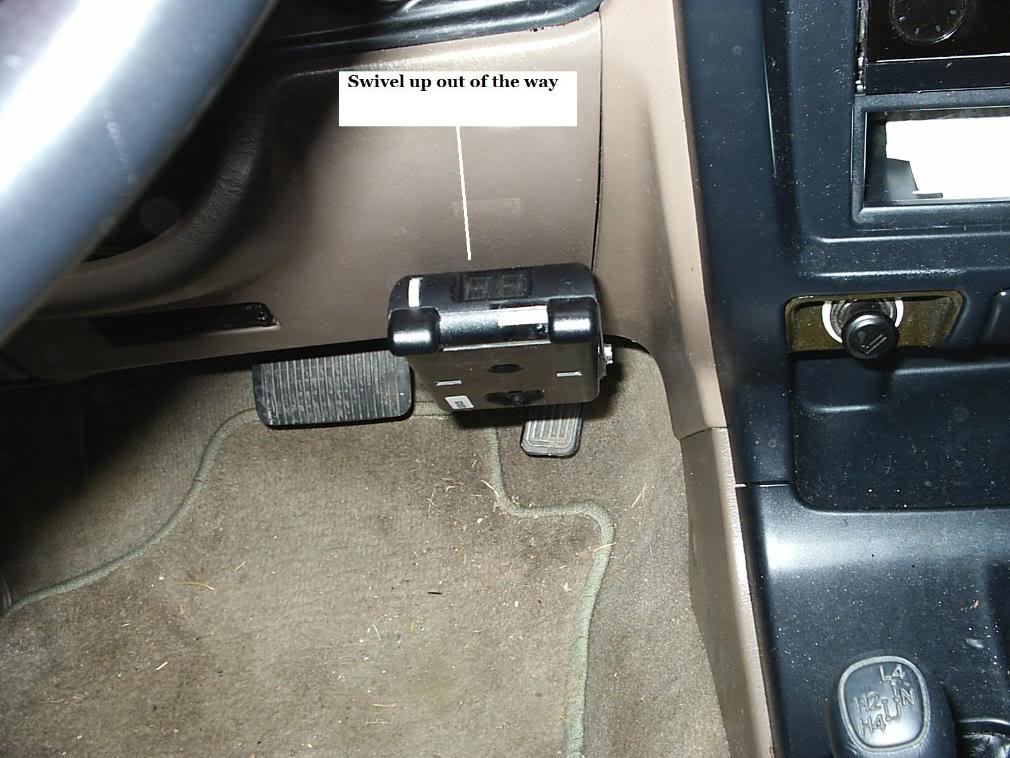
I put mine on the right side but it barely misses the e-brake (I have a Tacoma) and my knee. Someone with longer legs might be hitting it all the time. The one thing about a brake controller- they're always lit up. I got lucky in that a direct view of mine is blocked by the steering wheel. I need to move my head to the side to see it. Otherwise it would drive me crazy at night. I had to put electrical tape over the passenger airbag on/off indicator since it bothered me at night...
With a pickup there's less drilling into the body, which is nice. I'm pretty sure the only holes I put in my truck were for mounting the fuses. Everything else used existing holes or I just ran the wire outside the truck along the frame. The only splicing I did was into the brake light wire coming off the brake pedal.
This is n awesome write up- Thank you very much. Only one part I am confused on- the Reverse (back up lights?) wire coming off the 7 blade plug (its a purple wire on my Hopkins adapter, wired to the center pin)- where do I attach that wire? What do I splice into?
I'm researching this for a popup camper that has brakes. It's not possible to do brakes with 4-flat right?
I wish the pictures worked. Does anyone have the write up? Pictures?
Yeah you'd need to upgrade. I mean in theory you can mickey mouse it and just run another wire for brakes, but that's almost as much work as switching to a 7 pin and a hassle.
What's your vehicle? There are probably other tutorials online. It's a lot more straightforward on pickups than 4Runners.


 Mar 30, 2016, 03:30 PM


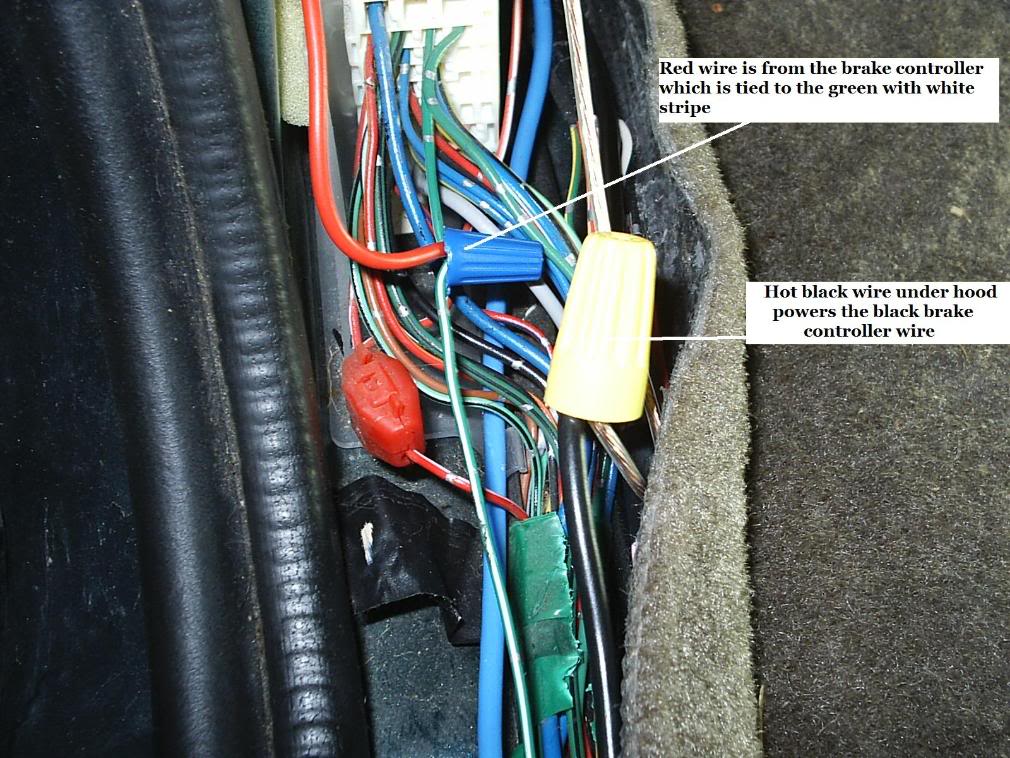


 Wow you are my Hero so brave as to show pictures of wire nuts on stranded wire!!