

 Mar 30, 2016, 11:07 AM
Last edit by: IB Advertising
See related guides and technical advice from our community experts:
- Toyota Tacoma How to Replace Headlights<br>Step by step instructions for do-it-yourself repairs.

'99 headlight Install on '98
May 19, 2008 | 09:07 PM
#1


'99 headlight Install on '98
 Got the parts I needed to finally finish my headlight upgrade. This looks soooo much nicer. So here is the install. I also have the directions for doing this install if you can't find the complete lamp & bucket assembly. I ended up using my old buckets as both lamps I found (at two different yards and times) had broken mounting clips. No worries figured out how to disassemble and I can tell you how if you want to save some cash. Both head lights cost me a total of $40 using my old buckets. So here is the install!
1996-98 to 99-02 Head Light Upgrade
This upgrade will consist of upgrading the main head lights on the Gen 3 1996-98 4runner to the 1999-2002 head lights. This is a pretty straight forward modification and only requires some simple hand tools and the time to perform the exchange.
This is or can be a direct replacement of the entire lamp and bucket assemblies. I my case, I acquired the two lamp assemblies with �broken� buckets. Each was missing one of the grill tabs for attaching the grill back on once the modification was completed.
Some hand tools you will need:
3/8 drive ratchet handle
6�-8� 3/8 drive extension
10mm deep socket
Needle nose pliers
#2 Philips screw driver
Material:
Left and right 99-02 head light assemblies.
If you do not have the complete assembly or like myself located the headlights with damaged buckets, not to worry. You can use the stock OEM buckets from your 96-98 but you will need the rubber boots from the 99-02 so be sure to retrieve them when you get the newer head lights.
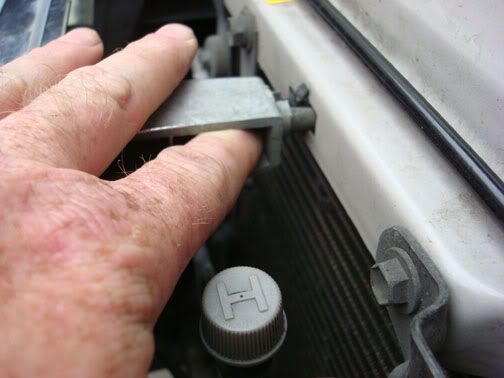
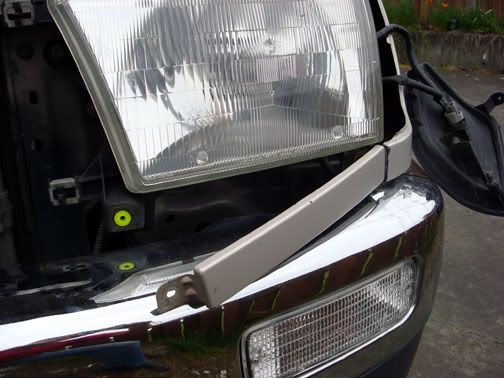
First thing you will need to do is to remove the grill. Very simple process, once you understand how to remove it. Locate all points where the grill attaches to the radiator supports. You will note that each pillar that attaches to the grill has an open side. Inside this support you can see a small plastic tab protruding through a slot in the front side of the support. Pressing lightly in an upward direction which will free the tab from the grill.
Once all the tabs have been pressed releasing the grill mounting posts, slowly lift the grill from it�s location up and out.
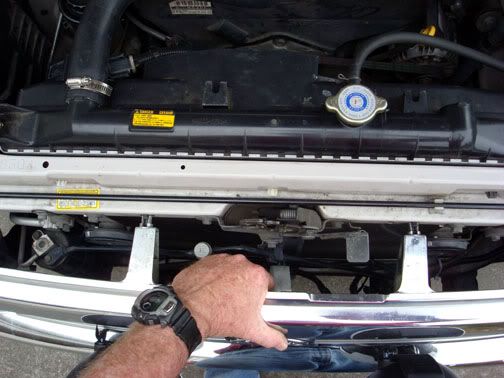
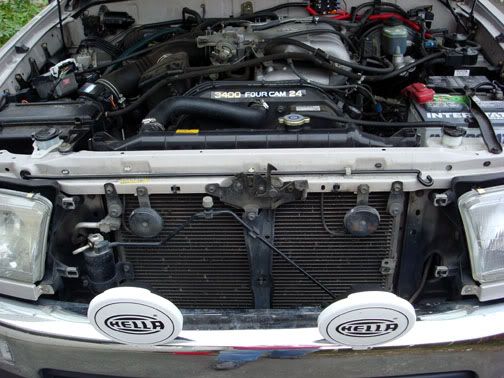
With the grill removed, you can now prepare the rest of the front for the head lamp removal.
Begin by removing the philips head screw from the corner lamp.
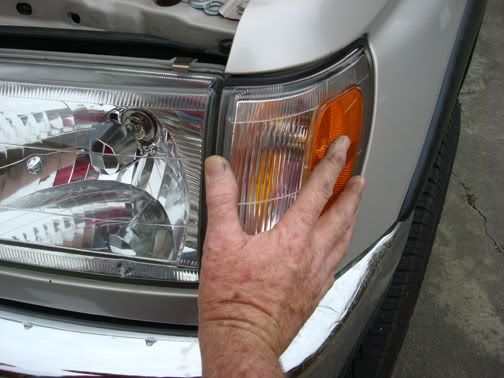
Grasp the corner lamp firmly in the hand and begin pulling the lamp straight out from it�s mounting. It may be necessary to wiggle the lamp slightly. The lamp should literally pop out of its housing in the fender.
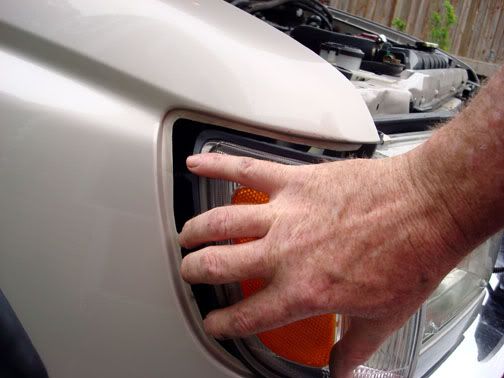
Let the corner lamp hang to the side. This will reveal the two securing nuts on the outer side of the bucket assembly.
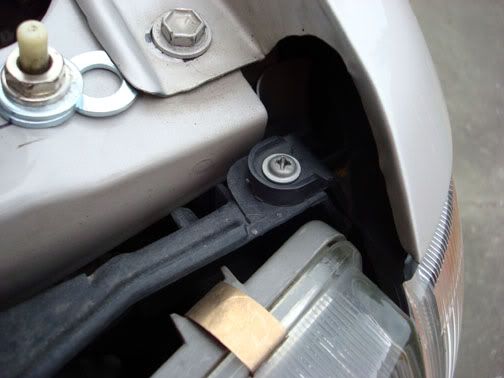
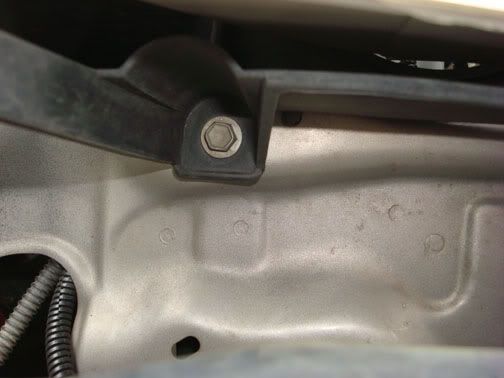
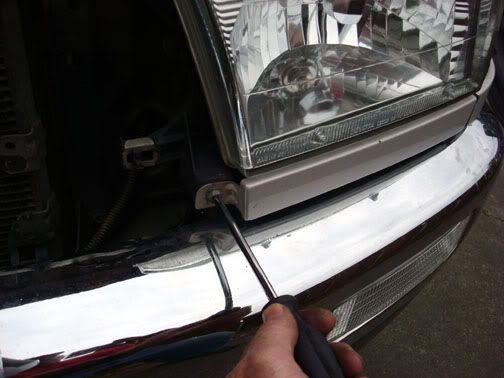
Beneath the lamp assembly is a small rectangle piece of trim held in place by a single screw. Remove this screw.

Be careful not to pull to much on the trim as it is attached to the fender with a plastic clip that can be easily broken.
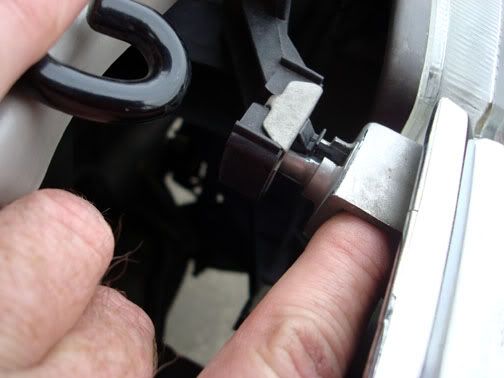
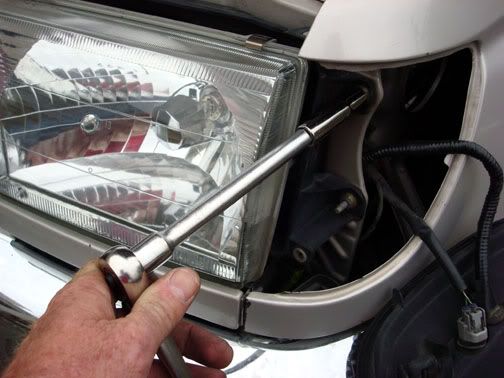
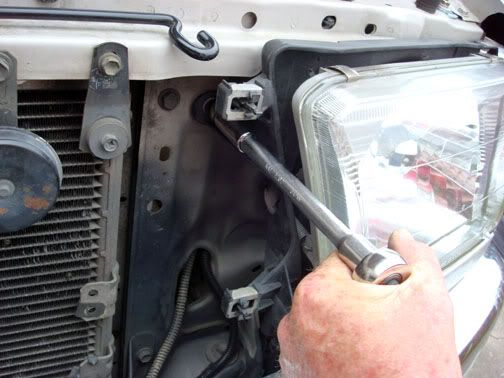
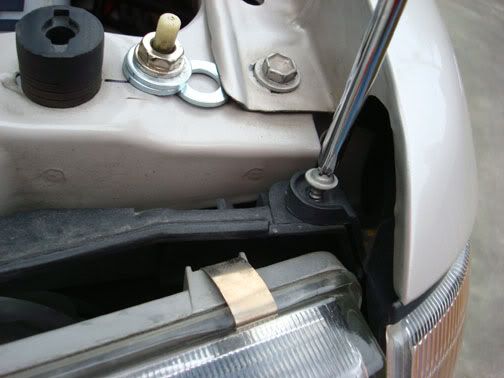
Now you will be able to access the lower inner securing bolt. Remove this bolt.
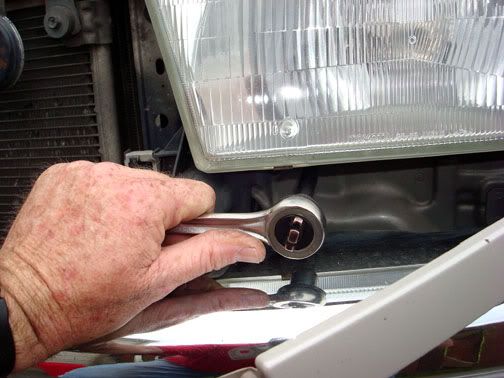
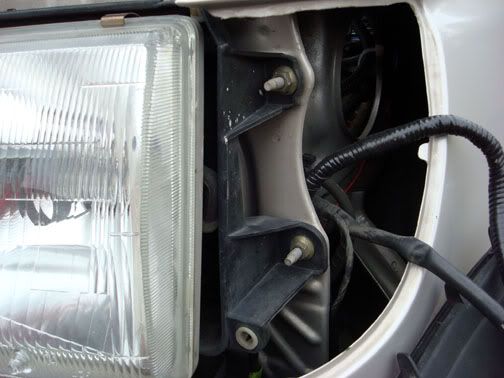
Remove the two outer lamp assembly nuts.

Remove the upper inner bolt. The lamp assembly will now be free of the mounting location so be careful not to let it fall.
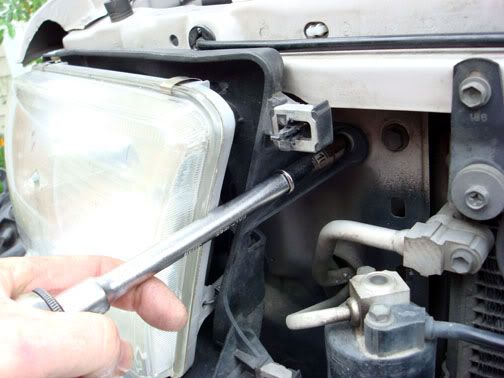
Grasp the assembly with both hands and pull it clear of the mounting studs on the outer edge enough to access the electrical plug on the back of the lamp.
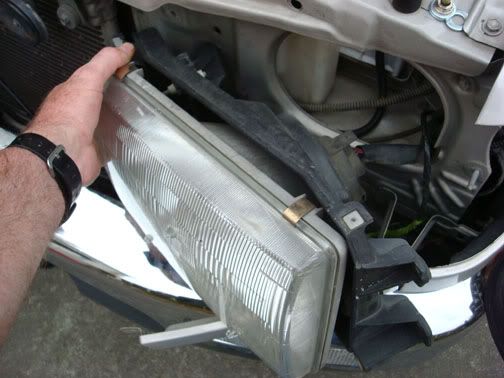
Grasp the plug and pull from the lamp pins.
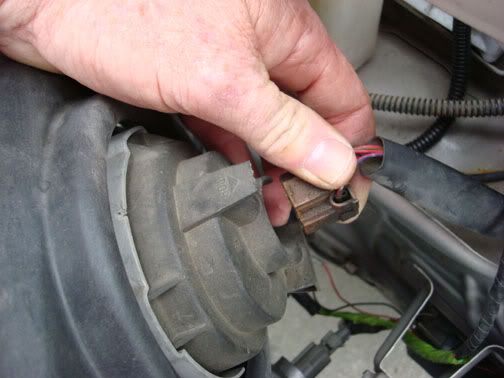
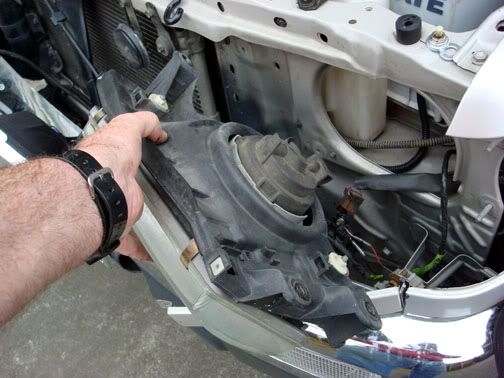
Remove the lamp assembly.
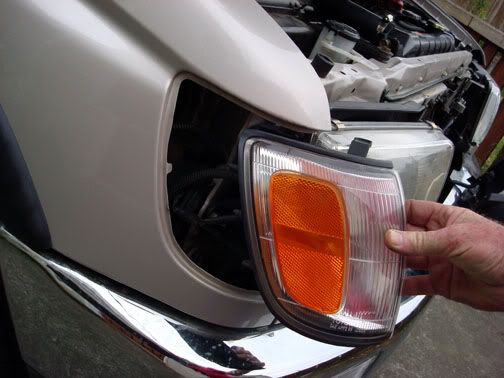
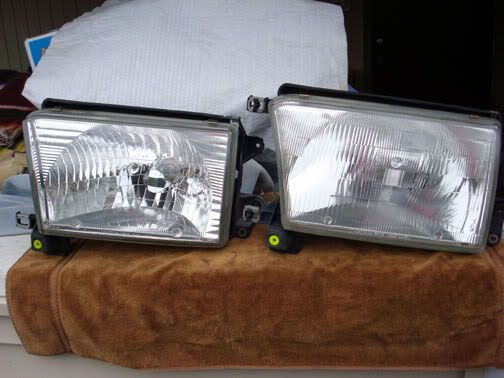
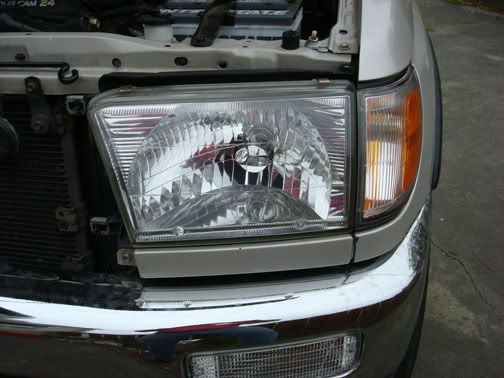
This is the two styles of lamps side by side. The 96-98 is on the right while the replacement 99-02 is on the left.
If you are using a complete lamp assembly then installation is literally the reverse order of removal. Install the complete assembly by attaching the lamp connector to the rear of the lamp.
Place the lamp assembly in position over the studs and install the nuts but do not tighten until both bolts and nuts are installed. Screw in the lower bolt. Then the upper bolt.
Attach the lower trim panel.
Install the corner lamp assembly by simply aligning the lamp with the opening and push into position.
Install the holding screw.
You are done with the lamp install. Repeat the procedure on the other lamp and when completed you are ready to install the grill.
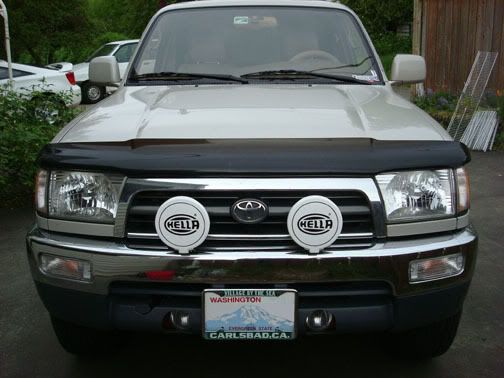
Install the grill by aligning the tabs on the mounting locations with the grill supports then gently push the grill in place. You will hear a slight snapping noise as the clips click into position. Stand back and admire!
If you do have any questions on replacing the buckets, just PM me and I will do a short write up complete with all the pics you need to replace the buckets on the new lamps.

Last edited by Ritzy4Runner; May 19, 2008 at 09:09 PM.
 May 20, 2008 | 06:37 AM
#6
Hey Blarchitect, I hope the wiring diagrams helped you out. Not so much I have all the time for the mods, I enjoy working on my truck when I get the chance. I just picked up the Tundra brakes (rotors & calipers) from a 2001 so this had the 199mm brakes, so I plan on trying to do the brakes in the next week or so. I'll try to do a complete write up them as well. I know they have been done, but its fun to do one
Thanks guys for the comps. Its fun to do these mods then post so others can benefit. Thats what this site is all about. Iknow its made it easier for me to do a few seeing how they are done. When they are easy to accomplish it helps others to say "Hey, I can do that!"

 I got a buddy who needs one.
 Trending Topics
 Jan 11, 2009 | 04:43 PM
#11

Registered User
Joined: Jan 2009
Posts: 8
Likes: 0
I got confused. Will the headlight upgrade "work" without also adding the '99 grill? I've got a '97 with original headlights and 145,000 miles on them. They desperately need to be replaced and I need some quick and bright and not too expensive. It's dark out here.
Oh, and anyone know about these? I'm plannning on murdering mine out.
http://cgi.ebay.com/ebaymotors/99-00...ht_4184wt_1167
Oh, and anyone know about these? I'm plannning on murdering mine out.
http://cgi.ebay.com/ebaymotors/99-00...ht_4184wt_1167
Last edited by CRYA; Jan 11, 2009 at 04:47 PM.
Jan 11, 2009 | 05:16 PM
#12
Registered User
Joined: Dec 2005
Posts: 702
Likes: 0
From: Columbia, SC
You can keep your 96-98 grill and run the newer style headlights no problem. I don't know about those particular aftermarket headlights but it is generally agreed that the aftermarket headlamps in general are not as good as OEM. From what I have read, they can be hit or miss when it comes to the beam pattern. One of the big reasons to do this upgrade is because of the better beam pattern on the newer style headlamps so by going aftermaket you are taking a big chance on losing out on that.
Last edited by mjwalfredo; Jan 11, 2009 at 05:40 PM.
Sep 11, 2009 | 06:44 PM
#14
Registered User
Joined: Sep 2009
Posts: 19
Likes: 0
From: Anaheim
Two things:
1. Check out the "primo" Pick Your Part locations in NorCal, they carry Toyotas 95 and up. The one down here really produces some key finds.
2. Ritzy!!!!!! You SAVED my life!! Your writeup helped me fit my new headlights tonight, freak what a difference, thanks a ton bud!
Mahalo Nui,
4runner4boards
1. Check out the "primo" Pick Your Part locations in NorCal, they carry Toyotas 95 and up. The one down here really produces some key finds.
2. Ritzy!!!!!! You SAVED my life!! Your writeup helped me fit my new headlights tonight, freak what a difference, thanks a ton bud!
Mahalo Nui,
4runner4boards
Sep 12, 2009 | 08:31 PM
#15
 As I said in the post, always glad to know my efforts helped someone to enjoy their truck a little bit more. I enjoy doing the write ups when I start a project as I know how much pictures along with instructions can make what seems to be a difficult mod into one that most anyone with any mechanical ability
  can take on and feel really good about after its done.
Those lights really do make a difference, IMHO I think they are much better as the reflector makes the beam pattern and not the lense of the lamp, focusing the light where it needs to be.
 Sep 13, 2009 | 08:49 AM
#17
Contributing Member
Joined: Sep 2003
Posts: 10,549
Likes: 0
From: Littleton,CO
eBay stuff is hit and miss and those so-called "JDM" black headlamps are simply OEM headlamps taken apart,painted and put back together and the quality is hit and miss.
There is no version of JDM lights for our 4Runners as they use the same here as they do there.
There is no version of JDM lights for our 4Runners as they use the same here as they do there.
Oct 2, 2009 | 08:37 PM
#18

Registered User
Joined: Oct 2009
Posts: 6
Likes: 0
Headlight Boots
I ended up with a Right and Left 1999 headlight without the 1999 boots. Does anyone have two boots from a 1999 that they would care to part with?
Material:
Left and right 99-02 head light assemblies.
If you do not have the complete assembly or like myself located the headlights with damaged buckets, not to worry. You can use the stock OEM buckets from your 96-98 but you will need the rubber boots from the 99-02 so be sure to retrieve them when you get the newer head lights.
Oct 10, 2009 | 06:31 PM
#19
Registered User
Joined: May 2007
Posts: 2,175
Likes: 2
From: Denver metro area-CO
another great Ritzy writeup and most helpful for the details on the grille work too. Adding the pics is sure helpful and thanks for keeping your hosting account rolling so we can see them.
I am noticing what appears to be a pin switch near the hood front edge rubber washer- with the dual washers and the one tucked under the fender tab-what's up with that ?
you got me curious
I am noticing what appears to be a pin switch near the hood front edge rubber washer- with the dual washers and the one tucked under the fender tab-what's up with that ?
you got me curious


