

 Apr 21, 2016, 03:11 PM
Last edit by: IB Advertising
See related guides and technical advice from our community experts:
Browse all: Toyota 4Runner Tire Repair and Maintenance
- Toyota 4Runner, Tacoma, and Tundra: How to Choose Aftermarket Wheels
Step by step instructions for do-it-yourself repairs.
Browse all: Toyota 4Runner Tire Repair and Maintenance

3rd Gen 4runner rims: which one?
 May 9, 2011 | 04:03 AM
#43
Registered User
Joined: Sep 2009
Posts: 166
Likes: 0
From: Acworth, GA

 May 26, 2011 | 08:52 PM
#45
Thread Starter
Registered User
Joined: Aug 2006
Posts: 1,691
Likes: 2
From: Colorado Springs, Co
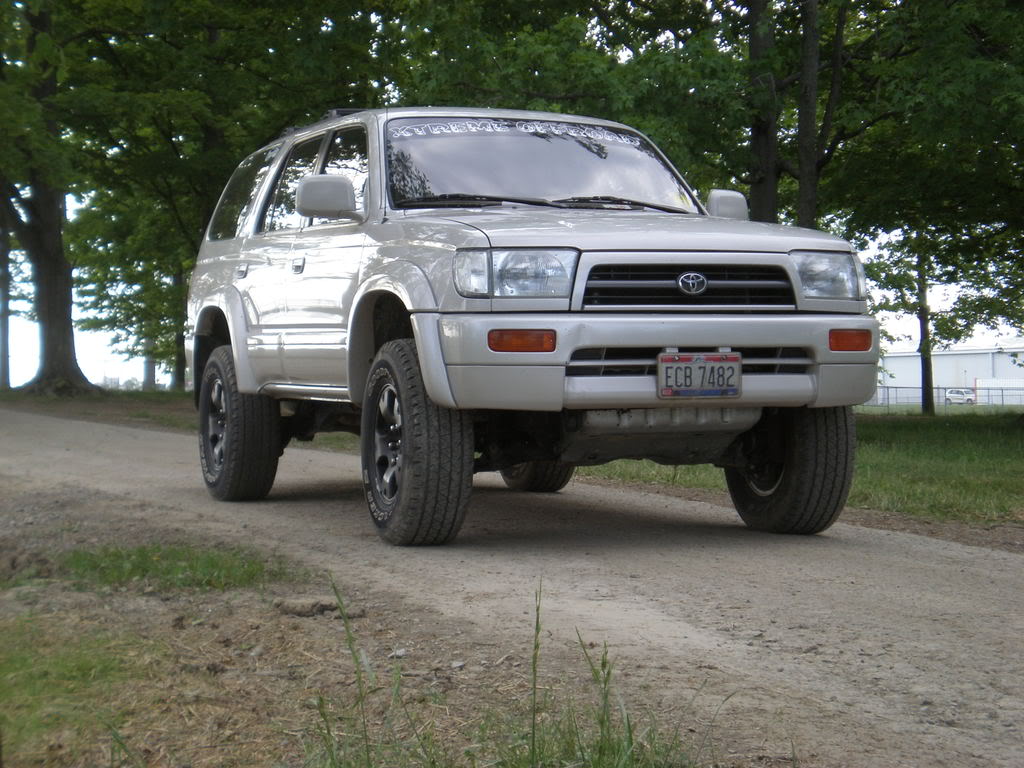
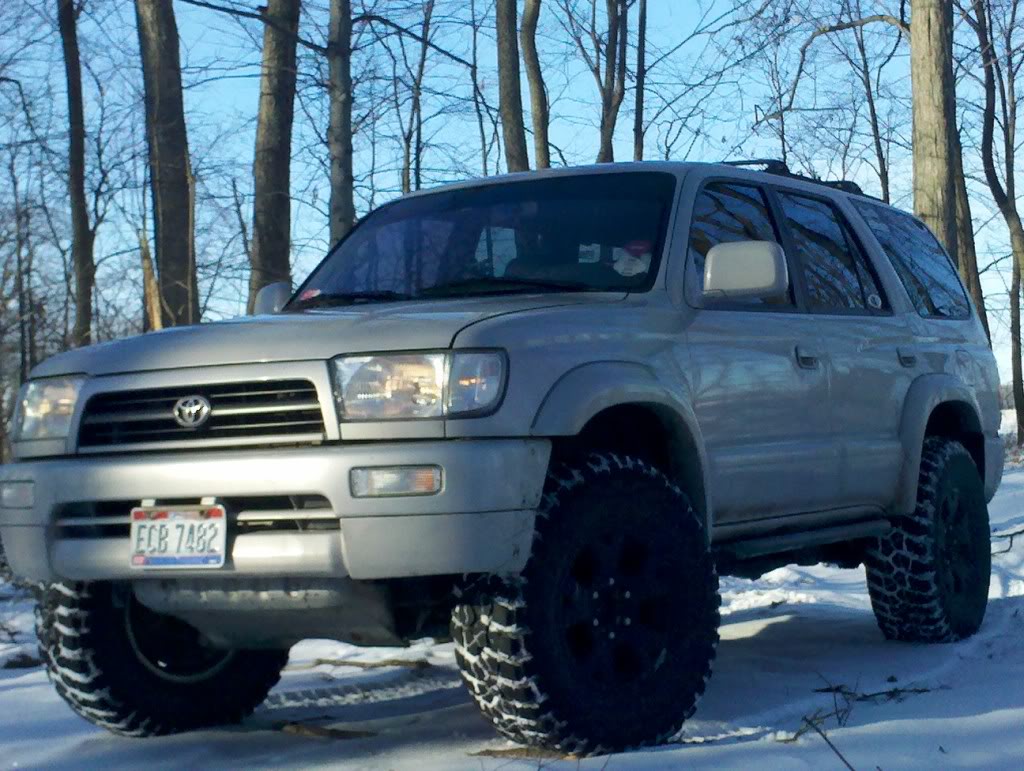
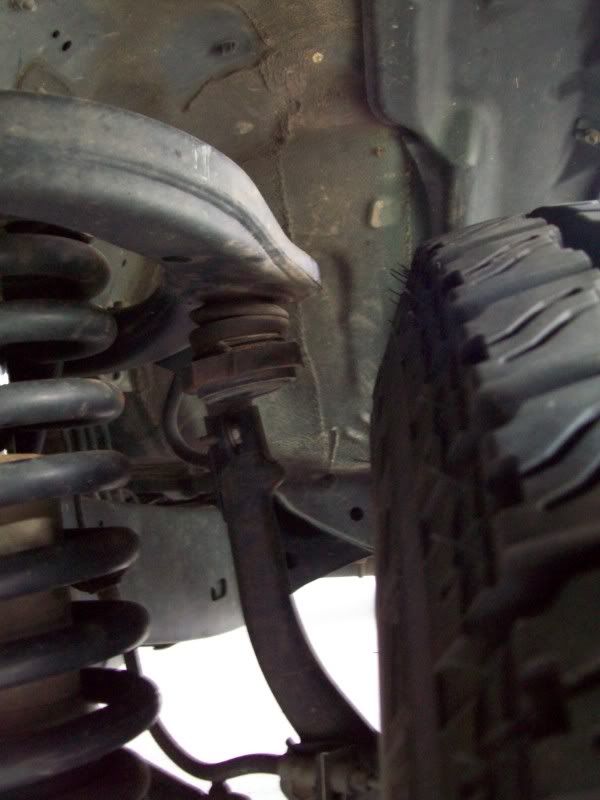
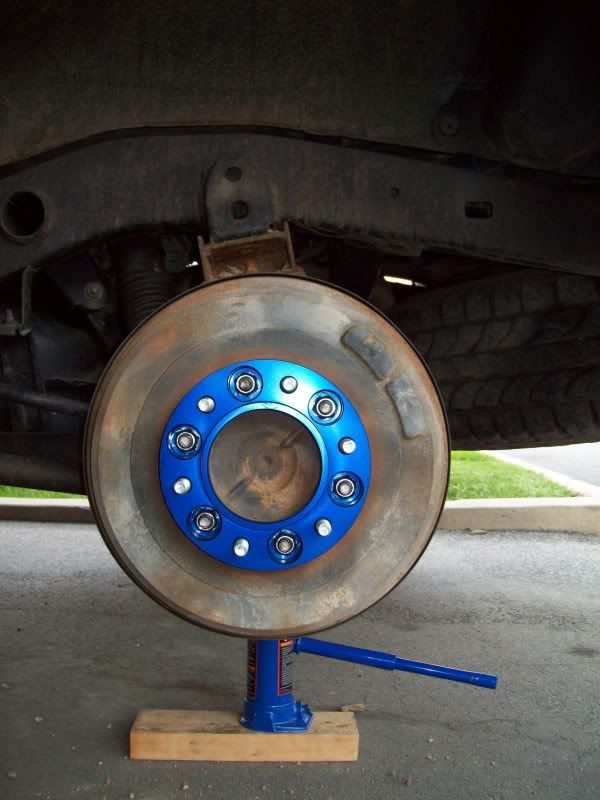
A little update on the rim thing since I had some rubbing issues with the UCA. A set of spider-trax spacers solved that problem.
Spent about 1.5 hrs tonight get the spacers put on all 4 corners (front and back). If anyone ever wants to have a good laugh come by my place and watch a 125 lb kid try to put a wheel back on.
Any how here are a few more photos
Drivers side UCA clearance before
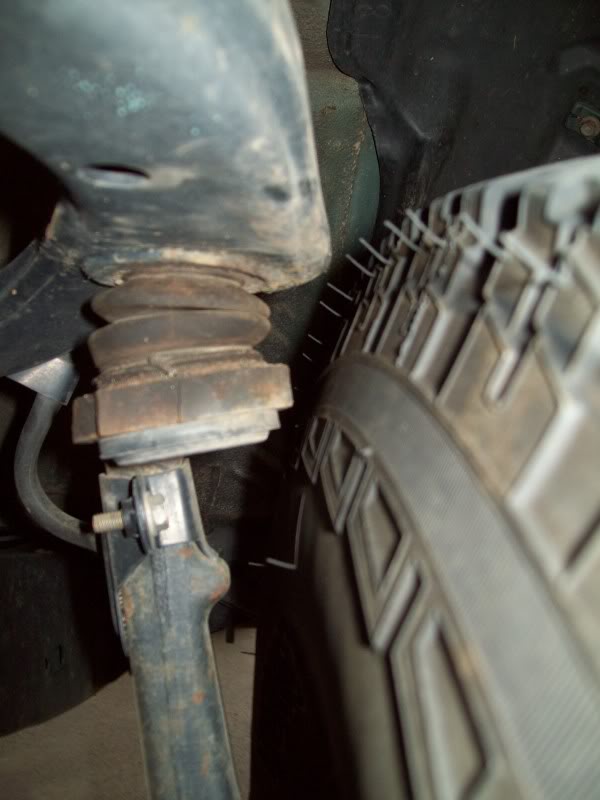

UCA Clearance after
Front view before
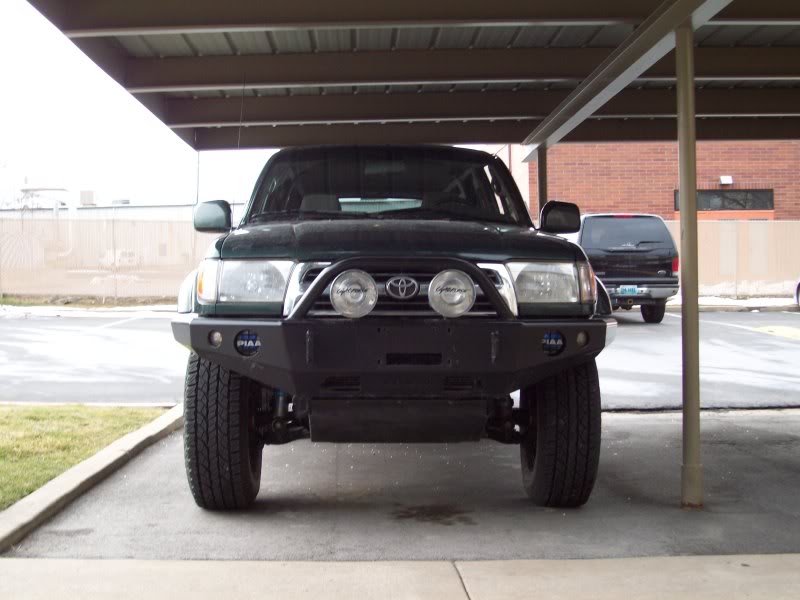
Front view after

Rear view before (passenger side, forgot to photo the drivers side before but you get te idead)
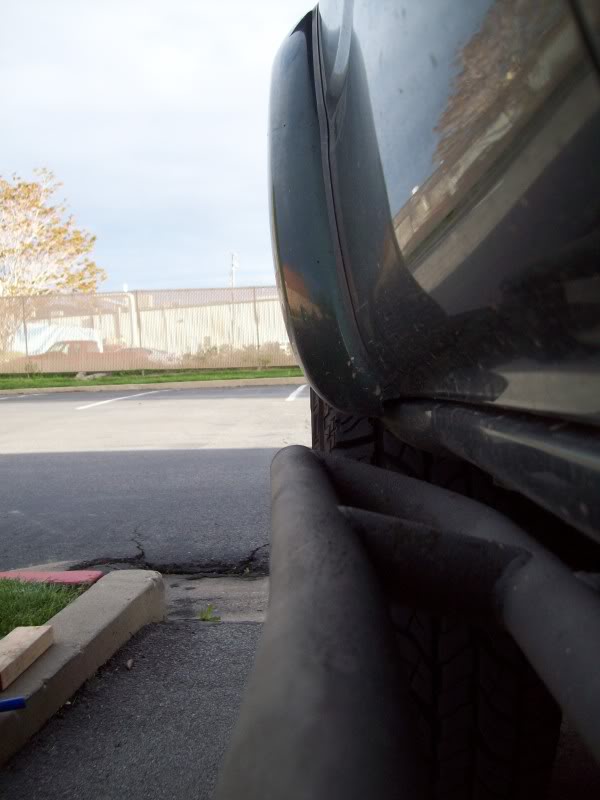
Rear view after
Took it out for a test driver after and the rubbing noise is gone and I haven't noticed any weird vibrations. Steering feels a little more normal as well.
I have plenty of lock-tite on the studs and on the nuts.
Spent about 1.5 hrs tonight get the spacers put on all 4 corners (front and back). If anyone ever wants to have a good laugh come by my place and watch a 125 lb kid try to put a wheel back on.
Any how here are a few more photos
Drivers side UCA clearance before
UCA Clearance after
Front view before
Front view after
Rear view before (passenger side, forgot to photo the drivers side before but you get te idead)
Rear view after
Took it out for a test driver after and the rubbing noise is gone and I haven't noticed any weird vibrations. Steering feels a little more normal as well.
I have plenty of lock-tite on the studs and on the nuts.
Aug 17, 2012 | 10:18 PM
#47

Registered User
Joined: Aug 2012
Posts: 3
Likes: 0
From: Menifee, CA
I followed suit, though I increased tire size to 265/75r16 from the stock 265/70r16. The BFG AT KO only have 1/4inch clearance with the upper control arm. Rubs quite a bit off road. Guess I'm going to get some spacers even though I hoped to avoid it. Looks great! 3inch suspension lift.
Aug 18, 2012 | 07:07 AM
#48

Registered User
Joined: Apr 2007
Posts: 8
Likes: 0
From: Huntsville, AL
Wow, a thread brought back from the dead.
I'm also running 265/75s with totally stock suspension and they do rub the frame a tiny bit at full lock, but I haven't really driven them off road much. I think the rubbing is more of a factor of the square profile of the AT KOs than the size.
With the flares I have I think spacers would push them out a little too much. They sit just about flush as is.
Matt
Aug 18, 2012 | 09:03 AM
#49
Registered User
Joined: Aug 2012
Posts: 3
Likes: 0
From: Menifee, CA
1998 Toyota 4runner 4x4 SR5: 3inch suspension lift.
Well, I have a 3 inch suspension lift. I suppose the geometry changed a bit, and the shape of the tire plays into it as well. you think spacers may interfere, what are my other options? Aside from putting smaller tires on.
I'll try to post a picture when I figure why this system won't allow me to do it has I've been attempting.
I'll try to post a picture when I figure why this system won't allow me to do it has I've been attempting.
Aug 20, 2012 | 02:13 PM
#50
Registered User
Joined: Apr 2007
Posts: 8
Likes: 0
From: Huntsville, AL
 Aug 24, 2012 | 09:18 AM
#52
Registered User
Joined: Apr 2007
Posts: 366
Likes: 0
From: San Diego, CA
http://t3.gstatic.com/images?q=tbn:A...bPgqEgn98R5IeK
I am buying a set of those that have been plastic coated black for my 97 4Runner. Come with some used Bridgestones and I am stoked about them. Not amazing looking, but better than my stock twin three spokes. Plus, I can pull the plastic coating off easy. $125 for all 4.
Edit:

I am buying a set of those that have been plastic coated black for my 97 4Runner. Come with some used Bridgestones and I am stoked about them. Not amazing looking, but better than my stock twin three spokes. Plus, I can pull the plastic coating off easy. $125 for all 4.
Edit:
Last edited by Man4God; Aug 26, 2012 at 01:44 PM. Reason: Add pic
Oct 3, 2012 | 06:56 AM
#53

Registered User
Joined: Aug 2012
Posts: 7
Likes: 0
Hey guys,
About a month back I got an itch to start messing with my 02 4Runner SR5. I've babied it up until now, and haven't messed with the stock look of it. But now that there was an impetus (I sort of needed new tires), I got to thinking... What if I ripped off the salt-hoarding running boards?... So it began, sans any REAL truck know how...
I started by ripping off the running boards, which served no REAL purpose other than acting as a step if you wanted to monkey with the rack. This was easier said than done, since the bolts hadn't been messed with since it rolled off the line. After breaking 3 or 4 of the bolts trying to take them off the legit way (and knuckling myself countless times), the running boards fell off. Much to my surprise, I didn't find much discoloration - nor did I find rust. It was a liberating moment.
Standing back, I got to thinking that I'd need some protection from rock chips and such. So, I did some scratching of my head and decided to get some spray-on bedliner, and tape up the rocker panels to add on some meat (and give the illusion of greater clearance). I jetted off to my local Menard's (MN), and pickup up come supplies for the job. It didn't take much more than an hour of careful cleaning, taping, and measuring, and I was ready to spray. I went through 2 cans of the stuff, and there was a generous few light coats (no drip) on the rocker panels. Again, I stood back and marveled at my work. Still, something was missing...
I started doing some digging on the forums, and saw the millions of posts on mudflaps. I though, "yeah, front mudflaps..." Well, after doing more and more researxch, I found out that Toyota didn't make mudflaps for the 02 SR5 with the super -wide flares. They expected the running boards to be enough for the 4Runner owner. Lame. So, I kept digging, and started seeing threads about installing Tacoma flaps on the 4Runner with minimal fabrication/modification. Slick. So the journey began calling scrap yards to find some (after learning that Toyota wanted my first unborn child for some - $80 each). A couple days later, I found a pair for like $40 or so (still expensive for old mudflaps) so I went for it.
Most of the holes matched up, but I did create a couple down lower for good measure and fastened them to the plastic inner fender to keep them from flopping around. In the end, they looked good - right what I was looking for to complete the look...so I thought.
Then I got the impulse to get some LC80 wheels to pair up with the tires I was eventually going to replace. Finding these is fairly simple. Getting them for a reasonable price is NOT. I called countless scrapyards, and just about every one wanted $100 each+ (without lug nuts and caps), so I just dug in and was persistent. Eventually I landed a set of 4 with caps for $225 shipped to me in MN. Good ones - not junky pitted ones. Boom goes the dynamite.
Now came the fun part... Refinishing alloys with no real know how or the correct tools to do it easily. I first tried the typical techniques - oven cleaner soaking and cleansing... 400 grit sandpaper, 600 grit sandpaper, 1000 grit sandpaper for polishing, 0000 steel wool for polishing even more. I applied a little elbow grease and after feeling like I was going to lose the arm over a few hours, the wheels looked good. The little marks (and one gouge from someone somehow curbing their LC) were virtually unnoticeable. But, here's the rub... The tiny little grooves that Toyota put in the wheels when manufacturing them were essentially gone in the places where I really had to do the work. This left me with wheels that were unevenly finished, and meant that I would need to refinish the entirety of each wheel to even out the finish. Not cool. My arms just weren't up for it. But I got to thinking... Now that I have a set of clean wheels, I could paint match them without any issues underneath the paint... This would allow me to get the stock look, and get consistency with the finish. So that's what I did. A simple process, though time consuming (light coats is KEY), but they turned out great.
Now for the tires... CL is a good resource to fin decent deals for tires, but if the deal is right they'll go FAST. Not having any real need to get tires immediately I sat and kept searching. I'd pull it up on my phone throughout the day, and generally saw ads posted by used tire dealers or stuff that resembled racing slicks. However, one day I stumbled upon a set of tires and wheels a guy was selling that fit the bill. He was getting rid of a stock set of wheels and tires for his new truck that only had 2K on them! Cooper AT3s - 265/75 16s - a perfect match for the LC80s. I picked these guys up for $350 for 5!!! Even I was amazed at that deal, since they go for $180/tire new. I was pretty amped about this deal.
Yesterday, I married all of the work together and mounted them up, had them balanced and slapped on the refinished caps (I did that too). It looked choice. I added in a Yakima MegaWarrior I picked up on CL for $150 and my journey toward the dark side was complete (again, I thought)...
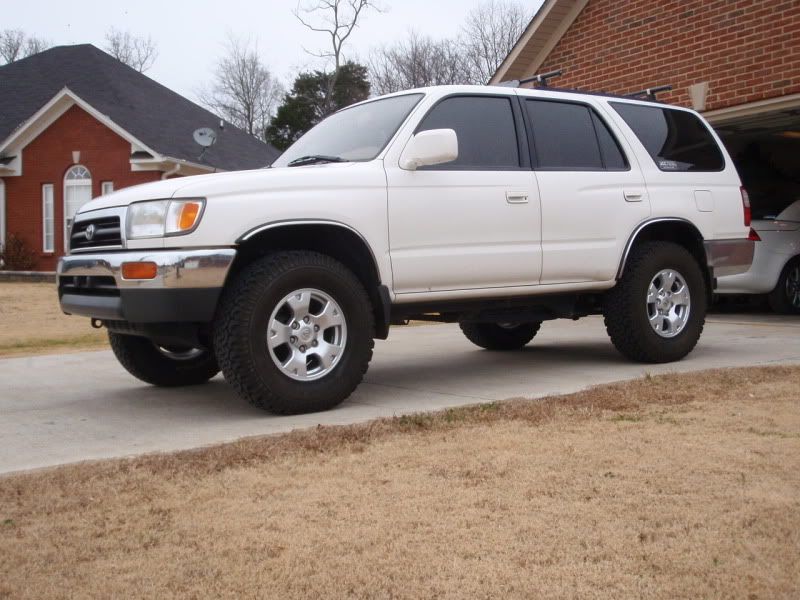
So that's where we are at. This process took about 6 weeks, and cost me ~$925 in total, which includes mounting and balancing them, and all of the supplies. All in all, considering I got essentially brand new tires, new rims, a safari rack, etc... I am super happy with it. The only issue with it I saw so far was this morning I got a run from the mud flap on the left front tire. When I backed out of my driveway, turning left to jet off to work, I got a rub of the tire on a bolt/screw that I used to attach the flap on that side. In haste, I removed it as to not damage the tire but I need to find a solution...
Here's where I need your opinion... If I added in a lift kit, or swapped out the 02 springs for highlanders from a 99, would this fix the rub? Just curious what the group here thinks...
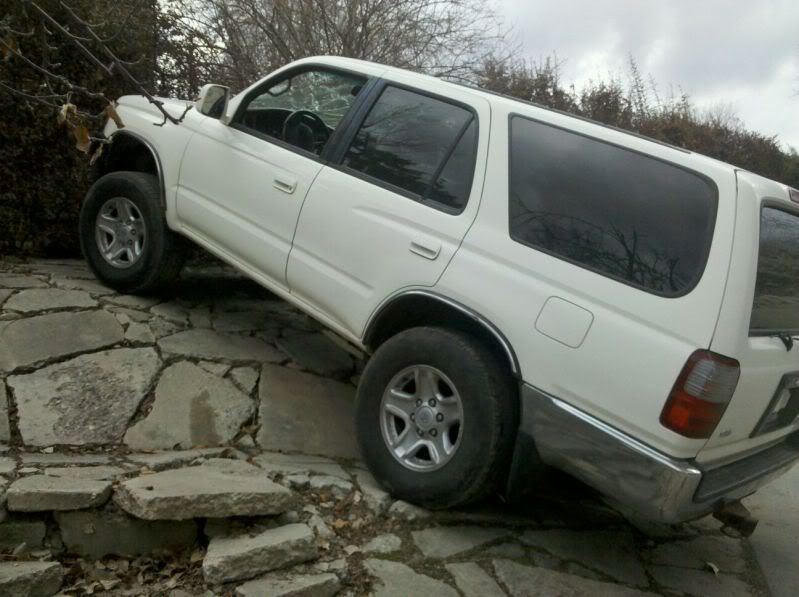
Oh, and just so you can see it, here's a bad picture of the truck as it sits now (and the stock look for reference). Sorry for the small pics, but I'm having a hard time working within the 48kb file size...
About a month back I got an itch to start messing with my 02 4Runner SR5. I've babied it up until now, and haven't messed with the stock look of it. But now that there was an impetus (I sort of needed new tires), I got to thinking... What if I ripped off the salt-hoarding running boards?... So it began, sans any REAL truck know how...
I started by ripping off the running boards, which served no REAL purpose other than acting as a step if you wanted to monkey with the rack. This was easier said than done, since the bolts hadn't been messed with since it rolled off the line. After breaking 3 or 4 of the bolts trying to take them off the legit way (and knuckling myself countless times), the running boards fell off. Much to my surprise, I didn't find much discoloration - nor did I find rust. It was a liberating moment.
Standing back, I got to thinking that I'd need some protection from rock chips and such. So, I did some scratching of my head and decided to get some spray-on bedliner, and tape up the rocker panels to add on some meat (and give the illusion of greater clearance). I jetted off to my local Menard's (MN), and pickup up come supplies for the job. It didn't take much more than an hour of careful cleaning, taping, and measuring, and I was ready to spray. I went through 2 cans of the stuff, and there was a generous few light coats (no drip) on the rocker panels. Again, I stood back and marveled at my work. Still, something was missing...
I started doing some digging on the forums, and saw the millions of posts on mudflaps. I though, "yeah, front mudflaps..." Well, after doing more and more researxch, I found out that Toyota didn't make mudflaps for the 02 SR5 with the super -wide flares. They expected the running boards to be enough for the 4Runner owner. Lame. So, I kept digging, and started seeing threads about installing Tacoma flaps on the 4Runner with minimal fabrication/modification. Slick. So the journey began calling scrap yards to find some (after learning that Toyota wanted my first unborn child for some - $80 each). A couple days later, I found a pair for like $40 or so (still expensive for old mudflaps) so I went for it.
Most of the holes matched up, but I did create a couple down lower for good measure and fastened them to the plastic inner fender to keep them from flopping around. In the end, they looked good - right what I was looking for to complete the look...so I thought.
Then I got the impulse to get some LC80 wheels to pair up with the tires I was eventually going to replace. Finding these is fairly simple. Getting them for a reasonable price is NOT. I called countless scrapyards, and just about every one wanted $100 each+ (without lug nuts and caps), so I just dug in and was persistent. Eventually I landed a set of 4 with caps for $225 shipped to me in MN. Good ones - not junky pitted ones. Boom goes the dynamite.
Now came the fun part... Refinishing alloys with no real know how or the correct tools to do it easily. I first tried the typical techniques - oven cleaner soaking and cleansing... 400 grit sandpaper, 600 grit sandpaper, 1000 grit sandpaper for polishing, 0000 steel wool for polishing even more. I applied a little elbow grease and after feeling like I was going to lose the arm over a few hours, the wheels looked good. The little marks (and one gouge from someone somehow curbing their LC) were virtually unnoticeable. But, here's the rub... The tiny little grooves that Toyota put in the wheels when manufacturing them were essentially gone in the places where I really had to do the work. This left me with wheels that were unevenly finished, and meant that I would need to refinish the entirety of each wheel to even out the finish. Not cool. My arms just weren't up for it. But I got to thinking... Now that I have a set of clean wheels, I could paint match them without any issues underneath the paint... This would allow me to get the stock look, and get consistency with the finish. So that's what I did. A simple process, though time consuming (light coats is KEY), but they turned out great.
Now for the tires... CL is a good resource to fin decent deals for tires, but if the deal is right they'll go FAST. Not having any real need to get tires immediately I sat and kept searching. I'd pull it up on my phone throughout the day, and generally saw ads posted by used tire dealers or stuff that resembled racing slicks. However, one day I stumbled upon a set of tires and wheels a guy was selling that fit the bill. He was getting rid of a stock set of wheels and tires for his new truck that only had 2K on them! Cooper AT3s - 265/75 16s - a perfect match for the LC80s. I picked these guys up for $350 for 5!!! Even I was amazed at that deal, since they go for $180/tire new. I was pretty amped about this deal.
Yesterday, I married all of the work together and mounted them up, had them balanced and slapped on the refinished caps (I did that too). It looked choice. I added in a Yakima MegaWarrior I picked up on CL for $150 and my journey toward the dark side was complete (again, I thought)...
So that's where we are at. This process took about 6 weeks, and cost me ~$925 in total, which includes mounting and balancing them, and all of the supplies. All in all, considering I got essentially brand new tires, new rims, a safari rack, etc... I am super happy with it. The only issue with it I saw so far was this morning I got a run from the mud flap on the left front tire. When I backed out of my driveway, turning left to jet off to work, I got a rub of the tire on a bolt/screw that I used to attach the flap on that side. In haste, I removed it as to not damage the tire but I need to find a solution...
Here's where I need your opinion... If I added in a lift kit, or swapped out the 02 springs for highlanders from a 99, would this fix the rub? Just curious what the group here thinks...
Oh, and just so you can see it, here's a bad picture of the truck as it sits now (and the stock look for reference).
Sorry for the small pics, but I'm having a hard time working within the 48kb file size...
Oct 4, 2012 | 11:41 AM
#54
Registered User
Joined: Aug 2012
Posts: 7
Likes: 0
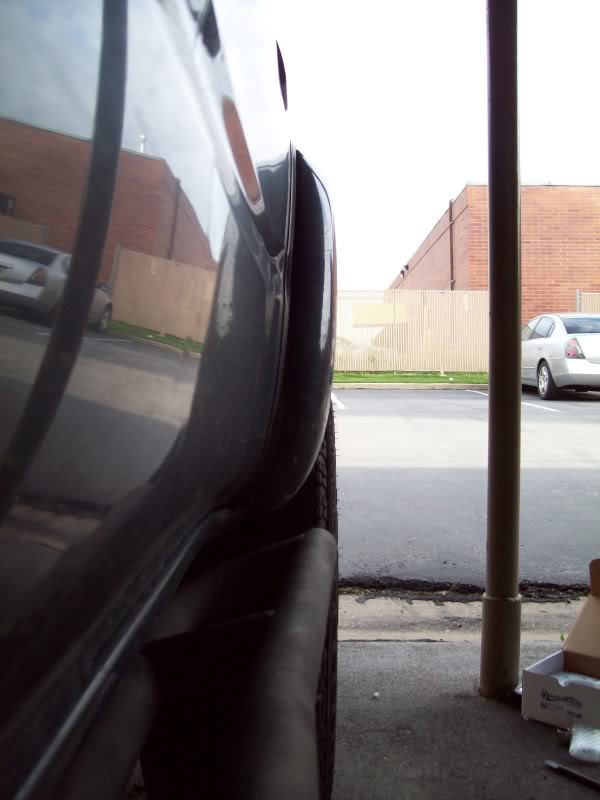
Correction: It's the front bumper that's rubbing more than the flap. The flap clears, albeit barely, but the bumper rubs a bit when backing out and the suspension is a bit compressed (meaning a small curb or bump).
On that note, I think the Cooper AT3s are a bit bigger tires than most 265/75 16s. From what I've read the standard 75s work fine, but it varies from tire to tire FYI...
On that note, I think the Cooper AT3s are a bit bigger tires than most 265/75 16s. From what I've read the standard 75s work fine, but it varies from tire to tire FYI...
Hey guys,
About a month back I got an itch to start messing with my 02 4Runner SR5. I've babied it up until now, and haven't messed with the stock look of it. But now that there was an impetus (I sort of needed new tires), I got to thinking... What if I ripped off the salt-hoarding running boards?... So it began, sans any REAL truck know how...
I started by ripping off the running boards, which served no REAL purpose other than acting as a step if you wanted to monkey with the rack. This was easier said than done, since the bolts hadn't been messed with since it rolled off the line. After breaking 3 or 4 of the bolts trying to take them off the legit way (and knuckling myself countless times), the running boards fell off. Much to my surprise, I didn't find much discoloration - nor did I find rust. It was a liberating moment.
Standing back, I got to thinking that I'd need some protection from rock chips and such. So, I did some scratching of my head and decided to get some spray-on bedliner, and tape up the rocker panels to add on some meat (and give the illusion of greater clearance). I jetted off to my local Menard's (MN), and pickup up come supplies for the job. It didn't take much more than an hour of careful cleaning, taping, and measuring, and I was ready to spray. I went through 2 cans of the stuff, and there was a generous few light coats (no drip) on the rocker panels. Again, I stood back and marveled at my work. Still, something was missing...
I started doing some digging on the forums, and saw the millions of posts on mudflaps. I though, "yeah, front mudflaps..." Well, after doing more and more researxch, I found out that Toyota didn't make mudflaps for the 02 SR5 with the super -wide flares. They expected the running boards to be enough for the 4Runner owner. Lame. So, I kept digging, and started seeing threads about installing Tacoma flaps on the 4Runner with minimal fabrication/modification. Slick. So the journey began calling scrap yards to find some (after learning that Toyota wanted my first unborn child for some - $80 each). A couple days later, I found a pair for like $40 or so (still expensive for old mudflaps) so I went for it.
Most of the holes matched up, but I did create a couple down lower for good measure and fastened them to the plastic inner fender to keep them from flopping around. In the end, they looked good - right what I was looking for to complete the look...so I thought.
Then I got the impulse to get some LC80 wheels to pair up with the tires I was eventually going to replace. Finding these is fairly simple. Getting them for a reasonable price is NOT. I called countless scrapyards, and just about every one wanted $100 each+ (without lug nuts and caps), so I just dug in and was persistent. Eventually I landed a set of 4 with caps for $225 shipped to me in MN. Good ones - not junky pitted ones. Boom goes the dynamite.
Now came the fun part... Refinishing alloys with no real know how or the correct tools to do it easily. I first tried the typical techniques - oven cleaner soaking and cleansing... 400 grit sandpaper, 600 grit sandpaper, 1000 grit sandpaper for polishing, 0000 steel wool for polishing even more. I applied a little elbow grease and after feeling like I was going to lose the arm over a few hours, the wheels looked good. The little marks (and one gouge from someone somehow curbing their LC) were virtually unnoticeable. But, here's the rub... The tiny little grooves that Toyota put in the wheels when manufacturing them were essentially gone in the places where I really had to do the work. This left me with wheels that were unevenly finished, and meant that I would need to refinish the entirety of each wheel to even out the finish. Not cool. My arms just weren't up for it. But I got to thinking... Now that I have a set of clean wheels, I could paint match them without any issues underneath the paint... This would allow me to get the stock look, and get consistency with the finish. So that's what I did. A simple process, though time consuming (light coats is KEY), but they turned out great.
Now for the tires... CL is a good resource to fin decent deals for tires, but if the deal is right they'll go FAST. Not having any real need to get tires immediately I sat and kept searching. I'd pull it up on my phone throughout the day, and generally saw ads posted by used tire dealers or stuff that resembled racing slicks. However, one day I stumbled upon a set of tires and wheels a guy was selling that fit the bill. He was getting rid of a stock set of wheels and tires for his new truck that only had 2K on them! Cooper AT3s - 265/75 16s - a perfect match for the LC80s. I picked these guys up for $350 for 5!!! Even I was amazed at that deal, since they go for $180/tire new. I was pretty amped about this deal.
Yesterday, I married all of the work together and mounted them up, had them balanced and slapped on the refinished caps (I did that too). It looked choice. I added in a Yakima MegaWarrior I picked up on CL for $150 and my journey toward the dark side was complete (again, I thought)...
So that's where we are at. This process took about 6 weeks, and cost me ~$925 in total, which includes mounting and balancing them, and all of the supplies. All in all, considering I got essentially brand new tires, new rims, a safari rack, etc... I am super happy with it. The only issue with it I saw so far was this morning I got a run from the mud flap on the left front tire. When I backed out of my driveway, turning left to jet off to work, I got a rub of the tire on a bolt/screw that I used to attach the flap on that side. In haste, I removed it as to not damage the tire but I need to find a solution...
Here's where I need your opinion... If I added in a lift kit, or swapped out the 02 springs for highlanders from a 99, would this fix the rub? Just curious what the group here thinks...
Oh, and just so you can see it, here's a bad picture of the truck as it sits now (and the stock look for reference). Sorry for the small pics, but I'm having a hard time working within the 48kb file size...
About a month back I got an itch to start messing with my 02 4Runner SR5. I've babied it up until now, and haven't messed with the stock look of it. But now that there was an impetus (I sort of needed new tires), I got to thinking... What if I ripped off the salt-hoarding running boards?... So it began, sans any REAL truck know how...
I started by ripping off the running boards, which served no REAL purpose other than acting as a step if you wanted to monkey with the rack. This was easier said than done, since the bolts hadn't been messed with since it rolled off the line. After breaking 3 or 4 of the bolts trying to take them off the legit way (and knuckling myself countless times), the running boards fell off. Much to my surprise, I didn't find much discoloration - nor did I find rust. It was a liberating moment.
Standing back, I got to thinking that I'd need some protection from rock chips and such. So, I did some scratching of my head and decided to get some spray-on bedliner, and tape up the rocker panels to add on some meat (and give the illusion of greater clearance). I jetted off to my local Menard's (MN), and pickup up come supplies for the job. It didn't take much more than an hour of careful cleaning, taping, and measuring, and I was ready to spray. I went through 2 cans of the stuff, and there was a generous few light coats (no drip) on the rocker panels. Again, I stood back and marveled at my work. Still, something was missing...
I started doing some digging on the forums, and saw the millions of posts on mudflaps. I though, "yeah, front mudflaps..." Well, after doing more and more researxch, I found out that Toyota didn't make mudflaps for the 02 SR5 with the super -wide flares. They expected the running boards to be enough for the 4Runner owner. Lame. So, I kept digging, and started seeing threads about installing Tacoma flaps on the 4Runner with minimal fabrication/modification. Slick. So the journey began calling scrap yards to find some (after learning that Toyota wanted my first unborn child for some - $80 each). A couple days later, I found a pair for like $40 or so (still expensive for old mudflaps) so I went for it.
Most of the holes matched up, but I did create a couple down lower for good measure and fastened them to the plastic inner fender to keep them from flopping around. In the end, they looked good - right what I was looking for to complete the look...so I thought.
Then I got the impulse to get some LC80 wheels to pair up with the tires I was eventually going to replace. Finding these is fairly simple. Getting them for a reasonable price is NOT. I called countless scrapyards, and just about every one wanted $100 each+ (without lug nuts and caps), so I just dug in and was persistent. Eventually I landed a set of 4 with caps for $225 shipped to me in MN. Good ones - not junky pitted ones. Boom goes the dynamite.
Now came the fun part... Refinishing alloys with no real know how or the correct tools to do it easily. I first tried the typical techniques - oven cleaner soaking and cleansing... 400 grit sandpaper, 600 grit sandpaper, 1000 grit sandpaper for polishing, 0000 steel wool for polishing even more. I applied a little elbow grease and after feeling like I was going to lose the arm over a few hours, the wheels looked good. The little marks (and one gouge from someone somehow curbing their LC) were virtually unnoticeable. But, here's the rub... The tiny little grooves that Toyota put in the wheels when manufacturing them were essentially gone in the places where I really had to do the work. This left me with wheels that were unevenly finished, and meant that I would need to refinish the entirety of each wheel to even out the finish. Not cool. My arms just weren't up for it. But I got to thinking... Now that I have a set of clean wheels, I could paint match them without any issues underneath the paint... This would allow me to get the stock look, and get consistency with the finish. So that's what I did. A simple process, though time consuming (light coats is KEY), but they turned out great.
Now for the tires... CL is a good resource to fin decent deals for tires, but if the deal is right they'll go FAST. Not having any real need to get tires immediately I sat and kept searching. I'd pull it up on my phone throughout the day, and generally saw ads posted by used tire dealers or stuff that resembled racing slicks. However, one day I stumbled upon a set of tires and wheels a guy was selling that fit the bill. He was getting rid of a stock set of wheels and tires for his new truck that only had 2K on them! Cooper AT3s - 265/75 16s - a perfect match for the LC80s. I picked these guys up for $350 for 5!!! Even I was amazed at that deal, since they go for $180/tire new. I was pretty amped about this deal.
Yesterday, I married all of the work together and mounted them up, had them balanced and slapped on the refinished caps (I did that too). It looked choice. I added in a Yakima MegaWarrior I picked up on CL for $150 and my journey toward the dark side was complete (again, I thought)...
So that's where we are at. This process took about 6 weeks, and cost me ~$925 in total, which includes mounting and balancing them, and all of the supplies. All in all, considering I got essentially brand new tires, new rims, a safari rack, etc... I am super happy with it. The only issue with it I saw so far was this morning I got a run from the mud flap on the left front tire. When I backed out of my driveway, turning left to jet off to work, I got a rub of the tire on a bolt/screw that I used to attach the flap on that side. In haste, I removed it as to not damage the tire but I need to find a solution...
Here's where I need your opinion... If I added in a lift kit, or swapped out the 02 springs for highlanders from a 99, would this fix the rub? Just curious what the group here thinks...
Oh, and just so you can see it, here's a bad picture of the truck as it sits now (and the stock look for reference).
Sorry for the small pics, but I'm having a hard time working within the 48kb file size...
Thread
Thread Starter
Forum
Replies
Last Post
RedRunner_87
95.5-2004 Tacomas & 96-2002 4Runners (Build-Up Section)
84
Jun 1, 2021 01:51 PM
FS[PacSouthWest]: 2- 8"3rd members:4.88 ratchet lockers,new setup kit, rear axle rebuild kit,diff armor
jerusry
Axles - Suspensions - Tires - Wheels
1
Oct 19, 2015 05:28 PM


