
Win243's 1988 4Runner (Build-Up)
 Mar 14, 2013 | 05:37 PM
#22
Thread Starter
Registered User
Joined: Sep 2012
Posts: 24
Likes: 0
From: Santa Cruz, California
http://www.lceperformance.com/Camsha...-p/1022021.htm
I would love to have a Doug Thorely tri Y header, but they are very expensive. I might try one down the road, but for now I'm going to stick with the stock manifold. I will soon be building a different exhaust system, to engnbldr's specifications (2" from the y pipe, through the cat and into the muffler, 2 1/4" from the muffler back). Also I pulled a y pipe from a 22r (it's longer and sort of resembles a tri y). I'm gonna try that too.
Jun 9, 2013 | 06:56 PM
#23
Thread Starter
Registered User
Joined: Sep 2012
Posts: 24
Likes: 0
From: Santa Cruz, California
I just finished installing a set of Marlin Crawler XD 4.7 transfer case gears. I haven't had it offroad with them yet, but it sure seems nice. Apologies for not posting pictures of this, I figured the step by step instructions on the marlin crawler website were better than what I could do.
Oct 23, 2013 | 04:44 PM
#24
Thread Starter
Registered User
Joined: Sep 2012
Posts: 24
Likes: 0
From: Santa Cruz, California
Uptade
I guess it has been awhile since I have updated this. I unfortunately have not got too much done recently, but here is what I have done.
First off, my cooling system was not doing a very good job. It is a real burden to have to get out and pour water all over the radiator every five minutes on the trail, so I decided to overhaul it. I found a 3-core radiator at the wrecking yard. These pictures should illustrate how much thicker the extra core makes it.
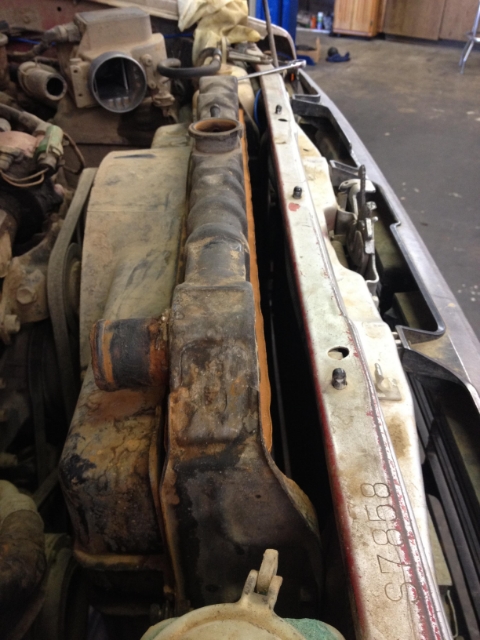
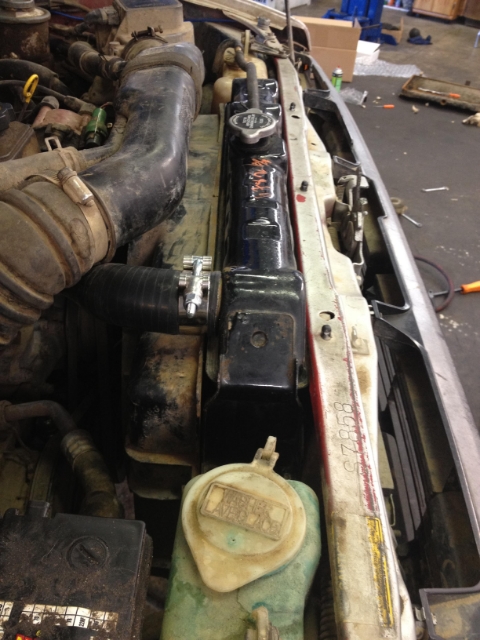
While I had the radiator out, I replaced the fan clutch (which I believe was the main problem). I also put in a LC Engineering pro oil pump while it was torn apart. When I put it all back together, I installed silicone radiator hoses from trail gear.
Oct 23, 2013 | 04:55 PM
#25
Thread Starter
Registered User
Joined: Sep 2012
Posts: 24
Likes: 0
From: Santa Cruz, California
Uptade cont.
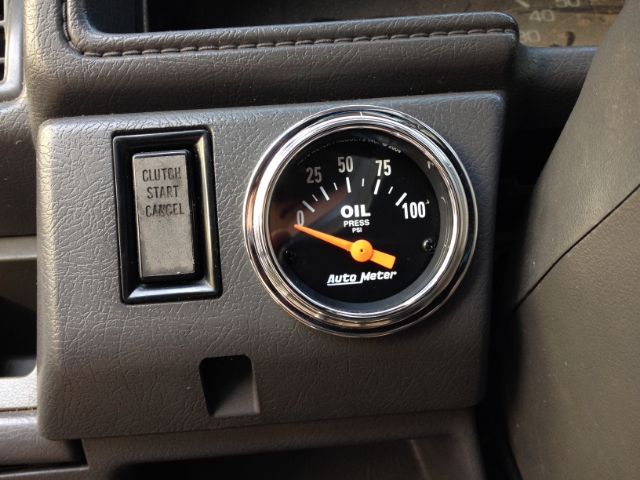
Here is a arbitrary picture of my oil pressure gauge that I installed awhile back: It was deceivingly difficult to get it to fit there. I had to cut away a big chunk of plastic inside the dash.
 Oct 23, 2013 | 05:38 PM
#26
Thread Starter
Registered User
Joined: Sep 2012
Posts: 24
Likes: 0
From: Santa Cruz, California
Rock Sliders
I finally installed some rock sliders. I had never done this before, so I didn't know the best way. I decided that I wanted to build plates and gussets where the legs weld to the frame. I basically just cut out squares of 1/4 inch plate for the plates. I used something much thinner for the gussets. I should have used something thicker, but that was the scrap metal I happened to have laying around. Still far better than just welding straight to the frame like most people do (although that seems to be fine as well).
I basically figured out where on the frame I wanted the legs to be mounted. Then I welded the 1/4 inch plates onto those spots. Next, I had a friend hold up the sliders and we adjusted them to where they looked right. Then I (while he was still holding them) roughly measured the lengths for the legs and cut them using a chop-saw. This was especially tricky on the front legs since the frame angles in. We held up the slider again and positioned the legs to check fit. Miraculously they fit well, so I drew a line on the leg and slider so that I could weld them in correct alignment. I set the slider on the floor and propped it up to achieve a slight angle. Then I welded the legs and gussets on. Then we held them up again and tacked, then welded them onto the frame.
I'm sure there are much better ways of installing rock sliders, however they are mounted very securely, and look pretty much the same on both sides. Here are a few pictures:
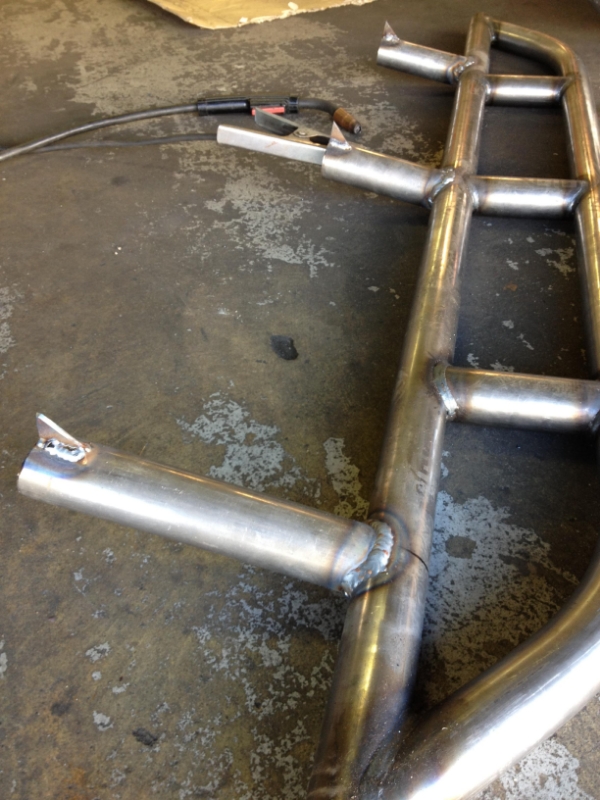
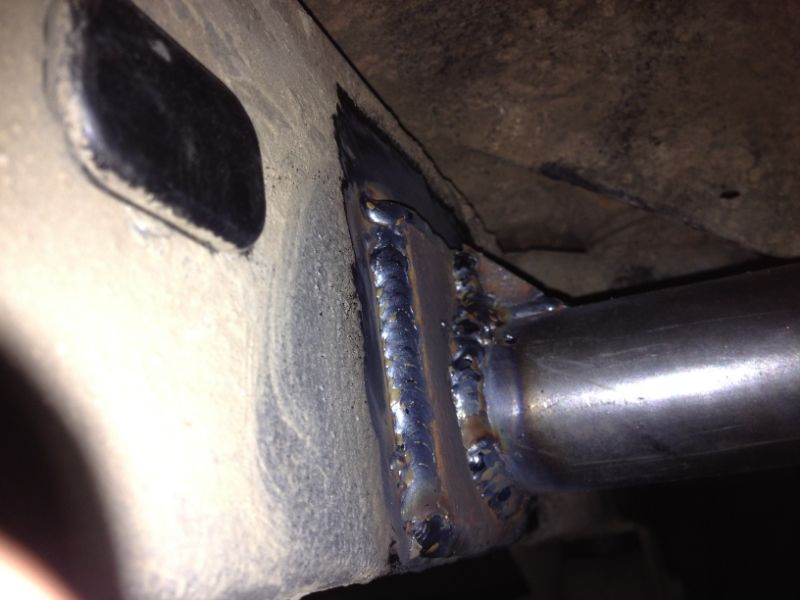
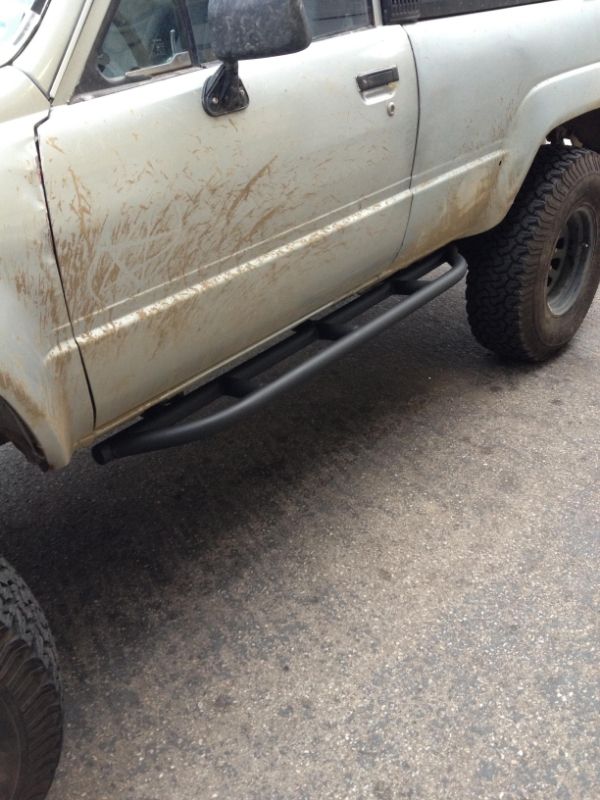
The welds are not perfect, but I think I did ok.
I basically figured out where on the frame I wanted the legs to be mounted. Then I welded the 1/4 inch plates onto those spots. Next, I had a friend hold up the sliders and we adjusted them to where they looked right. Then I (while he was still holding them) roughly measured the lengths for the legs and cut them using a chop-saw. This was especially tricky on the front legs since the frame angles in. We held up the slider again and positioned the legs to check fit. Miraculously they fit well, so I drew a line on the leg and slider so that I could weld them in correct alignment. I set the slider on the floor and propped it up to achieve a slight angle. Then I welded the legs and gussets on. Then we held them up again and tacked, then welded them onto the frame.
I'm sure there are much better ways of installing rock sliders, however they are mounted very securely, and look pretty much the same on both sides. Here are a few pictures:


The welds are not perfect, but I think I did ok.
Last edited by Win243; Oct 24, 2013 at 10:09 PM.
Nov 15, 2013 | 10:34 AM
#27
Thread Starter
Registered User
Joined: Sep 2012
Posts: 24
Likes: 0
From: Santa Cruz, California
I'm getting my exhaust built tomorrow. I will post some pictures when it's complete. I will be using the longer 22r Y pipe, which effectively makes the manifold into a really cheap try-Y header. As per Engnbldr's reccomendations, it will have 2" pipe with a 2" cat into a muffler, and 2 1/4" from there back. Muffler is a spintech with 2" inlet and 2 1/4" outlet. Hopefully it will work well.

Thread
Thread Starter
Forum
Replies
Last Post
88yodabasket
86-95 Trucks & 4Runners
15
Jul 13, 2015 01:32 PM


