86-95 Trucks & 4Runners (Build-Up Section) Post your build-ups here

tony's 1990 4runner build-up

Thread Tools
 
Search this Thread
 
Old 05-26-2013, 02:01 PM
  #41  
Registered User
Thread Starter
 
a51young's Avatar
 
Join Date: Jan 2013
Location: AZ
Posts: 271
Likes: 0
Received 0 Likes on 0 Posts
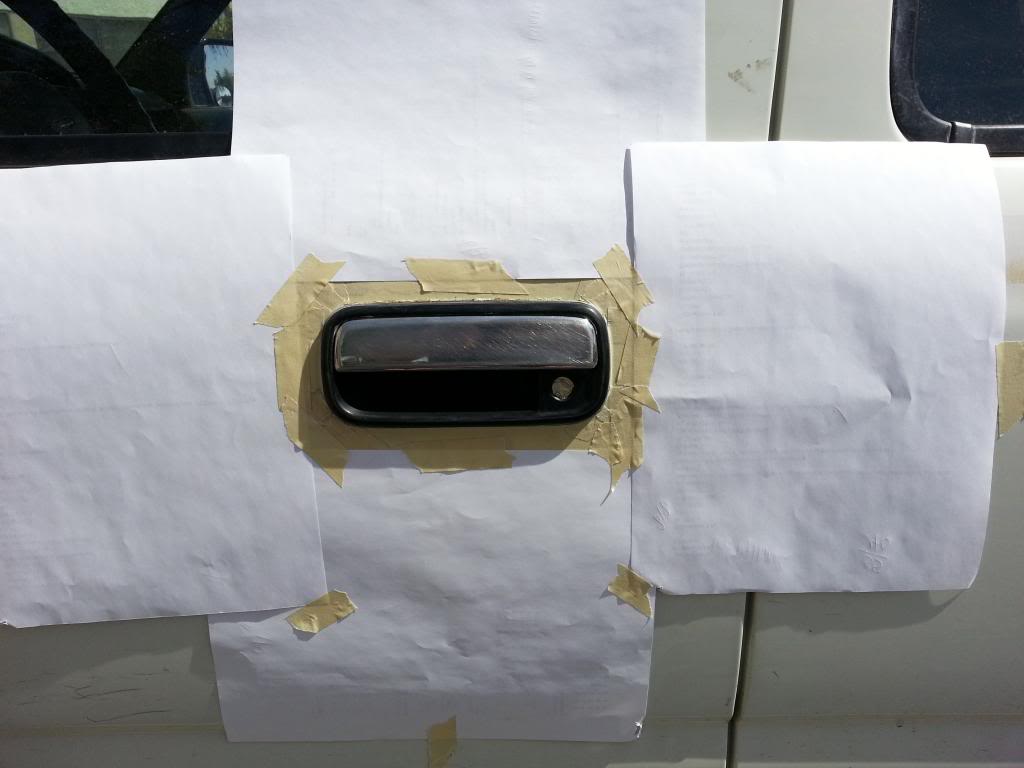
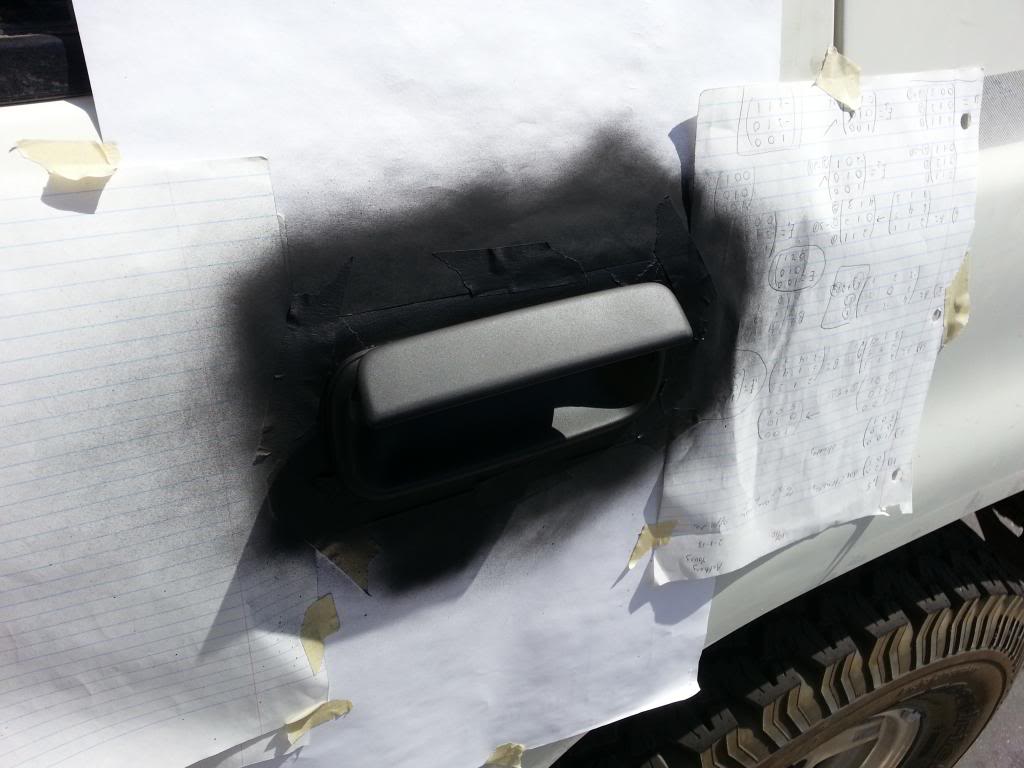
Went ahead an painted my door handles and rear bumper black. Still debating if I just want to take my rear bumper off and leave it off or not. Sand paper on the chrome is the best way I've found to keep the paint on.

Name:  2013-05-26094546_zps29e22879.jpg
Views: 100
Size:  49.1 KB

Name:  2013-05-26095507_zps38150dd8.jpg
Views: 105
Size:  70.0 KB

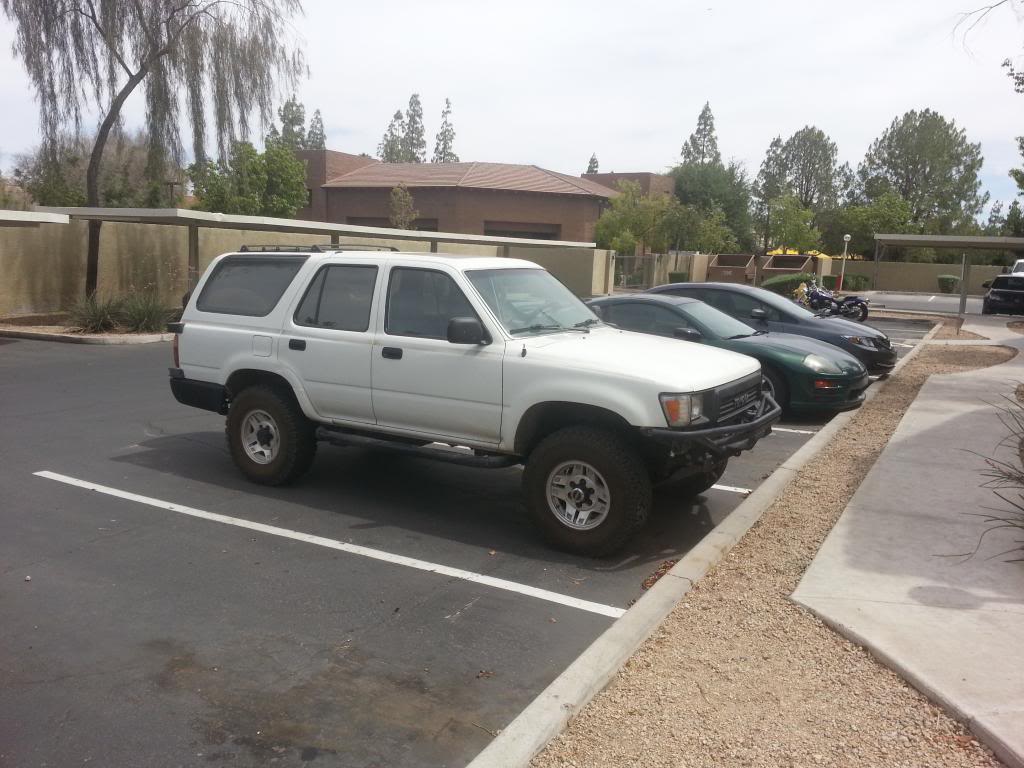
Thinking about not having a bumper
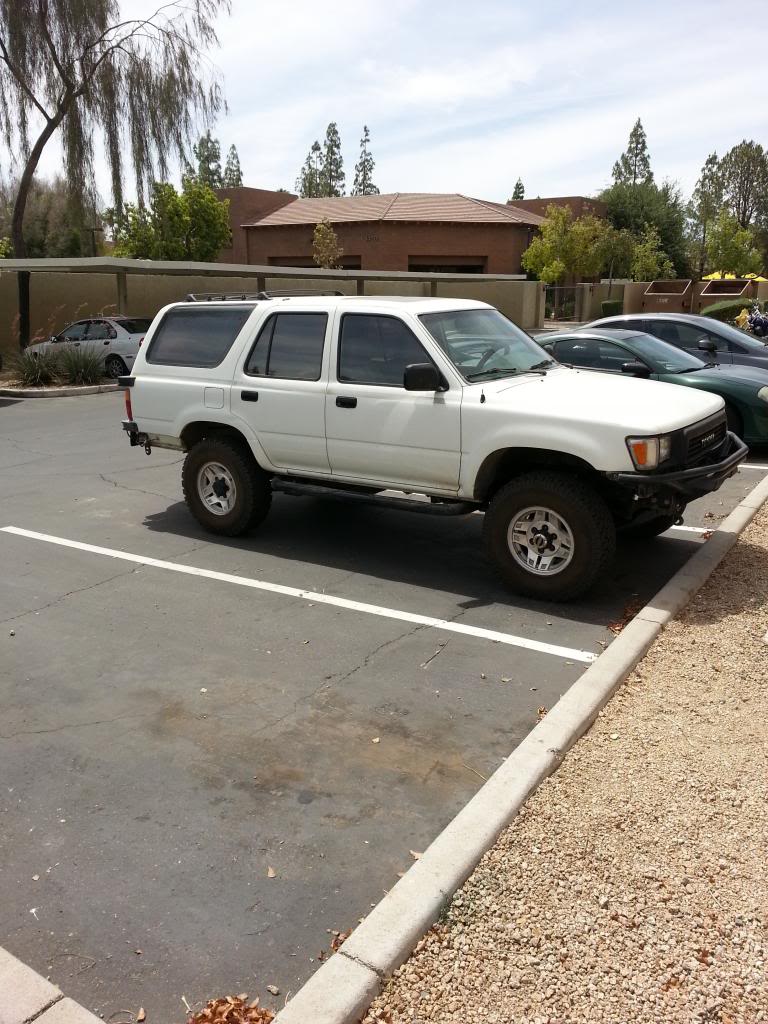
Name:  2013-05-26104805_zps2391db6b.jpg
Views: 125
Size:  139.4 KB

Name:  2013-05-26104739_zps64cd41d6.jpg
Views: 119
Size:  119.0 KB


or keeping it black


Name:  2013-05-26140112_zps8e57dc58.jpg
Views: 112
Size:  107.0 KB
Old 05-26-2013, 06:02 PM
  #42  
Registered User
 
BuzzardsGottaEat's Avatar
 
Join Date: Apr 2012
Posts: 153
Likes: 0
Received 1 Like on 1 Post
keep it black.
Old 05-26-2013, 06:03 PM
  #43  
Registered User
 
BuzzardsGottaEat's Avatar
 
Join Date: Apr 2012
Posts: 153
Likes: 0
Received 1 Like on 1 Post
I agree with that guy^
Old 05-26-2013, 06:04 PM
  #44  
Registered User
 
BuzzardsGottaEat's Avatar
 
Join Date: Apr 2012
Posts: 153
Likes: 0
Received 1 Like on 1 Post
x10


Old 05-26-2013, 06:35 PM
  #45  
Registered User
Thread Starter
 
a51young's Avatar
 
Join Date: Jan 2013
Location: AZ
Posts: 271
Likes: 0
Received 0 Likes on 0 Posts
Haha looks like I'll keep it then. One day I'll get one fabd up for the better angle. And get the exhaust put up higher.
Old 05-27-2013, 01:34 PM
  #46  
Registered User
 
Hezzy's Avatar
 
Join Date: Mar 2013
Location: Logandale NV
Posts: 19
Likes: 0
Received 0 Likes on 0 Posts
Awesome rig! I also have a 1990 4runner. I did the storage under the back like where the spare tire goes. its alot of work but i love it! you can fit alot in the small area. I like how you added a roof rack to yours. I've always wished mine came with one from the factory. did you just lay it up there and mark out the holes and drill? what did you put down for a gasket so it wouldnt leak water?

good job on the clean rig! and keep up the good work!
Old 05-27-2013, 01:35 PM
  #47  
Registered User
 
Hezzy's Avatar
 
Join Date: Mar 2013
Location: Logandale NV
Posts: 19
Likes: 0
Received 0 Likes on 0 Posts
Oh and did you just paint over the chrome crap or did you pull the chrome off and paint it? I just wondered how well/long paint will adhere to it? I like the looks of everything painted black but i dont want it to peel or chip easily.

dam im an idiot i just read where you said sand paper on the chrome and the paint sticks good. sorry

Last edited by Hezzy; 05-27-2013 at 01:37 PM.
Old 05-27-2013, 01:51 PM
  #48  
Registered User
Thread Starter
 
a51young's Avatar
 
Join Date: Jan 2013
Location: AZ
Posts: 271
Likes: 0
Received 0 Likes on 0 Posts
Thanks dude! Yeah I just laid the rack on top, lined it up as even as I could, marked and drilled the holes. I used a screw rivit press I picked up from harbor freight for $16. I used some silicone around the holes to seal it up. If I had to do it again I would probably move it up a little, it's just the moon roof location that concerns me.

The storage underneath is something I've been wanting to do for a while.

For the grill I pealed off the chrome, it was a big pita. The side mirrors, bumper and door handles I just sanded down. Im hoping the paint sticks well. So far so good on the grill and side mirrors.
Old 05-28-2013, 06:06 PM
  #49  
Registered User
 
Hezzy's Avatar
 
Join Date: Mar 2013
Location: Logandale NV
Posts: 19
Likes: 0
Received 0 Likes on 0 Posts
hey do you happen to remember what that roof rack cost ya? just would like to get a feel of what to expect.

Thanks!
Old 05-28-2013, 06:10 PM
  #50  
Registered User
Thread Starter
 
a51young's Avatar
 
Join Date: Jan 2013
Location: AZ
Posts: 271
Likes: 0
Received 0 Likes on 0 Posts
it was around 30-40 or something. I don't remember exactly, I got a bit of other stuff the same day, but I remember feeling ripped off from it.
Old 06-09-2013, 04:20 PM
  #51  
Registered User
Thread Starter
 
a51young's Avatar
 
Join Date: Jan 2013
Location: AZ
Posts: 271
Likes: 0
Received 0 Likes on 0 Posts
more time around four peaks

Name:  1005141_537596236302573_1260215825_n_zps265aed05.jpg
Views: 106
Size:  92.4 KB

Name:  2013-06-09124404_zpsc419258b.jpg
Views: 112
Size:  126.0 KB

Name:  2013-06-09124258_zps8c7f27c5.jpg
Views: 112
Size:  133.8 KB

Name:  2013-06-09124340_zps4d9b9a33.jpg
Views: 122
Size:  150.9 KB
Old 06-30-2013, 06:28 AM
  #52  
Registered User
 
julsruls's Avatar
 
Join Date: Jun 2013
Location: Maine
Posts: 451
Likes: 0
Received 0 Likes on 0 Posts
You going to trim behind the bumper? Make the lines of the valance match lines of bumper?

I liked it without rear bumper just cause lines matched a bit more.

Looks real good though.
Old 06-30-2013, 08:06 AM
  #53  
Registered User
Thread Starter
 
a51young's Avatar
 
Join Date: Jan 2013
Location: AZ
Posts: 271
Likes: 0
Received 0 Likes on 0 Posts
I think about that stuff all the time, those little corners in the front. I just need an extension cord that would reach an outlet in my apartment to where I park. Plus I'm not sure exactly how far I'd want to cut and it's a lot harder to add than subtract.

Yeah I feel like it looks better and the lines match more with the bumper off, plus it wouldn't get in the way anymore. But I don't have good spot to store it so I'm waiting for someone to damage it or more money for a tube one or something. But that will be after some other more pressing things get taken care of
Old 07-02-2013, 02:19 PM
  #54  
Registered User
 
BuzzardsGottaEat's Avatar
 
Join Date: Apr 2012
Posts: 153
Likes: 0
Received 1 Like on 1 Post
Park at the mall and wait for someone to ding the rear, then replace it with a Marlin Rear, because they're sweet.
Old 07-02-2013, 02:23 PM
  #55  
Registered User
Thread Starter
 
a51young's Avatar
 
Join Date: Jan 2013
Location: AZ
Posts: 271
Likes: 0
Received 0 Likes on 0 Posts
But then it might bend the mounts... it'll be nice to have more money for some rock sliders, rear bumper, steering stabalizer, ome suspension, rear locker, etc..
Old 07-11-2013, 06:37 PM
  #56  
Registered User
Thread Starter
 
a51young's Avatar
 
Join Date: Jan 2013
Location: AZ
Posts: 271
Likes: 0
Received 0 Likes on 0 Posts
latest trip. one day soon I hope to get a cb radio

Name:  2013-07-11161104_zps016465af.jpg
Views: 116
Size:  59.1 KB

Name:  2013-07-11161113_zpscd64d457.jpg
Views: 131
Size:  46.2 KB

Name:  2013-07-11161210_zpse3f5ee5f.jpg
Views: 106
Size:  32.8 KB

A little bit of ifs flex here


Name:  2013-07-11163802_zpsda51621c.jpg
Views: 106
Size:  138.5 KB

Name:  2013-07-11165719_zps69f25f17.jpg
Views: 117
Size:  124.5 KB
Old 07-12-2013, 09:39 AM
  #57  
Registered User
 
lofreqjeff's Avatar
 
Join Date: Jul 2005
Location: Chandler AZ
Posts: 1,224
Likes: 0
Received 1 Like on 1 Post
Nice work! I go out to the 4Peaks/Sycamore/Butcher Jones area all the time - next time you head out that way let me know, I'd like to get out with more Yota's.
Old 07-18-2013, 05:22 PM
  #58  
Registered User
Thread Starter
 
a51young's Avatar
 
Join Date: Jan 2013
Location: AZ
Posts: 271
Likes: 0
Received 0 Likes on 0 Posts
I got my cb radio installed, just needs to get tuned and it'll be all ready!
uniden pro520XL with 4' firestik and spring

Name:  2013-07-17174723_zps48b41024.jpg
Views: 118
Size:  71.1 KB

Name:  2013-07-17174732_zps5f230cfa.jpg
Views: 131
Size:  76.4 KB

Name:  2013-07-18172735_zpsa4140ccd.jpg
Views: 109
Size:  83.8 KB

Name:  2013-07-18172718_zps2b700914.jpg
Views: 107
Size:  92.3 KB

Name:  2013-07-18172753_zpseddc5d18.jpg
Views: 111
Size:  67.6 KB
Old 07-18-2013, 07:24 PM
  #59  
Registered User
 
julsruls's Avatar
 
Join Date: Jun 2013
Location: Maine
Posts: 451
Likes: 0
Received 0 Likes on 0 Posts
Good cb!!
Old 08-20-2013, 08:24 PM
  #60  
Registered User
Thread Starter
 
a51young's Avatar
 
Join Date: Jan 2013
Location: AZ
Posts: 271
Likes: 0
Received 0 Likes on 0 Posts
had a power steering leak the past few weeks, and it had been only getting worse, no luck with lucas stop leak. So I decided to go ahead and get a remaned one from benchworks here locally and got it put in today. Took a few hours but learned about how easy it is to pop off the steering wheel. Not that bad of a job to do and doesn't require anything special that can't be rented from an oreilly's of the like.


Quick Reply: tony's 1990 4runner build-up


All times are GMT -8. The time now is 07:48 AM.