
rustED's 86' V8-Runner Build-up Thread
 Aug 7, 2012 | 02:33 PM
#421
Mark is right about piecing things together it will add up, but sometimes it is easier to spend a little at a time then all at once. After seeing that kit, which is probably a fair price for what all is needed. I might have to keep an eye out for a solid axle frame.
Aug 8, 2012 | 05:25 AM
#422
Registered User
Joined: Mar 2008
Posts: 705
Likes: 19
From: Colorado
*I just read more carefully and realized you are not trying to "build" the truck, just use it "stock", in which case finding a solid-axle truck would be much cheaper than a sas. where the hell is the "delete" button? seems to come and go on this forum
Last edited by liveoffroad; Aug 8, 2012 at 05:33 AM.
Aug 8, 2012 | 05:34 AM
#423
Registered User
Joined: Apr 2012
Posts: 2,817
Likes: 2
From: Los Angeles CA
i wish it were that easy haha. at least half (probly more like 3/4) of that kit is still needed even if you start with a solid axle truck. (shackle flip kit, vented rotors, wheel spacers, longer brake lines, HIGH STEER). i'm still trying to piece mine together, even after 3 years
BTW ED what kit did you use on your SAS. (sorry haven't read the whole thread yet so I wouldn't know.)
Aug 8, 2012 | 08:29 AM
#424
Thread Starter
Registered User
iTrader: (2)
Joined: Sep 2010
Posts: 2,716
Likes: 7
From: Tri-Cities, Wa
Hello Ed, maybe I am missing something and I havent looked into doing a SAS,as it wasnt really an option for awhile, but this 84 I am stripping due to it being unsafe to drive because of rust, I was looking at it today and from what I could see other then the steering section, it looked as though the front springs just need a box/perch on the front, the drivers side of the frame would need a perch for the track bar, would need a hole cut and a steel piece of pipe into each side of the frame to mount the rear of the springs. Basically I would want to look as it was stock or as it is stock with out having to doing all of the lift kits available out there.
Is there really that big of a difference in the frames? I know all of the IFS gets cut off. From what I understand it is quite expensive to do a SAS and as I see it on the 84, it really doesnt look to hard for someone that knows how to weld. I cant weld but have a friend that can.
I could do a bodyswap blindfolded with no worries, but doing a solid axle swap would have me sweating bullets. I was talking to Jason last nite and his son has an 84 and he was saying how impressed he was with the ride of his truck. I was telling him how well this 84 rides, but is a disaster waiting to happen. I have had an 89 standard cab and a 91 extended cab, and neither ride as good as the 84 did. I will be highly disappointed if my 85 doesnt ride just as well. You would think a solid axle rides rougher then IFS, but apparently not the case. Another reason I favor the 84-88 generation.
May be a little long and I havent studied up on the SAS itself. Am I completely off my rocker as far as the differenece in frames and what it would need to do a stock SAS?
Edit..Oops!!forgot about the shock hoops.

^I believe the above kit is $20 for the frame tubes, and $20 for the frame jigs. For your front shocks you might be able to cut off and reuse the stock mounts off your 84' frame if your wanting to keep it stock looking, otherwise the shock hoops are around $50- but you would have to run a longer front shock, and the shock mounts are different, they look like the rear shocks...I hope I answered your question, Terry, if not please see me straight, lol!
Last edited by rustED; Aug 8, 2012 at 08:36 AM.
Aug 8, 2012 | 08:42 AM
#425
Thread Starter
Registered User
iTrader: (2)
Joined: Sep 2010
Posts: 2,716
Likes: 7
From: Tri-Cities, Wa
Man Terry, if you didn't live so far away I'd give you a rust free 85' frame, lol, its a long bed though, ha, ha. Also on your last post you were talking about how well your 84' rides, I'm also impressed with how well my SAS ride is, even with the amount of lift I have it rides very smooth, once I get my shocks mounted like I want with more uptravel, I think ill be 100% happy with it!
Aug 8, 2012 | 09:21 AM
#426
Thread Starter
Registered User
iTrader: (2)
Joined: Sep 2010
Posts: 2,716
Likes: 7
From: Tri-Cities, Wa

I traded the 85' fenders for an axel/knuckle rebuild kit. I traded a 22R carb and intake msnifold for front TG shackles, Sold a tranny/transfercase,clutch pedal assembly, master and slave cylinder with the hardlines, used that money to buy my hi-steer. Sold some other parts, bought the shock hoops, steering box relocation kit, charged the shocks on my Les schwab account, lol. Oh, I bought some used rear Toyota (2" lift springs) from Brian (OneIwilly) for $40...and that's where I'm at now. I probably have a little over $700 into it, probably saved about $400 peicing it together, but am pretty happy with the results so far! I'm not trying to sway you one way or another on buying the IFS Eliminator kit, just showing you that you can peice together a SAS on a budget, and have good results!__
Last edited by rustED; Aug 8, 2012 at 09:29 AM.
Aug 8, 2012 | 09:30 AM
#427
Registered User
Joined: Apr 2012
Posts: 2,817
Likes: 2
From: Los Angeles CA
I uunderstand. I'm just trying to get mopre info from people who have done the SAS and see what they went with. Good to do my research before i buy lol i get you. Thanks for that. I'm considering going with the addicted offroad IFS eliminator and just go with thew 3" lift in the front and buy the 4" lift for the back to match the front. Sounds like a good deal. From here on out its gonna be all about paying my card off from my engine rebuild work, and then buy both kits, gears and 2 spartan lockers. Still debating on the 4.88 or 5.29 bit. but ill get to a conclusion soon. might just go ahead and go for brand new 4.88's front and rear cuz i dont know what kind of abuse the 5.29's endured with the previous owner.
Its gonna be a nice chunk of cash. but It will be worth it. who knows maybe a kit might come up on the classifieds from here to then.
Its gonna be a nice chunk of cash. but It will be worth it. who knows maybe a kit might come up on the classifieds from here to then.
Aug 8, 2012 | 09:51 AM
#428
Thread Starter
Registered User
iTrader: (2)
Joined: Sep 2010
Posts: 2,716
Likes: 7
From: Tri-Cities, Wa
Yeah its a lot if money, but you'll have a sweet rig, and youll know it was all done correctly when its all said and done! I have one suggestion, if you go with the 3" ifs Eliminator kit, do a little research, because I've heard that the 3" lift springs are 2 inches shorter than the 4" and 5" lift kits, but they don't make that very clear in the install directions, so after getting everything welded in the front shackle angle isn't right. If you read Locked SR5's build thread he talks about it more, just thought I'd mention that.
Here's a link to his build, his SAS starts on post #27...
https://www.yotatech.com/forums/f199...75/index2.html
Here's a link to his build, his SAS starts on post #27...
https://www.yotatech.com/forums/f199...75/index2.html
Aug 8, 2012 | 10:09 AM
#429
Thread Starter
Registered User
iTrader: (2)
Joined: Sep 2010
Posts: 2,716
Likes: 7
From: Tri-Cities, Wa

^ took off the top yesterday!!!


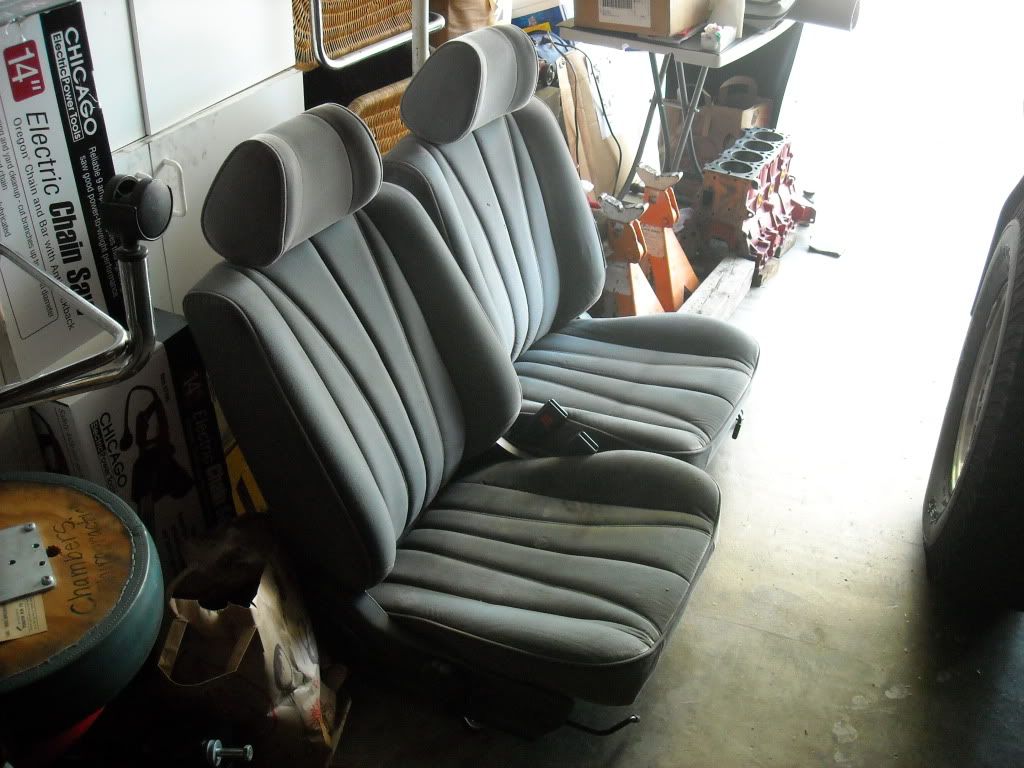
worked on my rear seats, they were missing a hinge on each side by the side panel, so I made new ones


^now the seats are all bolted in, and fold up like they're supposed to, just need to figure out something for the latching mechanism on the seat backs, and get some other shoulder style belts.
Last edited by rustED; Aug 8, 2012 at 10:37 AM.
Aug 8, 2012 | 03:15 PM
#431
Ed, the seats came out great... AWESOME IMPROV, SIR! haha...
Personally? Dye and such is SUCH A PITA... Reuphostering? WAY too costy... Just COVER EM and call it Wednesday, ya know? I remember you mentioning that it bothered ya... And brudda... I saw the SICKEST cover kit on my buddies 88 4Runner... It was front and back and they have sales all the time on 4wheelparts site that are "buy the fronts and get the backs free"... He paid like 120$ with tax for SICK neoprene covers for all 4. They look TOTALLY Factory, Ed... I gotta get pics for ya!
Anyway, just a thought. I've had really good luck at BigLots for the front seat covers... I get the Higher End Axis or whatever, other "decent" brands from parts stores, for like 10$ for both front seats w/head rest covers!
Yeah.... I would love to have a set of those REALLY nice Neoprene ones, ya know? Not to have bling or spend money I don't need to... I really think they're a good investment!(good covers) .... My passenger seat has always been covered by FACTORY Seat Covers that were offered(PO was a Toyota Mechanic that obviously loved jeeps or something/...>>HE DID NOT do things right on this rig, most often! hahaha).. That seat, underneath, is PRISTINE! It's hard to believe!
One more thing.... 86-91(maybe 92?) Camry Adjustable Head Rests pop RIGHT IN! They're WAY nicer and do not fall apart... WAY better foam and far thicker/better contoured to the neck bend, etc... THEY ROCK! And they're 5click adjustable, just like the OEM SR5 ones... I have em in mine and was one of the best cheap investments at Pick-Your-Parts, at least ON THE LIST! lol.....
These are Camry seats,...but the headrests that I put in.. I just don't have a pic of them ON MY SEATS, I'm always taking pics of the console or radio, lol... But these are the ones that work/great quality! >>>
THEY DO NOT, however, work for the back, as you most likely know, lol.
Aug 8, 2012 | 06:13 PM
#432
Thread Starter
Registered User
iTrader: (2)
Joined: Sep 2010
Posts: 2,716
Likes: 7
From: Tri-Cities, Wa
Thanks Mark, yeah I definately want to do something about the seats, I like the color, but I think it would be easier to stick with my original interior color and get covers like you said, then redoing my interior all gray. Its in pretty decent shape, other than the crack dash pad and the cargo area side panels need cleaned up and repainted as they are pretty faded. Thanks, Ill have to check 4wheel parts for those neoprene seat covers! I'll also keep in mind the Camry headrests, I might have to go to the pick & pull for some seatbelts, I'll have to keep my eyes peeled for Camry's too, lol.
Well i worked on my rear seats some more today, I figured out how to get the latching mechanism to work, it will require some more welding and Fab work (as usual, lol, nothing like welding in 100� weather, lol) I have the driverside almost done, didn't take any pics, but Ill post up some tomorrow when I finish.
Well i worked on my rear seats some more today, I figured out how to get the latching mechanism to work, it will require some more welding and Fab work (as usual, lol, nothing like welding in 100� weather, lol) I have the driverside almost done, didn't take any pics, but Ill post up some tomorrow when I finish.
Aug 8, 2012 | 07:20 PM
#433
Hey, "nothing like welding in 100*F weather".... Yep, but STANDING OVER A GRILL AT AN AMBIENT TEMP OF 140*F ISN'T FUN EITHER! HAHAHA. JK, I hear ya, man.... man, having to wear a helmet in HOT-HOT-HEAT? yuckkkkkkkk! HAHA.
Yeah, you can look into those, but for now, if you wanna save, Oh, 100$$$$$$ hahaha... go to BigLots.. They have em up there, no? I lived in Spokane.... I could have sworn they had a Pick-N-Save when I was up there, no? haha...McFrugals, BigLots, same thing, one and all. Their auto section is actually surprising, man! hahaha.
Saw some Weathertech like Mats there like my black ones in tan for 20$! Front and back! Same ones in Auto Stores are like 46$.... Can't remember the brand. sorry, lol.
Yeah, you can look into those, but for now, if you wanna save, Oh, 100$$$$$$ hahaha... go to BigLots.. They have em up there, no? I lived in Spokane.... I could have sworn they had a Pick-N-Save when I was up there, no? haha...McFrugals, BigLots, same thing, one and all. Their auto section is actually surprising, man! hahaha.
Saw some Weathertech like Mats there like my black ones in tan for 20$! Front and back! Same ones in Auto Stores are like 46$.... Can't remember the brand.
sorry, lol.
Aug 9, 2012 | 02:52 AM
#434
Hello Ed..Your seat brackets turned out great. Your rear seat look to be 4runners and the mounting tabs are behind the panels. You have to cut the slot out, and it is marked on the back side of the panel where to cut. I had to do the same thing on mine as it came backseat delete. I got some pics somewhere I will find and post later. Got to dig them up.
Wish you didnt live so far away, I would be all over that solid axle frame. I really did expect a rougher ride and was really impressed. I would have to stay stock, for cost and we just dont have anyplace to go around here. Where I used to go has been developed and privatized and know so far to go to a public place.
I looked a little deeper into a SAS and what is involved is ALOT. I have a new found respect for what you guys do that have the ability. I always knew it was expensive and then the ability to do it. That is one thing I like on this website is all of the different talent that is out there.
Hello liveoffroad.. I can understand taking 3 years to accumulate the parts. Took me 10 years to get my shop and am still having to use a power cord run to it and spent $75 on three tools. It all adds up and increases the time but you are getting there, you are better of then 3 years ago.
Aug 9, 2012 | 08:39 AM
#435
Thread Starter
Registered User
iTrader: (2)
Joined: Sep 2010
Posts: 2,716
Likes: 7
From: Tri-Cities, Wa
Hey, "nothing like welding in 100*F weather".... Yep, but STANDING OVER A GRILL AT AN AMBIENT TEMP OF 140*F ISN'T FUN EITHER! HAHAHA. JK, I hear ya, man.... man, having to wear a helmet in HOT-HOT-HEAT? yuckkkkkkkk! HAHA.
Yeah, you can look into those, but for now, if you wanna save, Oh, 100$$$$$$ hahaha... go to BigLots.. They have em up there, no? I lived in Spokane.... I could have sworn they had a Pick-N-Save when I was up there, no? haha...McFrugals, BigLots, same thing, one and all. Their auto section is actually surprising, man! hahaha.
Saw some Weathertech like Mats there like my black ones in tan for 20$! Front and back! Same ones in Auto Stores are like 46$.... Can't remember the brand. sorry, lol.
Yeah, you can look into those, but for now, if you wanna save, Oh, 100$$$$$$ hahaha... go to BigLots.. They have em up there, no? I lived in Spokane.... I could have sworn they had a Pick-N-Save when I was up there, no? haha...McFrugals, BigLots, same thing, one and all. Their auto section is actually surprising, man! hahaha.
Saw some Weathertech like Mats there like my black ones in tan for 20$! Front and back! Same ones in Auto Stores are like 46$.... Can't remember the brand.
sorry, lol.Ill have to check into BigLots, and McFrugals, I've never heard of either one around my area, they might have them in Spokane (about 3 hrs from where I live, ha, ha)
Aug 9, 2012 | 09:20 AM
#436
Thread Starter
Registered User
iTrader: (2)
Joined: Sep 2010
Posts: 2,716
Likes: 7
From: Tri-Cities, Wa
Hello Ed..Your seat brackets turned out great. Your rear seat look to be 4runners and the mounting tabs are behind the panels. You have to cut the slot out, and it is marked on the back side of the panel where to cut. I had to do the same thing on mine as it came backseat delete. I got some pics somewhere I will find and post later. Got to dig them up.
Wish you didnt live so far away, I would be all over that solid axle frame. I really did expect a rougher ride and was really impressed. I would have to stay stock, for cost and we just dont have anyplace to go around here. Where I used to go has been developed and privatized and know so far to go to a public place.
I looked a little deeper into a SAS and what is involved is ALOT. I have a new found respect for what you guys do that have the ability. I always knew it was expensive and then the ability to do it. That is one thing I like on this website is all of the different talent that is out there.
Are you still planning a stock heighth SAS? It seems like it would be more affordable, since you would probably be reusing the stock steering components, possibly the upper shock mounts, stock springs, if you built your own spring perches for the front all you would need is to cut out the holes and buy or make the frame tubes for the rear shackles, ha, ha.
I know what you mean about the variety of talent of the members here on the forum. I like doing metal work, modifying/ welding ( like my current seat project) but, tearing into the dash, like to remove the dash pad to repair it, I just don't look forward to it at all, lol, in fact, I'd probably just throw one of those carpeted covers over it and call it good! lol! That's how intimidated I am! Lol. Before I sold the my 85' cab, I was removing most the interior, and I gave up on removing the dash pad, ( which I now regret, it was in better condition than my current one) but I just felt like I was going to ruin it trying to remove, lol. Anyway, I have a huge amount of respect for the work you do on the interiors and paint and bodywork also! I just don't have the patience for bodywork, lol I get in to much of a hurry! Anyway, I haven't commented on your thread in awhile, but I did see how your dash turned out, amazing work Terry! It looks like brand new! I hope someday Ill get my interior to that point, ha, ha!
Aug 9, 2012 | 07:20 PM
#437
Thanks Ed..Apprciate the compliments. I am not going to do a stock SAS, I not sure if I want to trust this friend welding. Im sure he could do it, but he was a little concerned about it holding up to speed so that changed that for me.
I did make a video on the hardest part of the dashpad, trying to take some of the frustration out of it. I will be doing some dashwork soon and will add to that post. When I get it with a descent amount of info, look at the first page of my build for it if you run into it again. I will update it in a few more days. It isnt bad when shown the correct way of doing it.
I will try and make changing out the heater control switch a little more understandable. If you run into something like that let me know and I will try to get a video or pic that can help. Warning!!! My videos are terrible,but hopefully they get the idea across. lol
Another problem I see on the runners and was a headach for me to learn is the backhatch. It is nothing to be concerned about. Running a ground wire to the front tab of the center console bypasses alot of the safety on the backhatch. Grounding to the body wont work. Doesnt make sense, but that is the way it is. When Jason was out here, he didnt understand it as well and I think he has a better grasp of electricity then I do.
Last edited by Terrys87; Aug 9, 2012 at 07:38 PM.
Aug 9, 2012 | 08:28 PM
#438
Terry... 99C store has great little tripods that fit almost any point and shoot camera.... And you can also pre-zoom and set up your light and THENNNNN, with the camera wedged up in like, oh, I don' t know... BETWEEN THE HEADREST AND SEAT TOP? ... then you can click record with it focusing... click stop, make sure it's focusing right and getting that area like you want... and THEN mount a light there, too, like a flashlight,... and start recording and then you have both hands free
I have those tripods by the dozens... The 3 flat legs that fold up into one leg for storage... they are best for the dash, when shooting the road in front of me. I even stuff the camera up against the dash with something keeping it from HITTING the window, like foam or something stuck to it... Then put a door stopper behind it, to keep it from falling back... There is a way where there's a will, Yes? hahaha.. I only bring it up, because, well..... Your input is IMPORTANT.. you know lots of tricks and have helped many times... But watching a clear video of you doing it 'as you would' with both hands, etc.? That would make it even better... SO YES, I'M BEING SELFISH! hahaha... But I think it would help you as well, ya know?
I also have around 10 Tripods that I use for my point and shoot and CanonD that are up to 6Ft. if you want em to be, telescopic... I might have an extra if you can't find one cheap
I have those tripods by the dozens... The 3 flat legs that fold up into one leg for storage... they are best for the dash, when shooting the road in front of me. I even stuff the camera up against the dash with something keeping it from HITTING the window, like foam or something stuck to it... Then put a door stopper behind it, to keep it from falling back... There is a way where there's a will, Yes?
hahaha.. I only bring it up, because, well..... Your input is IMPORTANT.. you know lots of tricks and have helped many times... But watching a clear video of you doing it 'as you would' with both hands, etc.? That would make it even better... SO YES, I'M BEING SELFISH! hahaha... But I think it would help you as well, ya know? I also have around 10 Tripods that I use for my point and shoot and CanonD that are up to 6Ft. if you want em to be, telescopic... I might have an extra if you can't find one cheap
Aug 9, 2012 | 09:08 PM
#439
Thread Starter
Registered User
iTrader: (2)
Joined: Sep 2010
Posts: 2,716
Likes: 7
From: Tri-Cities, Wa
rear seats finished
Hi Terry, I will have to check out your video for the dash pad removal, that will help me out alot, I'm glad you go out of your way to make these videos to help out your fellow yota bretheren, lol, look forward to seeing it!
Finished my rear seats today. I got the latching mechanism working, here's some pics...

^i took the stock post that stuck out of the side panel, that the factory rear seat latched to and modified it.

^here it is after I modified it


^heres a bracket I made that ties into the hinge I made and the modified bracket shown above


Here's a couple pics if it finished
http://static.photobucket.com/player...e05/MOV010.mp4
^^^^^^^^^^^^^^HERE'S A VIDEO OF HOW IT WORKS^^^^^^^^^^^^^^^^^^^^^^^
Finished my rear seats today. I got the latching mechanism working, here's some pics...
^i took the stock post that stuck out of the side panel, that the factory rear seat latched to and modified it.
^here it is after I modified it
^heres a bracket I made that ties into the hinge I made and the modified bracket shown above
Here's a couple pics if it finished
http://static.photobucket.com/player...e05/MOV010.mp4
^^^^^^^^^^^^^^HERE'S A VIDEO OF HOW IT WORKS^^^^^^^^^^^^^^^^^^^^^^^
Last edited by rustED; Aug 9, 2012 at 09:36 PM.
Aug 9, 2012 | 09:43 PM
#440
Talk about sweet improv... NICE work, Ed
I AGREE, BTW.... I'm VERY grateful for Terry giving so much of his time to help US out, when he could just 'do it all and get it done faster' if he didn't stop to tell us all what he was doing! Good dude!
I AGREE, BTW.... I'm VERY grateful for Terry giving so much of his time to help US out, when he could just 'do it all and get it done faster' if he didn't stop to tell us all what he was doing! Good dude!


