
RBx 1988 4Runner Build-Up Thread

 Oct 18, 2013 | 04:27 AM
#1582
Thread Starter
Registered User

Joined: Jan 2010
Posts: 3,795
Likes: 33
From: Bloodymore
Smooth Knuckle Balls
My forearm and hand haven't hurt this much since I was 12, dam this is a lot of welding.
Knuckle balls smoothed... coat of JB Weld, then sanded off with 320, had a few scars and a little pitting from rust.


My version of the FROR t-case mount

Knuckle balls smoothed... coat of JB Weld, then sanded off with 320, had a few scars and a little pitting from rust.
My version of the FROR t-case mount
Last edited by RBX; Nov 16, 2015 at 11:35 AM.
Oct 18, 2013 | 08:52 AM
#1583
Dayummmm! Beautiful job on the knuckleball clean up! Also,.... Holy crapoly, look at you fabricating crazy stuff! I can't even imagine how sick this thing is going to be on the trail. Will certainly be the envy of Maryland locals! Lol... I know, there are tons of of sick trucks back east, but the way you put this thing together and figured everything out has been really fun to watch, and I just wish I could see it in person and roll with ya on some trails!
Oct 22, 2013 | 09:24 AM
#1584
Thread Starter
Registered User
Joined: Jan 2010
Posts: 3,795
Likes: 33
From: Bloodymore
Welded up, cleaned, degreased and ready for paint. I will be adding sheet metal to the inner fender to clean up my miscalculations.


Last edited by RBX; Nov 12, 2015 at 07:23 AM.
Oct 22, 2013 | 09:49 AM
#1585
Freakin exciting!
Short timin it fo sho! Haha. Looks like ur in the clear for a final path to completion, and I wanna wish you a congratulations post haste! Seriously, RB, you have really persevered to do really bad ass mod!
PS, I'm thinking about tires in advance, I'm anxious to see what you think about your choice.
Oct 22, 2013 | 10:49 AM
#1586
Thread Starter
Registered User
Joined: Jan 2010
Posts: 3,795
Likes: 33
From: Bloodymore
I have actually coated the frame from the transfer case forward as of Sunday. But since it is black, you can barely see anything. Painting the spines in the shock towers was tedious.
Next will be reassembly....which means... clean up engine, inner fender sheet-metal, wiring, A/C o-ring replace, steering linkage routing around the shock tower, route brake lines, regear the FJ80 3rd...To be continued
Next will be reassembly....which means... clean up engine, inner fender sheet-metal, wiring, A/C o-ring replace, steering linkage routing around the shock tower, route brake lines, regear the FJ80 3rd...To be continued
Oct 23, 2013 | 11:33 AM
#1587
Thread Starter
Registered User
Joined: Jan 2010
Posts: 3,795
Likes: 33
From: Bloodymore
a few pics of the new t-case mount and painted tower. I have to go back and touch up under the louvers in the spine, they are difficult to coat.


Last edited by RBX; Nov 12, 2015 at 07:30 AM.
Oct 23, 2013 | 11:55 AM
#1589
PS: I got Denso o-rings at Toyota for cheap. Of course, at the time the clerk guy was a buddy and was very helpful... If you're lucky they will dig them out for you. He was able to pick up the diagram and show me all the points where they are, I believe it was 17 or so. I just said I want every one of them, and then he went through their box and got me an o ring for each spot. I think I paid $28 or something. Believe it or not, I believe Napa still has Japan o-rings as well for the air conditioning. Anyway, that would be nice to have your AC nice and fresh 4 next summer. I'm sure it's pretty darn humid out there!
Oct 30, 2013 | 08:53 AM
#1591
Thread Starter
Registered User
Joined: Jan 2010
Posts: 3,795
Likes: 33
From: Bloodymore
finished inner fender sheet metal... welded, seam-sealed & undercoated. I need to touch up the frame a bit from spots i missed or are very this when I was painting it (or got seam-sealer on).
Last edited by RBX; Nov 12, 2015 at 07:30 AM.
Nov 5, 2013 | 04:47 PM
#1592
Thread Starter
Registered User
Joined: Jan 2010
Posts: 3,795
Likes: 33
From: Bloodymore
No real updates just reassembling the engine bay and all the things that have to be routed around the new suspension. I'm wrestling with a fuel line now and rebuilding the power steering pump.
Nov 17, 2013 | 06:49 PM
#1594
Thread Starter
Registered User
Joined: Jan 2010
Posts: 3,795
Likes: 33
From: Bloodymore
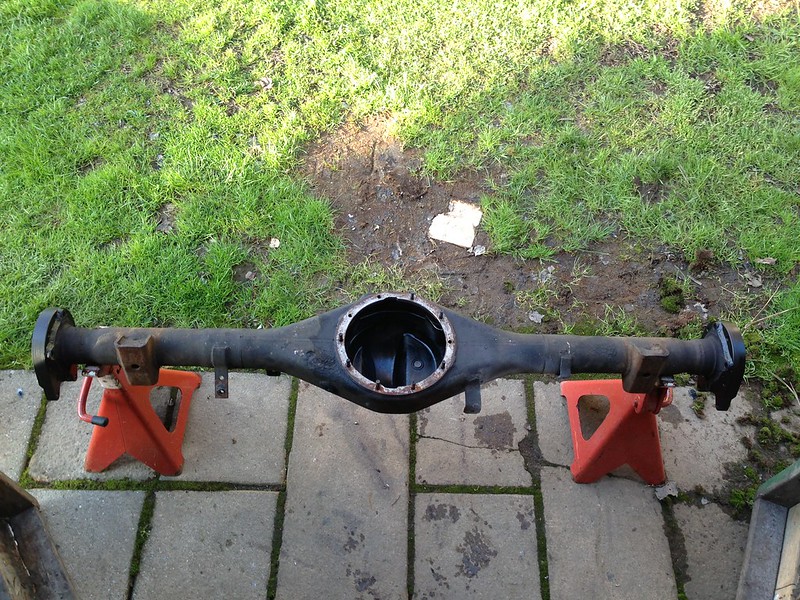
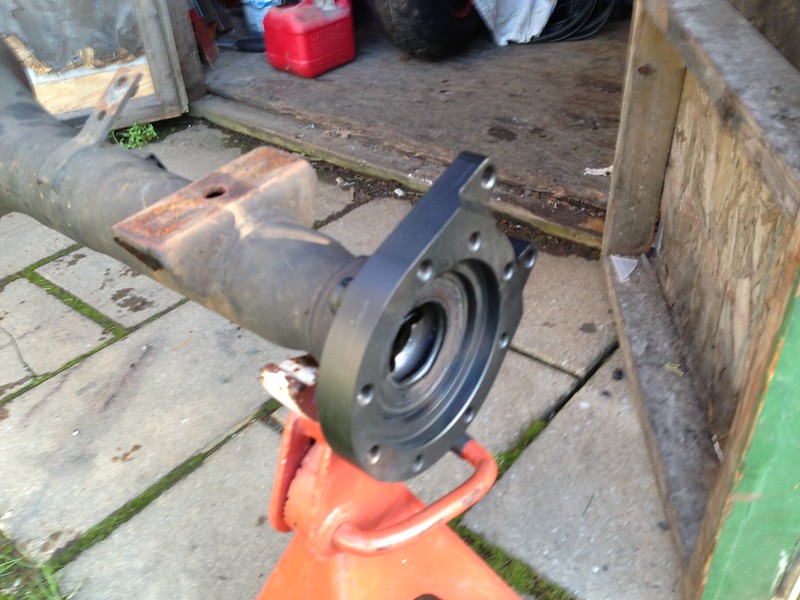
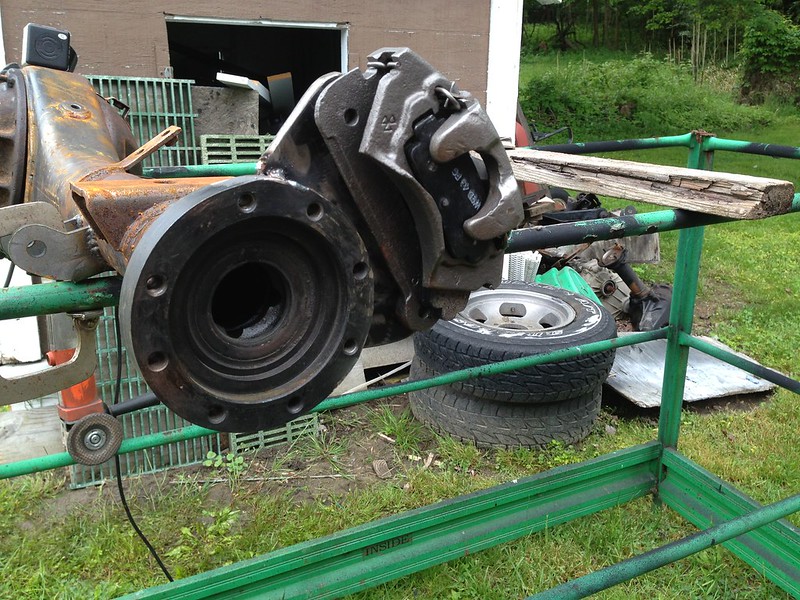
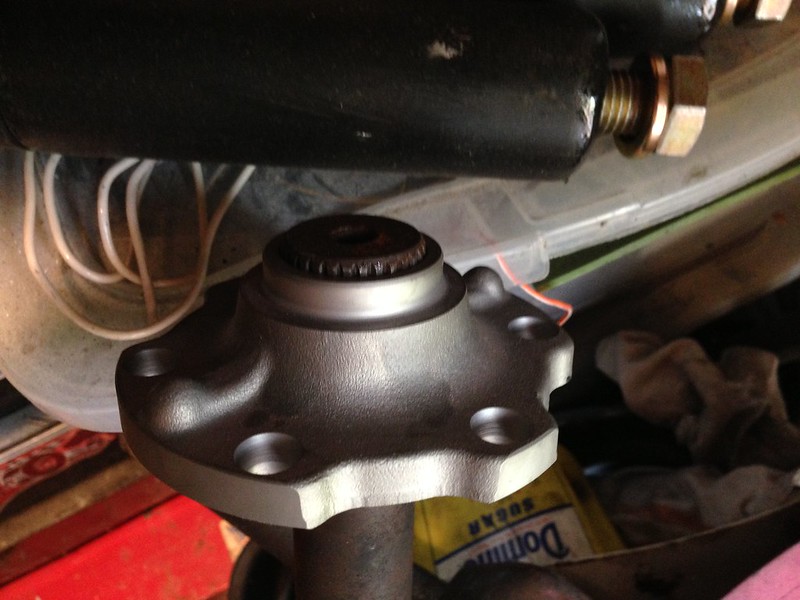
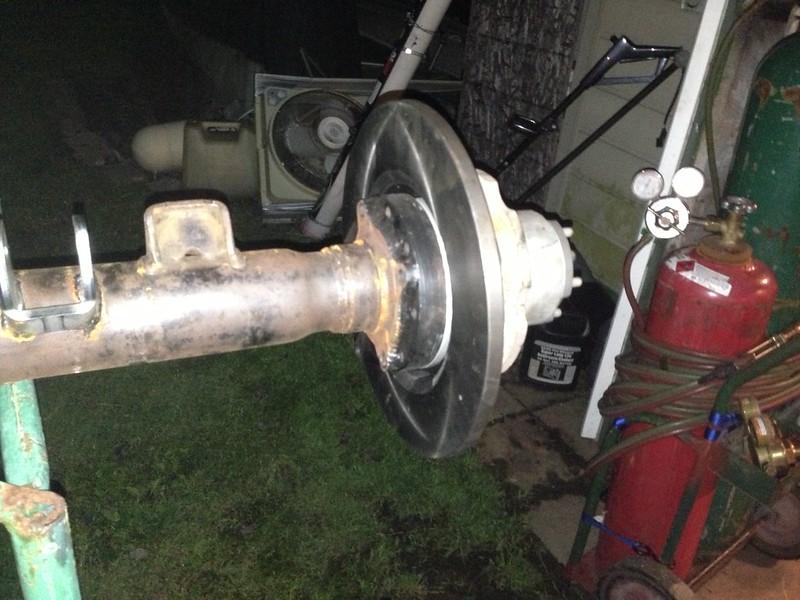
Toyota Full Float Rear Axle Seal
Did a bit of work to the new full float rear going in. Bought a pair of axle seal flanges from Garrett on Pirate. These will let me use the Marlin Eco-Seals for the front axle on the rear. Not that this method is proven to work, but i figure I'll give it a shot. Now I need to order my 32.5" axle shafts from Trail Gear.
Last edited by RBX; Nov 12, 2015 at 07:48 AM.
Nov 17, 2013 | 07:01 PM
#1595
Registered User
Joined: Dec 2009
Posts: 2,762
Likes: 1
that is a crazy looking shock tower up front. are you gonna be able to remove the two long bolts from the t case x member if you ever need to drop the case?? looks like the bolt goes up and the body is right on top of it..... eekk
that is pretty cool what you did with the rear axle. you must have done your homework cuz i never seen that before
that is pretty cool what you did with the rear axle. you must have done your homework cuz i never seen that before
Nov 18, 2013 | 02:52 AM
#1596
Thread Starter
Registered User
Joined: Jan 2010
Posts: 3,795
Likes: 33
From: Bloodymore
Thanks
The t-Case bolts have plenty of room, they are nuts and bolts, so when you remove the nut on the bottom, you need just to pull the bolt out of the 1/4" plate the t-case moutn sits on. I'll try to get a better pic up.
As for the FF rear, there are lots of information on how to make a toyota full floating rear, the problem is that no one addresses the lack of axle seal once the semi-float axles are removed.
Nov 30, 2013 | 04:46 AM
#1597
Thread Starter
Registered User
Joined: Jan 2010
Posts: 3,795
Likes: 33
From: Bloodymore
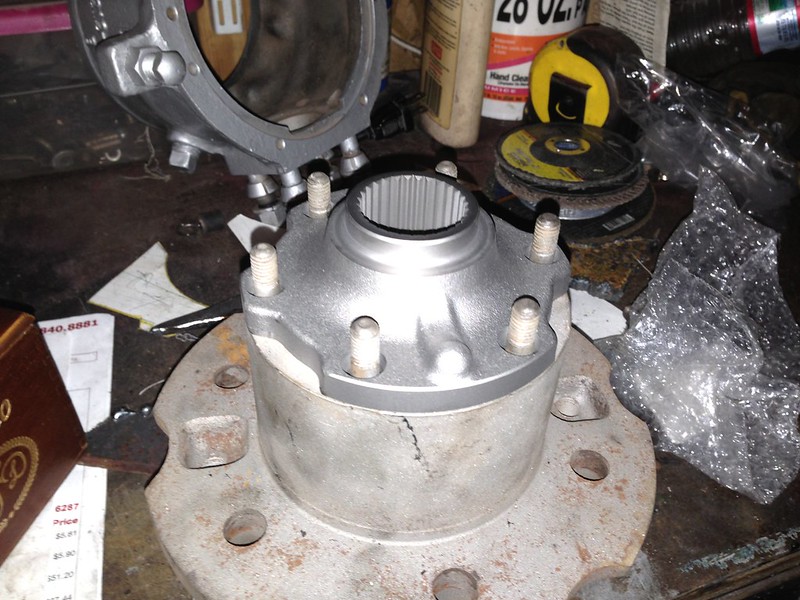
Toyota full float rear axle
Full float rear just need the axle shafts. Ready to run brake lines and hang it under the rig. I'll have to take it off the stands first. So this won't actually go in until the front legs are on.


Last edited by RBX; Nov 12, 2015 at 08:12 AM.
Nov 30, 2013 | 07:02 AM
#1599
Thread Starter
Registered User
Joined: Jan 2010
Posts: 3,795
Likes: 33
From: Bloodymore
It's driving me crazy also, it's not patience as much as its 'I don't know what I'm doing'. So I'm trying to cover everything and some time wasting is realizing I need a part or an adjustment to a modification.


