When you click on links to various merchants on this site and make a purchase, this can result in this site earning a commission. Affiliate programs and affiliations include, but are not limited to, the eBay Partner Network.
Yes, Sir!
At first he told me about his 4Runner that was stolen and found, and (would you believe it?) recovered in Mexico! He didn't say he had exactly same year and model, color as mine.
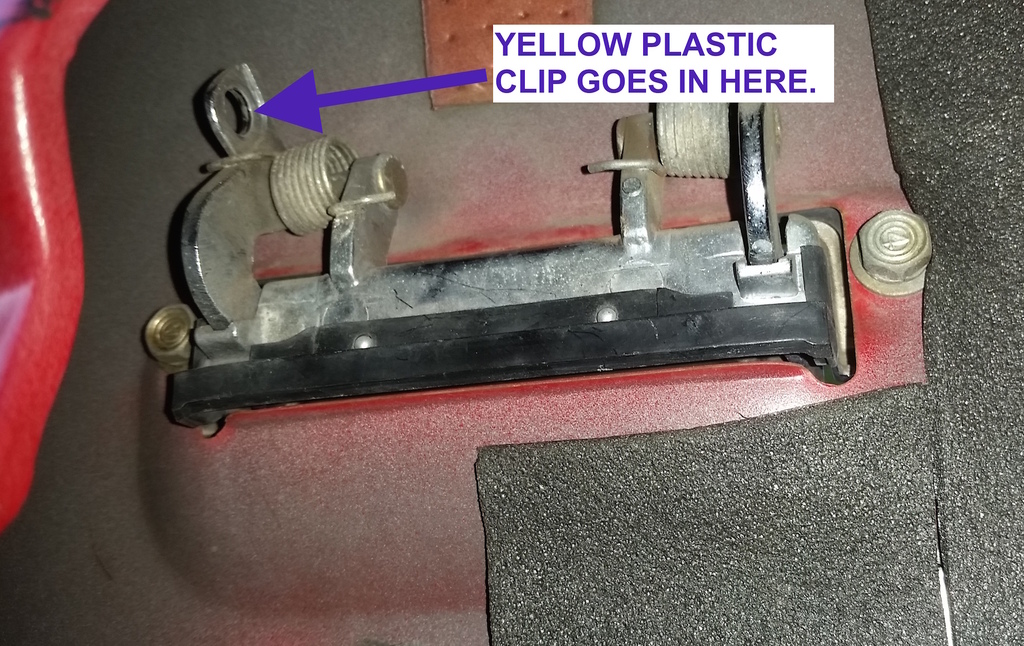
I have never been ablt to remove those clips with out breaking them. I just automatically assume I am going to have to replace them when I work on the door. I can install them in about 2 seconds but takes alot longer getting them out.
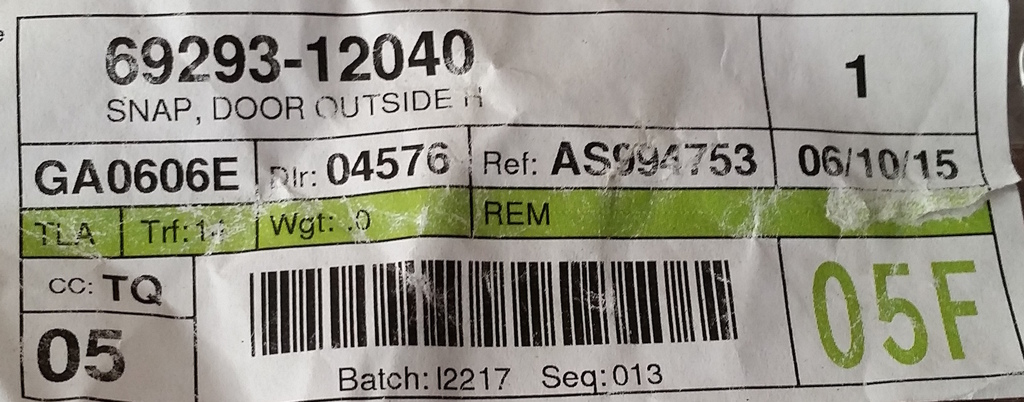
I missed the part where you were looking for clips. I could of posted that part number. I got it in my threads some where. I like to put some sound deadner in the doors when I have the panels off. It helps on the noise.
If you have a problem with the interior handle not opening the door easily, I have a cheap fix for that if you need it.
For a second I thought may it was the same truck you and your friend had but noticed the different interiors. It still would be like a step back in time. Bet he wishes he still had his.
I have never been ablt to remove those clips with out breaking them. I just automatically assume I am going to have to replace them when I work on the door. I can install them in about 2 seconds but takes alot longer getting them out.
I missed the part where you were looking for clips. I could of posted that part number. I got it in my threads some where. I like to put some sound deadner in the doors when I have the panels off. It helps on the noise.
If you have a problem with the interior handle not opening the door easily, I have a cheap fix for that if you need it.
For a second I thought may it was the same truck you and your friend had but noticed the different interiors. It still would be like a step back in time. Bet he wishes he still had his.
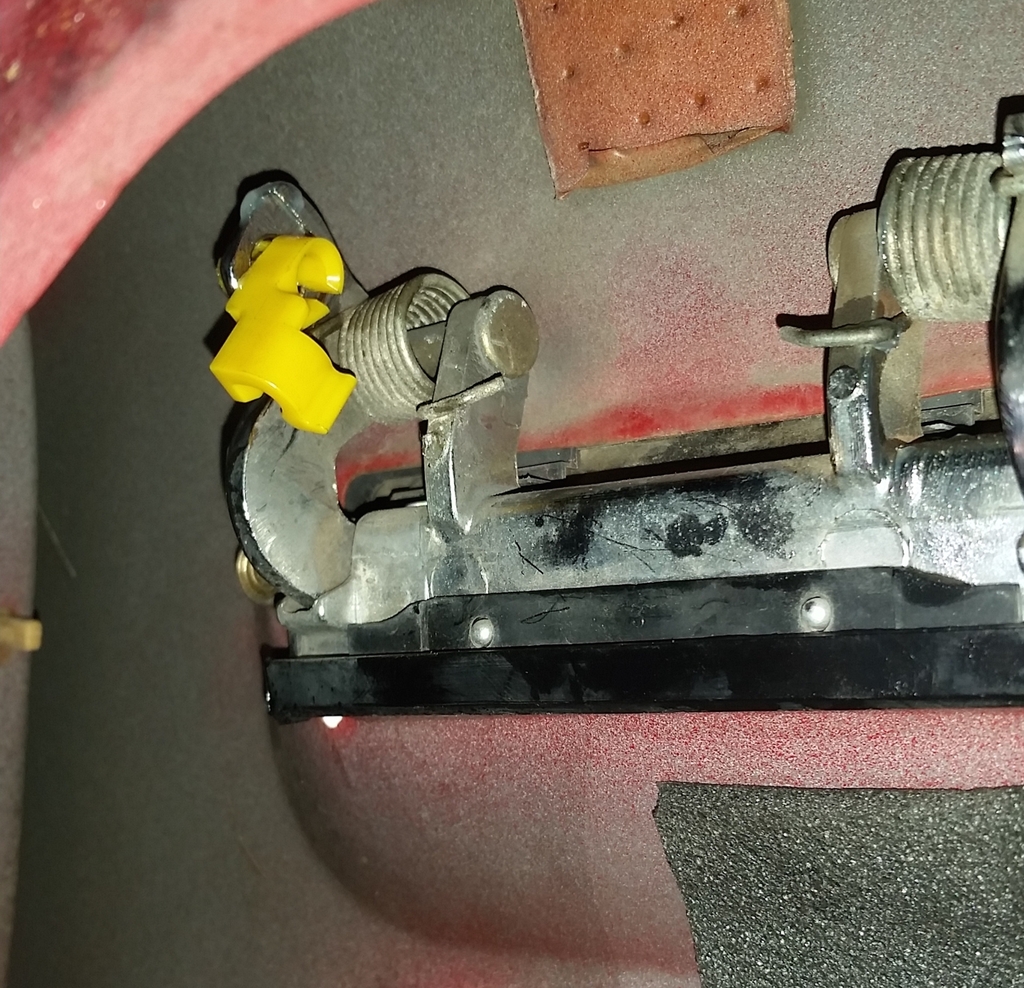
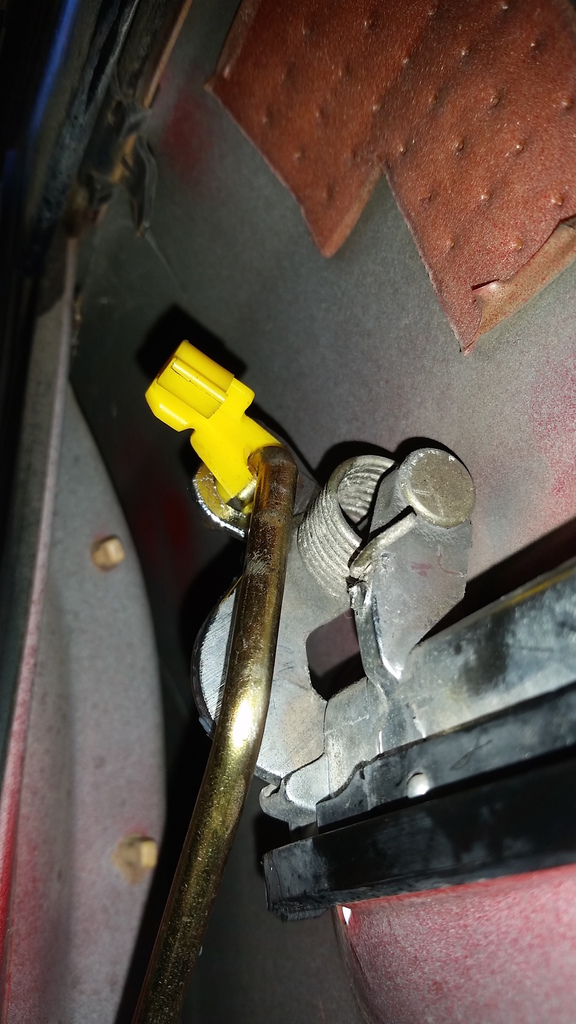
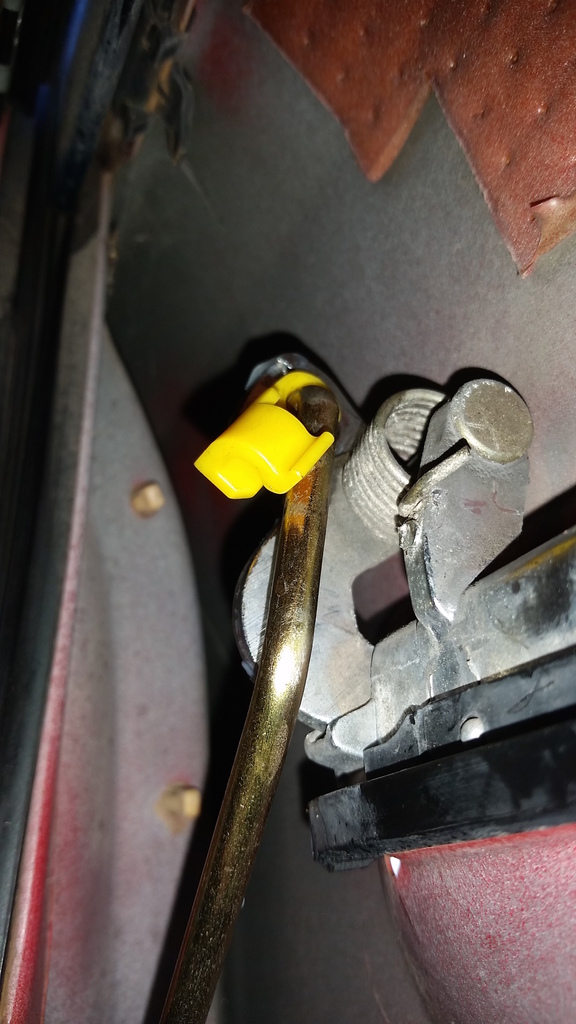
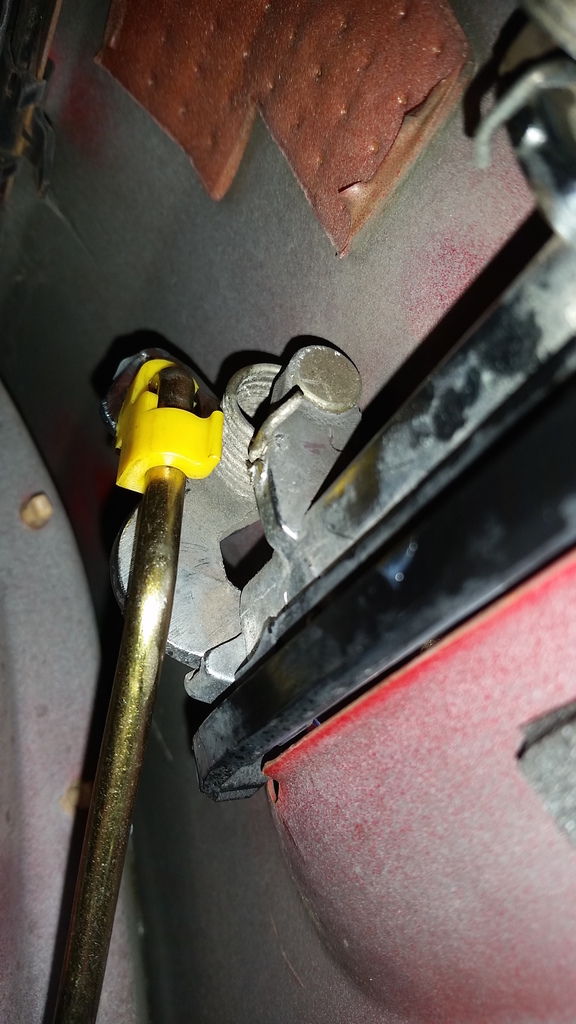
Tnx, Terry. I guess the trick is to unclip snap from hugging the rod first. Then pull rod out, then remove snap from opening. Exactly the opposite of what I did.
Yes I have peel n stick sound-deadening on door, then over that, insulating Ensolite. Had I known about the Frost King foam and foil like Chefyota used, I cud have used that, too.
I'm also converting the inner door panel to something more friendly to field tear-down.
(1) Will replace hidden fasteners with expansion nuts, finishing washers and screws,
(2) Already separated the main panel from the window sill vinyl,
(3) Will remove the velour cover and replace with spray and wipe vinyl. Need to find material for that... OR,
(4) Replace the board with plywood that has nice grain, stain and oil finish it. Better than a Lexus' fake burlwood! LOL! And I get to enjoy old-school wood finishing.
Console Rear Window Control/Coin Holder Into Cup Holder
Hi folks,
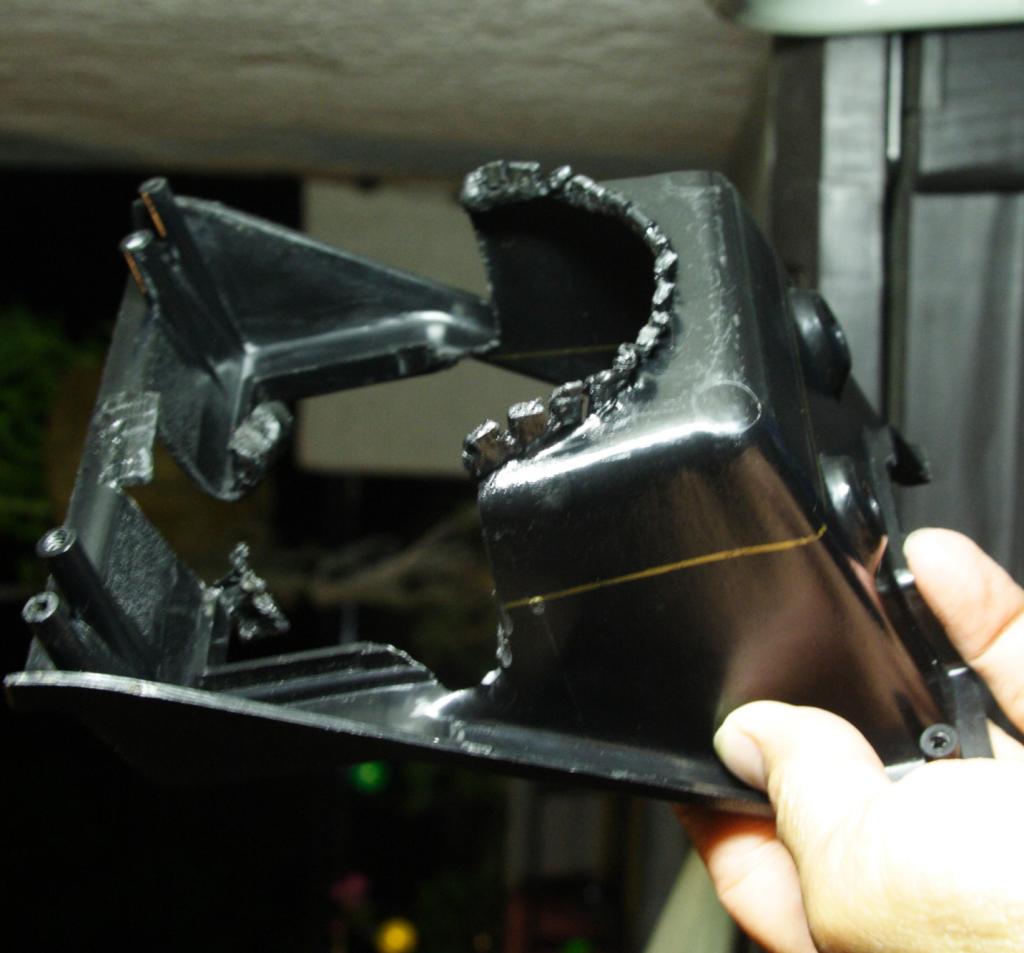
Anyone out here interested in fabricating / modifying the rear window control/coin holder insert so, after switches are relocated, it can be used as a single cup holder? It would look very much like stock.
Anyone who might be interested in buying so fabricator ca tell us the price?
I have ideas but no equipment nor experience doing Fiberglas or fabricating work.
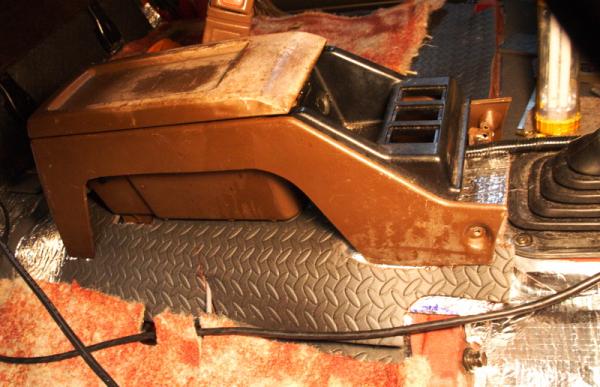
Switches removed:
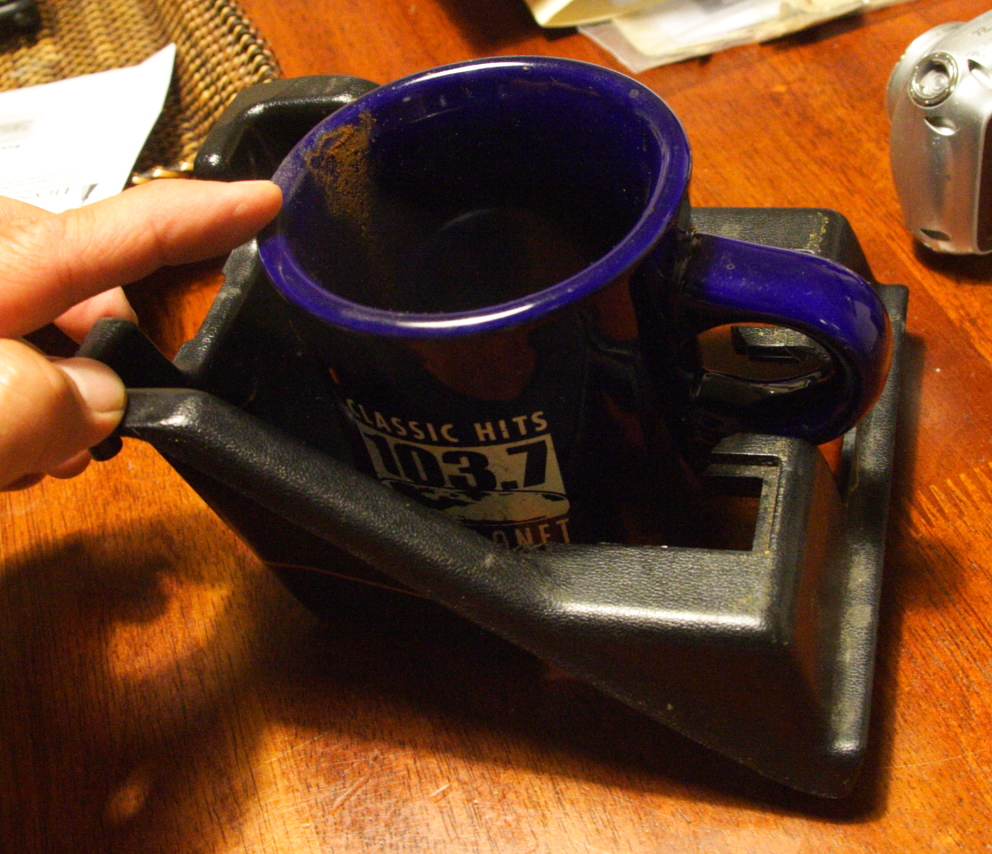
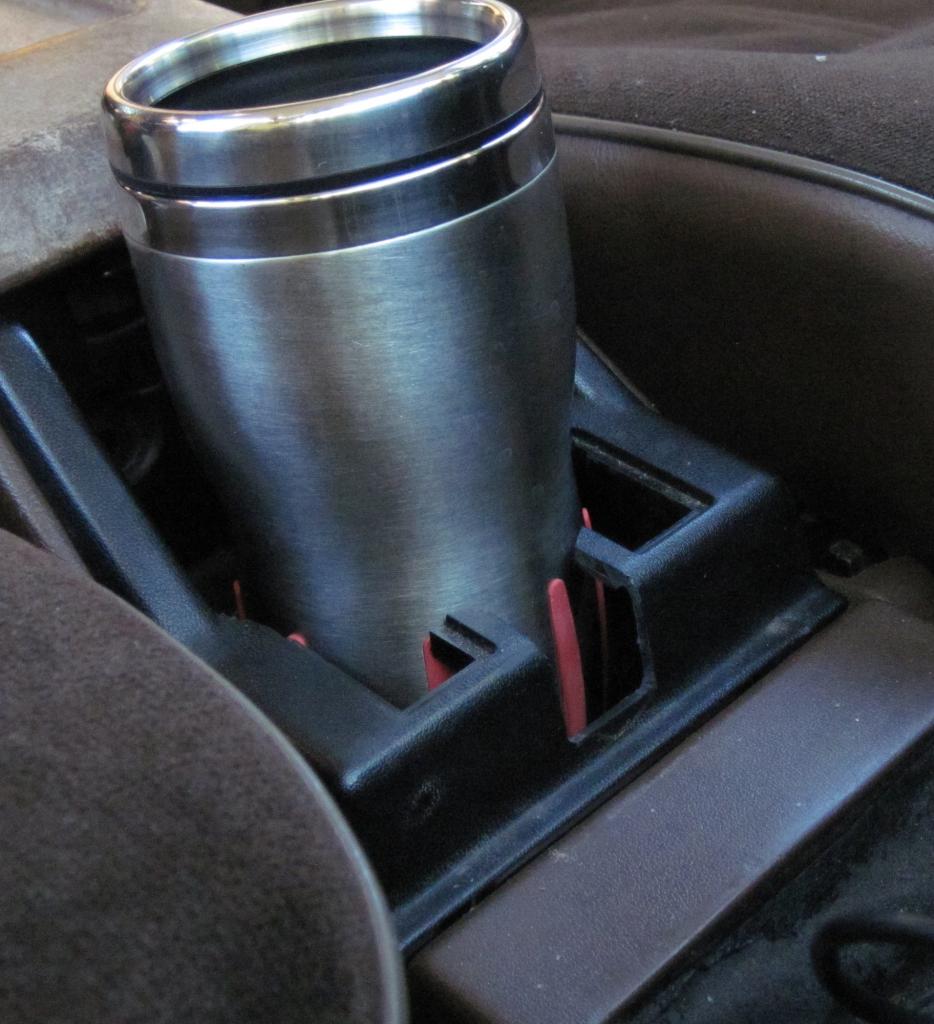
Insert modification in process. Common coffee mug sits on the existing "bottom" of insert:
Opening in existing bottom would accommodate skinnier travel cup:
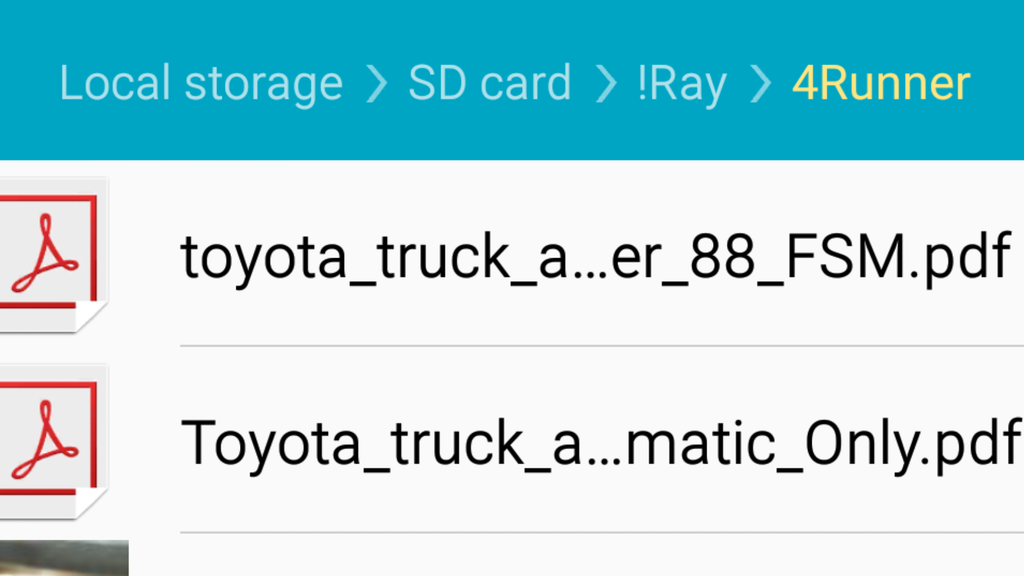
If you already have the PDF for your FSM or schematic, but drive your truck a lot but leave your computer a home, I recommend saving PDF's in your smartphone.
I like the cup idea. Eventually I want to move my switches near the ashtray and that would be a great place for a drink holder.
Yeah, I'm really liking it even my interim solution. I hope someone here could make/fabricate a modified "insert" like I show above, possibly in fiberglas or 3D print, so it would look stock, that would plug-and -play into existing console, and sell for a reasonable price.
It is not difficult to relocate switches and it is easy to remove the black insert and replace with cup holder one.
Seen somewhere that you was wanting to see some information on swapping out the Brake Master Cylinder. You have always been great about helping on my electrical issues. I dropped my phone in the lake and it will be a day or so before I get another one, but if you need help, I can step you over the phone on how to swap one and to bleed a MC.
I would get a disposable aluminum pan for baking for catching oil, a 10mm line wrench, ( a box end wrench with a cut out for slipping over the metal line) and a socket with 12mm (I think, will check to make sure) that holds the MC to the booster. It takes two people to bleed a system, one to open the bleed screw on the slave cylinders and one to pump up the brakes.
Most replacements don't come with the resivoir so you will need a 17mm or 19mm socket to move your old resivoir to the new MC. To bench bleed a MC, you can put it against a firm edge like a wall and a dowel or screw driver to pump the piston in the MC to get the cylinder full of fluid.
I would get a quart size brake fluid and while bleeding the lines, is a good time to get fresh fluid in the system.
Thanks a lot, Terry.
I probably don't need a replacement booster, but just need to inspect what parts are binding. Feels more mechanical than anything else.
Meanwhile, guys, here's a couple of pics from recent posts by Philbert's friends. They do trail maintenance, etc in his memory...
B/R
-Ray
Last edited by RAD4Runner; 10-01-2015 at 10:31 AM.
I had to replace my yellow clips recently too. earlier this year. who knew such a small piece could make getting into your 4runner such a pain in the butt.
Concise Starter Relay Re-Wire OR Retrofit for 84-88 22R/22RE Simplified and QUICK
"Starter Relay Re-Wire OR Retrofit for trucks with NO starter relay and those with relays but wired wrong AT THE FACTORY" moved to Classics Thread for ease of finding.
Safe Harbors: trusted Mechs and Shops Along 15 Fwy
Hi folks,
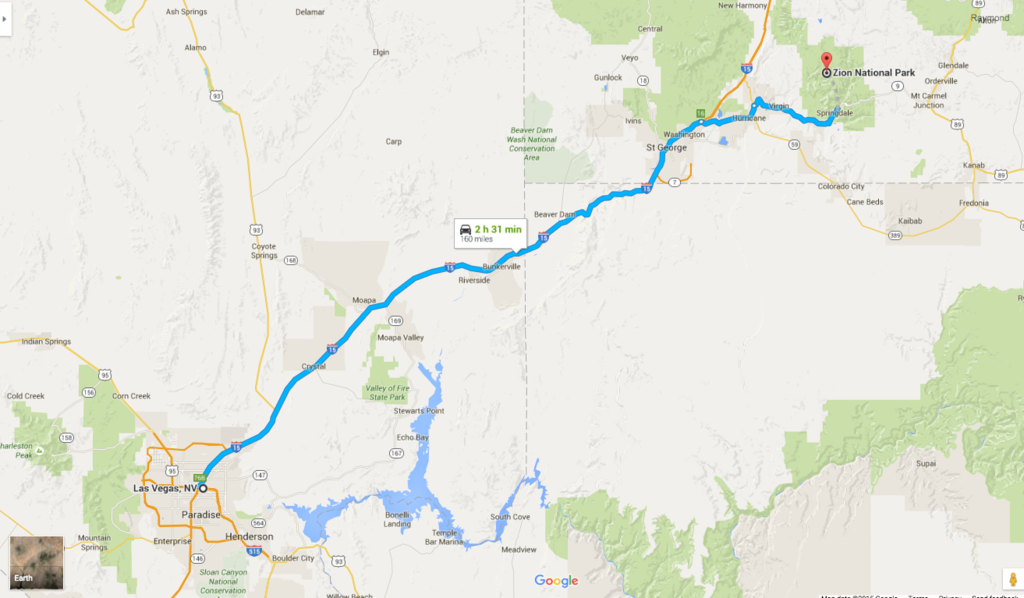
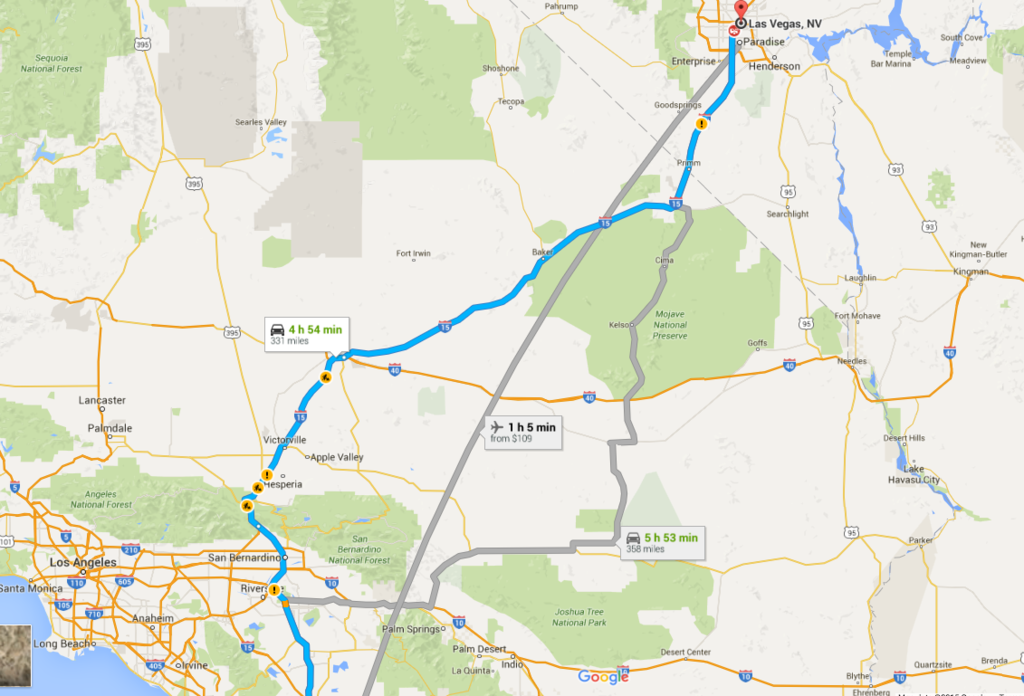
We plan to spend Thanksgiving in Las Vegas, then on Friday drive to Zion National Park, camp there and back to San Diego on Monday.
I do my best to keep the truck in tip-top shape but, like a good captain I want to know where safe harbors are ahead of time, in case truck happens to have serious unforeseen issues I could not handle with my multi-meter and toolbox. Do you know of any trusted/good shops/mechs along the 160 mile stretch of Fwy 15 between Vegas and Zion here
How about the 330-mile stretch between SD and LV here?
If you do, pls comment with their location ad contact info. I'm sure it could also help fellow members traveling along same routes someday.
Thanks in advance and Happy Thanksgiving!
Last edited by RAD4Runner; 11-23-2015 at 01:24 PM.
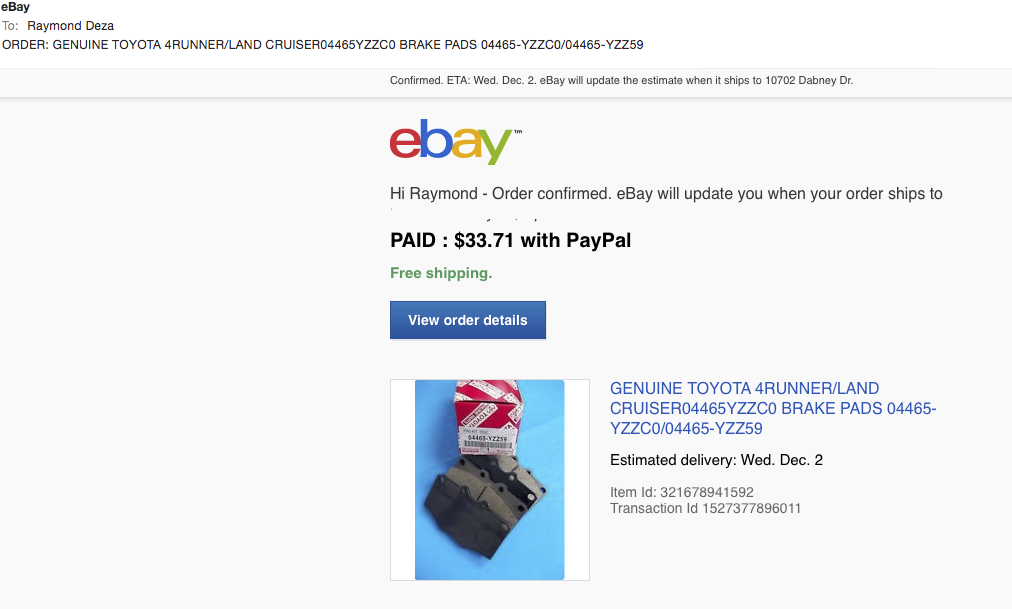
Hello Blueman, I would do toyota OEM equipment if you can, here is the part numbers front brake pads toyota part # 04465YZZC0s
Hi guys,
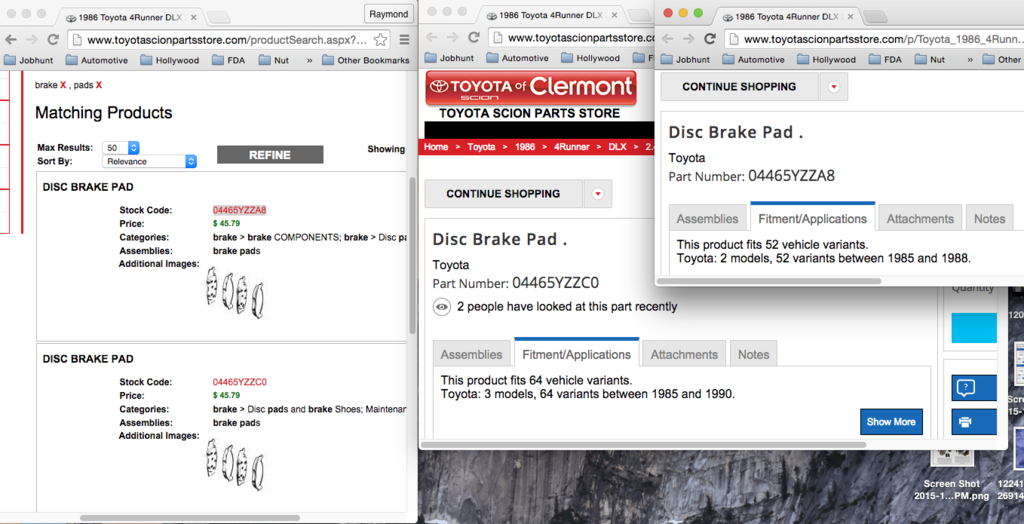
A couple of online stores I contacted said that PN "04465YZZC0" has been discontinued. Do you know of others that may still carry it>
Also, some online stores list different part numbers for front brake pads that are supposed to fit the 1986 4Runner, like the one below (lists "04465YZZA8").
Should we stick with with "04465YZZC0"?
Is there a difference or are they physically same?
I use ebay a lot and if I have a question, some site you can find their number and they will verify it for you. Not in all cases, but if they have a site elsewhere, you can ask them and avoid them having to pay ebays fees and save a few more dollars. So far I have never had an issue with ebay. One issue I had was with Rock Auto but it was for a part that was not much so I just kept it.
I made that Vegas trip several time but don't know of any safe places. I would like to get back out there again someday.
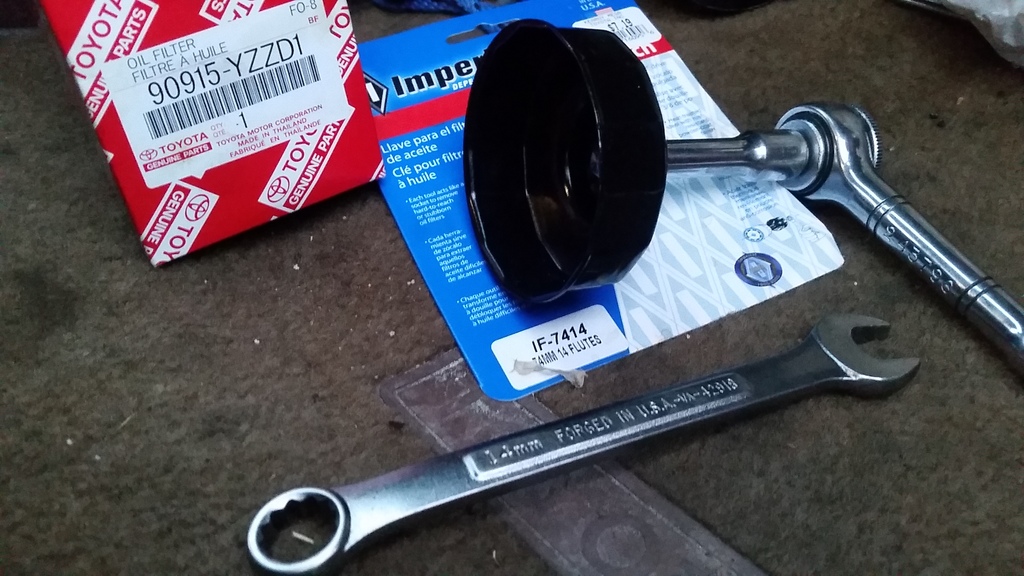
Dayumn! I did not realize how easy and simple it is to replace brake pads on the IFS First-Gen! (I don't know about the solid axles) However, unlike many service items, If I did not read the FSM before performing the job, I could have made a big mess.
NOTE: There is no floating/sliding caliper on the front brake system. CAUTION:
(1) DO NOT REMOVE ANY SCREW ON THE CYLINDER!
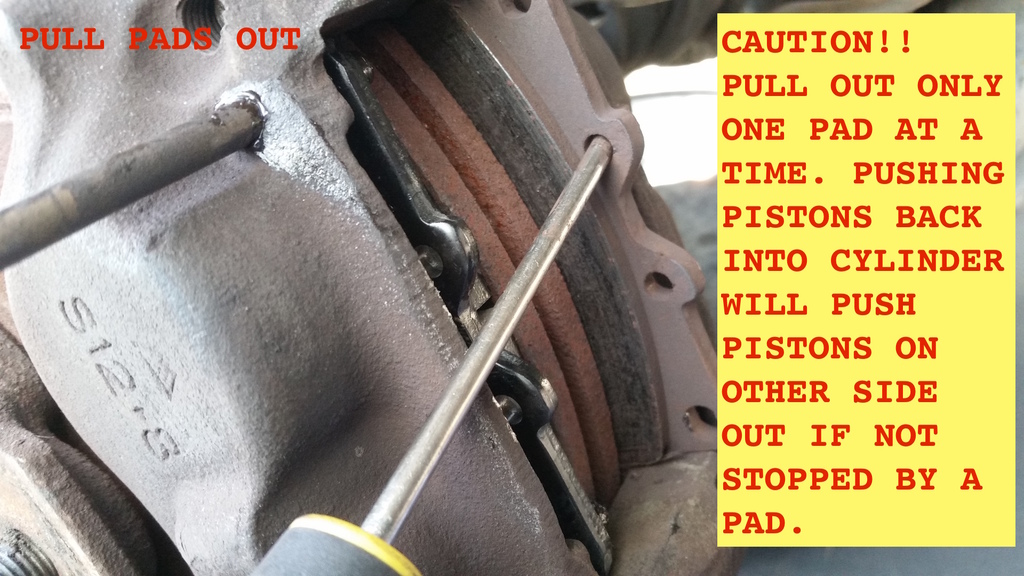
(2) REMOVE ONLY ONE PAD AT A TIME ON EACH WHEEL. Piston on opposite side may pop out when pushing one piston back into cylinder
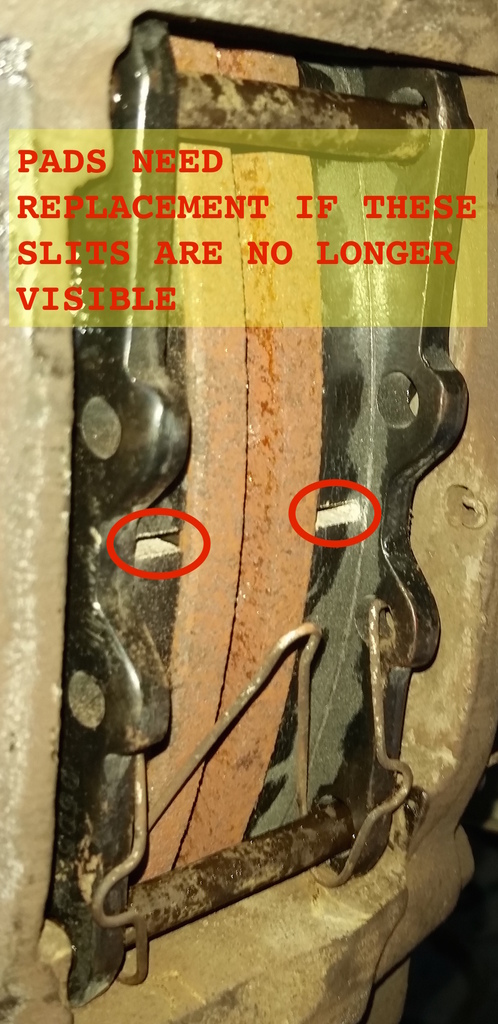
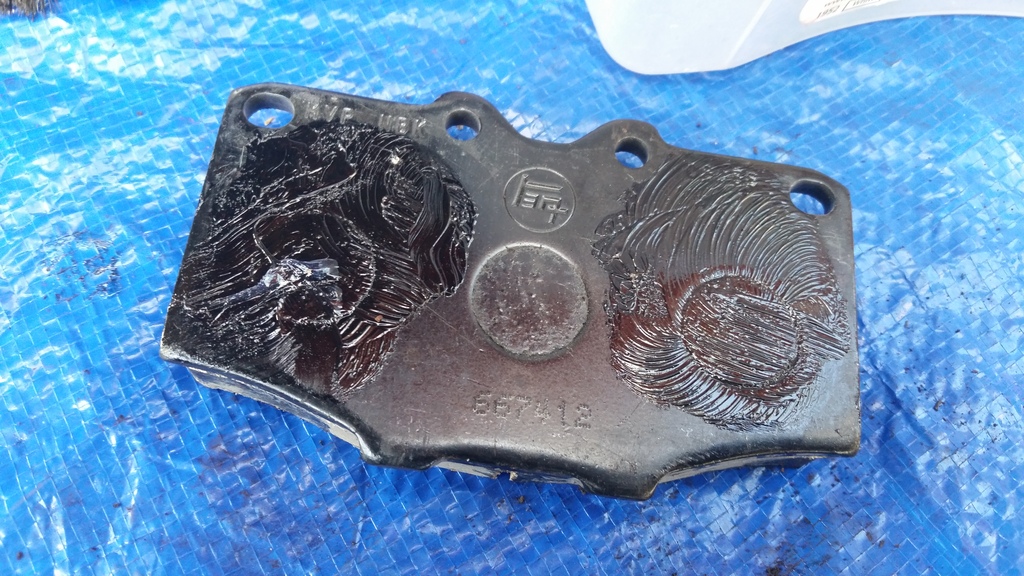
Inspect First (clearly visible as soon as you remove the wheel):
When slit is no longer visible, it means that the pad is thinner less than the required 1-mm.
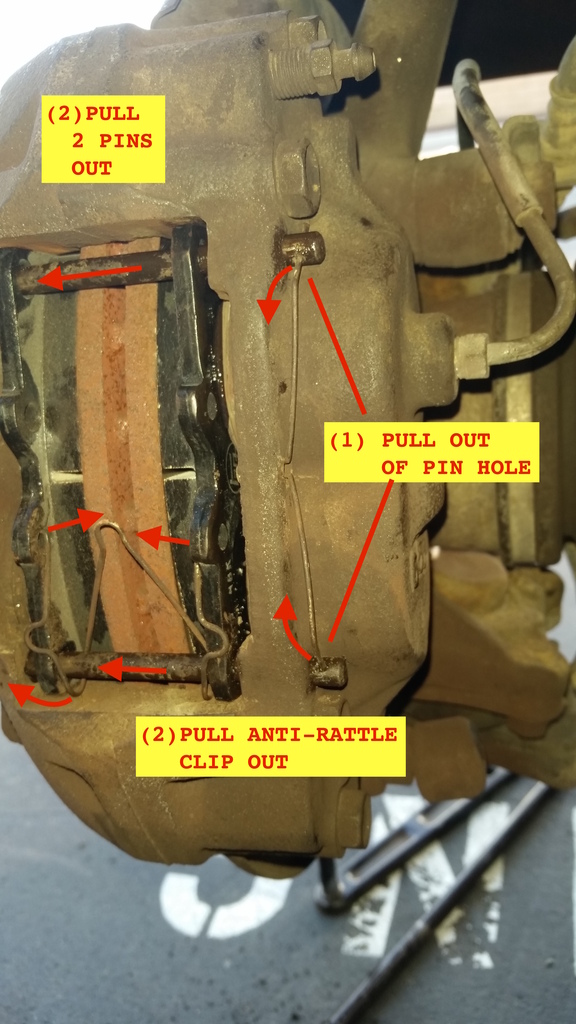
Just pull out 2 clips and 2 pins, and the pads are ready to come out:
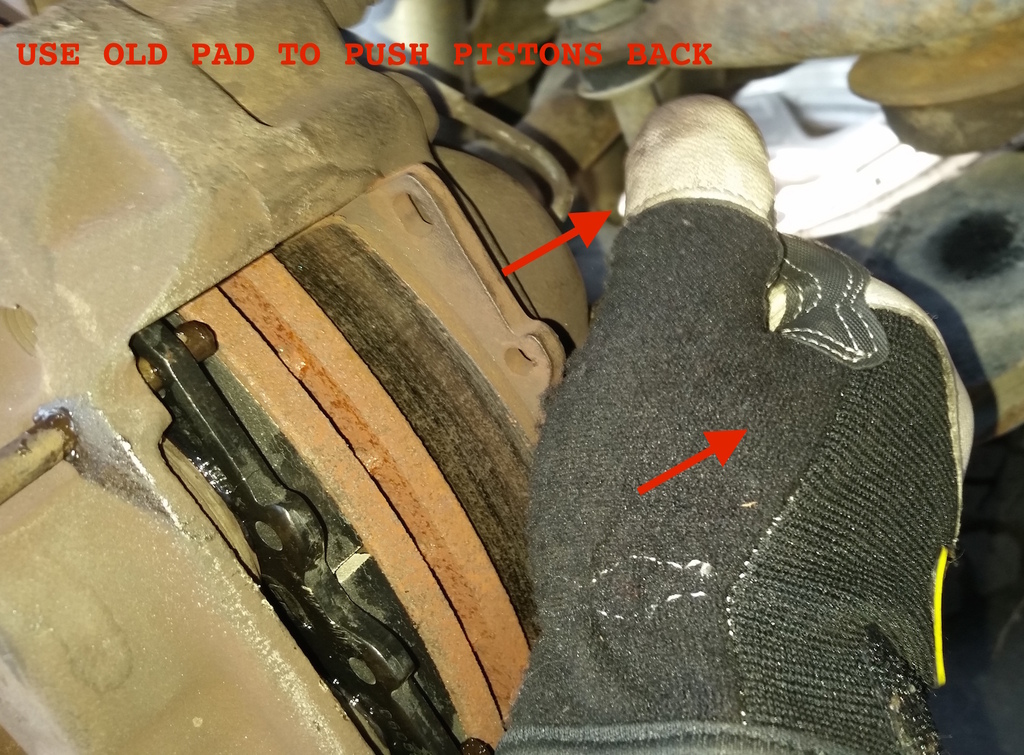
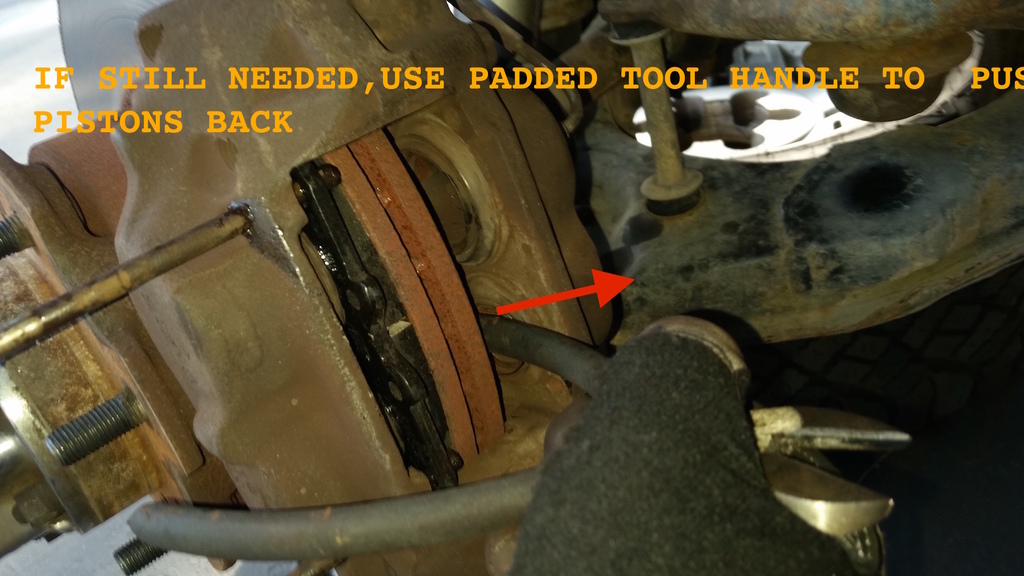
Use old pad to push piston back into cylinder.
(BTW, these Western Safety gloves with genuine leather palm and fingertips do "Fit Like Gloves" are a great value ($6 bucks a pair from Harbor Freight). An advantage I found is when exposed to petroleum based chemicals (like engine oil) leather does not get as sloppy as synthetic palms. I prefernot to buy made in China, but most gloves are, anyway.)
Use padded handle of tool to push piston back if still needed:
I used anti-squeal grease on the pads.
Last edited by RAD4Runner; 12-11-2015 at 10:32 AM.
At first hard-start went away for over a year after I fixed the CSI connector that was not properly seated. However, it came back and seems more persistent this time. CSI timer switch and CS injector resistances are within specs.
Seemed like a COLD-start issue at first. However, this time, I merely stopped at OReilly's to buy stuff (10 minutes max) and when I came back, got hard start again.
I will check AFM flapper as Terry suggests and also observe CS injector spray. I added comments to this thread.
 08-07-2015, 07:36 PM