
Numbchux' 1987 4Runner Build-Up Thread
 Apr 22, 2013 | 05:25 PM
#101

Thread Starter
Registered User
Joined: Nov 2006
Posts: 580
Likes: 33
From: Saginaw, MN
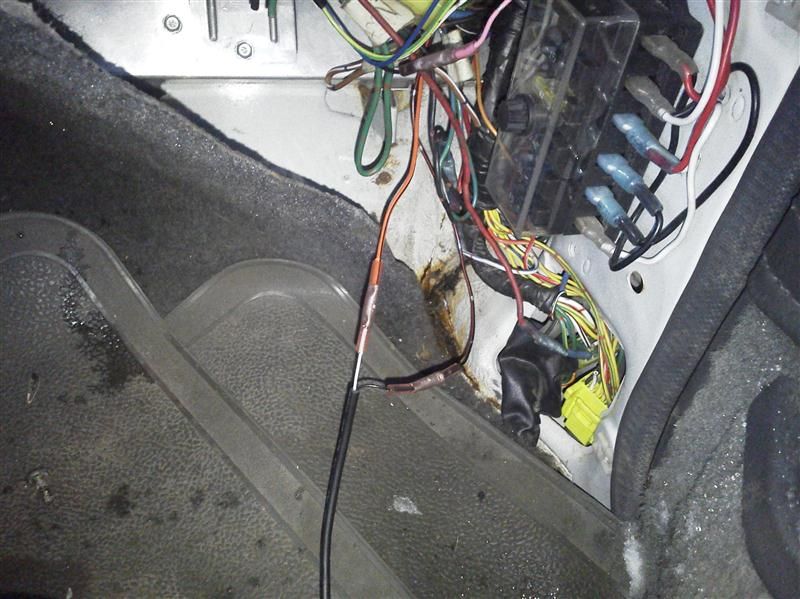
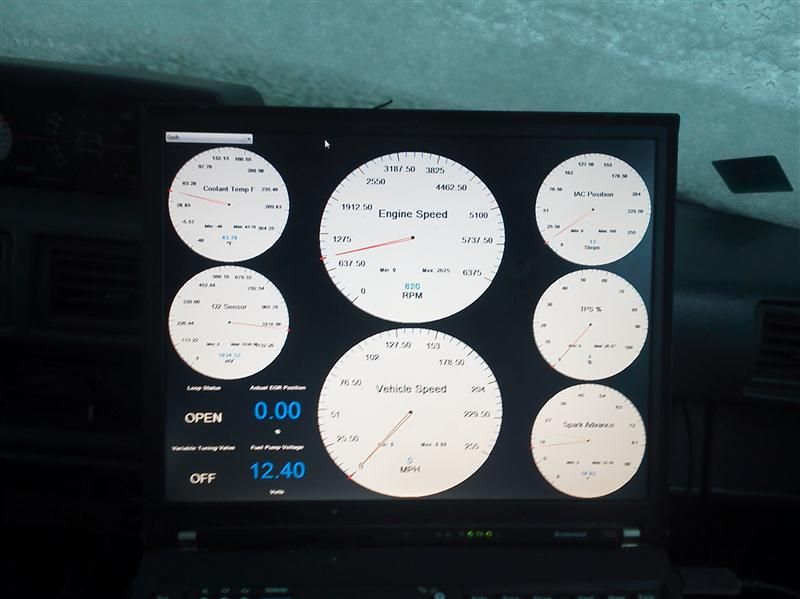
ALDL cable was delayed by a business day (of course, over the weekend...) due to the snow storm on thursday night.
But it arrived today, and I got it wired in. Super easy, just hooked up 2 wires, installed a driver, installed TunerPro RT, and a little messing with settings and I was off.
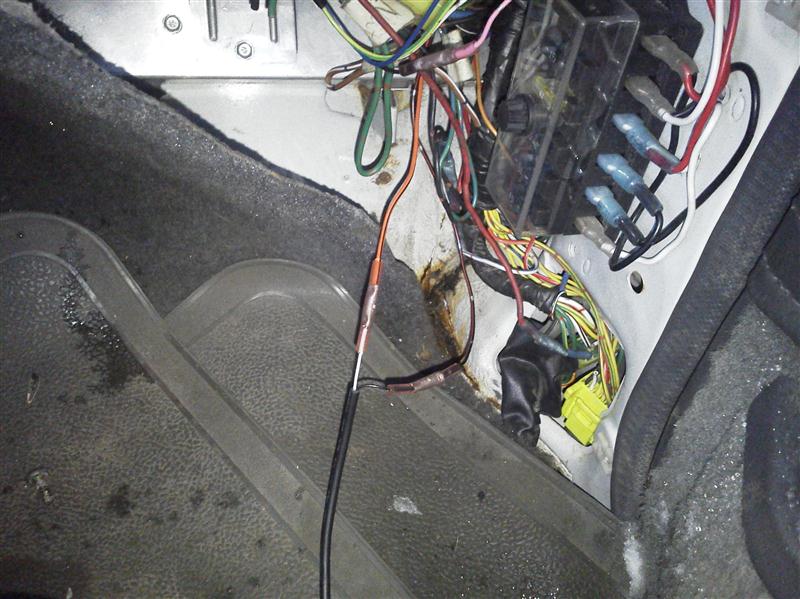
Cable is actually a lot longer than this, but just for illustration:
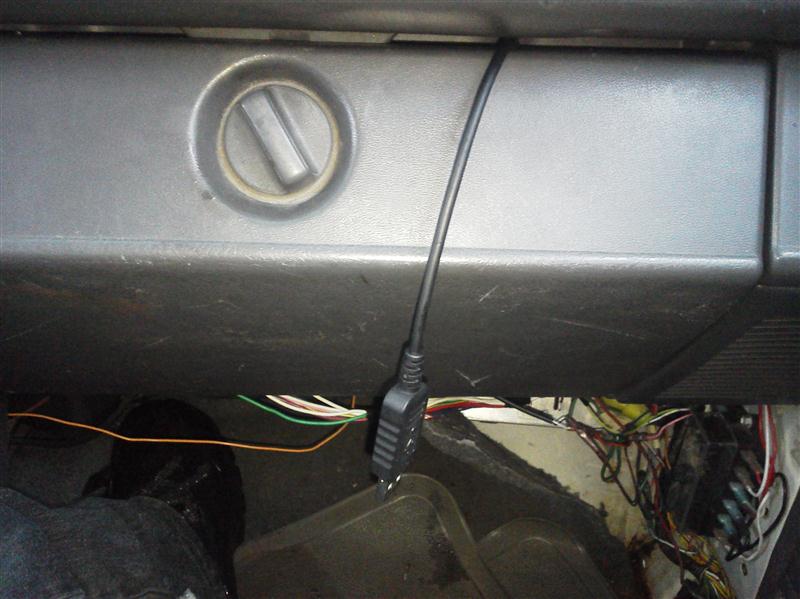
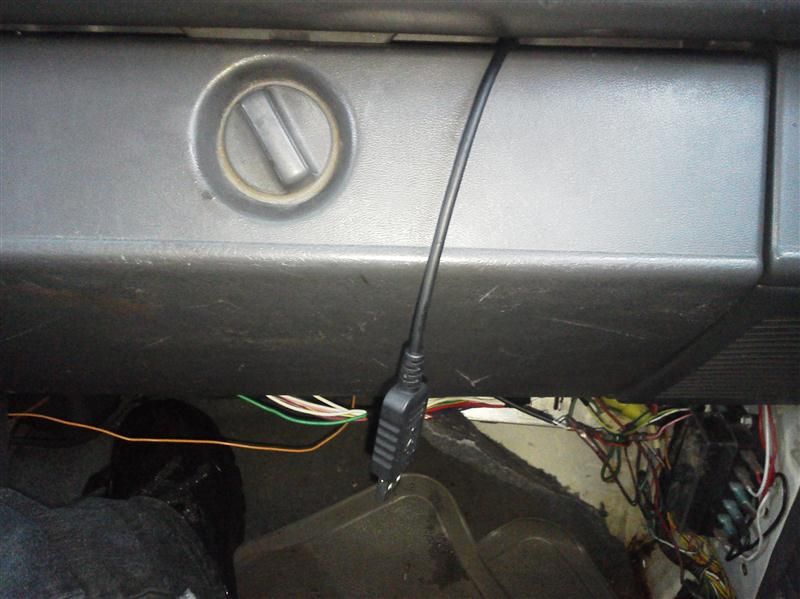
And my laptop screen. This is basically infinitely customizeable. And can also be set up to graph parameters

But it arrived today, and I got it wired in. Super easy, just hooked up 2 wires, installed a driver, installed TunerPro RT, and a little messing with settings and I was off.

Cable is actually a lot longer than this, but just for illustration:

And my laptop screen. This is basically infinitely customizeable. And can also be set up to graph parameters
 Apr 29, 2013 | 09:09 AM
#103
Thread Starter
Registered User
Joined: Nov 2006
Posts: 580
Likes: 33
From: Saginaw, MN
Drove it to work today....
Couple things I've noticed from the datalog.
The 02 sensor signal swings all over the place, so I think the sensor is junk, which sucks because it's basically brand-new.
Also....I hooked the vehicle speed sensor directly from the toyota gauge to the chevy ECU. Now that I can read how the ECU interprets it, it looks like it's double the "actual" speed (as far as the gauge is concerned, not taking into account the oversized tires).
So, I think when cruising at ~30mph, it shifts into 4th gear, and then it's trying to lock the torque converter.
Also, I think the issue I had on the freeway last fall may have been the same, as it would have thought I was going ~150mph
Apr 30, 2013 | 09:45 AM
#104
Thread Starter
Registered User
Joined: Nov 2006
Posts: 580
Likes: 33
From: Saginaw, MN
Well, good news and bad news today.
Good news (oddly), is the truck wouldn't start when I went to leave work for lunch. This is good news, because I work at AutoZone, so there are some specialty diagnostic tools right close by. Also....I was't on the side of the road.
TunerPro was unable to tell me much that I hadn't already guessed. Ignition seemed to be working, but no fuel. Pump runs, but the tone doesn't change (indicating to me that it's not loosing pressure while cranking...i.e. no fuel in the cylinders). Oxygen sensor signal confirms that.
So I went inside, and grabbed the loaner fuel pressure gauge. Hooked it up. Sure enough, 45psi. Holds solid when the pump is off, so I don't think it could be the regulator. I primed it a few times, tried to start it, nothing. Then primed again, and all of a sudden the pressure jumped up to 55. And it immediately started up.
So....bad news is, I need a fuel pump.
Now, to decide whether I get the Airtex one at work (I'm not a fan of Airtex...but AutoZone takes care of their customers when it comes to warranty stuff). Or something else, from somewhere else. Obviously this Trick Flow one I got on Summit is junk (second one I've had fail, the other one never had fuel through it, and seized up)
Apr 30, 2013 | 03:14 PM
#105
ALDL cable was delayed by a business day (of course, over the weekend...) due to the snow storm on thursday night.
But it arrived today, and I got it wired in. Super easy, just hooked up 2 wires, installed a driver, installed TunerPro RT, and a little messing with settings and I was off.
Cable is actually a lot longer than this, but just for illustration:
And my laptop screen. This is basically infinitely customizeable. And can also be set up to graph parameters
Did I miss something? This is awesome... How did you setup tunerpro up? looks like you removed the ECU...
Apr 30, 2013 | 06:15 PM
#106
Thread Starter
Registered User
Joined: Nov 2006
Posts: 580
Likes: 33
From: Saginaw, MN
Anyway. New fuel pump is in. It was a PITA, but I got the gas tank out, and back in, even though it was basically full. Also I re-modified the pump bracket to hold the pump designed for this engine, and it's strainer:

The pump that was in there was an inline pump rated for 65 psi, and I had modified things to use it as an in-tank pump. The strainer setup that I used fell off....and I could see pieces of debris in the pump.
New pump has a great strainer on it, it also is rated for 90psi max!! I decided to go with the Airtex. It's not my first choice, but it should work fine. And as a perfect demonstration of why I did this swap instead of a 3.4, this pump should be available almost anywhere.
May 5, 2013 | 07:31 PM
#107
Thread Starter
Registered User
Joined: Nov 2006
Posts: 580
Likes: 33
From: Saginaw, MN
Well, it was hiding in my "garage" for a few days, to try to keep dry while the bedliner dried....
But it's out now, and better than ever. I'm pretty unimpressed with the "Edge Lock" of the masking tape I used....but whatever. It's a functional paint job.
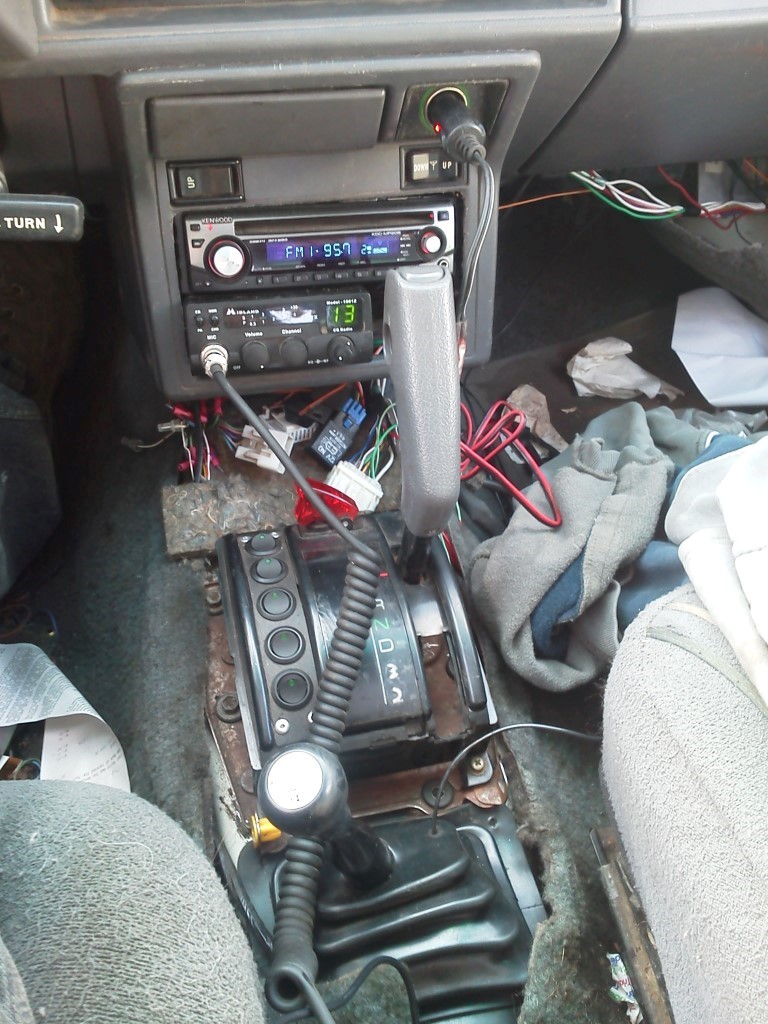
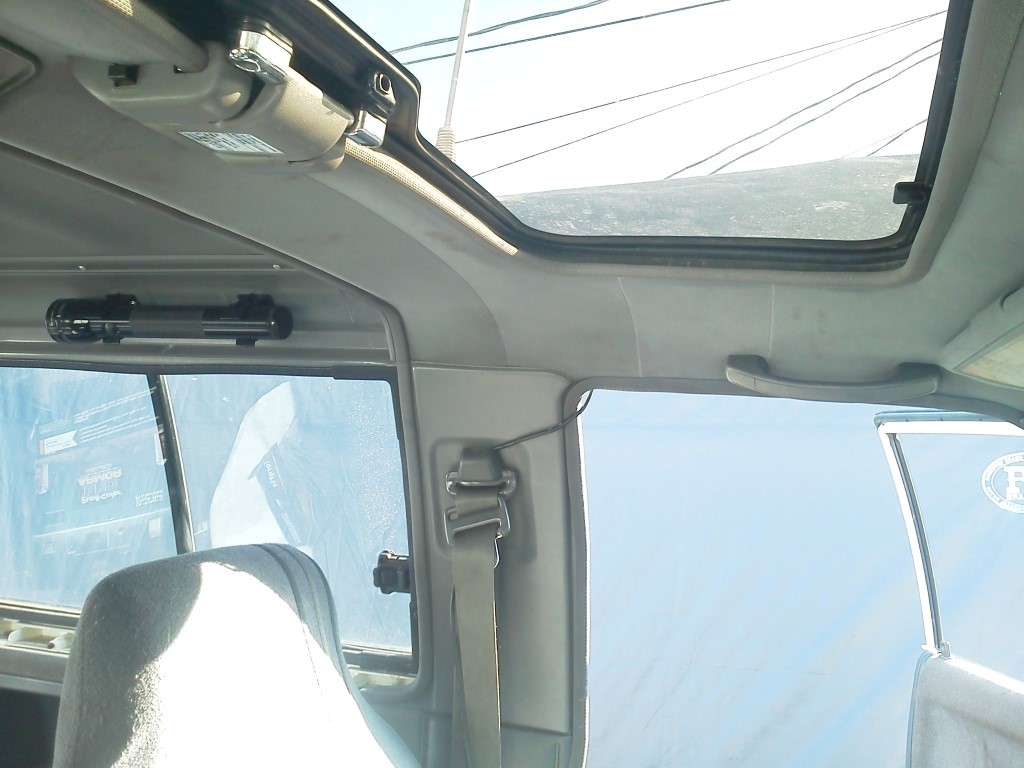
I also added a couple radios:
And thanks for 4Crawler's website for the idea about moving the LR handle to the LF for assistance getting in and out (threaded holes are already there), and putting mag light mounts in it's place
But it's out now, and better than ever. I'm pretty unimpressed with the "Edge Lock" of the masking tape I used....but whatever. It's a functional paint job.


I also added a couple radios:

And thanks for 4Crawler's website for the idea about moving the LR handle to the LF for assistance getting in and out (threaded holes are already there), and putting mag light mounts in it's place


 Jun 11, 2013 | 06:20 PM
#110
Thread Starter
Registered User
Joined: Nov 2006
Posts: 580
Likes: 33
From: Saginaw, MN
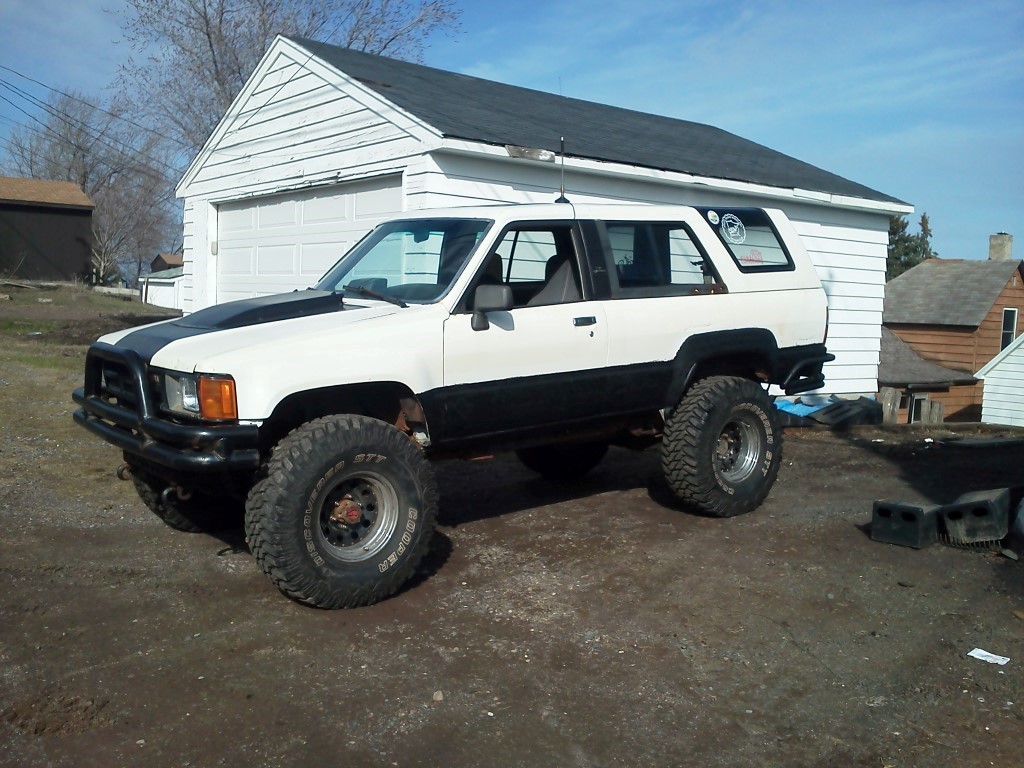
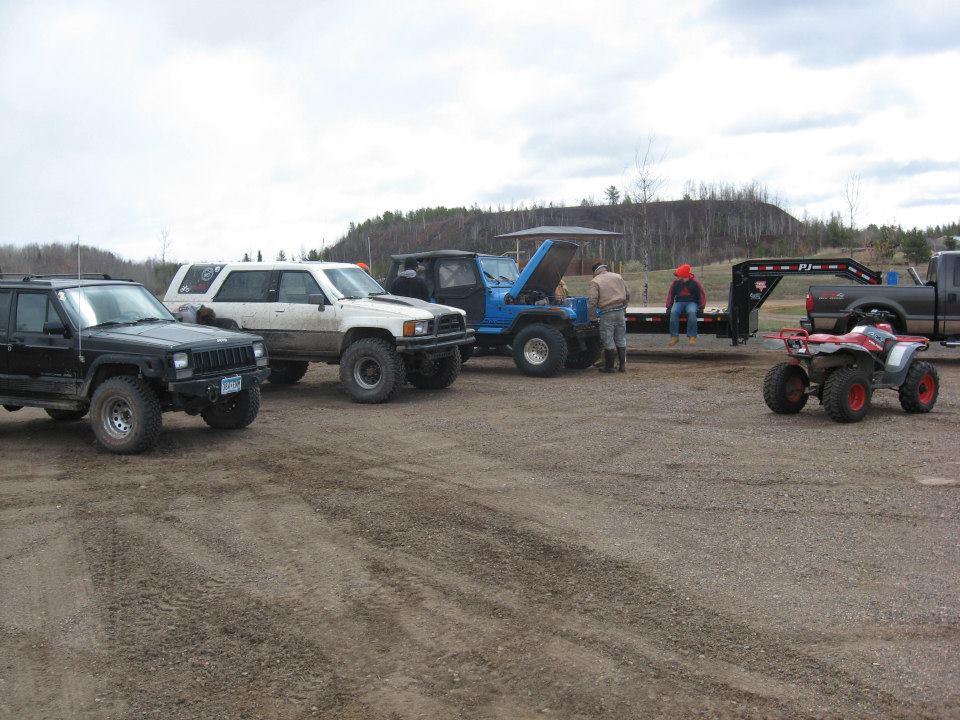
Just realized I never posted pics from my last outing with some friends. Only got a few pictures, and I still have some bugs to work out on the rig, but loving it.
The group:
And, after I got home, got the new tires mounted up, and old tires sold:
Side-by-side comparison. old wheels (8" wide, ~3.5" BS) vs new (7" wide, over 4" BS)
Nice and tucked under the bodywork, for now. It'll be a good start for the FJ80 rear axle, and long-travel IFS. Also, last major hurtle before the rear axle can happen, now I just need a caliper, some grinding, and to weld on spring perches!!
The group:


And, after I got home, got the new tires mounted up, and old tires sold:

Side-by-side comparison. old wheels (8" wide, ~3.5" BS) vs new (7" wide, over 4" BS)

Nice and tucked under the bodywork, for now. It'll be a good start for the FJ80 rear axle, and long-travel IFS. Also, last major hurtle before the rear axle can happen, now I just need a caliper, some grinding, and to weld on spring perches!!
Sep 29, 2013 | 09:01 AM
#111
Thread Starter
Registered User
Joined: Nov 2006
Posts: 580
Likes: 33
From: Saginaw, MN
Had some frustrating intermittent engine issues this summer that prevented it from getting driven much. I finally caved, and put a new distributor in it last weekend, and it hasn't missed a beat since. Time will tell if it's "fixed".
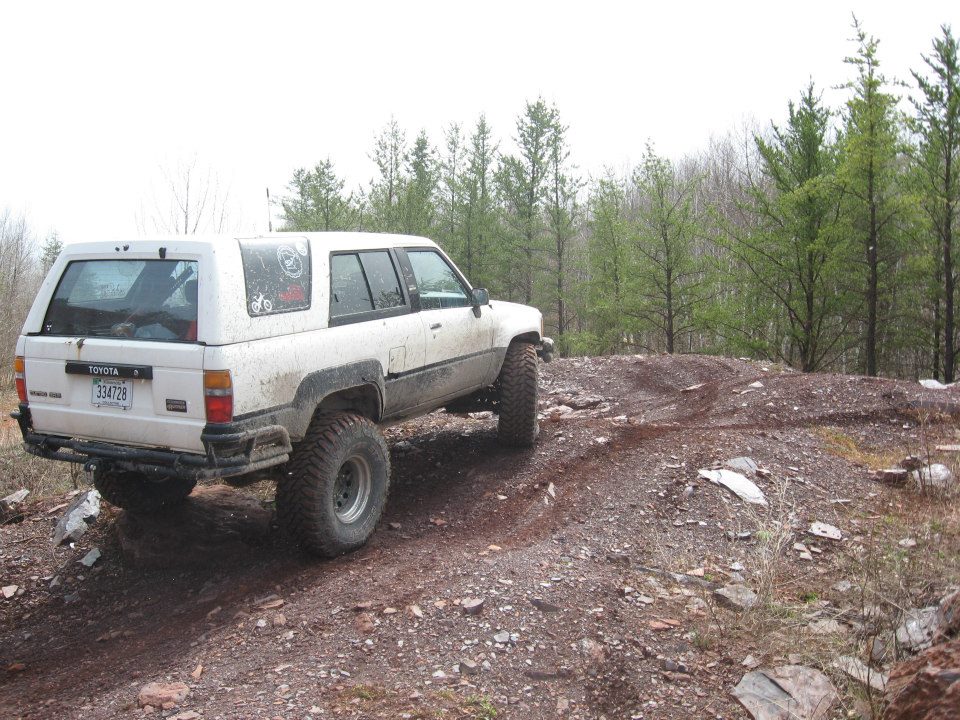
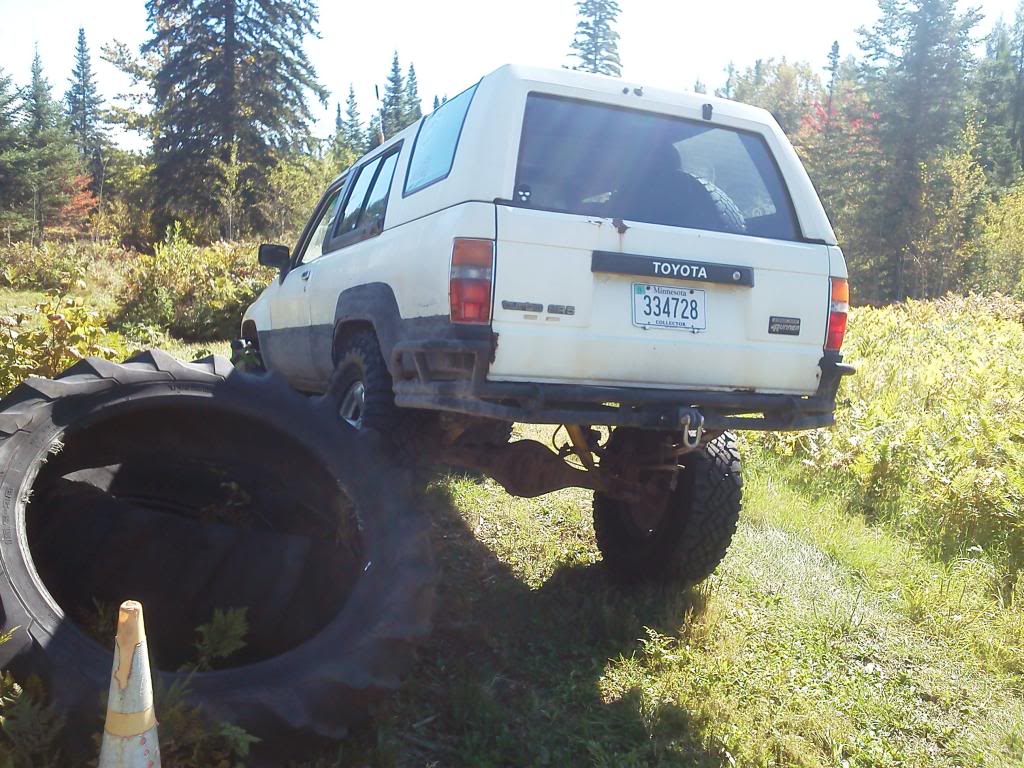
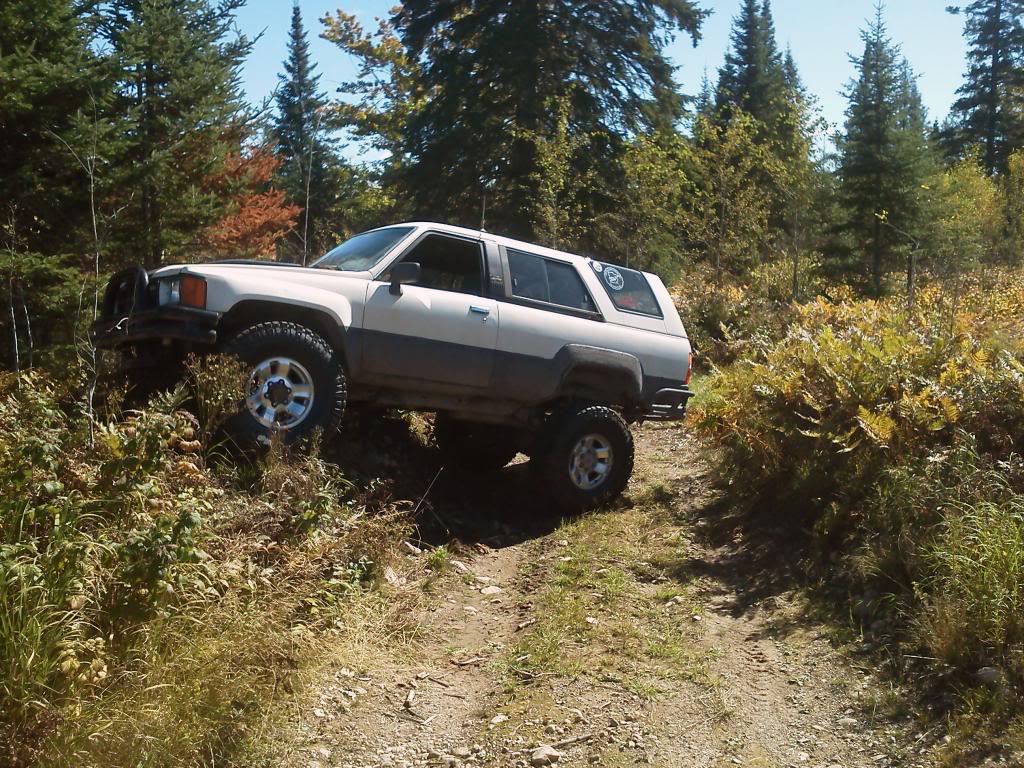
But, right after getting it fired up, I spent the afternoon playing around in a buddy's back 40....good stuff
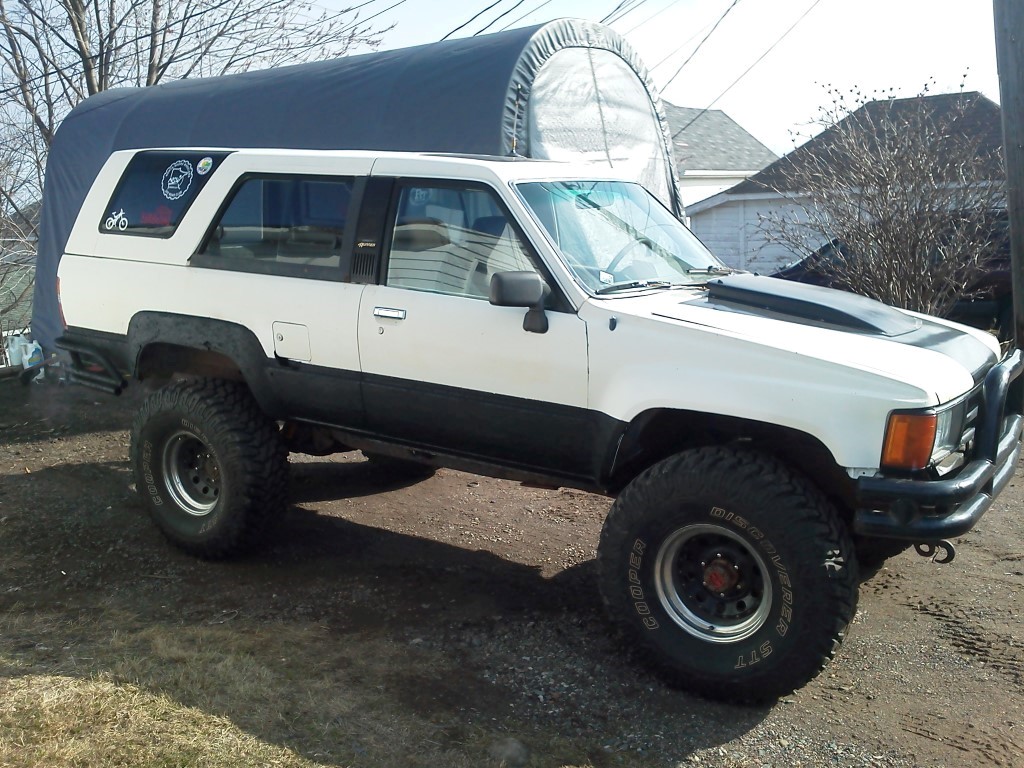
Parked on a tire:
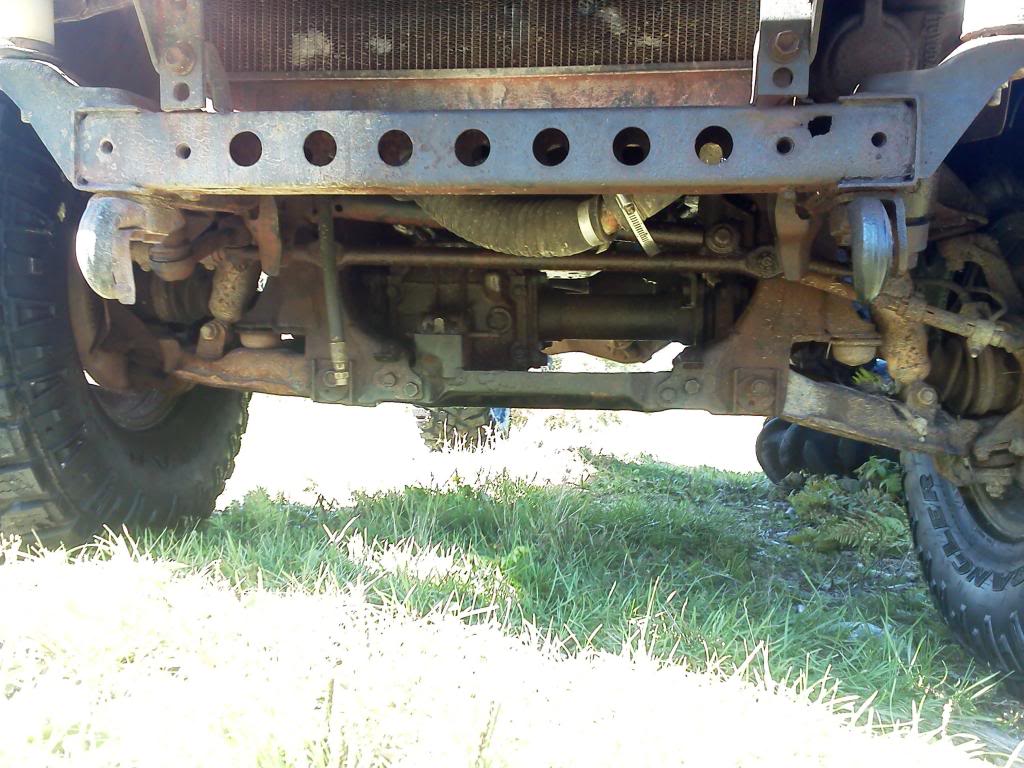
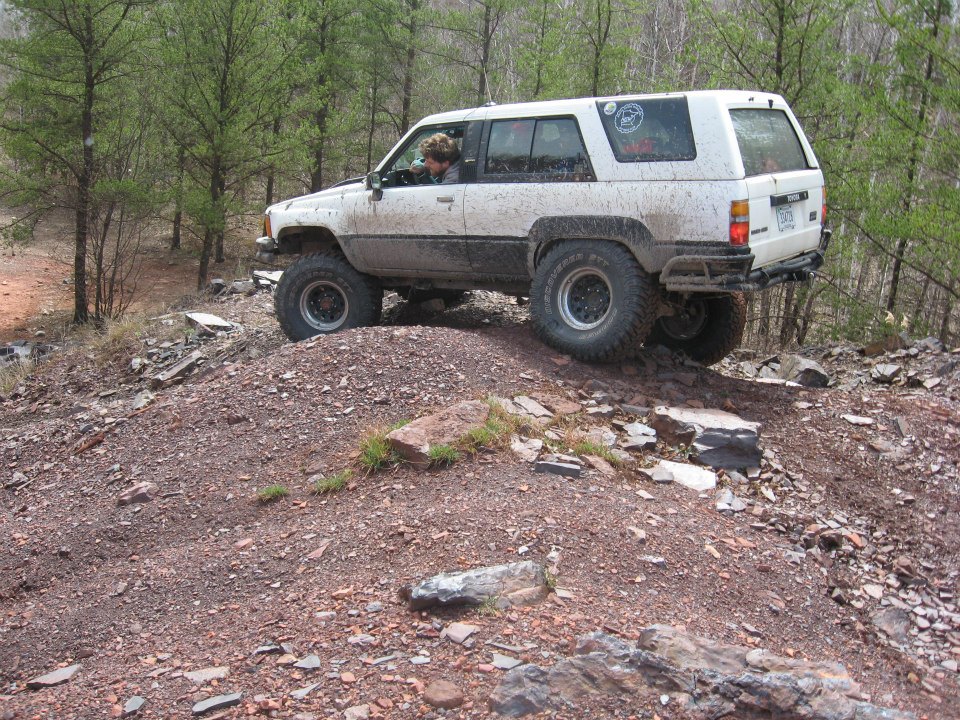
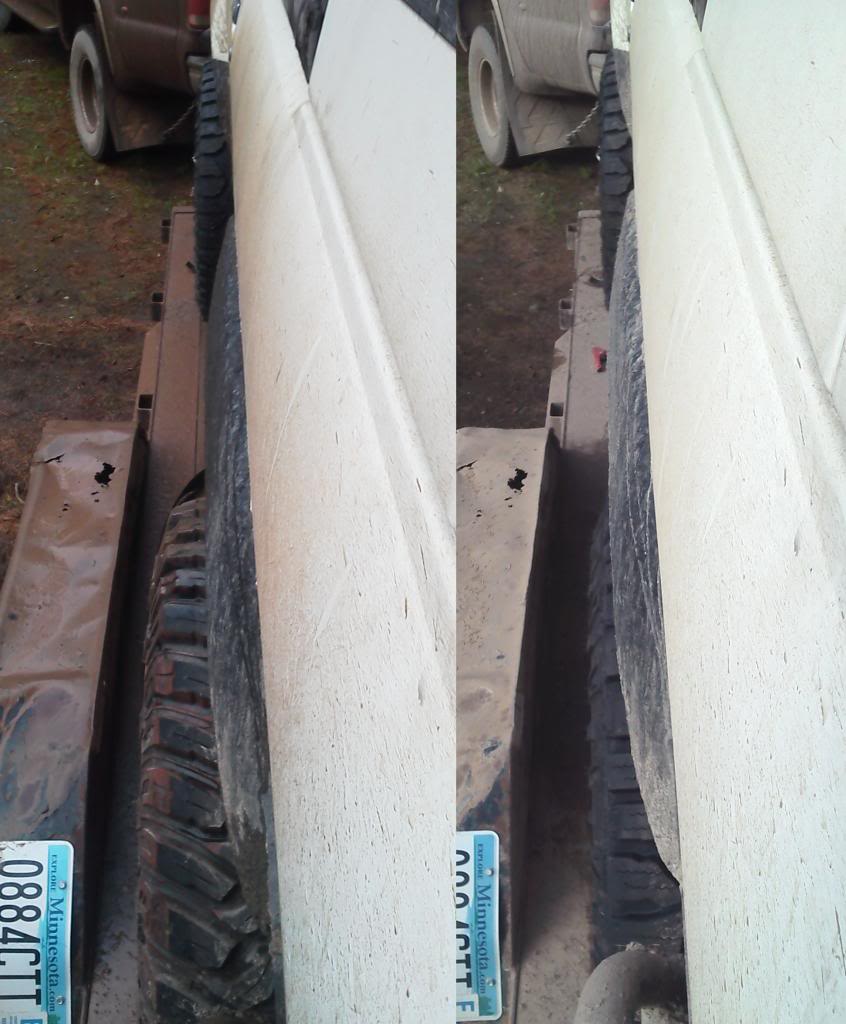
The higher backspacing on the new wheels has reduced the scrub radius, which has almost completely solved the body contact issues that it had:
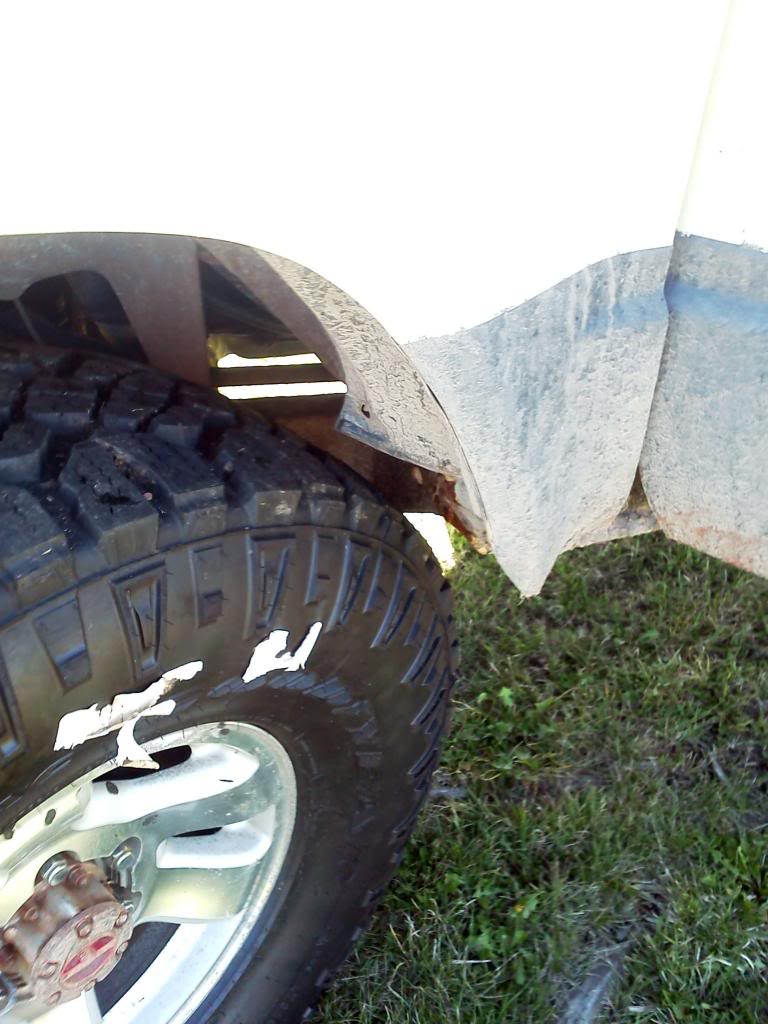
But, when turning left, the right tire hits the idler arm:
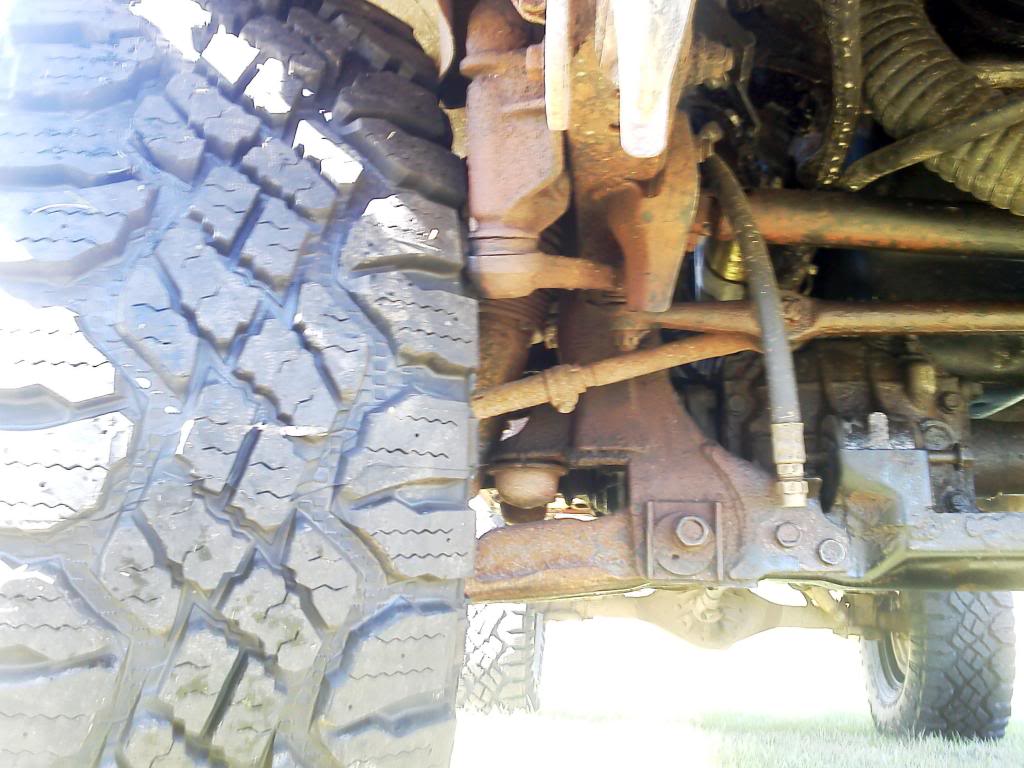
Oh well....long travel will fix that
Oh yea, and one more picture while screwing around:
But, right after getting it fired up, I spent the afternoon playing around in a buddy's back 40....good stuff
Parked on a tire:


The higher backspacing on the new wheels has reduced the scrub radius, which has almost completely solved the body contact issues that it had:

But, when turning left, the right tire hits the idler arm:

Oh well....long travel will fix that
Oh yea, and one more picture while screwing around:
 Jan 28, 2014 | 05:37 PM
#113
Thread Starter
Registered User
Joined: Nov 2006
Posts: 580
Likes: 33
From: Saginaw, MN
Life has slowed the project. I've still been working out the kinks of the engine swap. FJ80 axle hasn't been installed, and blazeland kit hasn't been purchased.
Depending on how well my current batch of flip cars and the house hunt goes, I'm hoping to change both of those things this year.
Depending on how well my current batch of flip cars and the house hunt goes, I'm hoping to change both of those things this year.
Jun 30, 2014 | 05:48 PM
#114
Thread Starter
Registered User
Joined: Nov 2006
Posts: 580
Likes: 33
From: Saginaw, MN
These are from this last weekend....I was with a pretty large group, but we kept moving most of the day. So really the only pictures I have are from this one obstacle when everyone was out watching....
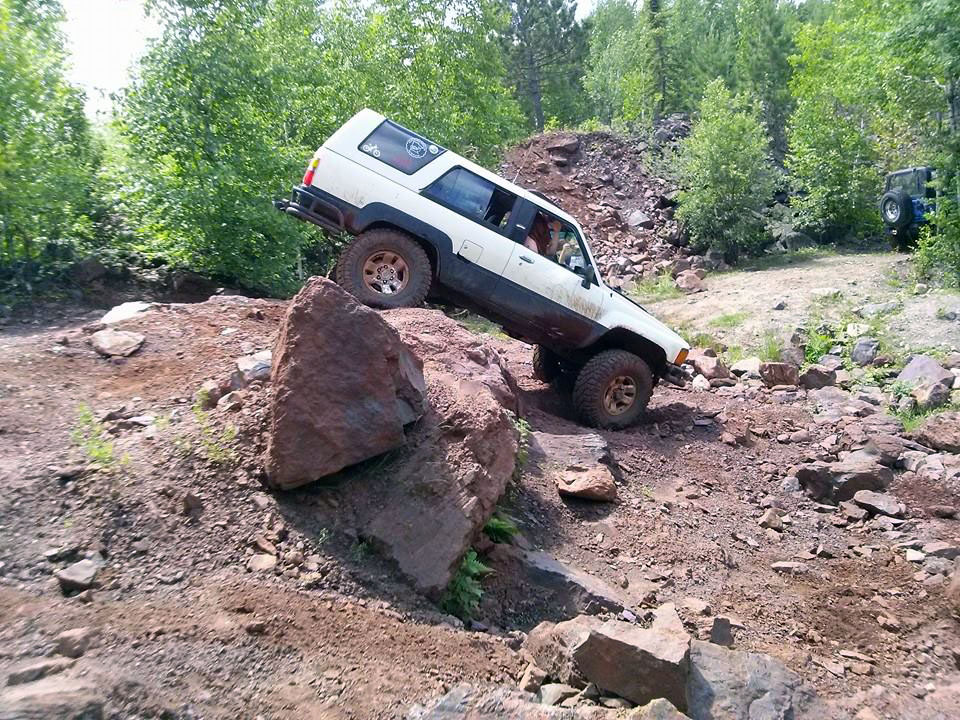
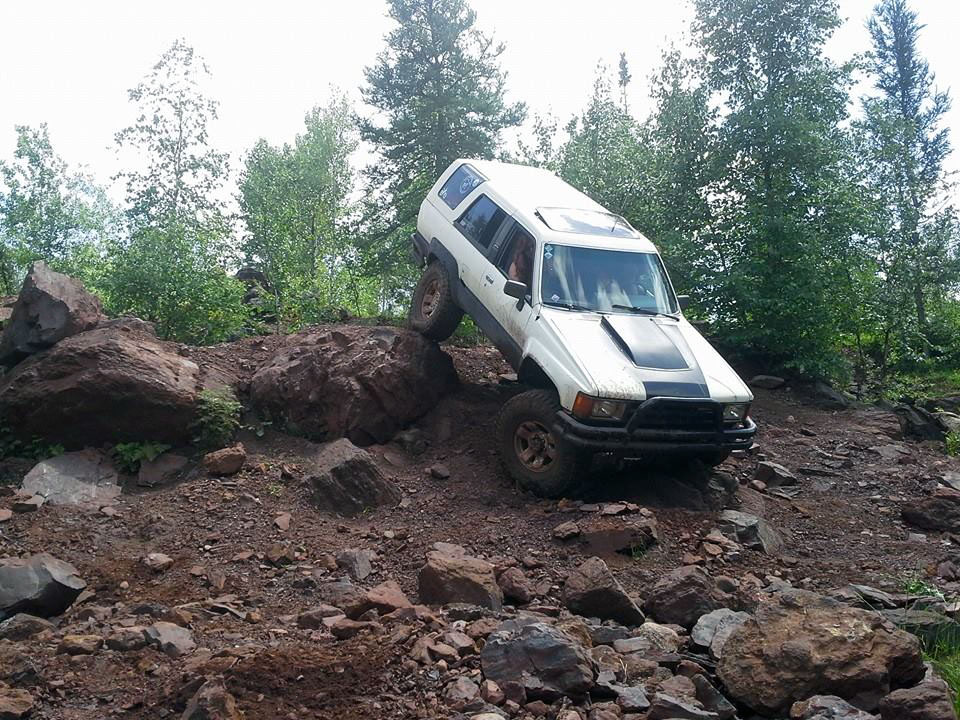
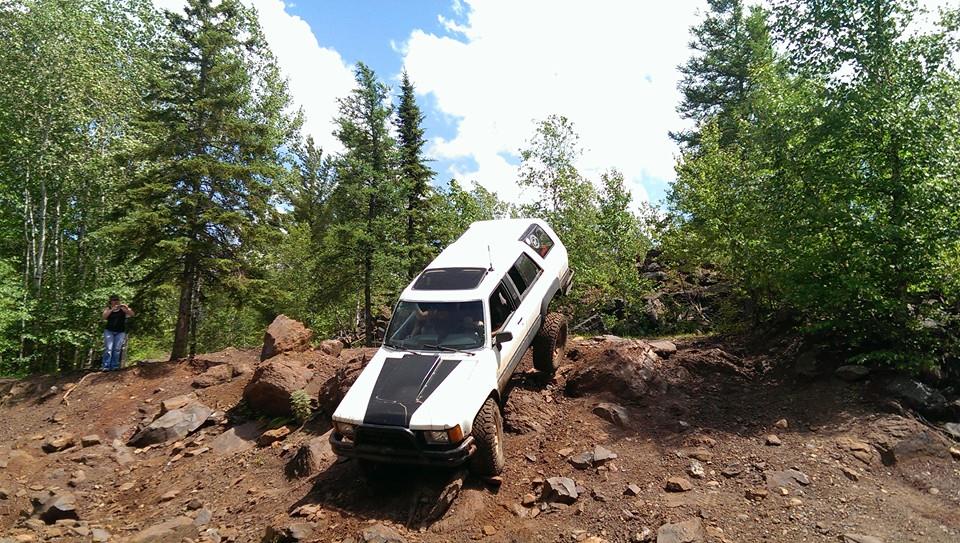
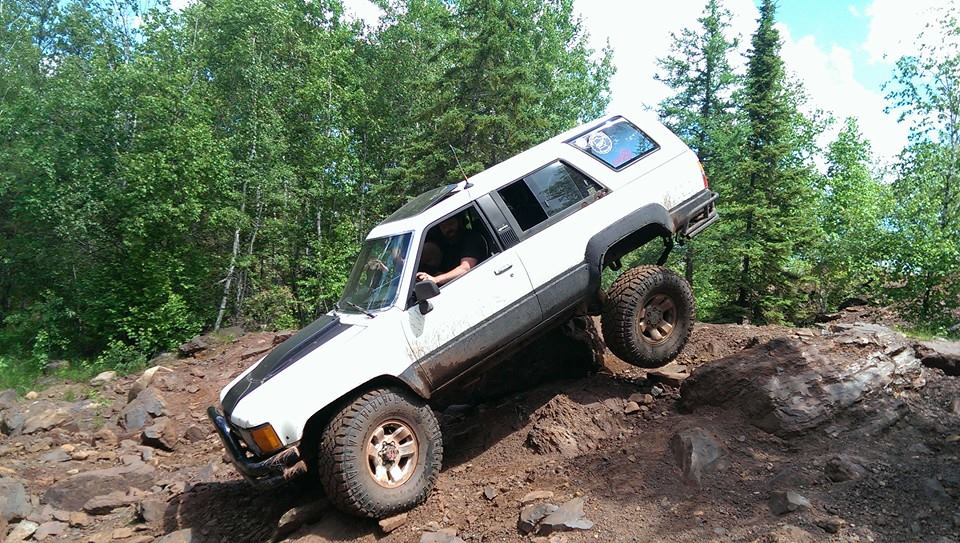
Have a few things to sort out, but overall it did really well.
FJ80 rear axle is almost prepped. Just needs spring perches.


Have a few things to sort out, but overall it did really well.
FJ80 rear axle is almost prepped. Just needs spring perches.
Dec 17, 2014 | 05:45 PM
#115

Registered User
Joined: Dec 2014
Posts: 18
Likes: 0
Jeeze� to say the least. Stay the course, keep bleeding, and it's all worth while. Right? I have bee cussing an 87 4runner pile in a bucket. It is "legal", but I am chasing a vibration/grinding noise most noticeable above 45mph. Any ideas?. aligned, balanced tires and driveshaft, replace hub bearings.
Nov 14, 2015 | 04:56 PM
#116
Thread Starter
Registered User
Joined: Nov 2006
Posts: 580
Likes: 33
From: Saginaw, MN
Well, long time without update. Didn't do any wheeling in the 4.3Runner this summer. I got married in Alaska in June, we drove the 4.3Runner to our Reception barely into August here in MN which was really fun.
There's a 1/8 mile drag race run on a public street right in the heart of town every year. I put the 4.3Runner in the car show with my buddy's Jeep on 35's. That was pretty fun, and the first time I had the topper off in a couple years.
Over Labor day weekend, some good friends and I took a mountain biking trip to visit another friend near Breckenridge, Colorado. We spent 2 days riding downhill at Keystone, and then drove out to Moab to ride some cross country. Unfortunately, I took a nasty tumble early in the first day at Keystone, and broke my collar bone. While that took me out of riding for the rest of the trip, I still had a blast. First time in Moab.
We did some dispersed camping for a couple nights. Our group was 2 Tacomas, a WJ Grand-Cherokee and a Ford Focus. The Focus got a little beat up getting to our first campsite. The second night, we set up camp closer to town, left the Focus and the bikes, and explored further out. It was a blast, some of the most fun I've ever had offroad. We made our way up along the side of a canyon, and watched the sun set from the top of the pass into the next canyon.
This made me realize something. While I love the 4.3Runner, it would have been miserable on the road, and bored on the trail... I could tow it out, but then I'd be stuck setting up camp somewhere, and then making day trips. I'd really like to have more of an expedition rig, and while this rig could do it, I think I'd rather trade some sheer offroad capability for something with better street manners, more seats, more doors, Air-Conditioning, and towing capacity.
Long story short, I've decided to sell the 4.3Runner, looking at likely getting a Sequoia. Maybe an FJ100 cruiser if I find a deal, but I think I'd rather have the space of the Sequoia than the aftermarket support of the cruiser.
With that said, I've put together a plan of projects to wrap up some of the issues that have shown up, finish the projects I've started, and get it ready for a new owner. I'll document most of that here this winter, and hopefully be starting a new build thread next spring
Last edited by Numbchux; Nov 14, 2015 at 05:01 PM.
Nov 14, 2015 | 05:52 PM
#117
Thread Starter
Registered User
Joined: Nov 2006
Posts: 580
Likes: 33
From: Saginaw, MN
Step one of these projects is wiring. When I did the engine swap, I did what I tell everyone never to do....and that is install it unfinished, and diagnose as I went. This had actually started causing issues (extra wires, poor routing, not sealed, etc.), and because of how tight behind the engine it was routed it was not possible to adequately clean up the wiring, and finalize the install.
So, I pulled the intake manifold and distributor so I would have room to work, and pulled the GM harness completely back out. I've completely removed everything unused, I've shortened some of the wiring to clean up the install, I'll be using heat shrink fabric tubing to clean up the install and protect the wires.
I've always had issues with the connector falling off the oil pressure switch on this truck. Having had minimal luck finding a new connector for it, I decided today to attempt pulling it apart and repairing it. This worked flawlessly...
Small flathead screwdriver to release the terminal from the plastic housing:
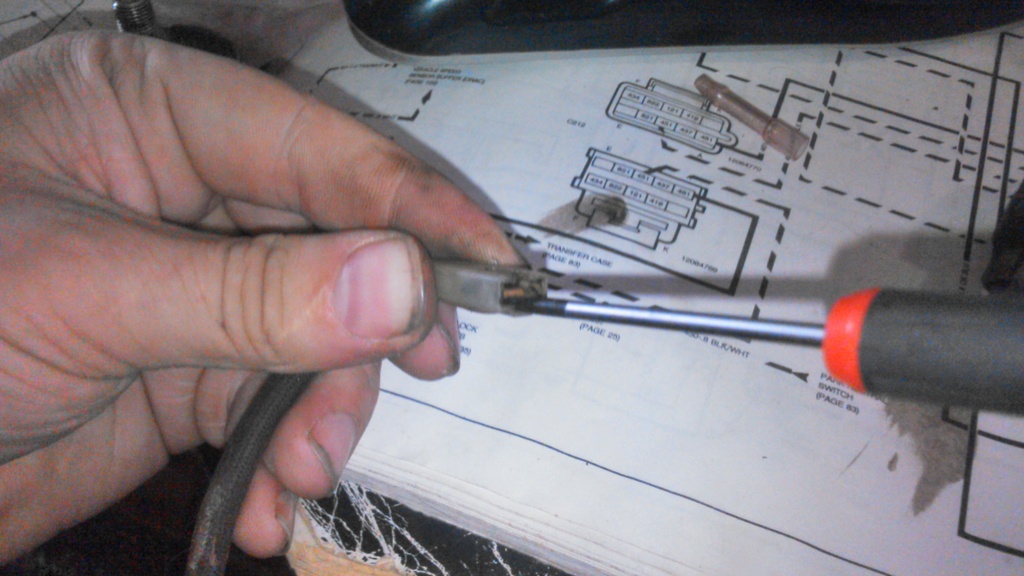
Separated into it's components:
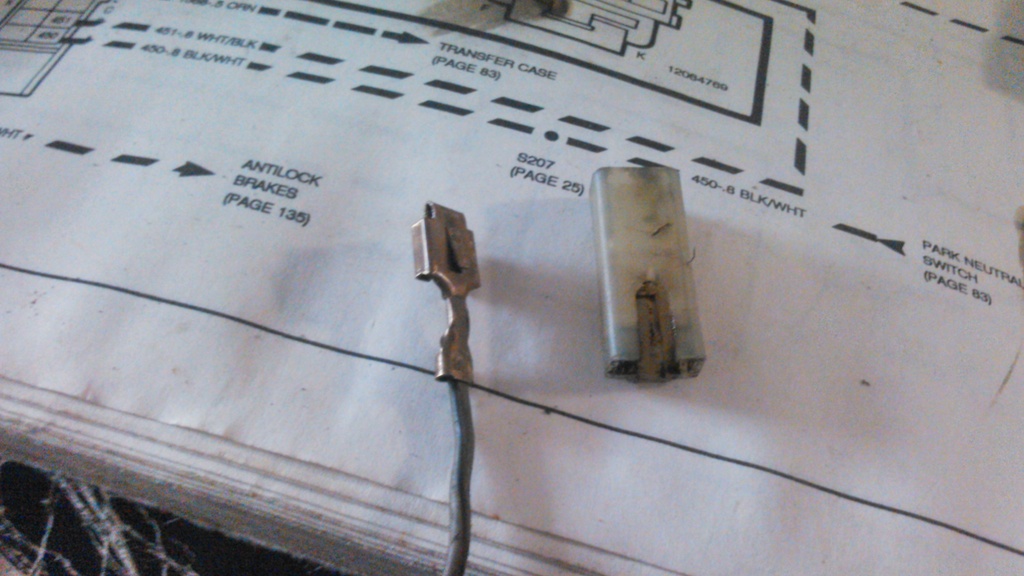
with a little careful work with that small screwdriver and a small nail (to push into the small openings from the side) I pushed that center tab back out.
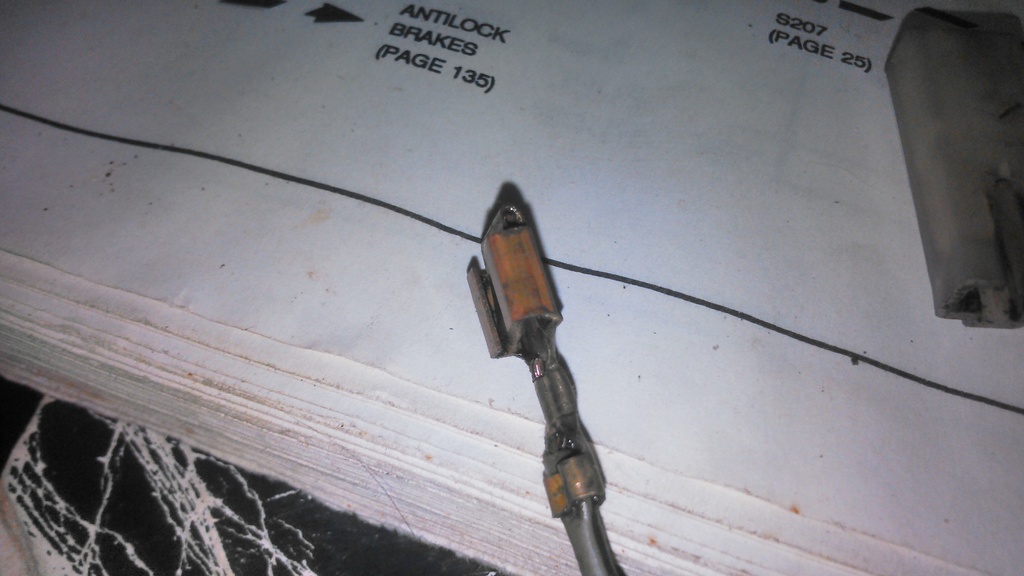
Put the halves back together, and now it clips tightly back onto the sensor. I also had issues getting the sensor to ground properly through the the collection of adapters and the T-fitting I used to use both the GM and Toyota oil pressure sensors. I'm going to replace it with an aftermarket sensor that has a spade terminal on the body of the housing to make sure it gets a good ground.
Another reason for re-doing the wiring is to document what I did, so the future owner won't have to reverse engineer what I did just to diagnose any issues.
I discovered in my wiring cleanup that one of the wires that I did not hook up (on the main diagram, it says "see ABS diagram", so I ignored it) was actually the power wire for the Torque Converter (it's actually a very simple circuit that just draws power through the brake switch, ensuring that the converter will always unlock when the brake is applied....). Might be why I've never gotten lockup....
I also did have an auxiliary fuse panel for some of my extra circuits mounted to the kick panel near the passenger door. I believe do to it's proximity to the door, this panel got some moisture in it, and corroded really badly. So, I've got a much nicer Blue Sea fuse panel that I'll be mounting behind the glove box. In an effort to get better routing for the wiring, I decided I would drill a new hole for the wiring to pass through right behind the A/C evaporator, and since the rest of the A/C system has been deleted, I swapped out the evap box for the duct out of a truck that didn't have A/C (ebay for about $30...):
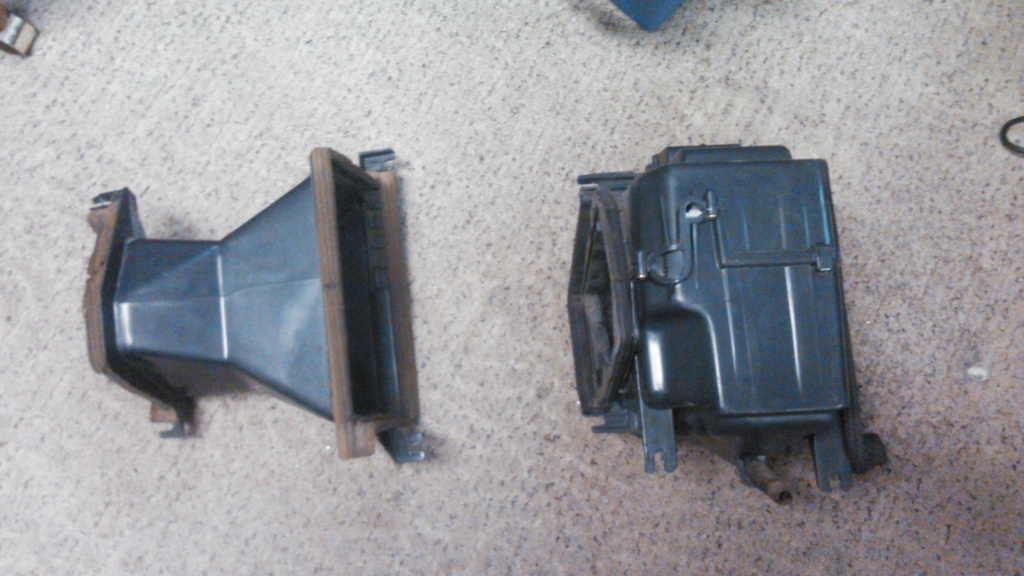
This improves the amount of room behind the glove box immensely!! The fuse box will mount to the front side of it, and it leaves enough room above and behind it to mount the GM ECU safely.
I'm also doing some other things to clean up the engine bay. The rear heater lines long since rusted out, leaked, and were bypassed. The heater itself was removed for more center console storage. But I still had the old 3" long chunk of heater hose off the heater valve with a bolt clamped in the end to cap it off. This sticks down into a very cluttered part of the engine bay. I considered buying one for a pickup that didn't have that extra port, but after a quick look at prices on ebay, I decided to try to modify this one. This seemed to work really well, but time will tell how well. I simply tapped the inside of the port to 1/4" NPT, and threaded in a plug....done. No hose hanging off, no extra clamps, sweet.
 Oct 19, 2016 | 08:34 AM
#118
Thread Starter
Registered User
Joined: Nov 2006
Posts: 580
Likes: 33
From: Saginaw, MN
I spent many hours over the winter and early spring cleaning and freshening things up. Some new gaskets, sandblasted and painted the valve covers and headers, a lot of work on the wiring.
We started trying to have a kid early in the spring, and immediately had success, we're due in February.
And we closed on a house in early August. Smallish house, 24x28 garage, but on 22+ wooded acres.
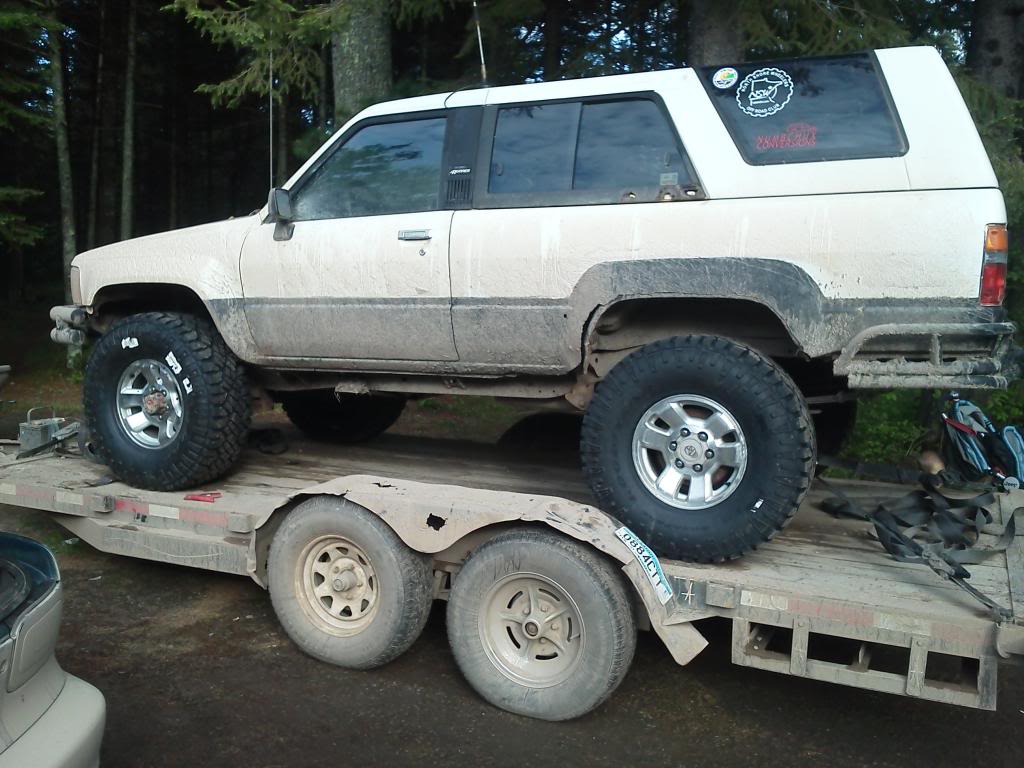
The 4Runner has been sitting at our old house while we've been moving, as our current arrangement means we don't have to be out soon. When this happened:
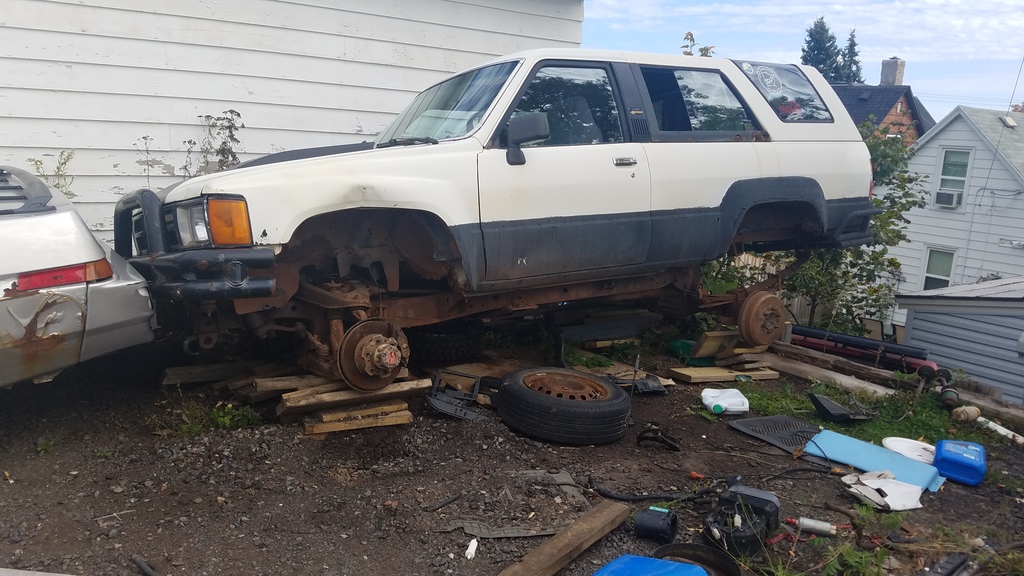
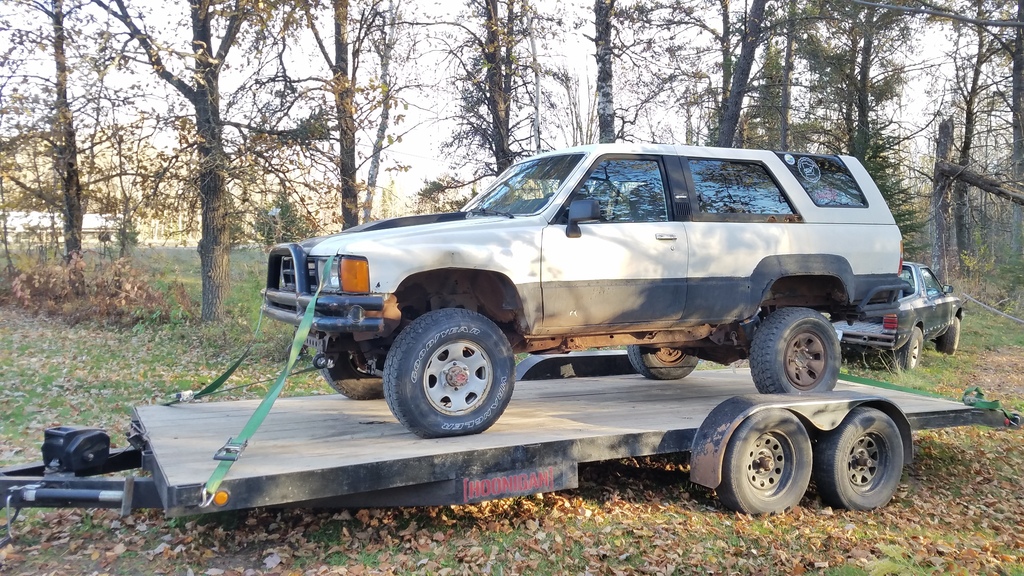
I managed to scare up a set of stockish rollers from the original spare from this truck and my parts 4runner, and a couple extras I bought when I converted my Brat to 6-lug, and borrowed a truck and trailer to bring it home. I looks so pathetic on stock tires:
We started trying to have a kid early in the spring, and immediately had success, we're due in February.
And we closed on a house in early August. Smallish house, 24x28 garage, but on 22+ wooded acres.
The 4Runner has been sitting at our old house while we've been moving, as our current arrangement means we don't have to be out soon. When this happened:

I managed to scare up a set of stockish rollers from the original spare from this truck and my parts 4runner, and a couple extras I bought when I converted my Brat to 6-lug, and borrowed a truck and trailer to bring it home. I looks so pathetic on stock tires:
 Dec 10, 2018 | 07:59 AM
#119
Thread Starter
Registered User
Joined: Nov 2006
Posts: 580
Likes: 33
From: Saginaw, MN
Not much for updates. This truck is pretty far onto the back burner, with other projects, a new house, and a new person (she's almost 2!!) in my life. But, I still think about it. It spent some serious time in the Garage in the spring of 2017 working on the engine. And this fuel injection system is not happy, and I can't figure it out. The only thing that it seems to come back to, is one of the factory knock sensors is right between the exhaust ports, and had to be removed for the headers. The factory manual says that this will throw a code, but that it will disable the system, and ignition maps will run as normal. I installed another sensor to another threaded hole in the head, but it's possible that's causing issues instead of fixing them (although unplugging it doesn't seem to make any difference). Also, I cannot get the transmission to stop leaking. Long story short, I've given up on the 4.3. I'm not spending another dime on it.
I decided to coat the frame with POR15, though.
Before (Keep in mind, My usual offroad spot is an old iron-ore pit mine. The mud is rust-colored, and doesn't wash off).
by https://www.flickr.com/photos/48523836@N06/, on Flickr
Went after it with a wire wheel, degreased and etched with POR15 Marine Clean and Prep and Ready. Then painted, used a Harbor Freight HVLP gun, and sprayed the POR just as it comes out of the can. Works great.
by https://www.flickr.com/photos/48523836@N06/, on Flickr
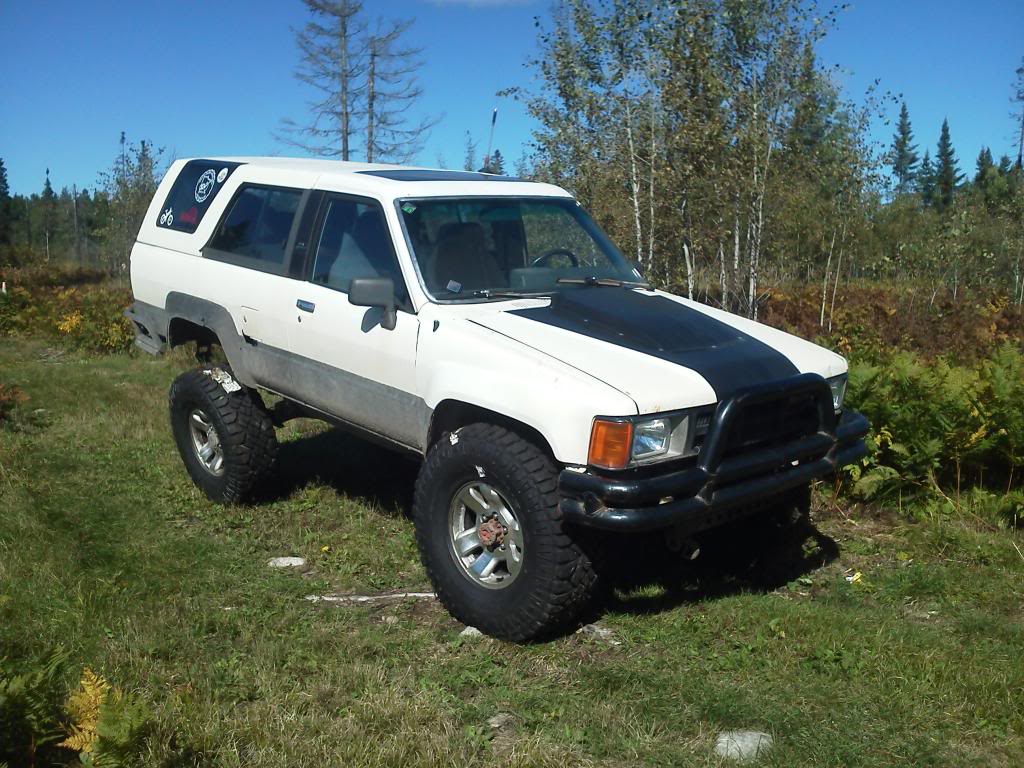
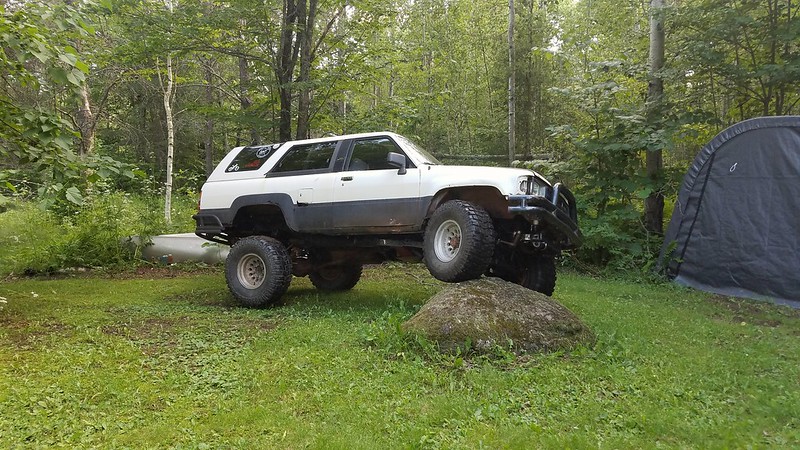
And posed on a rock in the backyard. Showing off my used 33" mud terrains I bought after my 35s were stolen:
by https://www.flickr.com/photos/48523836@N06/, on Flickr
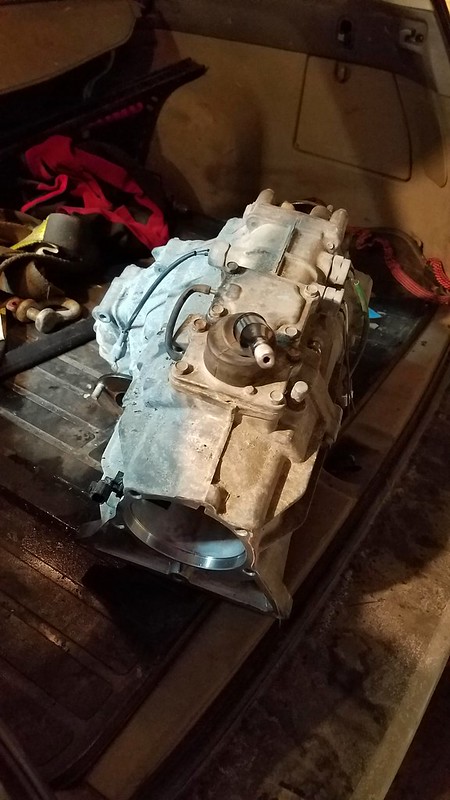
I've used the truck around the yard, and blazed some trails on the property since then, while I've been researching engine swaps. I've decided on a 1UZ or 5VZ, much prefer the 1UZ, but it'll come down to the right deal on a donor vehicle.
Yesterday, I got the first puzzle piece for that change. A T100 transfer case and adapter housing with 80k miles. This will bolt up to the auto transmission behind a 1UZ or 5VZ, and has a passenger side drop.
by https://www.flickr.com/photos/48523836@N06/, on Flickr
I decided to coat the frame with POR15, though.
Before (Keep in mind, My usual offroad spot is an old iron-ore pit mine. The mud is rust-colored, and doesn't wash off).
Went after it with a wire wheel, degreased and etched with POR15 Marine Clean and Prep and Ready. Then painted, used a Harbor Freight HVLP gun, and sprayed the POR just as it comes out of the can. Works great.
And posed on a rock in the backyard. Showing off my used 33" mud terrains I bought after my 35s were stolen:
I've used the truck around the yard, and blazed some trails on the property since then, while I've been researching engine swaps. I've decided on a 1UZ or 5VZ, much prefer the 1UZ, but it'll come down to the right deal on a donor vehicle.
Yesterday, I got the first puzzle piece for that change. A T100 transfer case and adapter housing with 80k miles. This will bolt up to the auto transmission behind a 1UZ or 5VZ, and has a passenger side drop.
 Dec 10, 2018 | 10:07 AM
#120
Registered User


Joined: Jun 2013
Posts: 3,112
Likes: 582
From: Portland, Oregon, USA
You really cannot go wrong with a good 5VZ-E or 1UZ.


