
Numbchux' 1987 4Runner Build-Up Thread


 Mar 20, 2019 | 01:45 PM
#123

Thread Starter
Registered User
Joined: Nov 2006
Posts: 580
Likes: 33
From: Saginaw, MN
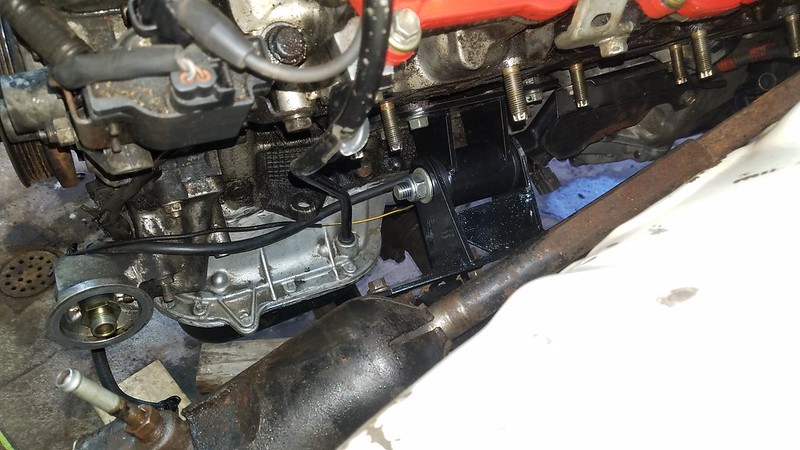
Starter has been rebuilt by a local shop (since it's under the intake between the cylinder banks, probably not possible with the engine in the truck).
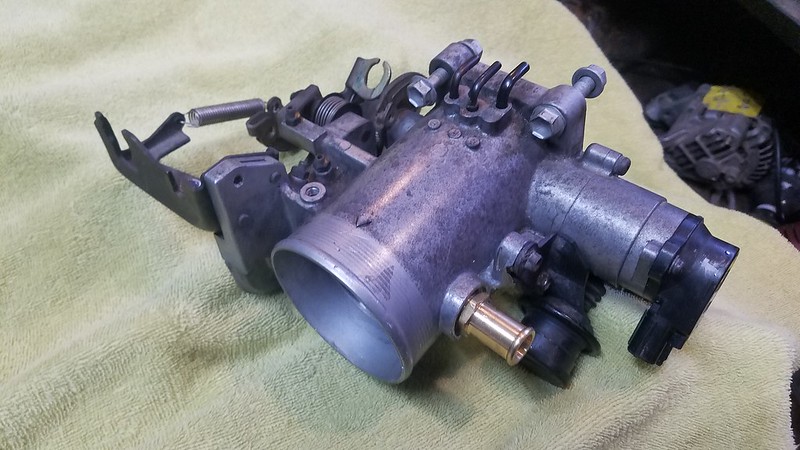
Traction control parts deleted from the Throttle Body, and replaced with a hose barb to connect to the IAC valve (now I don't have to worry about adding a port between the TB and AFM).
by https://www.flickr.com/photos/48523836@N06/, on Flickr
Dorman 555-008 freeze plug is an acceptable fit (with some locktite, probably wouldn't hold up to a boosted engine, but should be fine for a stocker) to delete the EGR port at the intake. I think this looks cleaner than an aftermarket blockoff (which usually doesn't incorporate a fitting for the PCV hose). Not to mention cheaper. I'll worry about blocking off the port on the exhaust manifold once I confirm that I can use these manifolds.
by https://www.flickr.com/photos/48523836@N06/, on Flickr
Working on wiring, hoping to test-fire it on the stand next weekend to confirm that everything is in good working order. I'm also going to use an infrared thermometer to get control readings on the exhaust manifolds. I might try Eastman's internal ceramic manifold coatings to help with underhood temperatures (was a bit of a problem with the 4.3), so I'll do one side, and then do another temp reading to see how much it actually helps.
Traction control parts deleted from the Throttle Body, and replaced with a hose barb to connect to the IAC valve (now I don't have to worry about adding a port between the TB and AFM).
Dorman 555-008 freeze plug is an acceptable fit (with some locktite, probably wouldn't hold up to a boosted engine, but should be fine for a stocker) to delete the EGR port at the intake. I think this looks cleaner than an aftermarket blockoff (which usually doesn't incorporate a fitting for the PCV hose). Not to mention cheaper. I'll worry about blocking off the port on the exhaust manifold once I confirm that I can use these manifolds.
Working on wiring, hoping to test-fire it on the stand next weekend to confirm that everything is in good working order. I'm also going to use an infrared thermometer to get control readings on the exhaust manifolds. I might try Eastman's internal ceramic manifold coatings to help with underhood temperatures (was a bit of a problem with the 4.3), so I'll do one side, and then do another temp reading to see how much it actually helps.
May 2, 2019 | 12:27 PM
#125
Thread Starter
Registered User
Joined: Nov 2006
Posts: 580
Likes: 33
From: Saginaw, MN
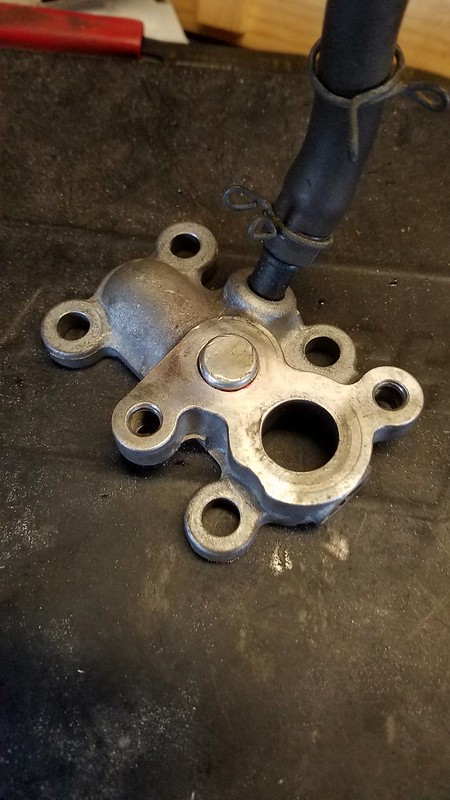
Cut some pipe threads in place of the unneeded ports on the thermostat housing. Pipe plug in one, and temp sensor in another (for fan control).
by https://www.flickr.com/photos/48523836@N06/, on Flickr
Nylon fuel line that feeds the cold start injector broke. Being discontinued, and I wasn't terribly excited about trying to get a decent used one. So I got a couple banjo fittings to use 1/4" fuel injection hose, and crimp-clamped it together. I'm very happy with it.
by https://www.flickr.com/photos/48523836@N06/, on Flickr
Paint, of course:
by https://www.flickr.com/photos/48523836@N06/, on Flickr
Fuse box stuff. I'm going to replace the stock fuse box, and add fuses and relays for extra components. Nice fuse/relay box, This will have 5 relays which will drive ignition, EFI, Hi and Lo headlights (one unused, for now). Higher amp relay out of the box for starter, Derale radiator fan controller, Mega fuse holder for alternator, and J-case fuse box to replace the 2 that are in the stock box.
by https://www.flickr.com/photos/48523836@N06/, on Flickr
by https://www.flickr.com/photos/48523836@N06/, on Flickr
I replaced the capacitors in the ECU, and test-ran the engine again. Then separated the transmission and began removing stuff to modify it (4WD shift shaft to move the linkage to the other side, transfer case, and shift kit). Very soon, I need to bring the truck into the garage and start tearing into it, but we keep getting snow.....

Nylon fuel line that feeds the cold start injector broke. Being discontinued, and I wasn't terribly excited about trying to get a decent used one. So I got a couple banjo fittings to use 1/4" fuel injection hose, and crimp-clamped it together. I'm very happy with it.

Paint, of course:

Fuse box stuff. I'm going to replace the stock fuse box, and add fuses and relays for extra components. Nice fuse/relay box, This will have 5 relays which will drive ignition, EFI, Hi and Lo headlights (one unused, for now). Higher amp relay out of the box for starter, Derale radiator fan controller, Mega fuse holder for alternator, and J-case fuse box to replace the 2 that are in the stock box.


I replaced the capacitors in the ECU, and test-ran the engine again. Then separated the transmission and began removing stuff to modify it (4WD shift shaft to move the linkage to the other side, transfer case, and shift kit). Very soon, I need to bring the truck into the garage and start tearing into it, but we keep getting snow.....
May 14, 2019 | 01:38 PM
#126
Thread Starter
Registered User
Joined: Nov 2006
Posts: 580
Likes: 33
From: Saginaw, MN
Transmission work.
4WD shift shaft. I used the VIN from the 4Runner that I got the shifter assembly at the junkyard to look this up:
 20190513_174415 by Numbchux, on Flickr
Remove the external linkage parts, loosen the nut on the neutral switch, the drill the dimple out of this thin collar, and a roll pin can be pounded out. Then the shaft slides out:
 20190513_212100 by Numbchux, on Flickr
Here's the old collar and pin:
 20190513_212141 by Numbchux, on Flickr
New pin, collar, shift shaft seals, and shaft, and it's ready for the linkage on the other side of the transmission.
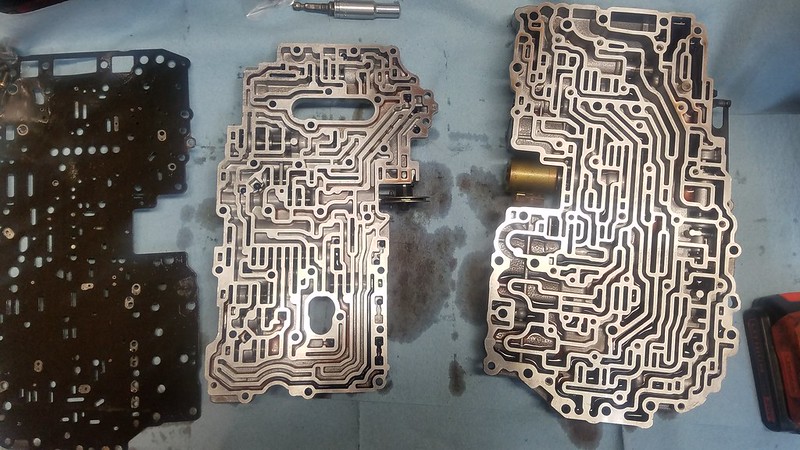
Installing a transgo shift kit while it's apart.
 20190513_214020 by Numbchux, on Flickr
4WD shift shaft. I used the VIN from the 4Runner that I got the shifter assembly at the junkyard to look this up:
20190513_174415 by Numbchux, on FlickrRemove the external linkage parts, loosen the nut on the neutral switch, the drill the dimple out of this thin collar, and a roll pin can be pounded out. Then the shaft slides out:
20190513_212100 by Numbchux, on FlickrHere's the old collar and pin:
20190513_212141 by Numbchux, on FlickrNew pin, collar, shift shaft seals, and shaft, and it's ready for the linkage on the other side of the transmission.
Installing a transgo shift kit while it's apart.
20190513_214020 by Numbchux, on Flickr
May 21, 2019 | 07:12 AM
#127
Thread Starter
Registered User
Joined: Nov 2006
Posts: 580
Likes: 33
From: Saginaw, MN
Transmission is back together, and mostly modded for a transfer case.
Sharpened a 10mm bolt to use as a center punch through the housing.
by https://www.flickr.com/photos/48523836@N06/, on Flickr
by https://www.flickr.com/photos/48523836@N06/, on Flickr
Stood the transmission up, and used the level built into my drill to drill a vertical hole. Tapped some threads, and voila, 7 bolts. It wasn't perfectly located, so I gave the hole in the adapter a little tickle with the mill.
by https://www.flickr.com/photos/48523836@N06/, on Flickr
Took some measurements and cut down the output shaft:
by https://www.flickr.com/photos/48523836@N06/, on Flickr
Cut down the tone ring and drill/tapped for a couple M6 set screws:
by https://www.flickr.com/photos/48523836@N06/, on Flickr
Drilled out the speed sensor hole, drilled/tap speed sensor mount hole, made a spacer out of some 1/8" aluminum.
by https://www.flickr.com/photos/48523836@N06/, on Flickr
Took some measurements. About 1mm air gap for the sensor....perfect:
by https://www.flickr.com/photos/48523836@N06/, on Flickr
Test-assembly.
by https://www.flickr.com/photos/48523836@N06/, on Flickr
Almost time to bring the truck in and tear it down.
Sharpened a 10mm bolt to use as a center punch through the housing.
Stood the transmission up, and used the level built into my drill to drill a vertical hole. Tapped some threads, and voila, 7 bolts. It wasn't perfectly located, so I gave the hole in the adapter a little tickle with the mill.
Took some measurements and cut down the output shaft:
Cut down the tone ring and drill/tapped for a couple M6 set screws:
Drilled out the speed sensor hole, drilled/tap speed sensor mount hole, made a spacer out of some 1/8" aluminum.
Took some measurements. About 1mm air gap for the sensor....perfect:
Test-assembly.
Almost time to bring the truck in and tear it down.
Last edited by Numbchux; May 21, 2019 at 07:16 AM.
Jan 16, 2020 | 12:05 PM
#129
Thread Starter
Registered User
Joined: Nov 2006
Posts: 580
Likes: 33
From: Saginaw, MN
Small update for anyone interested. My wife is pregnant with our 2nd, and has had complications that have left her very weak, she has not been to work since July. The 4Runner has fallen off the list. Knowing that this won't get better before March, and then we'll have an infant in the house, I don't anticipate being able to spend long hours in the garage, likely this whole summer. So, in the interest of a learning experience, and "quick" way to get this thing functioning again, I think I'm going to buy a Speeduino ECU and wire that in. I think I can do that in a couple hours, and then it's "just" a matter of tuning it. The ECU will work on other things, so will not be wasted money when I pull this engine out, and, assuming I can get it to run well, might help increase the resale value of the 4.3.
May 14, 2020 | 12:42 PM
#130
Thread Starter
Registered User
Joined: Nov 2006
Posts: 580
Likes: 33
From: Saginaw, MN
Well...the world went sideways since my last update.
I ended up getting laid off, and even with a new infant in the house, I decided to revert to my original plan, and do the 1UZ swap. So I finished a couple other projects, pulled the 4runner in the garage all crooked, and got to work.
Didn't take me long to rip the GM lump out
I should take a picture of it now, I washed an enormous amount of grime and dirt off the frame in the bay, and painted it with POR15.
And stick the 1UZ in for a test-fit:
Pretty good radiator space, and with a dent in the firewall, I should be able to shift the engine back an inch or so. This is my CSF 3 row radiator for the 4Runner
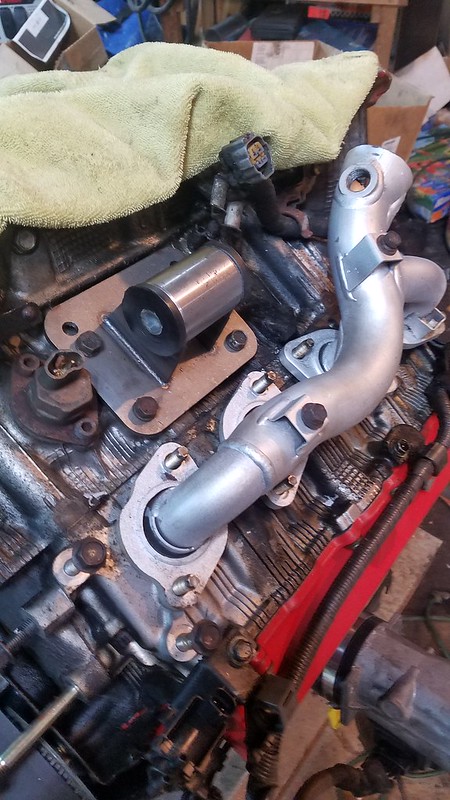
With my body/drivetrain lift, I probably could position things to make room for the front diff and SC400 oil pan not to hit, but I didn't like it. So I decided to swap to the LS400 front sump, luckily I had picked up everything for this, just in case. I decided that while I had the oil pan off, to reseal the oil pump, and rear cover. I'm glad I did this, as it forced me to take the timing belt off (someone had clearly done a timing belt/water pump job fairly recently, so I wasn't going to touch this if I didn't need to), turned out the washer behind the timing belt tensioner was missing, so the tensioner couldn't move freely. It was pretty tight, but I'm glad to get that fixed up.
After seeing the engine in the bay, I changed plans for the motor mounts. I ordered a cheap set of premade LS swap universal mounts on Ebay, and modified them to mount to the 1UZ.
Test fit, with the flanges cut off the manifold:
I got called back to work, so things are back to slow, but with this big head start, and the garage completely taken over, it's not off the list. Hoping to get the engine and transmission back together and ready to go into the truck for good this weekend.
I ended up getting laid off, and even with a new infant in the house, I decided to revert to my original plan, and do the 1UZ swap. So I finished a couple other projects, pulled the 4runner in the garage all crooked, and got to work.

Didn't take me long to rip the GM lump out
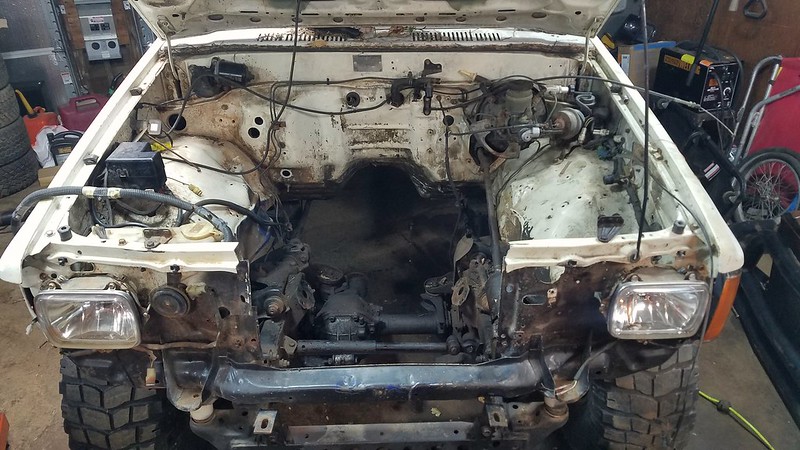
I should take a picture of it now, I washed an enormous amount of grime and dirt off the frame in the bay, and painted it with POR15.
And stick the 1UZ in for a test-fit:

Pretty good radiator space, and with a dent in the firewall, I should be able to shift the engine back an inch or so. This is my CSF 3 row radiator for the 4Runner

With my body/drivetrain lift, I probably could position things to make room for the front diff and SC400 oil pan not to hit, but I didn't like it. So I decided to swap to the LS400 front sump, luckily I had picked up everything for this, just in case. I decided that while I had the oil pan off, to reseal the oil pump, and rear cover. I'm glad I did this, as it forced me to take the timing belt off (someone had clearly done a timing belt/water pump job fairly recently, so I wasn't going to touch this if I didn't need to), turned out the washer behind the timing belt tensioner was missing, so the tensioner couldn't move freely. It was pretty tight, but I'm glad to get that fixed up.
After seeing the engine in the bay, I changed plans for the motor mounts. I ordered a cheap set of premade LS swap universal mounts on Ebay, and modified them to mount to the 1UZ.

Test fit, with the flanges cut off the manifold:
I got called back to work, so things are back to slow, but with this big head start, and the garage completely taken over, it's not off the list. Hoping to get the engine and transmission back together and ready to go into the truck for good this weekend.
Last edited by Numbchux; May 14, 2020 at 12:43 PM.
May 18, 2020 | 11:00 AM
#131
Thread Starter
Registered User
Joined: Nov 2006
Posts: 580
Likes: 33
From: Saginaw, MN
Finally took a picture of the clean engine bay with the painted frame. Looks soooo much better.
Finished swapping oil pans, resealed the oil pump, fixed the timing belt tensioner, resealed the rear cover, cleaned up the wiring, cut the flanges off the manifolds, and stuffed it back in the truck.
Still a lot to do, it wasn't supported by the truck yet, I did put the tcase crossmember in and propped things up on some wood blocks (have to build the motor mounts yet, and got the wrong tcase mount.
These motor mounts are going to work out nicely

Finished swapping oil pans, resealed the oil pump, fixed the timing belt tensioner, resealed the rear cover, cleaned up the wiring, cut the flanges off the manifolds, and stuffed it back in the truck.
Still a lot to do, it wasn't supported by the truck yet, I did put the tcase crossmember in and propped things up on some wood blocks (have to build the motor mounts yet, and got the wrong tcase mount.


These motor mounts are going to work out nicely
 Jun 1, 2020 | 10:51 AM
#132
Thread Starter
Registered User
Joined: Nov 2006
Posts: 580
Likes: 33
From: Saginaw, MN
Got my serp belt. #4060615 or 6PK1560. You can see the marks on the tensioner, it's on the low side, so a hair shorter might be better, but I think it should be OK.

I also bought a power steering pressure hose. This is for an '88-'89 V6 4Runner, there's a different part number for a '90-'95 without ABS that looks like it should work, but this one was a bit cheaper. This is #91680

There's a tab on the banjo end to keep it from rotating on the pump when you tighten the bolt, I had to bend this out a bit to fit well on my LS400 pump, but that's it.

I will make a mount of some sort to support the hardline on the RH side of the truck. It runs right along the back side of my radiator.
I didn't take a picture, but I bought a cheap single-pass cooler that I will mount behind the bumper, and have the PS return line go through it.
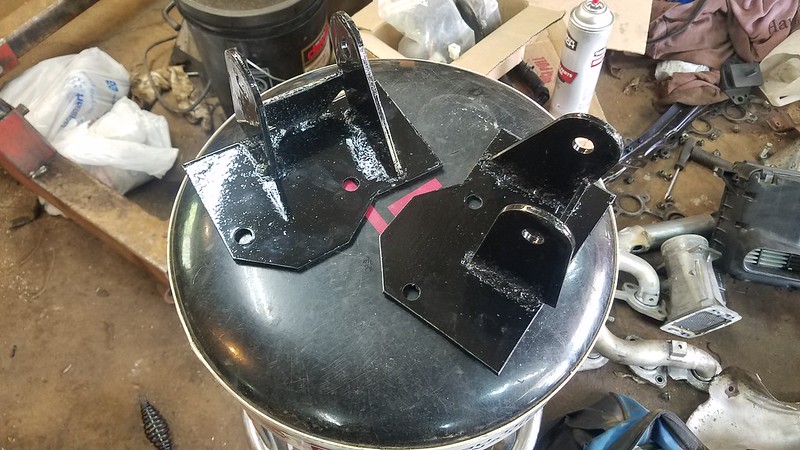
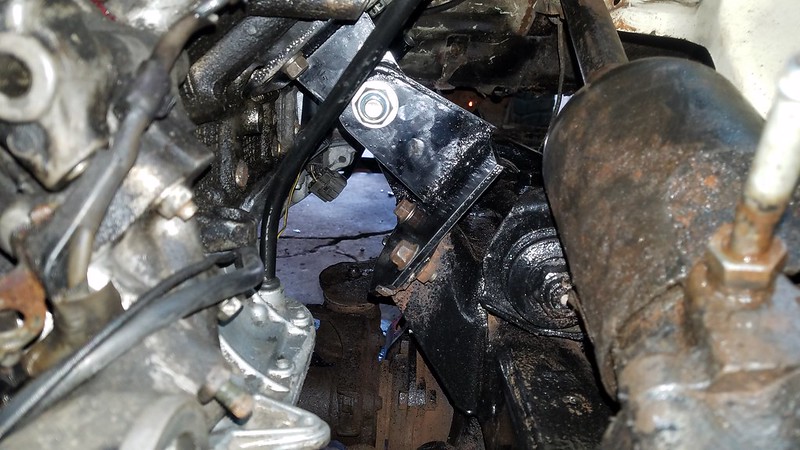
Frame-side motor mount brackets built. These sit right onto the tabs on the stock pads on the frame, I put the 2 tabs at different angles to improve access to the rear mounting bolt (between the 2 tabs). Don't judge my ugly flux core welds, they'll hold.
and installed
Then I moved to the transfer case mount.
At a glance, it looked like the T100 mount would bolt to my crossmember. So close....but no

Little tickle with the dremel, and I got those to tighten down adequately. Then carefully drilled 4 holes to catch the rear factory captive nuts through the meat of the crossmember, since it's moved back ~3".

I think I'm going to try drilling and tapping into the frame through the existing 2 holes in the crossmember that overlap the frame so I'll be back to 4 bolts on either side.
No pictures, but after over a week of soaking the inside of the gas tank in Metal Ready (in various positions) I thoroughly rinsed and dried it, vacuumed out the debris, and coated the inside with POR15 fuel tank sealer.
I went to test fit the front driveshaft, so I could plot out my exhaust routing, only to find out the front output bolt pattern on the T100 tcase is 61.5x70mm, and my old shaft was 60.1x68.3. DOH. Adapter ordered....
I also bought a power steering pressure hose. This is for an '88-'89 V6 4Runner, there's a different part number for a '90-'95 without ABS that looks like it should work, but this one was a bit cheaper. This is #91680
There's a tab on the banjo end to keep it from rotating on the pump when you tighten the bolt, I had to bend this out a bit to fit well on my LS400 pump, but that's it.
I will make a mount of some sort to support the hardline on the RH side of the truck. It runs right along the back side of my radiator.
I didn't take a picture, but I bought a cheap single-pass cooler that I will mount behind the bumper, and have the PS return line go through it.
Frame-side motor mount brackets built. These sit right onto the tabs on the stock pads on the frame, I put the 2 tabs at different angles to improve access to the rear mounting bolt (between the 2 tabs). Don't judge my ugly flux core welds, they'll hold.
and installed
Then I moved to the transfer case mount.
At a glance, it looked like the T100 mount would bolt to my crossmember. So close....but no
Little tickle with the dremel, and I got those to tighten down adequately. Then carefully drilled 4 holes to catch the rear factory captive nuts through the meat of the crossmember, since it's moved back ~3".
I think I'm going to try drilling and tapping into the frame through the existing 2 holes in the crossmember that overlap the frame so I'll be back to 4 bolts on either side.
No pictures, but after over a week of soaking the inside of the gas tank in Metal Ready (in various positions) I thoroughly rinsed and dried it, vacuumed out the debris, and coated the inside with POR15 fuel tank sealer.
I went to test fit the front driveshaft, so I could plot out my exhaust routing, only to find out the front output bolt pattern on the T100 tcase is 61.5x70mm, and my old shaft was 60.1x68.3. DOH. Adapter ordered....
Jul 1, 2020 | 11:11 AM
#133
Thread Starter
Registered User
Joined: Nov 2006
Posts: 580
Likes: 33
From: Saginaw, MN
Working on a few little things. Making fuel lines, little wiring, etc.
Bought an Elocker and center console. Even came with a few other parts.

Planning to yank the bed off, swap rear axle with the 4Runner (weld the old 4Runner one), patch the frame, and build a simple winch boom for lifting and moving stuff around the yard.
Bought an Elocker and center console. Even came with a few other parts.
Planning to yank the bed off, swap rear axle with the 4Runner (weld the old 4Runner one), patch the frame, and build a simple winch boom for lifting and moving stuff around the yard.
Jul 15, 2020 | 07:39 AM
#135
Thread Starter
Registered User
Joined: Nov 2006
Posts: 580
Likes: 33
From: Saginaw, MN
Last week, I built some fuel lines. These are 5/16 NiCopp, double flared on the ends of the pressure line, with flare-to-barb adapters to get a nice clean hose barb. Just a gentle bubble put on the return line with the flaring tool. This will cross over under the back seat, and then run between the body and frame rail up the LH side of the truck to the engine bay. That's a stock-replacement fuel filter for a 1UZ car (I don't remember what application I used) with the metric flare nuts on the line.

Finished editing some video that I took last week, showing how it all fits in there.
Stayed up late last night and got a bunch of work done. Gas tank is back in, gas hard lines are snaked into place, although not fastened at all. I took the transfer case crossmember off again to clearance it some more.

Then I put the front driveshaft on (I really didn't want to try to line up the adapter with the crossmember in the way). Pentadapter worked great, knocked the studs out and used a little loctite on the bolts.

So close to being able to fire it. Unfortunately, as soon as it runs at all, I have to move it out of the garage and get caught up on some other projects.
Finished editing some video that I took last week, showing how it all fits in there.
Stayed up late last night and got a bunch of work done. Gas tank is back in, gas hard lines are snaked into place, although not fastened at all. I took the transfer case crossmember off again to clearance it some more.
Then I put the front driveshaft on (I really didn't want to try to line up the adapter with the crossmember in the way). Pentadapter worked great, knocked the studs out and used a little loctite on the bolts.
So close to being able to fire it. Unfortunately, as soon as it runs at all, I have to move it out of the garage and get caught up on some other projects.
Last edited by Numbchux; Jul 15, 2020 at 07:41 AM.
Jul 31, 2020 | 12:49 PM
#136
Thread Starter
Registered User
Joined: Nov 2006
Posts: 580
Likes: 33
From: Saginaw, MN
Transfer case crossmember back on. Rear driveshaft in. Fuel hoses hooked up, still need to finish mounting the hardlines, but I'm getting there.
Primed the oil system. Swapped out the pressure sensor for a Subaru pressure switch (I had one on the bench from putting an aftermarket gauge in my '00), wired that to a test light, and cranked it over.

Didn't take long for the light to go out.
Put fuel in the tank, patched the wiring up enough to test it. Ignition and EFI relays came on as they should, CEL came on. Fuel pump did not prime. Spent an embarrassing amount of time testing. Finally moved on, and decided to turn the ECU on and crank it over, fuel pump came right on. So apparently these do not prime the fuel pump. Jumpered the fuel pump so it would run continuously to look for leaks. Had to tighten one of the flare nuts at the filter, but other than that, no leaks.
Bolted down the ignitors (grounded through the bracket), and it fired right up. Looks like the front main seal leaks a bit, which sucks, but oh well.
Then I moved on to the shift linkage. Bolted my '98 4Runner shifter assembly back into the rivnuts that I've installed (need to add some more material around the opening to finish that job, but...later). Took some measurements, and cut out 2" from the linkage, and then hooked it up.


After work today, I'm going to move some stuff around, and back this thing out of the garage.
Primed the oil system. Swapped out the pressure sensor for a Subaru pressure switch (I had one on the bench from putting an aftermarket gauge in my '00), wired that to a test light, and cranked it over.
Didn't take long for the light to go out.
Put fuel in the tank, patched the wiring up enough to test it. Ignition and EFI relays came on as they should, CEL came on. Fuel pump did not prime. Spent an embarrassing amount of time testing. Finally moved on, and decided to turn the ECU on and crank it over, fuel pump came right on. So apparently these do not prime the fuel pump. Jumpered the fuel pump so it would run continuously to look for leaks. Had to tighten one of the flare nuts at the filter, but other than that, no leaks.
Bolted down the ignitors (grounded through the bracket), and it fired right up. Looks like the front main seal leaks a bit, which sucks, but oh well.
Then I moved on to the shift linkage. Bolted my '98 4Runner shifter assembly back into the rivnuts that I've installed (need to add some more material around the opening to finish that job, but...later). Took some measurements, and cut out 2" from the linkage, and then hooked it up.
After work today, I'm going to move some stuff around, and back this thing out of the garage.


 Aug 21, 2020 | 01:00 PM
#139
Thread Starter
Registered User
Joined: Nov 2006
Posts: 580
Likes: 33
From: Saginaw, MN
Update is bad....
by https://www.flickr.com/photos/48523836@N06/, on Flickr
Somehow, the o-ring for the high pressure output of the oil pump into the block shifted while I was installing it, you can see half of it sticking out from behind the pump on the left side of the picture. I'm surprised how well it does seal, it squirts out there under pressure, but really not much volume, and it builds enough pressure to turn off an idiot light (admittedly, that's not much...). This is a pretty major setback, and to fix it correctly involves pulling both lower and upper oil pans off, which means I should pull the engine. I'm going to try to pull just the lower pan, which will make the pump bolts accessible. From what I understand, it's barely possible (have to extract one of the studs for the pickup, and even then...) to remove the pump that way, but I'm hoping I can get just enough to sneak an oring in there. This will depend how pliable the anaerobic sealer is.
With my current to-do list, this guarantees that this project won't be driveable this year....sucks, but things move a little slower when you have little kids.
Aug 24, 2020 | 10:23 AM
#140
Thread Starter
Registered User
Joined: Nov 2006
Posts: 580
Likes: 33
From: Saginaw, MN
OK, another small update. I got this console trim on ebay for a Tacoma. Need to paint it gray, but it fits nicely, and will allow 2 more cupholders (have to collapse them into 1 to slide the passenger seat forward to get into the back seat, but still).

Numbchux, on Flickr
Numbchux, on Flickr


