
JusToyotAdkins' 1986 Toyota 4x4 Build
 Aug 1, 2014 | 02:58 PM
#83
Thread Starter
Registered User
Joined: Jun 2014
Posts: 144
Likes: 0
From: Chipley, FLA
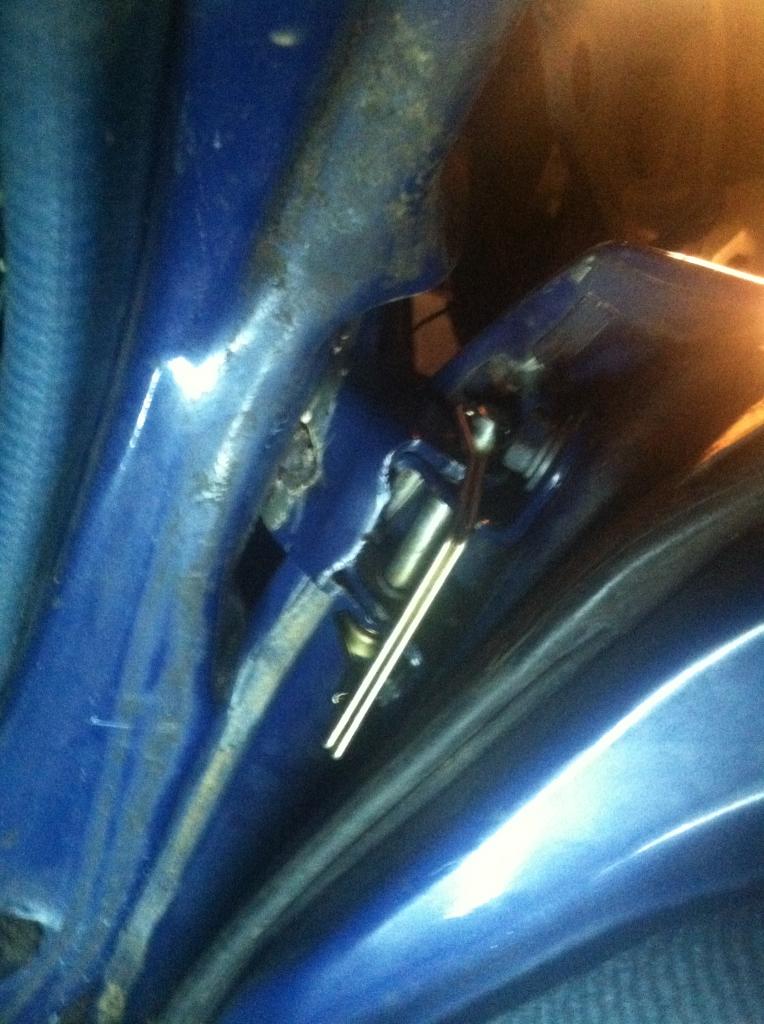
Did the quick release door mod with the trailer hitch pins. It takes longer than you think to line the hinges up, but i guess it's better than having to take the fender off. I was only able to do the passenger side but the door still shuts great.
I also ordered a set off cragar d windows for the rig
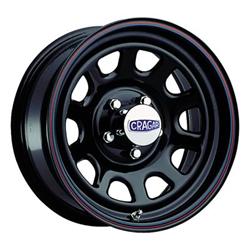

I also ordered a set off cragar d windows for the rig


 Aug 7, 2014 | 05:00 PM
#87
Thread Starter
Registered User
Joined: Jun 2014
Posts: 144
Likes: 0
From: Chipley, FLA
Just a little update...
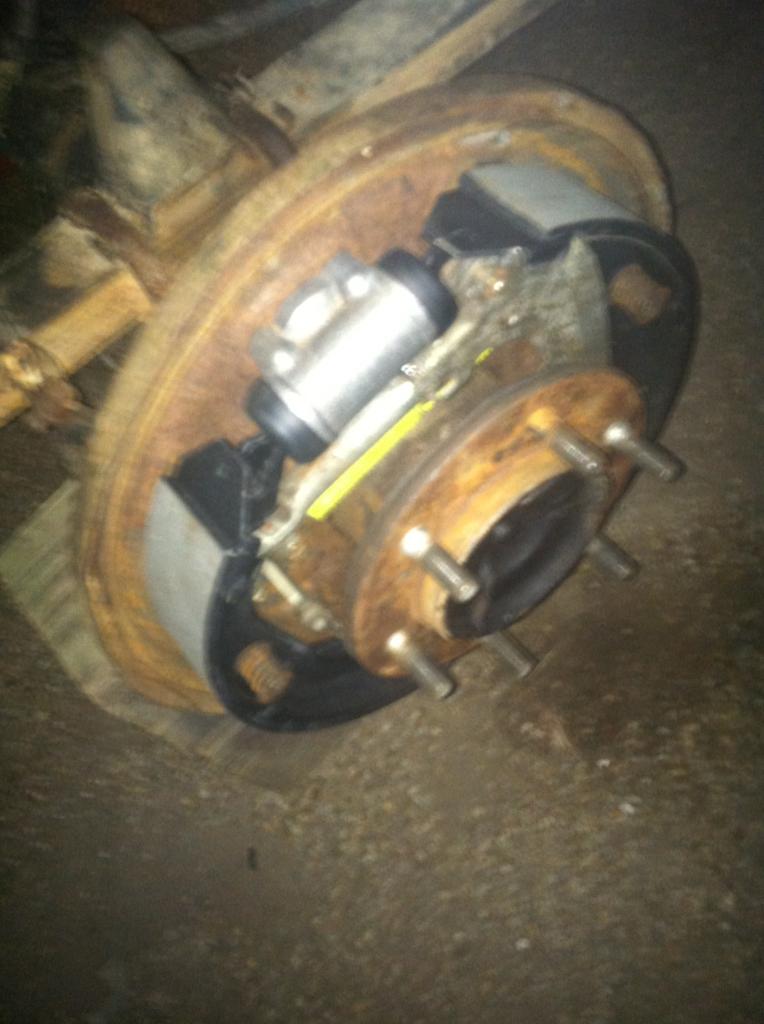
I'm in process of replacing the rear shoes and wheel cylinders.
I really wish they were disk breaks all around.
I've got two of my four wheels on the way
Along with a set of tail lights
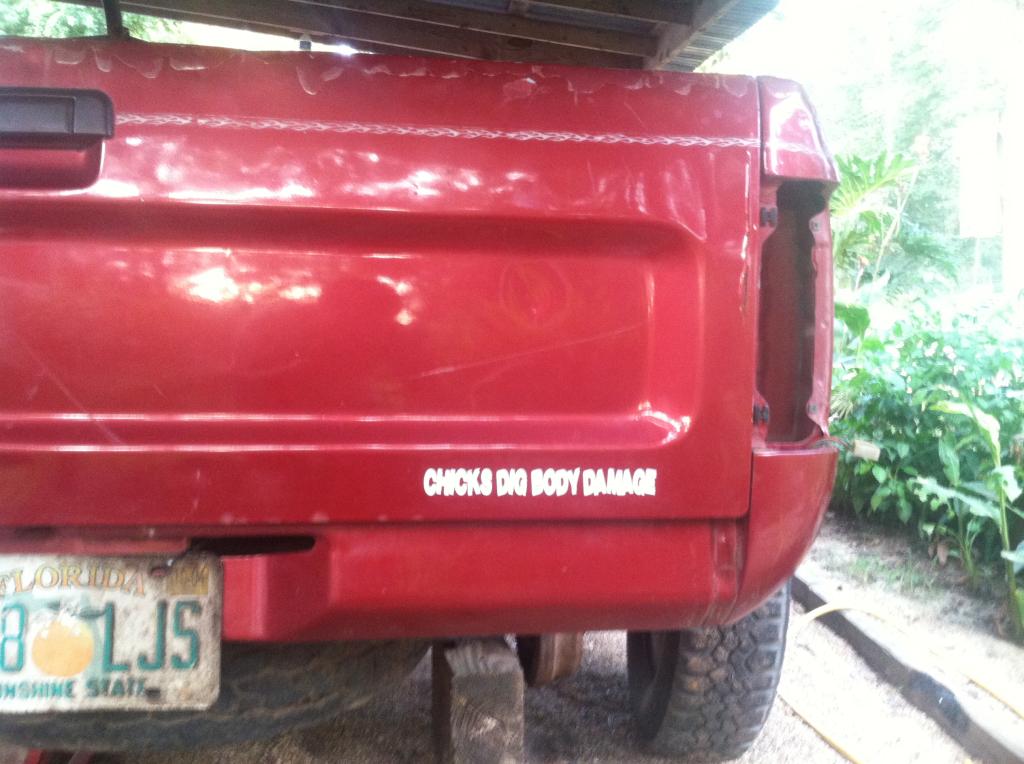
And a decal saying "Chicks Dig Body Damage"
Hopefully ordering the other two wheels this weekend then tires or BJ spacers
I'm in process of replacing the rear shoes and wheel cylinders.
I really wish they were disk breaks all around.
I've got two of my four wheels on the way
Along with a set of tail lights
And a decal saying "Chicks Dig Body Damage"
Hopefully ordering the other two wheels this weekend then tires or BJ spacers
Aug 9, 2014 | 05:11 PM
#88
Thread Starter
Registered User
Joined: Jun 2014
Posts: 144
Likes: 0
From: Chipley, FLA
Pretty new shoes and cylinders(little bit blurry)
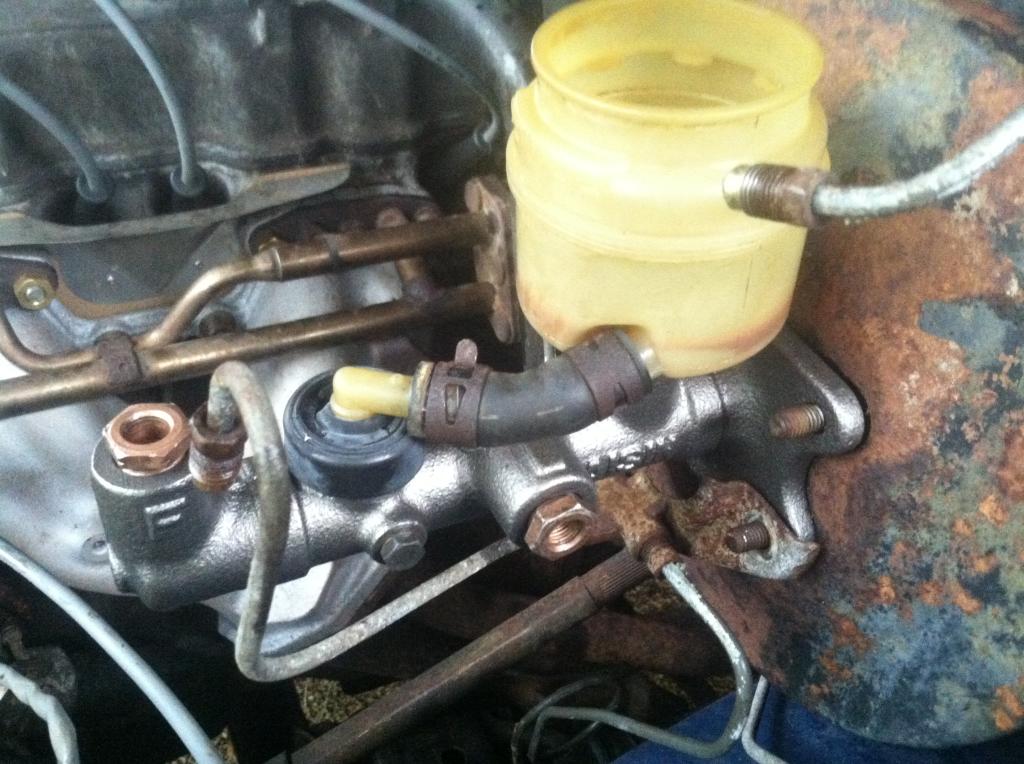
Shiny remanufactured master cylinder
I'm having problems with bleeding the rear brakes, it seems as though they aren't getting pressure but the fronts are. Any suggestions????
And the new decal

Shiny remanufactured master cylinder

I'm having problems with bleeding the rear brakes, it seems as though they aren't getting pressure but the fronts are. Any suggestions????
And the new decal
 Aug 11, 2014 | 01:35 AM
#89
Toyotas are a pain in the rear to bleed for me. Never had such problems in the past with other models. I bleed them and wait a few days and then do it again at a later time seems to work for me. Are you bleeding the Proportioning Valve on the passenger side of the frame on the rear?
Aug 12, 2014 | 06:40 PM
#91
Thread Starter
Registered User
Joined: Jun 2014
Posts: 144
Likes: 0
From: Chipley, FLA
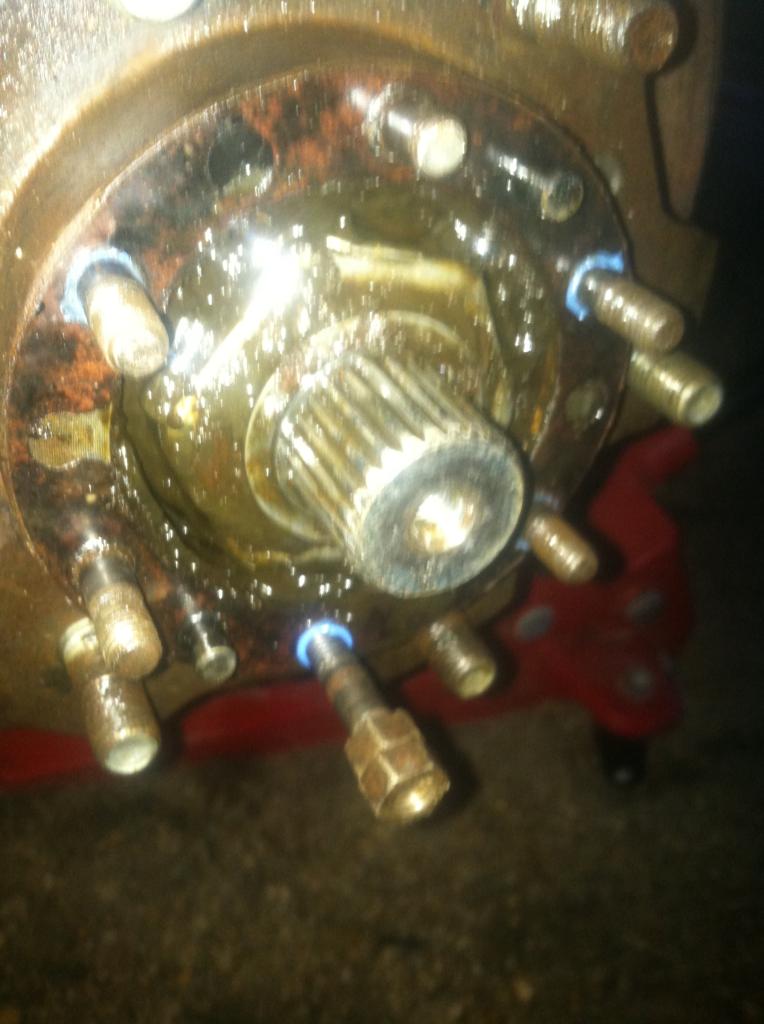
Well yesterday i got bored and decided to tear into the the manual hubs.
I plan on cleaning up and painting the cover to stock colors(black and red)
Cleaning out all the old grease and replacing with new.
Along with new gaskets
And gasket maker on the studs so they don't back out
I started on the passenger side to find this yummy messs
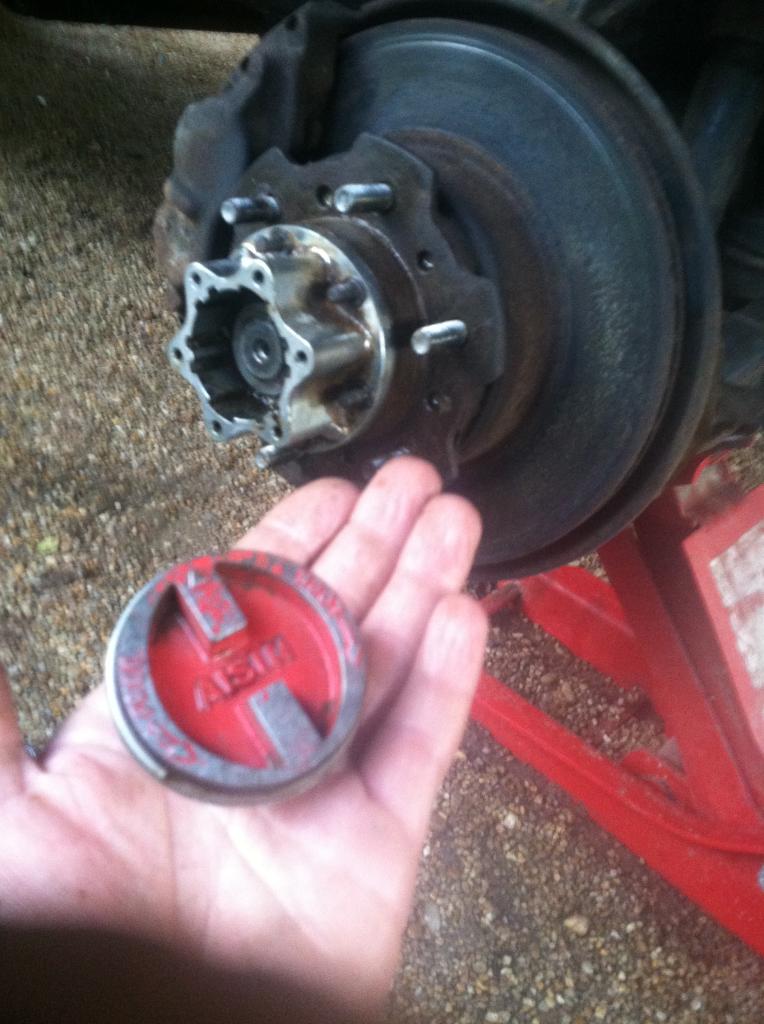
Also you can see where i started taking out the studs and putting gasket maker on them.(I ringed off the top one )
)
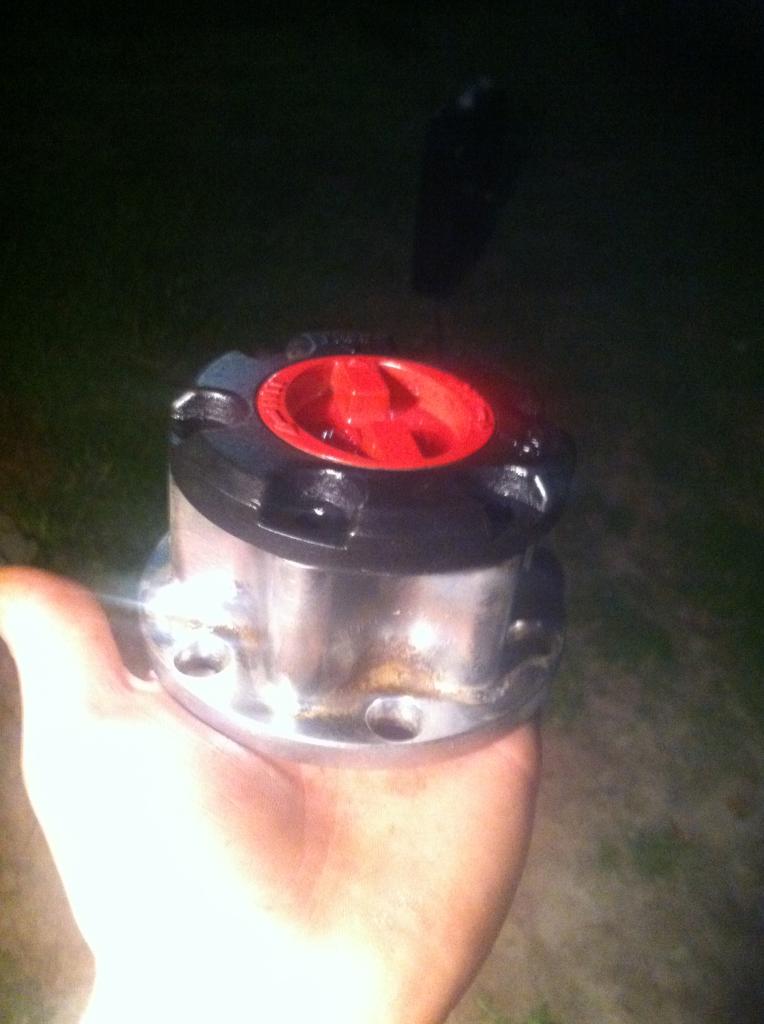
This is the best i have for a before pic of the cover(not much)
And here's the outcome so far. Hopefully i won't scratch it up to bad putting it back together.
That's all for now.
I plan on cleaning up and painting the cover to stock colors(black and red)
Cleaning out all the old grease and replacing with new.
Along with new gaskets
And gasket maker on the studs so they don't back out
I started on the passenger side to find this yummy messs

Also you can see where i started taking out the studs and putting gasket maker on them.(I ringed off the top one
)This is the best i have for a before pic of the cover(not much)

And here's the outcome so far. Hopefully i won't scratch it up to bad putting it back together.

That's all for now.
 Aug 14, 2014 | 04:47 PM
#96
Registered User


Joined: Oct 2009
Posts: 4,832
Likes: 332
From: Northfield, Vermont
Real nice work on the hubs! they cleaned up good!
Why were you taking the studs out to put gasket maker on them? Im a bit confused on that one.
Why were you taking the studs out to put gasket maker on them? Im a bit confused on that one.
Last edited by rattlewagon; Aug 14, 2014 at 04:49 PM.
Aug 15, 2014 | 10:00 PM
#98
Thread Starter
Registered User
Joined: Jun 2014
Posts: 144
Likes: 0
From: Chipley, FLA
Having trouble with making the hub retract. It just wants to stay in one position when I turn the dial but I can hold the hub in my hand with a little pressure from the back and it will work fine...


