
Dutchbelly's 1988 4runner Build-up
 Jun 7, 2011 | 08:19 PM
#141
Thread Starter
Registered User
Joined: Apr 2011
Posts: 428
Likes: 0
From: Southern Ontario
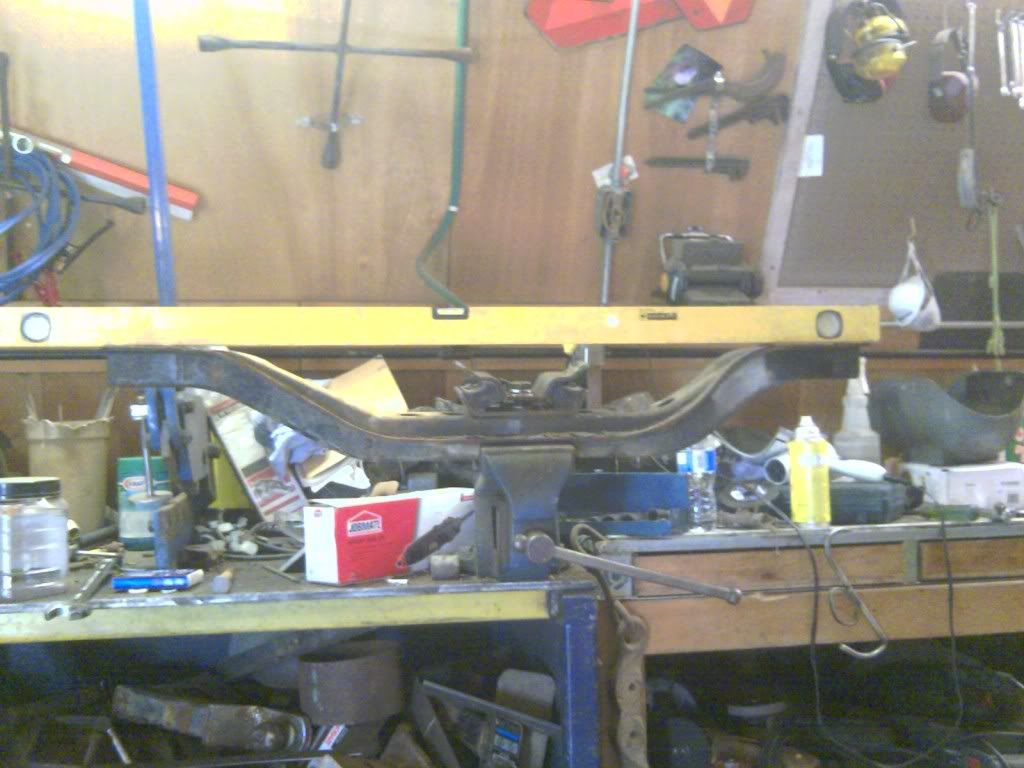
Went back out to work on the truck, trying to get everything in my list of things to do out of the way before this weekend's paintfest. I decided to lift the rear gas tank bracket.

I need to cut 2 inches out of this bracket for the 2 inch drivetrain etc lift. I used a torpedo level to give my first line just under where the brake bracket is on the other side. You'll see it in a later pic, I need to keep it intact.

Two inches.

Used the underside of the torpedo level for my second cut line.

Double check that the line is even on both ends.

I put a mark here so I could use a level straight up to realign the pieces after the cuts. I didn't take a pic, but here's one I took later to give you an idea what I did:

Which allows me to do this:

I used two vice grips to clamp small pieces of steel to the top piece as a guide to line up the piece I needed to weld:


You can see the alignment marks I made faintly shown on the left side. The pieces don't match up perfectly because the profile stamped in the steel goes off on angles, not straight up and down, so I'll have to weld up some gaps. I tacked the pieces together and used a straight edge to double check the pieces were straight:

I threw a few more small tacks on each side to give it some strength and pulled the gas tank out of storage to make sure I'd be able to bolt it up after it was welded solid:

I'm a lucky man. The bolts threaded right in no issues whatsoever. Here's a pic of where the tank will sit under the frame after it's all done:

The skid plate will hang down an inch or so lower, but that's a much flatter belly than stock. I'm pretty happy with it. I then welded up the bracket:


If you look at those two pics you'll see how close I had to come to the underside of the brake line bracket and also the flange that the tank bolts too. If I had done a 3" lift I would have had to rework the brake line bracket. I really need to get a tank of gas and some wire so I can use the mig welder in the shop. The little buzz box stick welder I've been using there is probably older than I am. I also stitch welded in the new backing piece to the front crossmember. Couldn't get my camera phone to focus properly so this is the only pic I have:

Was a good night, I thought.
Jump to next drivetrain lift post >>
I need to cut 2 inches out of this bracket for the 2 inch drivetrain etc lift. I used a torpedo level to give my first line just under where the brake bracket is on the other side. You'll see it in a later pic, I need to keep it intact.
Two inches.
Used the underside of the torpedo level for my second cut line.
Double check that the line is even on both ends.
I put a mark here so I could use a level straight up to realign the pieces after the cuts. I didn't take a pic, but here's one I took later to give you an idea what I did:
Which allows me to do this:
I used two vice grips to clamp small pieces of steel to the top piece as a guide to line up the piece I needed to weld:
You can see the alignment marks I made faintly shown on the left side. The pieces don't match up perfectly because the profile stamped in the steel goes off on angles, not straight up and down, so I'll have to weld up some gaps. I tacked the pieces together and used a straight edge to double check the pieces were straight:
I threw a few more small tacks on each side to give it some strength and pulled the gas tank out of storage to make sure I'd be able to bolt it up after it was welded solid:
I'm a lucky man. The bolts threaded right in no issues whatsoever. Here's a pic of where the tank will sit under the frame after it's all done:
The skid plate will hang down an inch or so lower, but that's a much flatter belly than stock. I'm pretty happy with it. I then welded up the bracket:
If you look at those two pics you'll see how close I had to come to the underside of the brake line bracket and also the flange that the tank bolts too. If I had done a 3" lift I would have had to rework the brake line bracket. I really need to get a tank of gas and some wire so I can use the mig welder in the shop. The little buzz box stick welder I've been using there is probably older than I am. I also stitch welded in the new backing piece to the front crossmember. Couldn't get my camera phone to focus properly so this is the only pic I have:
Was a good night, I thought.
Jump to next drivetrain lift post >>
Last edited by Dutchbelly; Jul 16, 2011 at 10:55 AM.
 Jun 8, 2011 | 06:46 AM
#145
You are getting a lot done. It is looking great. These gas tanks do hang low and I think it does give a cleaner look when tucked up.
Looking forward to paintfest. After all you have done to this point, it will make your work really look great. Not just your metal working, but getting everything else done like brakes.
I checked a couple of times but maybe I missed it. How did the front tires go? Did you get them to break loose?
Looking forward to paintfest. After all you have done to this point, it will make your work really look great. Not just your metal working, but getting everything else done like brakes.
I checked a couple of times but maybe I missed it. How did the front tires go? Did you get them to break loose?
Jun 8, 2011 | 05:09 PM
#146
Thread Starter
Registered User
Joined: Apr 2011
Posts: 428
Likes: 0
From: Southern Ontario
Yeah I honestly wish I lived closer to all you guys, Jason. I'd love having a buddy who could help me with my projects while I pitch in for his.
Jun 9, 2011 | 03:17 PM
#148
I hear you to Dutch. I am in the same boat as you and Jason, by my self. But at least I got Yotatech and it is nice to know somebody else out there is doing the same thing and am always getting tips.
For other type of car guys, Im not sure they have as good of a site.
For other type of car guys, Im not sure they have as good of a site.
Jun 9, 2011 | 08:09 PM
#149
Thread Starter
Registered User
Joined: Apr 2011
Posts: 428
Likes: 0
From: Southern Ontario
Transfer case Xmember and more
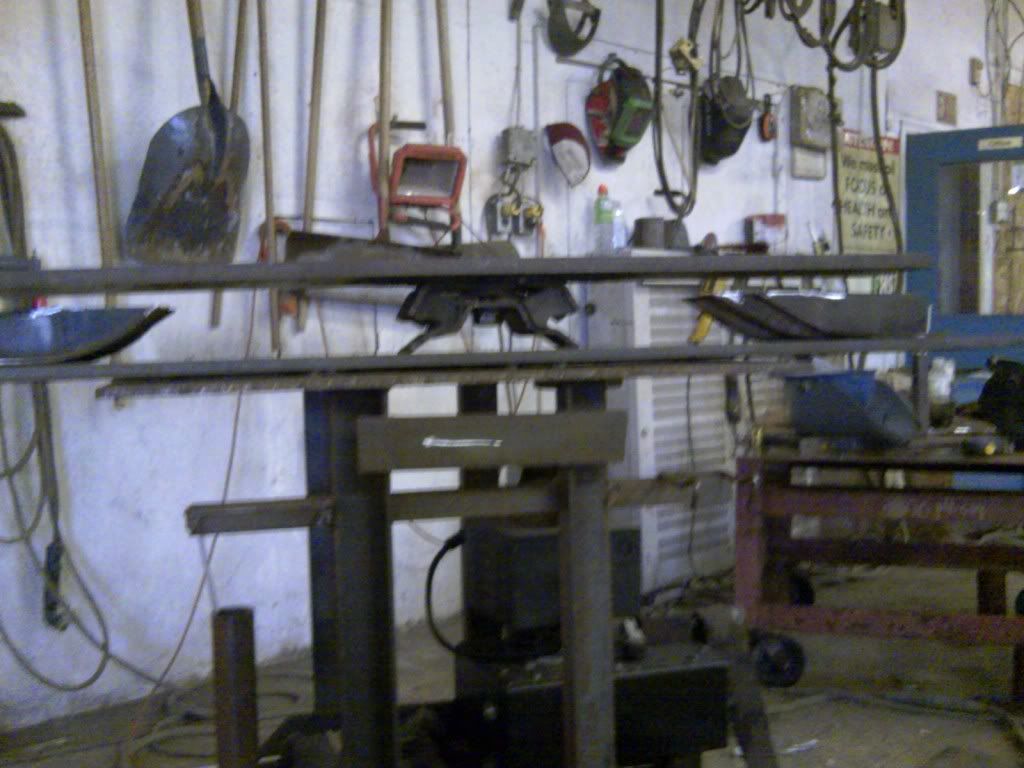
Time to start reworking the transfer case crossmember.
Threw it in the vise and tapped it till it was level. I need to match the same 2" lift that I'm doing with pretty much everything, the easiest way to do that would be to shim up the transfer case mount brackets, but I wouldn't gain any clearance that way, which would defeat the purpose. This means either I make a whole new bracket, or I have to cut out a 2" section in the centre of this bracket, like I did with the rear gas tank bracket. If you look at the lower section of the crossmember:

It's about 2 1/4" thick. If I can slim that down at the same time I can gain even more clearance. I'm not willing to sacrifice any crossmember strength, however, so that would mean I'd have to use something with a low profile, but much thicker material than the 1/8" wall factory crossmember. I'd originally planned on using a 1/2"X5" flatbar to replace the lower section of the crossmember, but I threw a piece across the frame rails, and my weight could cause it to deflect slightly. Probably not enough to cause issues, but I prefer to over engineer anything I build, so now I'm thinking probably a 5/8 or 3/4" plate instead, as the extra weight won't really be noticable, and the 1/4" or so clearance lost will not even come close to touching the amount I'll save by replacing the factory tube. I tried to make a few paint pictures to help illustrate my point:

So the bottom red line shows the bottom of the transfer case mount. It needs to end up where the red line above it is, 2" higher. The blue lines on the right show the 2" of crossmember that will have to be cut out and will be the same on the left side. The green lines in the bottom left show the 2 1/4" tube that I'd like to replace with plate. Even if I went with 3/4 inch plate, I'd be gaining 3 1/2" of clearance from the factory transfer case crossmember from my modified one. Crap paint illustration with what I hope will be the final product:

If the fab work goes as planned my modified crossmember will bolt straight onto factory location, and the only thing I'll have lost is the mounting location of the guard that wraps around the ujoint for the front drive shaft.
I took a couple measurements:

The crossmember is almost exactly 40 3/4" out to out.


As you can see the mount is not centred on the cross member. It's very close to 19 1/8" from the passenger side edge to the centre of the bolt. I double checked from the driver side back, and the math adds up.

I tacked the cross member to the piece of 1/2X5" plate I had intended on using for replacing the lower tubing so that each end of the cross member will be in the exact spot after the cutting and fabricating as before. I won't cut it free until the alterations are complete. I'll see if I can find the time to cut it apart and weld it all back together during a break at work tomorrow.

I then got looking at the gas tank. The tank is perfectly salvageable. I'd have to sand down the rust and paint it, but that's it. The lines going into the bracket for the fuel pump are what worry me.

I can't see any actual holes or breaks in the lines, but a pinhole can go unnoticed until the truck starts running, so I really don't want to go through the time and effort of cleaning this all up only to have to replace it. I once cut out and replaced the lines that went through this bracket on another 4runner, and honestly it was a pain to do so I might see how much it would cost to replace it. I've never bought a fuel pump for one of these trucks, do they come with the bracket, or do they just sell you the pump that hangs from the bracket in the tank? I'm trying to remember now what it looked like when I last took one apart.
So lastly I tried to work on the front wheels again, and they still won't budge. I'm seriously worried I'm going to have to cut the rims off. I've been spraying them every night I've been out there with penetrating fluid for like a week or so and no dice. I even tried using a 4X4 and a bottle jack from the bottom of one tire to the other side, putting a bunch of pressure on them and then whacking the tip of the tires with a sledge, still no movement. I left it like this:

Probably pretty close to what Jason had suggested. Soaked it again, and left it that way. I just hope that it eventually gives. I really like these rims, and dont' want to have to buy replacements.
Jump to next drivetrain lift post >>
Threw it in the vise and tapped it till it was level. I need to match the same 2" lift that I'm doing with pretty much everything, the easiest way to do that would be to shim up the transfer case mount brackets, but I wouldn't gain any clearance that way, which would defeat the purpose. This means either I make a whole new bracket, or I have to cut out a 2" section in the centre of this bracket, like I did with the rear gas tank bracket. If you look at the lower section of the crossmember:
It's about 2 1/4" thick. If I can slim that down at the same time I can gain even more clearance. I'm not willing to sacrifice any crossmember strength, however, so that would mean I'd have to use something with a low profile, but much thicker material than the 1/8" wall factory crossmember. I'd originally planned on using a 1/2"X5" flatbar to replace the lower section of the crossmember, but I threw a piece across the frame rails, and my weight could cause it to deflect slightly. Probably not enough to cause issues, but I prefer to over engineer anything I build, so now I'm thinking probably a 5/8 or 3/4" plate instead, as the extra weight won't really be noticable, and the 1/4" or so clearance lost will not even come close to touching the amount I'll save by replacing the factory tube. I tried to make a few paint pictures to help illustrate my point:
So the bottom red line shows the bottom of the transfer case mount. It needs to end up where the red line above it is, 2" higher. The blue lines on the right show the 2" of crossmember that will have to be cut out and will be the same on the left side. The green lines in the bottom left show the 2 1/4" tube that I'd like to replace with plate. Even if I went with 3/4 inch plate, I'd be gaining 3 1/2" of clearance from the factory transfer case crossmember from my modified one. Crap paint illustration with what I hope will be the final product:
If the fab work goes as planned my modified crossmember will bolt straight onto factory location, and the only thing I'll have lost is the mounting location of the guard that wraps around the ujoint for the front drive shaft.
I took a couple measurements:
The crossmember is almost exactly 40 3/4" out to out.
As you can see the mount is not centred on the cross member. It's very close to 19 1/8" from the passenger side edge to the centre of the bolt. I double checked from the driver side back, and the math adds up.
I tacked the cross member to the piece of 1/2X5" plate I had intended on using for replacing the lower tubing so that each end of the cross member will be in the exact spot after the cutting and fabricating as before. I won't cut it free until the alterations are complete. I'll see if I can find the time to cut it apart and weld it all back together during a break at work tomorrow.
I then got looking at the gas tank. The tank is perfectly salvageable. I'd have to sand down the rust and paint it, but that's it. The lines going into the bracket for the fuel pump are what worry me.
I can't see any actual holes or breaks in the lines, but a pinhole can go unnoticed until the truck starts running, so I really don't want to go through the time and effort of cleaning this all up only to have to replace it. I once cut out and replaced the lines that went through this bracket on another 4runner, and honestly it was a pain to do so I might see how much it would cost to replace it. I've never bought a fuel pump for one of these trucks, do they come with the bracket, or do they just sell you the pump that hangs from the bracket in the tank? I'm trying to remember now what it looked like when I last took one apart.
So lastly I tried to work on the front wheels again, and they still won't budge. I'm seriously worried I'm going to have to cut the rims off. I've been spraying them every night I've been out there with penetrating fluid for like a week or so and no dice. I even tried using a 4X4 and a bottle jack from the bottom of one tire to the other side, putting a bunch of pressure on them and then whacking the tip of the tires with a sledge, still no movement. I left it like this:
Probably pretty close to what Jason had suggested. Soaked it again, and left it that way. I just hope that it eventually gives. I really like these rims, and dont' want to have to buy replacements.
Jump to next drivetrain lift post >>
Last edited by Dutchbelly; Jul 16, 2011 at 10:54 AM.
Jun 9, 2011 | 08:24 PM
#150
Registered User
Joined: Aug 2009
Posts: 2,173
Likes: 0
From: hohenwald tn.
Wow man them wheels are really stuck I'd say leaving some pressure on them for sure ain't gonna hurt anything, are you sure You can't come to my place on vacation or something I could really use your Fab skills.
Jun 10, 2011 | 02:32 PM
#151
Thread Starter
Registered User
Joined: Apr 2011
Posts: 428
Likes: 0
From: Southern Ontario
Heck I only live 800 miles away, and I've got 20 bucks in my pocket. That should cover the gas right? Lol really wish I could Jason, none of my friends are into toyota's. And yeah, wheels are really seized. I'm running out of ideas. If it was a different time of year I'd even consider throwing the lug nuts on half way and towing it through a plowed field. I'm also wondering if I should lift it up on the side with a tractor and shake it side to side. I really don't want to break anything just to save a pair of rims, though. I might have to look into how much it would be to buy a new set and just cut these off but it would kill me to do it
Jun 10, 2011 | 04:50 PM
#153
Thread Starter
Registered User
Joined: Apr 2011
Posts: 428
Likes: 0
From: Southern Ontario
Continuing the transfer case Xmember
So I didn't have time today at the shop to work on the xmember during breaks. One of the things we had to do was to fix this roof access ladder:

It was on one of our job sites, and the guy running the backhoe mangled it. We salvaged what we could (that would be the rusty/painted steel in the pic) , and spliced in new steel where we couldn't. After we'd got it all straightened and fit up I didn't have enough work for the whole crew, so I punched out a bit early while they finished what work there was. I got a bit done and then I stayed a couple hours late after all the guys left. Was preferrable anyway, there was no one in the building but me, and that's usually when I get more done.

So here I am getting set up. As mentioned in a previous post I need to cut the bottom half of the xmember off, and replace the lower portion with a piece of plate to cut down the height of the xmember.
The xmember is as I left it in my last fab post, and that piece of plate in front of it is there as a guide for when I cut. Sorry the pics are pretty bad, I'm still using my phone as a camera, and it doesn't focus well when lighting isn't perfect.

I set the plate so I would cut everything off flush with the outward legs of the xmember.

I could only cut about halfway through because my guide plate stops me from going much closer with the grinder so I had to flip the xmember around and cut in from the other side.

I don't care how much experience you have cutting steel. Using a guide will always give you a better product.

this is pretty much when you start realising that if your plan doesn't work out, you're screwed.

looks pretty uniform, though.

So I chopped out a section of the upper tube wall with the transfer case mount. I'll explain why.

The distance from the top of the xmember to the underside of the transfer case bracket is 3 7/8". I need to cut out 2".

The thickness of the ends of the xmember is 2". If I were to cut out 2" of material, I would need to slice the bottom wall off the 2" end of the xmember. I don't want to do that. If I left the bottom wall on, my new plate across the bottom would be 1/8" lower than it should be, so if I leave the 1/8 thick section under the transfer case bracket, I've shimmed my bracket back up to where it should be=>2" higher than factory.

As you can see the underside of the 1/8 section of tube has a few components that would stop me from lying it tight to the top of the new plate xmember. I was already expecting this.

I sliced off 2 of the 4 bolts so they would stay close in their alignment, and then welded the sliced off bolts to the plate surrounding this. After that was done, I cut off the other 2 bolts, repeated the process, and ground the welds flush with the underside of the plate. I also completely negleted to take any pics of the process. That leaves me with only the round plate in the centre of the transfer case bracket to contend with. It's attached to the main bolt which holds together the bracket. You can't see it in that pic above because my clamp is on top of it.

I had planned on using this mag-drill to bore out a section of the plate to allow clearance, but didn't realise how darn dull that bit was and it was the only one big enough for the job. I ended up just cutting out the hole with the torch and taking a die grinder to the edges:

the line was to check to see if I was still able to center the bolt for the bracket in the right spot. I did ok, but I had to use the die grinder to widen the hole a bit because I was being cautious with the torch cut. I really didn't want to cut out any more than necessary.

When I was done with the die grinder the bracket fit quite snug and was where I needed it to be.

I welded it up all around the section of xmember wall that I'd left attached.
Once again sorry the pics are so blurry, I'm sure it's a combination of me getting my dirty hands on the lens and also it being a crap camera phone:
This is where I realise I'm an idiot. I don't have the clearance to weld the thing back together because the bracket is now higher than the space I've left between my cuts on the xmember and the plate I'm using to keep my spacing for the bolts into the frame. I'll probably end up bolting the xmember ends to the frame, and then lift my new plate into place and then tack it up, remove the xmember and weld it. Its unfortunate because I really wanted it done today, still holding onto the pipe dream of painting the frame this weekend despite the forecast of rain.
Jump to next drivetrain lift post >>
It was on one of our job sites, and the guy running the backhoe mangled it. We salvaged what we could (that would be the rusty/painted steel in the pic) , and spliced in new steel where we couldn't. After we'd got it all straightened and fit up I didn't have enough work for the whole crew, so I punched out a bit early while they finished what work there was. I got a bit done and then I stayed a couple hours late after all the guys left. Was preferrable anyway, there was no one in the building but me, and that's usually when I get more done.
So here I am getting set up. As mentioned in a previous post I need to cut the bottom half of the xmember off, and replace the lower portion with a piece of plate to cut down the height of the xmember.
The xmember is as I left it in my last fab post, and that piece of plate in front of it is there as a guide for when I cut. Sorry the pics are pretty bad, I'm still using my phone as a camera, and it doesn't focus well when lighting isn't perfect.
I set the plate so I would cut everything off flush with the outward legs of the xmember.
I could only cut about halfway through because my guide plate stops me from going much closer with the grinder so I had to flip the xmember around and cut in from the other side.
I don't care how much experience you have cutting steel. Using a guide will always give you a better product.
this is pretty much when you start realising that if your plan doesn't work out, you're screwed.
looks pretty uniform, though.
So I chopped out a section of the upper tube wall with the transfer case mount. I'll explain why.
The distance from the top of the xmember to the underside of the transfer case bracket is 3 7/8". I need to cut out 2".
The thickness of the ends of the xmember is 2". If I were to cut out 2" of material, I would need to slice the bottom wall off the 2" end of the xmember. I don't want to do that. If I left the bottom wall on, my new plate across the bottom would be 1/8" lower than it should be, so if I leave the 1/8 thick section under the transfer case bracket, I've shimmed my bracket back up to where it should be=>2" higher than factory.
As you can see the underside of the 1/8 section of tube has a few components that would stop me from lying it tight to the top of the new plate xmember. I was already expecting this.
I sliced off 2 of the 4 bolts so they would stay close in their alignment, and then welded the sliced off bolts to the plate surrounding this. After that was done, I cut off the other 2 bolts, repeated the process, and ground the welds flush with the underside of the plate. I also completely negleted to take any pics of the process. That leaves me with only the round plate in the centre of the transfer case bracket to contend with. It's attached to the main bolt which holds together the bracket. You can't see it in that pic above because my clamp is on top of it.
I had planned on using this mag-drill to bore out a section of the plate to allow clearance, but didn't realise how darn dull that bit was and it was the only one big enough for the job. I ended up just cutting out the hole with the torch and taking a die grinder to the edges:
the line was to check to see if I was still able to center the bolt for the bracket in the right spot. I did ok, but I had to use the die grinder to widen the hole a bit because I was being cautious with the torch cut. I really didn't want to cut out any more than necessary.
When I was done with the die grinder the bracket fit quite snug and was where I needed it to be.
I welded it up all around the section of xmember wall that I'd left attached.
Once again sorry the pics are so blurry, I'm sure it's a combination of me getting my dirty hands on the lens and also it being a crap camera phone:
This is where I realise I'm an idiot. I don't have the clearance to weld the thing back together because the bracket is now higher than the space I've left between my cuts on the xmember and the plate I'm using to keep my spacing for the bolts into the frame. I'll probably end up bolting the xmember ends to the frame, and then lift my new plate into place and then tack it up, remove the xmember and weld it. Its unfortunate because I really wanted it done today, still holding onto the pipe dream of painting the frame this weekend despite the forecast of rain.
Jump to next drivetrain lift post >>
Last edited by Dutchbelly; Jul 16, 2011 at 10:53 AM.
Jun 10, 2011 | 08:04 PM
#154
Registered User
Joined: Aug 2009
Posts: 2,173
Likes: 0
From: hohenwald tn.
I know you do this stuff for a living Dutch but I am truly in awe I love to build things but your thought prosess is way out of my league, my dad was a mechanical engineer and people like you and him amaze me.
Jun 10, 2011 | 09:25 PM
#155
Hello Dutch.. I got an idea of what you are trying to do, but that is way above my abilities. The measurement alone has to be exact, an I know you can do it.
On the fuel tank issue. You have to get the bracket seperate. If you get a used one, make sure the return is not plugged up. If I remember right it is the long "J" that goes back to the bottom of the tank.
On a fuel pump. I think Toyota wants around $300 for one, the parts store is around $150-$175. I did the parts store once (ouch), and then I found some on ebay for like $35 shipped. I have done 2 with these. One on mine and one on a friends. They were an exact match. Couldnt tell the difference and both have been working great. I can look up the seller if you need me to.
On the fuel tank they tend to be really rusty. I have a write up on what I did to mine if you have the same problems and it works great. Just check my first post and it will tell you where it is located.
Looking forward to Paint fest. Those rims are really stuck good. Great job.
Jun 10, 2011 | 09:43 PM
#156
Thread Starter
Registered User
Joined: Apr 2011
Posts: 428
Likes: 0
From: Southern Ontario
lol thanks Jason. I'm definitely not an engineer, I've just spent many years working with steel and troubleshooting steel fab issues. My solutions here aren't really that complex. I need to lift things 2", I also need to gain the same clearance, so I find a way to cut out 2" from the brackets while maintaining the same bolt patterns. You get to see the write up without watching me stare at the part for an hour or more scratching my head. Trust me the head scratching is fierce and prolonged.
Jun 10, 2011 | 09:52 PM
#157
Thread Starter
Registered User
Joined: Apr 2011
Posts: 428
Likes: 0
From: Southern Ontario
On the fuel tank issue. You have to get the bracket seperate. If you get a used one, make sure the return is not plugged up. If I remember right it is the long "J" that goes back to the bottom of the tank.
....
On the fuel tank they tend to be really rusty. I have a write up on what I did to mine if you have the same problems and it works great. Just check my first post and it will tell you where it is located.
Looking forward to Paint fest. Those rims are really stuck good. Great job.
....
On the fuel tank they tend to be really rusty. I have a write up on what I did to mine if you have the same problems and it works great. Just check my first post and it will tell you where it is located.
Looking forward to Paint fest. Those rims are really stuck good. Great job.
Jun 11, 2011 | 12:42 AM
#158
Amazing work! Just thought I'd stop by, ...sorry I'm not able to stop in more often, ...you understand, .....overwhelmed, barely getting to sleep at this point, ...zzzzzzzzzzzzzzzzz, WOE, sorry, ...nodded off there! lol.
Night!
Night!
Jun 11, 2011 | 05:45 PM
#159
Thread Starter
Registered User
Joined: Apr 2011
Posts: 428
Likes: 0
From: Southern Ontario
Thanks Chef, and I can only imagine what you're going through. I've always had a long term goal of rebuilding a 22re, but the 12 plagues of your engine rebuild are really giving me second thoughts. You're much more meticulous than I, and whatever could go wrong has gone wrong. I can only imagine what would happen should I undertake the same type of project. I realize you're asleep right now, but if I act like you're awake it's less like I'm talking to myself. Mowahaha ha
Jun 11, 2011 | 06:15 PM
#160
Thread Starter
Registered User
Joined: Apr 2011
Posts: 428
Likes: 0
From: Southern Ontario
Continued work on the truck today. I wiped down the whole frame with degreaser. I then put it on the hoist and cleaned up all the spots where a bit of rust came through the primer.


After I was done with that I threw another coat of primer on the whole thing.
Here's a pic of the products I've been/will be using.

I let the primer set for 45mins or so, the can asks for 30mins, so I played it safe. I then set up the spray gun, mixed some paint and hardener and threw the first coat of black chassis paint on:


I ran out of time, I'll have to do the 2nd coat tomorrow. I had to do the first coat in the shop because the weather was iffy today, but the weather is supposed to be better tomorrow so hopefully I can do it outside in the sun. The lighting inside the shop isn't ideal, I have to keep moving around a halogen stand to see anything well while painting, and I'm still sure I missed a few spots on the front suspension.
After I was done with that I threw another coat of primer on the whole thing.
Here's a pic of the products I've been/will be using.
I let the primer set for 45mins or so, the can asks for 30mins, so I played it safe. I then set up the spray gun, mixed some paint and hardener and threw the first coat of black chassis paint on:
I ran out of time, I'll have to do the 2nd coat tomorrow. I had to do the first coat in the shop because the weather was iffy today, but the weather is supposed to be better tomorrow so hopefully I can do it outside in the sun. The lighting inside the shop isn't ideal, I have to keep moving around a halogen stand to see anything well while painting, and I'm still sure I missed a few spots on the front suspension.


