
Dutchbelly's 1988 4runner Build-up
 Jan 19, 2012 | 02:59 PM
#442
Dutch, that thing will have 'HUGE REWARDING TINGLE UP THE LEG' bonus poitns for ya, far beyond mine, ... You done WELL! I'm sure it'll be CHERRY!
Jan 21, 2012 | 03:09 PM
#443
Thread Starter
Registered User
Joined: Apr 2011
Posts: 428
Likes: 0
From: Southern Ontario
hey Redneckbatmobile, welcome to the thread.
I have been getting little bits done on the truck here and there, but I don't have any pics worth posting. I finished connecting all the brake lines, and filled it up with fluid, and bled the lines. I also started putting back all the things I took out of the engine bay before I cleaned and painted it. There's still a fair way to go, but every little step brings me closer to firing it up. Oh, I also lengthened and reconnected the steering linkage, I'll have to see if I can find the pics I took of that. Hope to have more updates soon.
I have been getting little bits done on the truck here and there, but I don't have any pics worth posting. I finished connecting all the brake lines, and filled it up with fluid, and bled the lines. I also started putting back all the things I took out of the engine bay before I cleaned and painted it. There's still a fair way to go, but every little step brings me closer to firing it up. Oh, I also lengthened and reconnected the steering linkage, I'll have to see if I can find the pics I took of that. Hope to have more updates soon.
Jan 21, 2012 | 04:16 PM
#444
Excellent news..... She'll be roaring down the road like a raped ape(Ok, a baby chimp with the 22re, but strong nonetheless, right? hehe  ) ......... in NO TIME! You've done a LOT in a very reasonable time, Dutch..... Very much a fan of your thread!
) ......... in NO TIME! You've done a LOT in a very reasonable time, Dutch..... Very much a fan of your thread!
Feb 15, 2012 | 11:20 AM
#446
Thread Starter
Registered User
Joined: Apr 2011
Posts: 428
Likes: 0
From: Southern Ontario
Hey guys. Just stopping in to say hi and to let you know I'm still working on the old girl when I can but I've been working 12's and weekends have been busy so it's been slow going. I went out last weekend to hook up a few more odds and ends but I really need to go get my other 4runner from my buddy's where I have it parked and put them side by side for a day to route all the vacuum lines etc. lll update as soon as I have anything interesting to say
Last edited by Dutchbelly; Mar 5, 2012 at 11:57 AM.
Feb 18, 2012 | 02:39 AM
#448

Registered User
Joined: Oct 2005
Posts: 578
Likes: 2
From: New Brunswick, Canada
I'm also keeping an eye on your progress...It's not the easiest time to work on a vehicle here in the "Great White North". Kind of makes me nostalgic for a little Bob & Doug MacKenzie...Eh!
Mar 5, 2012 | 11:25 AM
#449
Thread Starter
Registered User
Joined: Apr 2011
Posts: 428
Likes: 0
From: Southern Ontario
Hey guys have a couple updates. I sold the 89 runner to a buddy who needs it for a bush/wood hauler. I also got more work done hooking up everything under the hood. The alternator is wired now and a buddy made up a bracket for me to hook up it's tensioner bolt. I'm not sure if I mentioned it but the celica engine had a bracket that didn't line up with the alternator. I also hooked up the heater hoses, blocking off the one for the rear heater which I removed. Finished with power steering lines. Vaccuum lines are next and I'm not looking forward to it.
Mar 20, 2012 | 02:11 PM
#450
Thread Starter
Registered User
Joined: Apr 2011
Posts: 428
Likes: 0
From: Southern Ontario
I'm going to have to get a picture or two posted. I'm having trouble finding where to route the lines for the engine. Most of the egr system and many of the vacuum lines are different on the celica engine. One line in particular is the one coming out of what I think is a fuel vapor canister. One line is labelled purge. I think that's the one I'm unsure of. I'll look for picks when I'm done work. I hate asking for help but right now I may have to.
 Mar 21, 2012 | 04:07 PM
#452
Hello Dutchbelly...This hose comes from the Purge just behind to the Throttle Position Sensor and goes below the Plenum to the gold piece that my finger is on. It is near #4 injector.
From the canister on the fender well. It goes from the Purge port to the VSV Valve on the far rear of thevalve cover. I will post a pic of it and edit this when I get a good one.
From the canister on the fender well. It goes from the Purge port to the VSV Valve on the far rear of thevalve cover. I will post a pic of it and edit this when I get a good one.
Last edited by Terrys87; Mar 21, 2012 at 04:10 PM.
Apr 15, 2012 | 02:26 PM
#453
Thread Starter
Registered User
Joined: Apr 2011
Posts: 428
Likes: 0
From: Southern Ontario
Thanks terry. I'm at the farm again today so I'll see if I can use your pic to connect that line. I have progress picks from the last few weekends as well I just can't seem to remember to post them when I'm home. At this point I have a few. Coolant lines the exhaust and the battery to put in before I have to finally figure out the vacuum lines.
Apr 23, 2012 | 06:46 PM
#455
Registered User
Joined: Apr 2009
Posts: 190
Likes: 0
From: Fremont, Ca
I finally replied to you and skimmed your build. Awesome work and very thorough.
https://www.yotatech.com/51907233-post49.html
What I paid for OME rears. Think Fronts billed separately because of the delay. Don't rem the full price.
https://www.yotatech.com/51907233-post49.html
What I paid for OME rears. Think Fronts billed separately because of the delay. Don't rem the full price.
Last edited by chrismcdowell25; Apr 23, 2012 at 07:03 PM.
Jul 6, 2012 | 01:41 AM
#456
Thread Starter
Registered User
Joined: Apr 2011
Posts: 428
Likes: 0
From: Southern Ontario
Update
So first of all, apologies to everyone who was keeping current with this build so faithfully. You all know who you are. I've been pretty busy with a ton of real life things, new job, honey-do-list, and other random things. The new job is the biggest culprit, I'm working afternoons now, so I no longer have the option to go work on the truck after work, I get done at 330 in the morning most of the time. I have been able to go out a bunch of times on weekends but very often got very little done, most of my time being spent trying to remember where I left off last, and where I left parts, tools, etc. All excuses/apologies out of the way, I do have some progress pics.
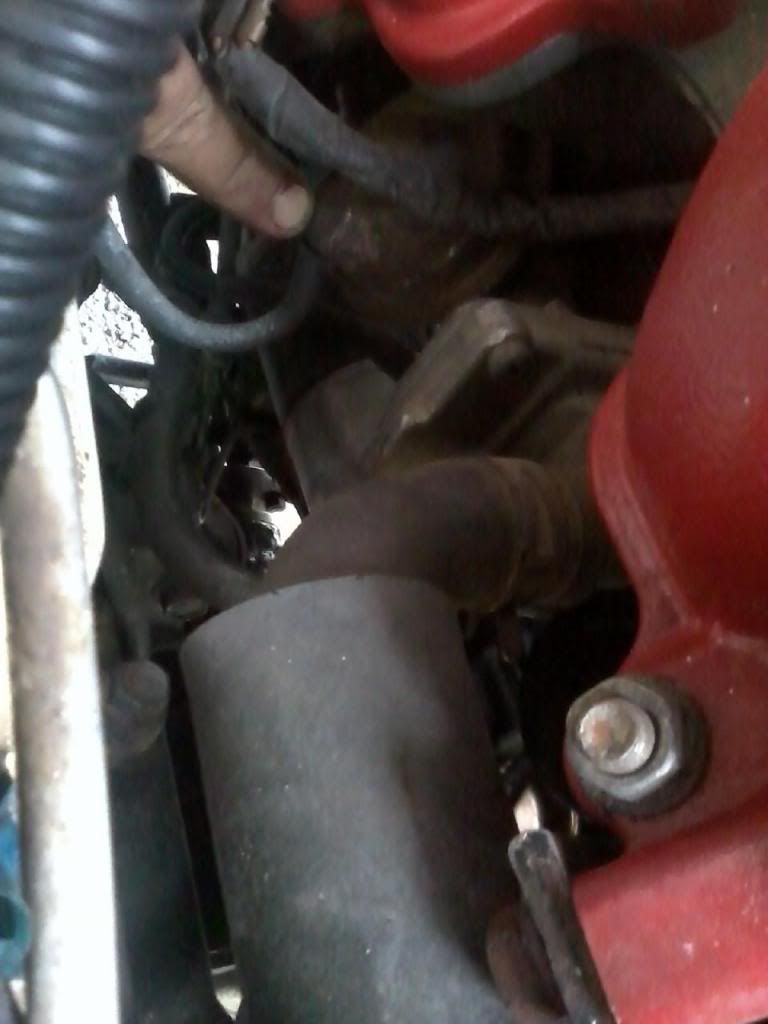
This is when I started bolting things back to the inside of the engine bay. Everything is just hanging loose at this point.
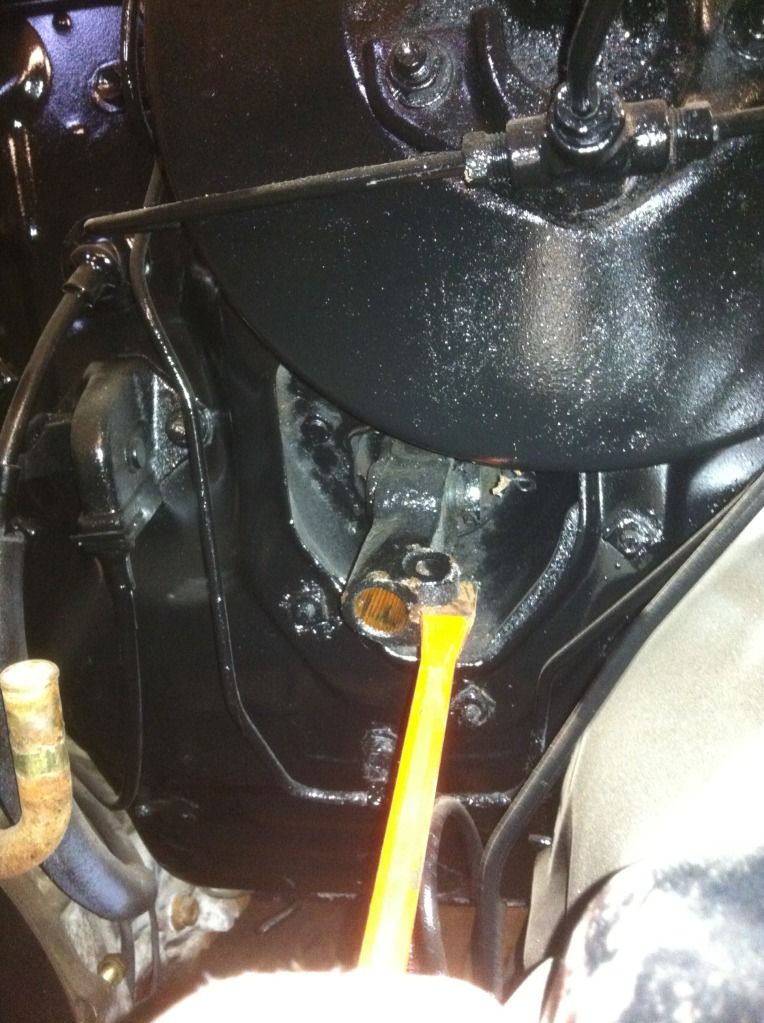
This is me using a wedge to open up the steering connection a bit for the shaft. The shaft itself needed to be extended slightly to account for the body lift.
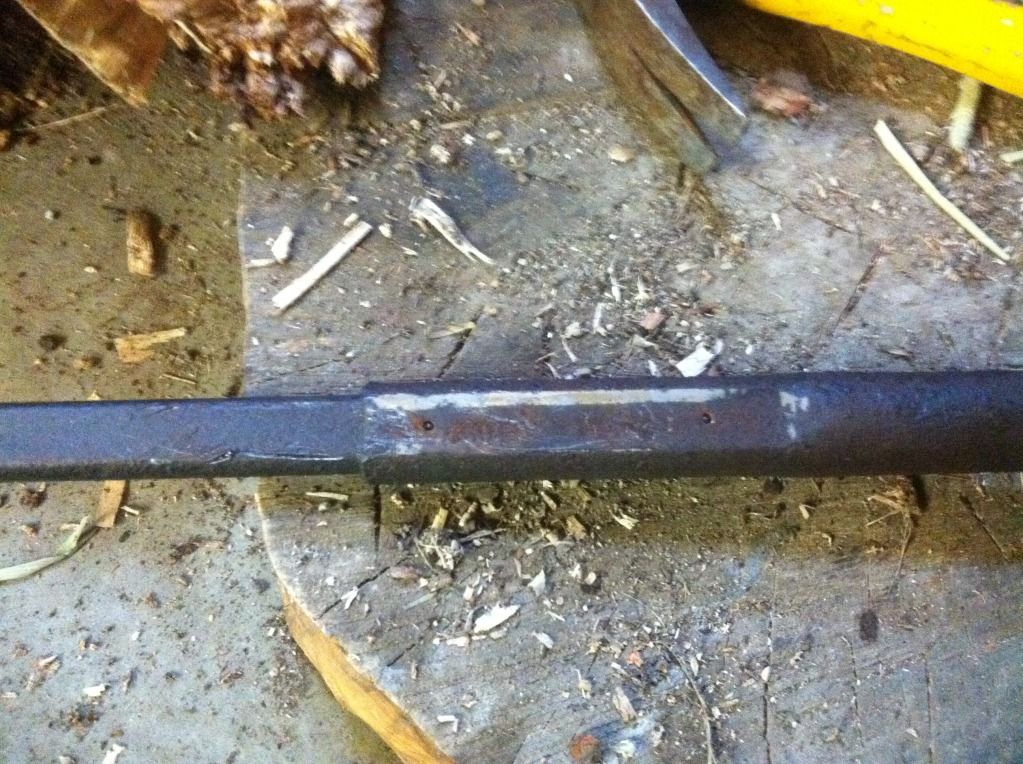
The shaft has two small bolts connecting the two half. They're not actually bolts, just pins made of some sort of plastic. I tried to drill them out and then opted to just set them on fire.

This was very effective.
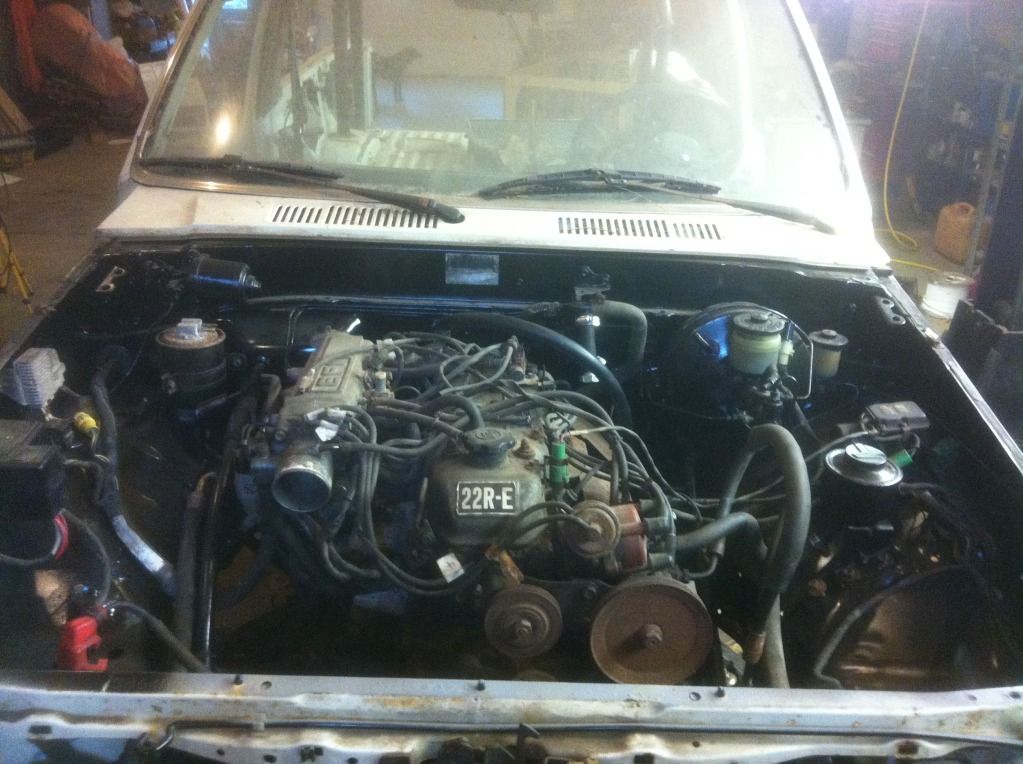
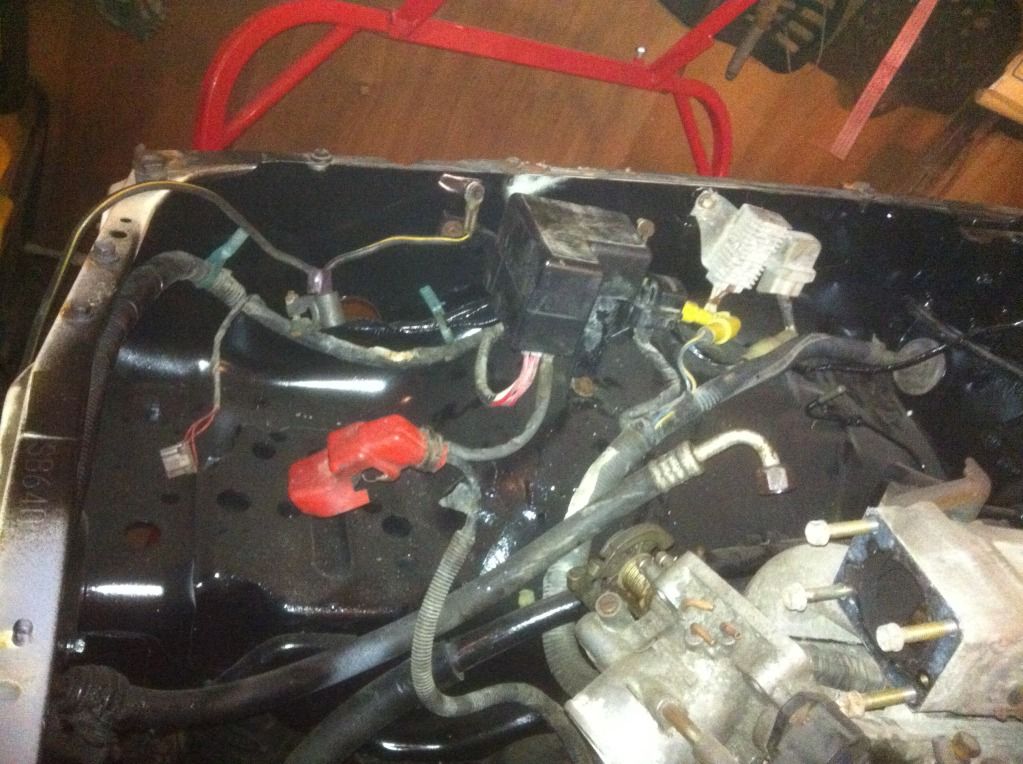
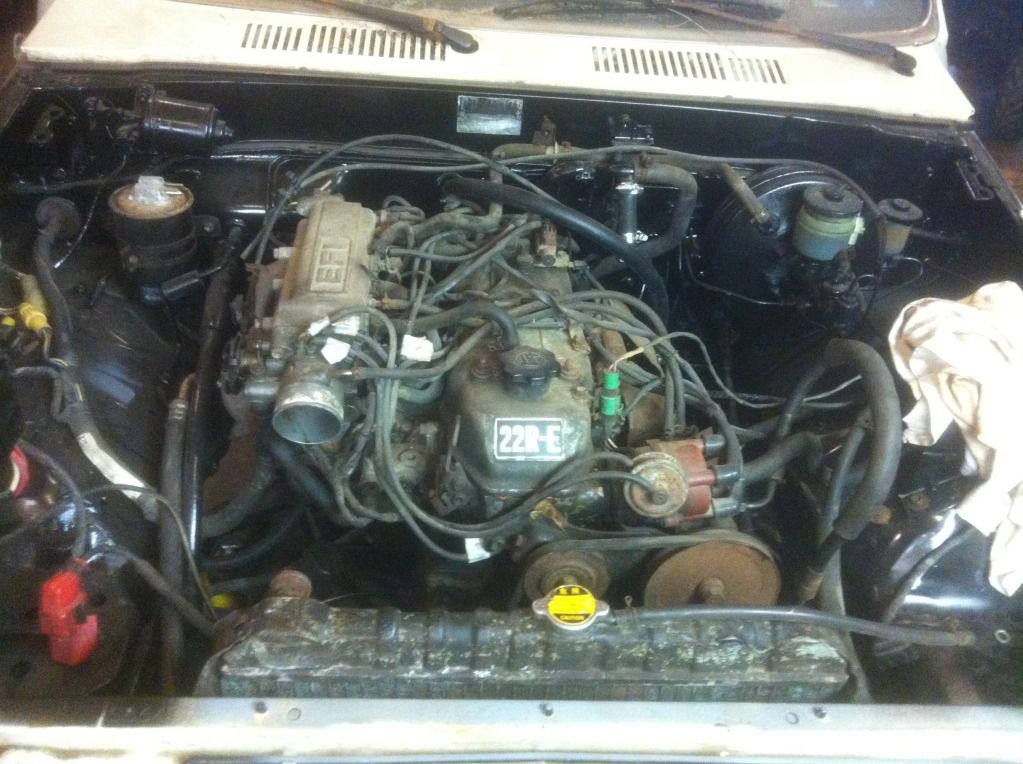
Here's a good overview of how far I was at this point. I have a lot of the components bolted in now. I put in new coolant lines, and capped off the part that would go to the rear heater. I'm not planning on putting the rear heater back in.
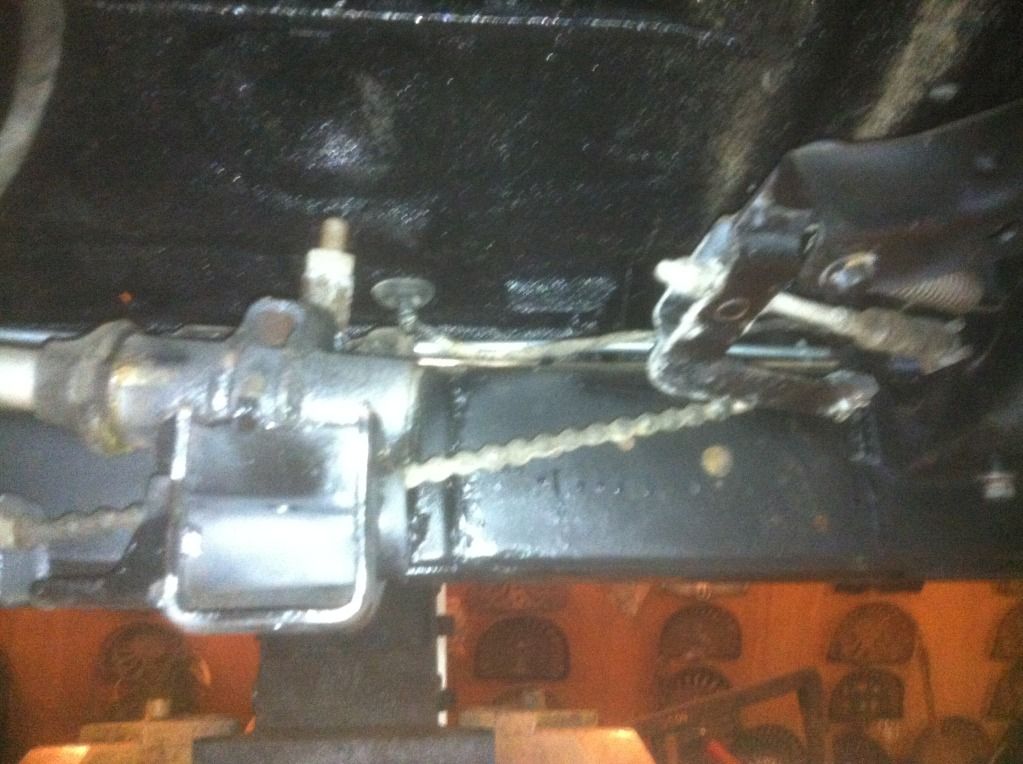
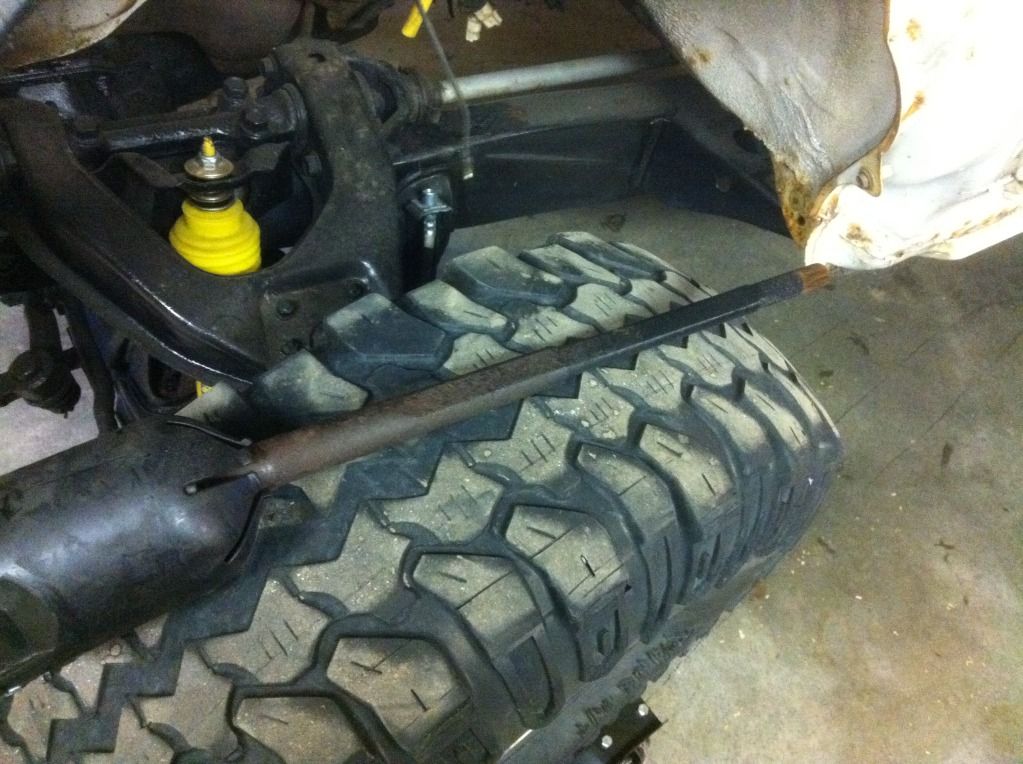
I had trouble getting my phone camera to focus here. This shows the angle of the parking brake cable because of the drive train lift. You can see how much higher the connection on the right is after the lift. I'm not sure yet if this is going to be a problem.
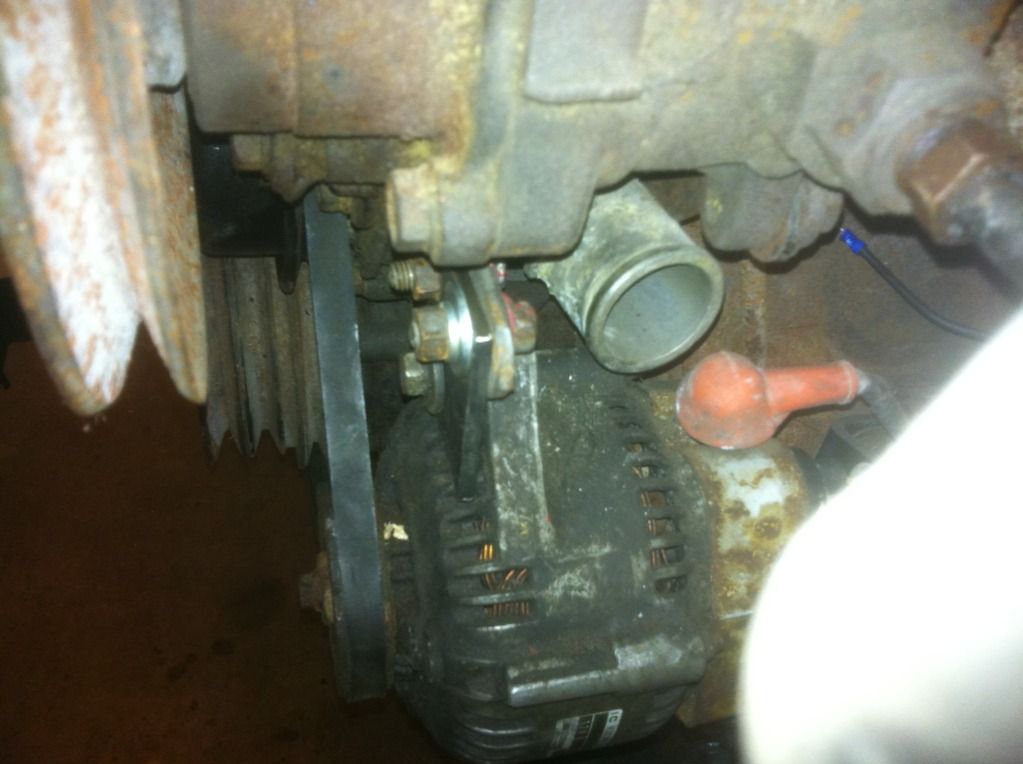
I put the alternator in, and found out the tensioner bracket is different on this year of 22re. I had a buddy with me this day, he made up a little bracket out of plate while I worked on other stuff. Here's another pic:
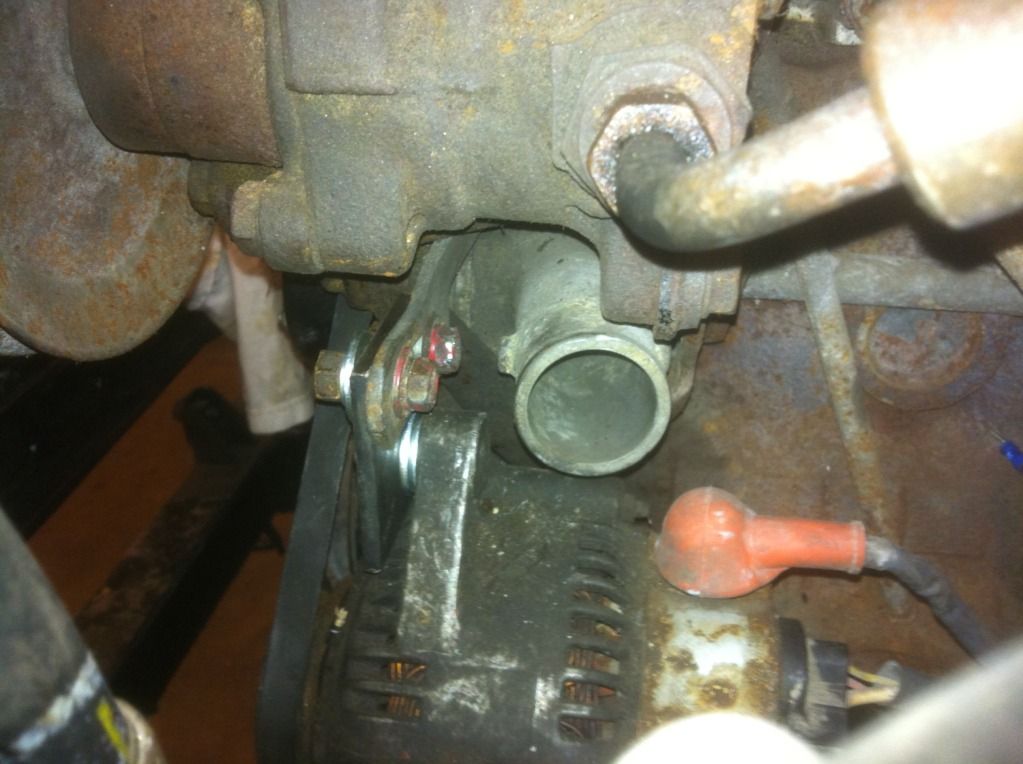
I had to use washers to get everything to line up ok. I'm hoping this works, I still haven't fired up the engine.
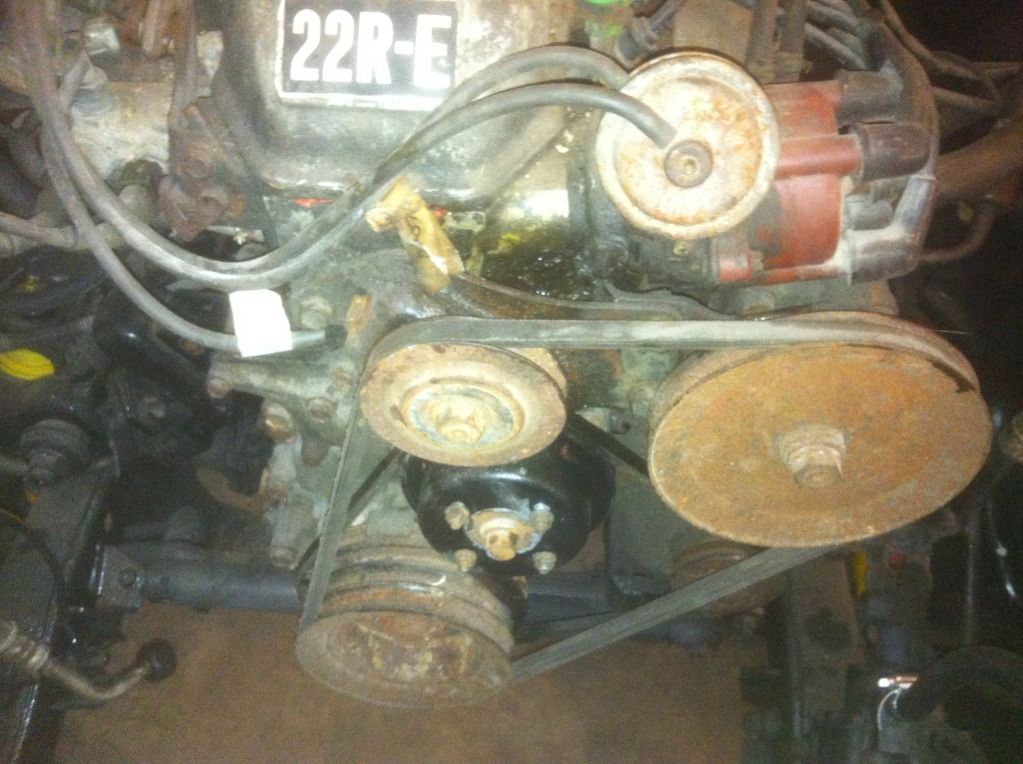
Threw on some belts. This really is an ugly engine. I really hope I'll find the time/money to rebuild the original engine, and clean it up like a lot of you guys have done before putting it back in. I don't even care if it's a fancy paint job, just clean would be nice. I still toy with the idea of capping off all the egr lines, and ripping out all the electronics and vacuum lines and putting in a propane kit. Maybe someday.
Progress pic from later on.

Thats it for the pics I've taken so far. I've also installed most of the exhaust. I had to run a new line between the clutch cylinders as well, which was a royal pain to do. I also cleaned out and freed up the air intake as best I could. I'm going to replace the factory air box with the same setup I had in my last 4 runner. Like this:
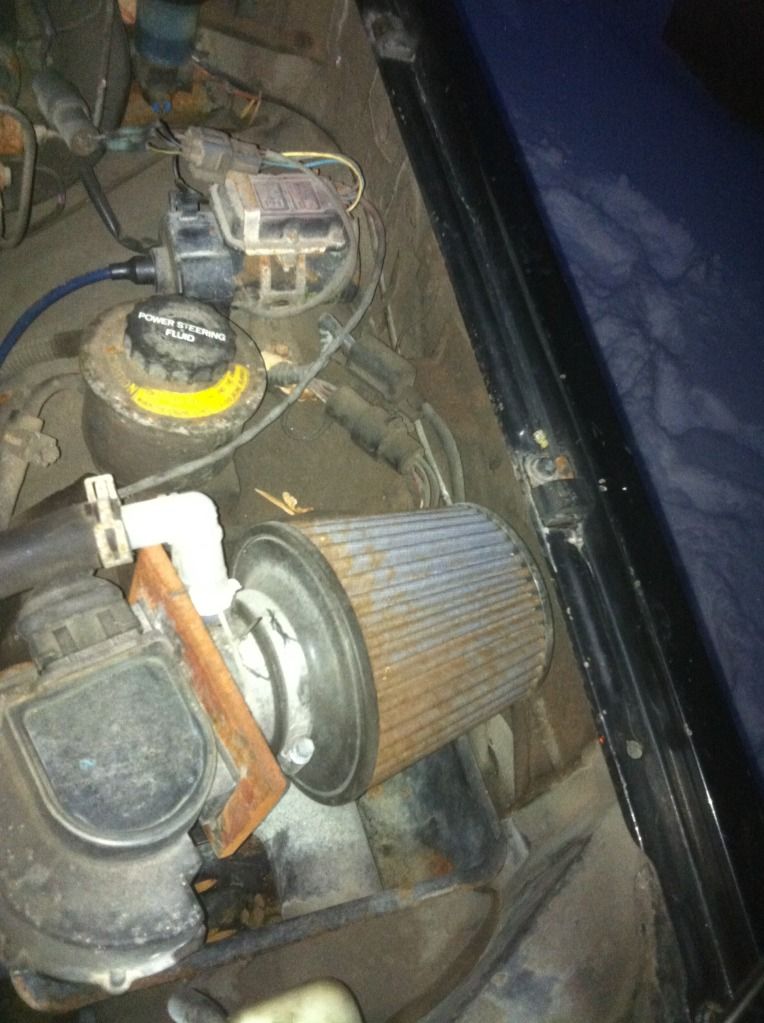
That was the first attempt at my own adapter. The second one should look better. That seems to be it for my update pics. I'll try to get more done soon.
This is when I started bolting things back to the inside of the engine bay. Everything is just hanging loose at this point.
This is me using a wedge to open up the steering connection a bit for the shaft. The shaft itself needed to be extended slightly to account for the body lift.
The shaft has two small bolts connecting the two half. They're not actually bolts, just pins made of some sort of plastic. I tried to drill them out and then opted to just set them on fire.
This was very effective.
Here's a good overview of how far I was at this point. I have a lot of the components bolted in now. I put in new coolant lines, and capped off the part that would go to the rear heater. I'm not planning on putting the rear heater back in.
I had trouble getting my phone camera to focus here. This shows the angle of the parking brake cable because of the drive train lift. You can see how much higher the connection on the right is after the lift. I'm not sure yet if this is going to be a problem.
I put the alternator in, and found out the tensioner bracket is different on this year of 22re. I had a buddy with me this day, he made up a little bracket out of plate while I worked on other stuff. Here's another pic:
I had to use washers to get everything to line up ok. I'm hoping this works, I still haven't fired up the engine.
Threw on some belts. This really is an ugly engine. I really hope I'll find the time/money to rebuild the original engine, and clean it up like a lot of you guys have done before putting it back in. I don't even care if it's a fancy paint job, just clean would be nice. I still toy with the idea of capping off all the egr lines, and ripping out all the electronics and vacuum lines and putting in a propane kit. Maybe someday.
Progress pic from later on.
Thats it for the pics I've taken so far. I've also installed most of the exhaust. I had to run a new line between the clutch cylinders as well, which was a royal pain to do. I also cleaned out and freed up the air intake as best I could. I'm going to replace the factory air box with the same setup I had in my last 4 runner. Like this:
That was the first attempt at my own adapter. The second one should look better. That seems to be it for my update pics. I'll try to get more done soon.
 Jul 11, 2012 | 04:12 PM
#459
You have come along ways on your build. Glad to see your back. Hope all is going well. All of the small steps add up and you should be starting to see some light at the end of the tunnel.
Aug 15, 2012 | 05:48 PM
#460
Thread Starter
Registered User
Joined: Apr 2011
Posts: 428
Likes: 0
From: Southern Ontario
Hey guys, it's about time I updated my thread again. I haven't had much time to make it out to the farm as I'm really trying to focus on work. Almost a year ago I resigned from the structural steel company I was with, and started a new job at a company that makes pressure vessels, boilers, etc. Long story short I've been doing my best to work my way up the ranks at the new company, which has required me to spend a lot of hours at work, and not on my project. I'm explaining this in the hopes of reassuring anyone who might be thinking the project has been abandoned. This is not the case. I went back on dayshift this week for more training, which is giving me the chance to go work on the truck in the evenings again. Since the last post I've hooked up the clutch lines. Most of you are probably aware these trucks have hydraulic clutches with master/slave cylinders. As soon as I hooked the lines back up and tried bleeding them I ran into trouble. I couldn't get any fluid to move anywhere, and found out the bleeder screw on the slave cylinder was plugged. I cleaned that out, and then still couldn't get the master to do much of anything. I figured the master cylinder was screwed, so I pulled it out, which was a royal pain in the butt, every year that goes by seems to add a few pounds to the ol Dutch belly, and I never did fit well underneath the dash of one of these trucks. I finally released the connection between the clutch pedal and the cylinder only to fine it perfectly operational while outside of the truck. I'm sure I'm the only person in the universe that has experienced this. <=sarcasm. I connected everything again, and was happy to find the cylinder continued to be functional after being installed in the truck. I promptly discovered leaks in the clutch line. On a later night I replaced the entire line only to find out the slave cylinder was seized. This truck will be comprised entirely of new parts by the time it travels it's first Mile/Kilometer, as I opted to just buy a new one. It was only 20 bucks or so. I'm going to break here, I have more updates, hope to talk about them as well tonight, but I'd like to make sure I get at least some information out to the guys that have always been faithful (and forgiving) readers. You know who you are.


