DIRTCO's 1986 4Runner Build-Up Thread
 02-02-2009, 06:40 PM
#441
Registered User
Thread Starter
Join Date: May 2007
Location: Summit County, Colorado
Posts: 1,441
Likes: 0
Received 0 Likes
on
0 Posts
Thanks!
I think it turned out pretty good, the shifter fits in that location really well. 
You can have all of that linkage stuff, I was going to throw it away but thought you might want it.
You can have all of that linkage stuff, I was going to throw it away but thought you might want it.
 02-02-2009, 06:55 PM
#442
Registered User
Join Date: Apr 2006
Location: Aurora, CO
Posts: 2,018
Likes: 0
Received 0 Likes
on
0 Posts
02-02-2009, 08:44 PM
#443
Registered User
iTrader: (1)
Join Date: Nov 2006
Location: Clarkston,WA
Posts: 363
Likes: 0
Received 0 Likes
on
0 Posts
Pictures
You did a great job showing you Rail Shifter install. Looks great. If you send those photos, I'll post a couple on my website if you don't mind.
Great job keep up the good work on the build.
Great job keep up the good work on the build.
02-03-2009, 05:13 PM
#444
Registered User
Thread Starter
Join Date: May 2007
Location: Summit County, Colorado
Posts: 1,441
Likes: 0
Received 0 Likes
on
0 Posts
02-03-2009, 05:18 PM
#445
Registered User
Thread Starter
Join Date: May 2007
Location: Summit County, Colorado
Posts: 1,441
Likes: 0
Received 0 Likes
on
0 Posts
Not a problem, you can use the pictures of my install. I'll E-mail you the higher quality ones as soon as I get some time.
02-03-2009, 11:15 PM
#446
Registered User
Join Date: Sep 2008
Location: Edmonton, AB
Posts: 62
Likes: 0
Received 0 Likes
on
0 Posts
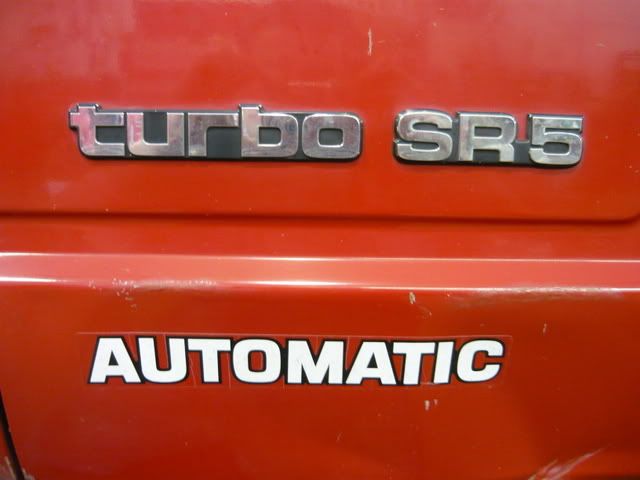
nice build man, I love watching your rig come together. have you gotten rid of the AUTOMATIC decal on the tailgate yet? man that decal would bother me so bad!
02-06-2009, 04:49 PM
#448
Registered User
Thread Starter
Join Date: May 2007
Location: Summit County, Colorado
Posts: 1,441
Likes: 0
Received 0 Likes
on
0 Posts
 02-06-2009, 04:58 PM
#449
Registered User
Thread Starter
Join Date: May 2007
Location: Summit County, Colorado
Posts: 1,441
Likes: 0
Received 0 Likes
on
0 Posts
Thanks, I got lucky with how close in size the Rail Shifter was compared to the 4wd shifter openning. It took a little time to figure out the ergonomics of all the switches and stuff, but it mainly came down to where everything would fit.
02-06-2009, 05:49 PM
#450
 02-07-2009, 05:29 PM
#451
Registered User
Thread Starter
Join Date: May 2007
Location: Summit County, Colorado
Posts: 1,441
Likes: 0
Received 0 Likes
on
0 Posts
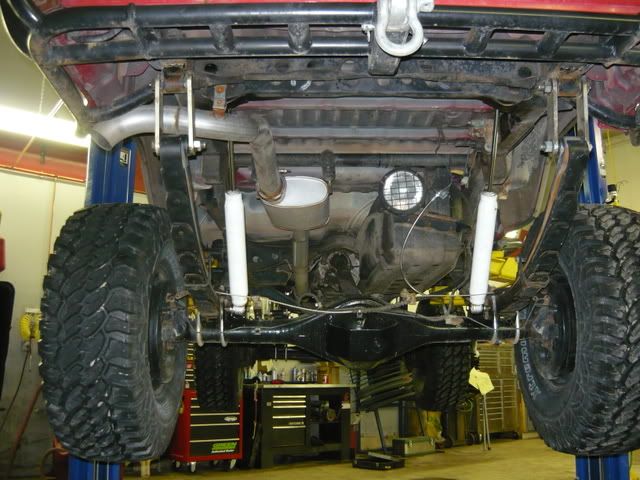
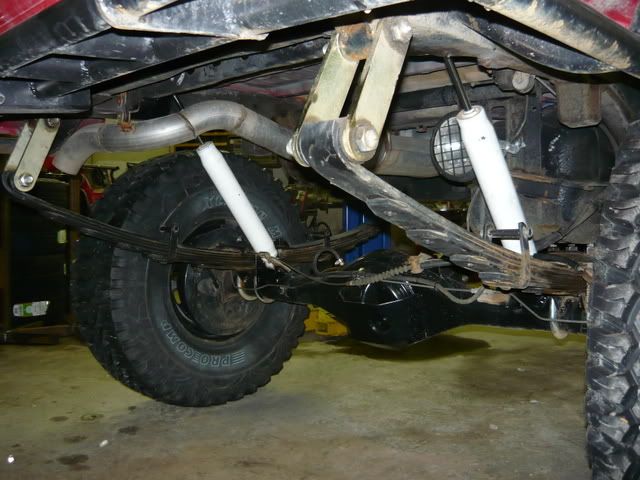
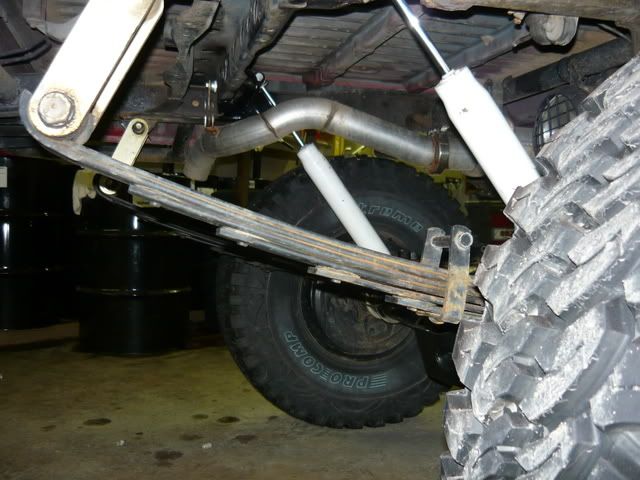
It depends on who makes the shock, most the nice higher end shock mount the way you are talking about with shock body above the shaft. These are some cheap Skyjackers and were designed to mount the other way. I will be replacing these with some nicer shocks later.
02-07-2009, 05:42 PM
#452
Registered User
Thread Starter
Join Date: May 2007
Location: Summit County, Colorado
Posts: 1,441
Likes: 0
Received 0 Likes
on
0 Posts
I spent the day in the shop, working on wrapping up a couple smaller things.
First, I installed my new steering wheel. I'm really not a big fan of the stock steering wheels, especially with the hydro assist. I picked up a 13" Grant wheel and adapter. The last truck had a 11" wheel, which was way too small, this one feels perfect. It really give's a whole new feel to driving the truck.
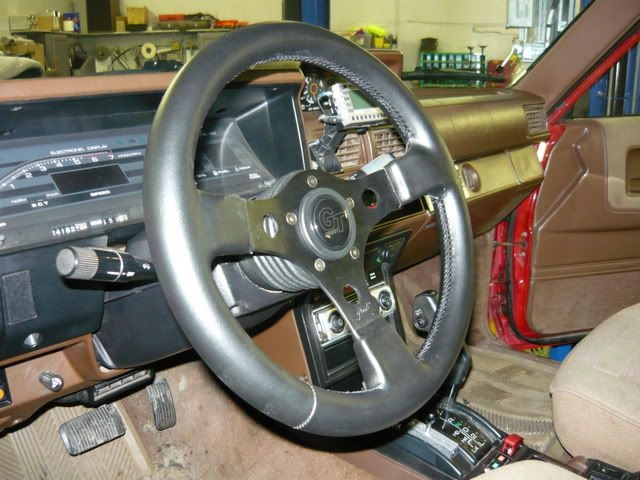
First, I installed my new steering wheel
. I'm really not a big fan of the stock steering wheels, especially with the hydro assist. I picked up a 13" Grant wheel and adapter. The last truck had a 11" wheel, which was way too small, this one feels perfect. It really give's a whole new feel to driving the truck.
02-07-2009, 05:49 PM
#453
Registered User
Looking good! I figured you were almost done with this and it got me to thinking about how sad you are going to be when you have nothing to wrench on or modify. So, with deep concern for you and your well being, I went out and bought a 4runner that I'd be willing to give you for yours. No no I don't want any thanks I just want to be sure you're happy.
Where do you want to meet to do the trade?
Just kidding. Keep up with the updates and pictures!!!!!
Where do you want to meet to do the trade?
Just kidding. Keep up with the updates and pictures!!!!!
02-07-2009, 06:01 PM
#454
Registered User
Thread Starter
Join Date: May 2007
Location: Summit County, Colorado
Posts: 1,441
Likes: 0
Received 0 Likes
on
0 Posts
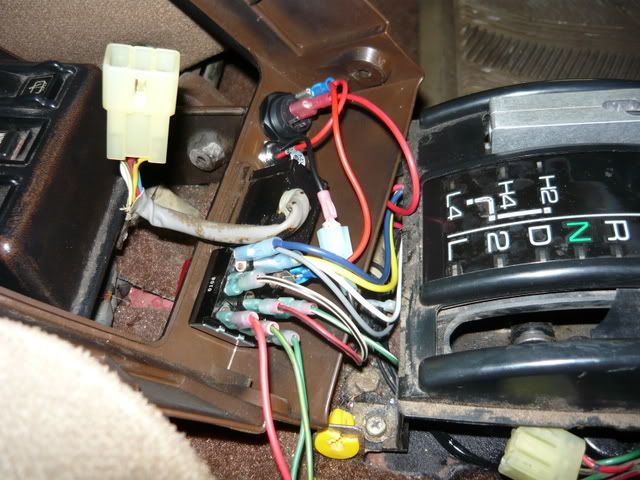
Next up was finishing the tranmission controller. I left off with everything mounted, but still needing to wire the transmission up to the controller. I spent some time going through my FSM and found which wires control the solenoids.
The three wires on the right are what controls the shift solenoids. While I'm sure that there are differances between differant years, I found that for my 86 4Runner the following.
Yellow - Torque Converter
White - Sol. 1
Black w/ Yellow - Sol. 2
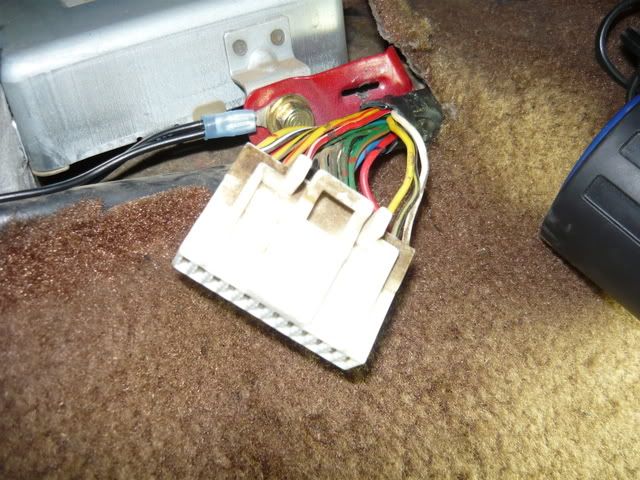
I then cut the wires, extended both sides and started wiring up the switch.
The three wires on the right are what controls the shift solenoids. While I'm sure that there are differances between differant years, I found that for my 86 4Runner the following.
Yellow - Torque Converter
White - Sol. 1
Black w/ Yellow - Sol. 2
I then cut the wires, extended both sides and started wiring up the switch.
02-07-2009, 06:25 PM
#455
Registered User
Thread Starter
Join Date: May 2007
Location: Summit County, Colorado
Posts: 1,441
Likes: 0
Received 0 Likes
on
0 Posts
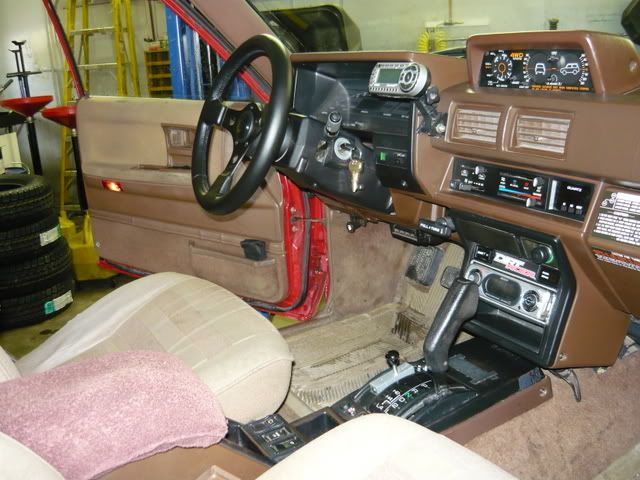
After moving some wires around, moving some other wires around and overall fighting with the thing for a while I got got everything in place and mounted. I left the middle center console section out because the twin sticks for the t-case will be in that general area.
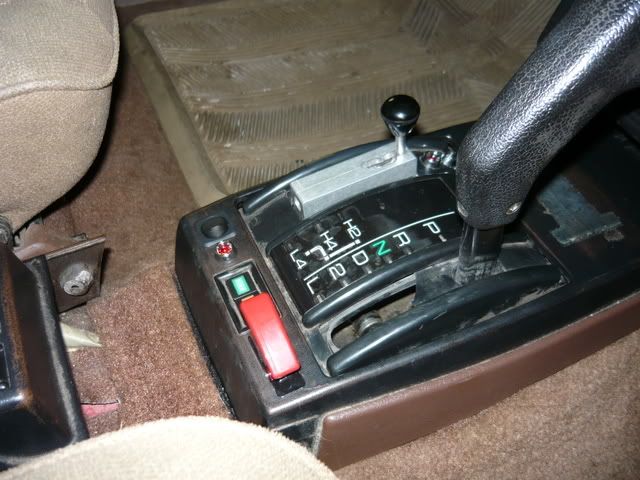
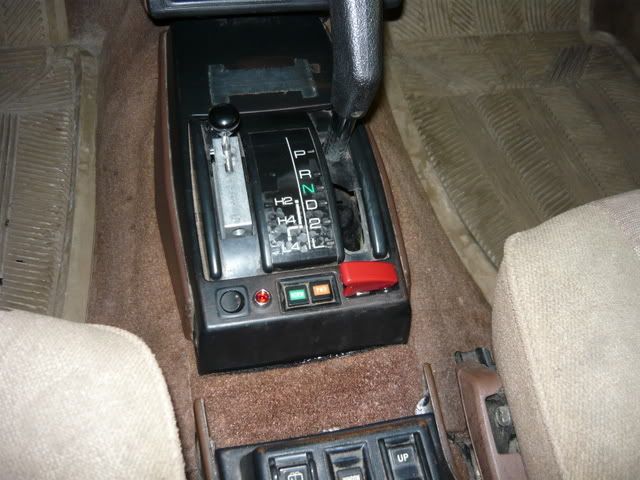
Then I took the thing for a drive and found the controller works really well. I don't think it would be very practical for using all the time / everyday, but on the trail and going over steep mountain passes it should be awesome. It's so nice to control the shifting and TC lock up. If you are going to install this make sure to take the time and wire up a TC switch, you can really feel a differance turning it on/off. While the contoller worked well, I had two of the LED's stop working I checked the wiring the best I could (without tearing the thing all the way apart) and I think it's the LED's, not the wiring.
Then I took the thing for a drive and found the controller works really well. I don't think it would be very practical for using all the time / everyday, but on the trail and going over steep mountain passes it should be awesome. It's so nice to control the shifting and TC lock up. If you are going to install this make sure to take the time and wire up a TC switch, you can really feel a differance turning it on/off. While the contoller worked well, I had two of the LED's stop working
I checked the wiring the best I could (without tearing the thing all the way apart) and I think it's the LED's, not the wiring.
02-07-2009, 06:37 PM
#456
Registered User
Thread Starter
Join Date: May 2007
Location: Summit County, Colorado
Posts: 1,441
Likes: 0
Received 0 Likes
on
0 Posts
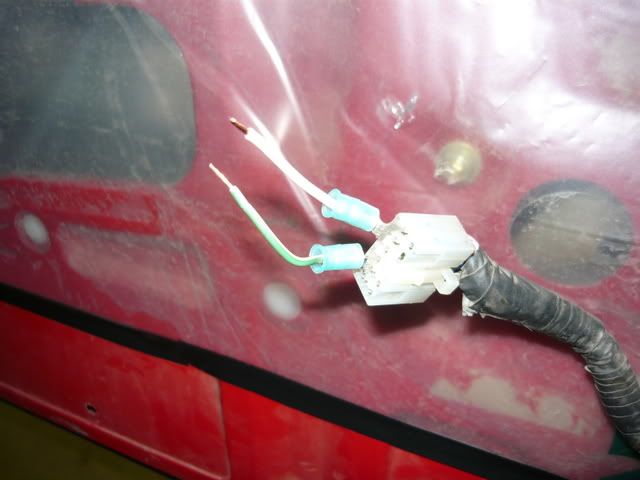
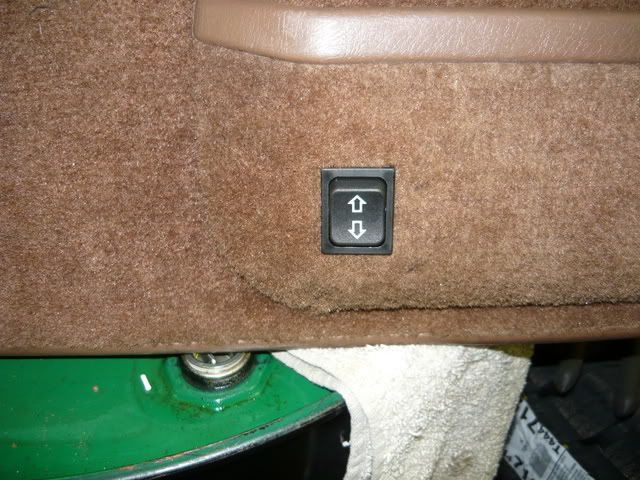
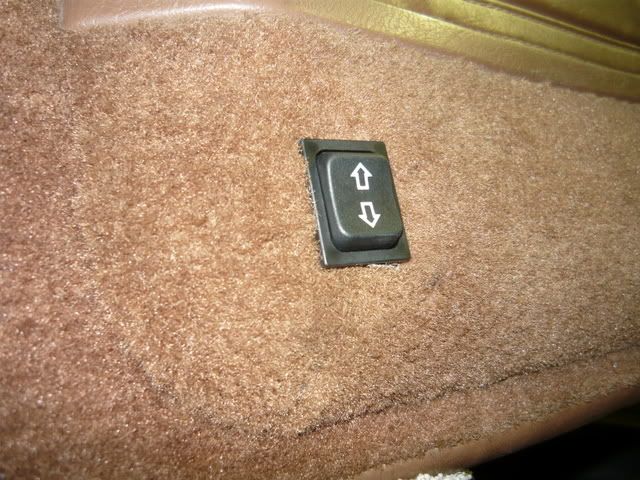
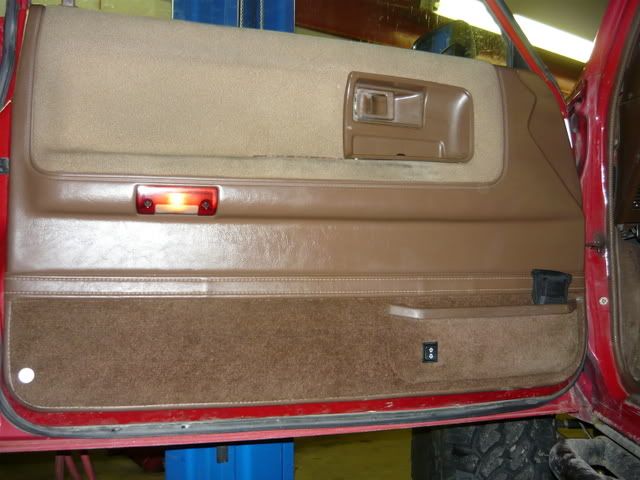
Then I moved on to a couple little things that have been bothering me for a while. First was the broken door lock switch, it didn't seem like a big deal when it was stock but after the SAS it's a pain to jump up into the cab to unlock the pass. side door. Since it's pretty much impossible to find used Turbo SR5 parts I decided to modify what I had. I got a universal power window switch and did some more research in the FSM.
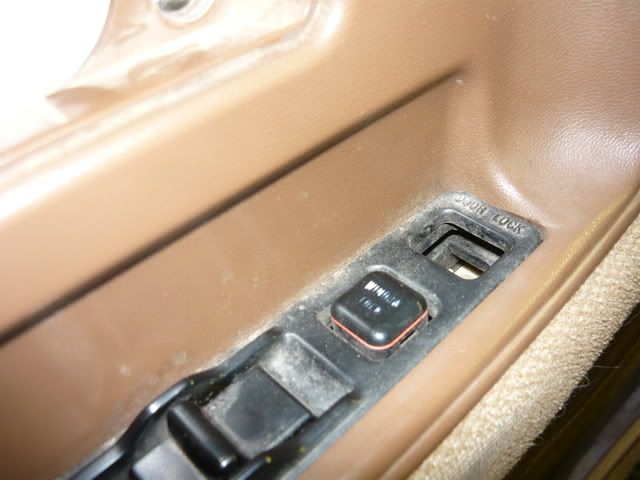
Brown w/ white - Lock
Pink w/ white - Unlock
White w/ black - Ground
Connect the Lock/Unlock wires to the ground and it works!
I mounted the switch in the corner of the map pocket, it's easy to reach down and hit it or push it when your out of the truck
Brown w/ white - Lock
Pink w/ white - Unlock
White w/ black - Ground
Connect the Lock/Unlock wires to the ground and it works!
I mounted the switch in the corner of the map pocket, it's easy to reach down and hit it or push it when your out of the truck
Last edited by DIRTCO; 02-07-2009 at 06:41 PM.
02-07-2009, 06:52 PM
#457
Registered User
Thread Starter
Join Date: May 2007
Location: Summit County, Colorado
Posts: 1,441
Likes: 0
Received 0 Likes
on
0 Posts
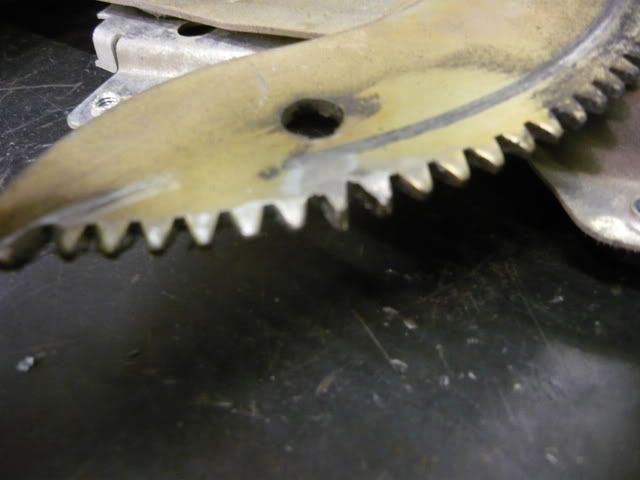
While I had the door apart I decided to try and fix the window regulator. I knew that the teeth were stripped out, it wouldn't close very well and would fall about a 1/4 inch as you were driving.
This is what I found

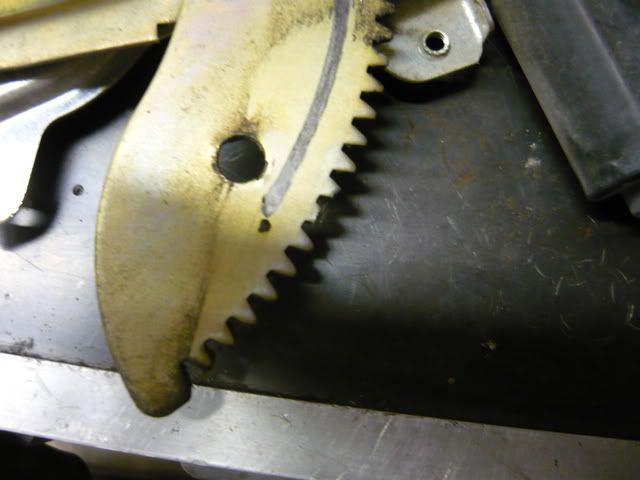
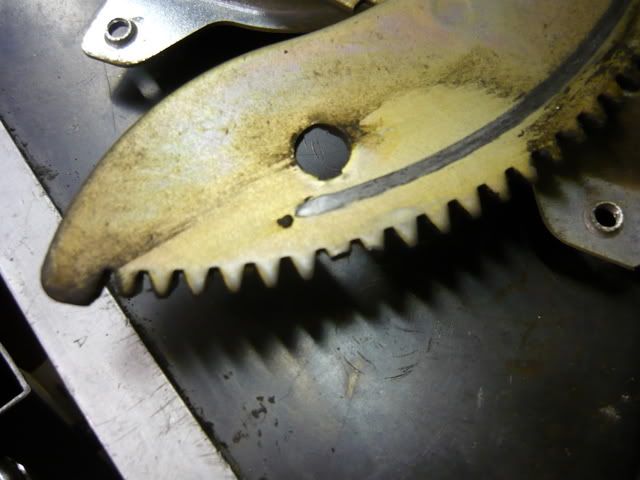
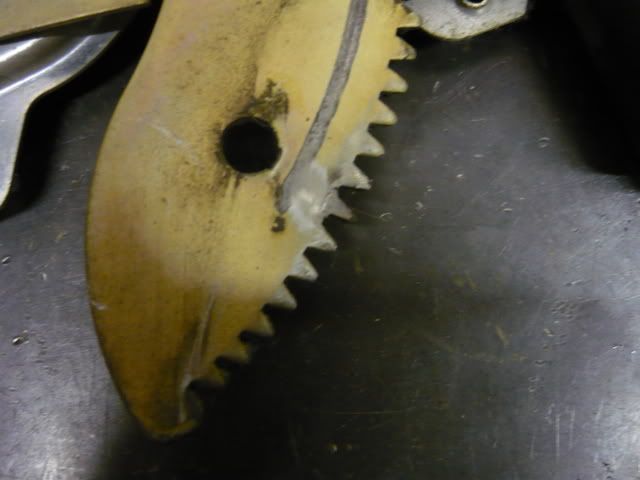
I used the the welder to build up some metal, then hit it with the grinder and Dremel tool. I really didn't think this was going to work, but after looking at the finnished product I had a little hope.
This is what I found
I used the the welder to build up some metal, then hit it with the grinder and Dremel tool. I really didn't think this was going to work, but after looking at the finnished product I had a little hope.
02-07-2009, 06:57 PM
#458
Registered User
Thread Starter
Join Date: May 2007
Location: Summit County, Colorado
Posts: 1,441
Likes: 0
Received 0 Likes
on
0 Posts
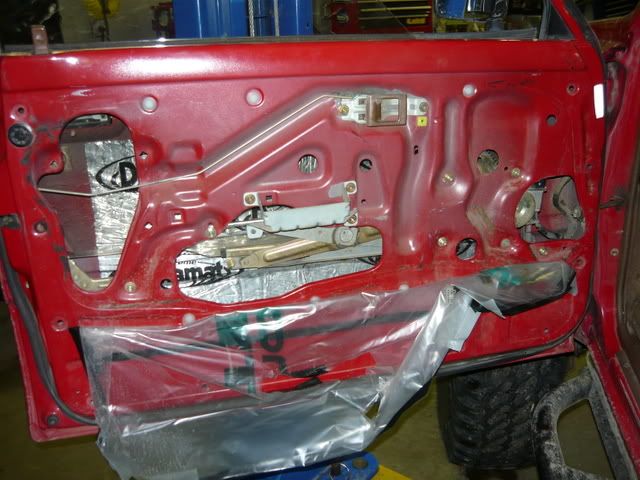
I re-installed everything and tested the window out, it works just like new
I don't really know how long it will last, but it took me less than an hour so I'm not too worried about it.
I don't really know how long it will last, but it took me less than an hour so I'm not too worried about it.
02-07-2009, 07:07 PM
#459
Registered User
Thread Starter
Join Date: May 2007
Location: Summit County, Colorado
Posts: 1,441
Likes: 0
Received 0 Likes
on
0 Posts
Looking good! I figured you were almost done with this and it got me to thinking about how sad you are going to be when you have nothing to wrench on or modify. So, with deep concern for you and your well being, I went out and bought a 4runner that I'd be willing to give you for yours. No no I don't want any thanks I just want to be sure you're happy.
Where do you want to meet to do the trade?
Just kidding. Keep up with the updates and pictures!!!!!
Where do you want to meet to do the trade?
Just kidding. Keep up with the updates and pictures!!!!!

That's funny! I was just thinking today that once I pretty much finnish the Turbo 4Runner that I'm going to have to start some kind of another project. I've gotten so used to building rigs that I don't know what I would do if there was nothing to really do on the rig, I think I might have to start planning the next project soon. Maybe a old school VW or rally car
 02-07-2009, 07:18 PM
#460
Registered User
Just a thought.


