
dakotawho's 1987 Pickup Build-Up Thread
 May 9, 2013 | 07:36 PM
#401


If you know where to look you can visually see the cracks (most of the time) just takes the time to clean it up and inspect, by all means take it to a shop if your unsure.
I think head studs are overated for most builds. And they make it a pain for clearance on install and removal on engine in vehicle.
If i had a potent engine that was worth the $$$ for head studs,
I think head studs are overated for most builds. And they make it a pain for clearance on install and removal on engine in vehicle.
If i had a potent engine that was worth the $$$ for head studs,
May 9, 2013 | 09:33 PM
#402
Registered User
Joined: Jul 2012
Posts: 2,365
Likes: 4
From: Idaho
If you know where to look you can visually see the cracks (most of the time) just takes the time to clean it up and inspect, by all means take it to a shop if your unsure.
I think head studs are overated for most builds. And they make it a pain for clearance on install and removal on engine in vehicle.
If i had a potent engine that was worth the $$$ for head studs,
I think head studs are overated for most builds. And they make it a pain for clearance on install and removal on engine in vehicle.
If i had a potent engine that was worth the $$$ for head studs,

oh wait your talking about head studs an i was suggesting "intake and exhaust studs"
i dropped mine in with not a single clearance issue with the "intake and exhaust studs" an working with my roommate kris not a single curse word THAT shows the studs werent in the way an the engine went in so easy i nearly called gunniss book about it
"yep kris didnt even get a single flustered anger moment...nope not a single cuss..it is a new record! awesome!"

@Dakota you have an intake manifold the LCE site has for carbed setups too give um a call it certainly makes intake gasket install a lot easier as well
Last edited by Cyberhorn The Dragon; May 9, 2013 at 09:39 PM.
May 11, 2013 | 01:16 PM
#403
Thanks for the tip Cyber, looks like a much better solution than what it came with from the factory, I'll think about it but gotta keep her on a budget  You go to LCE and your talking serious $$$
You go to LCE and your talking serious $$$
May 11, 2013 | 02:59 PM
#404
Actually, LC engineering has fairly decent deals on things like Exhaust stud kits and other studs and valve clearance adjuster screws... actually on quite a few things they are okay on price. Other things? Yes, they can get quite out of hand with lofty pricing! Hahaha
Hahaha
May 11, 2013 | 08:09 PM
#405
Registered User
Joined: Jul 2012
Posts: 2,365
Likes: 4
From: Idaho
Actually, LC engineering has fairly decent deals on things like Exhaust stud kits and other studs and valve clearance adjuster screws... actually on quite a few things they are okay on price. Other things? Yes, they can get quite out of hand with lofty pricing! Hahaha
Hahaha
May 12, 2013 | 10:27 AM
#407
Registered User
Joined: Jul 2012
Posts: 2,365
Likes: 4
From: Idaho
May 12, 2013 | 06:03 PM
#408
@Cyber
I hear ya about protecting the investment....I'm just thinking about future removal, would make header and exhaust install a bit easier, along with manifold gaskets....
@Chef
Yeah your right...kinda... haha for 7 studs or however many it is 17$ seems like a lot haha. Gosh it sucks to be in high school making no money
@Terry
I'm thinking about it too now that cyber brought it up
Haven't got to call engnbldr yet.... Ended up mowing all weekend...nice for cash flow but stinks for personal time lol.
I was talking to my buddy, he has a yota too!(Poor truck gets abused) Anyways he has a clunk/clank in his front end when he locks the front wheels..Don't have to have transfer in 4wd...You can run one side locked and the other not locked,but when both are locked you'll be driving and every few feet clunk/clank... You guys got any idea what it might be, just trying to help him diagnose...I searched but didn't really see anything.
May 12, 2013 | 07:11 PM
#409
Registered User
Joined: Jul 2012
Posts: 2,365
Likes: 4
From: Idaho
basic diagnosis plan dakota
check obvious things
id grab hold on his front driveshaft an give it some good pulls an tugs if it clunks bad Ujoints
his IFS or SFA ?
if IFS jack up front let it hang the wheels free of the ground an tug on the bottoms of the wheels straight out clunks.. bad ball joints bigger clunks bad control arm bushings
SFA : same thing get the wheels off the ground check the lower an upper bearings on the axle there should not be any clunkin
his getting the sound when half the front is locked in sounds like one side has an internal issue with the hub which a quick disassemble could show
mine the PO left the locking washer unbent an mine was loose enough to eat the rear grease seal thankfully the bearings didnt get munched as well
May 12, 2013 | 09:39 PM
#410
His is IFS
I didn't suspect the driveshaft because, shouldn't it be moving for it to make a noise....In order for it to move don't you have to be in 4 hi or lo?(We weren't locking the transfer in)
Also Cyber, you must have misunderstood, it's only making the sound when both sides are locked...It makes not a peep when one side is locked and the other side is not. It doesn't matter if the drivers is locked and the pass isn't or passenger locked drivers isn't. Only when both hubs are locked does it go clunk/clank, don't need the transfer in 4wd to do it either.
May 12, 2013 | 10:42 PM
#411
Registered User
Joined: Jul 2012
Posts: 2,365
Likes: 4
From: Idaho
ok sorry for the misunderstanding i had a long day working on mine (go check my thread)
so it only happens when both hubs are locked an being in 4wh dont matter happens every so many feet
tooth or teeth on the ring gear would be my best guess ya could jack the front end up transfer case in neutral lock the hubs an turn it see if you can feel it clunk not sure why it'd only do it with both hubs locked an not just one but the only thing really moving with the hubs locked an transcase not in 4wh is the driveshaft half shafts an 3rd member on what would be the coasting side of the gears taking the brunt of the pressure as the engine isnt pushing the gears just the forward motion of the truck
id also check the shafts comin outa the 3rd to the wheels
i really dont know
May 12, 2013 | 11:52 PM
#412
I dont understand why it doesnt do it with only one locked in and then either side. Gears are my weak area. With the one locked, seems like the power gets transfered to the free one( which cant engage) and that may be why you arent getting any noise until both are locked. Probably not much help but sometimes it might get you out of the rut you get stuck in sometimes.
May 13, 2013 | 04:35 AM
#413
@Cyber
He said something about the ring gear too, I just don't know enough about these(kinda like terry)
@Terry
Yeah he hates to even have to lock it....that clunk kills him. He's wanting me to get him my front end out of my parts truck, was kinda looking for a solution before I did all that..Might post up a thread
Some parts might be coming today according to tracking....woo! Haven't gotten to do much research here lately....had a 4 page English poetry analyzeation paper....(YUCK!) haha. Also gotta call a local buddy, he might have a engine jack...would just have to buy a stand.
He said something about the ring gear too, I just don't know enough about these(kinda like terry
)@Terry
Yeah he hates to even have to lock it....that clunk kills him. He's wanting me to get him my front end out of my parts truck, was kinda looking for a solution before I did all that..Might post up a thread
Some parts might be coming today according to tracking....woo! Haven't gotten to do much research here lately....had a 4 page English poetry analyzeation paper....(YUCK!) haha. Also gotta call a local buddy, he might have a engine jack...would just have to buy a stand.
May 13, 2013 | 06:19 PM
#414
Well looky here, Thanks UPS
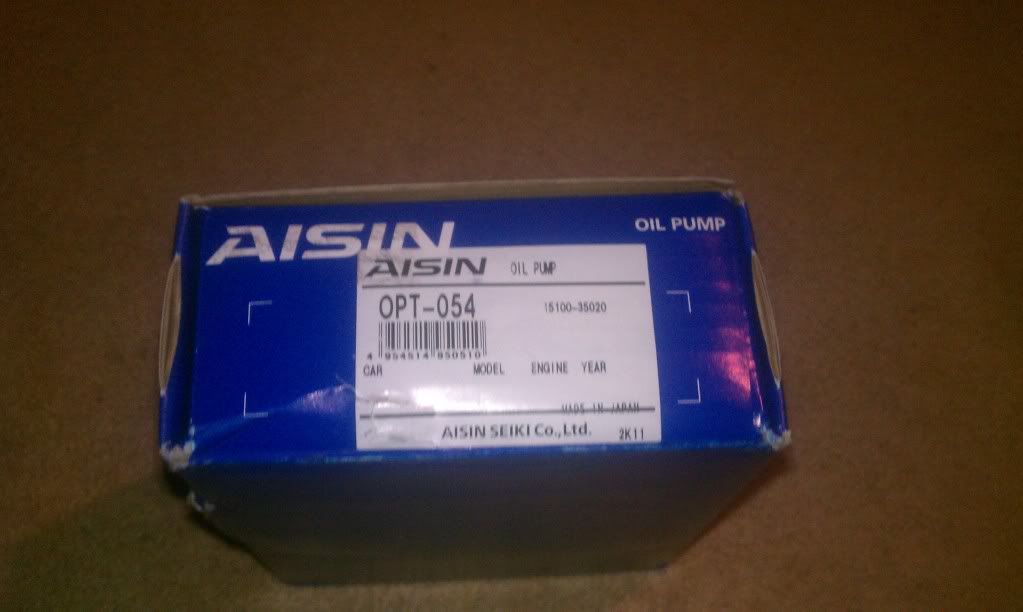
I'm assuming TOYOTA was scratched out here
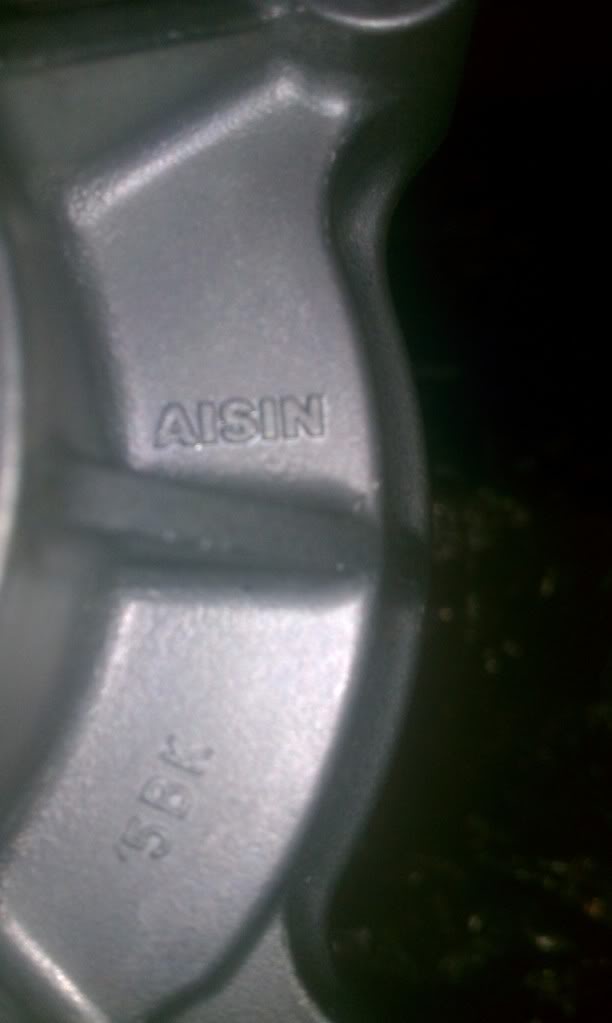
I know those 2 arrows have some relation....gonna look at the FSM and see how this puppy is installed.
So I finally got around to doing one of those compression tests! kinda was rushed so not sure if I did it right. All my cylinders had roughly 150 on the compression test....I think that's not too bad. Isn't 170 like good compression?
I possibly will redo this test just to double check my test. I did it once without oil and then did it with oil. With oil they didn't differ too much, only a few pounds.
Shew, the less I have to hear my truck like that, the better, I felt like I was killing her doing the compression test.
While doing the test I learned my spark plugs are NGK(WOO) BPR5EY
And the current plug wires being run are Sumitmo Z-16 X-S(Haha they are from 2002, ole truck won't know what to do with all the upgrades she's gonna be getting)
Hopefully I can make some time for egnbldr tomorrow... need to quit putting it off!
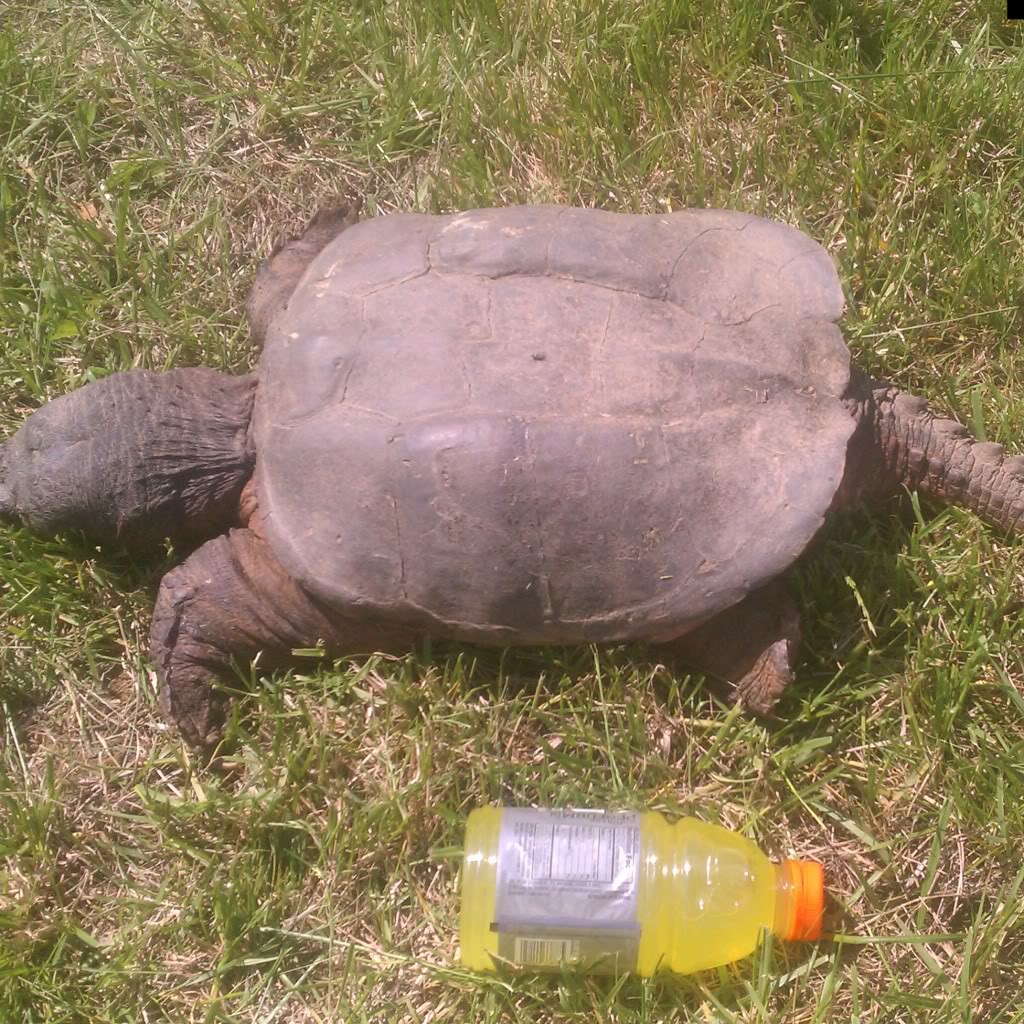
Holy Turtle....DinoTurtle


I'm assuming TOYOTA was scratched out here


I know those 2 arrows have some relation....gonna look at the FSM and see how this puppy is installed.

So I finally got around to doing one of those compression tests! kinda was rushed so not sure if I did it right. All my cylinders had roughly 150 on the compression test....I think that's not too bad. Isn't 170 like good compression?
I possibly will redo this test just to double check my test. I did it once without oil and then did it with oil. With oil they didn't differ too much, only a few pounds.
Shew, the less I have to hear my truck like that, the better, I felt like I was killing her doing the compression test.
While doing the test I learned my spark plugs are NGK(WOO) BPR5EY
And the current plug wires being run are Sumitmo Z-16 X-S(Haha they are from 2002, ole truck won't know what to do with all the upgrades she's gonna be getting)
Hopefully I can make some time for egnbldr tomorrow... need to quit putting it off!
Holy Turtle....DinoTurtle
 May 13, 2013 | 06:50 PM
#415
Registered User
Joined: Jul 2012
Posts: 2,365
Likes: 4
From: Idaho
the mild change in test Lbs just shows the rings are sealing good remember top compression ring needs engine running to get full seal (pressure behind the ring pushing it to the cyl wall)
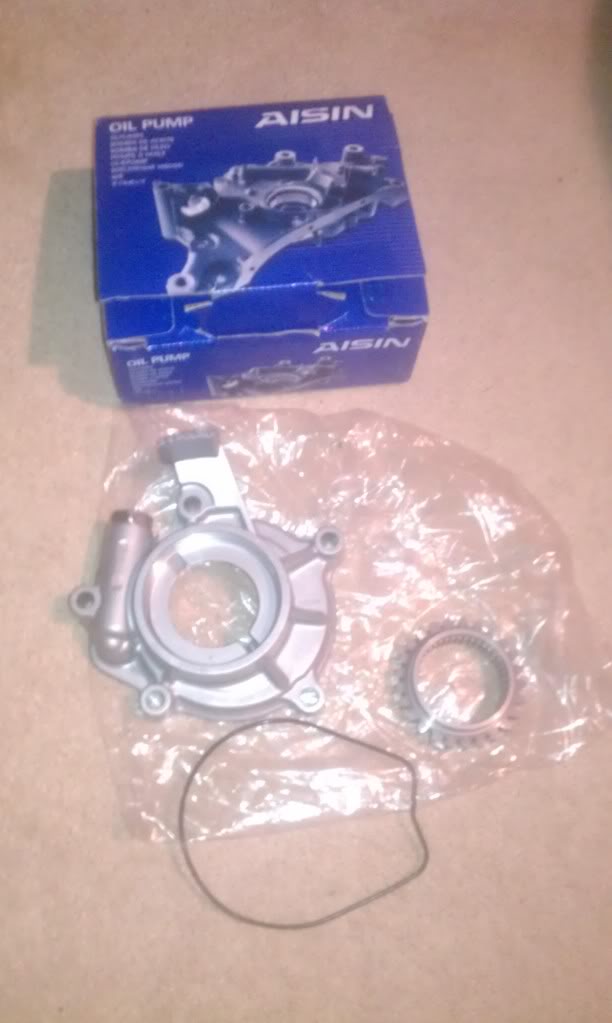
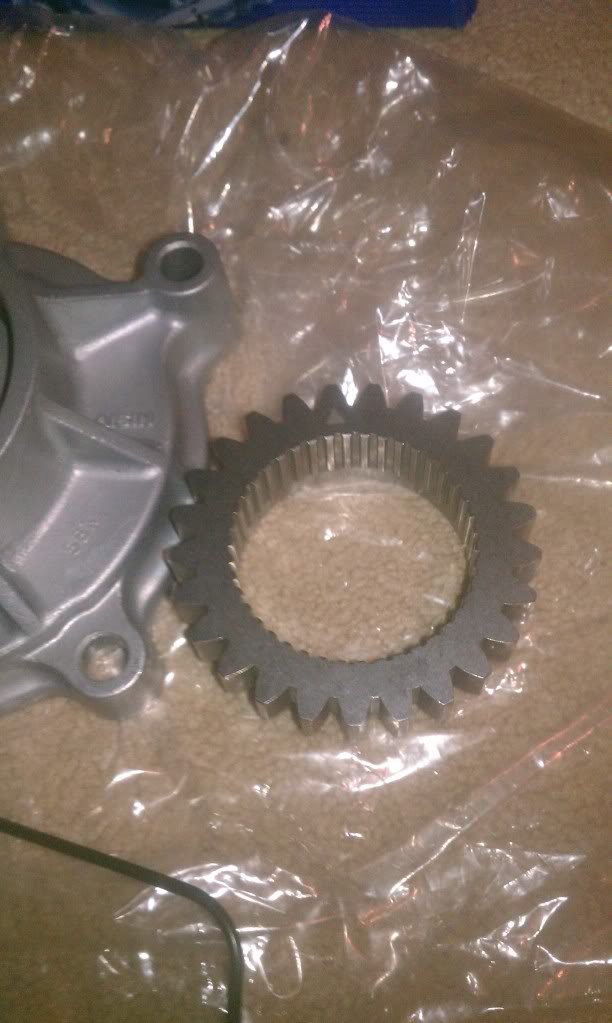
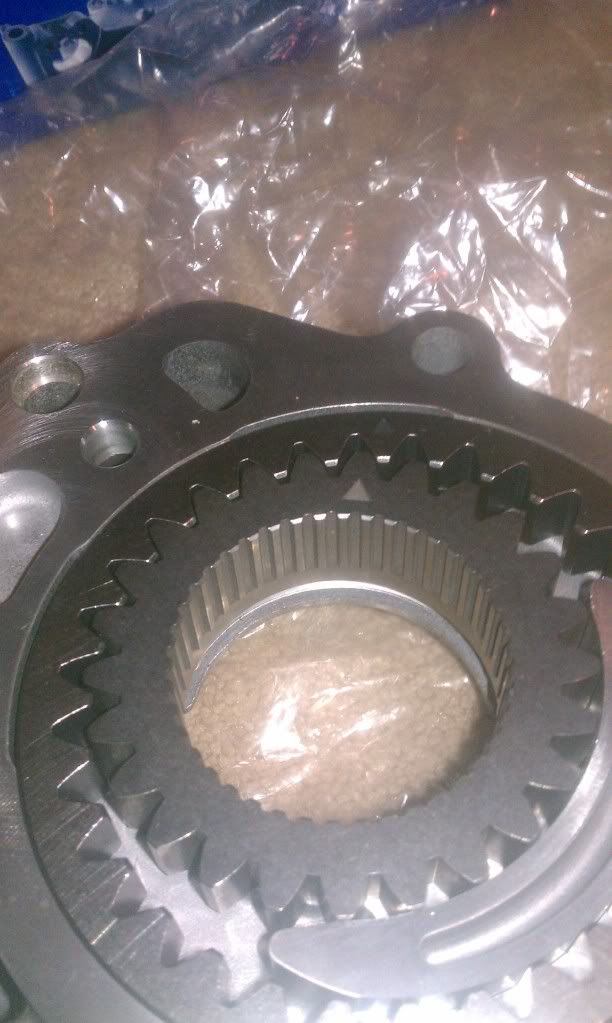
oil pump arrows i couldnt find anything that said what to do with them
oil pump arrows i couldnt find anything that said what to do with them
May 13, 2013 | 07:15 PM
#416
So my compression numbers seem good?
It possibly could be as simple as this side out as far as the arrows go...I'm sure i'll find something somewhere or someone will chime in
WOW I guessed right before I found this
BOLD are questions normal are answers(From 92 TOY thread)
Hi. you said to write if I had questions.
The OIL PUMP. It was securely sealed in a bag held together by a rubber band but the gears ...and to prove I've been doing my reading...the DRIVE GEAR and the DRIVEN GEAR...were not flat inside the housing.
A few questions about this....
I took the DRIVE GEAR out but the DRIVEN GEAR still is not flat......what do I do next?
I want to install the pump today...maybe and want to have it all lined up properly.
Do I have to take the Relief Valve spring out to remove the rest of the stuff (DRIVEN GEAR)
are those TRIANGLES match-marks for something....are they supposed to point at each other or no?
Please give me some advice and help.....I'm a total newbie with this......if you ever have a few days free, you could read my thread on YOTATECH (92TOY is the screen name)...yes, it's that slow.
what parts of the pump do i smoosh with Vaseline?
If you could really, really, dummy it down for me I would most definitely appreciate it.
Hi!
They jiggle around and slip out in transport, we use the band to try and stop that but it still happens. If even slightly cocked they will stick.
I use my thumbs to give it a push, it should click right into the casting and then rotate easily.
Remove the inner gear, press the outer into place and lube it up. Take the outer ring out and start over if you have to. It should spin freely. Then insert the inner gear and rotate to distribute lube.
When correct, you will see the little arrows at the rear of the pump. Don't face those to the inside. Pack some grease or Vaseline around the gears and rotate a couple of times, then bolt her on, all there is to it.
No need to remove the check valve assembly.
************************************************** **********
ted,
so the arrows mean nothing except I should be seeing them (facing me) but they don't have to line up with anything. right?
Yes, that is correct. The gears are directional, as long as you can see the arrows that is all there is to it.
Ted
__________________
THANKS YT SEARCH AND TED!
Last edited by dakotawho; May 13, 2013 at 07:30 PM.
May 13, 2013 | 08:03 PM
#417
Freakin awesome! Gotta love Guru-Ted! .... That's why he's and more lies in my signature! Nothing more nothing less, all Ted! Hahaha... Seriously, I cannot count on both hands that he and his son have helped me! Tod is the man as well!
150 is plenty good! Thats actually great news and especially that they are all fairly close in compression numbers. Even lower than that would be fine as long as the numbers are fairly even from one hole to the next. When you start getting it two very up to 15 pounds from one hole to the next,... Then it's really start paying attention time. 150 pounds across the board, buddy you should be good for another hundred thousand miles easy . I was at 150 pounds at 100,000 miles, and then finally at 254 thousand miles I decided to rebuild and my numbers were 139, 140, 138 and 120... It was clearly starting to lose the rear ring and it also had some pretty weak exhaust valve action going on.
Sounds good and I can't wait to see you get it back on the road buddy!
May 13, 2013 | 08:14 PM
#418
Registered User
Joined: Jul 2012
Posts: 2,365
Likes: 4
From: Idaho
i used assembly grease in my oil pump an the logical way for the gears arrow out so im good lol
so 150 is excellent an shows valves are doing great as well (nothing bent or worn) your right on course! for a good timing chain set replacement awesome
so 150 is excellent an shows valves are doing great as well (nothing bent or worn) your right on course! for a good timing chain set replacement awesome
May 14, 2013 | 09:15 AM
#419
Woo glad to hear you guys think it checks out! Great news! Still gonna remove the head when doing this and do the head gasket and have my head checked out at local machine shop. Also glad I found the simple answer to the oil pump! Water pump and timing cover coming soon. Also got spark plugs. Anyone know where to Sumitomo plug wires?
May 14, 2013 | 09:19 AM
#420
Registered User
Joined: Jul 2012
Posts: 2,365
Likes: 4
From: Idaho
Woo glad to hear you guys think it checks out! Great news! Still gonna remove the head when doing this and do the head gasket and have my head checked out at local machine shop. Also glad I found the simple answer to the oil pump! Water pump and timing cover coming soon. Also got spark plugs. Anyone know where to Sumitomo plug wires?


