Christopher D Burch 1989 Pickup Build-Up Thread

 05-27-2013, 03:46 PM
#22
Registered User
Thread Starter
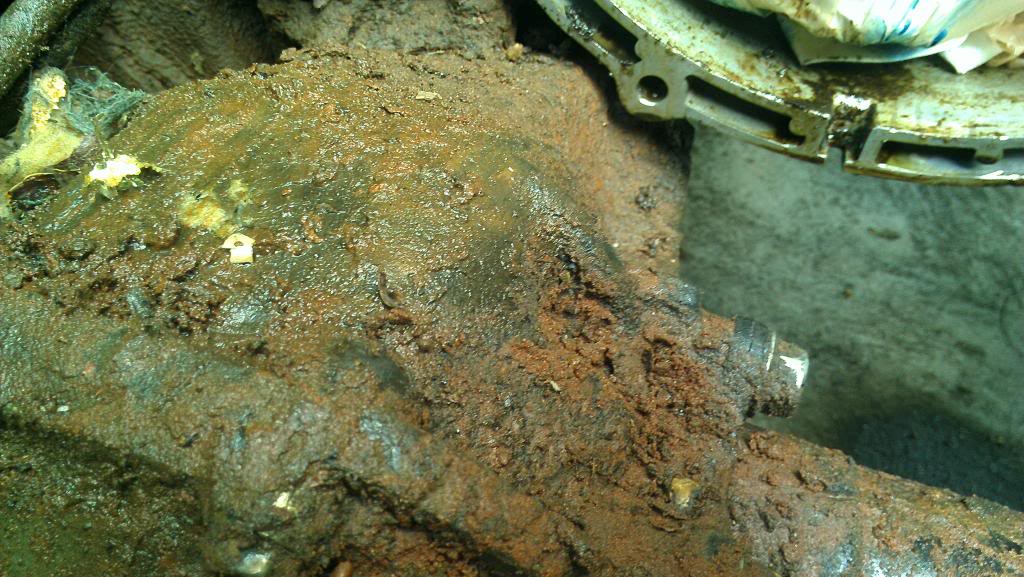
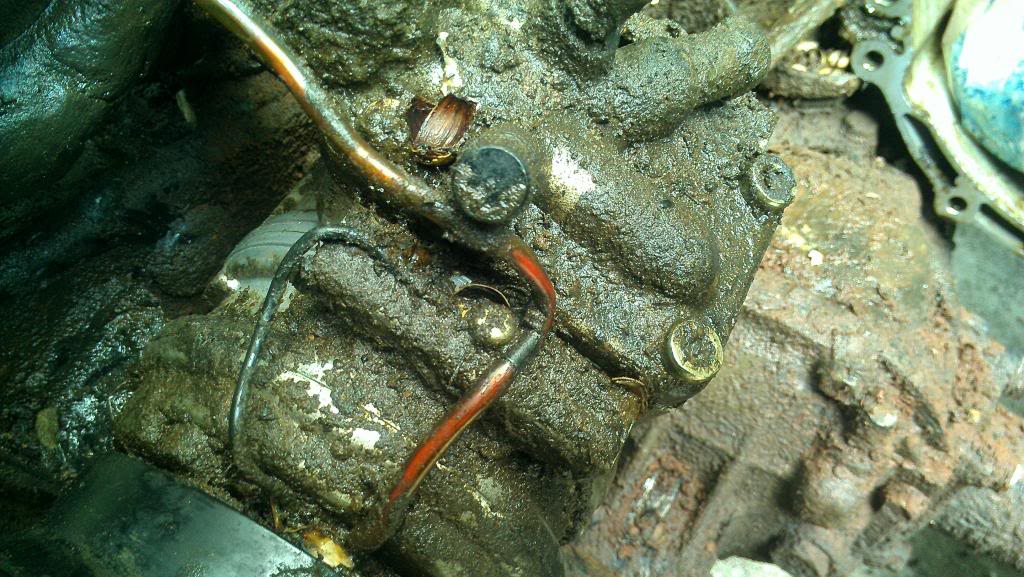
Well, now that I'm waiting for an engine to arrive I figured I would try and knock a little more dirt off of the truck. Here is the before and after:
Before (rat poop, Georgia clay, acorns, and engine sludge):
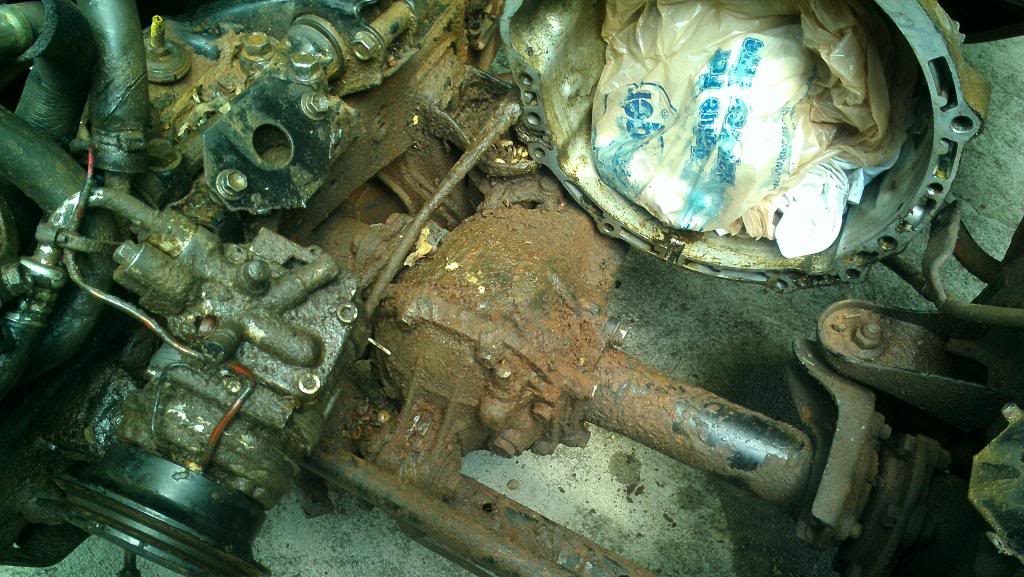

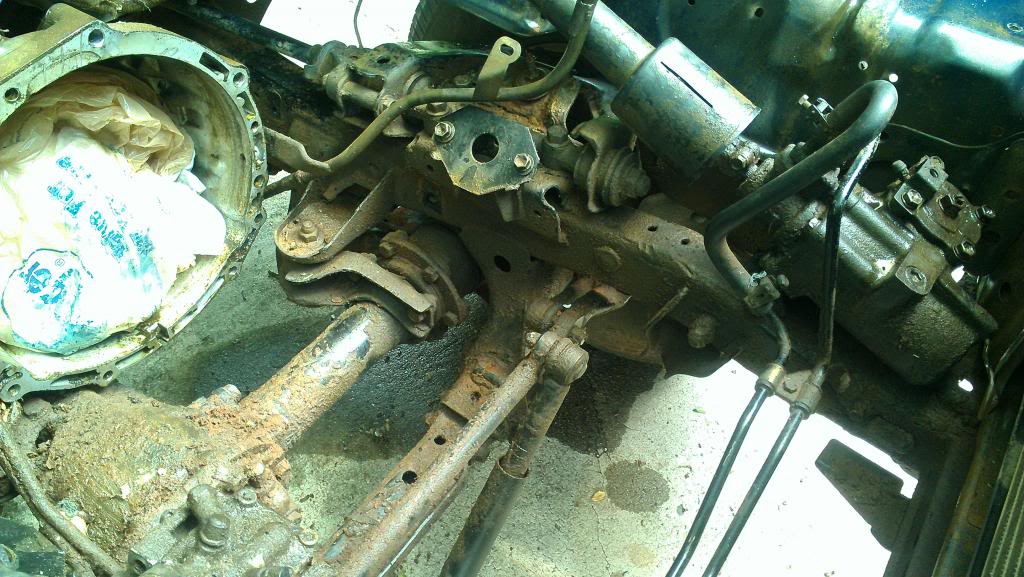
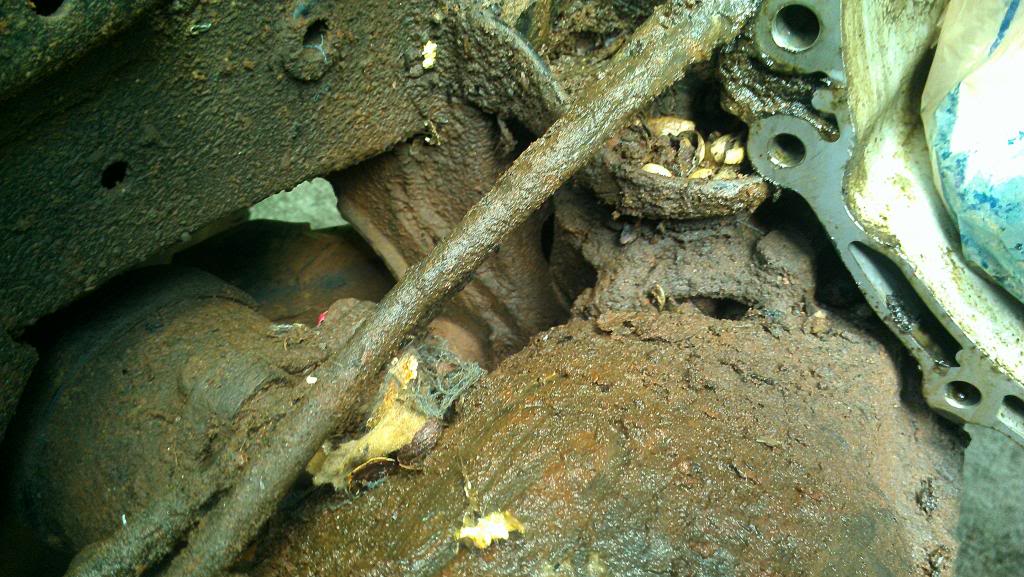
After:
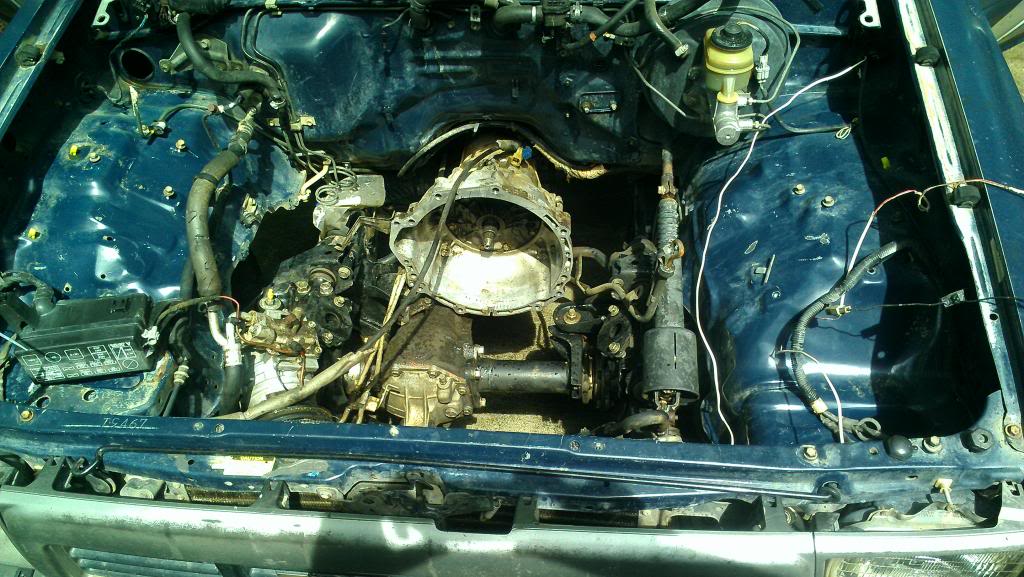
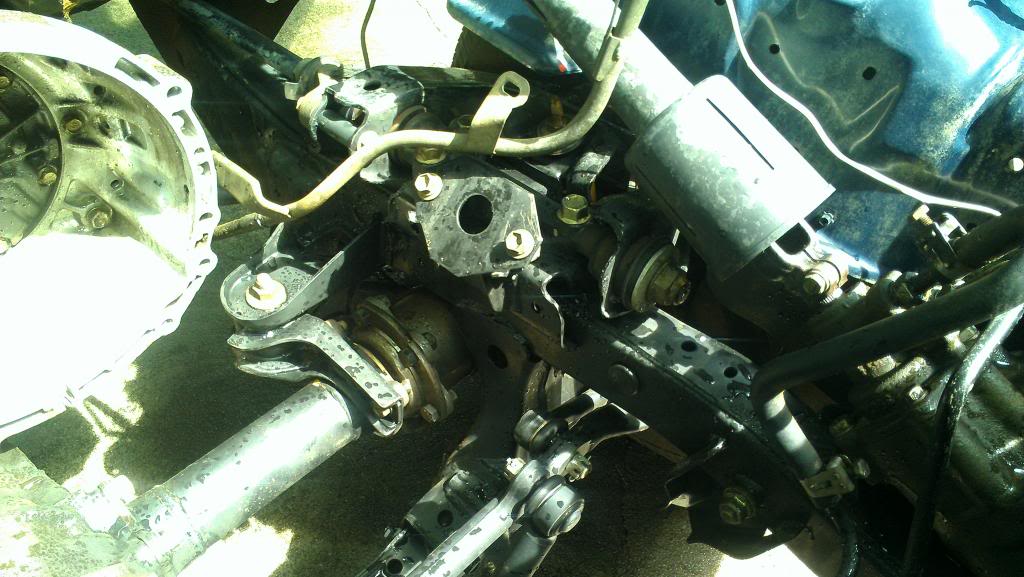
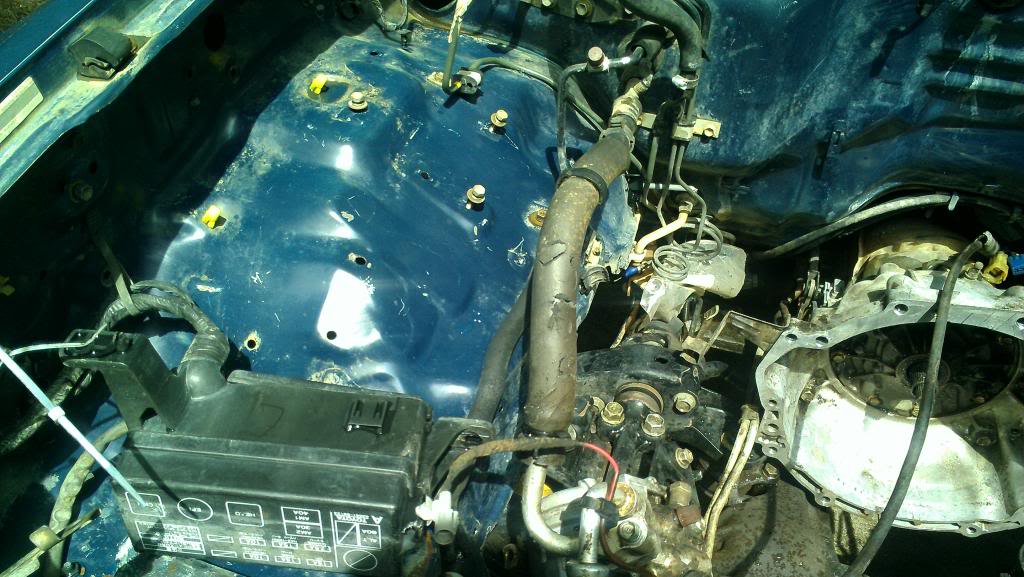
I'm sure there are still a couple of cracks I didn't get to, but she looks a hell of a lot better now!
-Chris
Before (rat poop, Georgia clay, acorns, and engine sludge):


After:


I'm sure there are still a couple of cracks I didn't get to, but she looks a hell of a lot better now!
-Chris
05-28-2013, 02:00 PM
#23
Registered User
Thread Starter
Just got an update on the engine! I will have a brand newly rebuilt engine in 1 week to throw in the truck. Should include nearly all the pieces I need to finish the job. Now I just need to figure out if I want to spend $800+ shipping on new LC Engineering headers. Is it really worth half the cost of a new engine? I'm thinking no, especially since I'm on a budget but tell me if I'm wrong. The guys at my engine supplier think that I won't need to do this but they're also in the business of rebuilding dead engines so it wouldn't necessarily be in their best interest to have completely reliable engines.
Anyway, I better get to work rebuilding my wire harness since I've only got a week left now!
-Chris
Anyway, I better get to work rebuilding my wire harness since I've only got a week left now!
-Chris
05-28-2013, 07:36 PM
#24
Registered User
Thread Starter
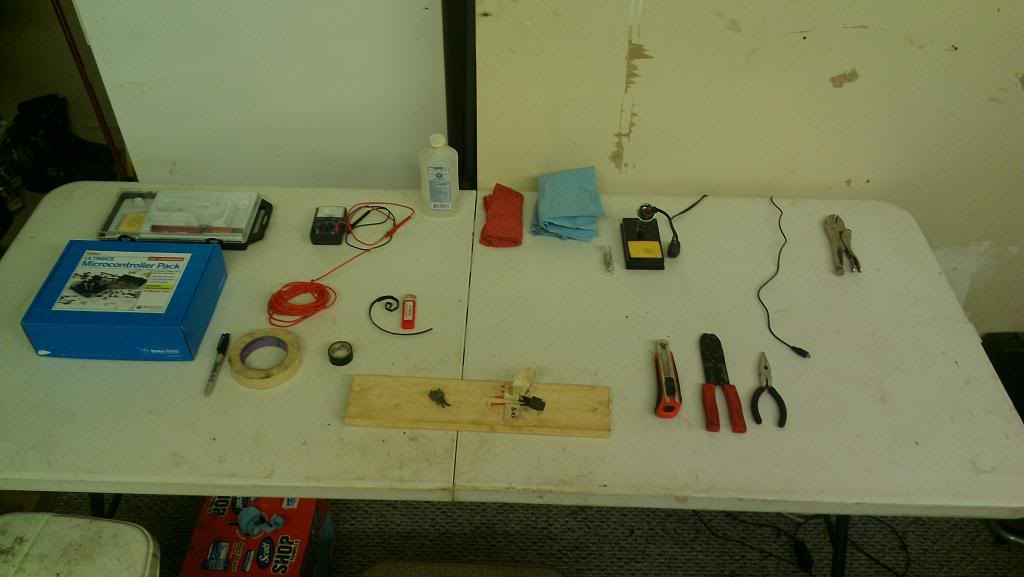
Just a couple shots of working on the wire harness. This will probably take me until my new front grill and bumpers arrive on Thursday. 
Goodnight!
-Chris


Goodnight!
-Chris
05-28-2013, 08:22 PM
#25
Wow your engine bay looks a thousand times better. Did you power wash it? I plan on cleaning mine when I pull the engine.
I think if you are on a budget it would be smart to steer away from spending that kind money just got headers. I know there are alot of guys who have had some good results with using the stock setup and some with modifying it themselves. If you have to have headers, look at northwest offroad. If I remember right they are less expensive.
I think if you are on a budget it would be smart to steer away from spending that kind money just got headers. I know there are alot of guys who have had some good results with using the stock setup and some with modifying it themselves. If you have to have headers, look at northwest offroad. If I remember right they are less expensive.
05-28-2013, 08:38 PM
#26
Registered User
Thread Starter
Wow your engine bay looks a thousand times better. Did you power wash it? I plan on cleaning mine when I pull the engine.
I think if you are on a budget it would be smart to steer away from spending that kind money just got headers. I know there are alot of guys who have had some good results with using the stock setup and some with modifying it themselves. If you have to have headers, look at northwest offroad. If I remember right they are less expensive.
I think if you are on a budget it would be smart to steer away from spending that kind money just got headers. I know there are alot of guys who have had some good results with using the stock setup and some with modifying it themselves. If you have to have headers, look at northwest offroad. If I remember right they are less expensive.
 ) and either a new dust cover for the right front cv joint or a whole new cv joint. I really won't know until I get that dust boot off.
05-29-2013, 05:35 PM
) and either a new dust cover for the right front cv joint or a whole new cv joint. I really won't know until I get that dust boot off.
05-29-2013, 05:35 PM
#27
Registered User
Thread Starter
This re-wiring job is a PITA!!!  First off, the Haynes manual's wiring diagram is pretty much useless for a 3vze. I don't even know why I bought the damn thing. Second, why in the world did Toyota decide to use the same two colored wires for every fuel injector? Do they all fire at the same time? This is driving me nuts. If I ever find the literal rat that did this I am going to shred it with a crowbar.
I will figure this out. Rant over.
-Chris
Edit 1:
Maybe this will help:
http://snjschmidt.com/wiring/
Edit 2:
I'm just dying to find a wire color code labeld "L-OL" or "W-TF" or "FM-L". If I ever design a car I will do this just to give people a smile.
Edit 3:
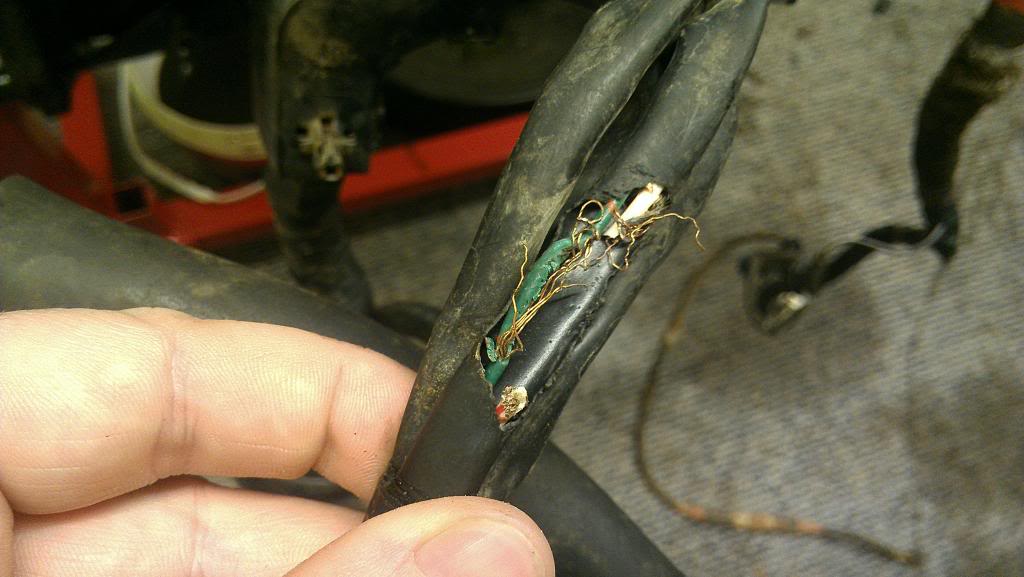
I may be screwed at the knock sensor - It is a braided co-ax cable. I'm not sure if you can do this but I un-braided it at both sides, twisted the braid into a wire I could then tie to my jump wire and soldered both ends so the flow will go through that wire. Then I jumped & soldered the middle wire as normal. In my head this should work but I'm a mechanical guy not an electrical guy. I'm wondering if this will cause some kind of un-wanted interference. I guess I will find out.
Edit 3:
I found out! Apparently this motor uses "simultaneous fuel injection". I forgot for a moment that I have stepped back in time to the 1980s. What this means is that since the computers back then were very slow, they had to fire all injectors at the same time. It isn't even batch-fired as the wiring diagram might initially lead you to believe. Despite the fact that one bank of cylinders uses a white wire and the other uses a white-red wire and the fact that they join the ECU in two different ports (#10 & #20), both wires are spliced together at splice E18 and the ECU fires both simultaneously anyways. (why they bother to have two ECU outputs I don't understand. Maybe it is to supply a little extra current or as a fail-safe.) Either way, the answer to my initial question in this post has been solved. It doesn't matter that they're all the using the same frickin' two colors - they are supposed to all fire at the same time!http://snjschmidt.com/wiring/Engine_Control_3vze_2.jpg
Whew, enough stressing out. Time to get back to work.
First off, the Haynes manual's wiring diagram is pretty much useless for a 3vze. I don't even know why I bought the damn thing. Second, why in the world did Toyota decide to use the same two colored wires for every fuel injector? Do they all fire at the same time? This is driving me nuts. If I ever find the literal rat that did this I am going to shred it with a crowbar.I will figure this out. Rant over.
-Chris
Edit 1:
Maybe this will help:
http://snjschmidt.com/wiring/
Edit 2:
I'm just dying to find a wire color code labeld "L-OL" or "W-TF" or "FM-L". If I ever design a car I will do this just to give people a smile.
Edit 3:
I may be screwed at the knock sensor - It is a braided co-ax cable. I'm not sure if you can do this but I un-braided it at both sides, twisted the braid into a wire I could then tie to my jump wire and soldered both ends so the flow will go through that wire. Then I jumped & soldered the middle wire as normal. In my head this should work but I'm a mechanical guy not an electrical guy. I'm wondering if this will cause some kind of un-wanted interference. I guess I will find out.
Edit 3:
I found out! Apparently this motor uses "simultaneous fuel injection". I forgot for a moment that I have stepped back in time to the 1980s. What this means is that since the computers back then were very slow, they had to fire all injectors at the same time. It isn't even batch-fired as the wiring diagram might initially lead you to believe. Despite the fact that one bank of cylinders uses a white wire and the other uses a white-red wire and the fact that they join the ECU in two different ports (#10 & #20), both wires are spliced together at splice E18 and the ECU fires both simultaneously anyways. (why they bother to have two ECU outputs I don't understand. Maybe it is to supply a little extra current or as a fail-safe.) Either way, the answer to my initial question in this post has been solved. It doesn't matter that they're all the using the same frickin' two colors - they are supposed to all fire at the same time!http://snjschmidt.com/wiring/Engine_Control_3vze_2.jpg
Whew, enough stressing out. Time to get back to work.
Last edited by Christopher D Burch; 05-29-2013 at 06:35 PM.
05-29-2013, 08:55 PM
#28
Registered User
Join Date: May 2013
Location: Siletz, Oregon
Posts: 62
Likes: 0
Received 0 Likes
on
0 Posts
Man do I hate wiring, I feel ya man. I have to go through all my wiring here in a few weeks on my 3vze when I'm a little less busy cause I got some wiring under the hood that was burnt to a crisp so I'm super excited to work on that after seeing all the fun you're having. Anyways I'm subscribing keep up the good work man.
06-01-2013, 07:55 PM
#29
Registered User
Thread Starter
Haven't posted in a couple of days. Time for an update.
Progress on the wiring harness has been slow. Went to a Braves/Blue Jays game on Thursday night and then went out with friends on Friday night. So those days were gone.
However, did get some parts in! Since the bumpers up front have all been smashed or are just plain old I'm swapping them out for SR5 style new ones. Cheap knockoffs anyways - I hope they hold up, but they look the part for sure.
http://www.ebay.com/itm/200806525926...84.m1497.l2649
http://www.ebay.com/itm/121086888424...84.m1497.l2649
At those prices I couldn't pass them up.
Anyways, a visit from my parents didn't slow me down today! Managed to get the exhaust headers and engine mounts off. And the oil cooler. Now I'm gonna go splice some more harness wires together. I'm targeting a 6/15 date to have this truck leave the driveway under its own power.
-Chris
06-02-2013, 10:36 AM
#30
Registered User
I wish you all the best with rebuilding that engine harness... Im glad to see another 3.0 stay in place when everybody says do a 3.4 swap. good luck in making reviving that truck ! I would take a beat old Toyota any day over any ford ranger....
06-02-2013, 02:52 PM
#31
Registered User
Thread Starter
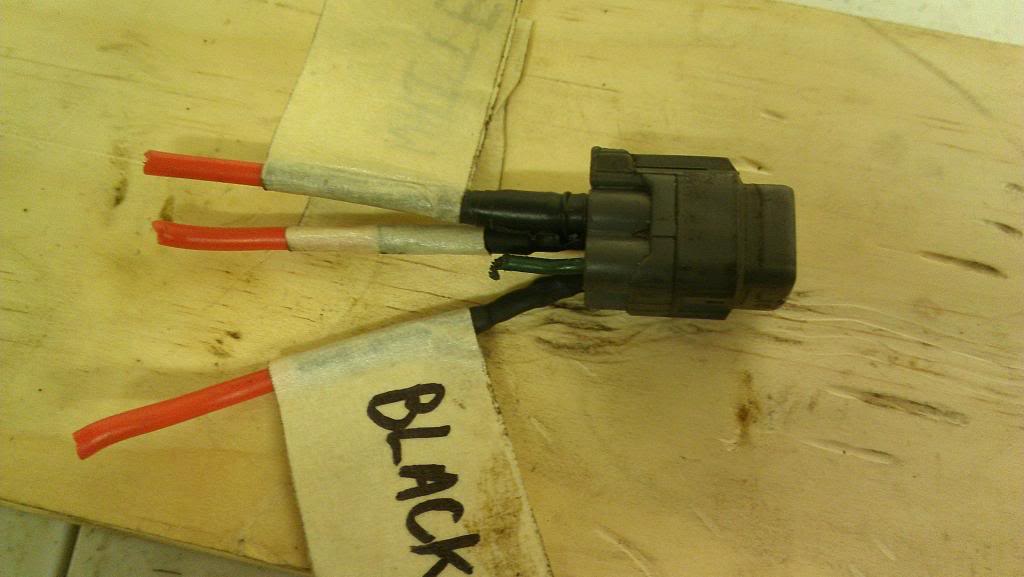
Does anyone know why there isn't an EWD available for the 1989 3vze pickup anywhere on the internetz yet? The 1993 EWD will not completely match up and I'm getting frustrated. I've got three or four yellow-green or yellow-blue wires, and 3+ brown-black wires that are in between the #2 & #6 fuel injectors on the wiring harness and have all been sliced open by the rat. I'm trying to make sure that I splice the correct wires back together. It appears that a yellow-blue and a yellow-green wire connect to the volume air flow meter. Any help would be appreciated. Here are pics of all the relevant connectors downstream from where I'm talking about:
Volume air flow (From left to right - Brown, Green-Yellow, Green-Black, Brown-Black, Yellow-Blue?, Yellow-Green?):
Single wire connector (Yellow-green?) very hard to tell. (Water temp sender?):
Throttle Position Sensor, 4-wire connector (yellow, yellow-blue?, green-black, brown-black)
2-wire connector (Green?, Brown-Black) (Engine Coolant Temp Sensor, EFI?):
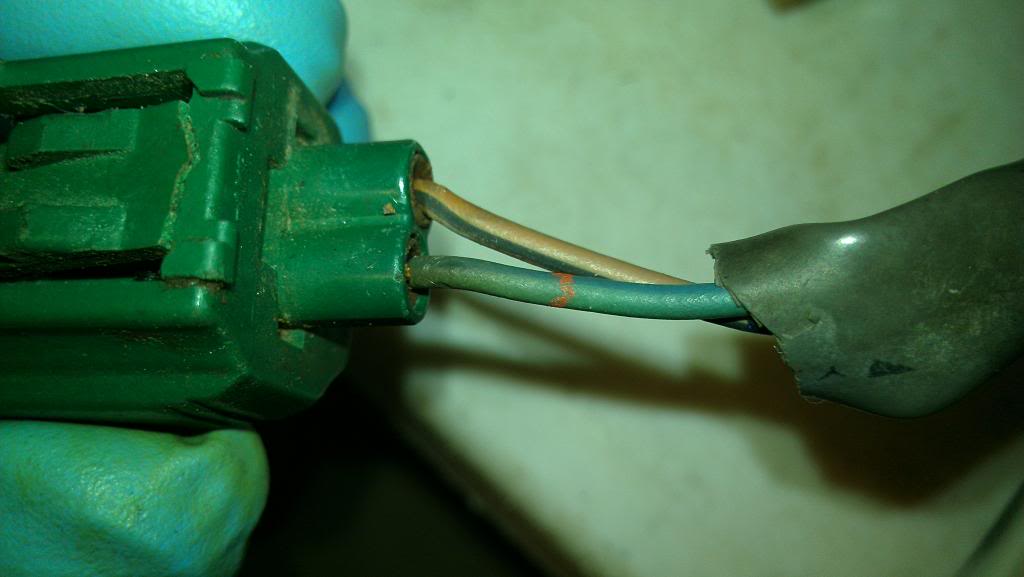
This is a bit of a challenge without the proper electrical wiring diagram. I've bought one off of ebay but it may not get here until the 15th and I was hoping to have this bad boy running by then! Any help would be much appreciated.
-Chris
Volume air flow (From left to right - Brown, Green-Yellow, Green-Black, Brown-Black, Yellow-Blue?, Yellow-Green?):

Single wire connector (Yellow-green?) very hard to tell. (Water temp sender?):

Throttle Position Sensor, 4-wire connector (yellow, yellow-blue?, green-black, brown-black)

2-wire connector (Green?, Brown-Black) (Engine Coolant Temp Sensor, EFI?):

This is a bit of a challenge without the proper electrical wiring diagram. I've bought one off of ebay but it may not get here until the 15th and I was hoping to have this bad boy running by then! Any help would be much appreciated.
-Chris
Last edited by Christopher D Burch; 06-02-2013 at 04:28 PM.
06-02-2013, 08:34 PM
#32
Registered User
Thread Starter
1989 3vze pickup wiring diagram online!!! Finally, watching random youtube videos has helped me for once:
http://bbbind.com/tech_database.html
Just sign up (sort of), search for your vehicle and voila!
-Chris
http://bbbind.com/tech_database.html
Just sign up (sort of), search for your vehicle and voila!
-Chris
06-03-2013, 08:54 PM
#33
Registered User
Thread Starter
Progress is ongoing...
The wiring harness is two wires from being complete. This thing is going to be pretty much water & dirt tight when I'm done. I'm wrapping everything in electrical tape, then wrapping it in those flex wire covers, then taping those! Overkill? Maybe, but I have no intentions of letting water get anywhere near my hard work and since I do want to keep my engine clean with chemicals and possibly high-pressure water washing, this is the only way for me.
The engine is confirmed for a Thrusday/Friday delivery so I already know what I'm doing this weekend!
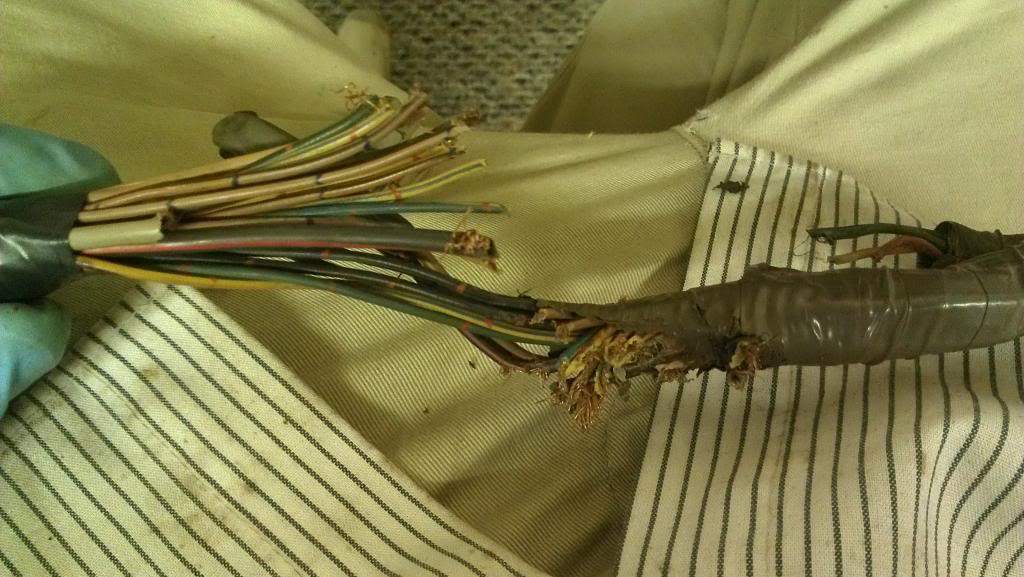
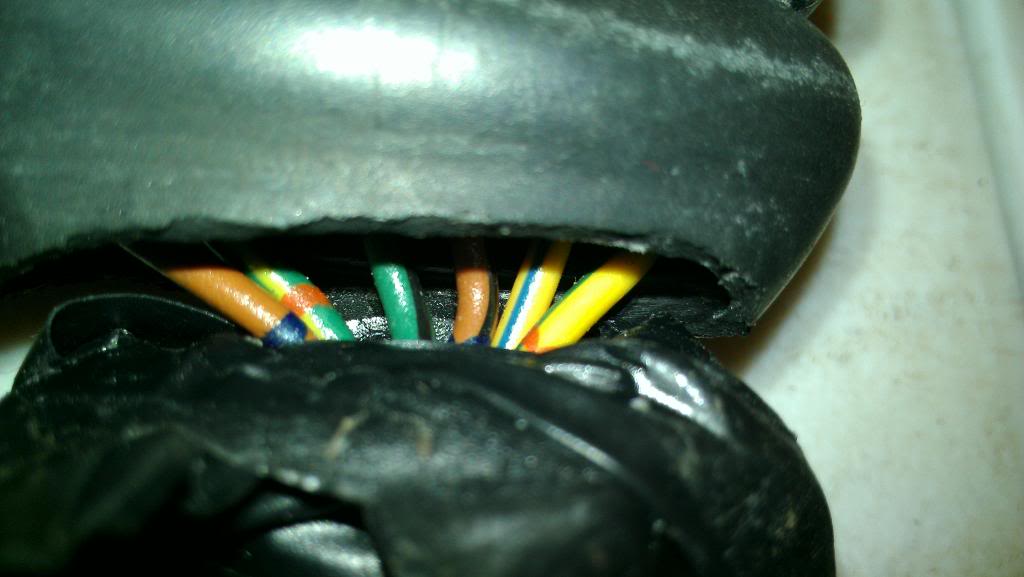
Here's a couple more pics - Giant splice job:
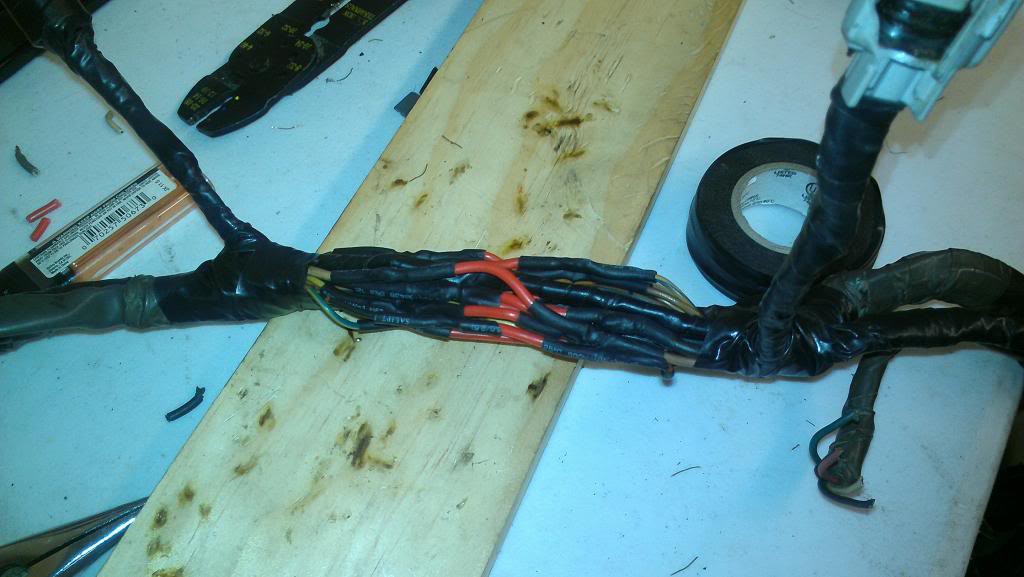
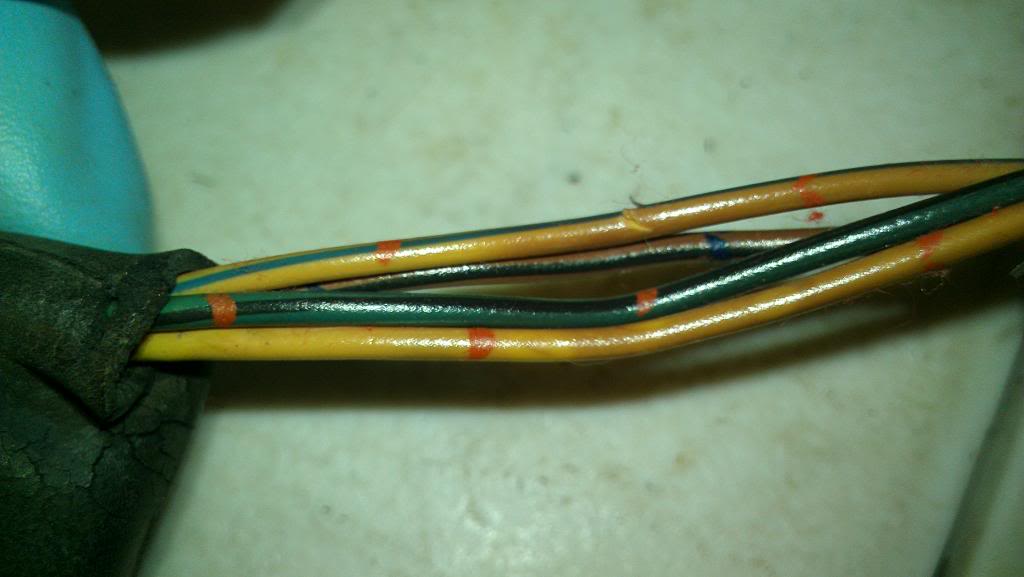
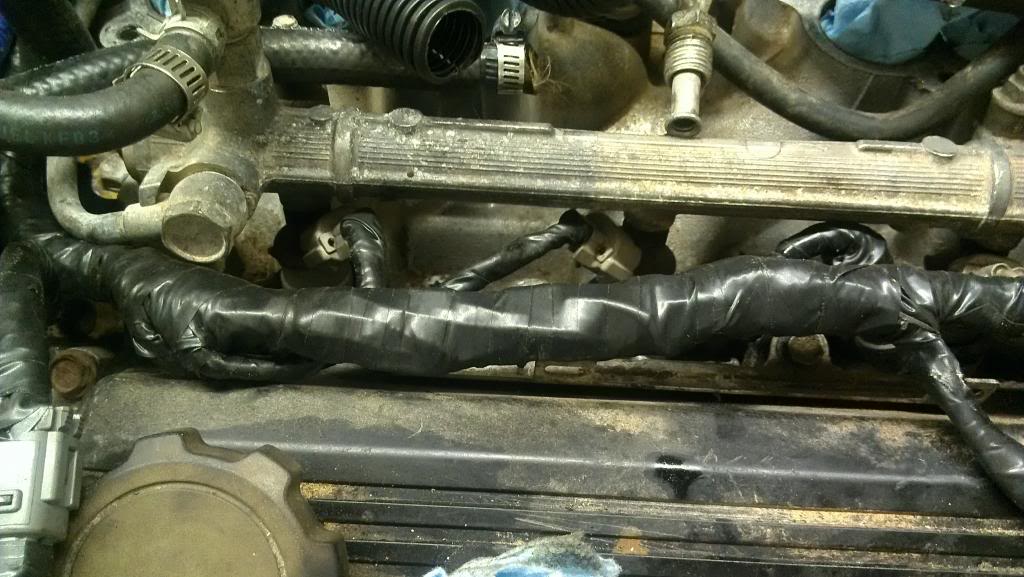
Same as above, but wrapped and test-fitted:
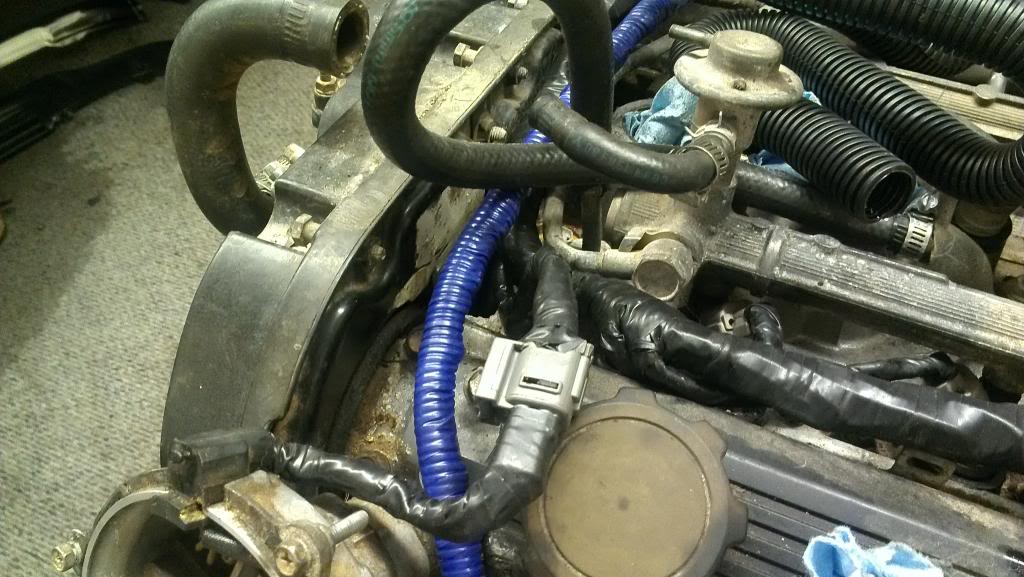
A little blue for fun:
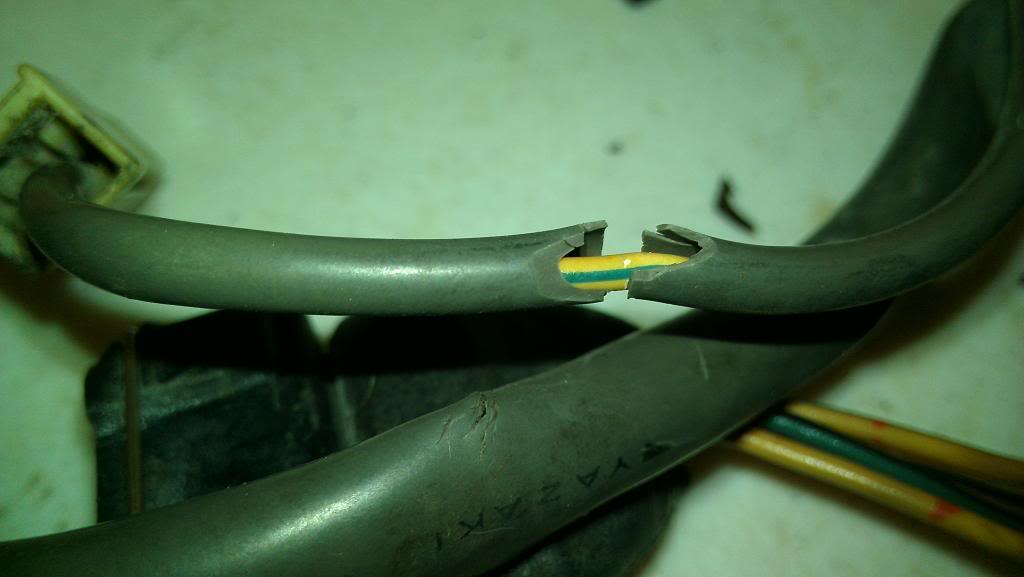
Last two to fix:
-Chris
The wiring harness is two wires from being complete. This thing is going to be pretty much water & dirt tight when I'm done. I'm wrapping everything in electrical tape, then wrapping it in those flex wire covers, then taping those! Overkill? Maybe, but I have no intentions of letting water get anywhere near my hard work and since I do want to keep my engine clean with chemicals and possibly high-pressure water washing, this is the only way for me.
The engine is confirmed for a Thrusday/Friday delivery so I already know what I'm doing this weekend!
Here's a couple more pics - Giant splice job:

Same as above, but wrapped and test-fitted:

A little blue for fun:

Last two to fix:

-Chris
06-09-2013, 05:47 PM
#36
Registered User
Thread Starter
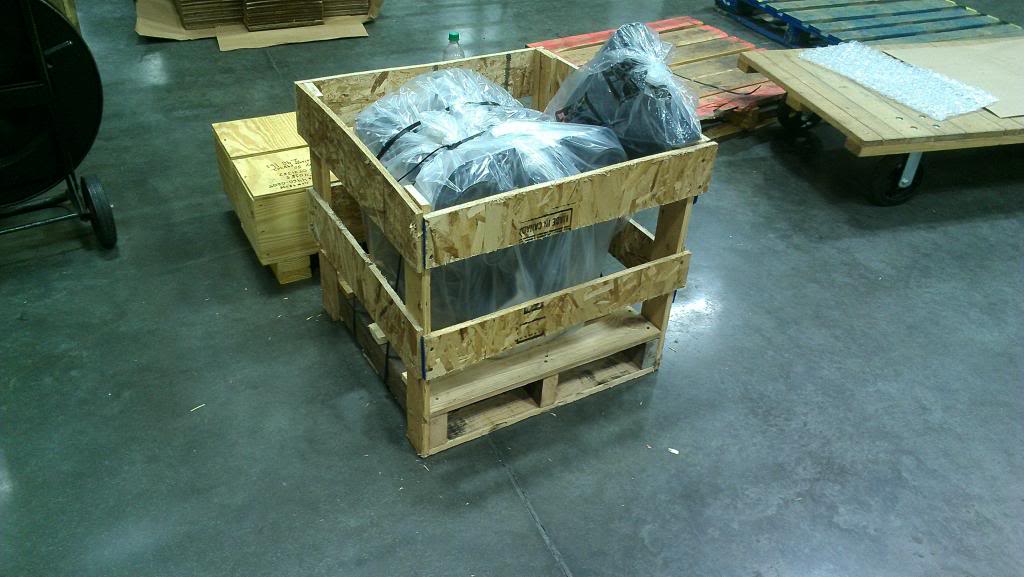
Well crap. I just realized that my oil filter and oil cooler on the rebuilt long block have swapped places from my current block. This means that I have the 2wd 3vze block. Here is where I need advice for sure:
1. Can this even fit in my 4x4 truck, assuming that I can bolt the 4x4 oil pan from my old engine on and that the engine mounts and transmission bolt pattern are the same and that the 2wd oil filter and oil cooler don't interefere with other parts on the truck???
2. If #1 is a go, what other obstacles do I have? I'm kinda bummed out at the moment so any positive advice would be wonderful.
Other than that, I'm trying to get all of my other parts as clean as my new long block.
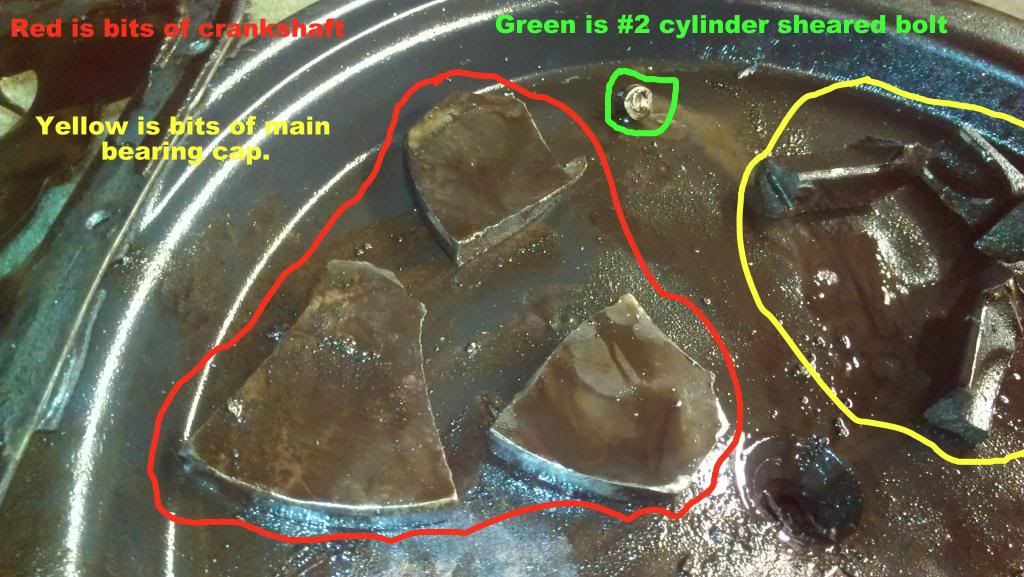
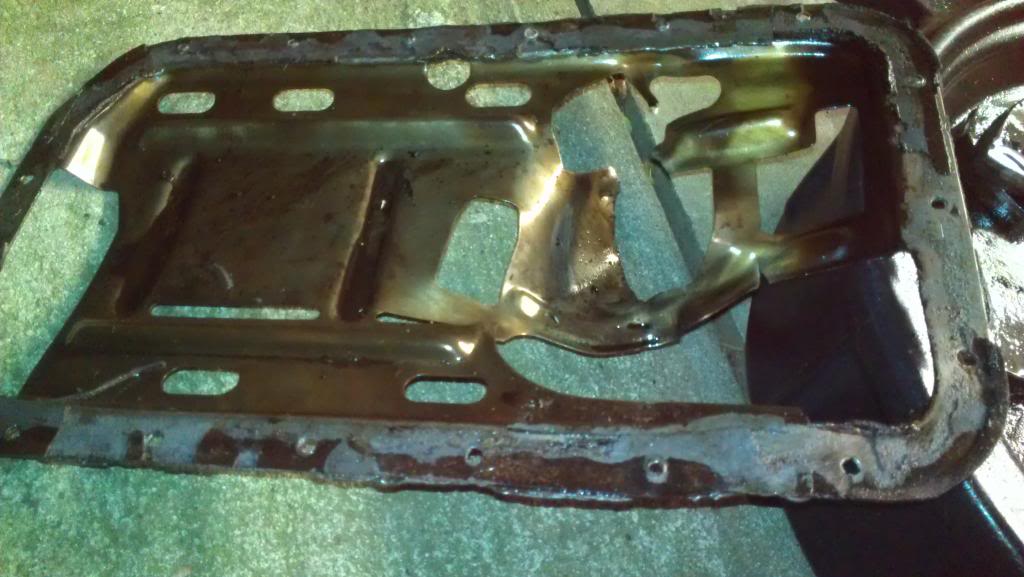
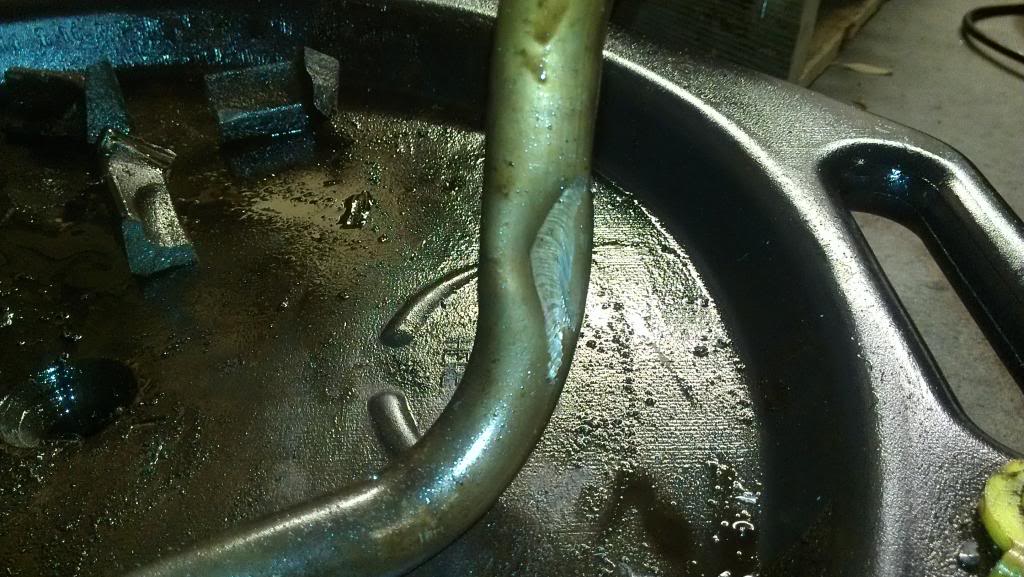
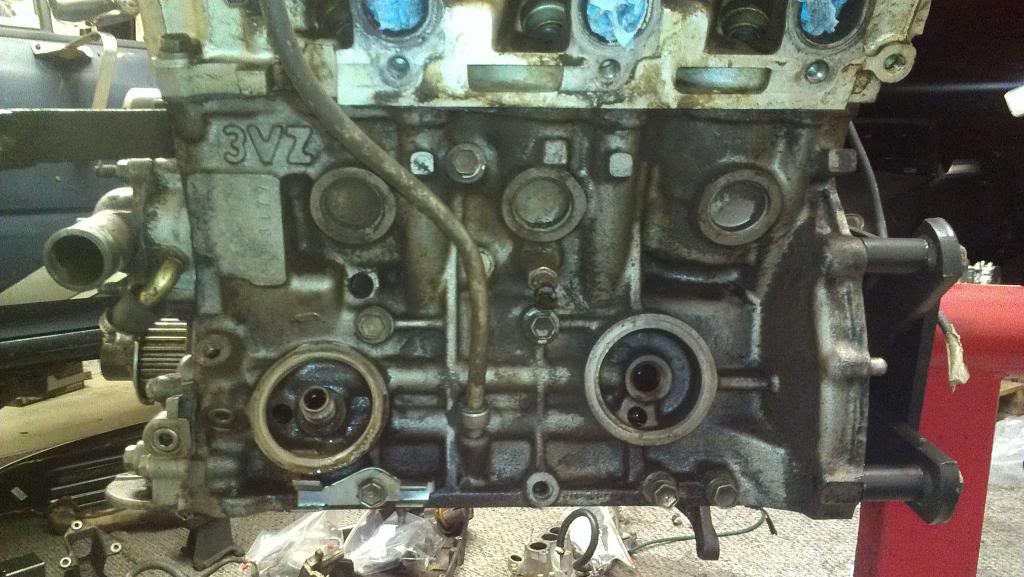
Also, after taking off the oil pan I was able to find out just how much damage the old motor sustained. It was massive. The crankshaft is broken between the #1 & #2 cylinder, it shattered the main bearing cap in the same area, and the #1 connecting rod is now split into two halves. Also, one of the bolts on the #2 cylinder connecting rod sheared off, the oil pan baffle plate is mangled, and the oil pickup tube is dented pretty good. I will put pictures up later.
-Chris
1. Can this even fit in my 4x4 truck, assuming that I can bolt the 4x4 oil pan from my old engine on and that the engine mounts and transmission bolt pattern are the same and that the 2wd oil filter and oil cooler don't interefere with other parts on the truck???
2. If #1 is a go, what other obstacles do I have? I'm kinda bummed out at the moment so any positive advice would be wonderful.
Other than that, I'm trying to get all of my other parts as clean as my new long block.
Also, after taking off the oil pan I was able to find out just how much damage the old motor sustained. It was massive. The crankshaft is broken between the #1 & #2 cylinder, it shattered the main bearing cap in the same area, and the #1 connecting rod is now split into two halves. Also, one of the bolts on the #2 cylinder connecting rod sheared off, the oil pan baffle plate is mangled, and the oil pickup tube is dented pretty good. I will put pictures up later.
-Chris
Last edited by Christopher D Burch; 06-09-2013 at 07:17 PM.
06-09-2013, 07:30 PM
#37
Registered User
Thread Starter
Okay, I think I may have been worried over nothing. As far as I can tell, all 3vze are the same as far as the block and heads are concerned. Which is good, since that's all I bought to replace my old one. It seems as though all I had to do to switch from one to the other was move the oil filter union from the rearward port to the forward port. See the diagram here:
http://personal.utulsa.edu/~nathan-b...ne/69cylin.pdf
If I am wrong about this, someone let me know please.
Anyway, some pictures as promised. I will try to get a shot of the bottom side of the old block when I can get it back outside again. I'm not flipping that thing upside down in my garage!
Broken parts:
Bent baffle:
Dented oil pickup tube:
Friday arrival at work:
Hello there, shiny:
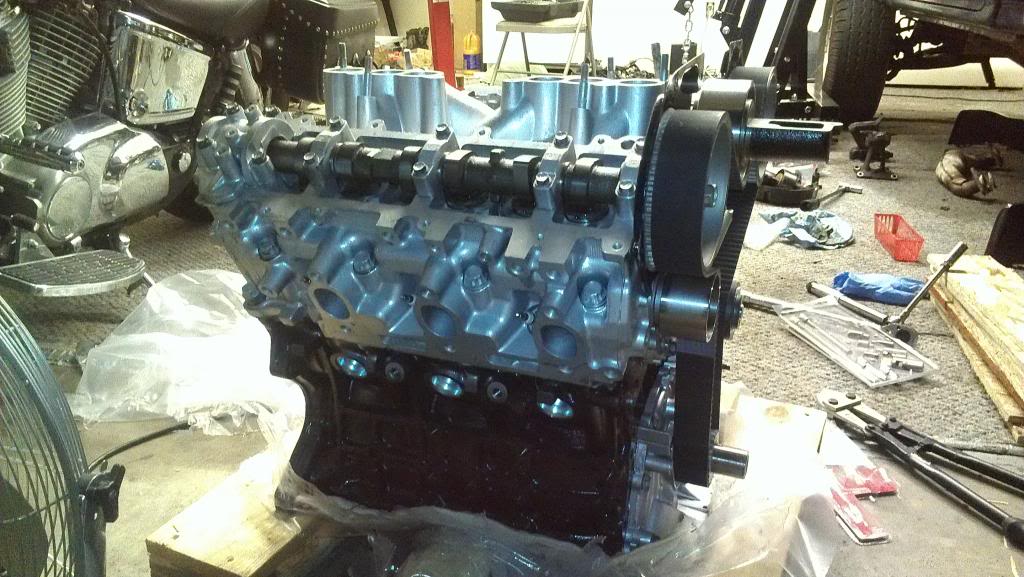
Oh crap, looks different:
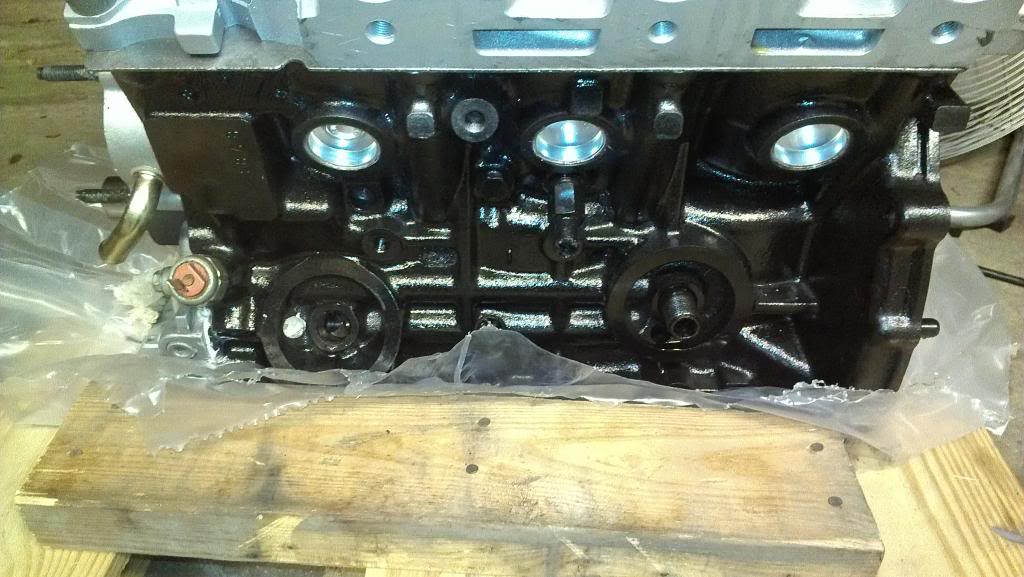
Oh wait, this just comes out and gets swapped over. Scared me for a min.:
More to come, stay tuned!
-Chris
http://personal.utulsa.edu/~nathan-b...ne/69cylin.pdf
If I am wrong about this, someone let me know please.
Anyway, some pictures as promised. I will try to get a shot of the bottom side of the old block when I can get it back outside again. I'm not flipping that thing upside down in my garage!
Broken parts:

Bent baffle:

Dented oil pickup tube:

Friday arrival at work:

Hello there, shiny:

Oh crap, looks different:


Oh wait, this just comes out and gets swapped over. Scared me for a min.:

More to come, stay tuned!
-Chris
06-18-2013, 06:11 PM
#38
Registered User
Thread Starter
It's been too long since I've had an update!
Progress is slow, but continuous. I've ordered a lot of parts in the past couple of days and spent many 10s of hours scrubbing every part, bolt, stud, and washer that I'm using from the old engine on the new engine. Turns out that Georgia Clay + Oil + Carbon soot + Heat = a really big frickin mess that is very hard to clean up.
New parts:
Exhaust studs and nuts
Gaskets and o-rings for oil cooler
High-Temp Gasket Sealer for exhaust manifold gasket (Permatex copper)
Oil Pan baffle plate
Harmonic Balancer (Main crankshaft pulley)
Fuel Rail Crush washers
Cold Start Injector Crush Washers
#1 & #2 Oil Cooler Hose
Blue Silicone Vacuum Hose Kit
Oil Pressure Switch/Sender
Long Block + All new gaskets
All-new front bumpers, grill, etc. (SR5-Style)
I probably missed something, but it adds up $$ in a hurry!
In addition to all of the above my local SCCA is having their first Rallycross on July 21st, so I had to pick up a little rally car...
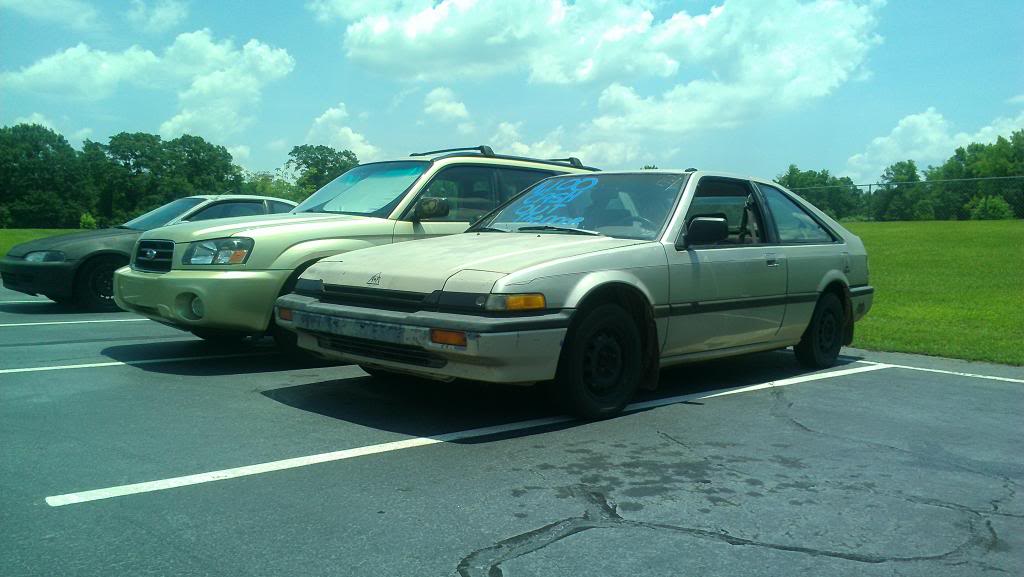
I love it. I used to have an 86 Accord sedan and this 87 hatch runs even better.
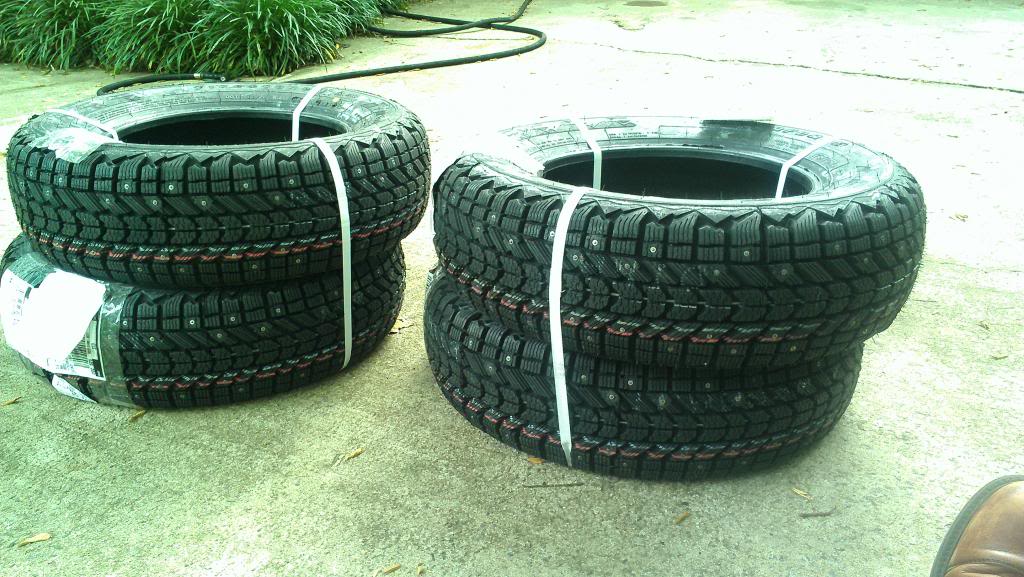
Also, this is how you win rallycross with a cheap, under-powered car:
Studded snow tires in July? Why not?!
Anyway, here are some Yota pictures of parts during/after the cleaning process:
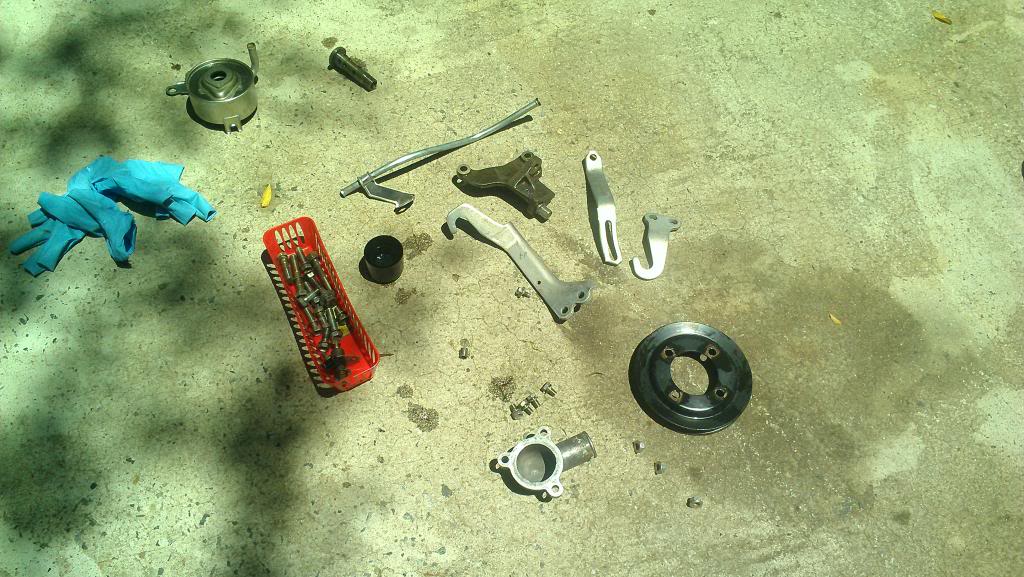
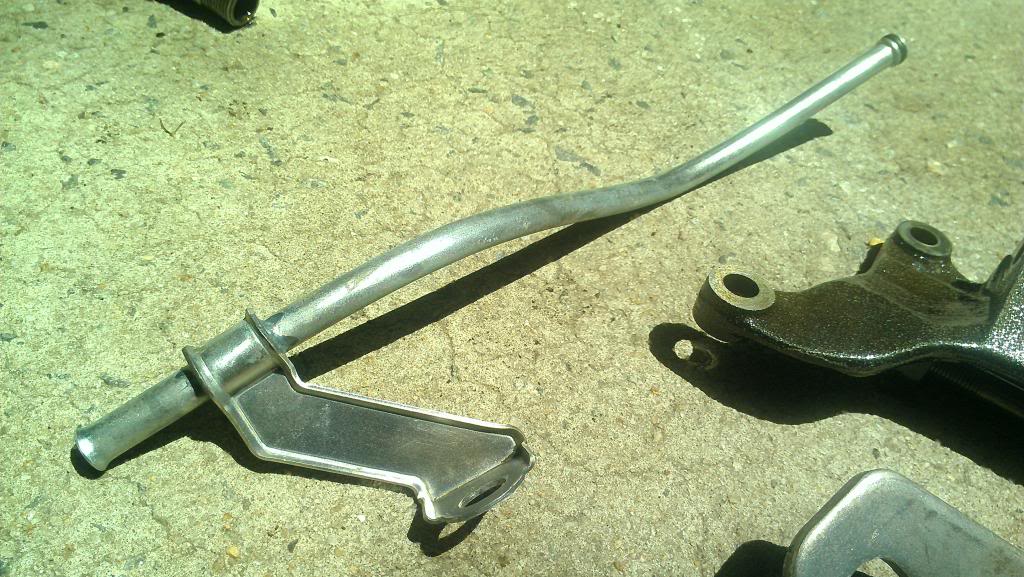
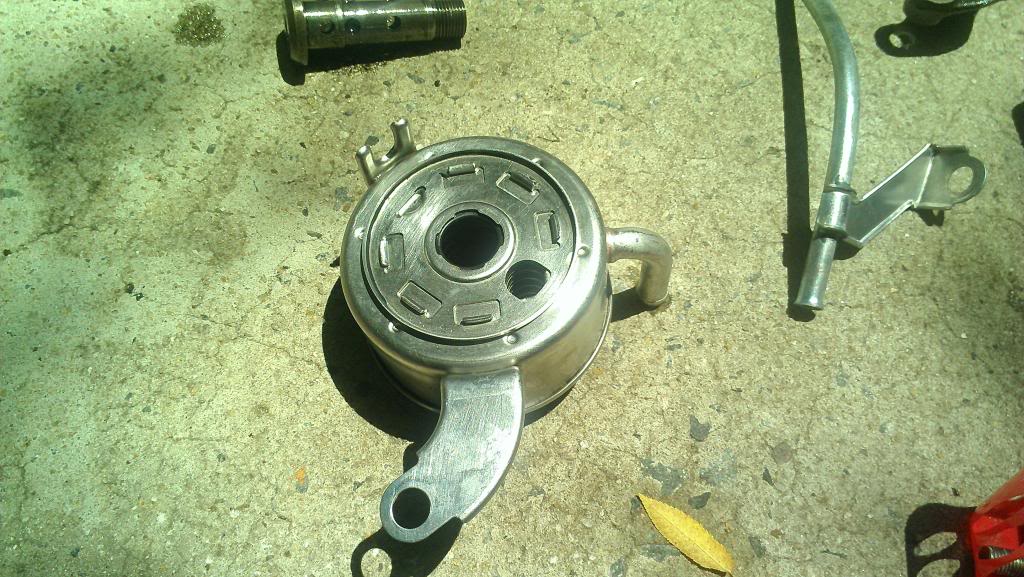
You can see what the dipstick looked like before cleaning in the previous post.
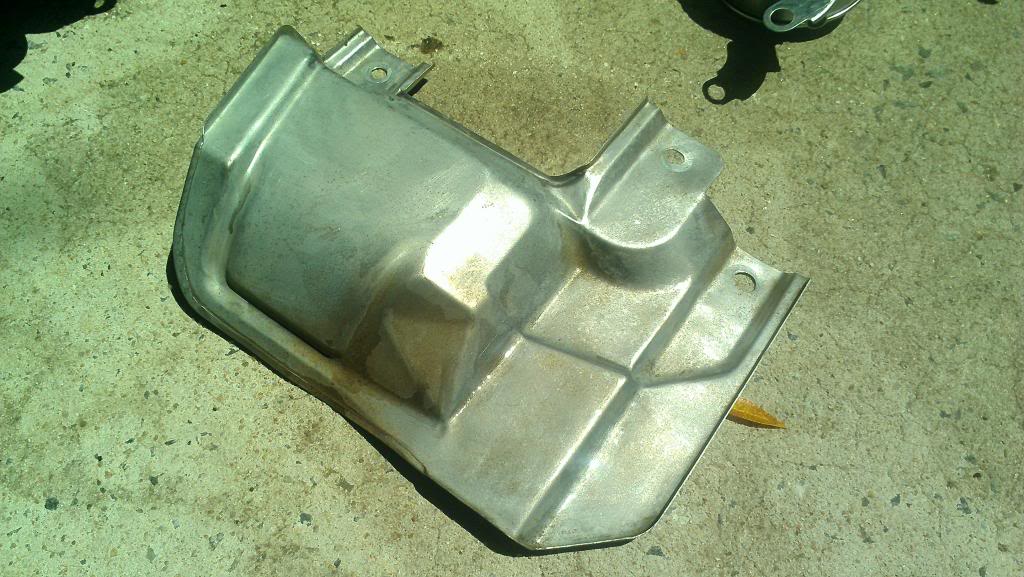
Before cleaning (btw, these are representative of pretty much everything that was attached to the old engine, so you get an idea what I've been doing):
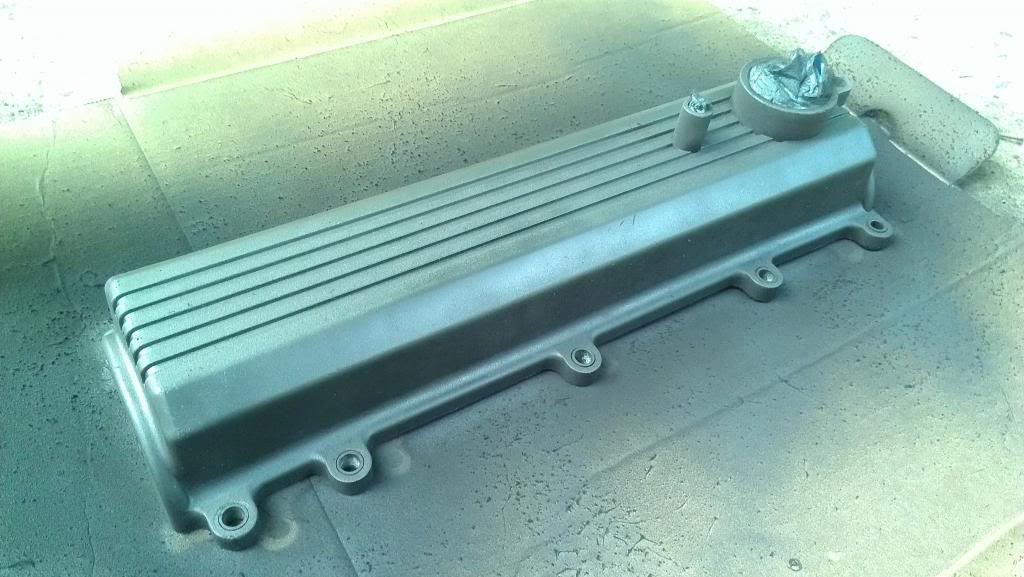
After cleaning:
As always, more updates to come!
-Chris
Progress is slow, but continuous. I've ordered a lot of parts in the past couple of days and spent many 10s of hours scrubbing every part, bolt, stud, and washer that I'm using from the old engine on the new engine. Turns out that Georgia Clay + Oil + Carbon soot + Heat = a really big frickin mess that is very hard to clean up.
New parts:
Exhaust studs and nuts
Gaskets and o-rings for oil cooler
High-Temp Gasket Sealer for exhaust manifold gasket (Permatex copper)
Oil Pan baffle plate
Harmonic Balancer (Main crankshaft pulley)
Fuel Rail Crush washers
Cold Start Injector Crush Washers
#1 & #2 Oil Cooler Hose
Blue Silicone Vacuum Hose Kit
Oil Pressure Switch/Sender
Long Block + All new gaskets
All-new front bumpers, grill, etc. (SR5-Style)
I probably missed something, but it adds up $$ in a hurry!
In addition to all of the above my local SCCA is having their first Rallycross on July 21st, so I had to pick up a little rally car...

I love it. I used to have an 86 Accord sedan and this 87 hatch runs even better.
Also, this is how you win rallycross with a cheap, under-powered car:
Studded snow tires in July? Why not?!

Anyway, here are some Yota pictures of parts during/after the cleaning process:


You can see what the dipstick looked like before cleaning in the previous post.
Before cleaning (btw, these are representative of pretty much everything that was attached to the old engine, so you get an idea what I've been doing):

After cleaning:


As always, more updates to come!
-Chris
Last edited by Christopher D Burch; 06-18-2013 at 06:14 PM.
06-19-2013, 06:22 PM
#39
Registered User
Thread Starter
Decided to throw a little paint on things today. I'm wondering if I should add a little blue paint in the grooves to match everything else, or maybe some red paint?
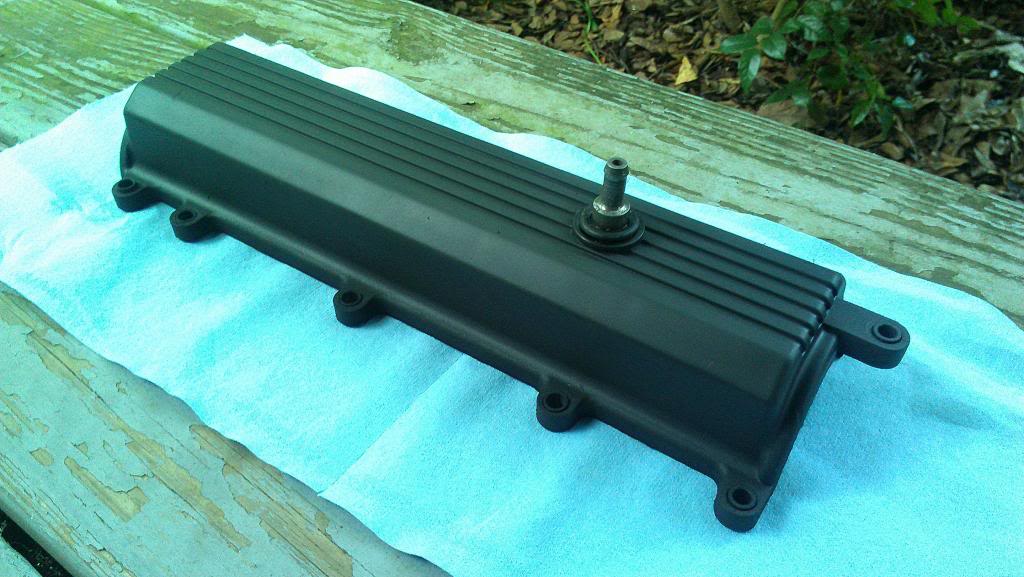
Later,
Chris


Later,
Chris
06-20-2013, 06:33 PM
#40
Registered User
Thread Starter
Well...  Sweet. Well, some of them are trickling in.
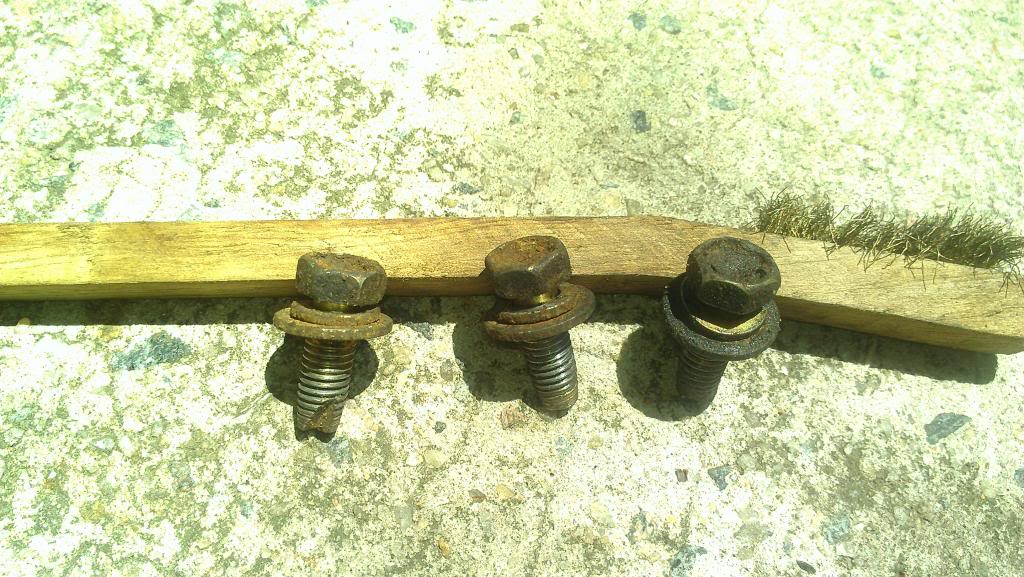
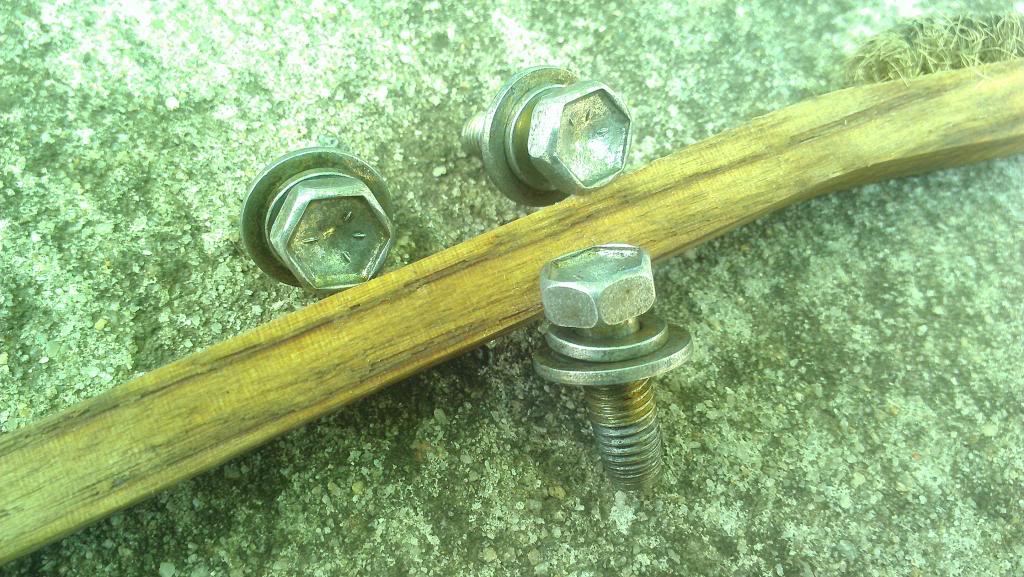
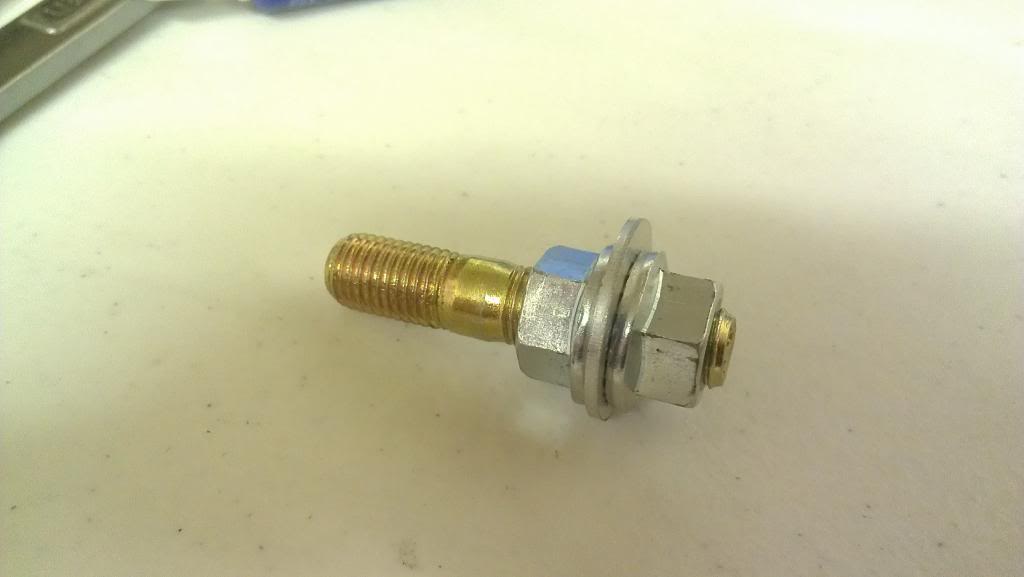
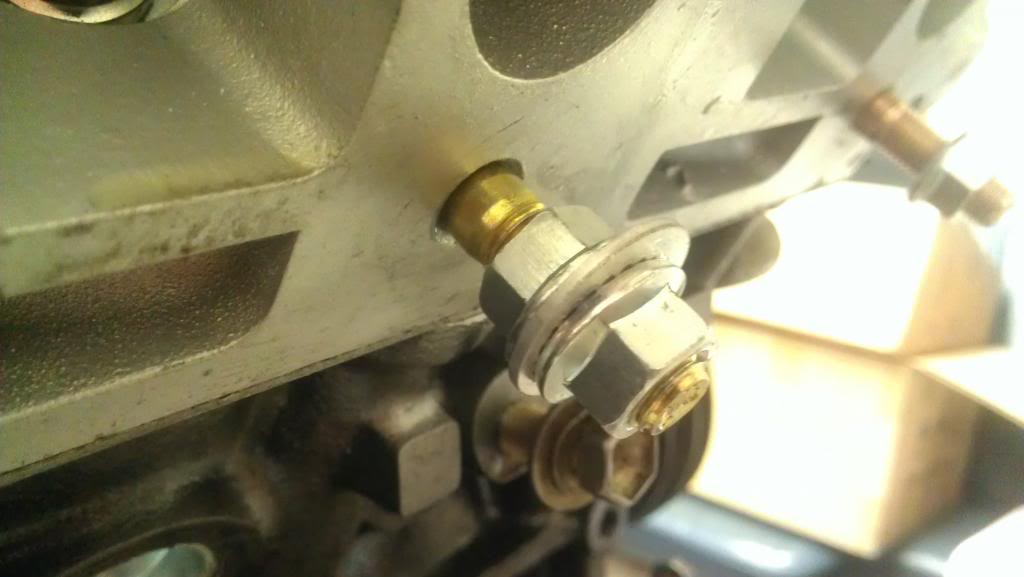
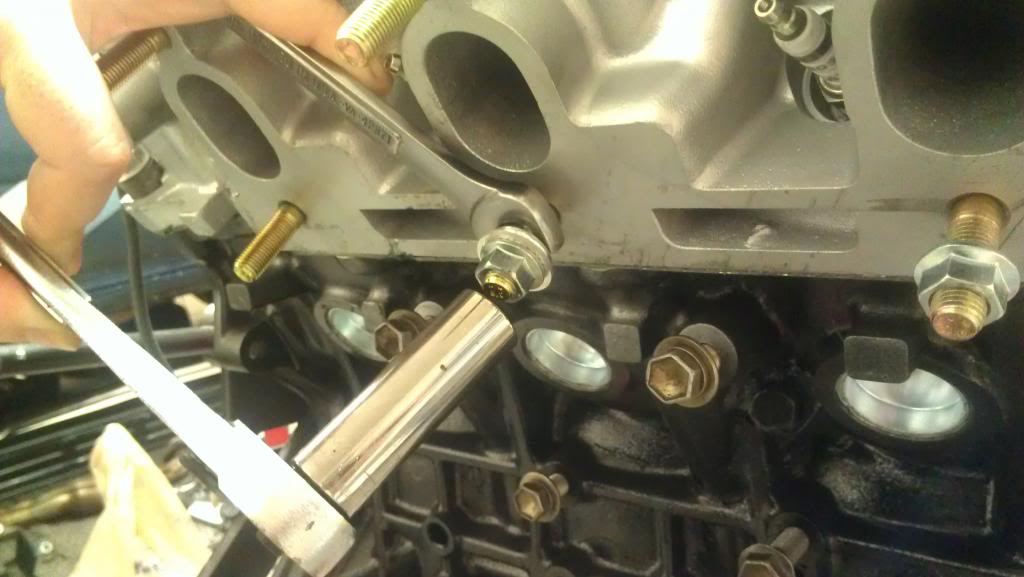
Of course, pics (Exhaust manifold studs, blue silicone vacuum hose):
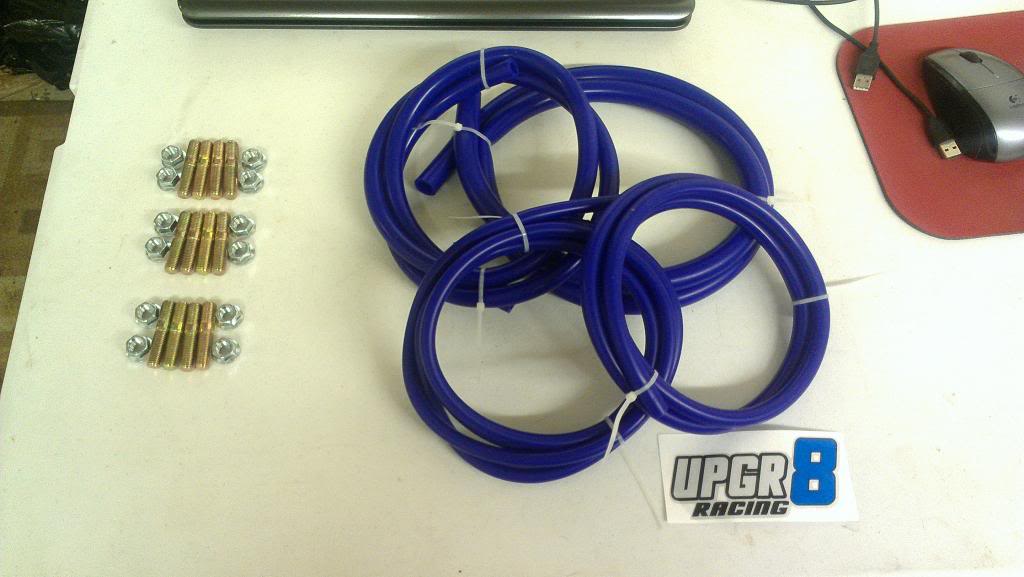
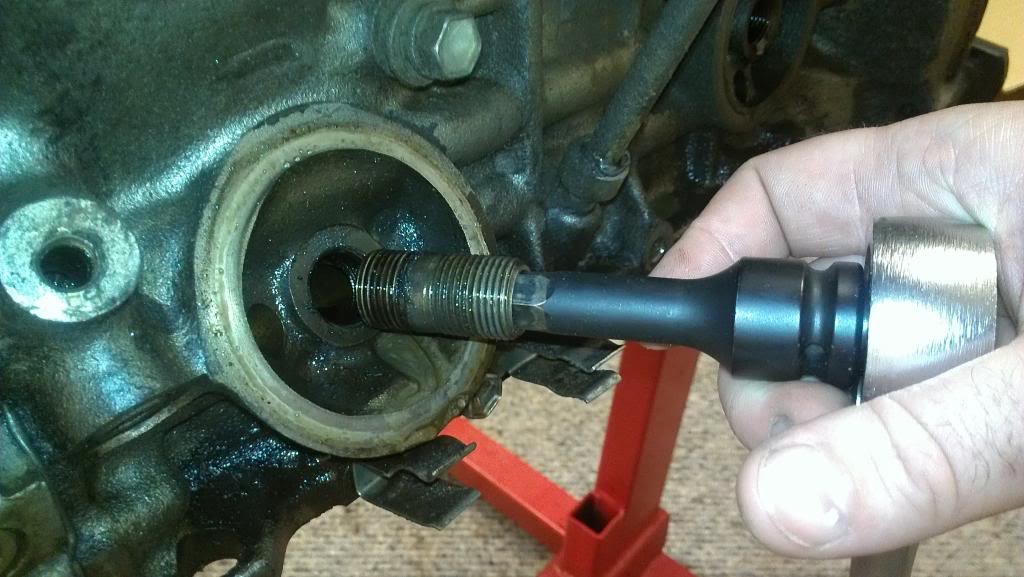
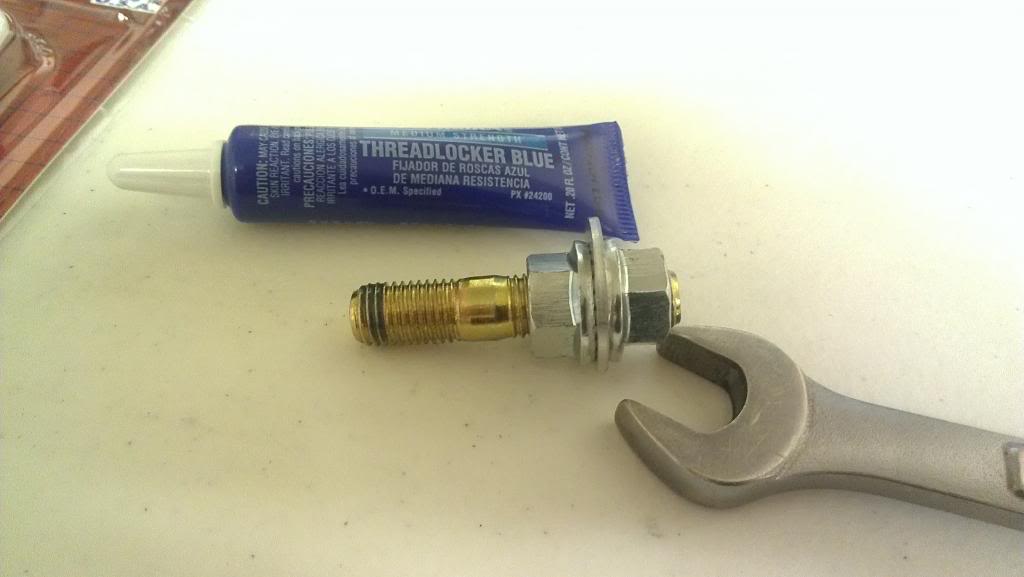
And this is a great way I have learned (learnt in GA) how to install studs:
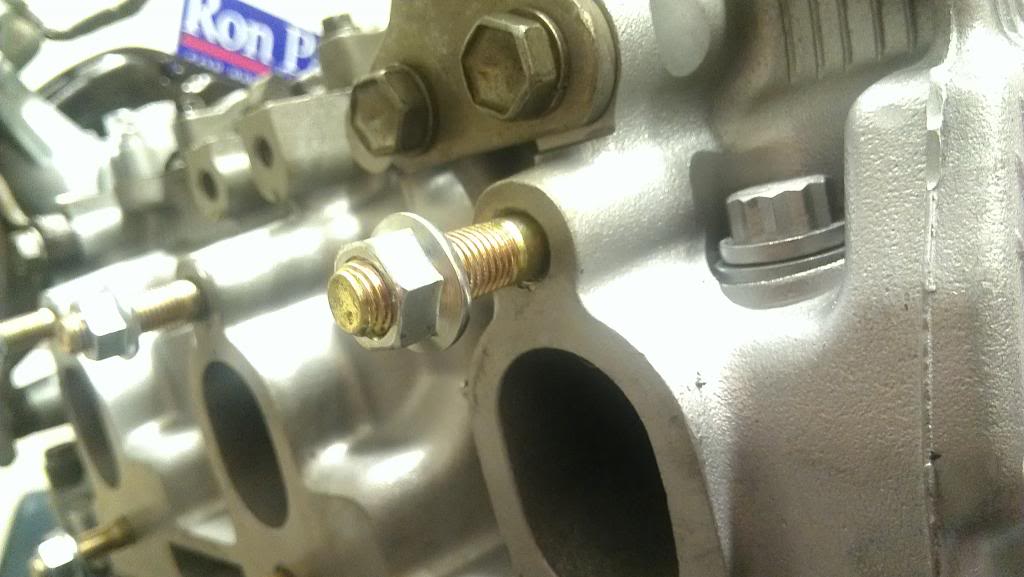
And here is a selection of the products I'm going to use to make sure various stuff stays in place and/or doesn't leak:
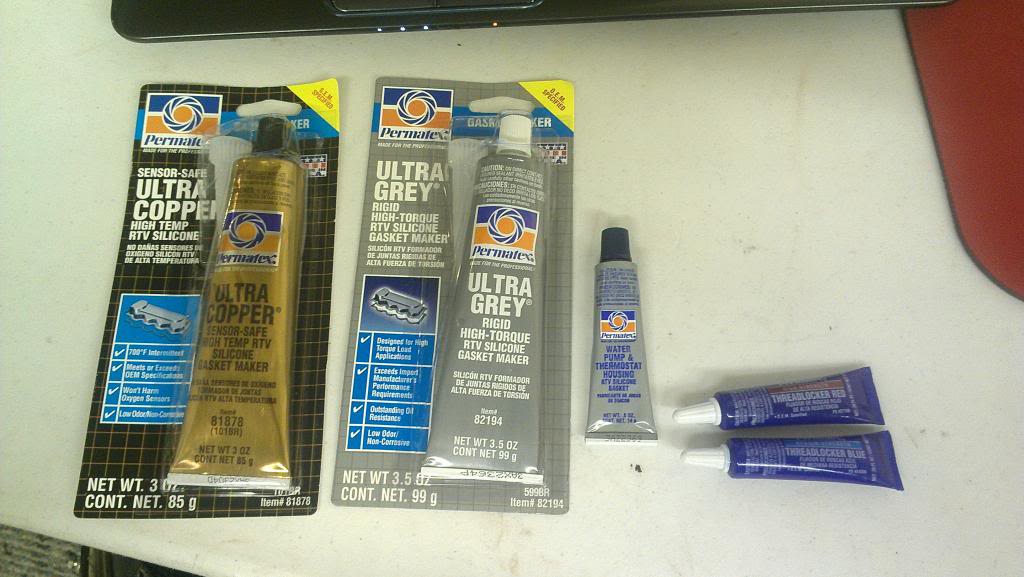
Ultra Copper between the exhaust gaskets and the manifold/headers; Ultra Grey just about every where else (oil pan, valve covers in the corners,); Water pump and thermostat housing RTV on any coolant gasket areas; Thread locker blue/red where applicable (blue on exhaust studs, red on oil sender, etc.)
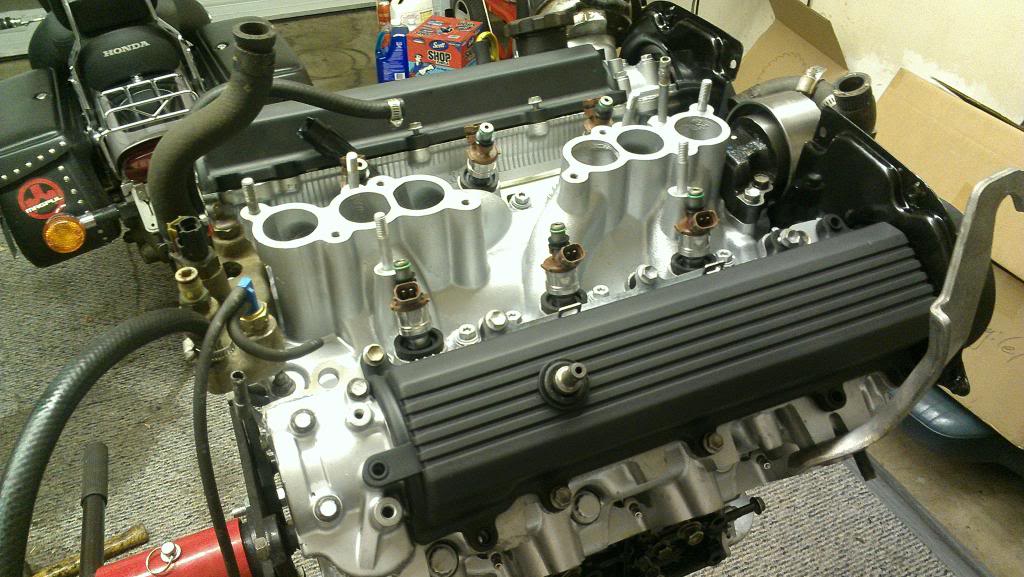
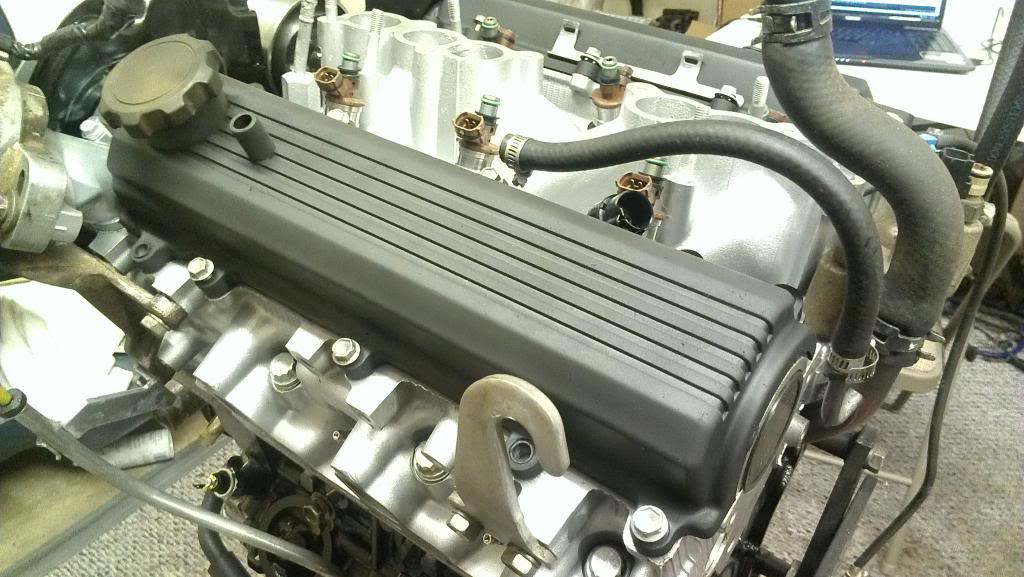
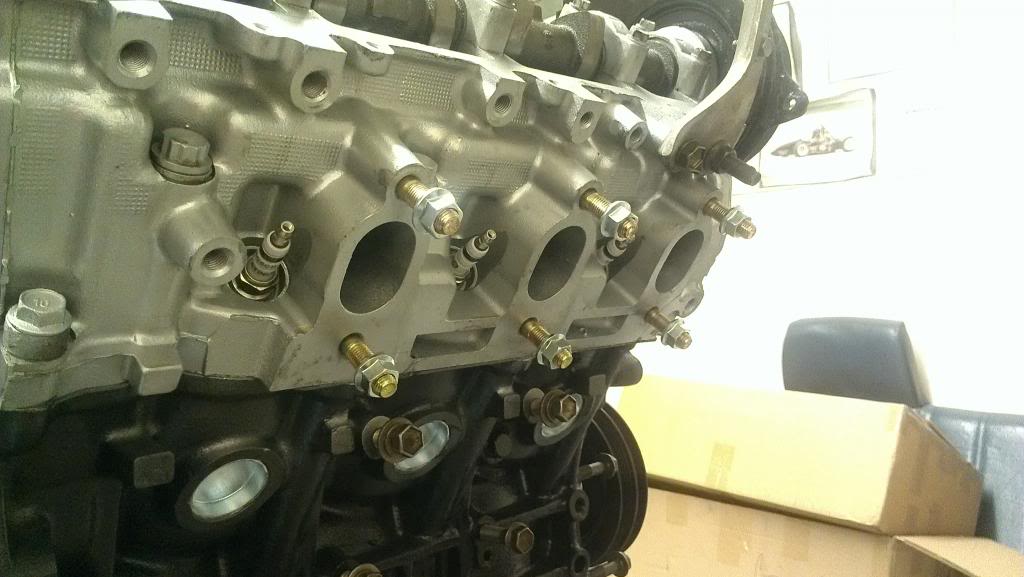
It is starting to look very nice!
Progress today: Exhaust studs installed, Water by-pass outlet installed, oil cooler install finished after hose install, oil sender installed, LH engine mount, generator bracket, and oil dipstick all installed.
Time for bed.
-Chris
Sweet. Well, some of them are trickling in.Of course, pics (Exhaust manifold studs, blue silicone vacuum hose):

And this is a great way I have learned (learnt in GA) how to install studs:


And here is a selection of the products I'm going to use to make sure various stuff stays in place and/or doesn't leak:

Ultra Copper between the exhaust gaskets and the manifold/headers; Ultra Grey just about every where else (oil pan, valve covers in the corners,); Water pump and thermostat housing RTV on any coolant gasket areas; Thread locker blue/red where applicable (blue on exhaust studs, red on oil sender, etc.)
It is starting to look very nice!
Progress today: Exhaust studs installed, Water by-pass outlet installed, oil cooler install finished after hose install, oil sender installed, LH engine mount, generator bracket, and oil dipstick all installed.
Time for bed.
-Chris


